Search the Community
Showing results for tags 'resist'.
-
Hello, for anyone with knowledge on finishes and where to find them, I’m looking for neat lac or clear lac. I have called Tandy and they do not supply, neither does spring field leather. I’m woundering if I have to order wyosheen but apparently some people don’t recommend using it. There must be a neat lac supplier still selling if anyone has any updates thank you much appreciated. ben N
-
Anyone have suggestions on how to use a resist to get the lines in the “thin blue line flag” to look distressed? Was going to at least carve and bevel the stripes and then put some block out on...thinking if I use a dry brush technique with the block dye that may work. Anyone ever try that? Image
- 2 replies
-
- flag
- resist dying
-
(and 2 more)
Tagged with:
-
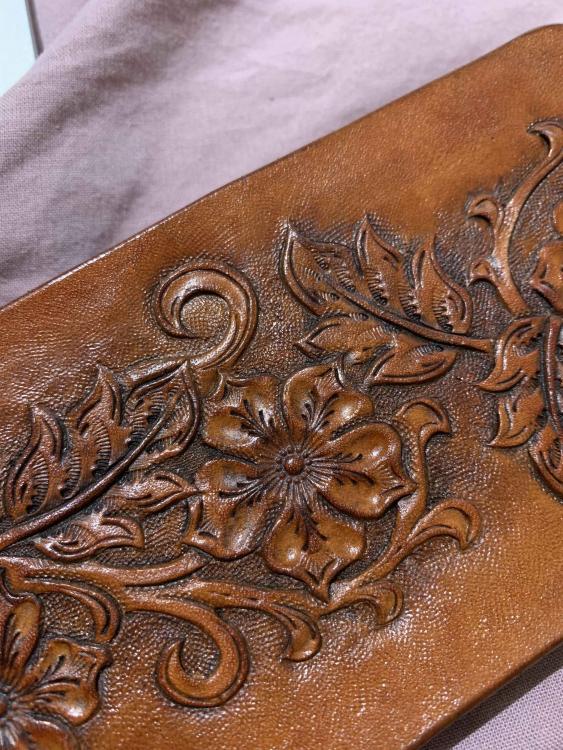
Hi there, I have just finished a new leather case for my phone. I'm curious about an issue that I encounter on all my projects: I like to carve flowers and try to make a few deep pear shader marks. When I apply some antique (Fiebing Antique Finish or Tandy Hi-Lite, used as an antique), it never stays into the petals (see picture attached). My dream is to achieve something closer to this: https://www.instagram.com/p/BAdbOq4R2g3/. Beautiful and subtle shades. I'm quite far from this result Here is my routine after tooling & dying, do I do something wrong? - I apply 2 coats of Tandy's super sheen or, more frequently, Fiebing's Resolene (60% Resolene / 40% water), with a little spray bottle. I rapidly swipe with a piece of coton wool, to prevent the "bubbles" of resist to make stains on the leather. Let it dry several hours between the 2 coats, and after the 2d one. - I apply some antique (Fiebing's paste or Tandy's Hi-Lite): I put a glove on and spread the product all over the leather piece with my fingers, then remove the excess with paper towel, trying to go horizontal. Let it dry and buff. - I apply another coat of resist, sometimes 2. Most of the time, the antique tends to blend :-( My guess: maybe I don't carve deep enough? Maybe my way of doing this is all wrong? I thank you in advance for your help and suggestions! Sophie
-
Anyone have experience using Fiebing's Pro Resist and can you cut it with water to apply with an air brush like Resolene? It's seem very thinck to apply it as supplied form. Thanks.
- 3 replies
-
- fiebings
- pro resist
-
(and 1 more)
Tagged with:
-
I'm working on personalized dog collars. I stamp the name, apply super sheen over the letters and use Eco Flo Antique gels with no problem. Most people want the vibrant colors like red, blue, green for the collar. I have all of the Fiebing's Pro Dyes, but I can't seem to find a resist to stop my letters from being dyed as well. I hate the look of painting acrylics on top of the dyes..... Has anyone had any luck figuring out a resist for the Pro Dye? Thank you,
-
About a JILLION articles, books, videos, all going on (and on) about "resist". Now, I get it -- most of those are aimed at SELLING you something (step one is convince you that you need it). And some are just not well informed, and have become convinced that's necessary, and thus convince you (intentionally or otherwise). I have used a bit of liquid stuff to block out very fine areas when applying dye, but turns out even that isn't necessary. Note in this video at about 3:53 -- the "resist" is in the process of becoming a curved back holster. But what I want you to see is the LEFT HAND GLOVE. Without ANY application at all, the area UNDER the holster is "masked off". You can make this a precision operation with very little prep (in seconds).
-
I tried an experiment using Feibings paste Antique and various different types of resist. For some reason the antiquing didn't work on any of them? On this piece I used Mop-N-Glo top half 1 coat, bottom half 2 coats, Sheridan Brown Feibings paste. On this piece I used Super Sheen two coats Medium Brown paste. On this piece I used RTC on the top portion 2 coats, and 50% Reslone 2 coats on the bottom. I really don't see any antique to speak of on any of the pieces. Any and all thoughts welcome please.
-
Hello, I was wondering if it is possible to dip leather into RTC Resist and Finish? If so, is there a good technique to get it to come out right? Or is it better to just brush on with a wool dauber? Thanks!
-
Hi all! I am currently working on a purse with a tooled floral design on the front. I wanted to use the Antique Mahogany color with the design a lighter color (the resist area). Everything turned out just okay. I find the Antique very hard to use on the natural veg tan leather - it comes out a little streaky. And I think I should have wiped the excess off quicker from the resist areas to make it a bit lighter. However, my issue is that on my resist parts, there was one big spot that didn't resist. And I'm not gonna lie - I'm pissed about it because it throws the whole thing off. it's a mega eye sore and I don't think I have any other choice but to scrap that whole piece and start a new one. (*insert sad face here) I'm 100% positive I covered all areas with my Super Sheen. I was very careful and attentive. I put it on fairly thick and let it dry for over 24 hours. The rest of the resist parts came out not bad. So here am I wondering......... WHY? My only thought is that it possibly wasn't clean enough prior to putting on my Super Sheen so maybe it didn't absorb/adhere properly to the leather?? Any ideas? (I imagine there is no way to lift this spot of color? (I read some stuff about leather bleaching but no one actually said anything worked to lift color - especially in just a portion of the piece). I appreciate any thoughts on this! I'm still new so trying to work through it all! Elle
- 10 replies
-
- antique
- resist failure
-
(and 2 more)
Tagged with:
-
I got roped into leatherworking a few weeks ago by stumbling into Tandy's videos by George Hurst on Youtube and said "This is for me!" I'm so glad I did! I ran out and bought their ultimate set and a pile of other stuff and books (ok maybe too much? lol but I figure I'll learn as I go along). Anyway, I made a few coasters from the kit following the instructions and then got ready to do the dyes. I chose to do what he did - use super shene as a resist on the center flower and the border. The only problem is it did NOT come out like his. The resist did do SOMETHING... but not nearly what it did in his video I'm still satisfied the piece looks good for a first time noob but I want to get it like his and I followed the directions to the letter (or so I thought). I applied a generous coat of super shene with a brush. I let it dry over 30 min. I applied another coat. I let it sit overnight to be absolutely certain it was ready to resist. Using a dauber (like George Hurst did), I generously applied the same dye he did (Hi-Lite in Briar Brown). I then used what he did, a folded up paper towel to wipe off the excess. See the results in the photos. His has TONS of contrast and mine looks like the resist hardly did anything. I then tried the same thing with Eco Flo block and got the same results I did with super shene. I am disappointed and don't know of anything I did wrong unless his results are a camera trick or some kind of Voodoo I don't know about yet and was left out of the video?! Please show pity and help the noob! PS: In his youtube video on making leather cuffs - he uses same two chemicals and his brown is WAY darker than mine and his resisted area is WAY lighter. UGH HELP!
-
I have no idea if anyone has tried this before, but I thought it may be worth posting. I saw my wife had bought a bottle of " Mod Podge" for a craft project of hers for the kids room. I've use this myself before for other paper craft projects. I thought to my self " I wonder how it works on leather". I tested it on a few scrap pieces of veg tanned leather and let it dry for a couple of hours. I was actually shocked at how well it worked.It left a nice glossy shine on the leather. It resisted water just as well as super shene, maybe better. I tried a tiny bit of Feibings Antique on it, and it resisted it quite nicely. Its a pretty thick substance and tacked up in about 10-15 seconds. Once it tacked up I slightly moistened the sponge with water and went back over it lightly and it thinned the Mod Podge into the same consistency and look as super shene. I even flexed the leather to see if I would get some cracking, but it didn't crack either. I didn't do a rub test or anything like that yet. Disclaimer:: Please do not use Mod Podge as your final finish. I only posted because I though it may be worth looking into further. There's a ton I still haven't learned about leather working and I only tested this on a few scrap pieces, and have no idea how it will hold up in the long run. It may have some kind of negative effect on the leather. Or it may be the next best thing, Who knows.. I will try to post some pics of the practice pieces tomorrow. I have no intentions of using this on any projects, until I test it out further.
- 11 replies
-
- clear coat
- finish
-
(and 2 more)
Tagged with:
-
Would someone kindly point me in the right direction. For several weeks now I've been trying to come up with published techniques when using multiple Fiebings dyes (in my case on shoes and belts) separated/protected by some sort of resist or technique. I'm accustomed to using paraffin in a pottery situation to either prevent the clay from receiving any color (at all or at that moment of the process - or to protect a final step while completing colors in another section). Is there a corollary in using Fiebings' dyes? I've gotten reasonable good at blending in the dyes creating a patina, hue or amalgam I like. I am unable to discover a product or technique that will enable me to create crisp lines.


