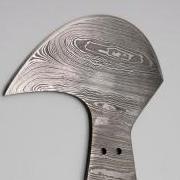
Members Munday Posted July 29, 2021 Members Report Posted July 29, 2021 I'm a woodworker and I'm building a stitching pony (I'm starting leather working). I'm looking for advice about a couple design features. How big of a clamping surface is recommended? Should I add a piece of leather to the clamping surface? I'll be adding a pair of magnets near the top. I think a needle will find a natural alignment on the magnet. Before I glue the magnet in I want to align it so the needle is in a convenient position. Is there a preferred alignment such as angled at 10 or 2 O-clock off the front or rear; maybe straight out the side (I'm guessing it is s personal preference but I want to avoid stabbing my hand grabbing for it). I'm test fitting the maple parts in the picture. It is designed to work on a chair or clamped to a workbench and rotated off the side 100 degrees. Quote
Members rleather Posted July 29, 2021 Members Report Posted July 29, 2021 Yes you definitely want to line the clamp area with scrap pieces of leather ( flesh side to the wood). I would not attach needles to the horse, I have never seen it done , just something to get in the way,IMO. Quote
Members zuludog Posted July 29, 2021 Members Report Posted July 29, 2021 Yes, line the jaws with leather, that is usually done with sewing ponies, saddler's clams, and similar devices Have a look at relevant videos, and of people sewing up finished items, and you'll see the sort of clamps and the area of leather they use Quote
Members Hasbeencowboy Posted July 29, 2021 Members Report Posted July 29, 2021 Just a thought but on the 2 ponies I have made, I put a spring between the jaws just to help opening them. I agree that you will want to put leather on your jaws. As far as the width of the jaws, one of mine is 3" and the other is 6". Your design is very similar to mine and mine works for me. I do not have any magnets but have never felt the need for any. Quote
Members dikman Posted July 29, 2021 Members Report Posted July 29, 2021 That looks very nice, Munday. You definitely want to line the jaws with leather, the size of the jaws is a personal thing, mine are about 4". As mentioned a spring fitted on the bolt between the legs is a good idea and replacing the handscrew with a cam-operated toggle will make life easier when repositioning things in the jaws. As for the magnets I wouldn't bother, wherever you put them will probably work out wrong! If you really want somewhere to put your needles stick some cork on there so you can stick the pointy end in. Quote Machines wot I have - Singer 51W59; Singer 331K4; Seiko STH-8BLD; Pfaff 335; CB4500. Chinese shoe patcher; Singer 201K (old hand crank)
Members Klara Posted July 30, 2021 Members Report Posted July 30, 2021 Leather on the jaws like everybody said. I would also put a strap of leather over the upper bolt (vertically, and loosely enough so you can reach in to work the bolt/nut) to avoid having the thread catch on it while sewing. The lower bolt you can saw off or take out altogether and replace with glue or wood screws as you have a hinge for movement. As for the clamping surface, horizontally it looks fine to me. Vertically you could reduce the size, that might make it easier to clamp things when there's hardware in the way. Though I have a similar surface area and it has not caused enough trouble for me to do something about it. I have never felt the need for a spring, either to open or close the clamp. I don't quite understand what you want the magnet for. It almost sounds like you thought a magnet would somehow help with sewing. It won't. You don't want to have anything dragging on the needle in any way. Besides, your leather won't always be clamped in exactly the same position either... I'd say leave it as it is, just add the 3 pieces of leather. Once you've used it you will realise what improvements are needed, if any. Quote
Members Munday Posted July 30, 2021 Author Members Report Posted July 30, 2021 Thank you all for the feedback. I'll be skipping the magnets and adding leather and a spring. I'll be cutting the threaded rods to size. I'm thinking of epoxying the nuts to the bolts on the left side. The spacer is a little awkward but it does reduce the amount of threading needed with the knob; I might add a tether to the spacer. Quote
toxo Posted July 30, 2021 Report Posted July 30, 2021 For normal sewing the hinge isn't needed. Just angle the center piece so you have around 1/4 inch gap after you include the leather. The biggest problem is coming up with a clamping method that won't be forever snagging the thread. Quote
CFM chuck123wapati Posted July 30, 2021 CFM Report Posted July 30, 2021 (edited) one thing i had to re-do when i built mine was make the jaws narrower so my fingers could grip the needles while stitching and i could use my awl without the handle hitting the vice. and you may have a problem with your thread snagging up on that tee handle. It is a good looking vice! Edited July 30, 2021 by chuck123wapati Quote Worked in a prison for 30 years if I aint shiny every time I comment its no big deal, I just don't wave pompoms. “I won’t be wronged, I won’t be insulted, and I won’t be laid a hand on. I don’t do these things to other people, and I require the same from them.” THE DUKE!
Members Spyros Posted July 30, 2021 Members Report Posted July 30, 2021 I've made a couple of those smaller ones to be honest in the end they just don't work for me, unless I'm making something really small like a wallet. The problem is the depth of the opening, like if I want to put a bag in there it just doesn't fit. I've also tried a traditional clam design and that doesn't work for me either, I just can't get comfortable with that thing. So last weekend I went ahead and I made this giant clothes peg LOL That works. Fast opening/closing action, very comfortable height (for me anyway), and it fits pretty much anything. And easy to make if you have a decent bandsaw. Definitely keep the one you're making, it will get used, but I think sooner or later you'll also want something bigger. Quote


Recommended Posts
Join the conversation
You can post now and register later. If you have an account, sign in now to post with your account.
Note: Your post will require moderator approval before it will be visible.