All Activity
- Past hour
-
I have two spot setters for sale. Wm. Brown Holster Co. text or call…970-200-6328. Bill
-
Outstanding work!
- Today
-
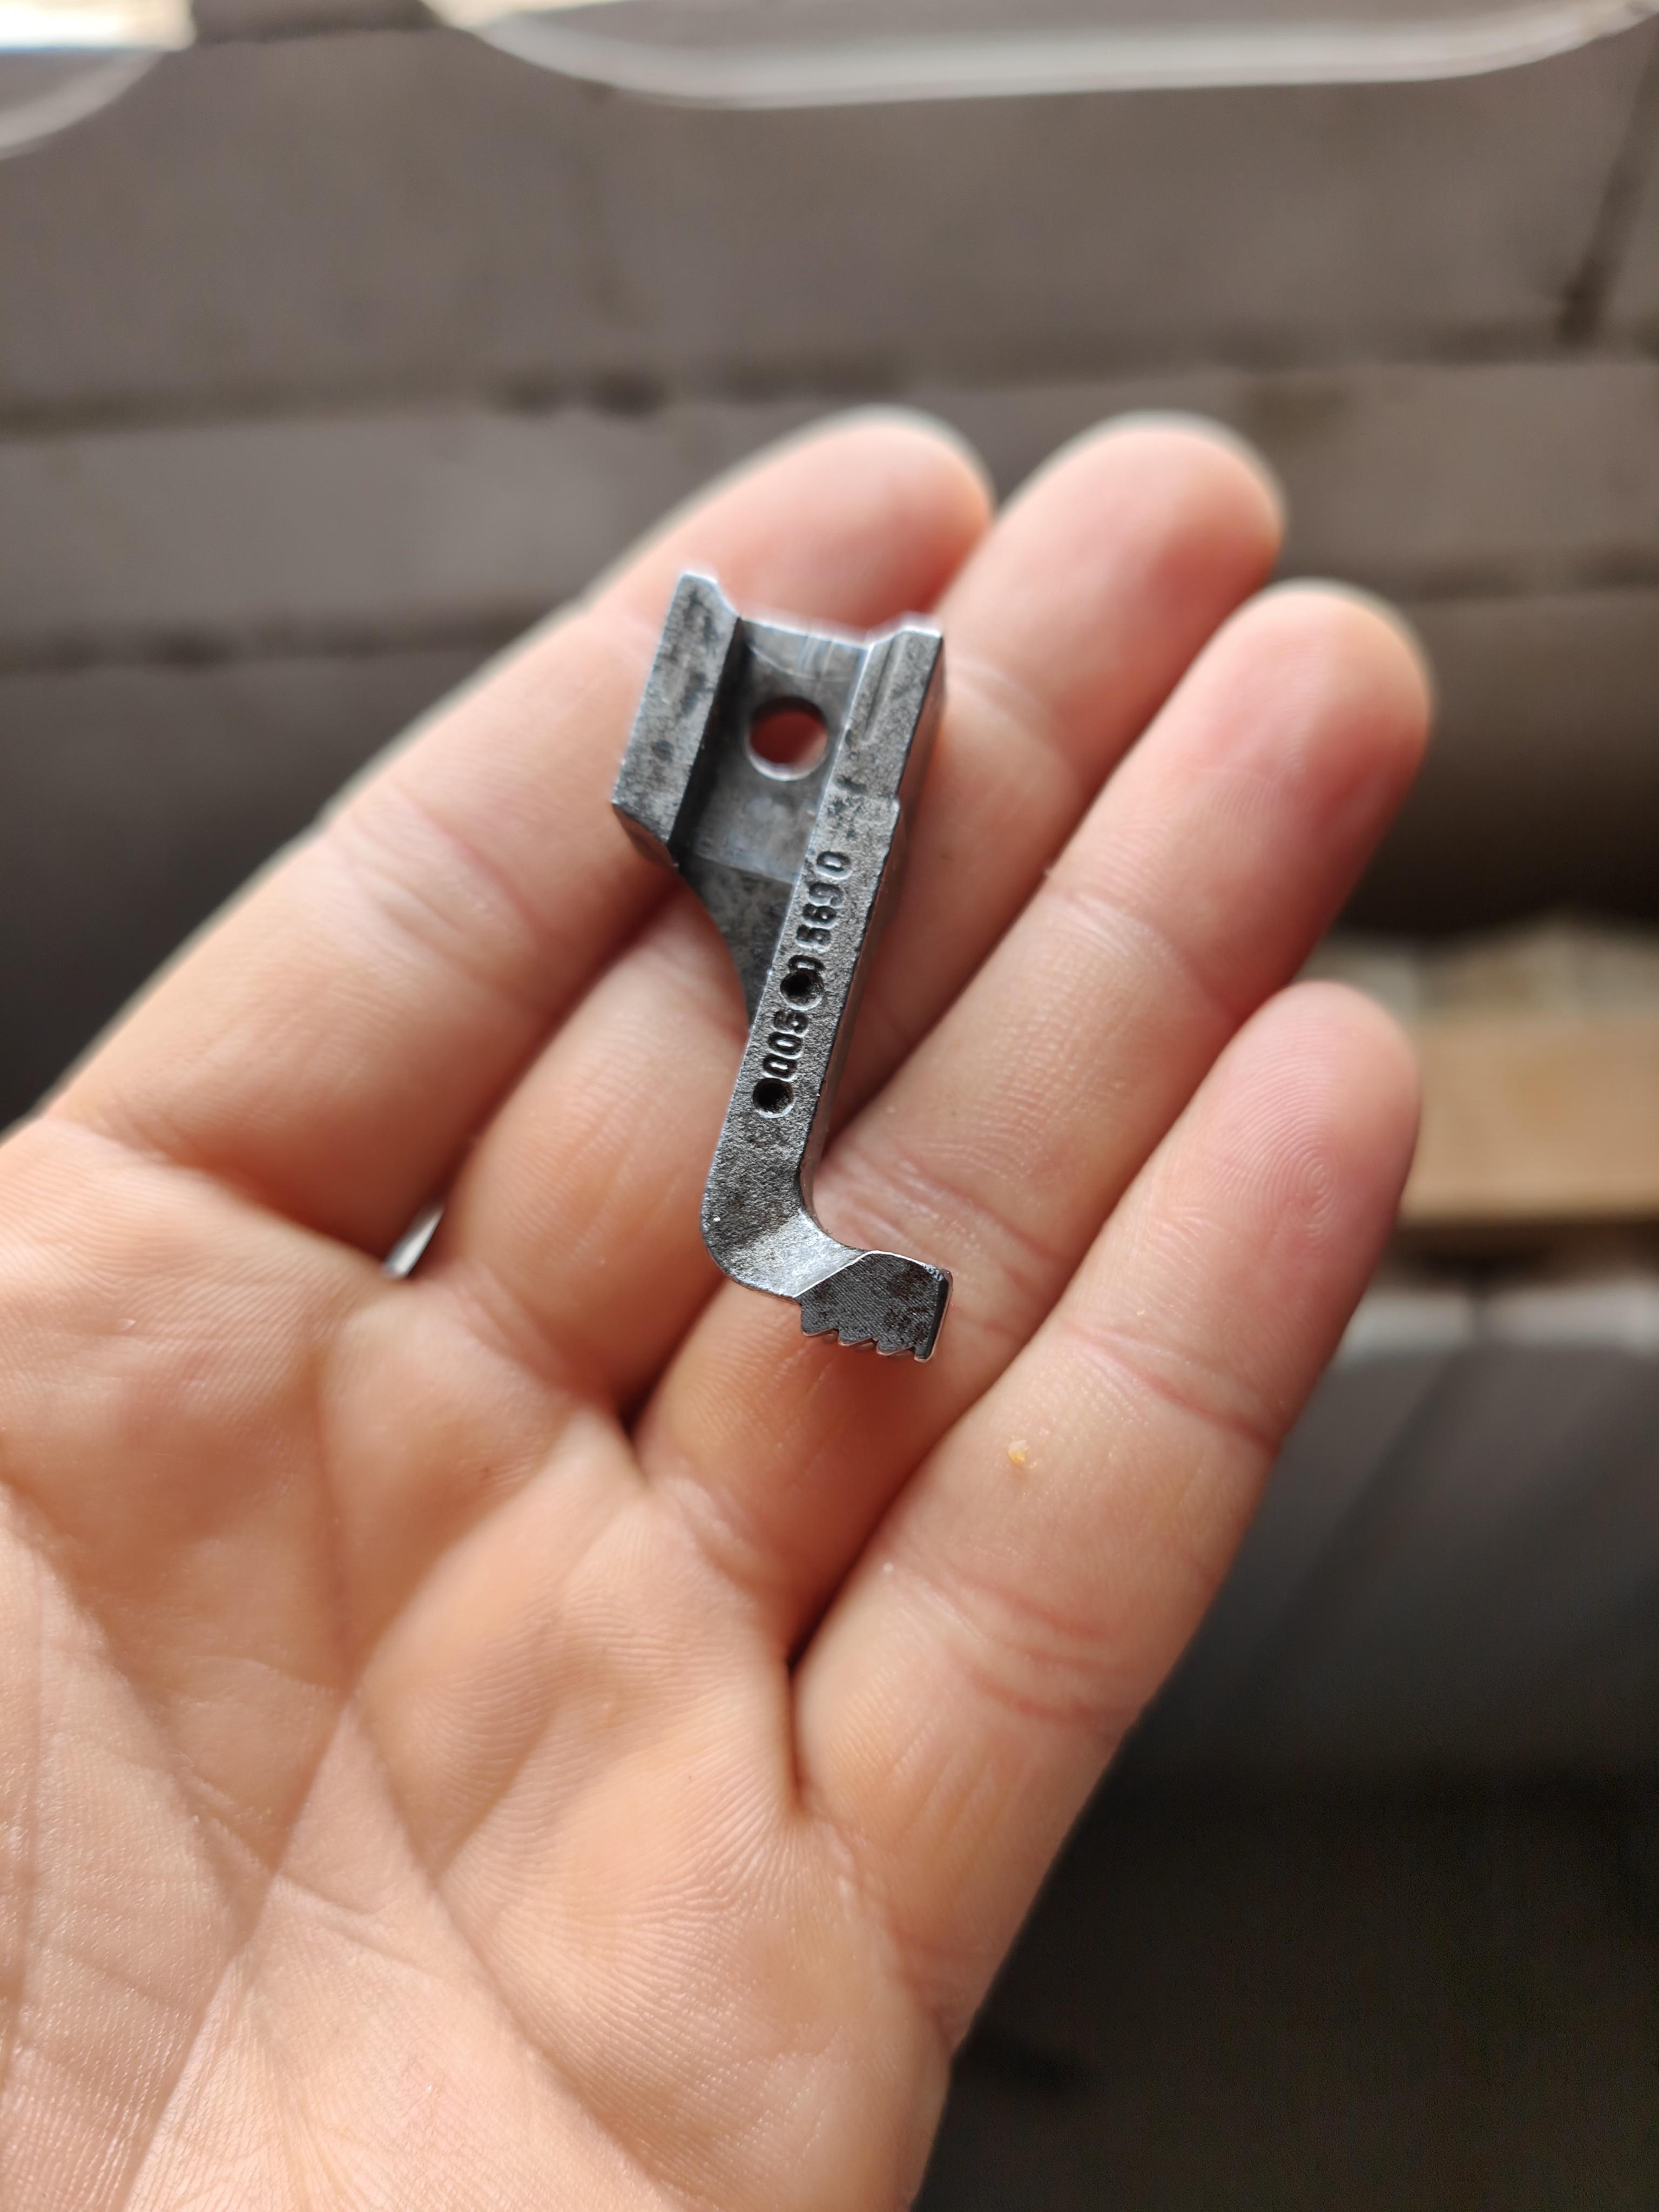
Download for a 133K manual but not exactly for the 133K13 but it may help: https://leatherworker.net/forum/topic/56667-singer-133k-information-wanted/page/6/#findComment-546077 the 2 parts on the left are positioning fingers and you notice the gap, right?
-
I guess you alreday have figured that is is a darning machine that ex factory is not set up for sewing operations. I once owned 133K3 but it´s long gone. There it a Bobbin case positioning finger that holds the bobbin case in position. You see it in your picture (that part is the "bar" above the hook / bobbin case in your picture). The top end of the bobbin case has to sit in the gap of the positioning finger (remove the needle plate and you have a better view on it and I think you will know what I mean when you see the gap). You only can insert and remove the bobbing case when the hook is in the right potion and you have to flip the bobbin case retainer aside before you can insert the bobbin case. EDIT: hope this helps

-
@pierre2171 I split this out into it's own topic so maybe we can get you some help. It looks like an interesting machine. EDIT: In fact, a search for 133k13 turned up a few hits. I'll leave you to sort through them. https://leatherworker.net/forum/search/?&q=133k13&search_and_or=or
-
What is a Cobra 13? Do you maybe mean a 3? I'd you have one you're dissatisfied with, maybe post a picture of the problem? Stitching problems tend to be fairly generic.
-
Nah, you couldn't have bought one that nice. The only way that gets better for me is if the pouches are modular. It's one of those bespoke things you can afford to have because you're a leather worker.
-
AIZilla, Tony V, Oddball, ClaimedVacancy . . . thanks to you all . . . Lots of ideas there to digest . . . see if I can get anything out of the process that will work for me. May God bless, Dwight
-
Does anyone have one and if so can you tell me or better yet post a picture of what the underside stitch looks like.
-
 Thanks for the generous offer, Leo! Just grabbed a sample to test on my next project — can't wait to see how it handles with different leather weights.
 -
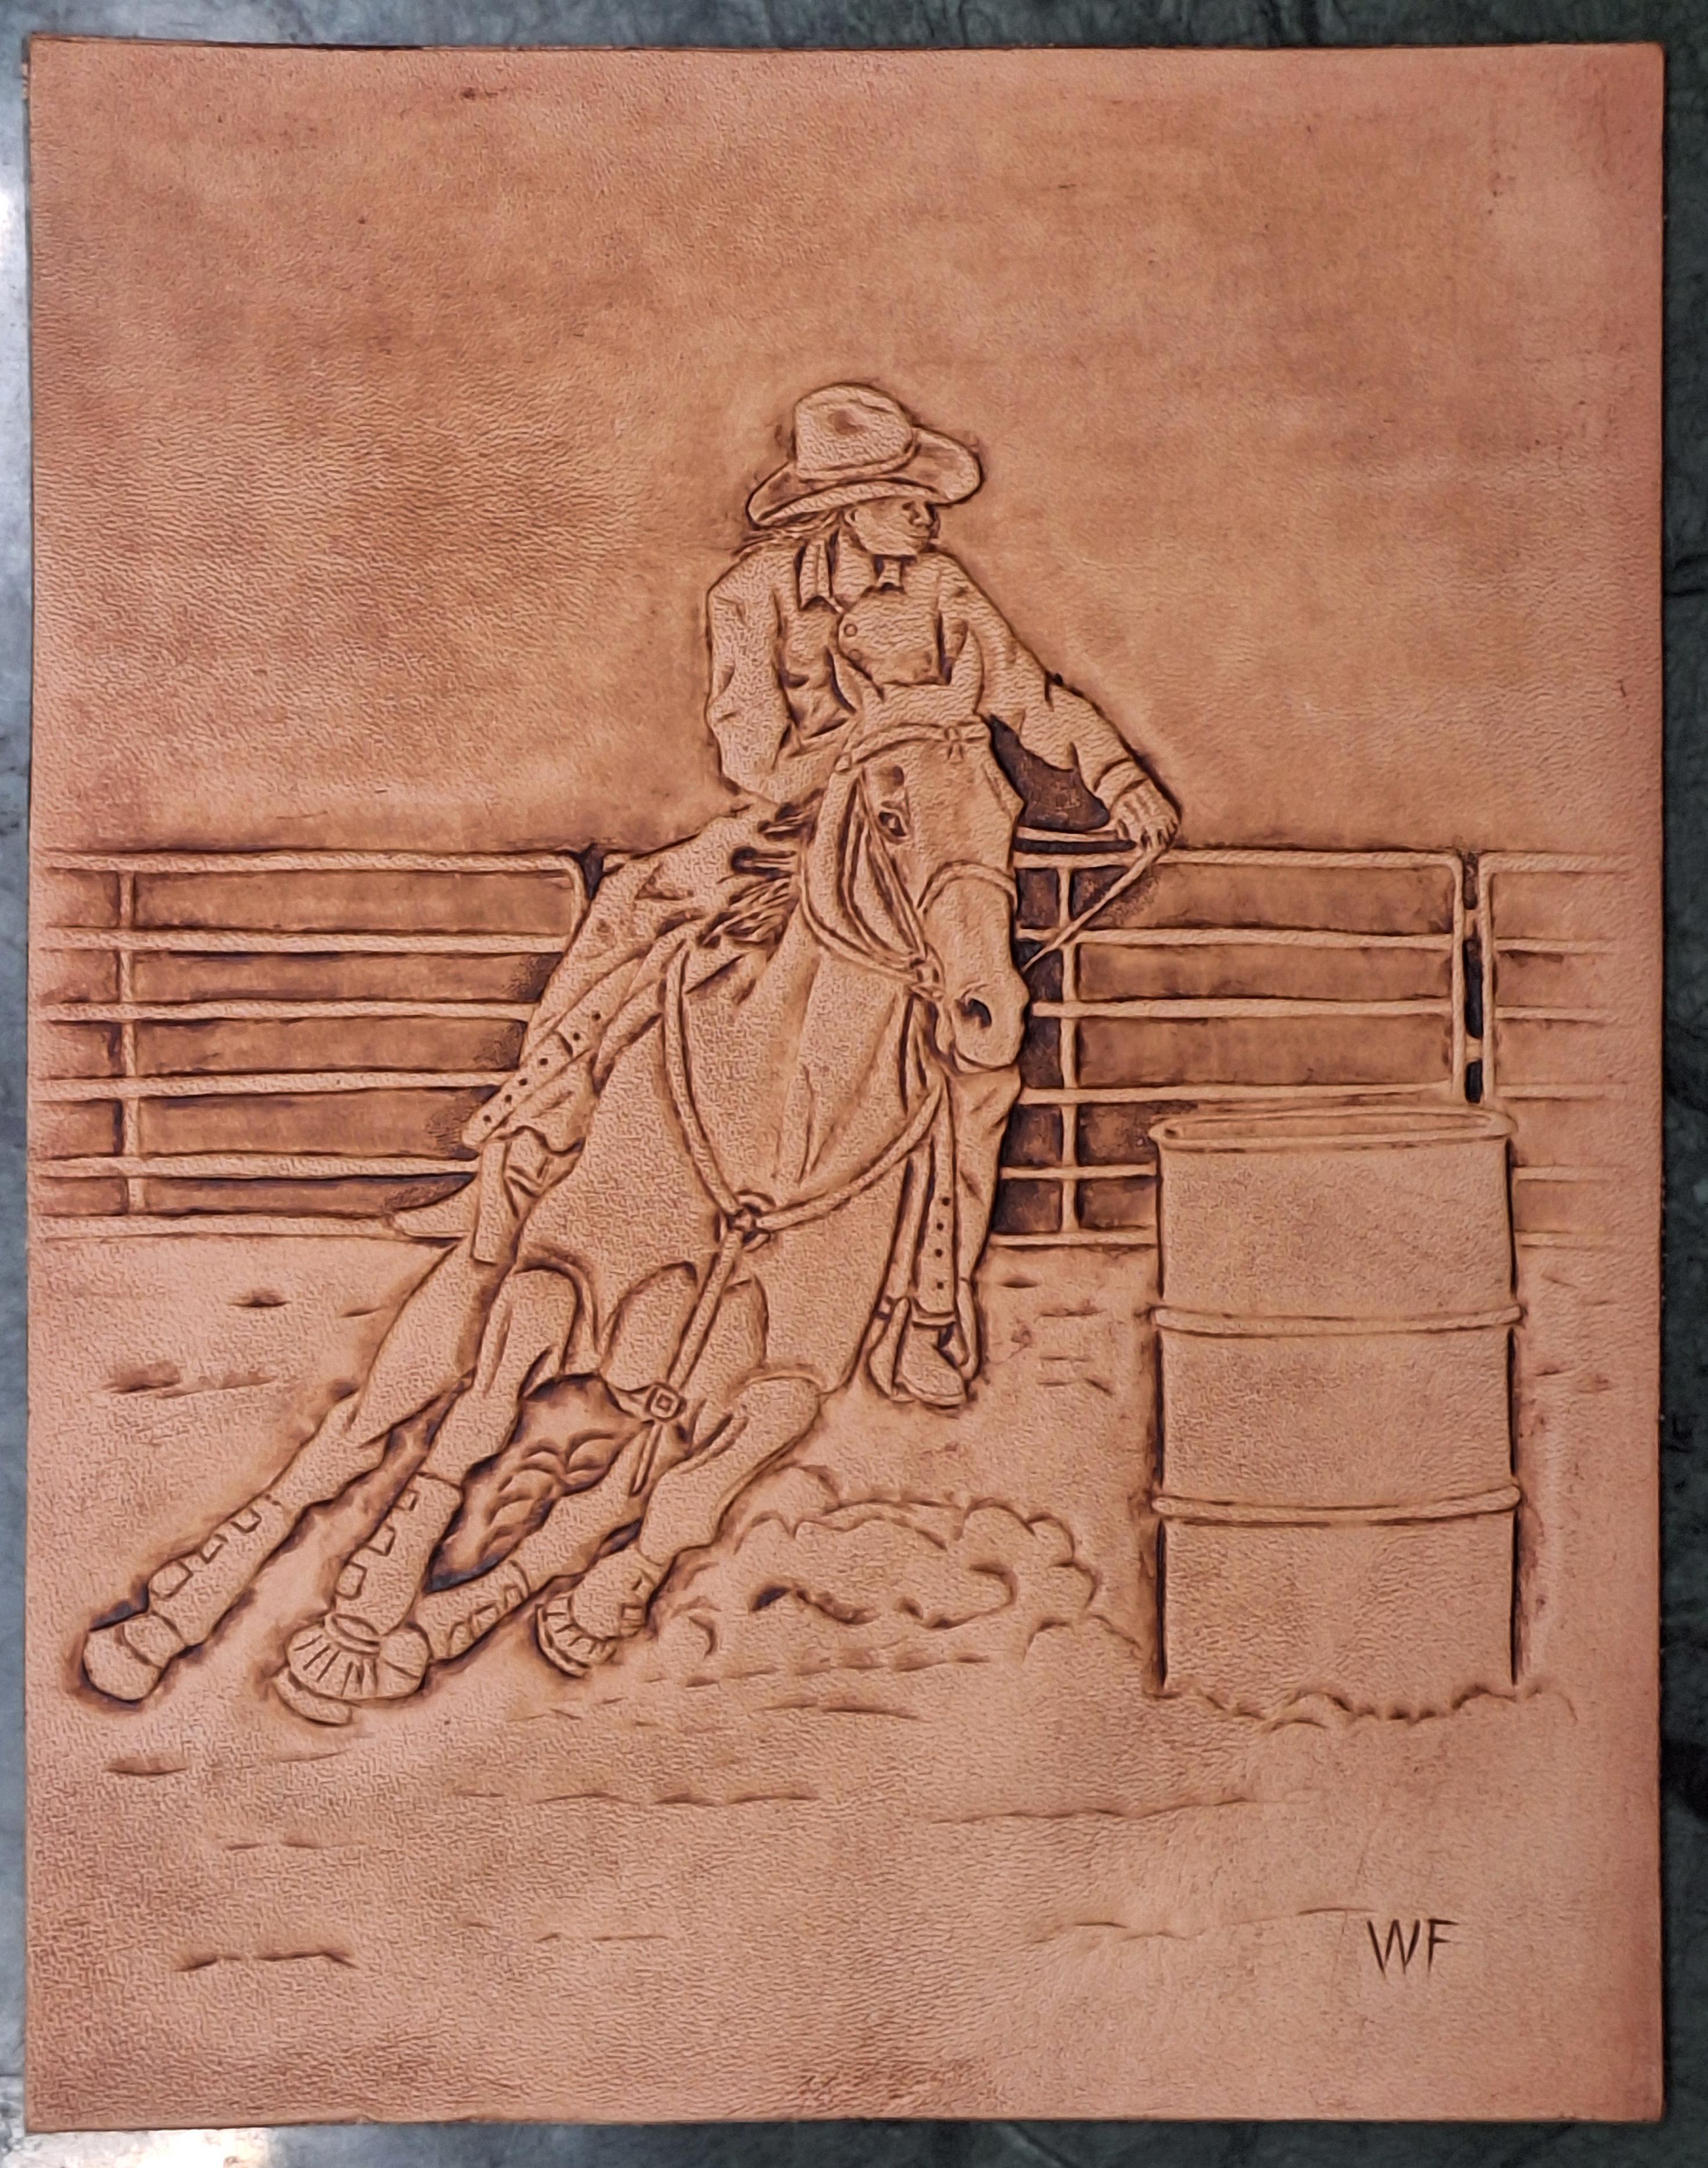
I would be mad to if someboody burnt my leg! Thank you, they are fun to do. Done next to frame it.
-
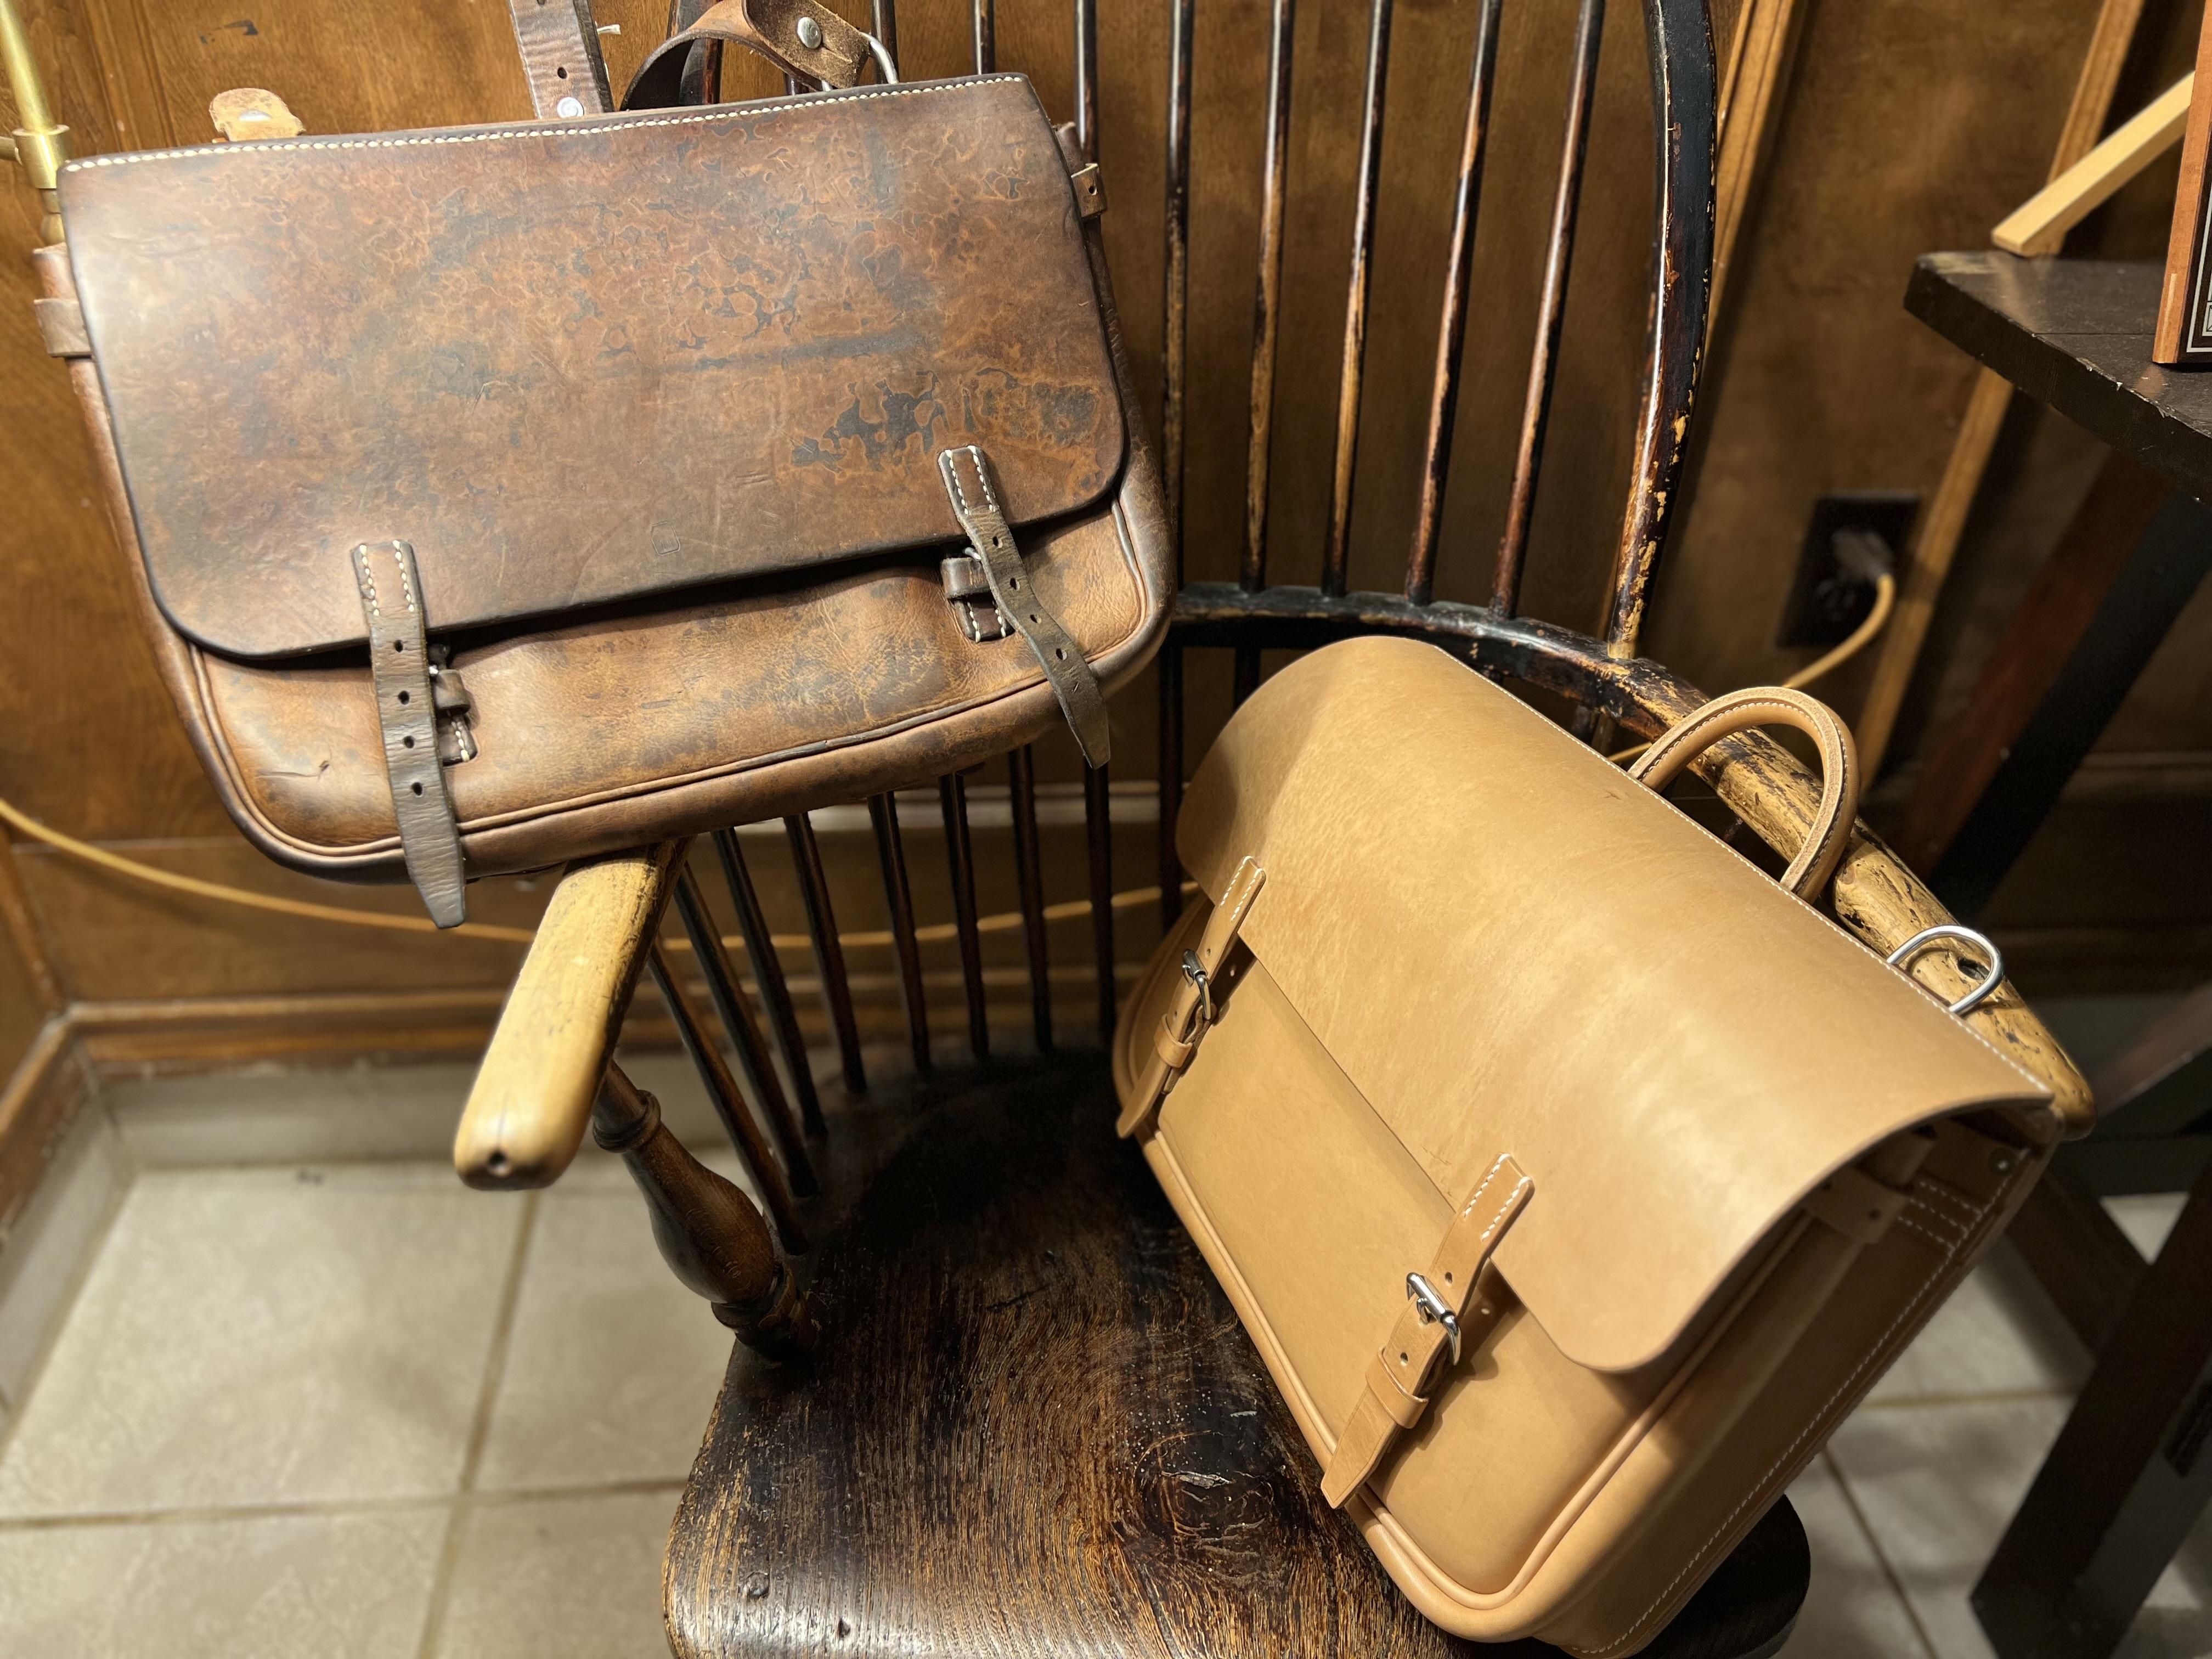
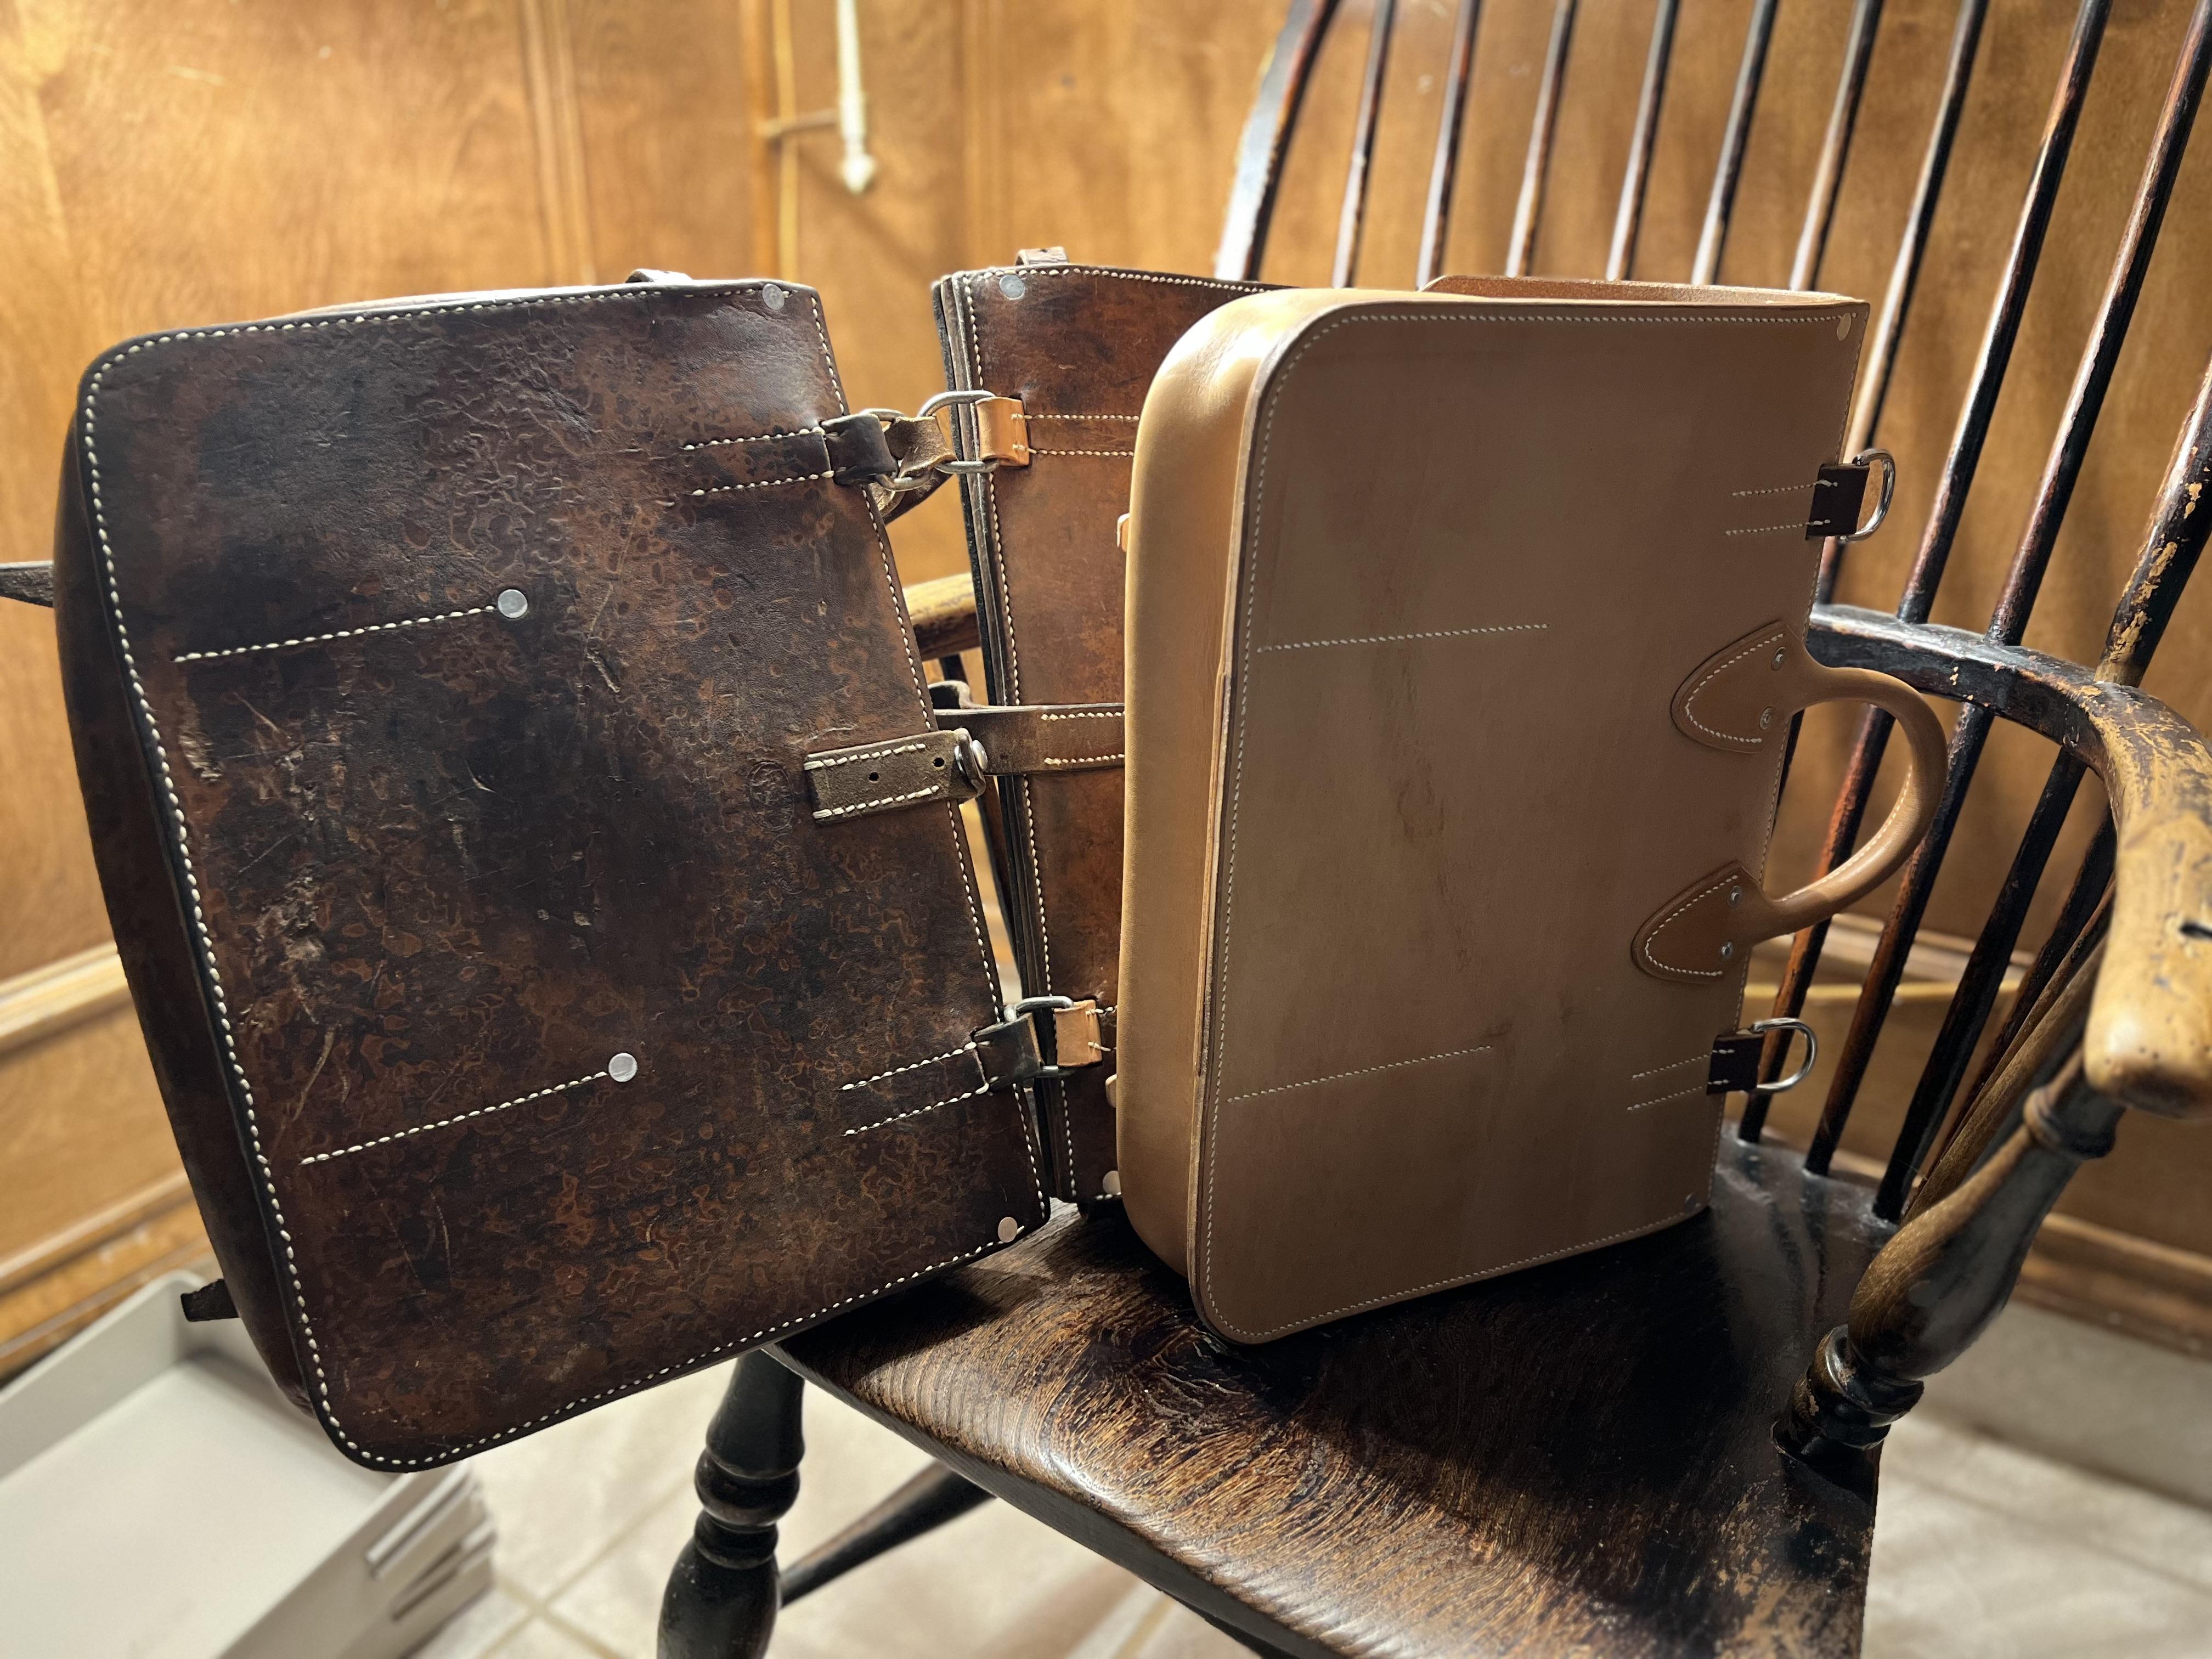
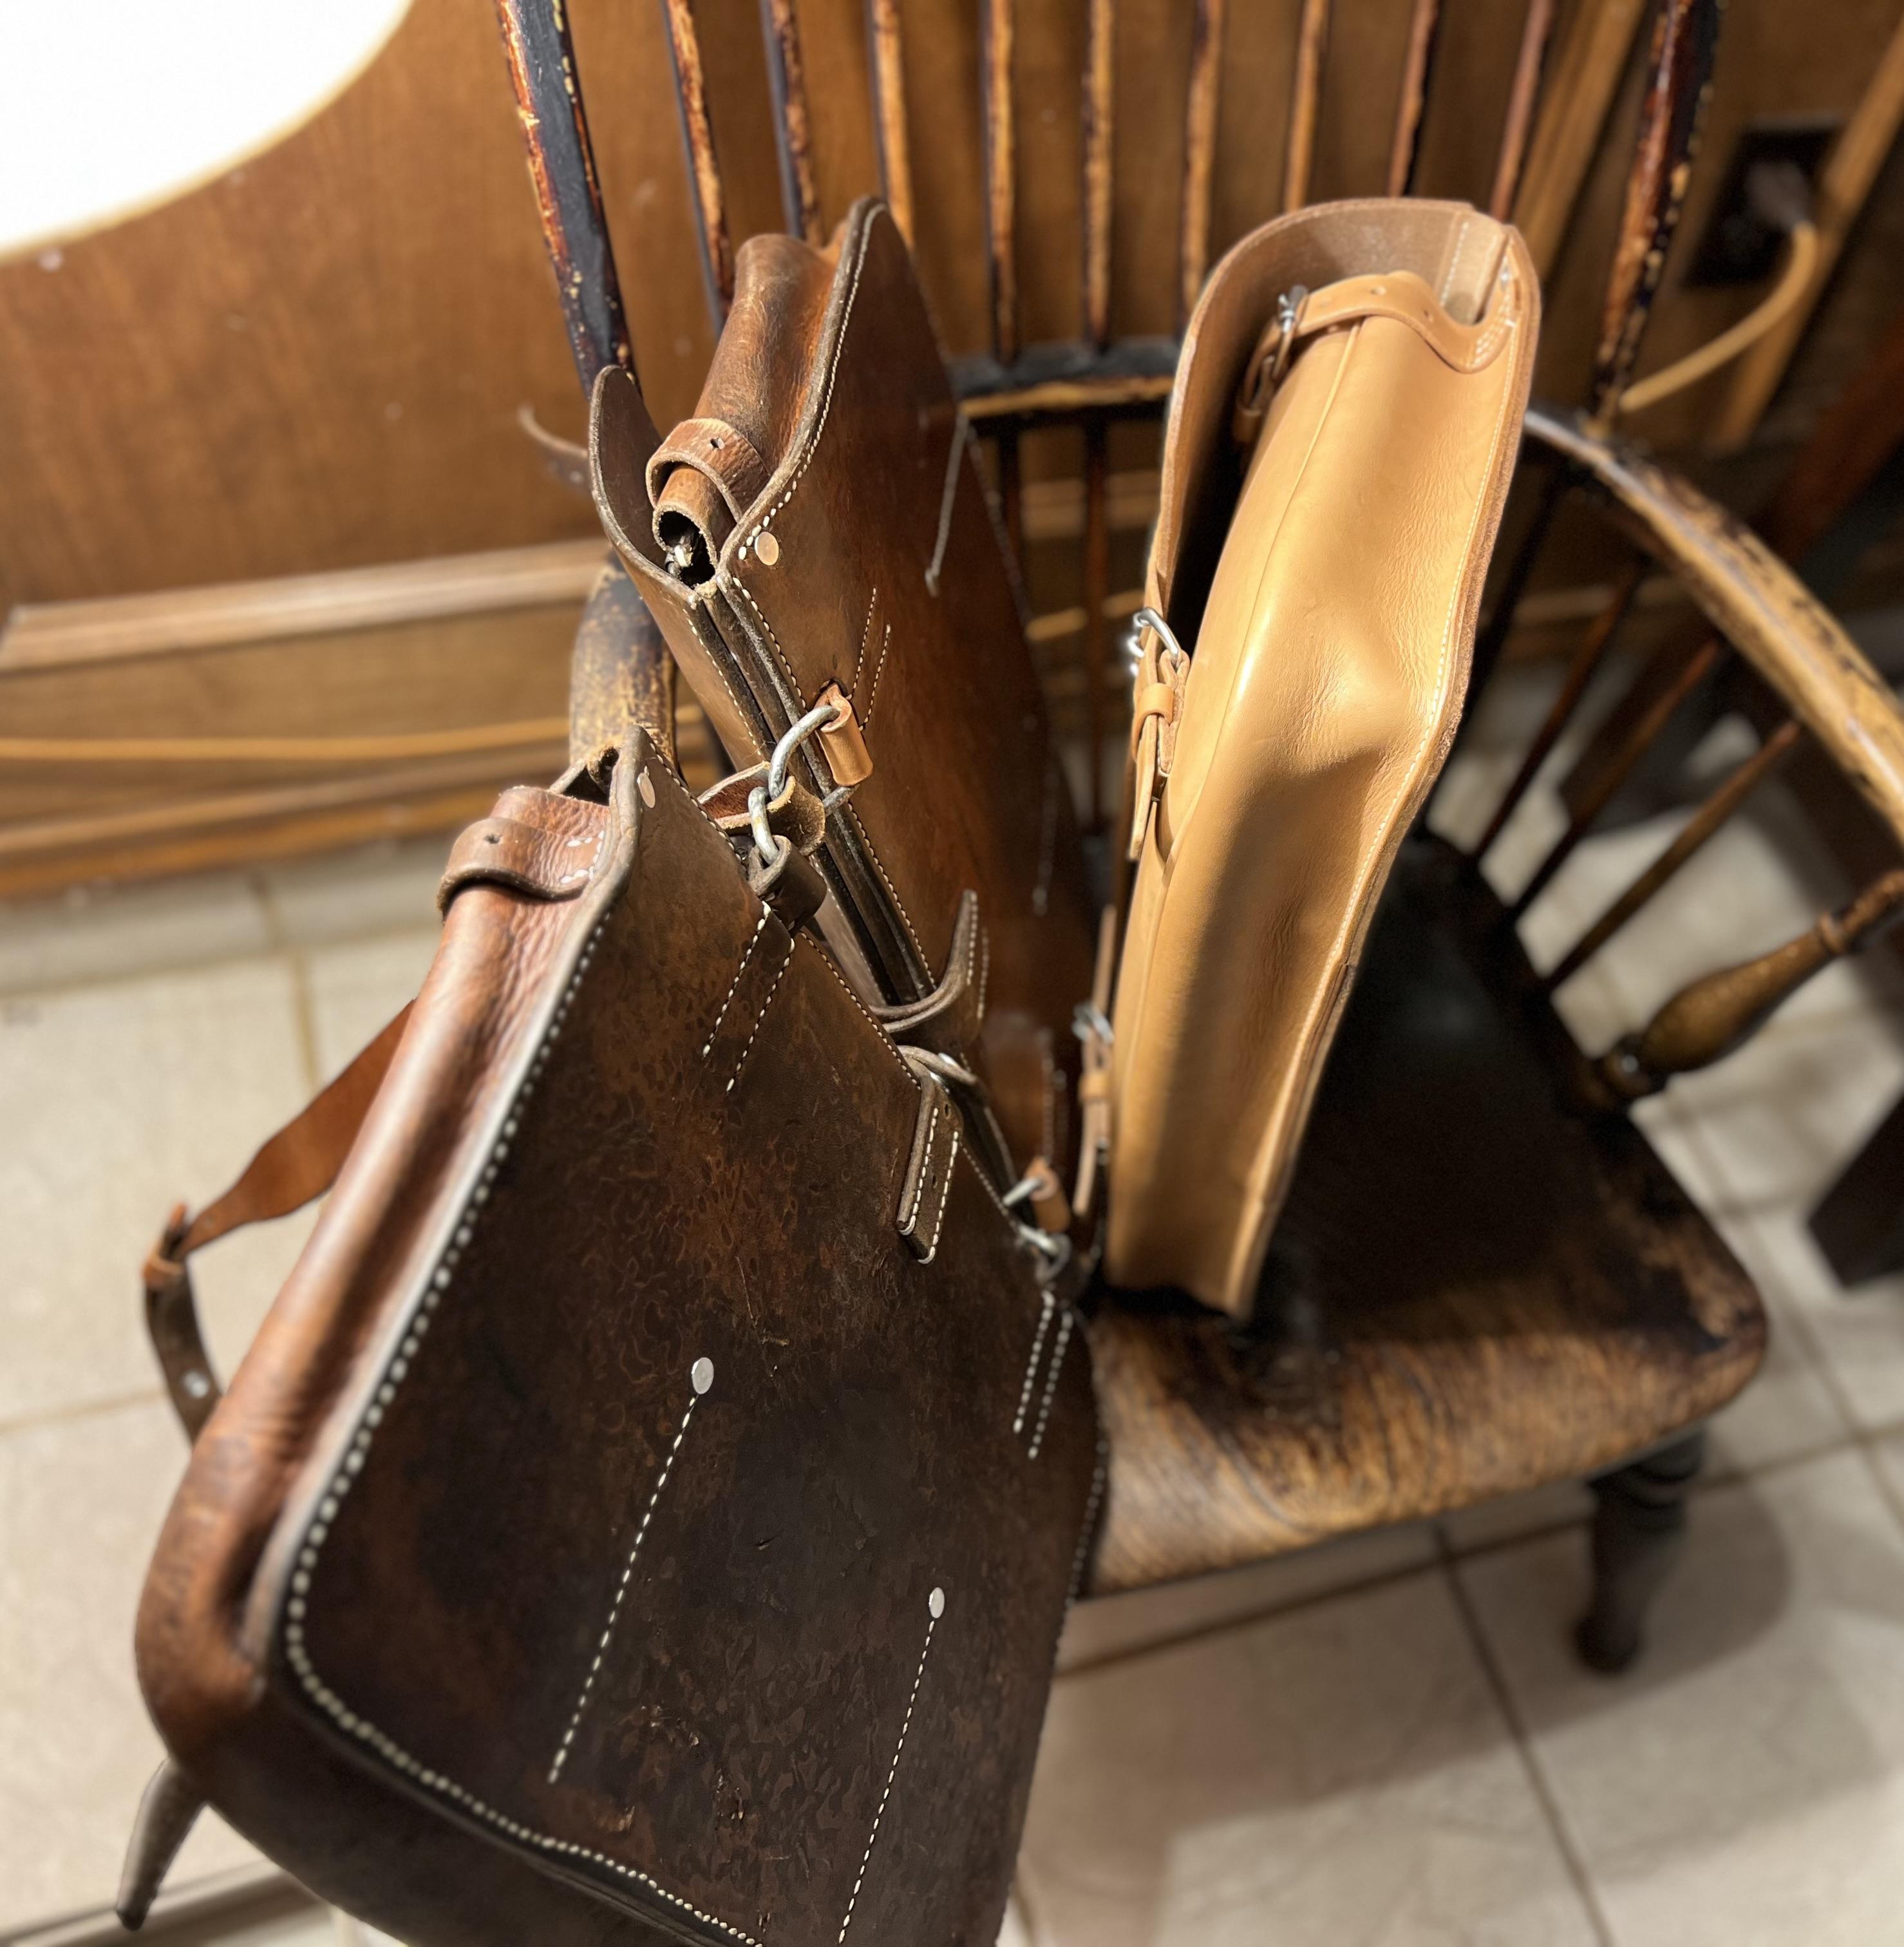
@Dwight Looks like I might have inspired ya huh? So the size of the one I posted is 16” long, 11” tall, and 4” deep. Only problem is that it’s not an available template since I had to create it. This book https://archive.org/details/leatherworkingha0000mich/page/128/mode/2up by Valerie Michael has a template in the advanced section that is close to the same size if that interests you. And with the online archive you can just borrow the book versus buying it. If you would rather the Swiss type, you can get one for $50 and take it apart to create your own, or! Just use it as is. This is BY FAR the best price for these bags. Most still have a ton of life left in them too. I’ve purchase from Teskey for years, and they are just down the road from me. https://teskeys.com/collections/salebarn-tack/products/used-vintage-german-leather-saddle-bag-copy-3 This one would be a lot more simple, and it’s about 13-14” long, 9-10” tall, 3-4” deep. I have one and it is fantastic. https://teskeys.com/collections/salebarn-tack/products/used-vintage-german-leather-saddle-bag-copy-1 Take a look on their barn sale page.
-
It's too nice to use.
-
Thanks for the compliments. All in all, it was a fun learning experience. Not sure it's a new direction though. I'll be really interested to see how it holds up during use. Randy
-
 Thinner leather - grain side only. Skirting leather - heavier on grain side/lighter on flesh side. The fibers on the grain side are denser and slower to wick through. The flesh side is looser and wicks in faster. Butt and top of the back is denser, lower belly and neck is looser on grain side so that is a factor also. Just because a piece of leather sucks in the oil does not automatically mean it is dry. Likewise oil that sits and does not absorb right away does not mean the leather is well oiled already. Apply light coats and wait. I applied my oil to nearly every project with a fine napped paint roller and paint tray. Dip the roller in the oil, roll off the excess on the ramp, and apply. I did 3 to 4 belts side-by-side, spur straps arranged in a single layer, and most other small projects. If I needed to overlap for wider projects I just butted up the next roll to the last one, I didn't overlap and over oil that section. It will wick over to the dryer areas faster that it will wick away from an over applied area. After a few times you develop a feel for how often to wait and decide to reapply and how much oil to leave on the roller for thinner or thicker leather.
 -
Impressive Randy. I made a tool belt for an electrician a few years ago, and there is more that goes into the project than what many people would think. A whole new line of work for you to consider. Ron
-
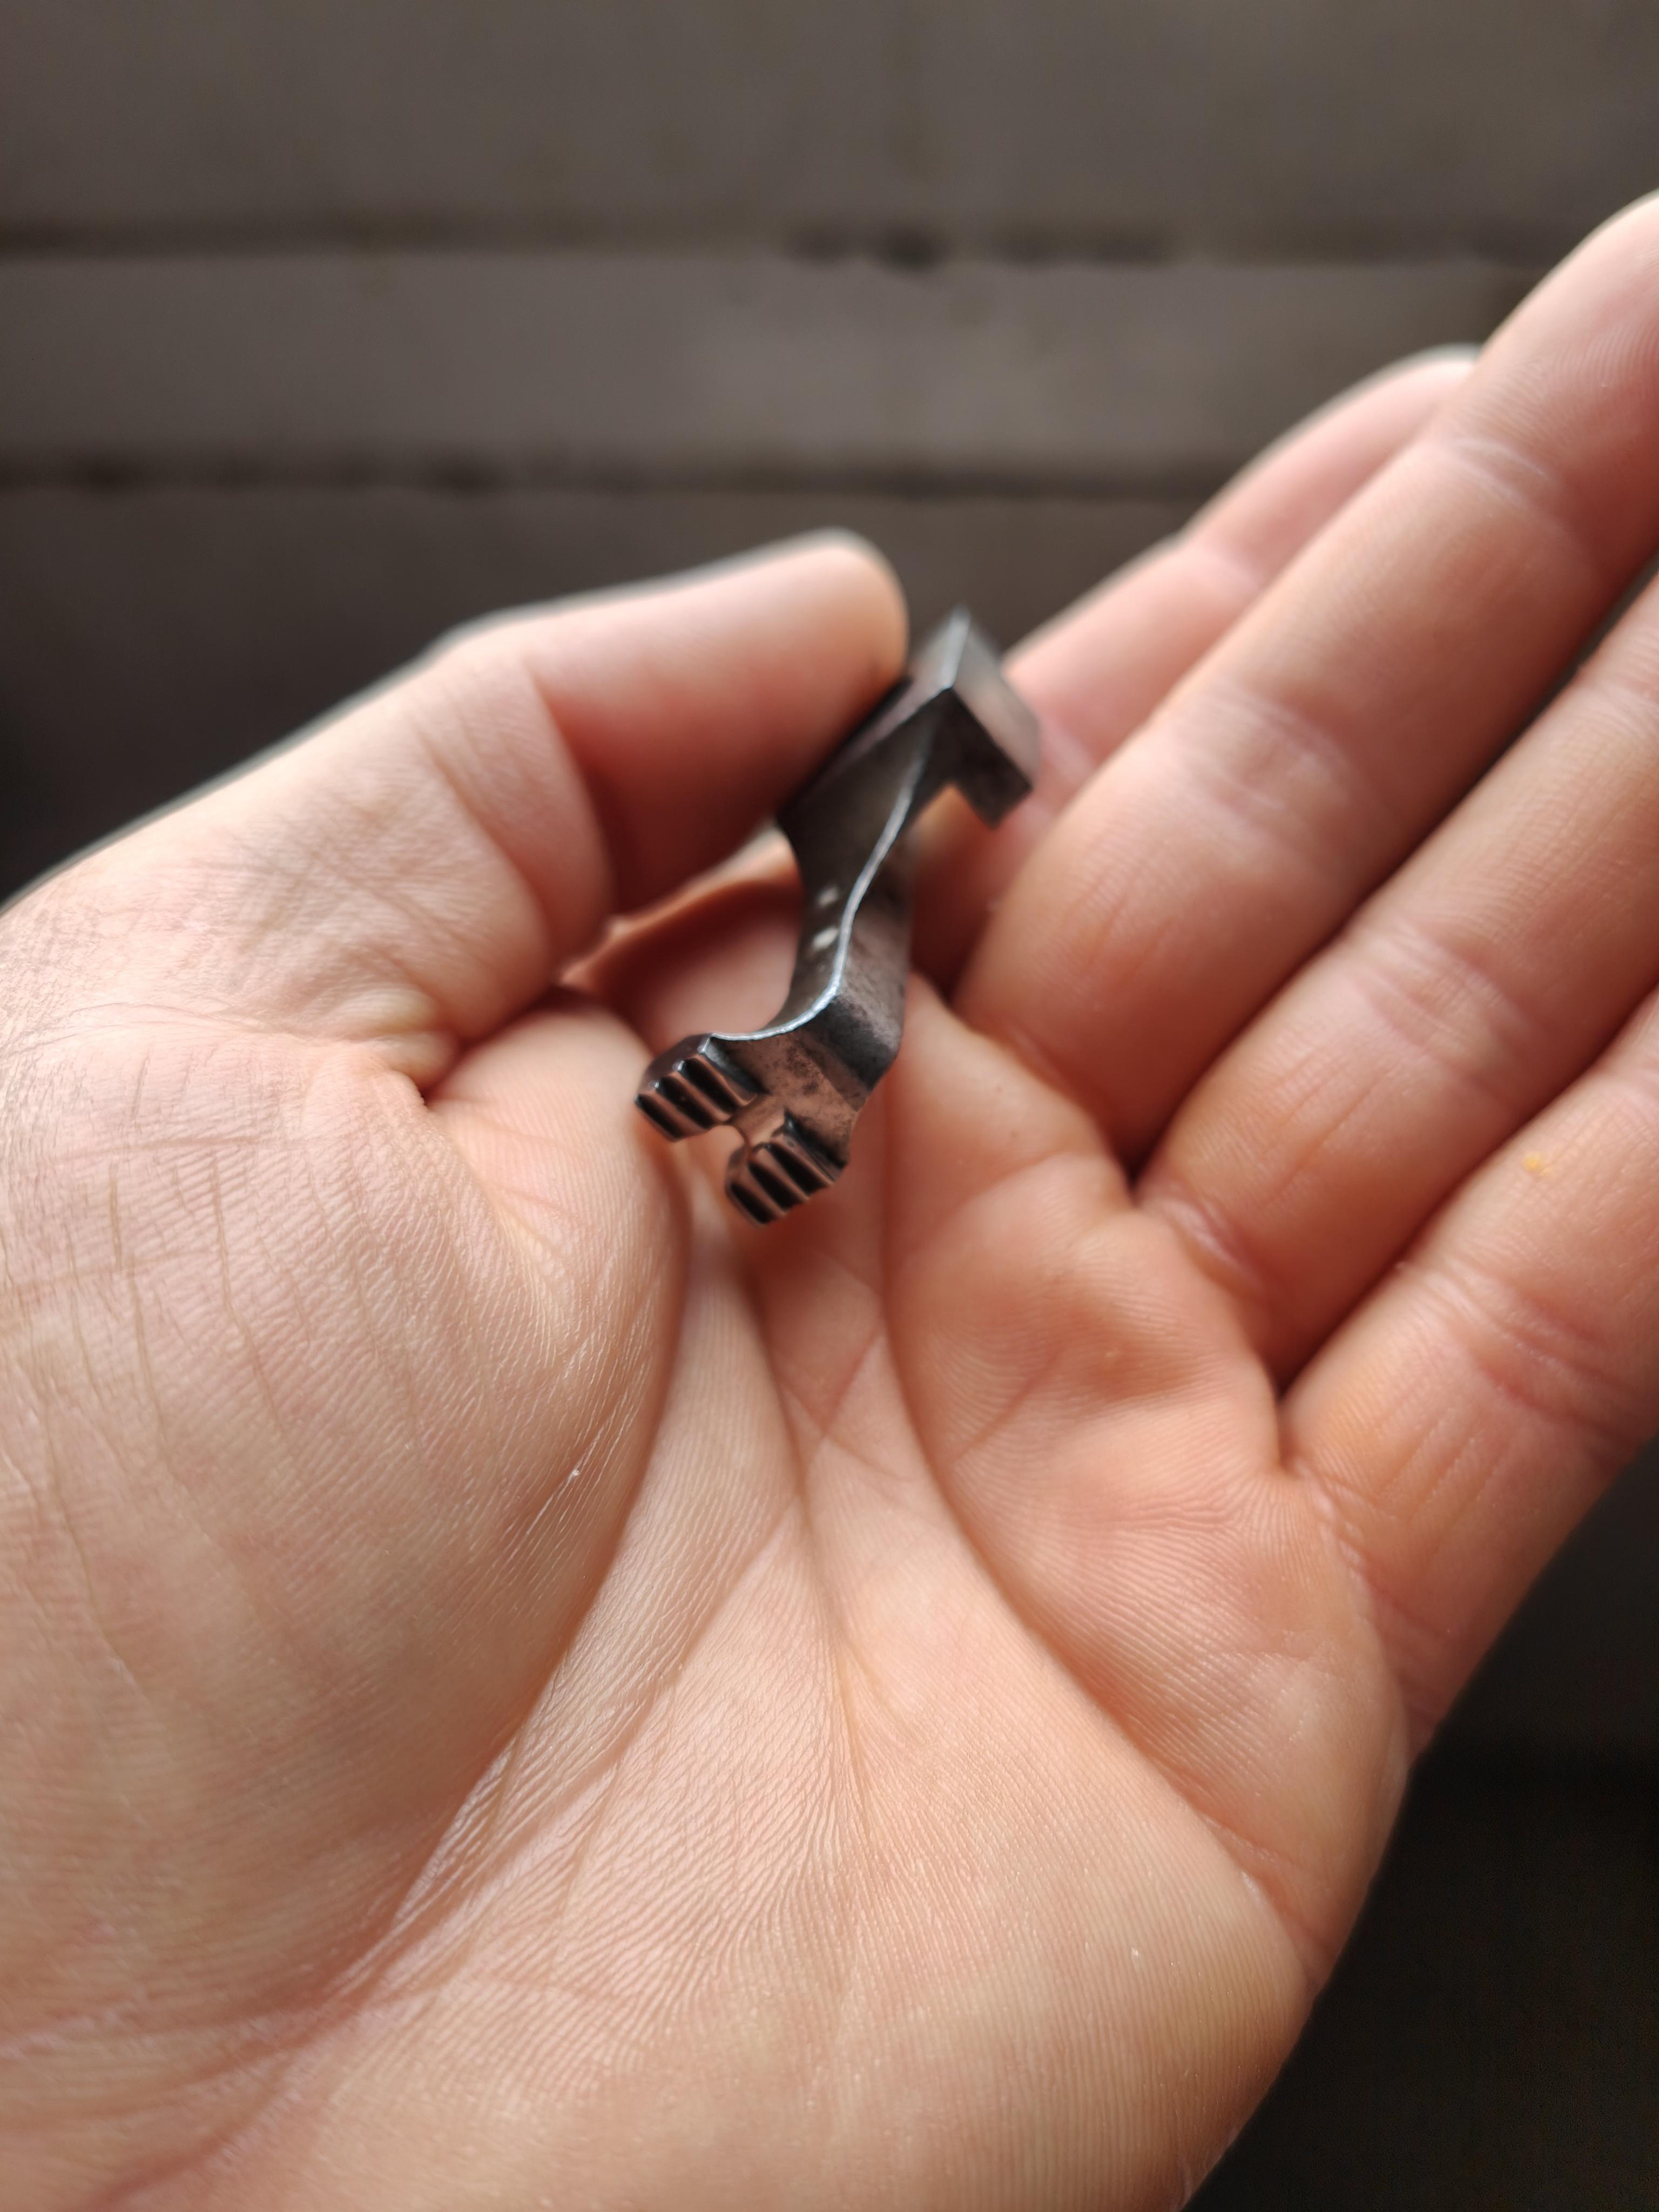
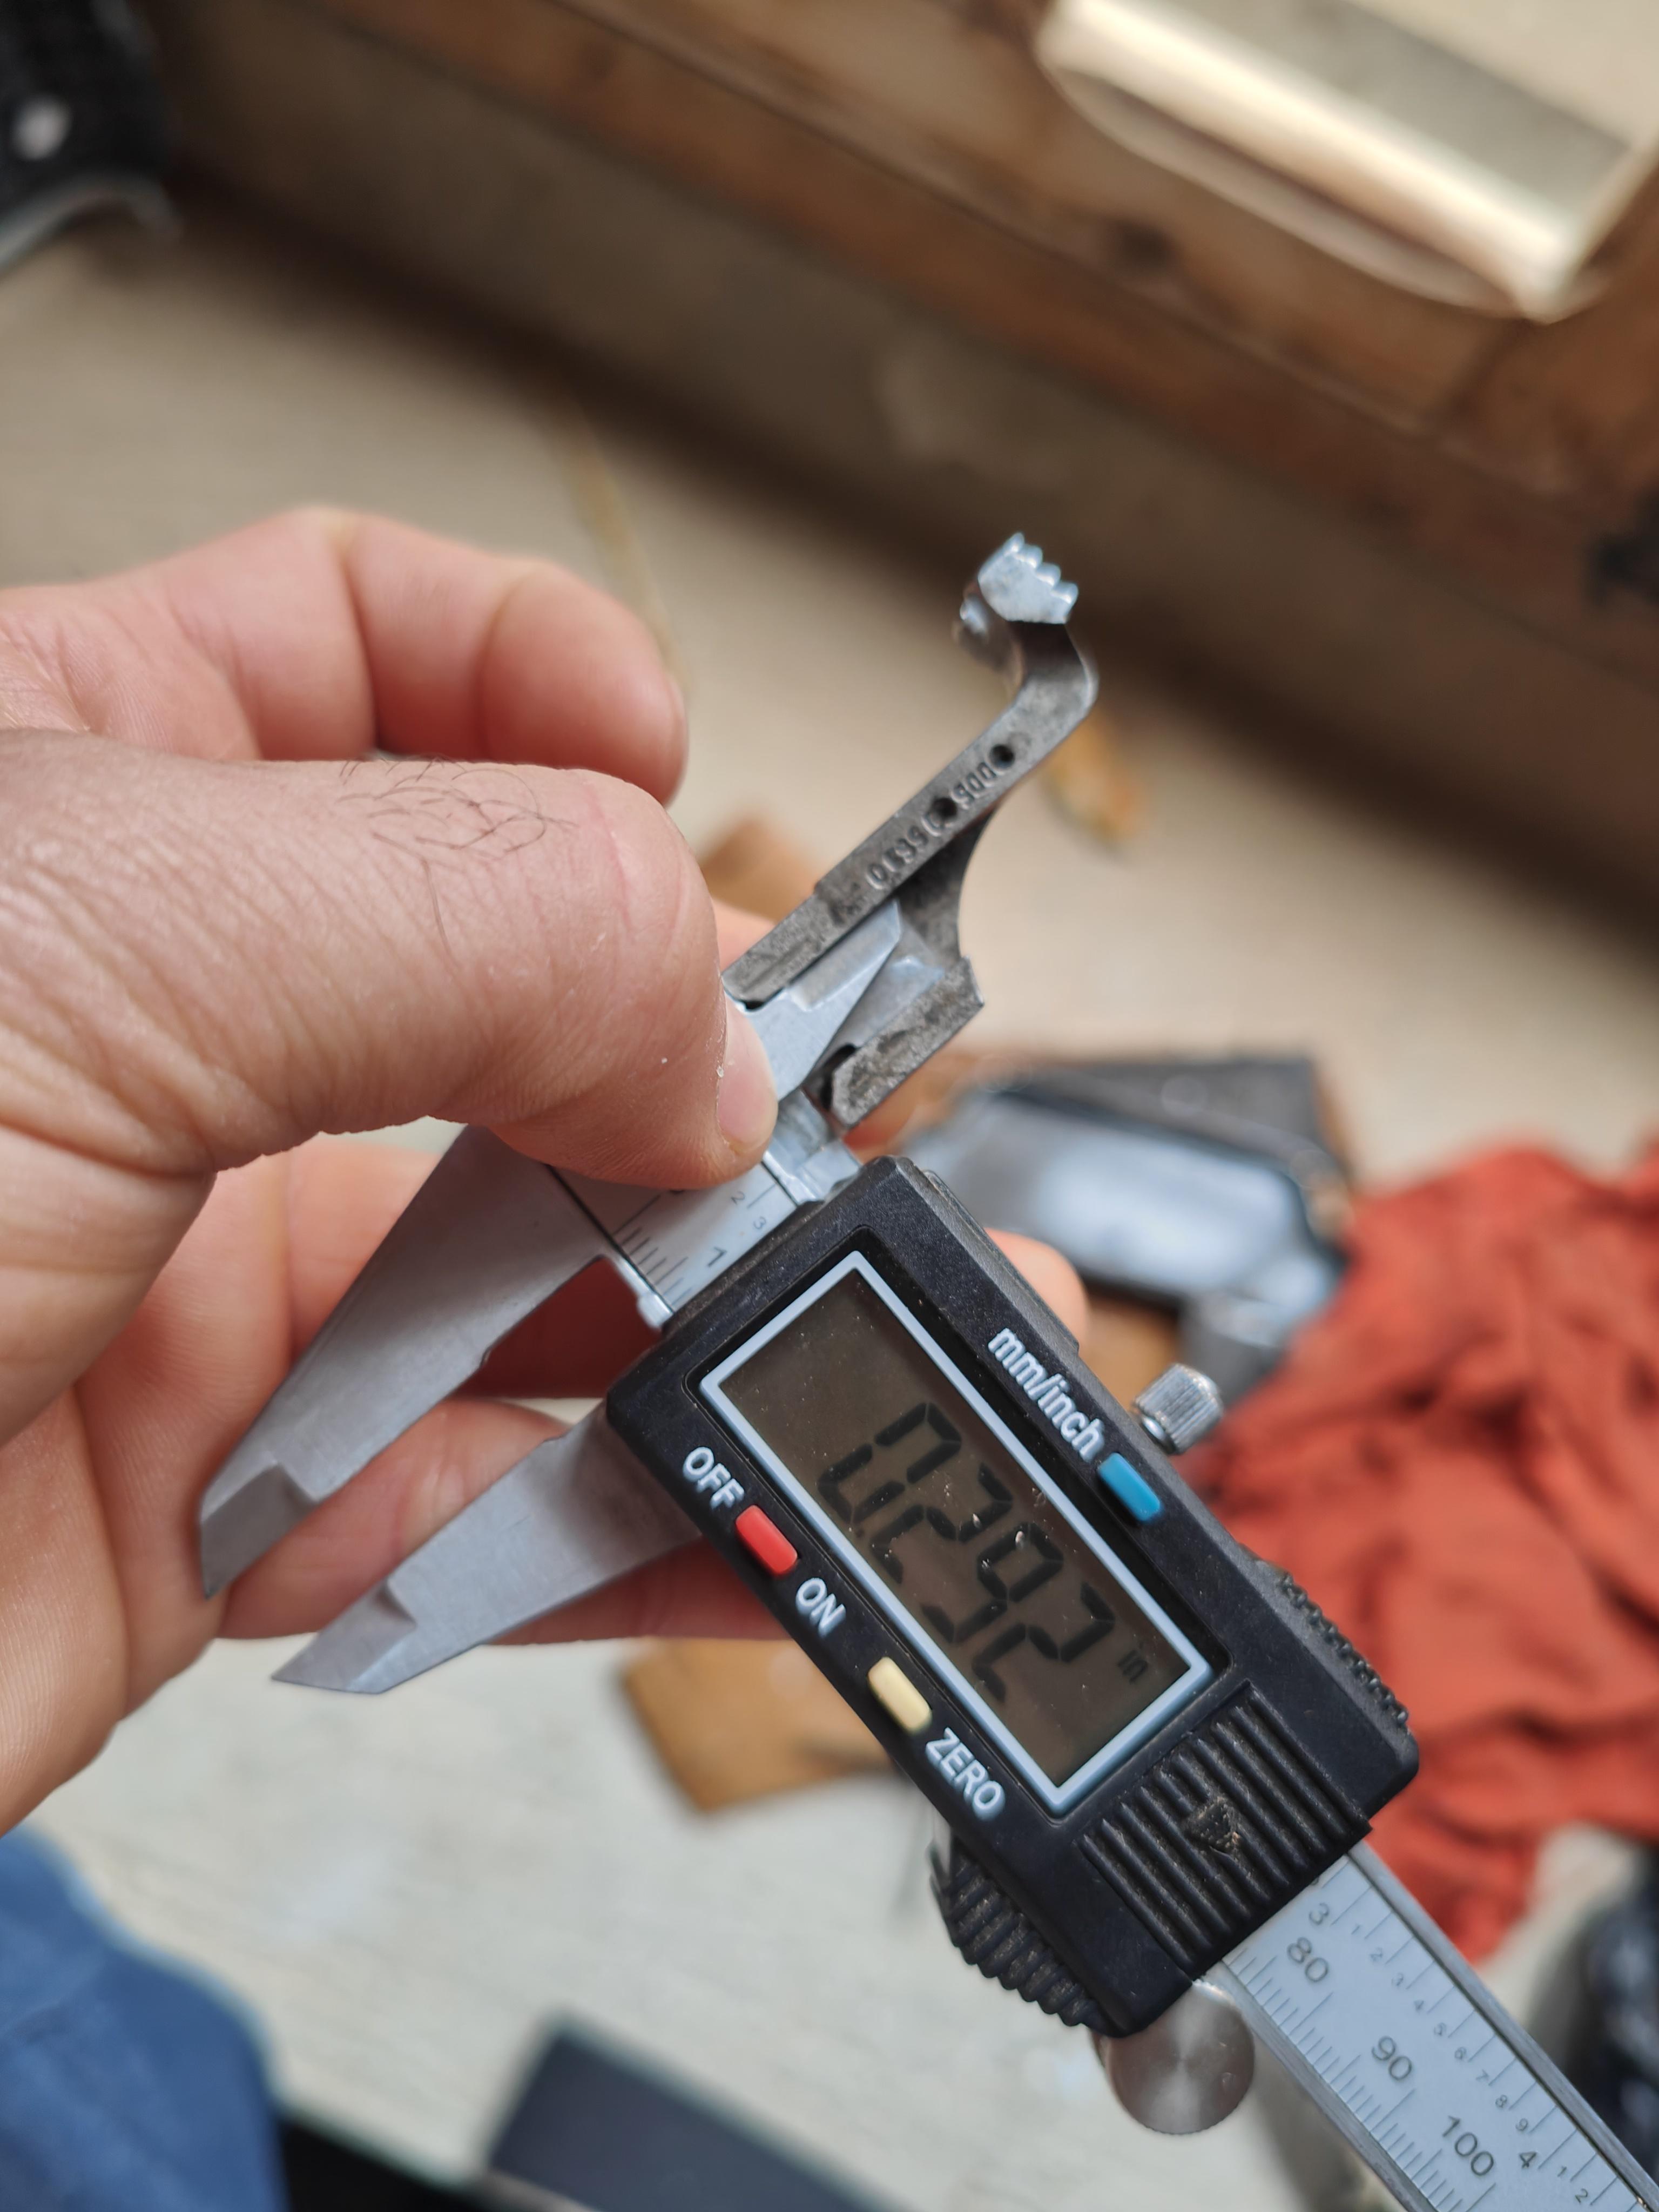
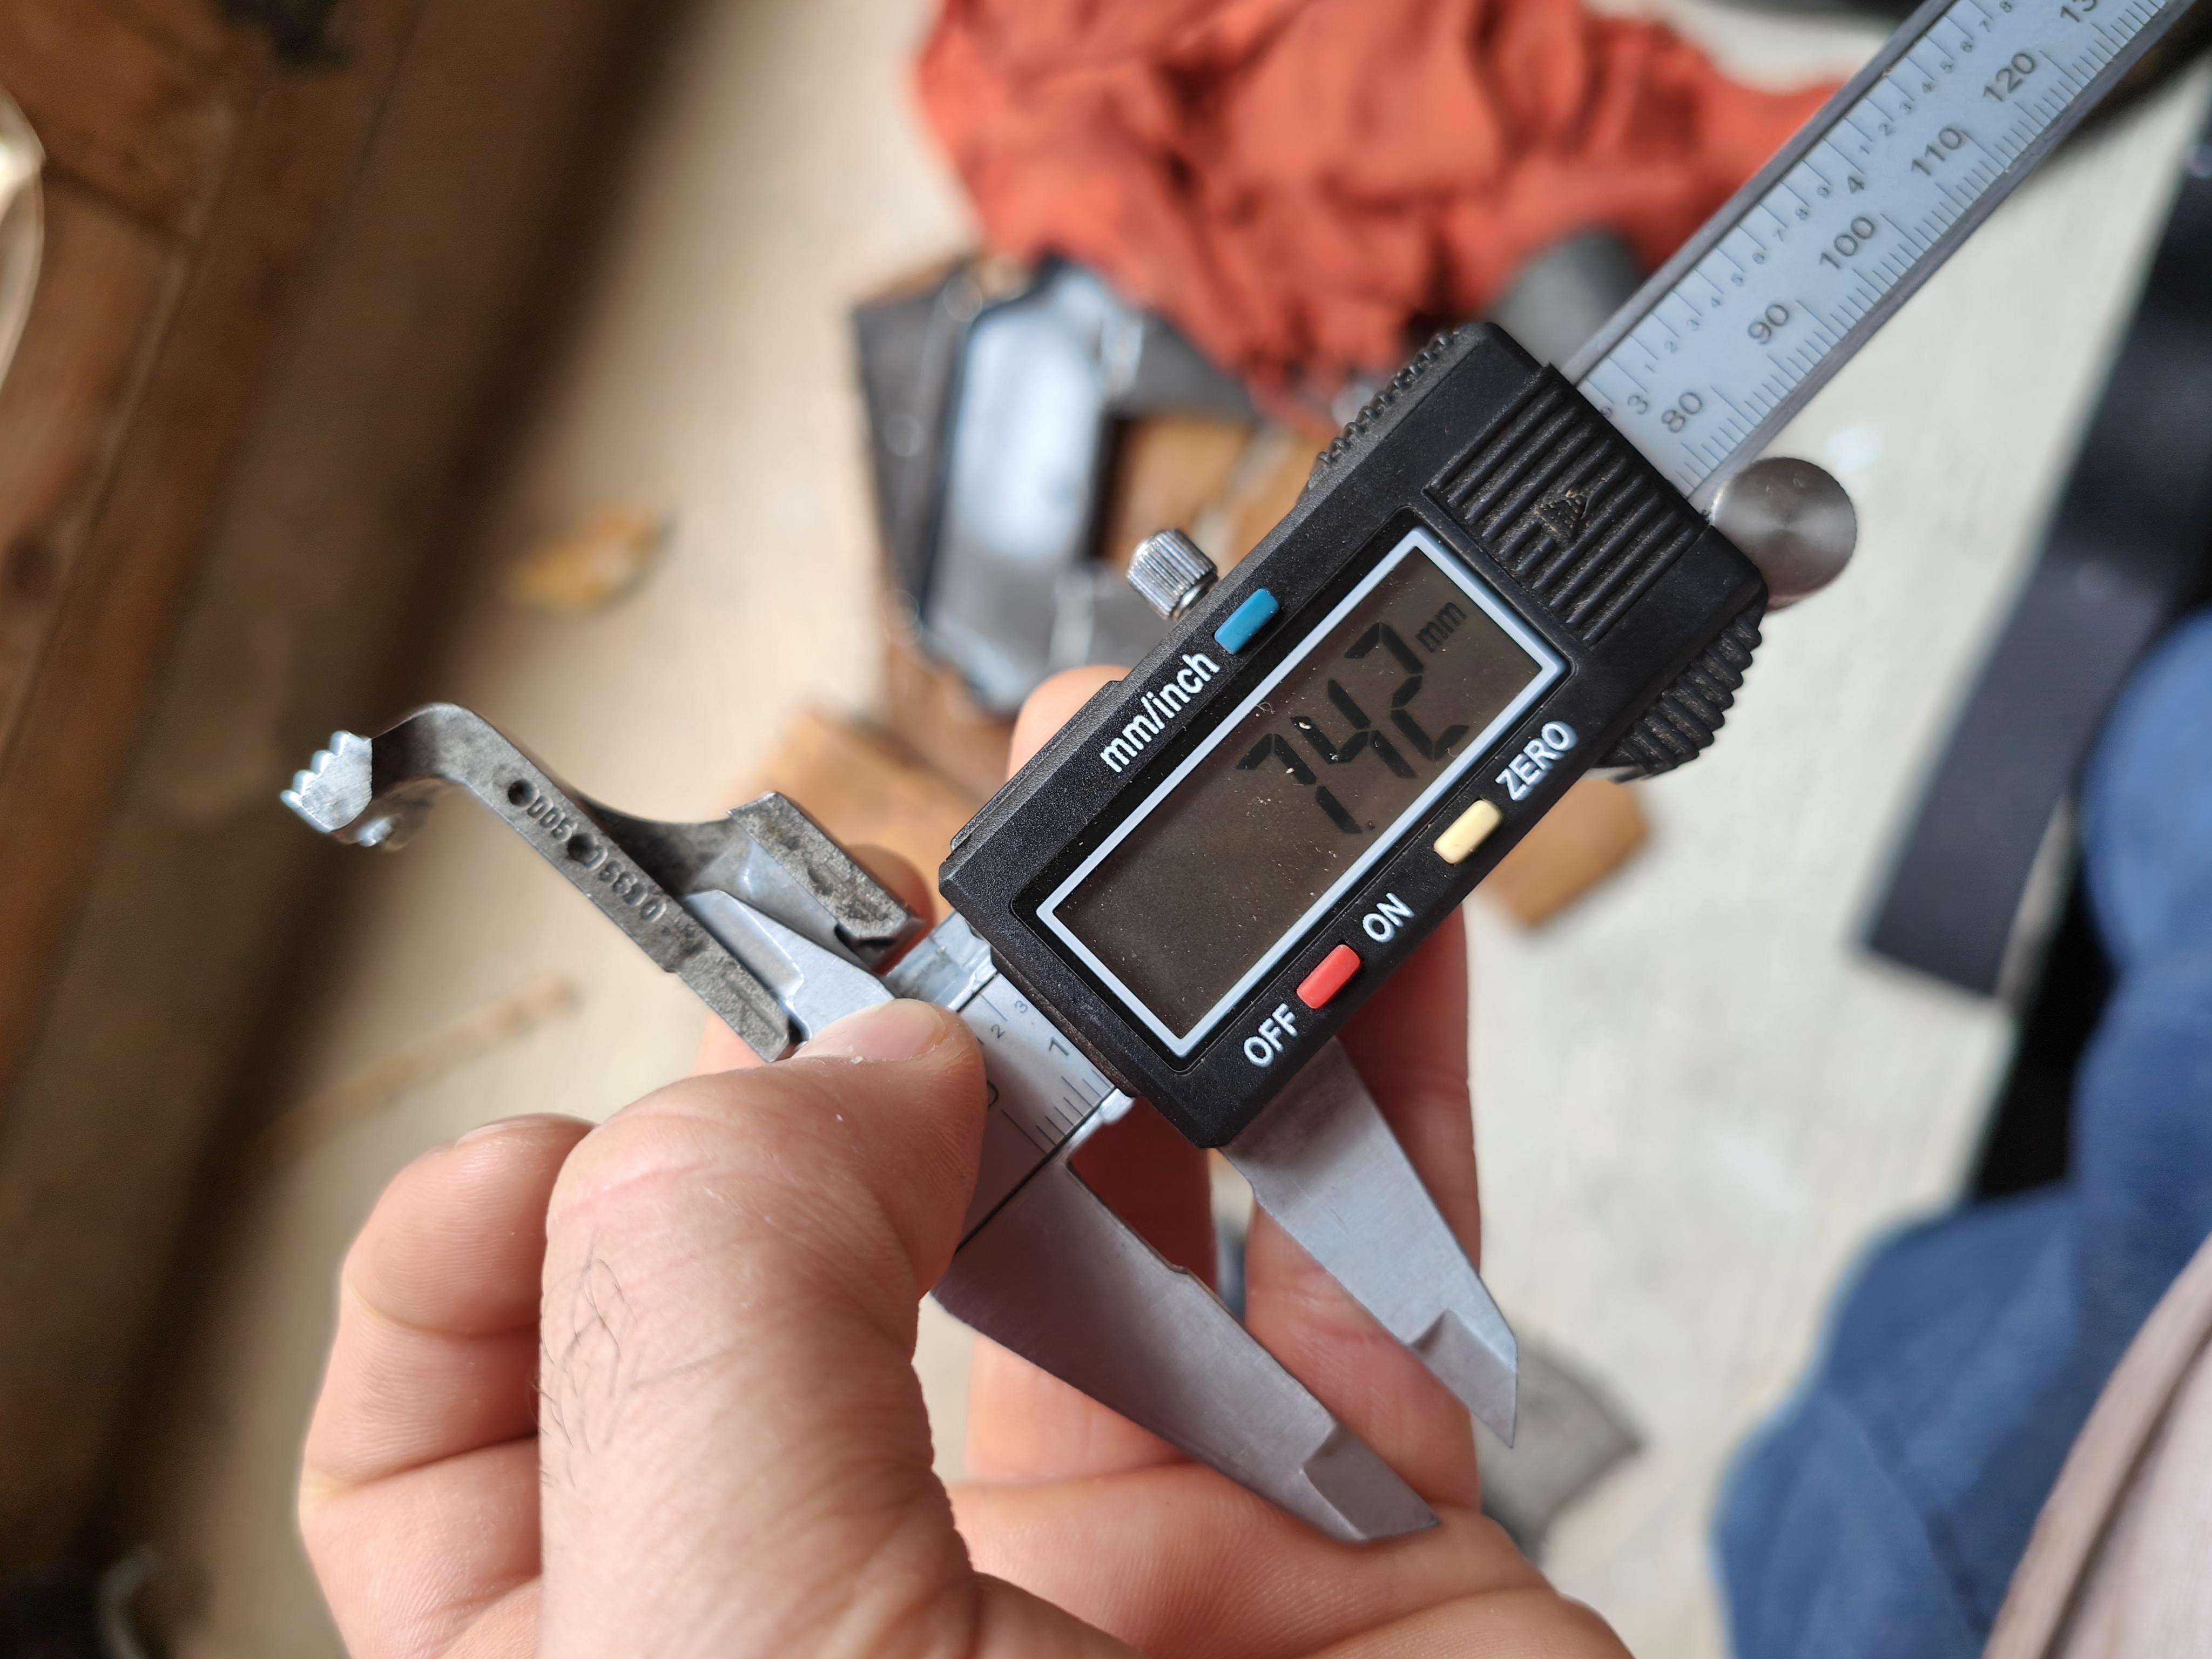
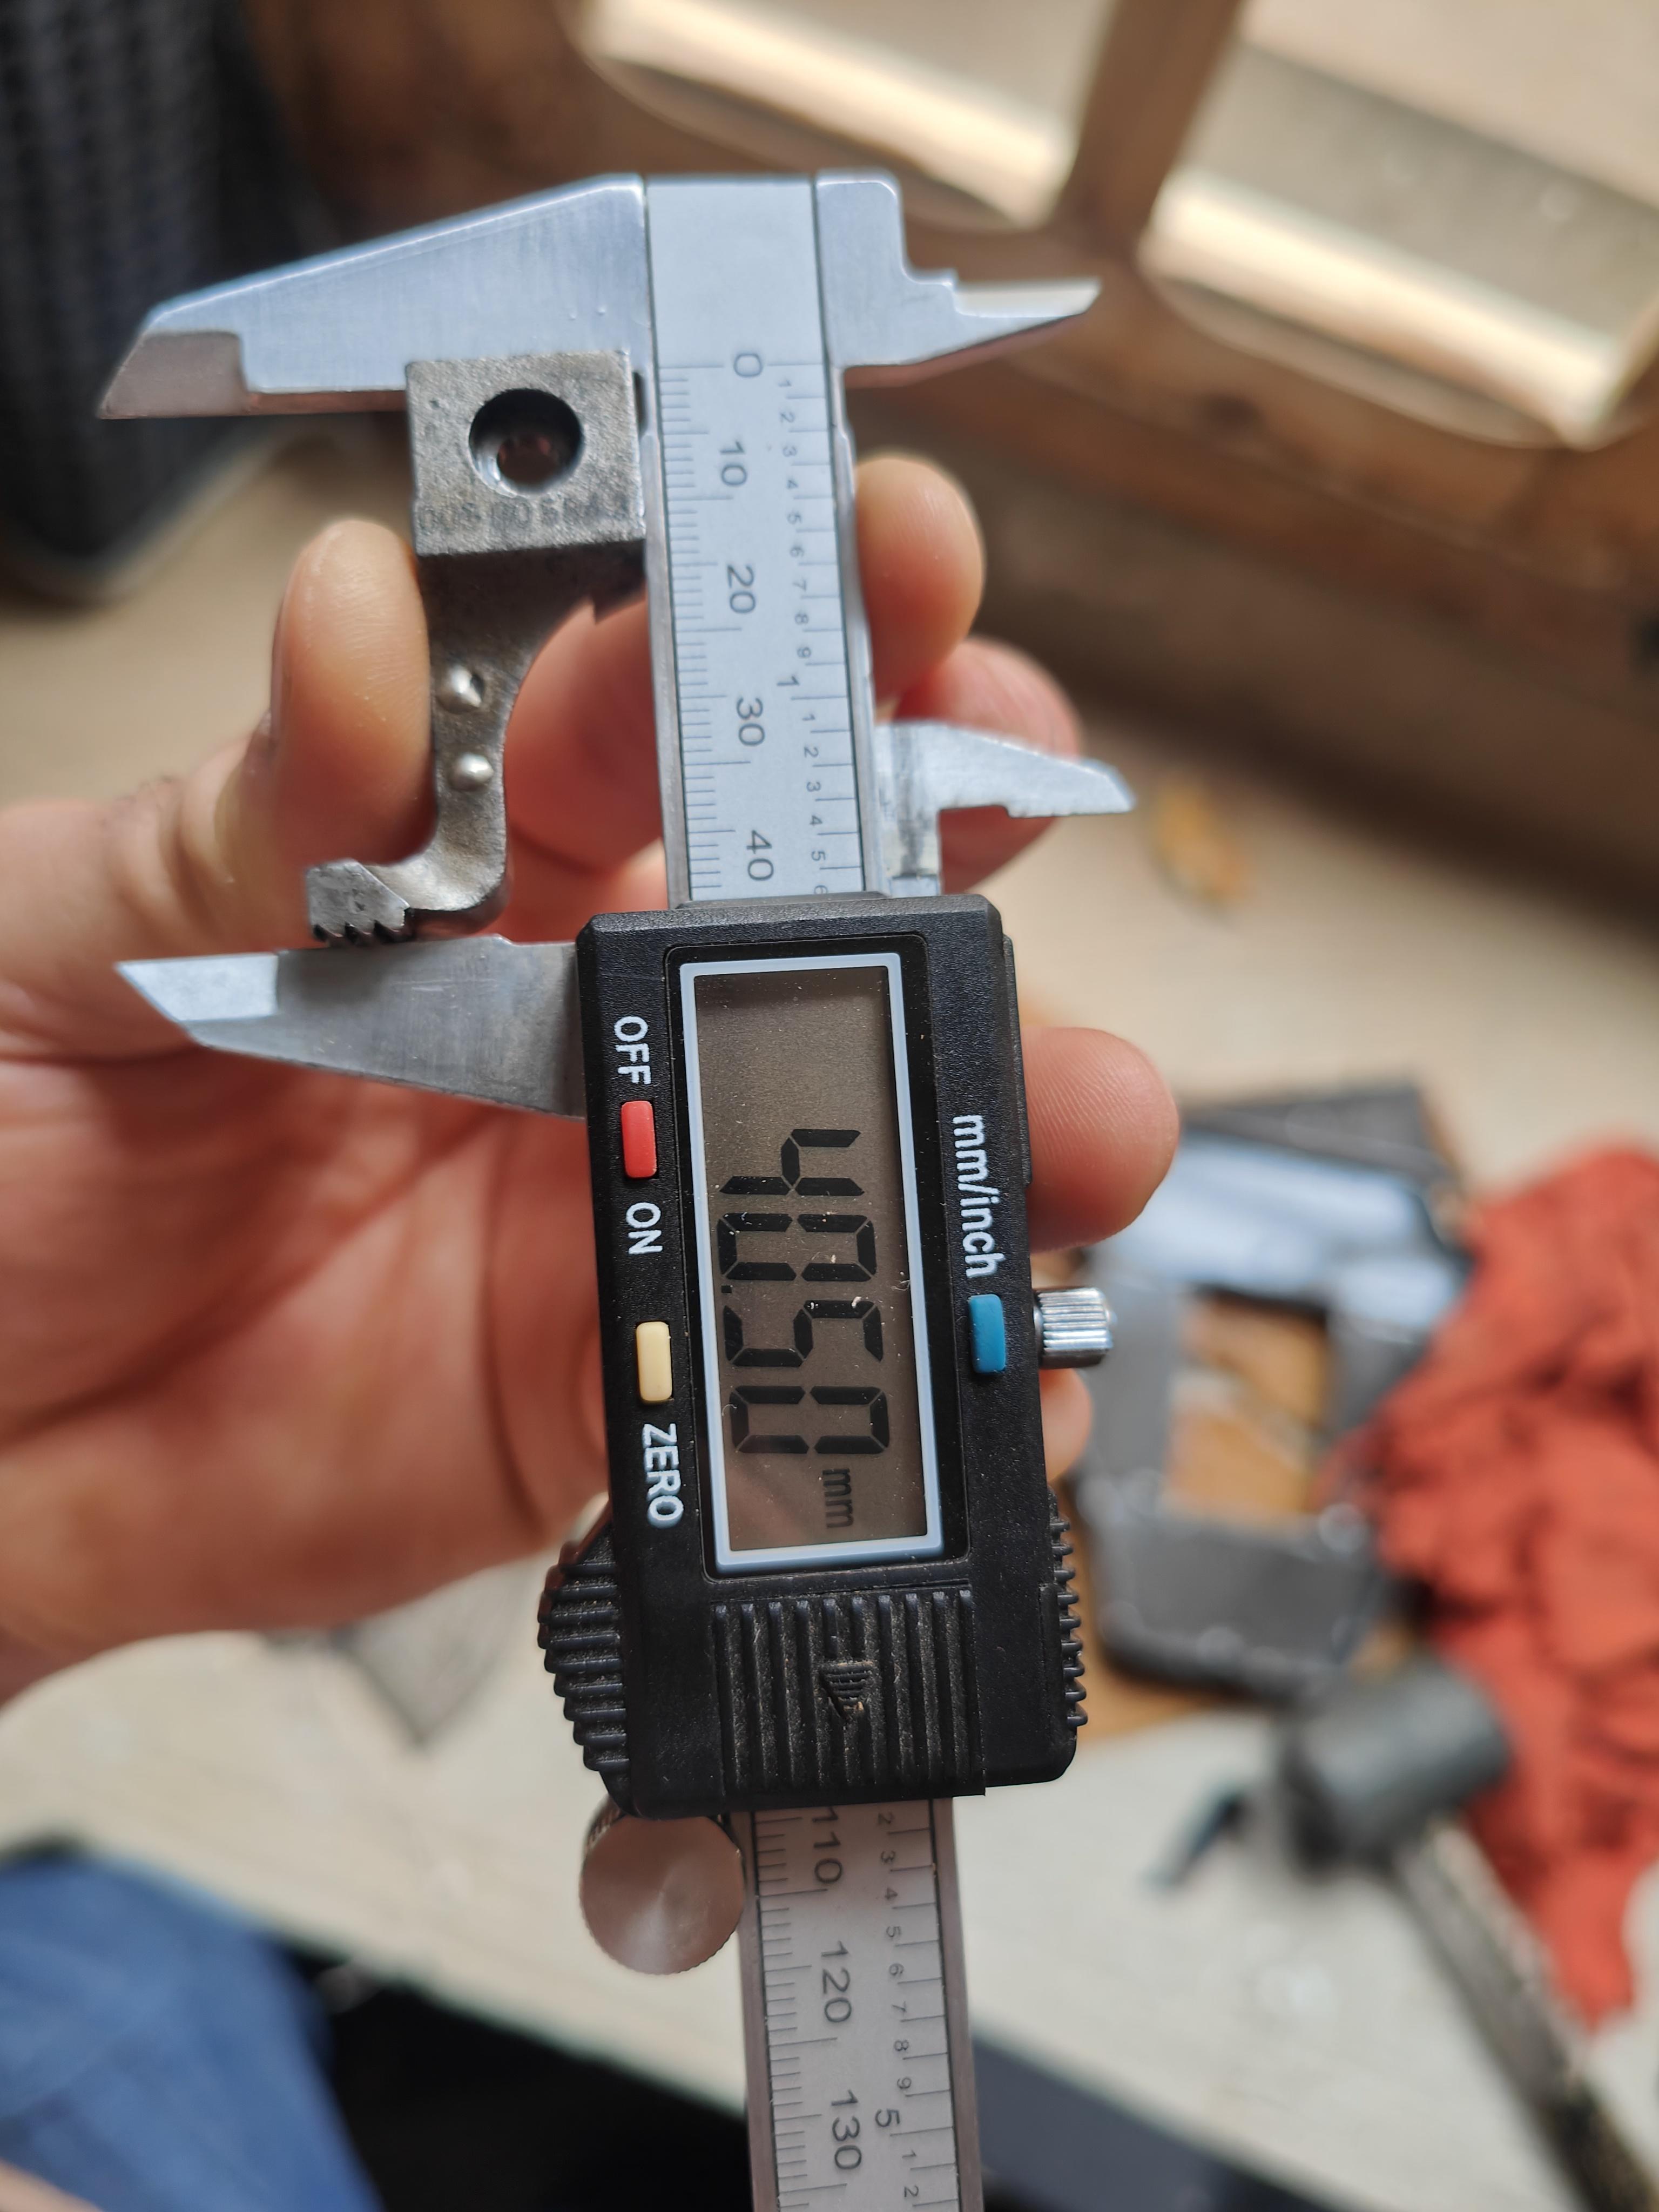
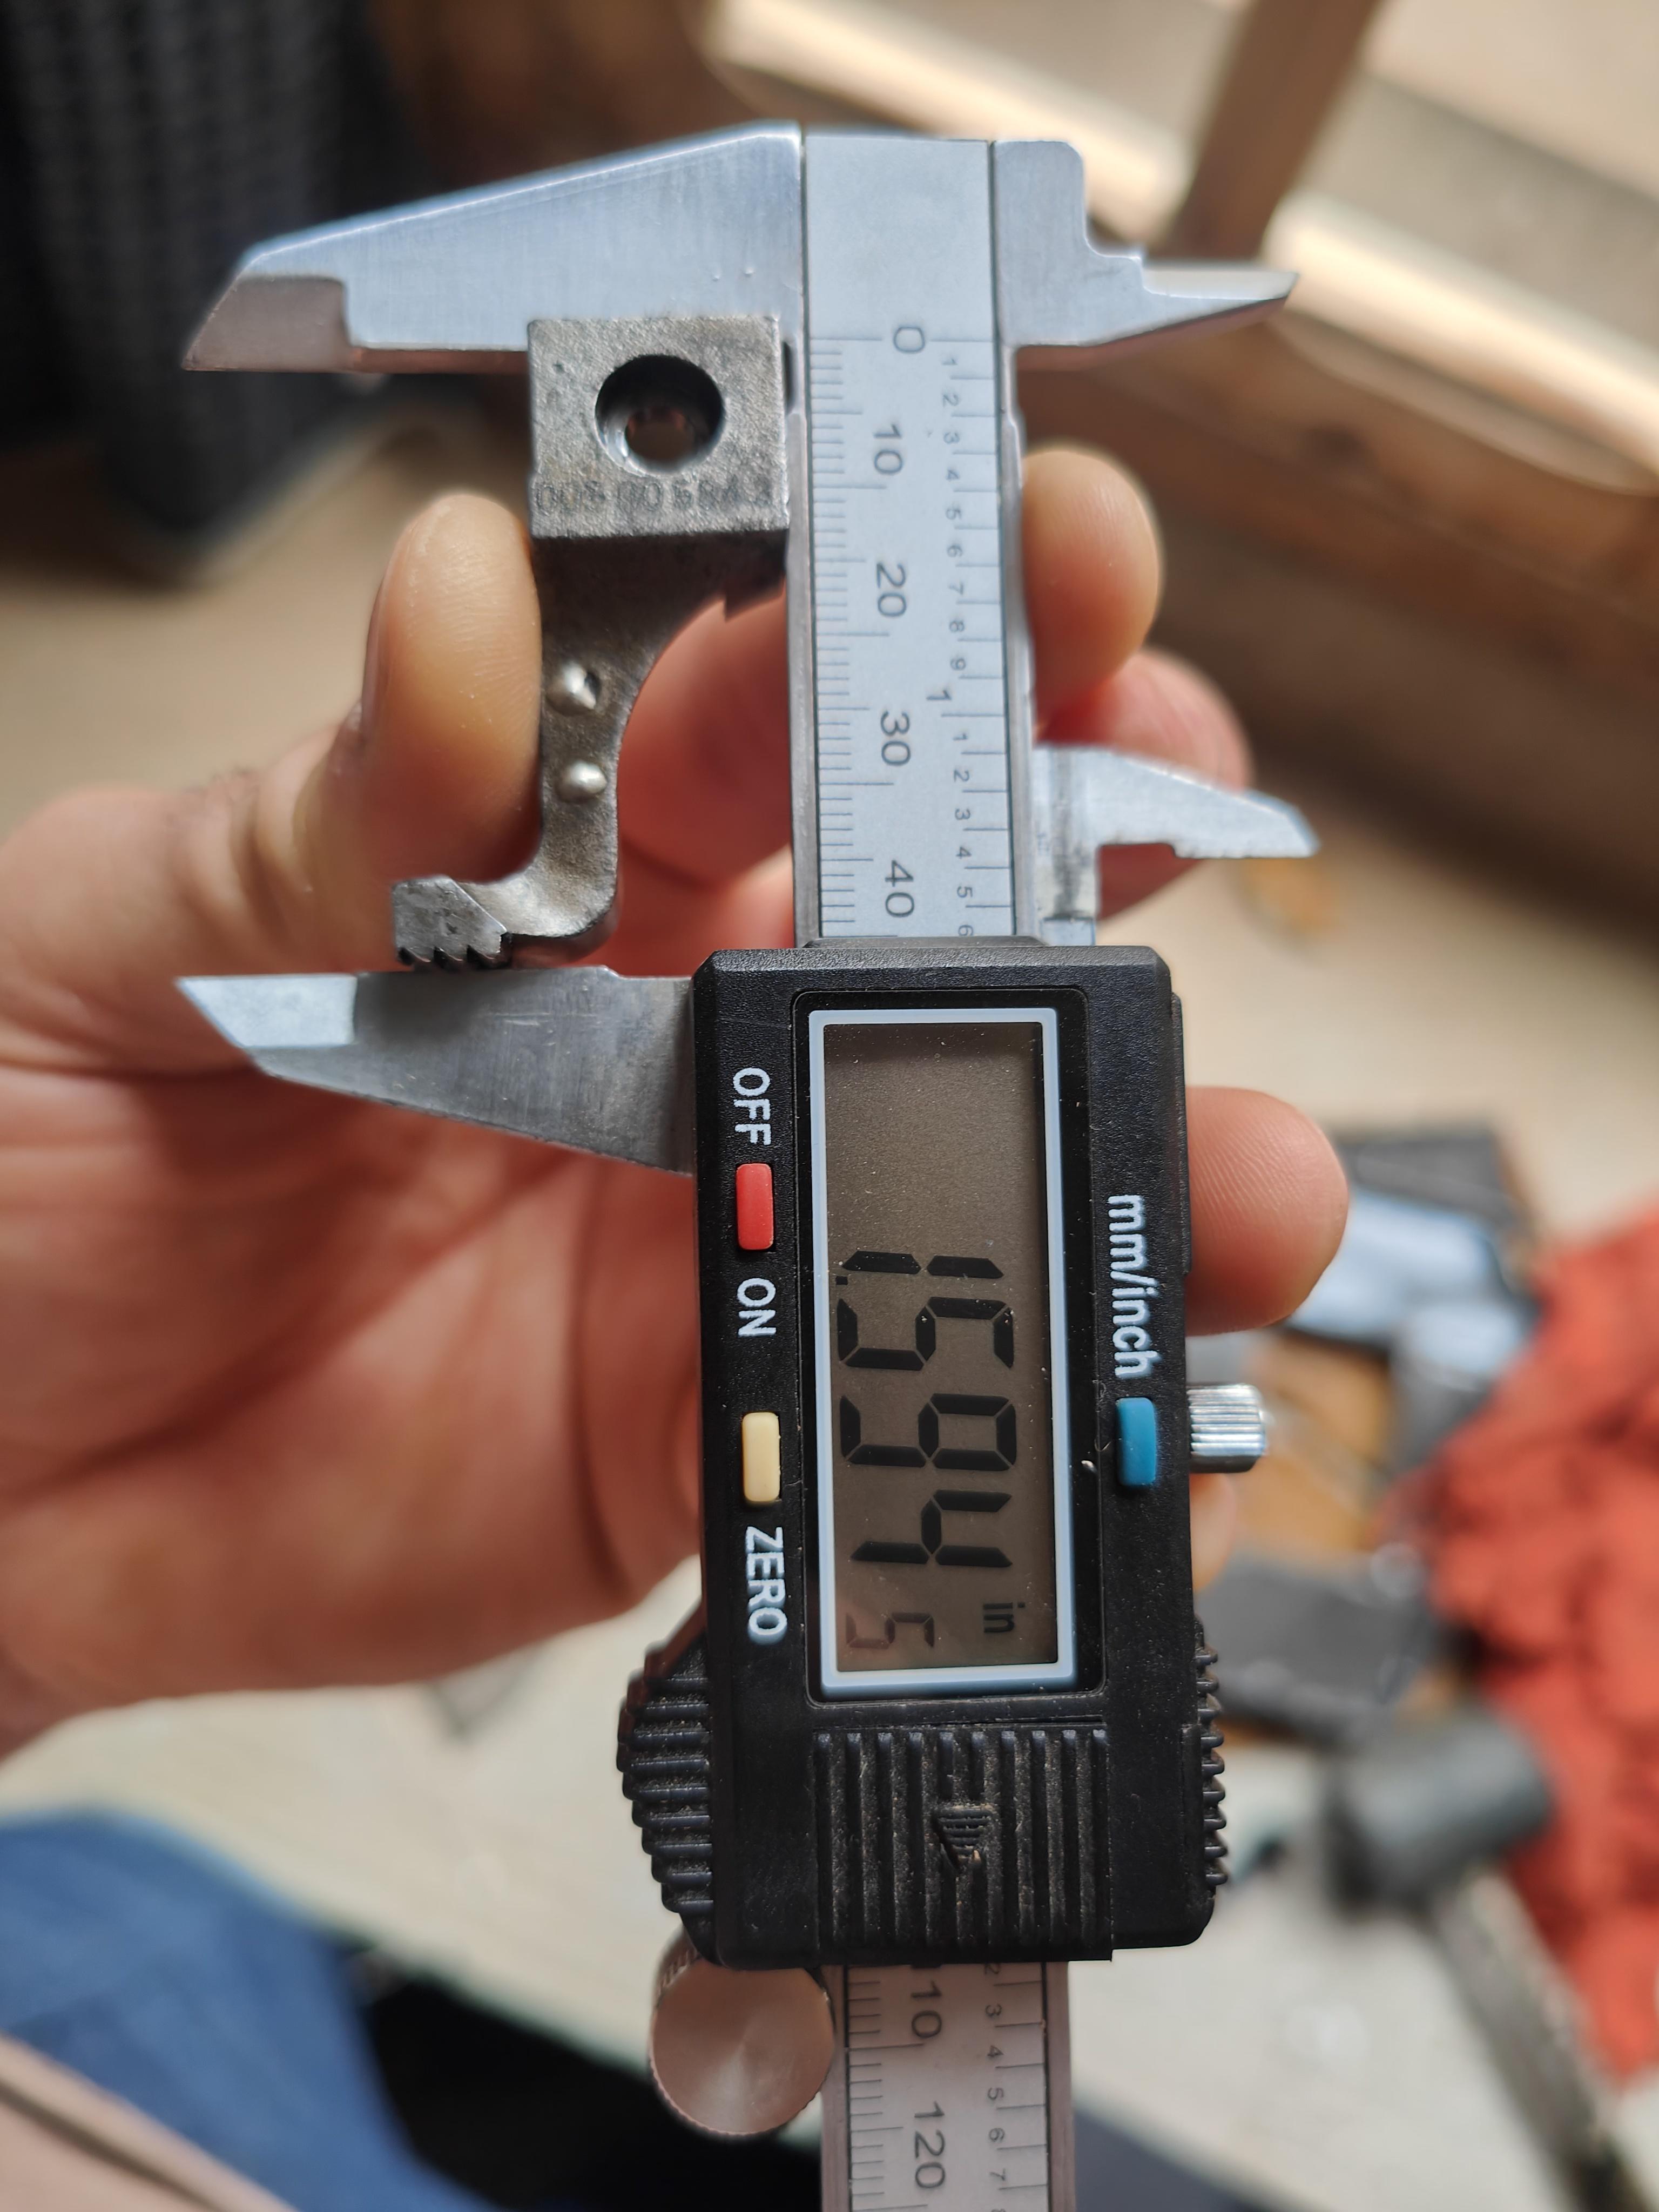
 So i bought this machine recently for a very good price, however i can't find a presser foot compatible with it due to my very poor knowledge of sewing machines, can you identify what system is this foot, and what should i searched when looking for it. I have looked everywhere on Amazon, AliExpress, eBay, everywhere i just keep finding presser foot for Adler 205-370 but nothing for this MO25 version. This foot i have is functioning, but it's just too broad and short and using it is annoying TBH, and the left tooth is completely useless it's landing on air only the right tooth is doing something. Thank you in advance.
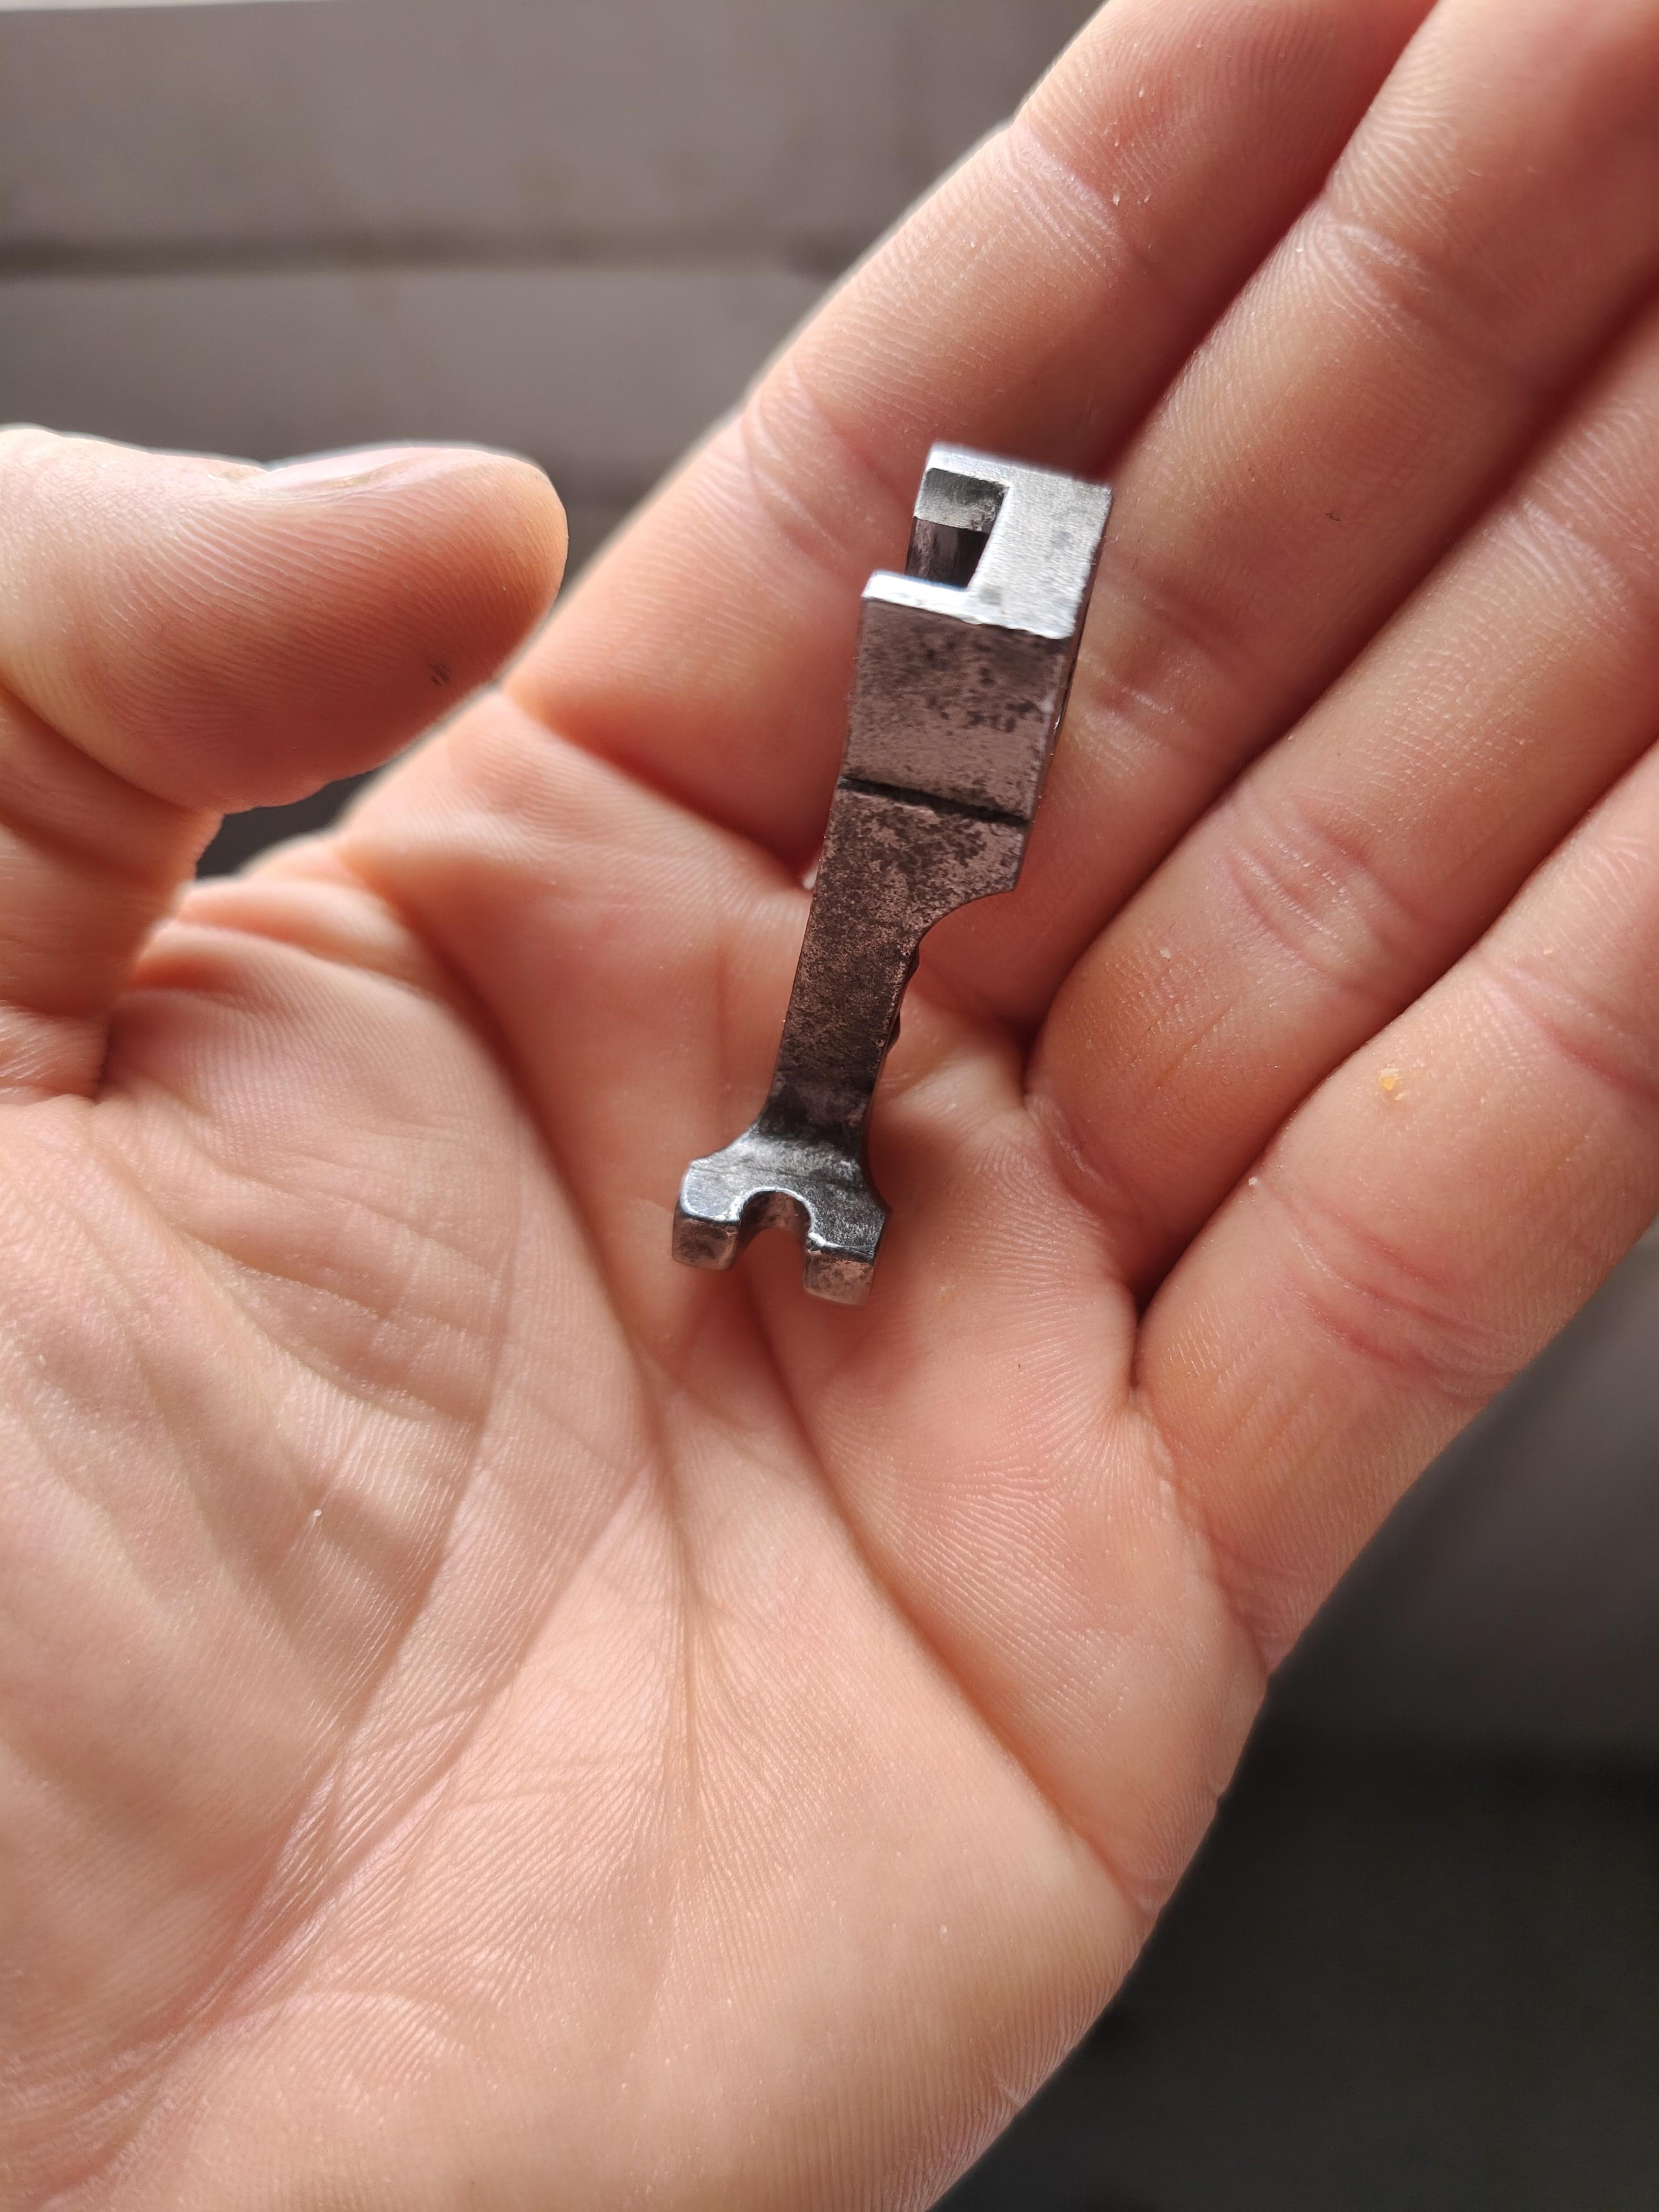
-
Holy cow, that’s amazing! I hope he’s a big boy - that looks like it would hold 1000 pounds of tools, lol!! Nice job!
-

Pedersen 309 Bobbin case wires question
Einherj replied to Einherj's topic in Leather Sewing Machines
Thank you. I always take a lot of photos when I'm pulling a machine apart. I don't trust my memory at all. I can post more photos when I get further with it, no problem. My aim is to make sure it's running smooth and also looks decent, but not an overall rebuild. I run a small leather goods business, so I have my own workshop to stink up, don't have to worry about the Mrs. I don't even know what that is. They clean machines with dry ice? -
Lots of great pointers in here already. I'd add that Weaver Leather Supply has a line of YouTube videos by Chuck Dorsett explaining how to do various individual skills and walking you through various projects. Those are immensely helpful. Armitage Leather's videos on saddle stitching are the best I've seen. And, if you have a Tandy nearby, taking in-person classes is a great way to get hands-on guidance with a skill—you can only get so far trying to teach yourself.
-
Marvelous work! I see why you now feel you should have just bought him one, lol.
-

Is there a sewing machine for me?
friquant replied to D.jsherwood's topic in Leather Sewing Machines
Pfaff 545 is a flatbed with triple feed (aka walking foot) that I see come up on marketplace for $600 - $800. That's what I bought as my first machine. It's biggest fault for me was the stitch length only went up to 4mm. -
 bike packing bags, chalk bag bottoms, stuff like that. but really i prefer the vertical bobbin if i am using it as a binder.
 -
 Do you have a need for that smaller diameter cylinder arm? If not using smaller needles, then i think the arm size is really the only benefit of going with 246 over 1341 class.
 -
thanks for the reply. the 246 I recently used was a -7 model and brand spanking new. I will check with foresewing. these two are at advanced sewing in pittsburg. I use heavier fabrics, ultra 400tx, all weights of cordura, 16 oz ballistics, ultra 800tx as well as light dyneema, so have different machines for different weight fabrics. whatever cylinder arm I end up with won't be a full time binder nor used on the lighter fabrics.