All Activity
- Past hour
-
 Coffee grinder jumped to mind when I read this. I remember some posts from the early days here. As I recall - "old coffee grinder" or "cheap coffee grinder" were the key recommendations.
 -
 I forgot to add, when making a flat back holster and gluing up the inside and outside. I apply all my glue to both pieces and when I mate the pieces and use wax paper to keep them separated so I am only mating specific areas at a time. I think that would work well when adding a lining. Apply all the glue where needed, add wax paper to the body on each side, press the sight tunnel (bend), and when ready to move, start slipping the wax paper out as you press the leather together. Does that make sense? DAve
 -
Though I make my own holsters, I recently grabbed a nice Ted Blocker duty holster off eBay - these sell for about $260 new; I got this one for $24! After I re-did the edge painting and used some Fiebing's Atom balm/wax on it, the holster could pass for new. Unfortunately, it was definitely used by a policeman, and it has a musty smell that I'm guessing is patrol car. Almost like a musty gym locker, or a musty old book. The smell actually clings to the gun too. I tried "bathing" the holster overnight in cedar shavings and that helped some. But the cedar smells wears off fairly quickly, leaving the musty smell. Does anyone have any tips for actually exorcising the holster of this squad car funk? I'm especially sensitive to off smells, so it's a bit of a buzz kill. Thanks, DeWayne
-
I completely agree about pre-bending the leather when lining, though I have never done it myself. I say that because I have now torn down two original holsters to duplicate them and I am preparing to do a third, and forth, and so on. I discovered that you cannot break down an original holster, flatten it, and trace a pattern. The pattern will be too small. It took me three tries to learn this lesson. On close examination I found that when flattening the original leather you will see wrinkles forming on the outside of the bend. What you end up with is a traced pattern that fits the "inside" of the holster, not the outside. I built three copies of my first remake of Federal Man before I caught on to what was happening. The thicker the leather the greater the difference. I now break down the holster, flatten it to get a tracing, and then add 2X the thickness of the leather to the outside dimension, as a starting point. Were I to line a holster, I would follow Dwight's advice. I also notice that many commercial lined holsters use a very soft suede leather for the lining which would add almost nothing to the strength as suede is a split, and without the hair side, is relatively weak. DAve
- Today
-

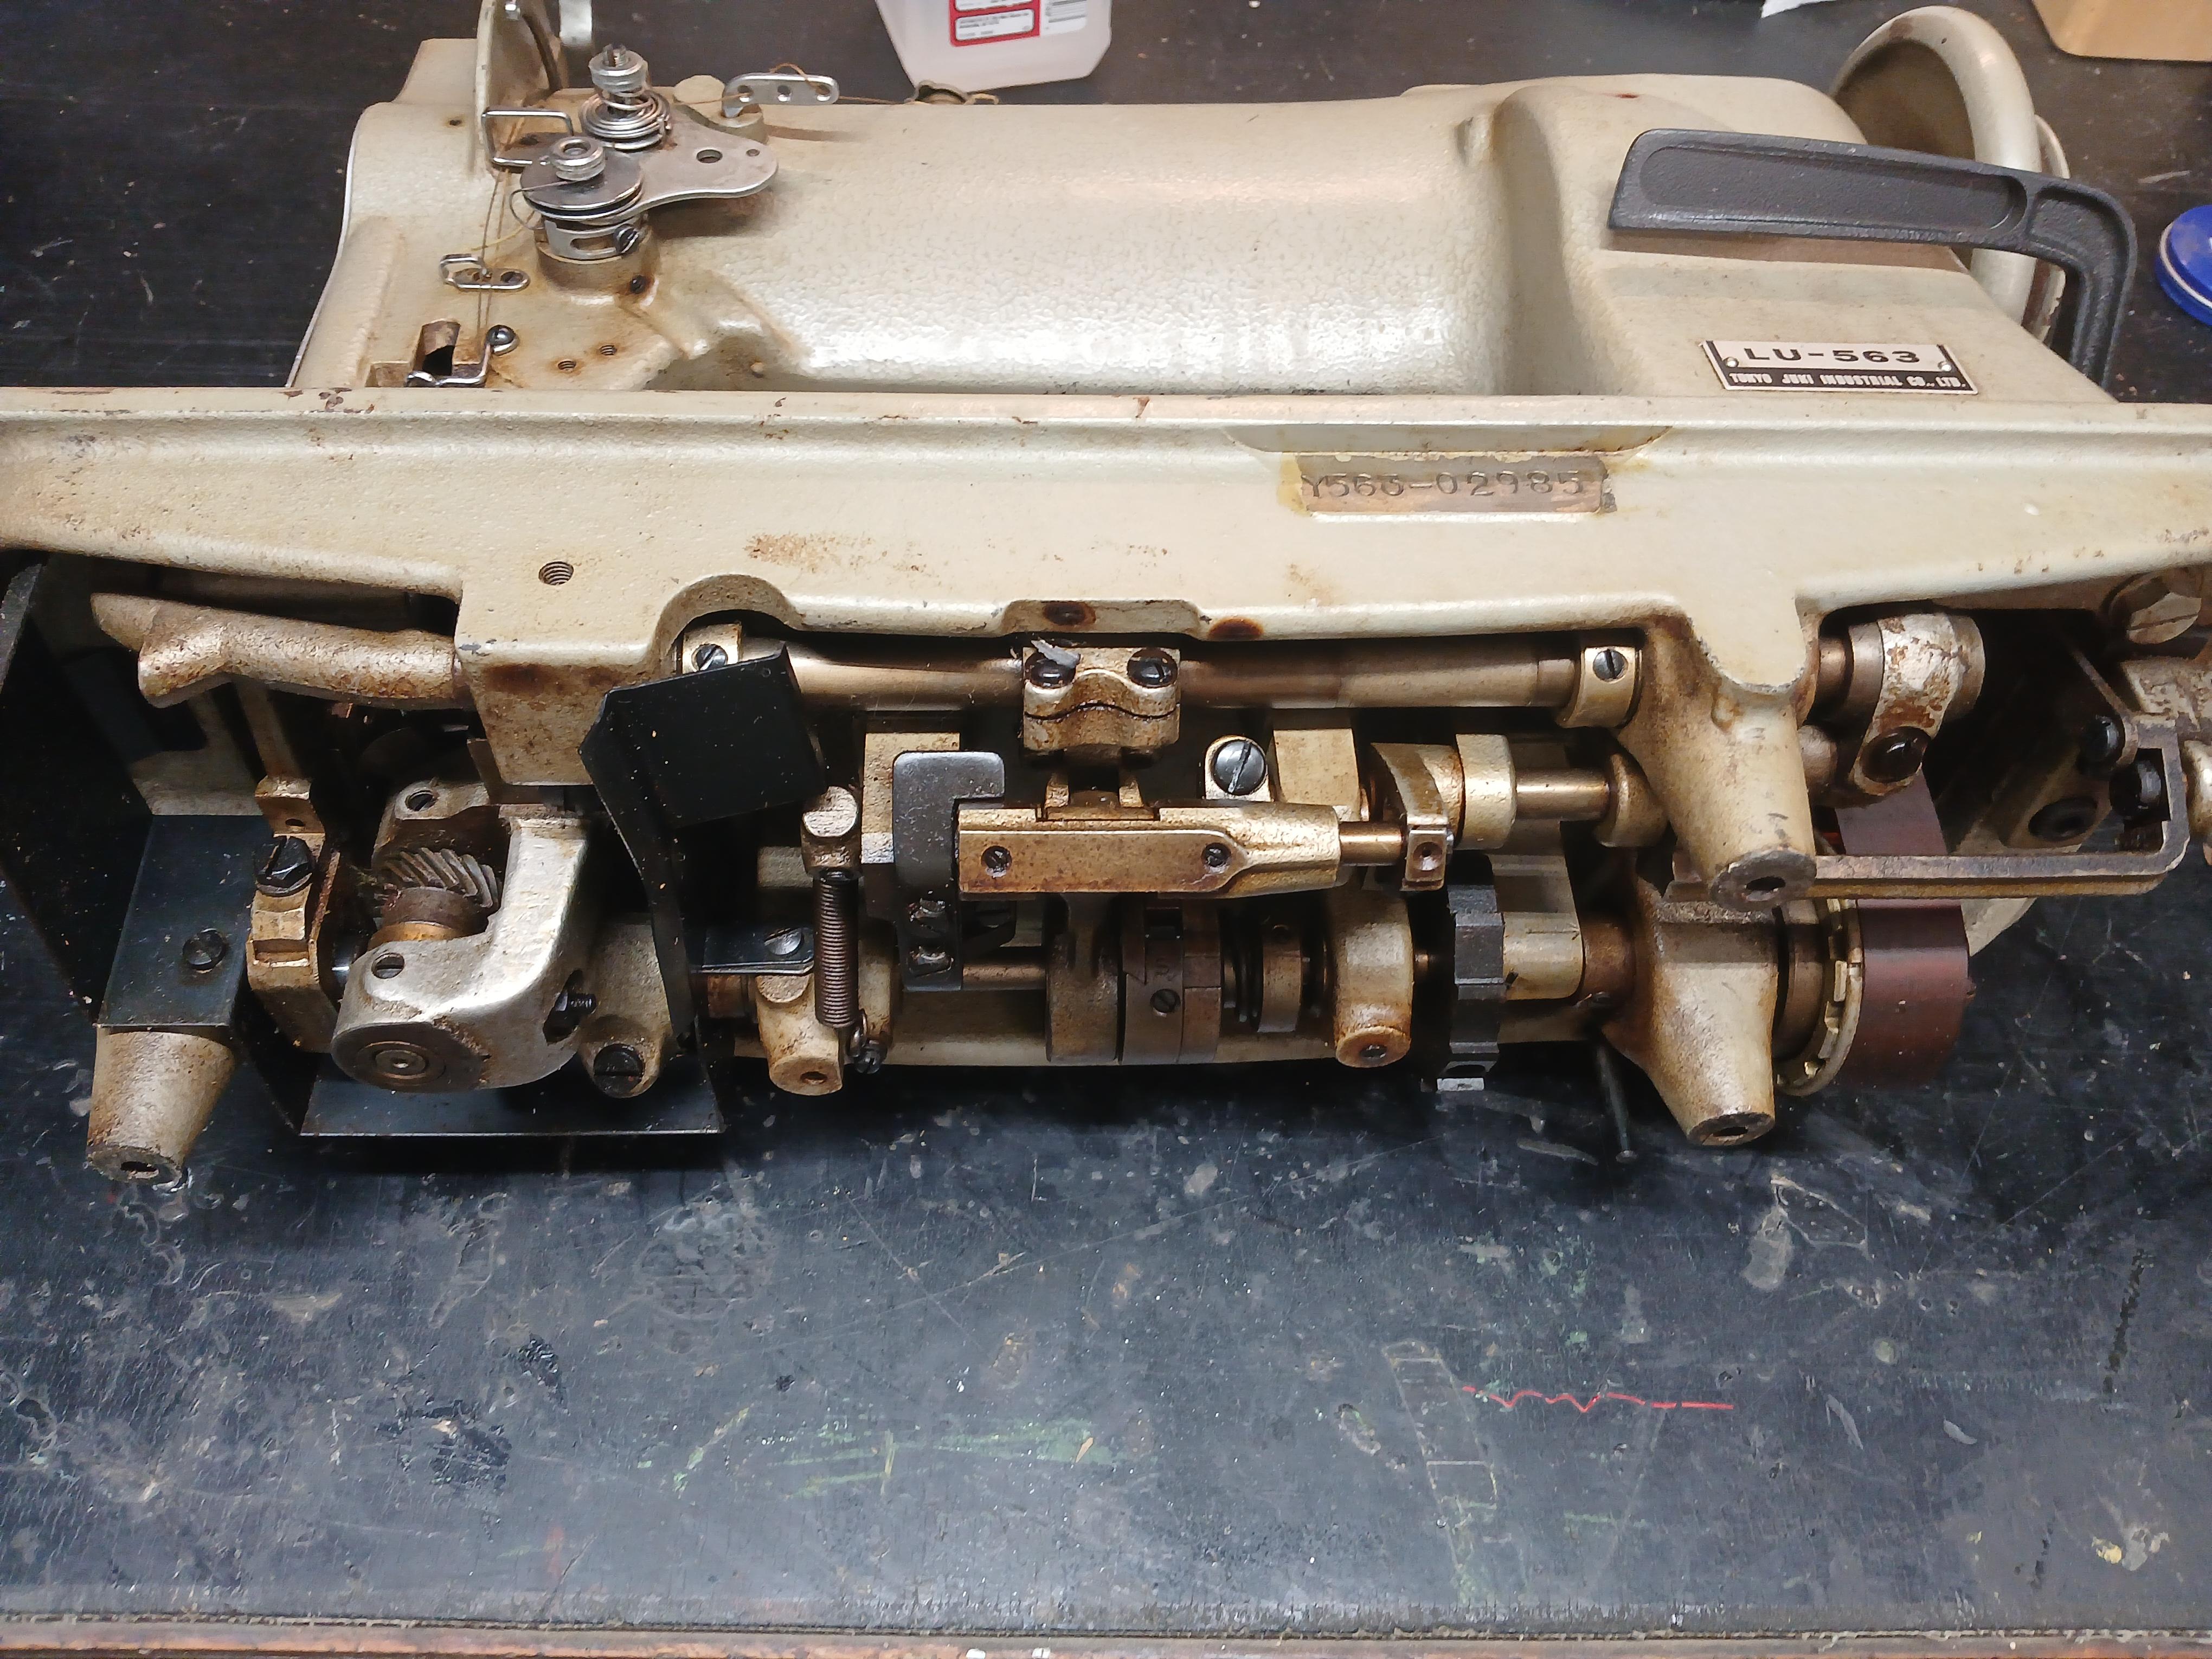
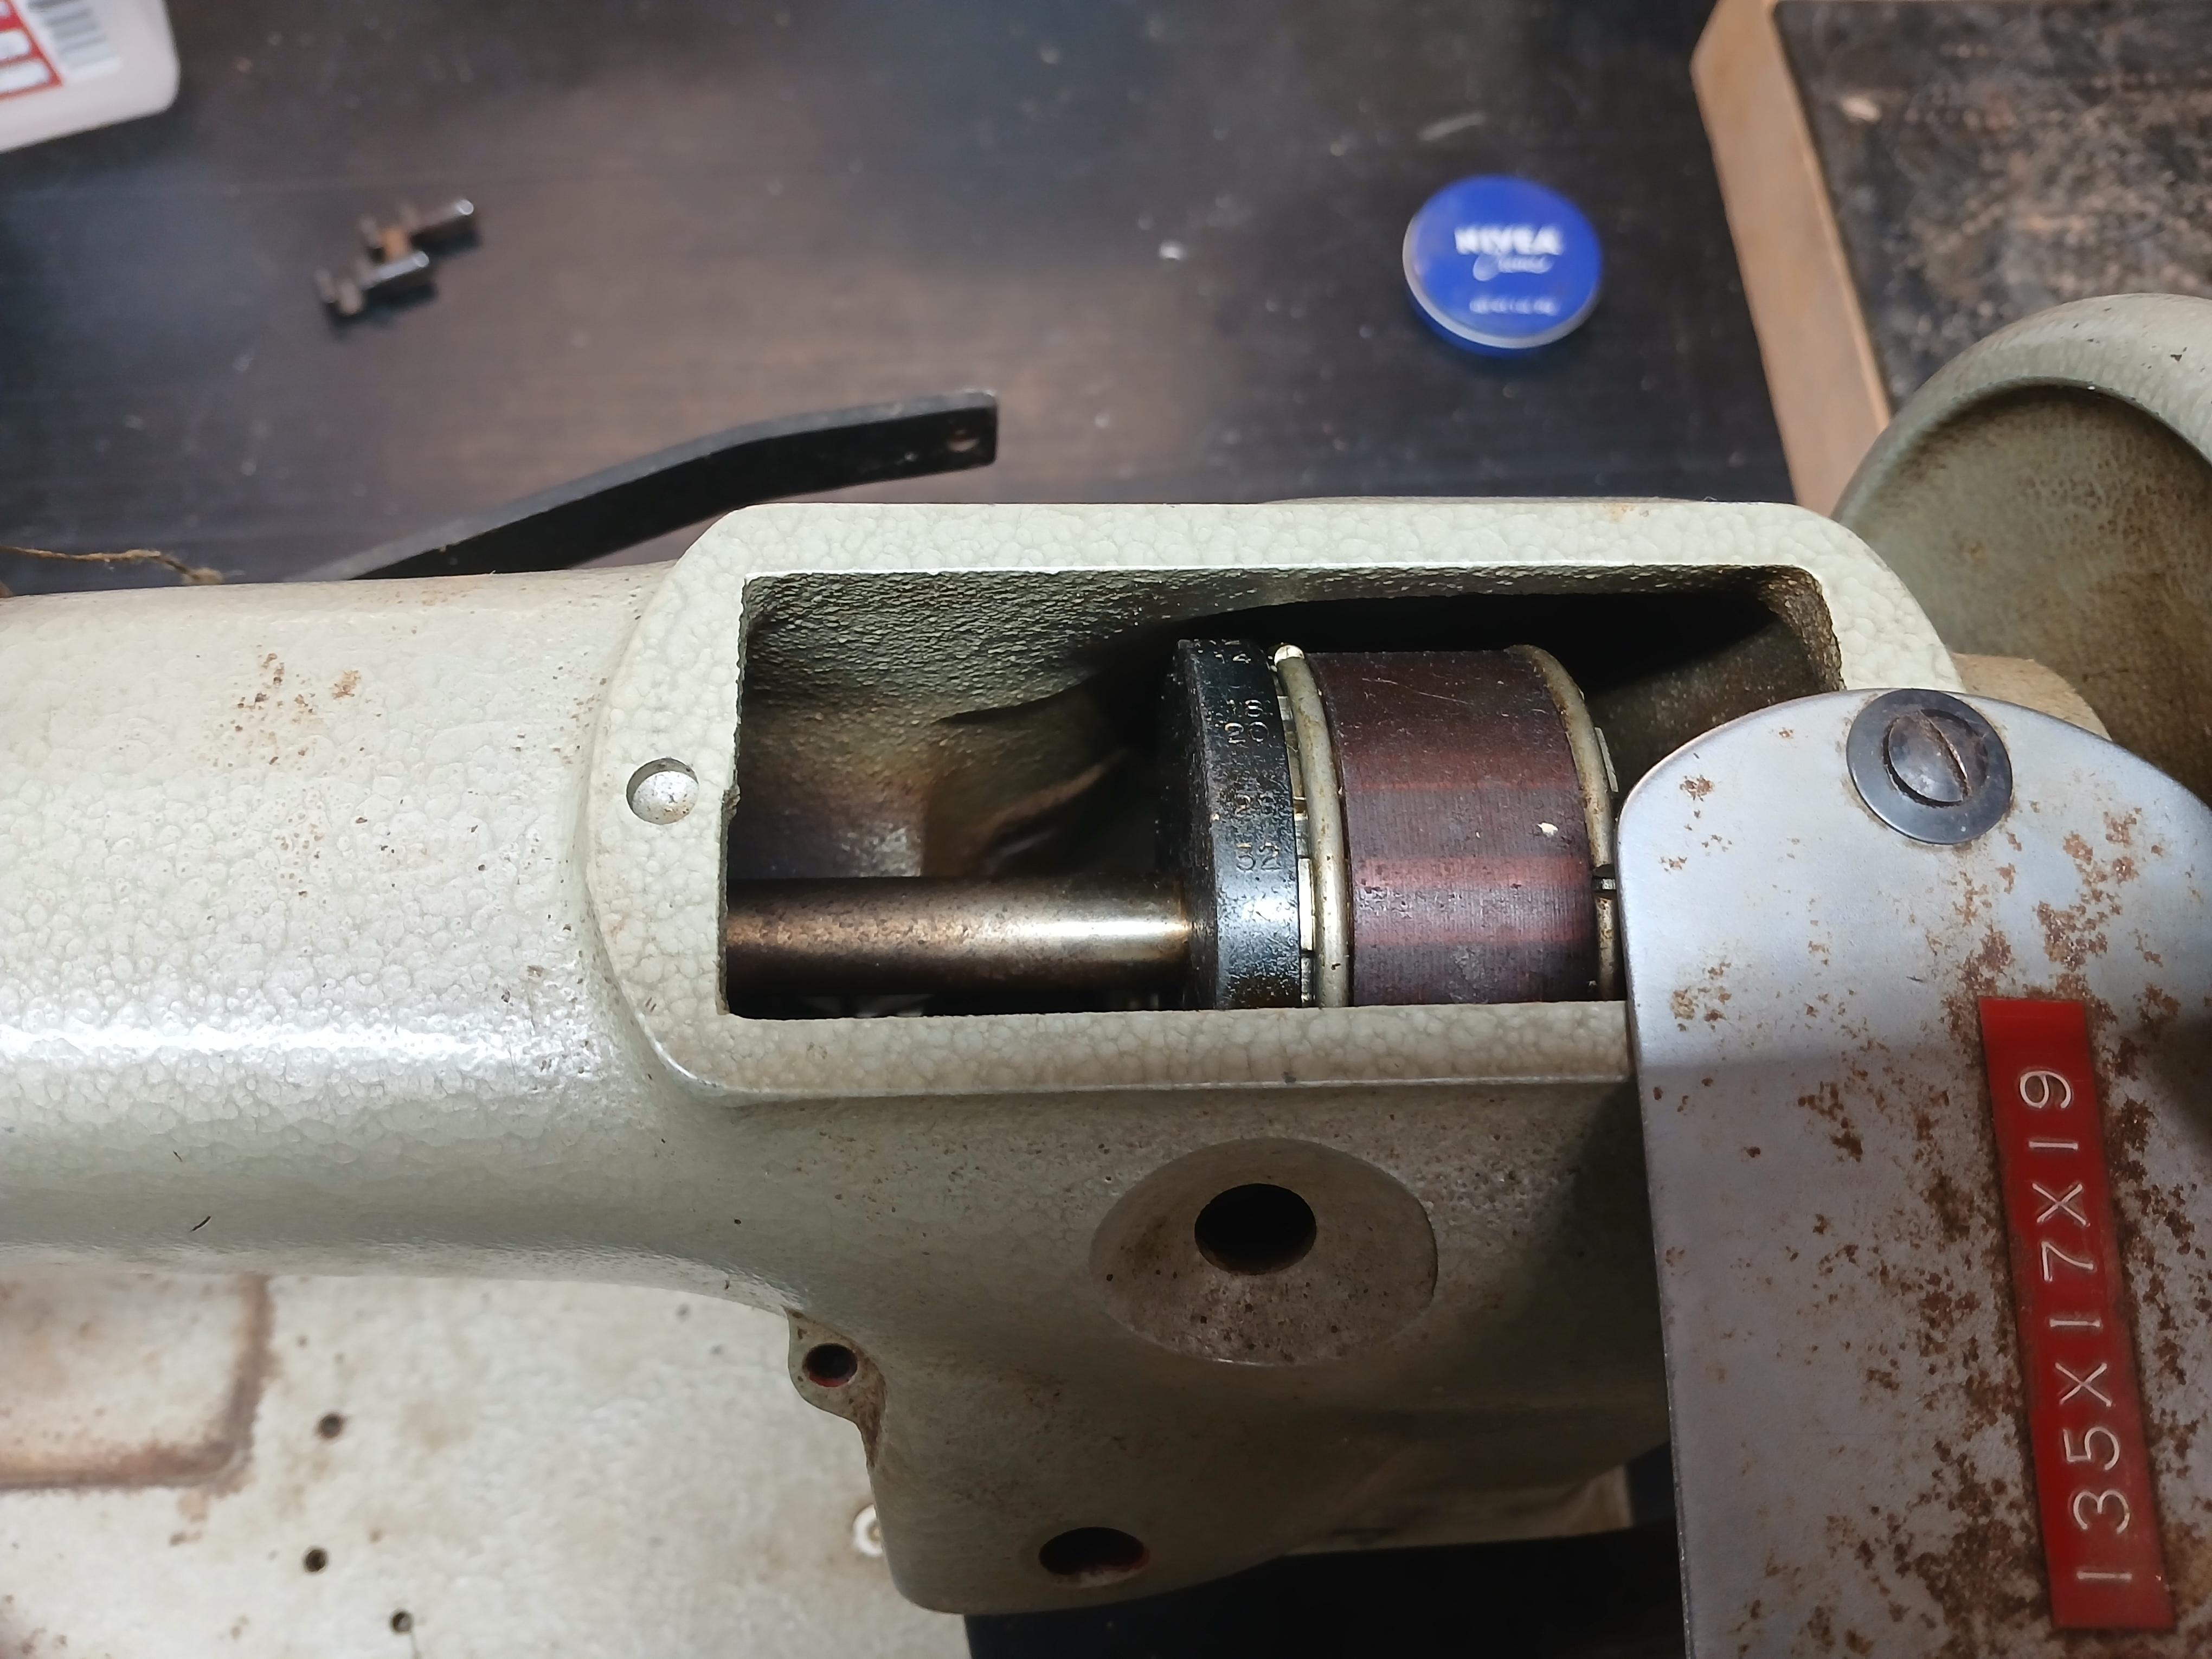
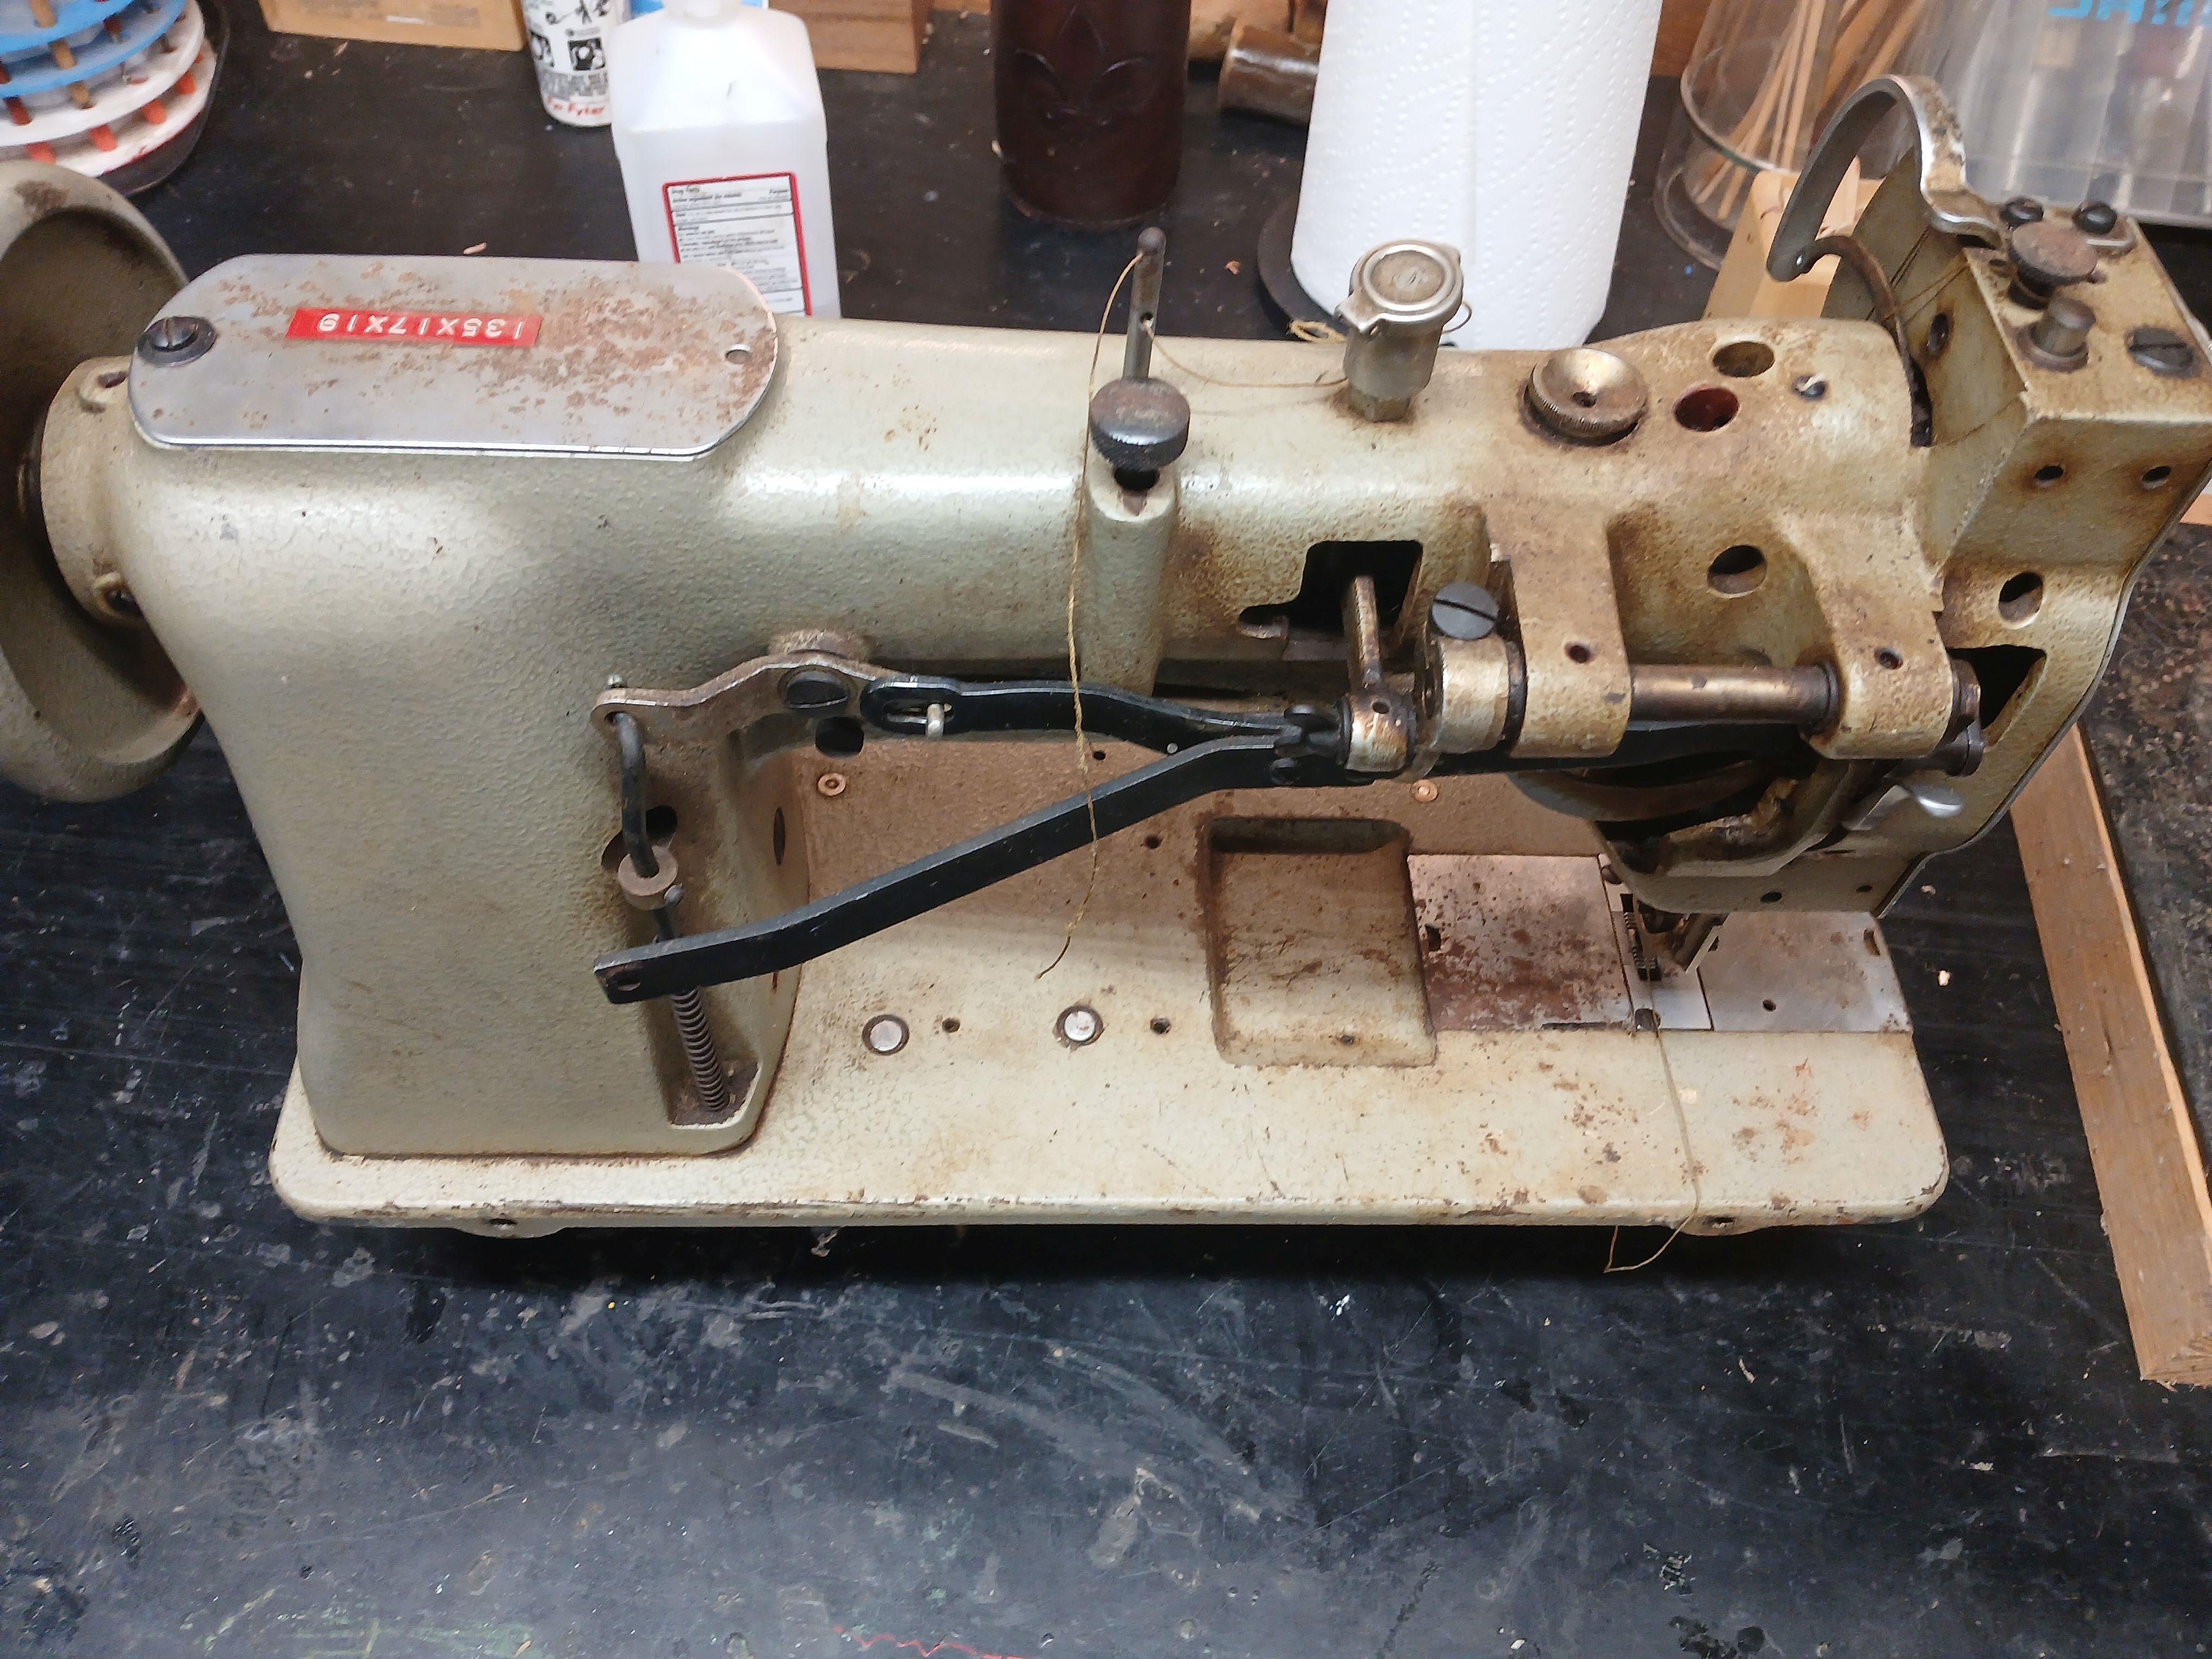
Bringing a neglected machine back to life (Juki LU-563)
AlZilla replied to MikeG's topic in Leather Sewing Machines
A site search for LU-563 turns up 18 pages of reading material. https://leatherworker.net/forum/search/?&q=111w156&page=2&quick=1&item=132320&search_and_or=or&sortby=relevancy -
 I've seen leather dust mixed with cement to make a filler or packing for the back of 3D carvings.
 -
Bringing a neglected machine back to life (Juki LU-563)
AlZilla replied to MikeG's topic in Leather Sewing Machines
That looks like a win to me. It's a pretty close clone of the Singer 111w156, if not identical. Parts and information are going to be abundant and easily found. Look for the user instructions. If the 156 isn't easily found, the 111w155 will be close enough for the oiling points. You know that journey of a thousand miles that begins with a single step? You just took that step. Welcome to the rabbit hole. EDIT: Here's the 156 manual. It'll get you started. 111w156.pdf -

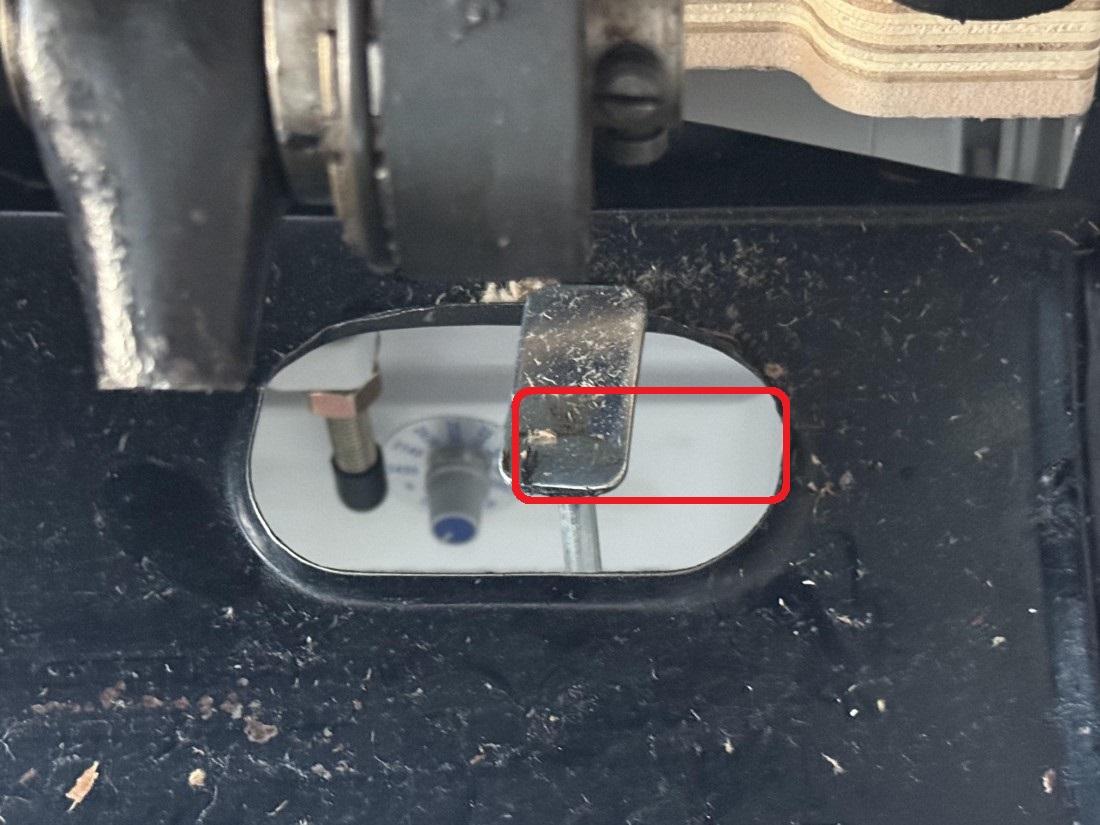
Singer 112W 115 Knee lifter installation
Constabulary replied to DMH's topic in Leather Sewing Machines
I cannot see how you mounted the lifter but what I can see is that the roller (224413) on the lifting rod (240550) is missing (isn´t it?) and the orientation of the "tab" is wrong. It has to be like the red frame IMO the longer end has to face right. Thats what I can tell the rest is trial and error where you put the foot lifter assy.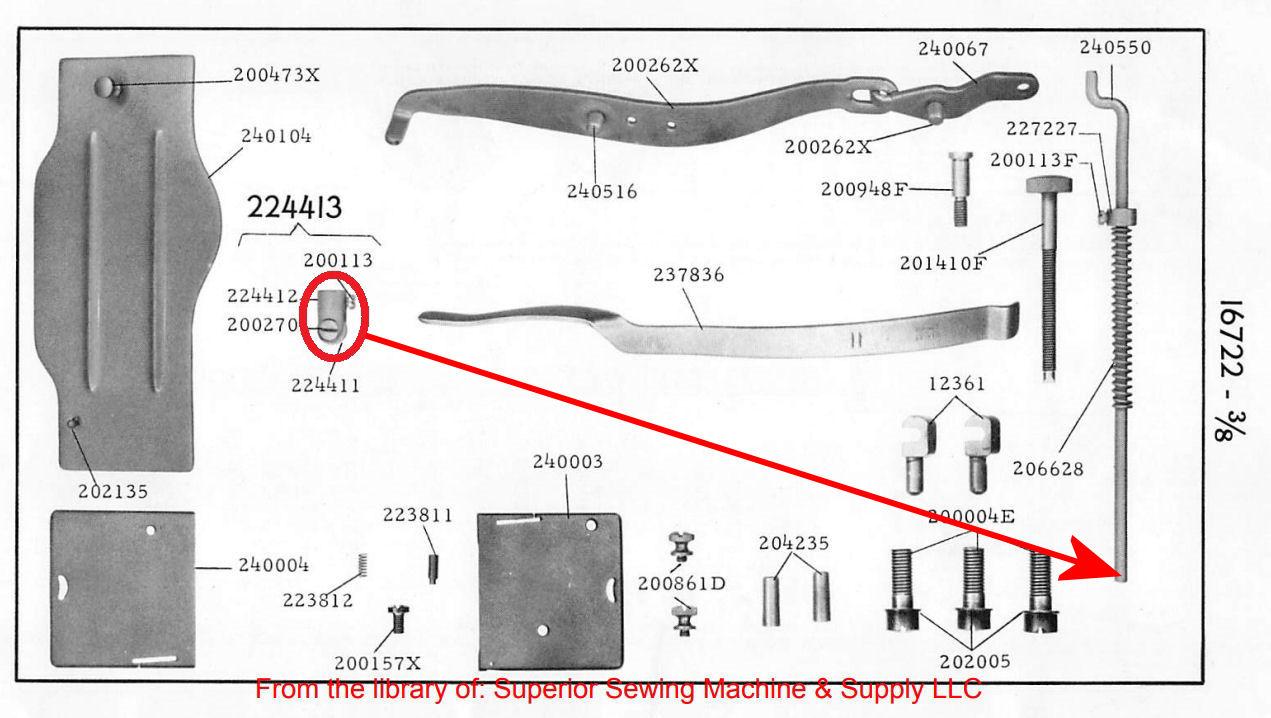
-
 I am intrigued 🤔. This is something I have never heard of. So,the pieces are too small to make into other small saleable items ? Like using wood dust or wood particles i guess .So you use a binder like in particle board or chip board? HS
 -

Bringing a neglected machine back to life (Juki LU-563)
MikeG replied to MikeG's topic in Leather Sewing Machines
Thank you all for the input - that is wonderful news! Yes, I have the table, but it needs a thorough descaling, paint, and a new top. Bob, I will be ordering a Consew servo motor soon.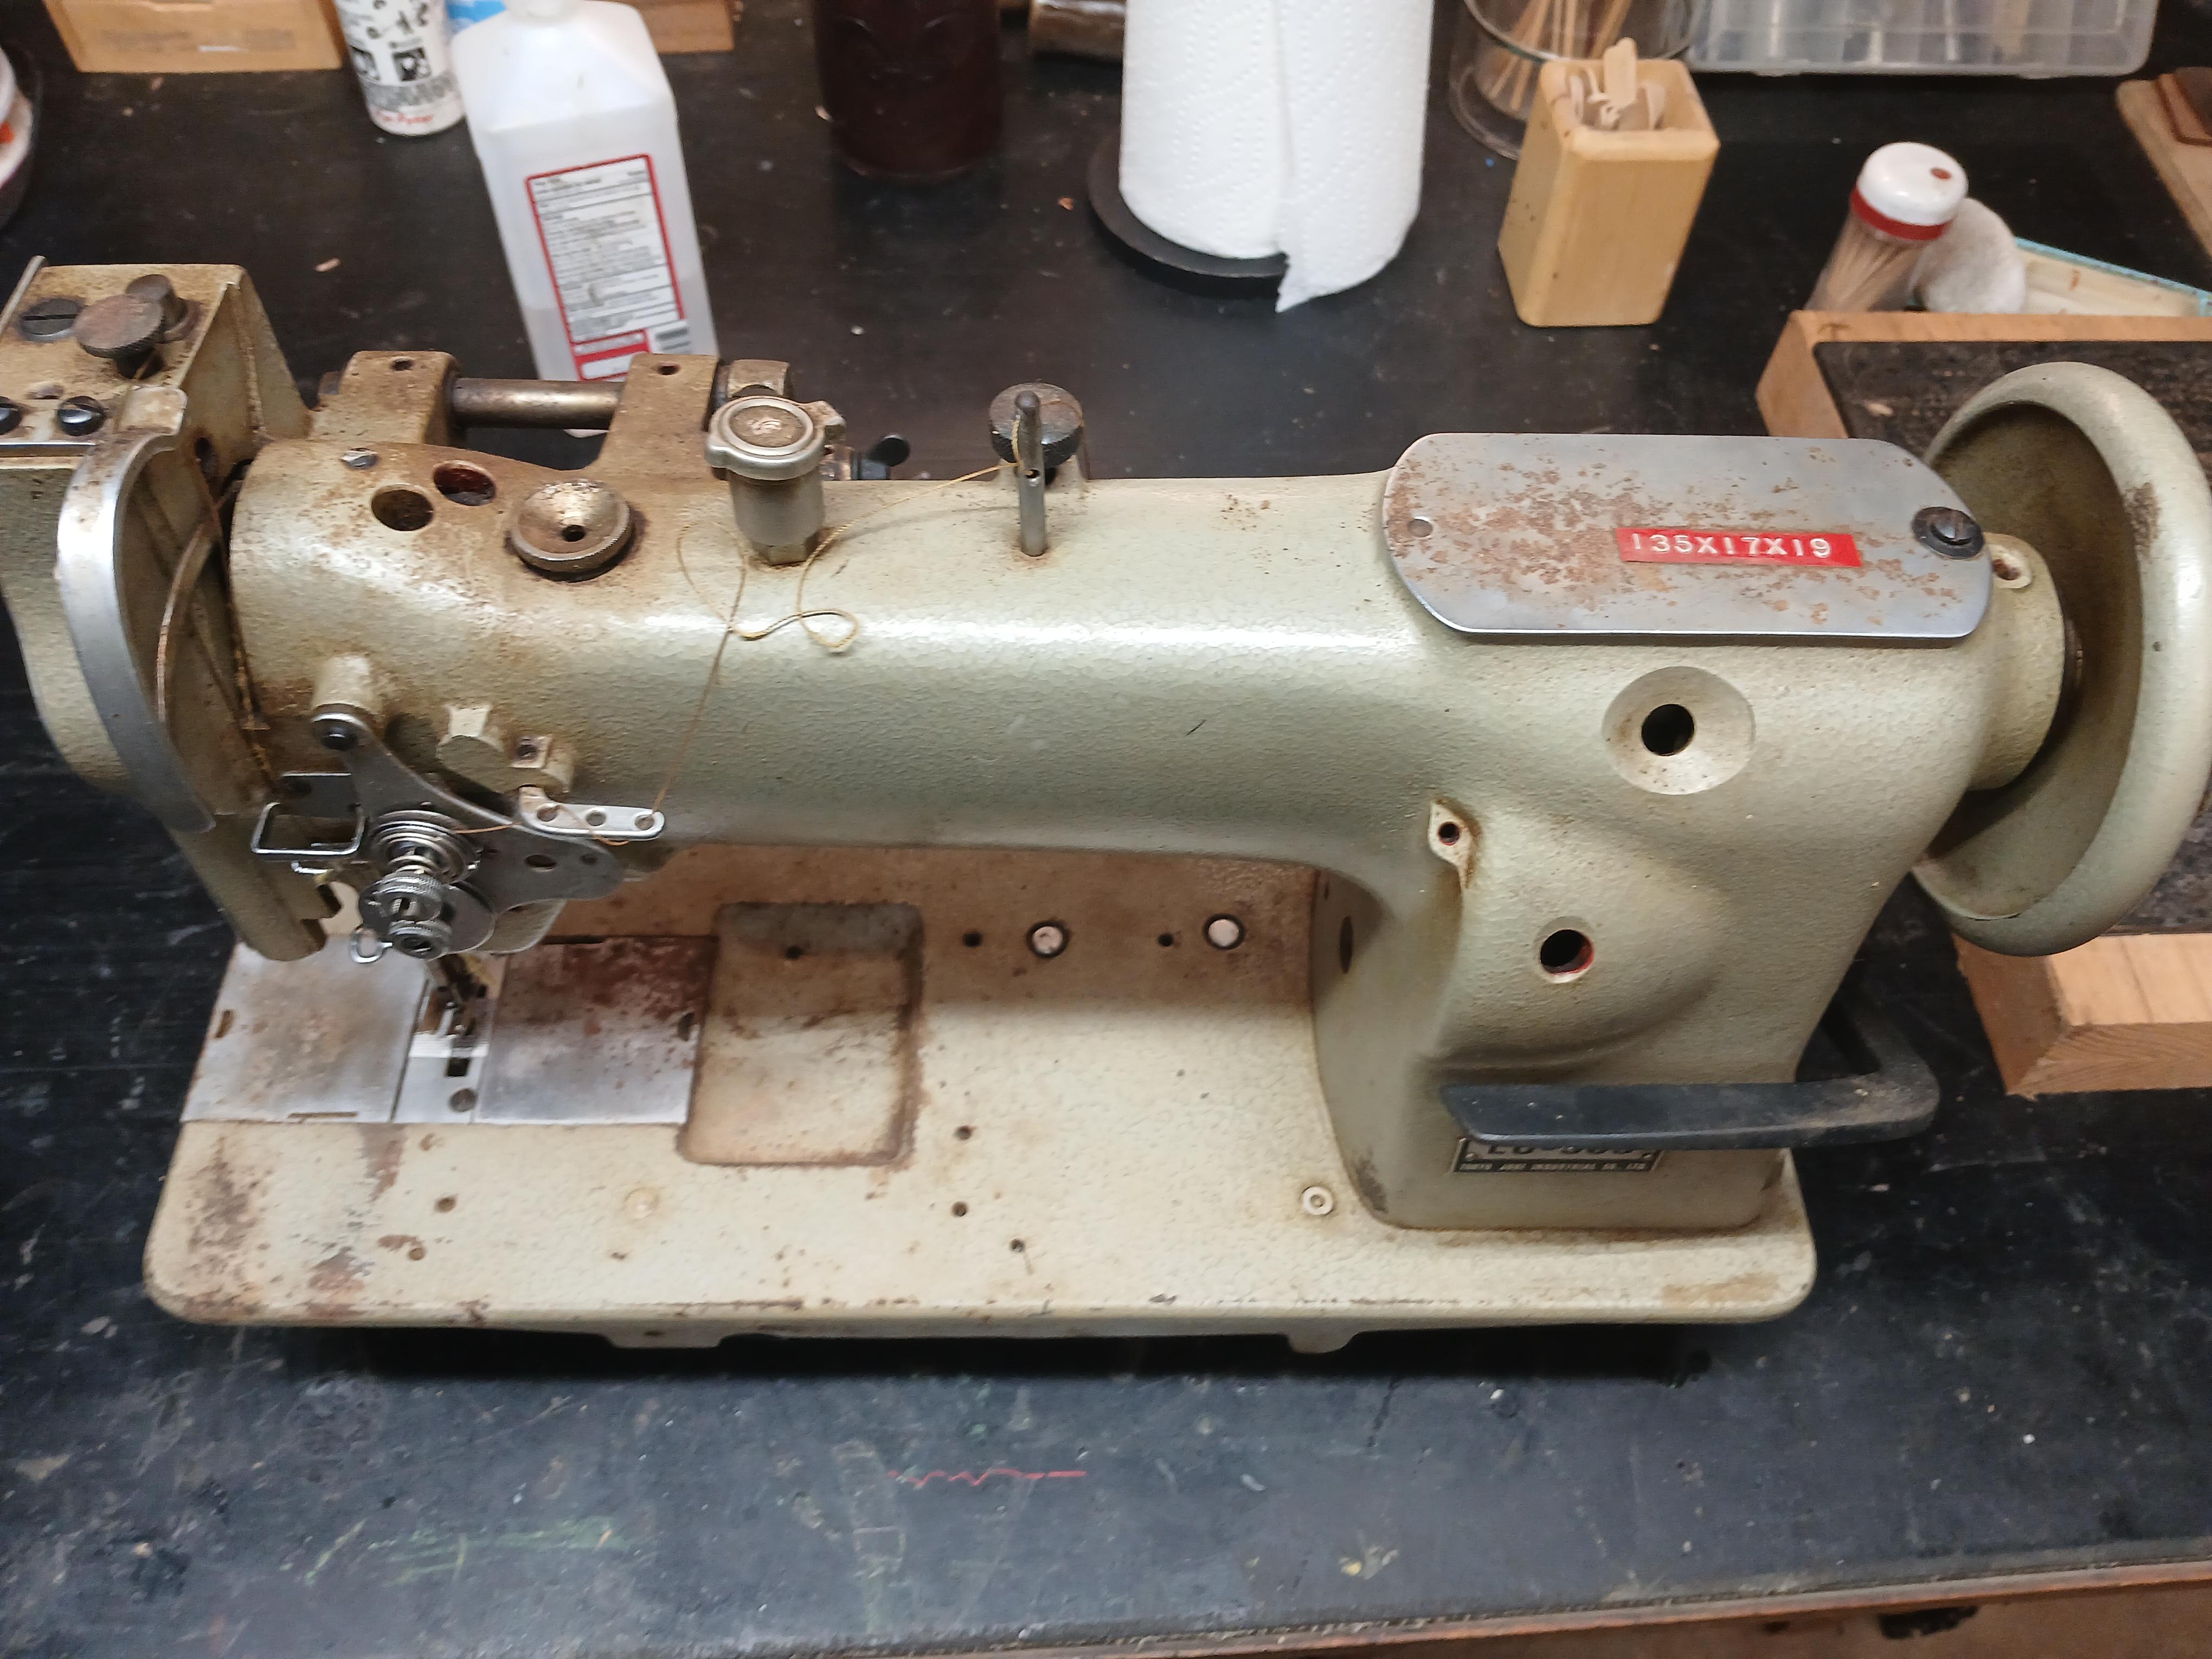
-

Bringing a neglected machine back to life (Juki LU-563)
CowboyBob replied to MikeG's topic in Leather Sewing Machines
NO,don't ever take it apart,just oil everything & use it.It will loosen up as you use it. -

Custom Tooled & Painted Saddle Bag
chuck123wapati replied to ChesterHasAProblem's topic in Show Off!!
great looking bag indeed. The only thing I would do is change that inner piece on the flap. What does it do?. I would either lose it or lengthen it all the way around,skive it down and trim it closer to the stitch line and stain it to match better. oh, and i would beef up your stitching on the strap ends, those take the most stress on the whole bag and will tear out if it gets too heavy. All in all, that is one nice-looking bag. I really like that leather, and your tooling is wonderful. -
Advice: Do it with love and don't rush. Improve your level.
-
yes, along the entire length
-
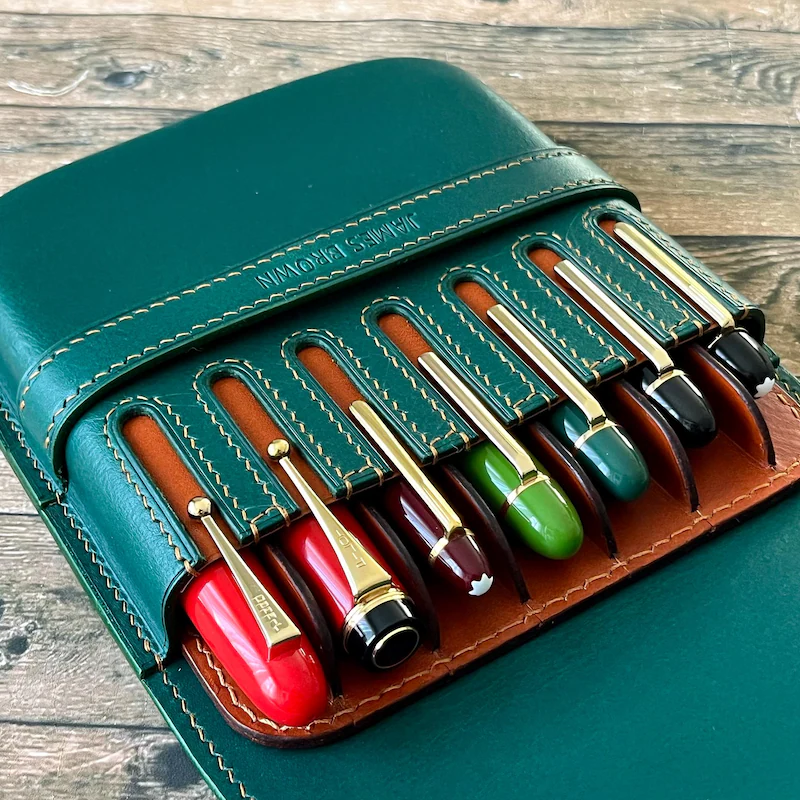
You don't say how this would be carried. I'm guessing in maybe a briefcase rather than a pocket. Maybe 12 pens wide may be a bit unwieldy so maybe think about a staggered double decker. That would look cool. As for spacing, you have one pen. Is all you need, you can't cater for every size that's out there so just allow a little leeway. Ive just built a 56 loop bandolier and the loops were based on one shell case. Start with a pen and paper, it won't come to you immediately but it will come. Then maybe some card templates. Your pic shows a thing of beauty but doesn't tell all. Is the brown bit seperate and able to come out? If so maybe one green bit and two brown bits to cater for the 12 pens?
-
Ask the client to measure his pens.
-
 Alrighty, it sounds like pre-bending is the way to go. Do you find that simply applying pressure with your hands when cementing the layers results in a strong enough bond? This was the only reason I had planned on gluing flat, that I have more confidence in the hold of the contact cement when it's had a little time with some weight applied to it while curing. You use the gun to wet mold the individual layers to the correct curve radius before glue up? That sounds like an excellent way of doing it. Do you leave the gun in the leather while it's drying like when doing final molding or do you just mold it to the proper curve, take the gun out and let it dry?
 -
I'd wear it proudly if I were a lady May God bless, Dwight
-

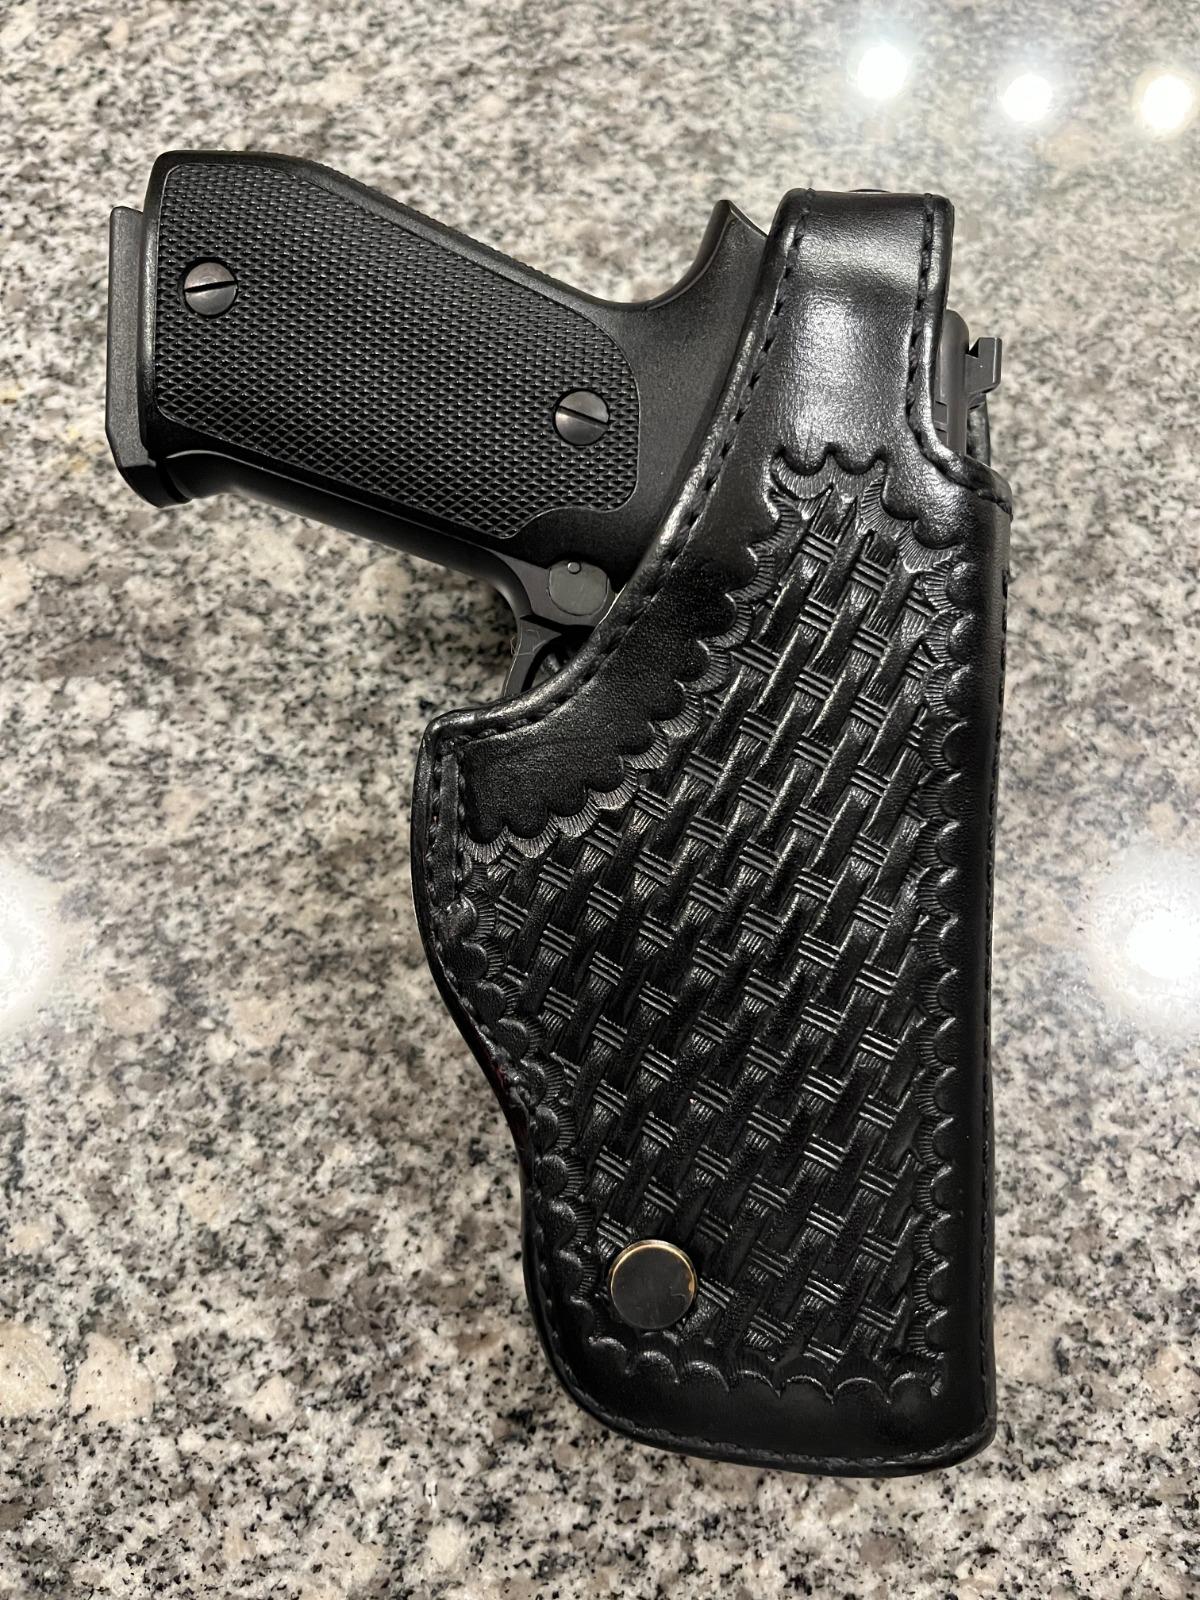
Leather Weight for Lined Holsters.
dikman replied to Latigo Smith's topic in Gun Holsters, Rifle Slings and Knife Sheathes
All my holsters were made glued flat and then folded, it's inevitable that wrinkling will occur although sometimes it's possible to minimise them. The last holster I made was a SlimJim style and I wanted to carve it so used thicker leather for the outside but this time I tried pre-curving it while glueing to the inner (as Dwight suggested). It did make a neater finish although it was a bit more messing around getting it right. -
That would be made by me using two molds. Both are 2 piece molds . . . one big enough for the pen body . . . the other one big enough to hold the total pen body. You might try making one big enough to put both pieces in there . . . that would alleviate any match-up problems later on. I'd then find out the dimensions of his pens . . . taking a decent picture of them . . . you can fairly accurately predict the size for each hole . . . and I would add a 1/16 to 1/8 inch to each hold just to make sure. Wooden dowels can be substituted for the real thing. And don't worry about the expense . . . if you do that right . . . I'm betting for more orders based on word of mouth . May God bless, Dwight
-

Leather Weight for Lined Holsters.
Dwight replied to Latigo Smith's topic in Gun Holsters, Rifle Slings and Knife Sheathes
Yes . . . I totally pre bend my holsters that are lined. AND . . . you isolated the big reason . . . wrinkles. If you glue them flat . . . you have a 999 out of 1000 chance that the inside will wrinkle like the 98 yr old witch living down the road. I moisten and wet mold the inside piece . . . as it touches the weapon . . . so it needs it's positioning settled up front and wet molding it does that trick. I then let it dry . . . completely . . . At the same time . . . I will also wet mold the outer layer so that the sight track portion knows it is not laying flat the rest of it's life. It's only a so-so molding . . . just enough to set the curve for the final bonding. I do the same for the back flap of the holster . . . bending the inside piece before bonding with the outer piece. It makes for a much better curve for the flap. Concerning the weight . . . generally speaking the thicker the leather . . . the stiffer the final product. But that can also be achieved by cheating. Putting the two pieces together . . . and either slipping it thru the Mexican loops or adding the front buckle loop . . . you then wet the whole thing . . . and hang it in a 140 degree farenhite "hot box" . . . take it out after a couple hours . . . if it was made out of 5/6 or 7/8 . . . the holster itself is a weapon . . . you could knock someone out . . . banging them on the head with that holster. May God bless, Dwight -
Hi everyone! I’m planning to make a 12-pen fountain pen case similar to the one in the attached photo, and I’m trying to figure out the best way to create the inner wooden form. For those of you who have made fountain pen cases before: Did you make your own or buy a wooden form somewhere? If you made it yourself, how did you determine the dimensions for the pen slots? I only have one fountain pen on hand (this is a commission), so I don’t have multiple pens to measure for variation in size. I’d really appreciate any advice on how you handled sizing when you didn’t have access to the client’s full collection. Thanks in advance!
-
Bringing a neglected machine back to life (Juki LU-563)
AlZilla replied to MikeG's topic in Leather Sewing Machines
Well, the good news is that you probably don't have to take it all apart. and you might just be able to oil it and go. Some pictures would help us to to evaluate it. Maybe a video walk around. Do you have the whole machine, table,motor and all? Or just a head unit? For starters, I'd oil it everywhere metal moves against metal. All the oiling points on top, everyplace underneath that a bushing, bearing or anything else moves metal on metal. Turn it over by hand and let it sit for a day. If you have the whole setup, motor and all try running it and give it a listen. When I got my first industrial, it turned over a lot harder than any domestic i had worked with. I had no idea how tight it should have been so I erred way on the side of caution and flushed PB Blaster through everything followed by sewing machine oil. Turned it endlessly by hand trying to decide if it was too tight. I removed the internal belt so I could evaluate the top and bottom separately. After a week or so of this activity, turned out it was fine to begin with. -

Leather Weight for Lined Holsters.
Thadrick replied to Latigo Smith's topic in Gun Holsters, Rifle Slings and Knife Sheathes
After doing several holsters with different techniques I've settled on using a heavy weight for the outside layer for one reason only. I like to carve as deep as possible. For me, lighter weight leather doesn't give me the depth I like when carving and doesn't hold the carving as well after final forming and bending. My most recent holster was 8/9 outside and 3/4 inside. Forms great and is very stiff when dry. If your not carving the leather, any combination equaling 12oz is perfect. -
 Chris Andre does his with 2 layers of equal weight. I do this when I want a lined holster and I can say it is very stiff. My method is different than Dwight. I just glue 2 layers together and treat it as I would normally. I haven't read the article but I do know bianchi was a fan of using suede linings, in which case would be lighter in weight and adhered to the heavier holster body. I'd recommend 2 layers if 4/5 oz for owb and 3/4 for iwb.