All Activity
- Today
-
At school we learn to cut liner a bit larger than the leather panels to glue it to. That way you have extra space to apply glue so that the glue extends to the very edge of the leather. Afterwards the excess liner is cut off. We also always stitch edges so that the liner doesn't come loose. If liner and leather is properly glued together and cut to the exact same size, painting the edges shouldn't be a problem. I've painted edges with three layers (outer leather, salpa reinforcement, and pigskin liner) without a problem. If stuff doesn't exactly line up you can start with a coat of filler before applying the first coat of edge paint.
-
Done this only a few dozen times so far. Mark the bottom centre on all parts. I measure the curves on the stitch line with soft bendy ruler or tape from that centre each way, then cut a bit long. Then test fit it with clips and mark it. Then glue liner on if im using . Then test fit it again, just to be sure, then I'll fold and stitch or whatever the tops of the gusset. I'll finally glue it and stitch. Been caught a few times where the front and back panels join up slightly uneven with the gusset. Only takes to be a couple mm off the stitch line to change where it ends up. Gets way easier once you get one right and make a template
-
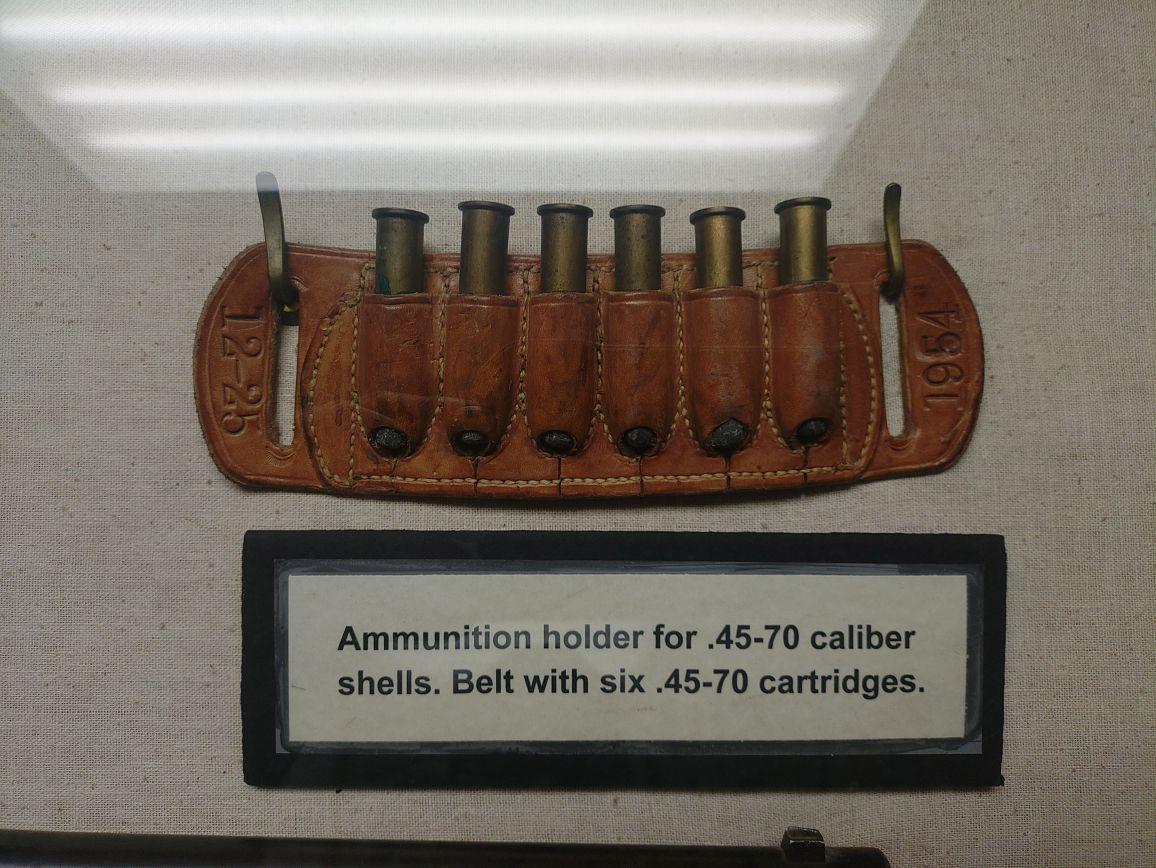
Looking at the picture there is a slit below each bullet loop/pocket. I am sure some bit of leather was removed at the bottom like a "dart" in patterning. The cut edges were then butted up and that allows some of the loop to form and still lay flat around the ends of the bullets. Cool design work and once you work out the patterning for the cuts, it probably falls together much easier than you think. There is going to be some wet forming to make a tight fit, but the design will make that a whole lot easier.
-
Definitely wet formed to an extent but the bottom part of the loops are nicely designed and sewn down to the end of the cartridge. Sometimes that kinda stuff floors me with our ancestors designs. They were brilliant.
-
Yeah, I just tried paper and it won't form properly. It kinda looks like piano keys when laid flat though. Obviously wet formed to an extent?
-
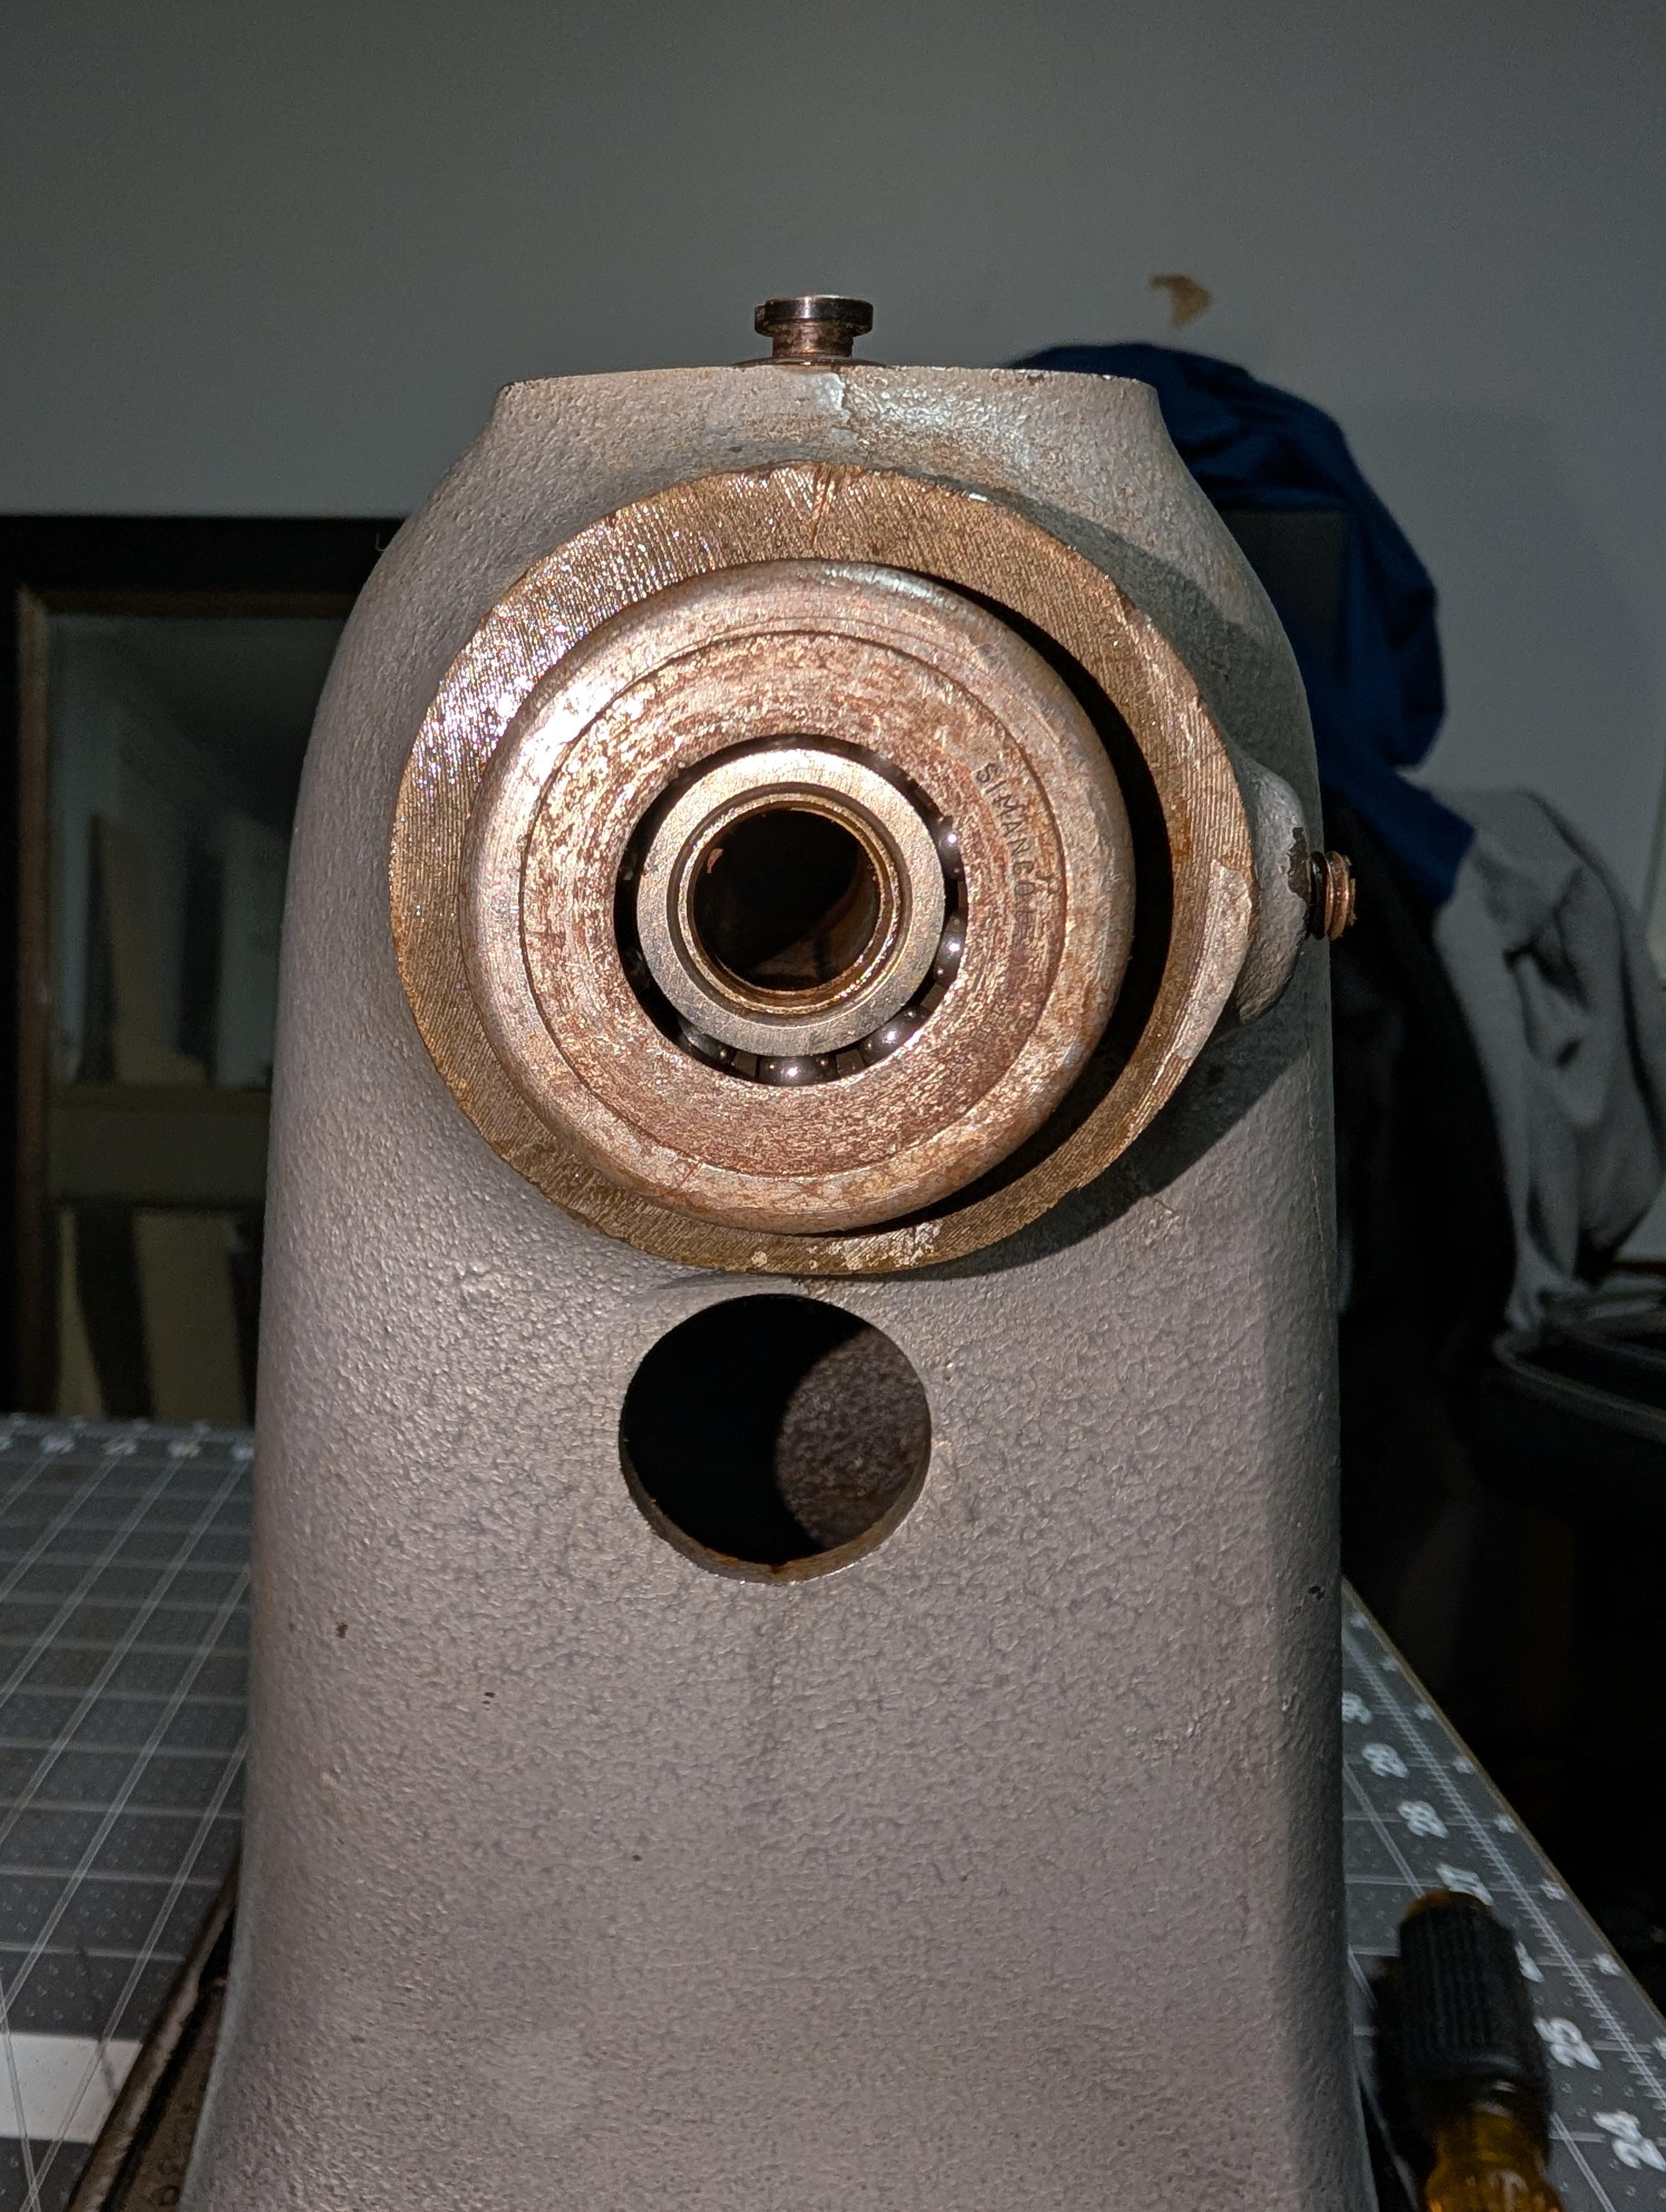
Ah yes. On other machines, this is called the needle guard. Its purpose is to prevent the hook from stabbing the needle. Whereas the hook is very hard and fairly brittle, the needle guard is soft and malleable. You can bend the needle guard out of the way just a smidge, move the hook saddle closer to the needle so the hook point rubs a little on the needle, then bend the needle guard back so that the needle guard pushes the needle to the side just a bit as the hook comes by and the hook point just misses the needle. Here's a video by Uwe, known as "Stuffing the Hook" And some references: https://leatherworker.net/forum/topic/47477-211g155-do-i-have-the-wrong-machine/page/6/#findComment-304044 https://leatherworker.net/forum/topic/65973-video-how-the-hook-catches-the-thread-loop/#findComment-428831 https://leatherworker.net/forum/topic/65973-video-how-the-hook-catches-the-thread-loop/#findComment-428844 https://leatherworker.net/forum/topic/65997-video-sewing-veg-tan-leather-on-a-consew-225/#findComment-429071 https://leatherworker.net/forum/topic/131796-singer-211-u166a-walking-foot-problem/page/3/#findComment-785084
-
Your needle is probably to small for the T135 (V138) thread in thick/grabby leather. You should try using a #24 needle. Here is a link to a good thread size vs needle size chart: ( https://www.tolindsewmach.com/thread-chart.html ). kgg
-
My bestest guess is, the bullet holders were sewn in place then soaked in water and the bullets forced in, basically wet-moulding the holder
-
1/8" craft foam is a pretty good stand in for prototyping leather. Your imagination is probably as good as mine about how to make it happen.
-
The hook washer as it’s called in the parts book, is the large flat washer that sits under the hook, it has like a finn that extend at 90 degrees upward just below the point of the hook. i can’t figure out what it’s function is, but the needle is rubbing on it, and I don’t think it supposed to be this way. I’m an automotive mechanic by trade, I have no previous experience in sewing machine. when sewing multiple layers of upholstery leather, it all goes well for about 12 inches, then my string frays and breaks. (135 thread, 160 needle, 5 stitches per inch, pressure is ok)
-
If this is your rookie effort, I can't wait to see what's next!
-
Ive seen many ammo holders on here in the past but this one stumps me. I found this in a museum and couldnt help think that this design would work perfectly for bottle neck rimless ammo. My question is how the heck did they cut the outher loops like that to get things to fit ammo and yet look so clean? How can a person reproduce this to fit bottle neck ammo? Just use a bunch of leather and try till its right? Where are the measurements taken from? Anyhow? anyone know of any writeups on this design?
-
Exactly, just tweak the stopping point until it stops with the tension arm all the way up. I'd have to go sit down in front of a machine, but it should be pretty close to the moment the needle is all the way up.
-
Trust the machine. (not the motor haha) To understand when is an appropriate time in the stitch cycle to pull your material free, you can stitch slowly (handwheel!) with the bobbin cover removed. I both start and end my seams with the takeup lever at the top of the stroke. Depending on which model of digital servo motor you have, there may be adjustment within the menu to configure how much rotation happens between what the servo considers Needle UP vs Needle Down. I suppose in my wildest dreams a needle positioner might default stop for needle down a little after the hook point grabs the thread. Then when I heel tap it would first rotate to where the takeup lever is at its highest point (to lock the last stitch), then reverse ten or twenty degrees and come to a stop when the needle is at its highest position so it's easy to pull the material out. ☺️
-
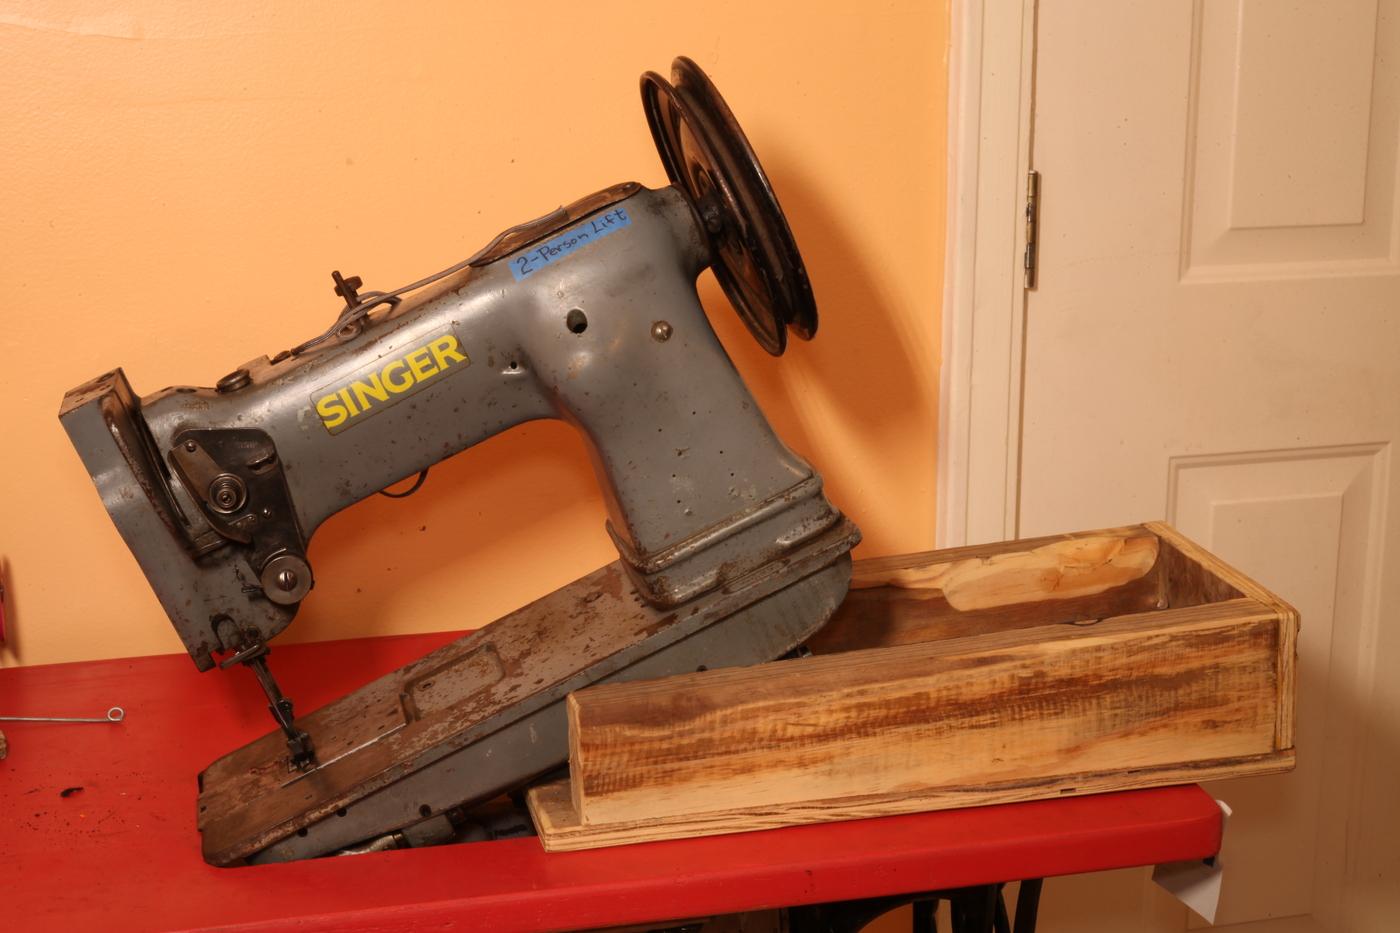
@kiltedkrafts As they don't have serial numbers i don't think you will ever know . All i can say is that it is pre world war 2 because the factory was bombed. Vihl perderson took over production after that and made them under their name . Both machines are identical and parts are interchangeable . Needles are still available from the link below but to get parts means to buy an old machine and cannibalise it. https://www.leffler.com.au/pederson-needle-ltr-for-309-machine/
-
On the subject of lubrication: should this bearing get packed with grease, or does it just get sewing machine oil?
-
Hello all, this forum helped greatly in helping me identify the machine that I wanted and most anything I needed to know. however, I have one issue that I can’t seem to find the answer to. my machine sews pretty well, and I have outfitted it with a consew servo motor and eps. Works awesome. the question I have is that when my needle comes to the peak of the up stroke, my bobbin thread is still hooked. I have to advance the hand wheel 20-25 degrees before the thread releases to pull out so I can cut it. I have checked the timing from the hand wheel to the bobbin shaft as shown in the manual and it’s dead on. its a minor inconvenience but the needle has already started dropping by the time the thread releases and seems wrong. Maybe that is just how these machines are, but if it’s not I want to fix it. thanks for any guidance.
- Yesterday
-
Thanks for the video, unlike him I have 4 corners and I’m not joining the gusset like he did. I have the outside piece overlapping the gusset. Wish I had the names for how gussets are joined up. Anyway, the wax string following the hole pattern for stitching worked pretty dang good. I cut gusset long for safety but marked with pen the dimension of the string inside. As I stitched my way around meeting in the middle the marks were true so I cut gusset and punched a few holes. I’ll try to post a pic tomorrow.
-
Very cool!
-
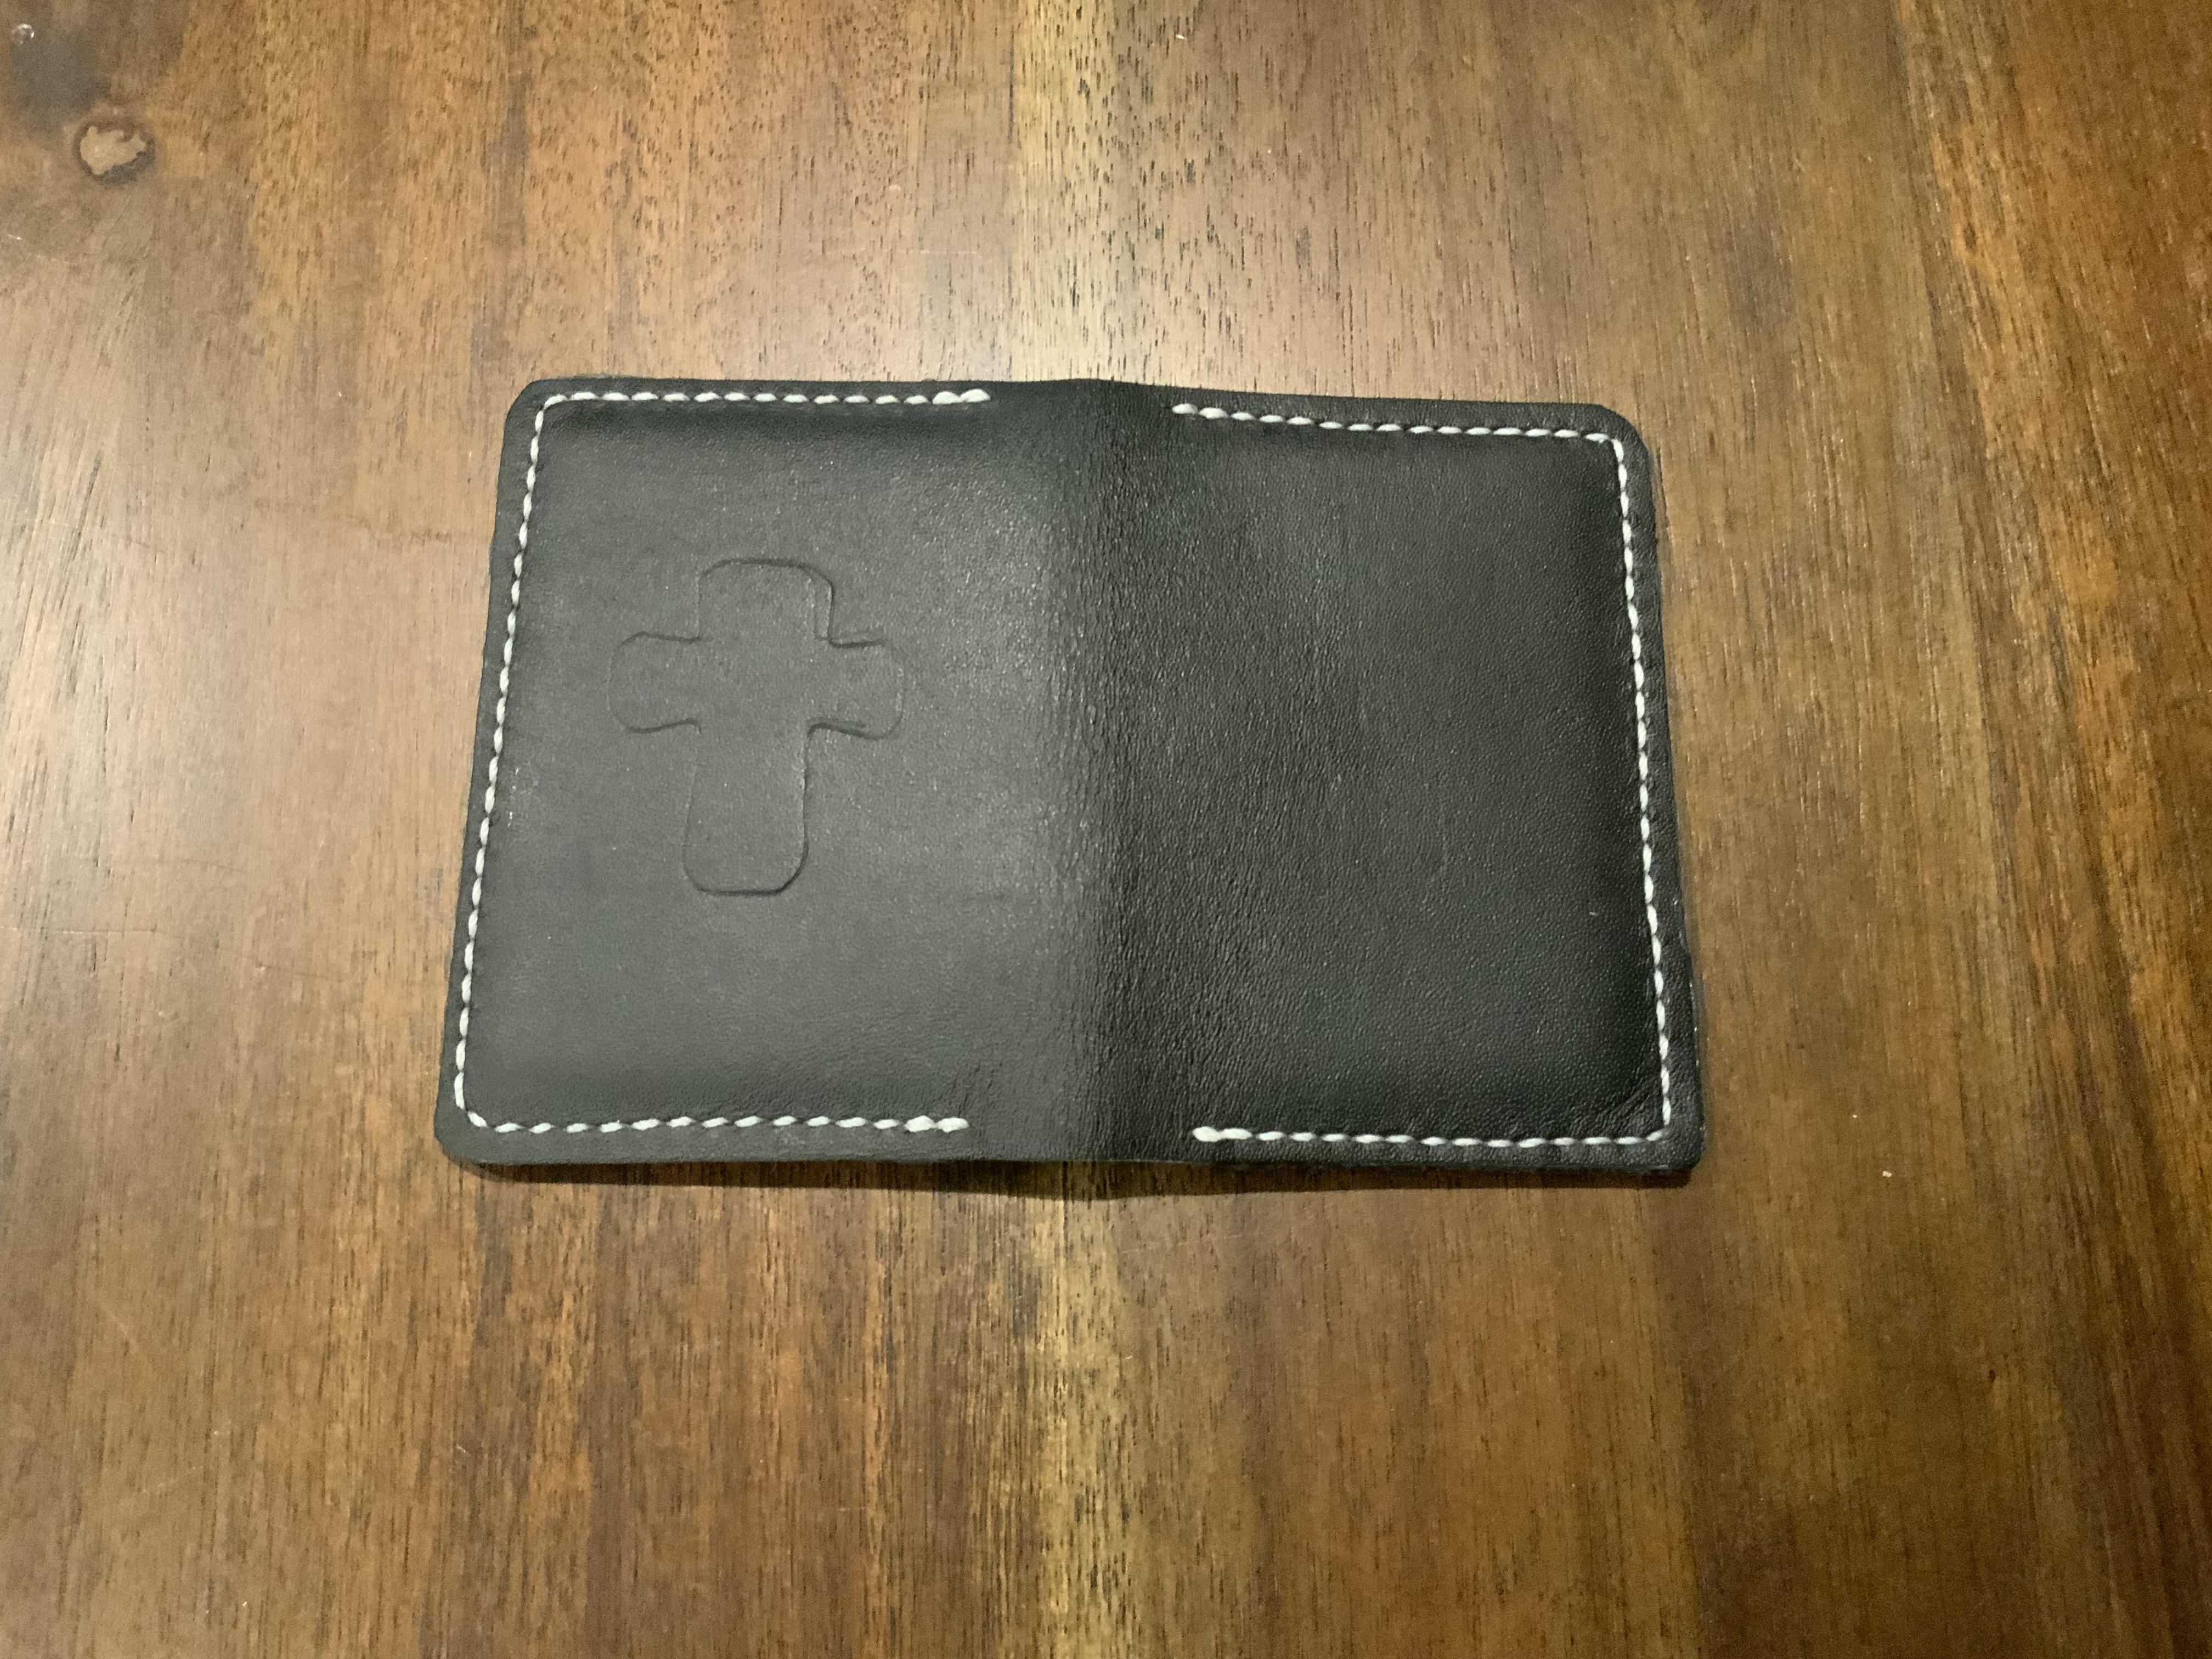
Great job, love the colour
-
This is my first wallet and attempt at stitching. 4-5 chrome tan leather. Never mind the cross, I had a brain fart and thought I try stamping that after it was put together. Been carrying it for about a month.

-
You might be struggling but that came out great! Very nice work.
-
I have just bought one from eBay. How would i go about finding out the approx manufacture date? is there any way to guess at it?
-
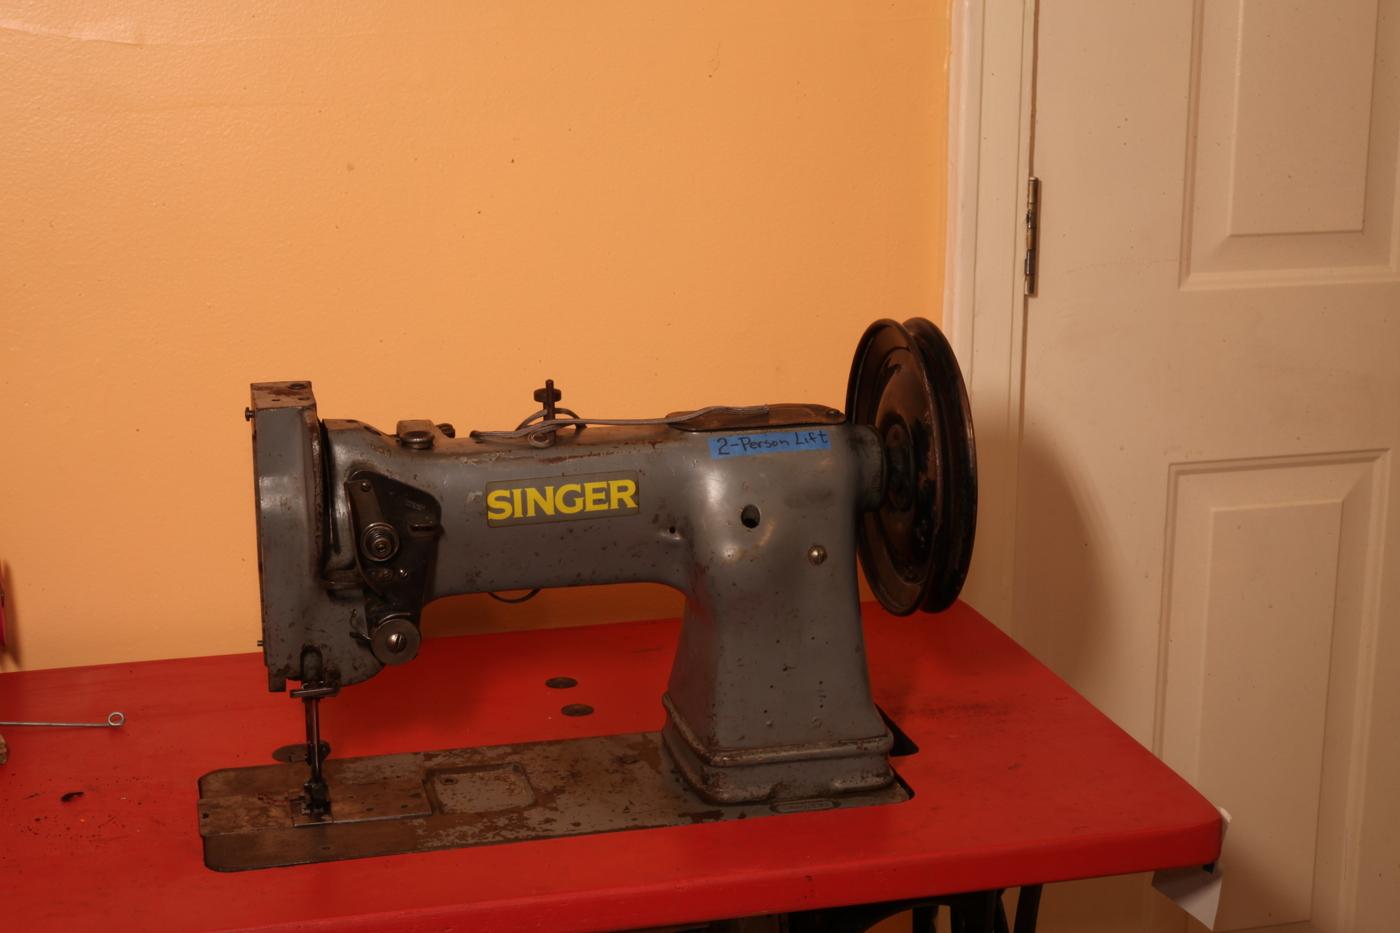
This cradle that I built to support the machine while working on it works fairly well as an assist for dropping the machine into the hole. That means your table is too pretty. Make it work! And I've been dragging things across the table, enough that I got a remark, "We're going to have to repaint that top" 😁🫢

-
Looks like two good machines to me! I'm also considering selling a head unit, as I don't have enough tables. To really outfit someone well, I would sell them a head unit + table + digital servo motor.