

All Activity
- Past hour
-
Ok, so I’ve noticed that a lot of people recommend sanding your edges down, presumably for a cleaner, more professional look. But most people seem either to not sand, or they don’t mention it. I’m thinking there has to be an obvious difference between the two, but does anyone have a side-by-side pic or such to point it out to me? I have experimented, but I’m not sure what I’m really looking for… May you never burn your bacon, AZR
-
 Hello everyone, Some of you might already know that I am currently working on a Y-harness for my dog. During my research for this project, I noticed a recurring problem: many people try to build their own harnesses but miss several critical points. At the same time, there are surprisingly few good tutorials that explain not only how to build a harness, but also why certain design choices matter. This guide is my attempt to change that. You are very welcome to contribute—whether by adding points I may have missed or by correcting information if something turns out to be inaccurate. This guide is not intended for training purposes, provides no medical advice, and does not include product comparisons or commercial recommendations. It is a design and fitting guide, grounded as much as possible in biomechanics. I am not a professional—just a science nerd who loves her dog and struggled to find properly fitting harnesses in stores. My goal is to share knowledge and reasoning, so you can make informed choices when designing or fitting a harness for your own dog. In several parts, I will explain how to measure a dog for a harness and, more importantly, the reasoning behind those measurements and design decisions. Before we dive into the topic : a few general words on harness building and materials. When building a harness, always ask about the intended use first, and only then look at the dog and honestly assess whether the harness type you have in mind is suitable. Some harness designs simply do not fit certain dogs—no matter how well they are made. In my opinion, a harness must fit the dog first, and the purpose second. When choosing fittings, always check: breaking strength maximum load overall size and weight A practical rule I follow is: maximum load = dog’s body weight × 4 Scale matters. A Dachshund needs very different (lighter) fittings than a Newfoundland. Oversized hardware adds unnecessary weight and can negatively affect balance and comfort. Leather Choice (This Is Not Optional) For leather harnesses, I recommend: 3–4 mm thickness normal to hard tempered leather (I personally prefer hard) leather from the butt or dorsal (spine) area preferably harness or bridle leather (For my own harness, I use Italian harness leather, double butt with a resin back. (Note: this particular leather is not suitable for equestrian saddlery work, but works well for dog harnesses.)) This type of leather stretches less over time and holds its shape better, which is essential if you want to use the harness for more than a few weeks. Heavily oiled or fat leather is cheaper, yes—but it stretches significantly more and often has a very high breaking strength. In a worst-case scenario, we want the leather to fail before the metal fittings. If a dog gets caught and cannot slip out of the harness, it is safer for the leather to break than for rigid metal to hold indefinitely. For animal welfare reasons: do not use heavily oiled or fat leather for harnesses. Breed, Build, and Development Breed and build must always be considered when fitting a harness. For example: My current dog is long, mid-height, and slender My previous Springer Spaniel was long, sturdy, and rounder My mother’s dog is tall, long, slender, and overbuilt Three dogs—three very different ideal harnesses. Also consider how your dog may change with age. While growth and muscle development cannot be predicted perfectly, ignoring them entirely is a mistake. Some breeds are also more prone to injuries caused by ill-fitted harnesses, which makes proper fitting even more important. Part 1 – Biomechanics As mentioned earlier: a harness has to fit the dog. The other way around is simply impossible. The goal of a harness is to act as a leading device that interferes with the dog’s natural movement as little as possible. To achieve this, we must first understand canine biomechanics. In this section, I reference several open-access scientific sources using APA 7 style, all linked at the end of this part. I will do the same in every following section whenever possible. Harnesses and Their Effect on Movement The way a harness distributes pressure across a dog’s body actively affects gait and overall movement. Research on this topic is not entirely uniform: some studies show changes in spinal movement when a harness is used others show changes in stride length compared to walking on a collar some find little difference under certain conditions What we can safely say is that harness design matters. Many modern harnesses are marketed to restrict “undesirable” movement, such as pulling. This is not a long-term solution. If you are using a harness to prevent pulling, please work with a qualified trainer. The main advantage of a harness is that it removes pressure from the neck and—ideally—distributes it more evenly across the body. Stride Length, Shoulder Freedom, and Body Proportions In a study by Williams et al. (2023), it was shown that the distance from a dog’s elbow to the ground is a key measurement when evaluating how restrictive a harness is on stride length. This has practical consequences: Dogs with longer legs may benefit from a chest-strap harness rather than a Y-harness Smaller breeds often have relatively longer shoulders compared to forelimb length In these dogs, a chest strap may sit too high and actively restrict shoulder movement The conclusion is simple but important: no harness fits every dog. Weight Distribution and the Kinetic Chain A healthy dog carries up to 60% of its body weight on the forelimbs. The spine, shoulders, and limbs function as a single connected kinetic chain (Sürer et al., 2020). Even small changes in one area can alter overall movement patterns, affecting back motion and limb coordination. Irregularities in movement are most easily detected at the trot. An ill-fitted harness can, over time, lead to a shift of weight from the forelimbs to the hindquarters (Williams et al., 2023). One simple indicator for owners is to closely observe their dog’s movement on a collar versus in a harness. Because dogs do not have a clavicle, the shoulder joint is a so-called “false joint,” stabilized primarily by muscle. Poor harness fit can affect both the scapula and the spinous processes of the spine. Compensation and Injury Risk Canine gait can be modeled in three dimensions and is normally symmetrical. This symmetry breaks down when the range of motion of any limb is restricted. A study by Lin et al. (2020) demonstrates that dogs compensate rather than stop moving. Forward motion is maintained by redistributing forces—often until injury occurs. Dogs are very good at hiding discomfort. This makes it our responsibility as owners and builders to ensure that equipment supports healthy movement instead of silently undermining it. This concept is very similar to saddle fitting in horses. A well-fitting saddle that allows the shoulder to glide freely results in smoother, more even movement. Girths and breastplates also offer useful parallels. The thoracic (belly) strap of a harness serves a similar function to a girth: keeping the equipment in place Like a girth, it must allow free elbow movement If it interferes with the elbow, stride length is restricted and weight shifts rearward A breastplate in horses prevents forward saddle movement; in dog harnesses, the chest strap primarily distributes pressure and stabilizes the harness. Anything positioned in front of the shoulder has the potential to restrict stride extension and must therefore be fitted to the individual dog. This is a common shortcoming of chest-strap harnesses when strap width and placement are poorly chosen. A Final Word on Restriction For those who intentionally want to restrict their dog’s movement using a harness: be aware that restriction worsens under tension. An open-access DAWGAIT dissertation shows that while a dog may appear to move normally at a walk, restrictions become evident at trot and gallop. What feels like “only a little restriction” can quickly turn into a real problem under load. Personally, I use a harness to allow my dog to move freely in front of me. The leash is never tight—it is simply an extension of my arm, used for safety and communication. Our walks are calm, low-stress, and give my dog the freedom to explore while staying secure. I also use harnesses as a secondary safety measure in new or potentially frightening situations, especially with young or insecure dogs. Used thoughtfully and fitted correctly, a harness can be a valuable tool. Used carelessly, it can do long-term harm. In the next part, I’ll show you exactly how I measured my dog for her new harness. I’m still waiting on some new tools, so updates might come a bit slower than I’d like—but I’ll share everything as soon as I can. Sources: Lin, C.-C., Wu, C.-H., Chou, P.-Y., Chen, Y.-C., & Chen, C.-H. (2020). Evaluation of a multibody kinematics optimization method for three-dimensional canine pelvic limb gait analysis. BMC Veterinary Research, 16(1), Article 105. https://doi.org/10.1186/s12917-020-02323-5 Sürer, E., Evangelisti, M. A., Paolini, G., Della Croce, U., & Manunta, M. L. (2020). A canine gait analysis protocol for back movement assessment in German Shepherd dogs. Veterinary Sciences, 7(4), Article 195. https://doi.org/10.3390/vetsci7040195 Williams, E. R., Hunton, V. D., Boyd, J. A., & Carter, A. J. (2023). Effect of harness design on the biomechanics of domestic dogs (Canis lupus familiaris). PeerJ, 11, e14719. https://doi.org/10.7717/peerj.14719 University of Georgia. (n.d.). DAWGAIT: Development and application of an open-source tool for canine gait analysis(Doctoral dissertation). UGA Open Scholar. https://openscholar.uga.edu
 -

Pinkie protection…
ThisIsMyFirstRodeo replied to ThisIsMyFirstRodeo's topic in Leatherwork Conversation
Thank you for the ideas, guys. I’ll start experimenting here. - Today
-
Wow! Very nice!
-

How to ease when sewing leather on a 1341?
joetroba replied to joetroba's topic in Leather Sewing Machines
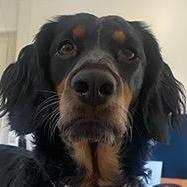
So, after several attempts (and wrestling) I think I have made some decent progress. I think the addition of a bell skiver made a world of difference. The one photo is of the finger backs I sewed. You can see a decent curve on the pinky side. Now I am fighting the thumb pieces, in other photo. That has a much larger curve. Making progress though.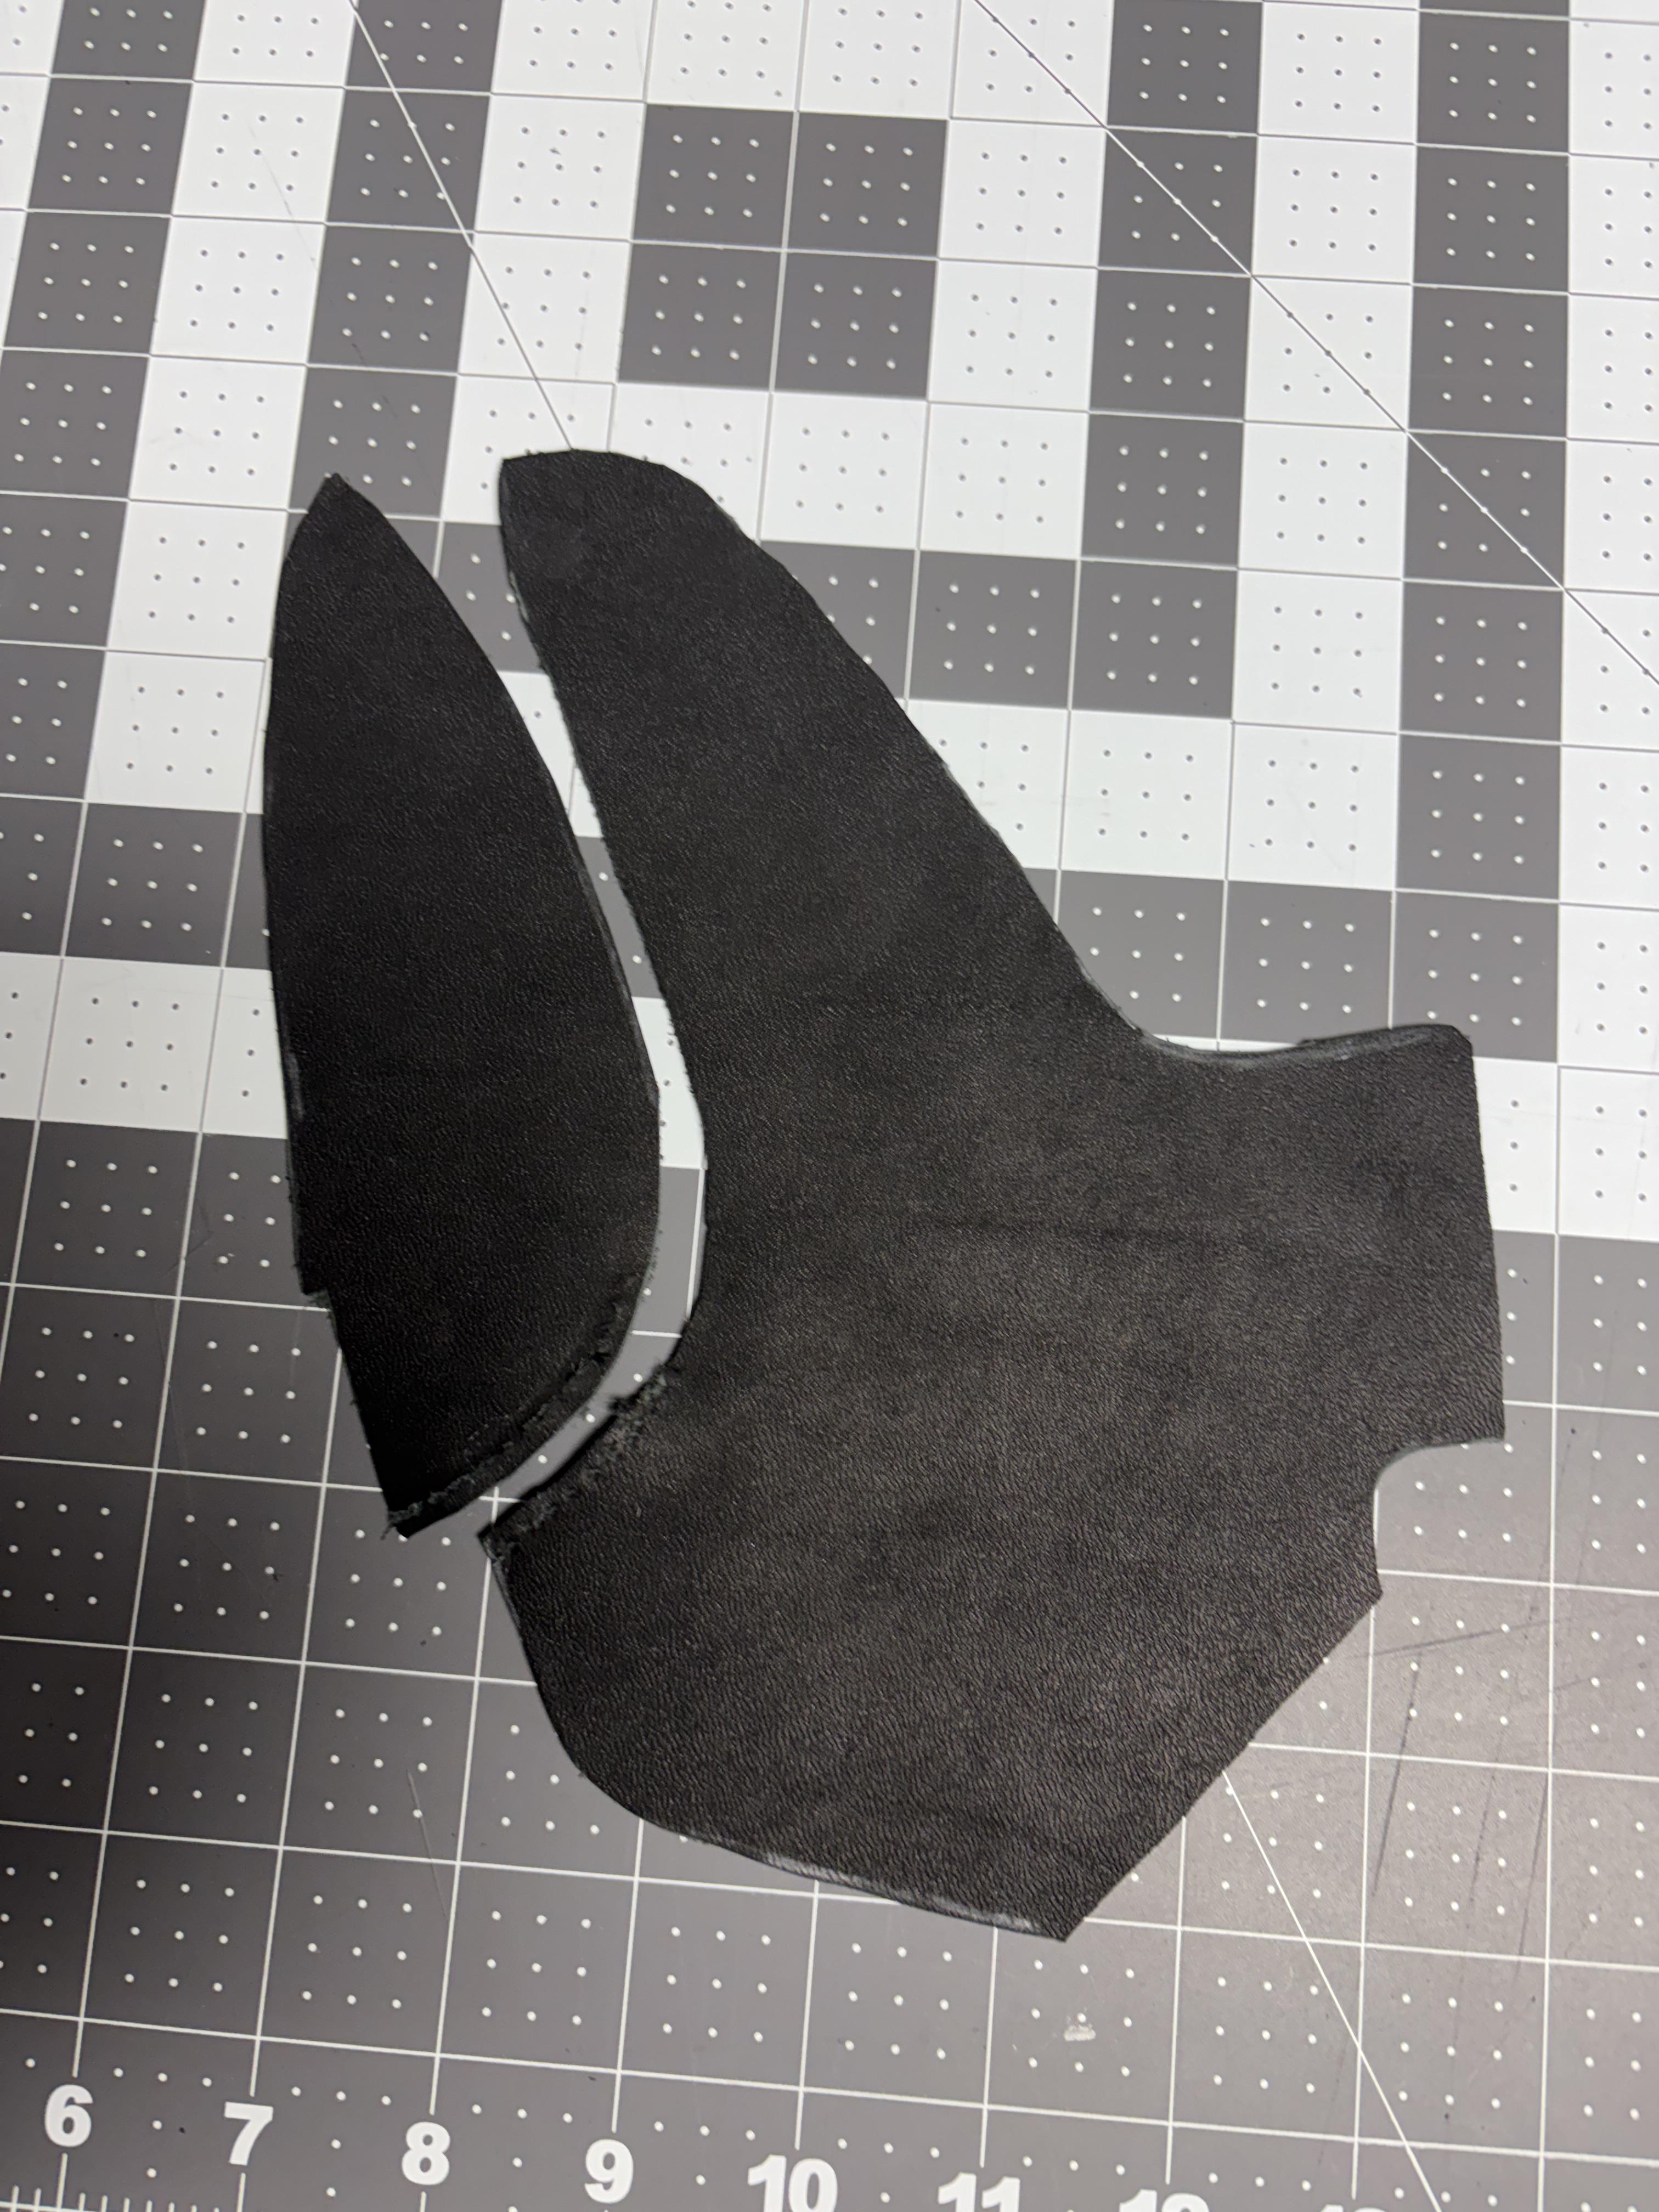
-
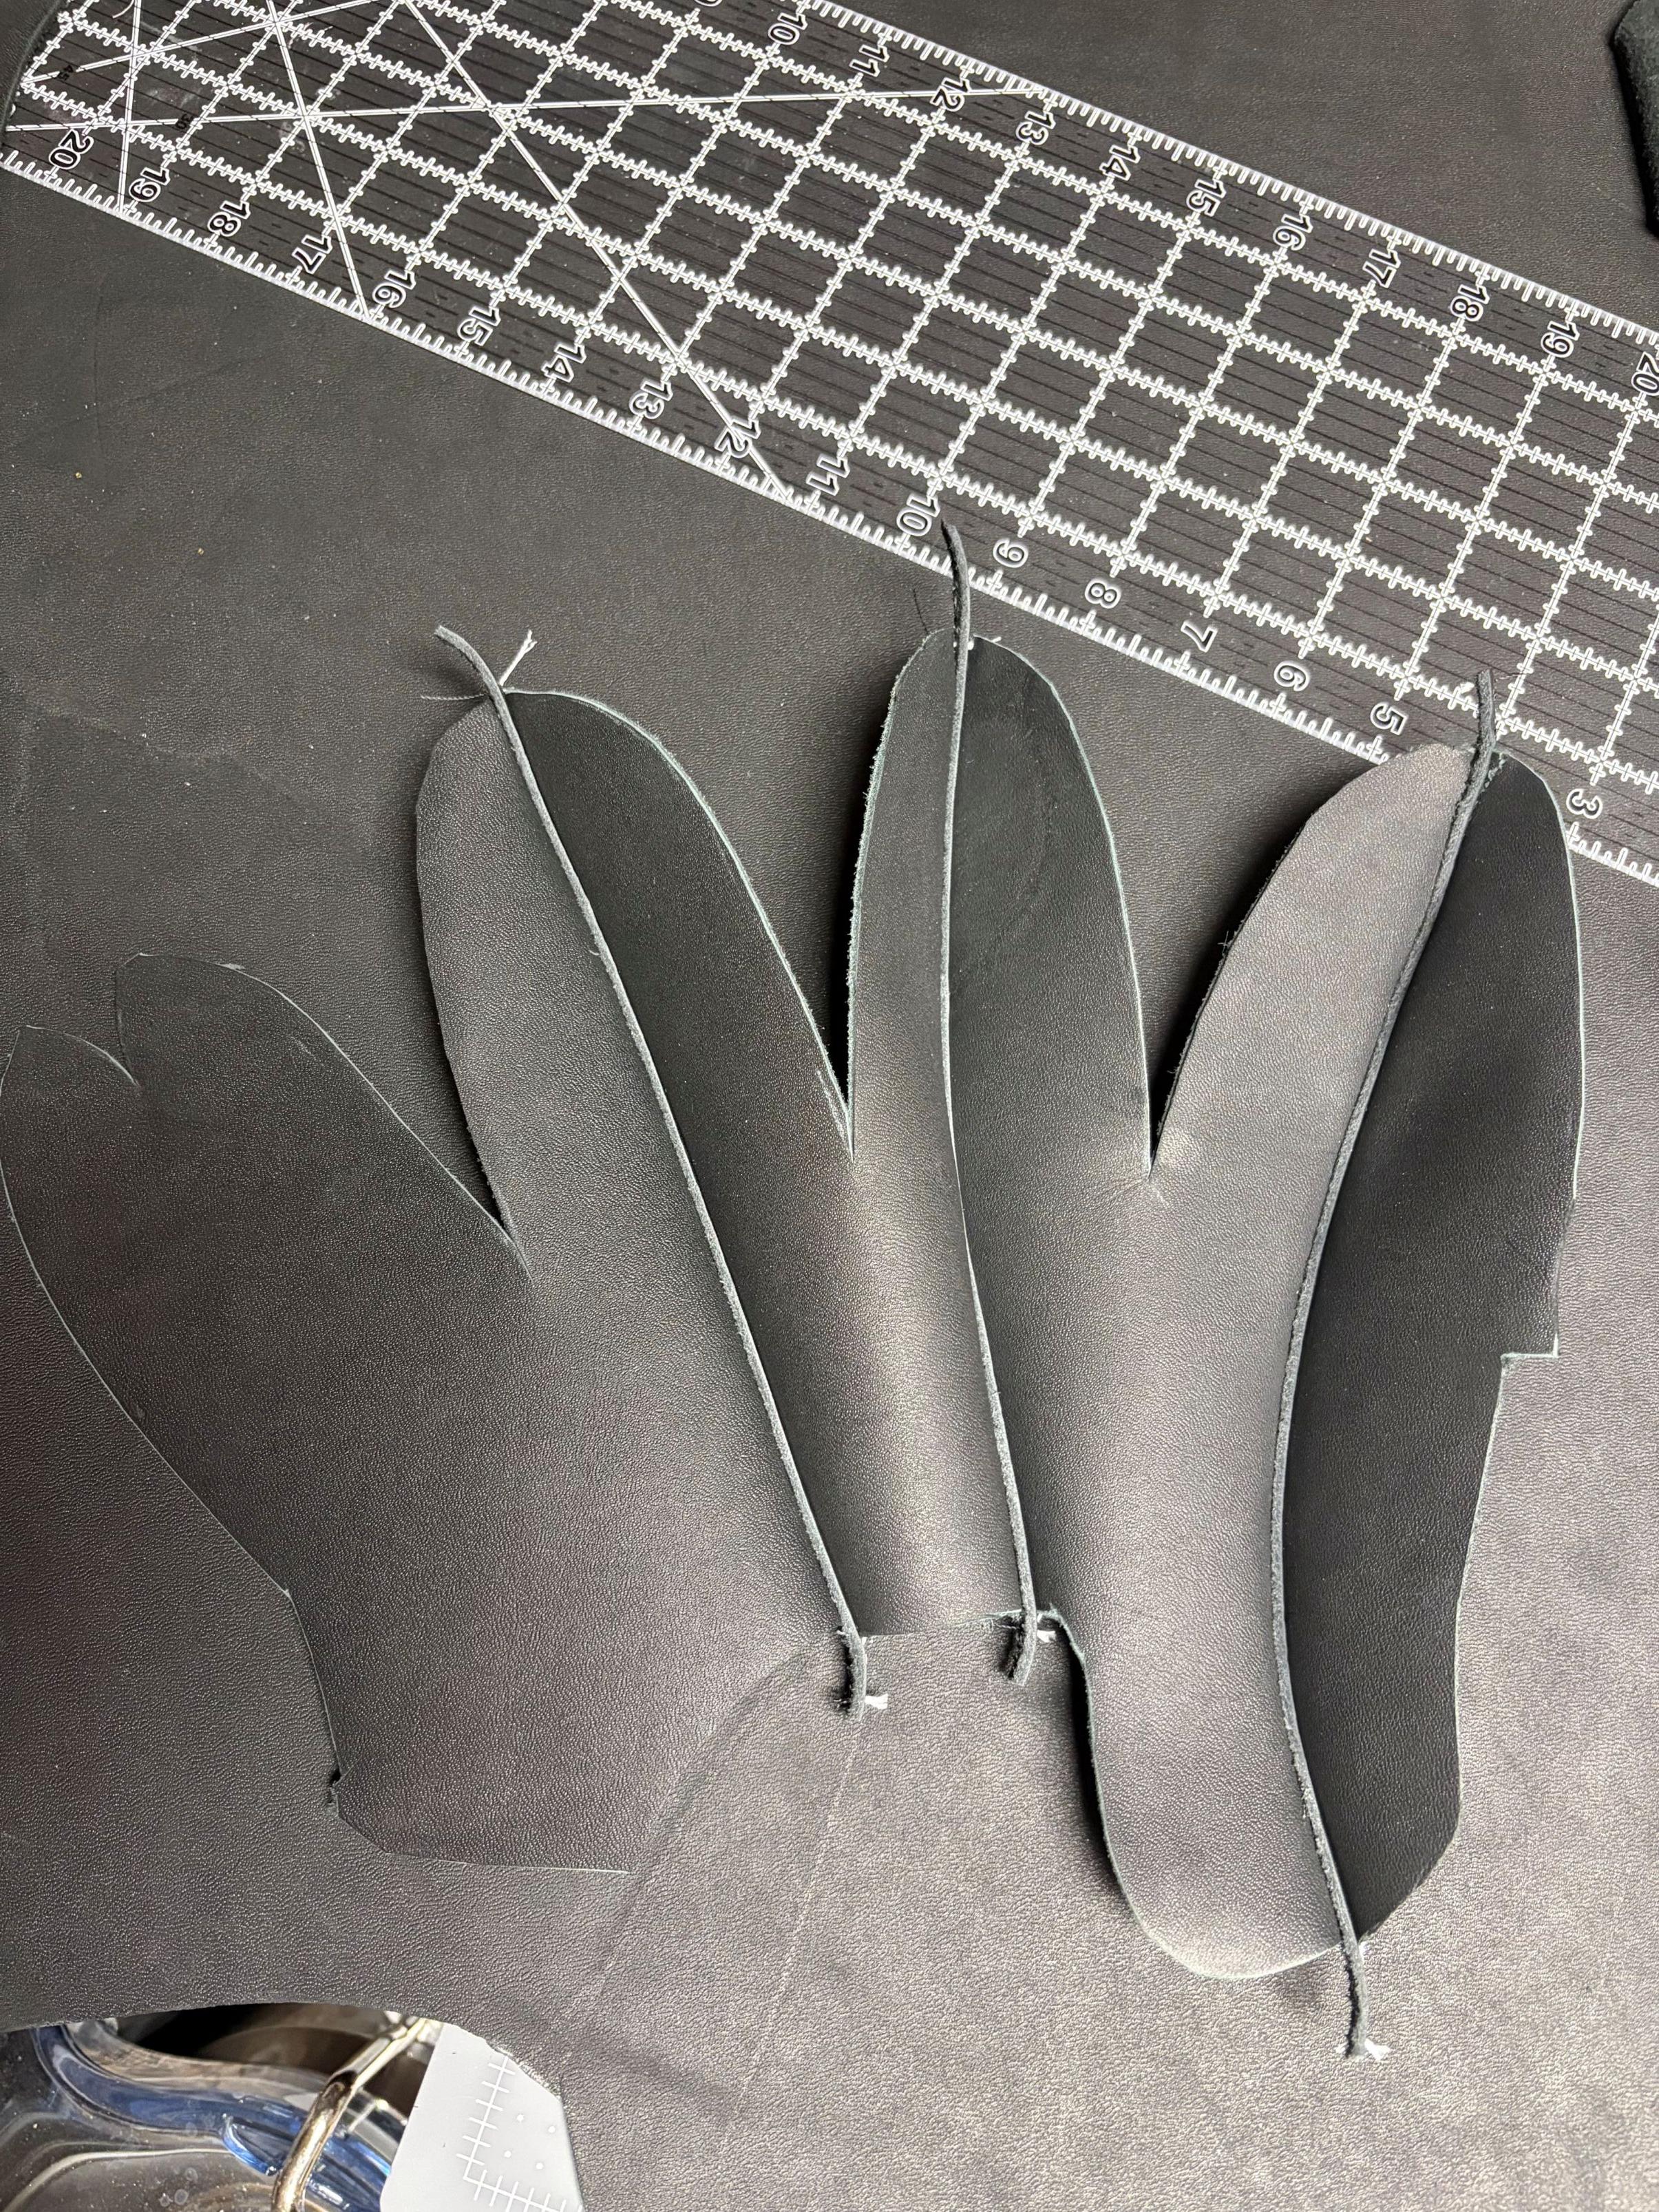
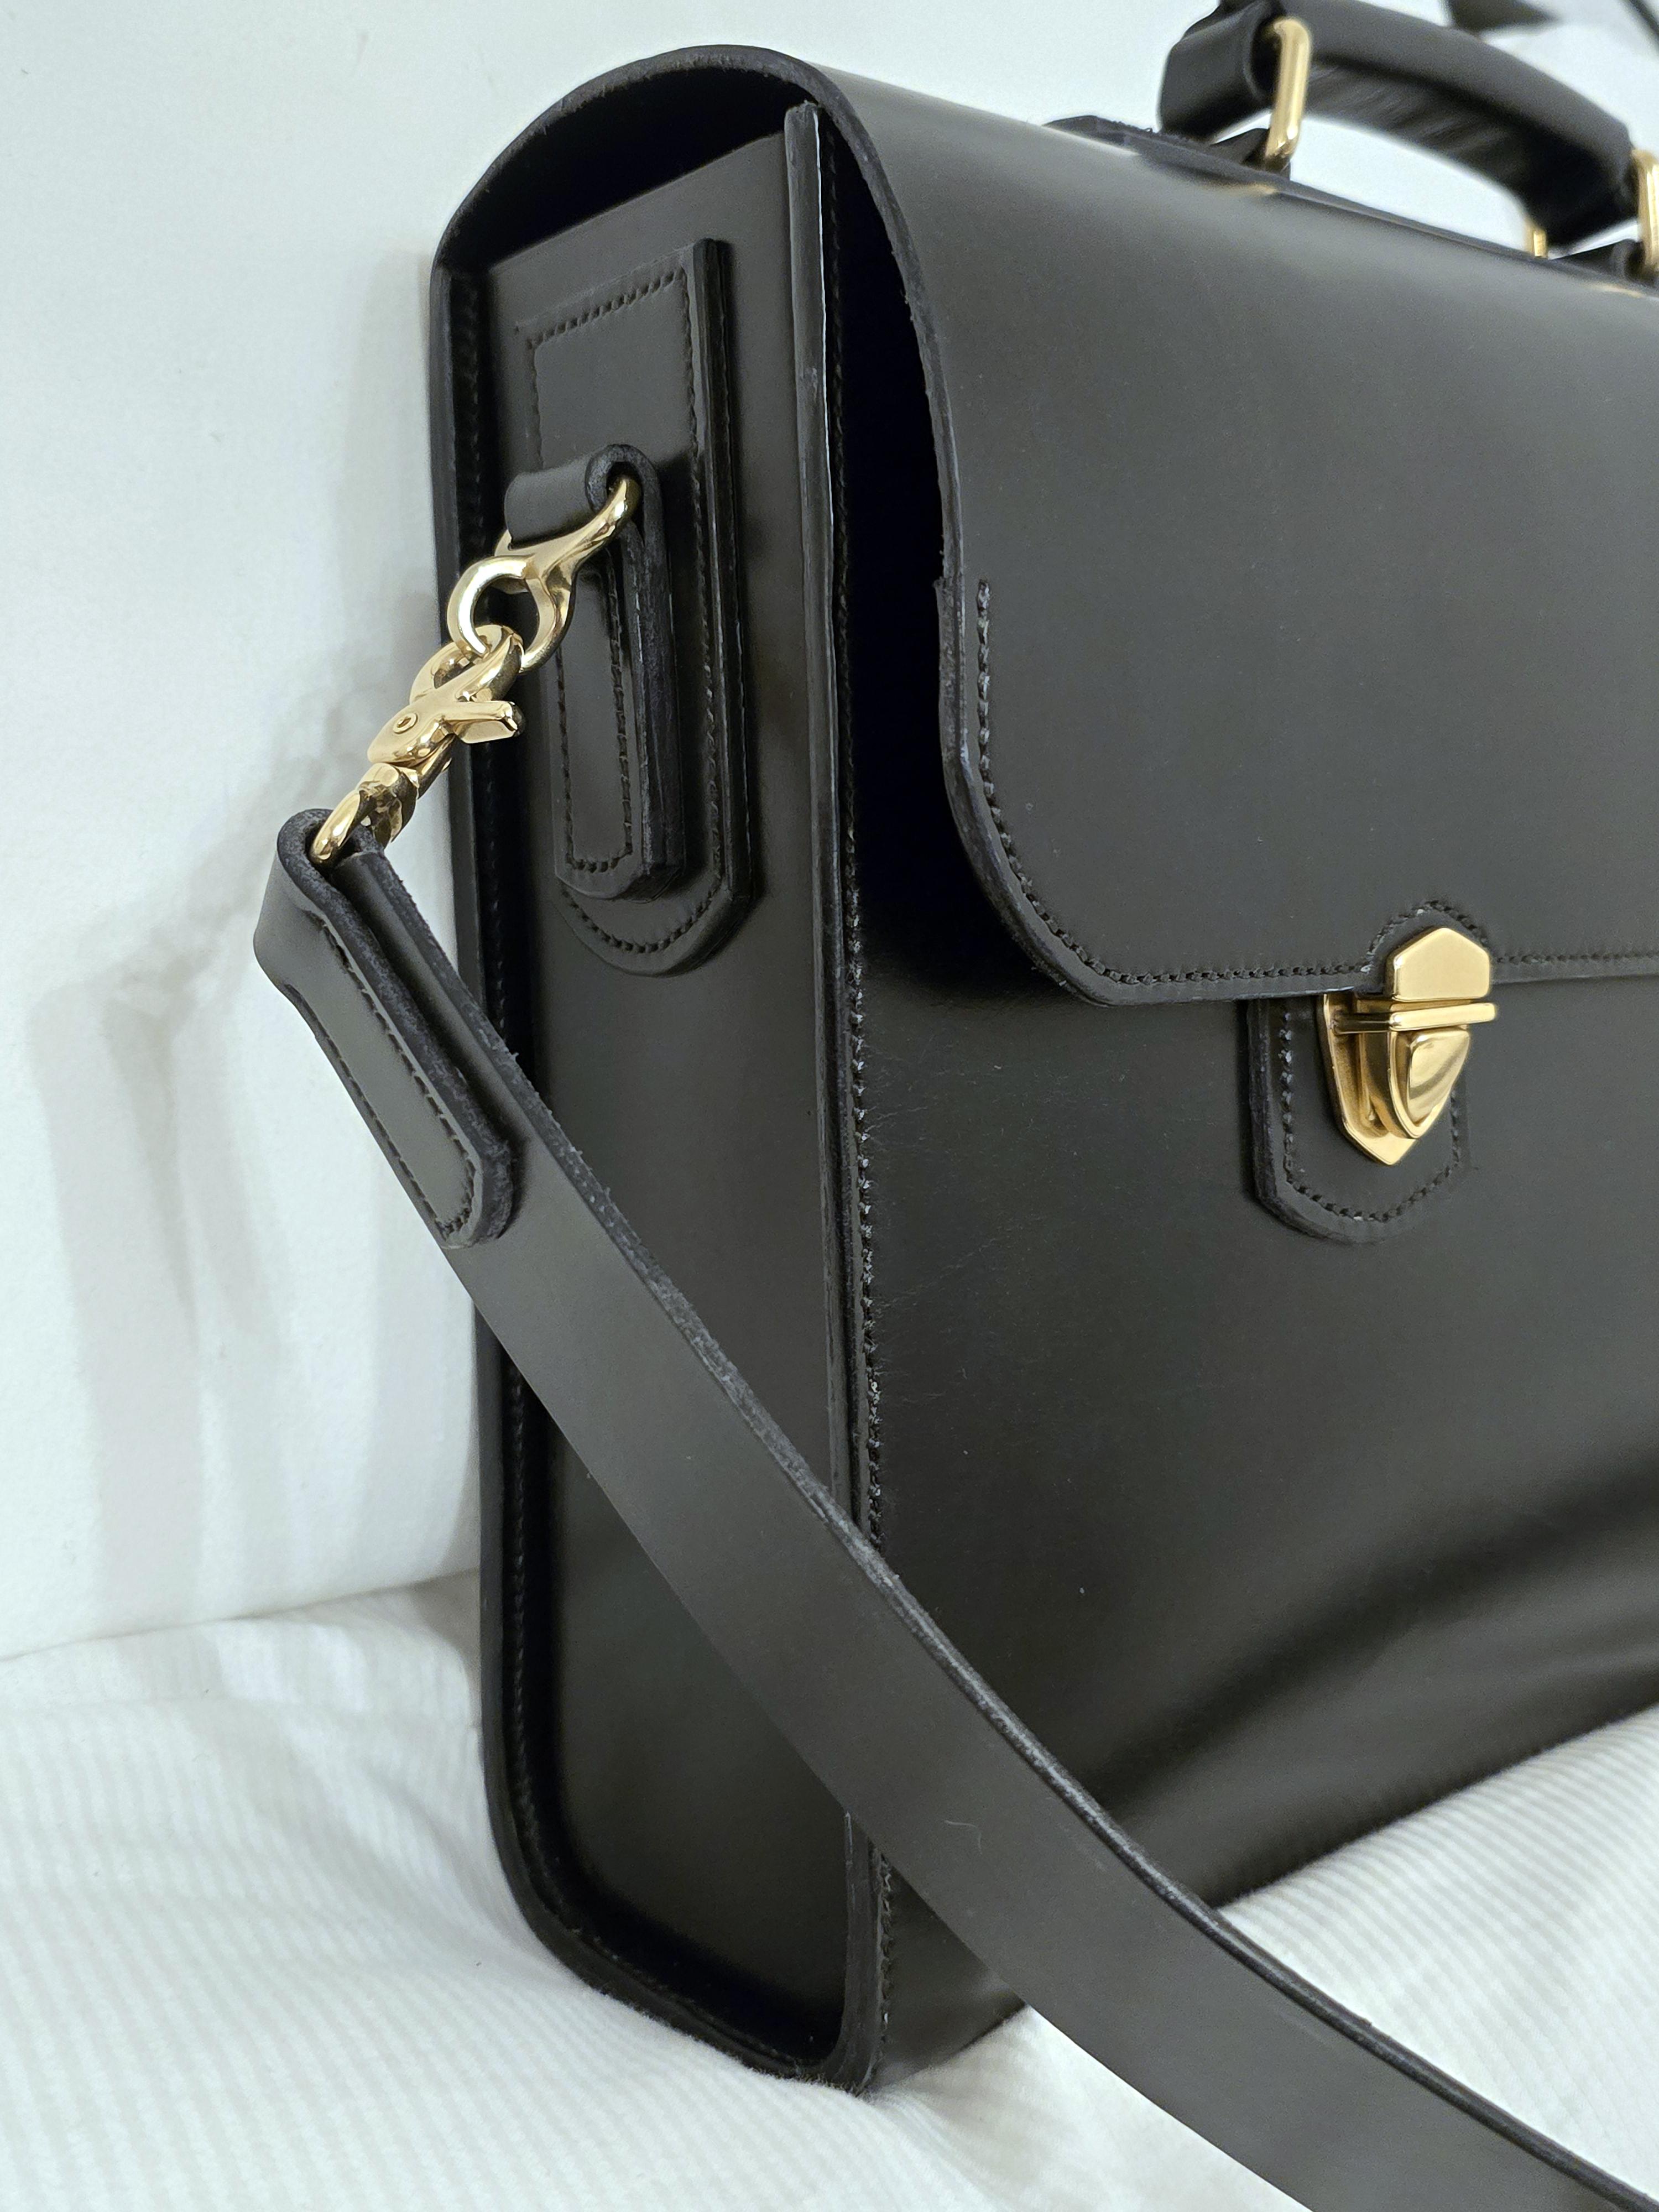
Just 3 layers. The extra layer serves three purposes: I sewed the loops to it, not too worried if the stitching on the back was perfectly straight, then sewed the sub-assembly to the end of the bag. Sewing through only two layers its easy to get the seams straight on both sides. The second purpose is extra rigidity, worth having since I wear such bags cross-body so the strain on those loops is diagonal and the end of the bag could deform. The third purpose is as a spacer to make sure the brass fittings don't rub the edge of the flap. All in all, those extra bits of leather are doing a lot of work. I could probably claim a fourth purpose: Aesthetics, because I really like the look of it, but that's subjective.
-
@chuck123wapati Cinnamon rolls sound delish 😋 Even my dog had a happy Christmas, she got a long rawhide chewy thingy , " hours of fun ",...... it lasted an hour . She also had turkey, ham, potato's etc. I am now sipping on a nice ex$y whisky that i bought for myself, , a rare Christmas treat. Enjoy the Cinnamon rolls 😋 HS
-
Amazing, 12 hrs hand sewing isn't easy, you're a monster. It's really nice!! Did you sew those strap loops through all four layers? They look awesome!!
-
Call it a laptop tote bag . . . one of my next projects. Got a keyboard giving me fits . . . have to get that settled before I do anything else though. It's not exactly the design I will use . . . but thanks AndrewWR for the pictures . . . I'm getting closer to my project with your example. Good job by the way . . . May God bless, Dwight
-
Thanks, Bruce, and Merry Christmas!! Edgers are underrated and the differences somewhat confusing, but a nicely finished edge makes a project look far better and much more professional IMO. I edge, depending on the design of the project, and put as much thought into them as other parts of the work. I think of them as part of the overall design, and also how life will react to the edge, belt loops for example. An edge for lace work is another example; the shape of the leather edge underneath the lace will dictate the overall shape of the lace braid.
-
 Hassan Vahed joined the community
 -
Edge beveling seems to be an under addressed area for the rookie leather crafter. I would have liked to run into this rule of thumb early on, to start with a third to half the thickness of my leather and adjust to taste. Such a bewildering array of expensive bevelers to choose from in the market, I've just stuck with the small one that came in my original tool set. Thanks for this post.
-
Another one of those projects I wish I had an excuse to build. Well planned and nicely executed.
-
 banksia joined the community
 -
Seeking a U.S. maker who does true round/rig-plait braided leather belts (3-D, not flat), ~1.5″ wide, cowhide, braid-through buckle — recommendations?
-
Mike, Thanks for catching that! Yes, 3/64 inch edger and I went back corrected that. Merry Christmas to you and yours!
-
If you're looking for proper leather then I have to point out that a cow is only so long so yardage might be problematical. However, sites like Temu or Ali Express might sell rolls of what they call leather or faux leather. Might be cheaper than Ebay or Amazon. Be aware that some might be pre-folded to give a clean edge.
-
Bruce, for 8 oz. do you mean 3/32" or 3/64"? Merry Christmas! Mike
- Yesterday
-
OK, so I started a few days ago with pre-cutting and wet moulding a couple of pieces but the build of this bag started this morning about 8ish (its December 25th). A bit over 12 hours work later and... I figure there is still some burnishing to do when I get some daylight but I'm pretty happy with the outcome and it sure as heck beats the traditional activity of trying to set a new personal best for carbs consumption. I couldn't get a photo of the inside because it just looked like a black hole but it's a single compartment in unlined bridle hide. The style is very much like an offering on Tool & Hide's website (Canadian bag maker) but a bit bigger (250mm x 360mm x 100mm vs 230mm x 330mm x80mm). The hardware is obviously solid brass and the stitching is all by hand. Wishing you all the very best for what's left of the holidays and a happy an d healthy new year.
-
 DarbukaDave joined the community
 -
Merry Christmas to all the fellow leather workers here!😃
-
 TLepik joined the community
 -

When u design a new holster pattern
Dwight replied to rccolt45's topic in Gun Holsters, Rifle Slings and Knife Sheathes
I use either marine grade vinyl ( about 25 bucks for a piece that is 36 x 48 . . . OR . . . I use yellow manila folder stock. The vinyl gives me a really good shot at what I need . . . and is best for some unique do dad . . . but in the end I use the cut piece of leather to mark out and cut the pattern on manila folder stock for future reference. I always make the first cut 1/2 inch wide in all directions . . . and trim as needed. It is very seldom that 1/2 inch margin doesn't do the trick. May God bless, Dwight -
 Just Deb joined the community
 -
I am looking for thin leather 1/2” - 1” for making my own leather piping. I am looking to purchase it by the roll. I know I can purchase straps, very thin but I am looking for yardage. Any help will be appreciated.
-
Good information Bruce. I knew size numbers varied by mfr, but didn't know where was a method behind their madness.
-

When u design a new holster pattern
AlZilla replied to rccolt45's topic in Gun Holsters, Rifle Slings and Knife Sheathes
I like 1/8th" craft foam. It's about the thickness of 8 ounce leather and gives me a good idea how things are going to align and fit together. I don't sew anything or make a full prototype. Once I get it satisfactory, I have a craft foam pattern. -
 Except I go for it all the way, tooling and finishing to boot, if it's good first time around that a win, if it's not then it's a lot of good practice for the whole project. I usuallypractice my tooling and finishing a couple of times on scrap beforehand to help make that good first try.
 -
.thumb.jpg.327685d8c1787fa894323fed9a6b2dac.jpg)
Happy Christmas 2025
DoubleKCustomLeathercraft replied to Handstitched's topic in All About Us and Off Topic
Merry Christmas to you and yours, and everyone here. -
Merry Christmas to all! Even that chick in Canada!

.thumb.jpg.4ed1dbae8dada980d06392d599329b6e.jpg)


