

All Activity
- Past hour
-
Nice work!
-
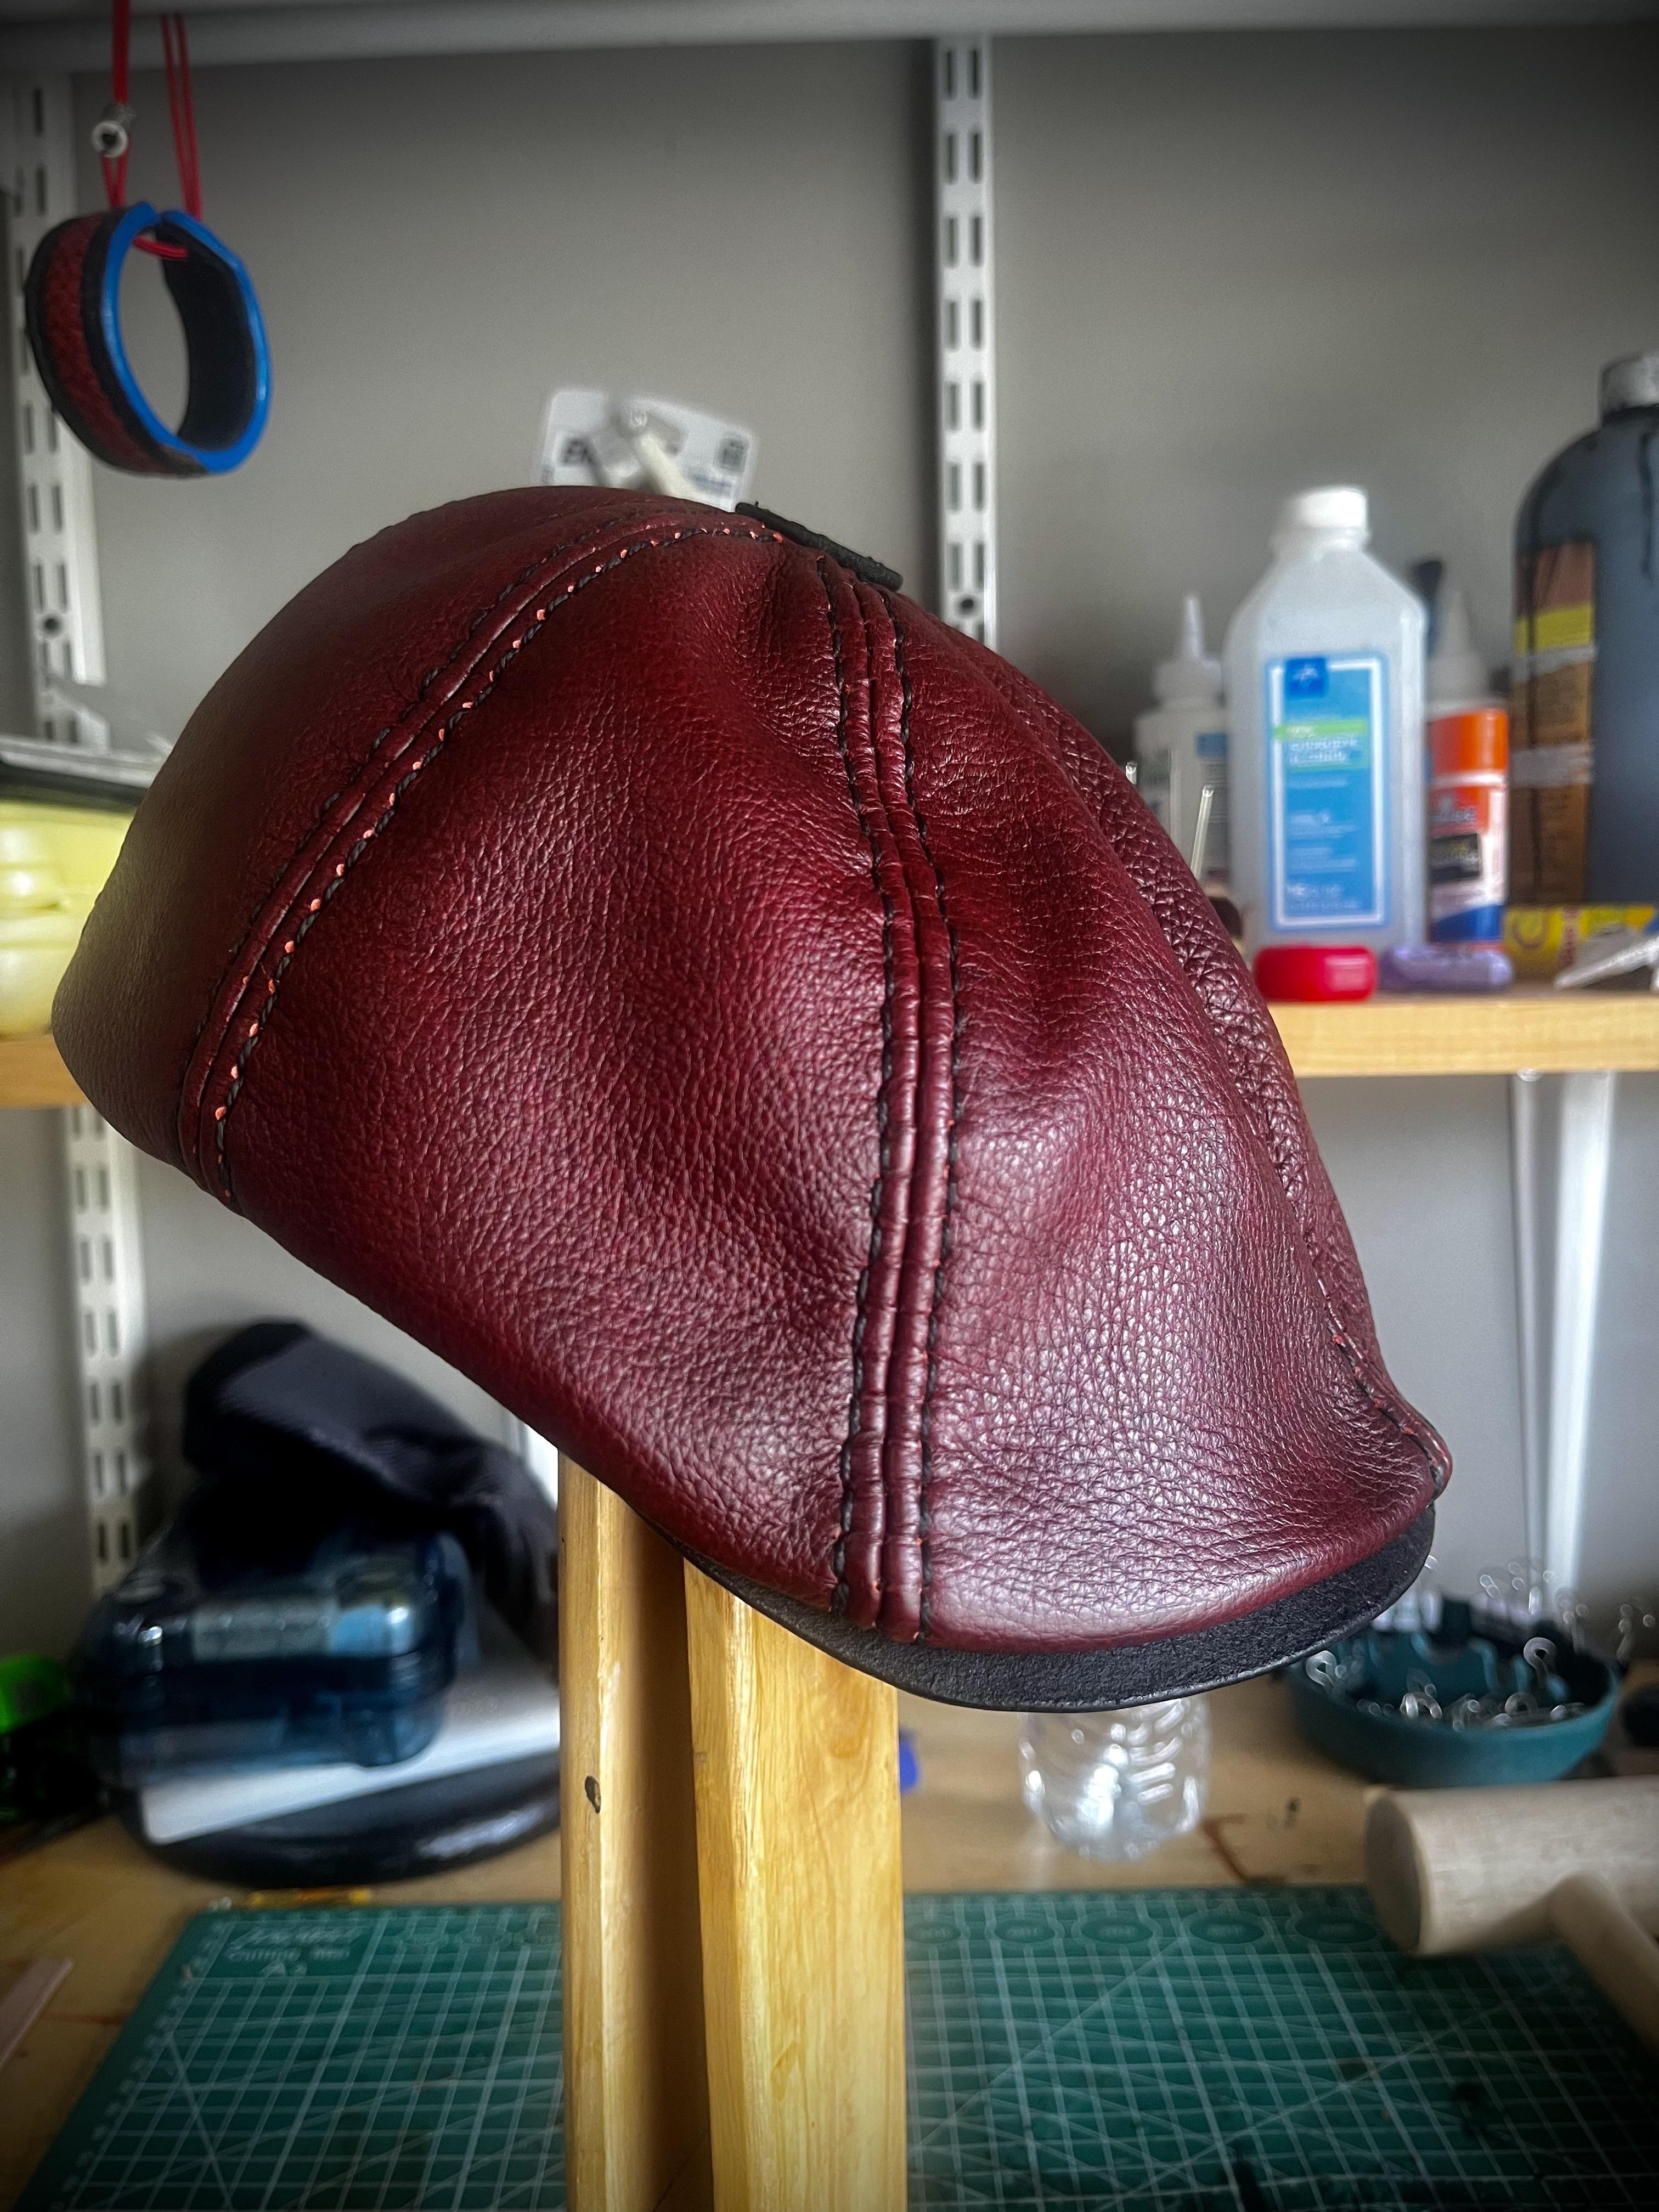
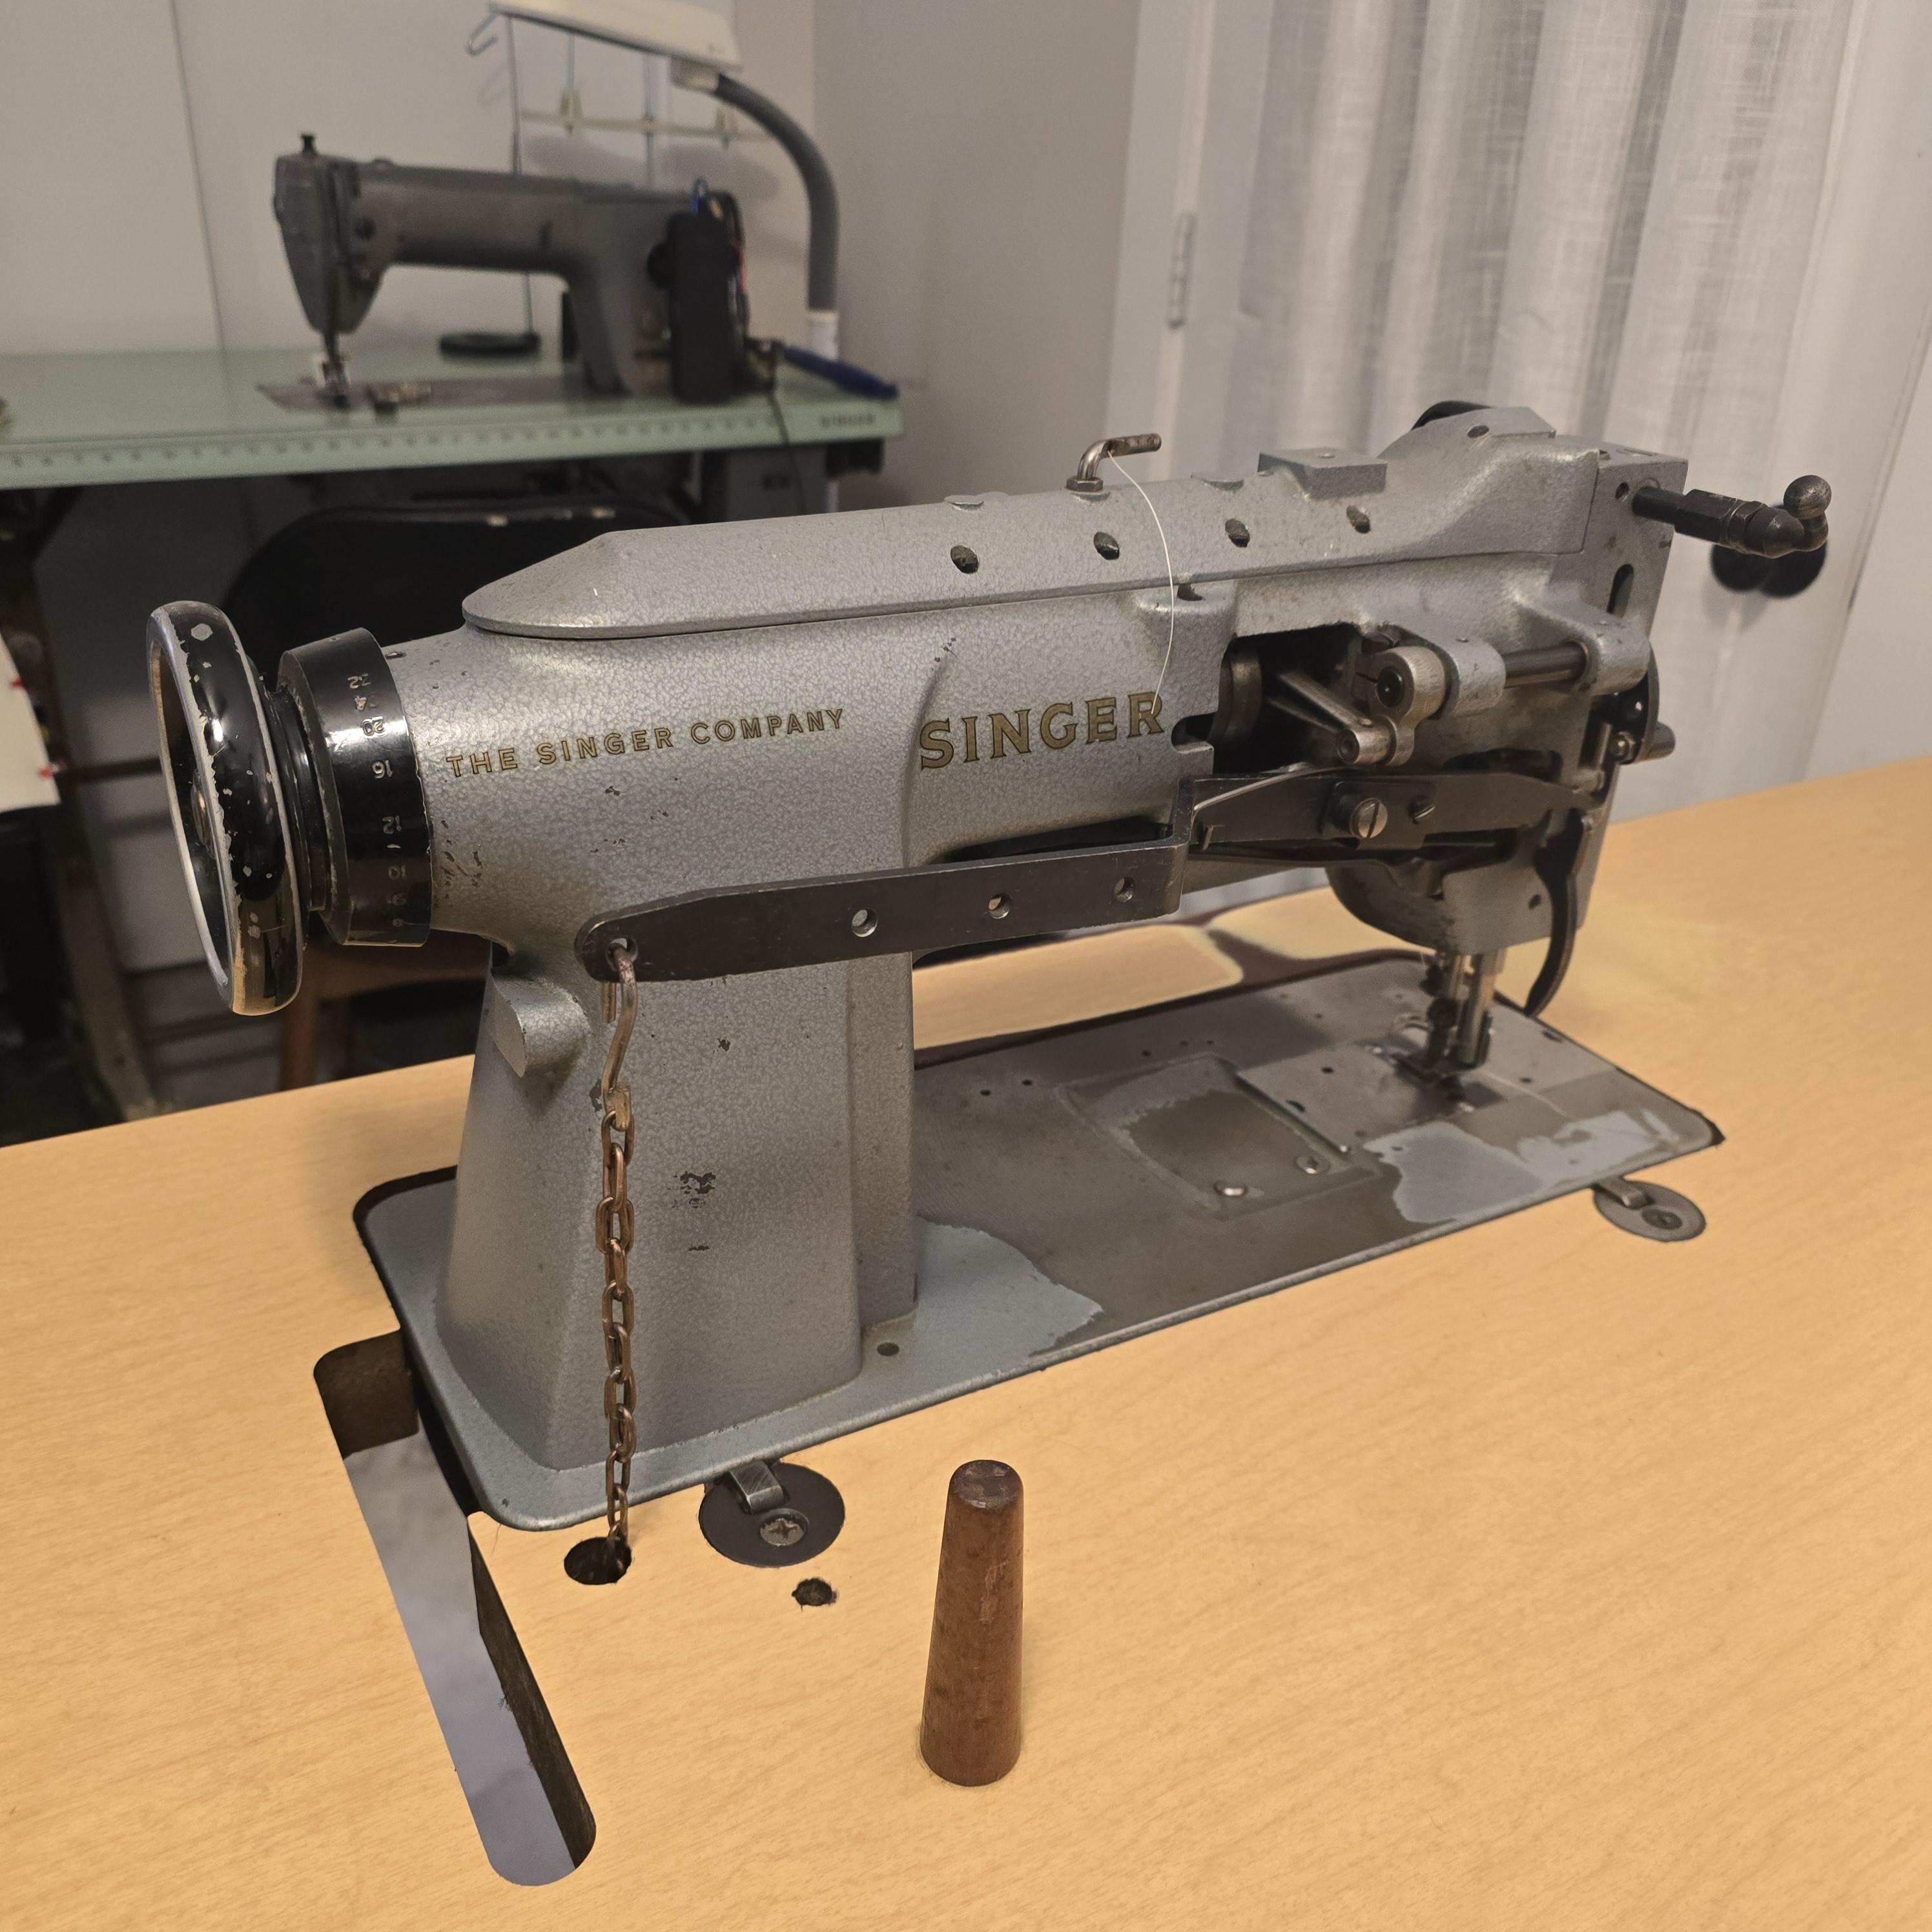
There is a specialized industrial sewing machine that is perfect for sewing all kinds of hats. It is known as a post, or post bed machine. Some have a flat foot with bottom feed. Some have a roller foot and bottom feed. I have one that is a triple feed walking foot mechanism. A post machine lets the work hang down on all four sides. My Singer 167 has a 7 inch tall post. I have used #138 thread in it, although it is happier with #69 and #92. This machine uses the same bobbins as the Singer 111 series machines.
-
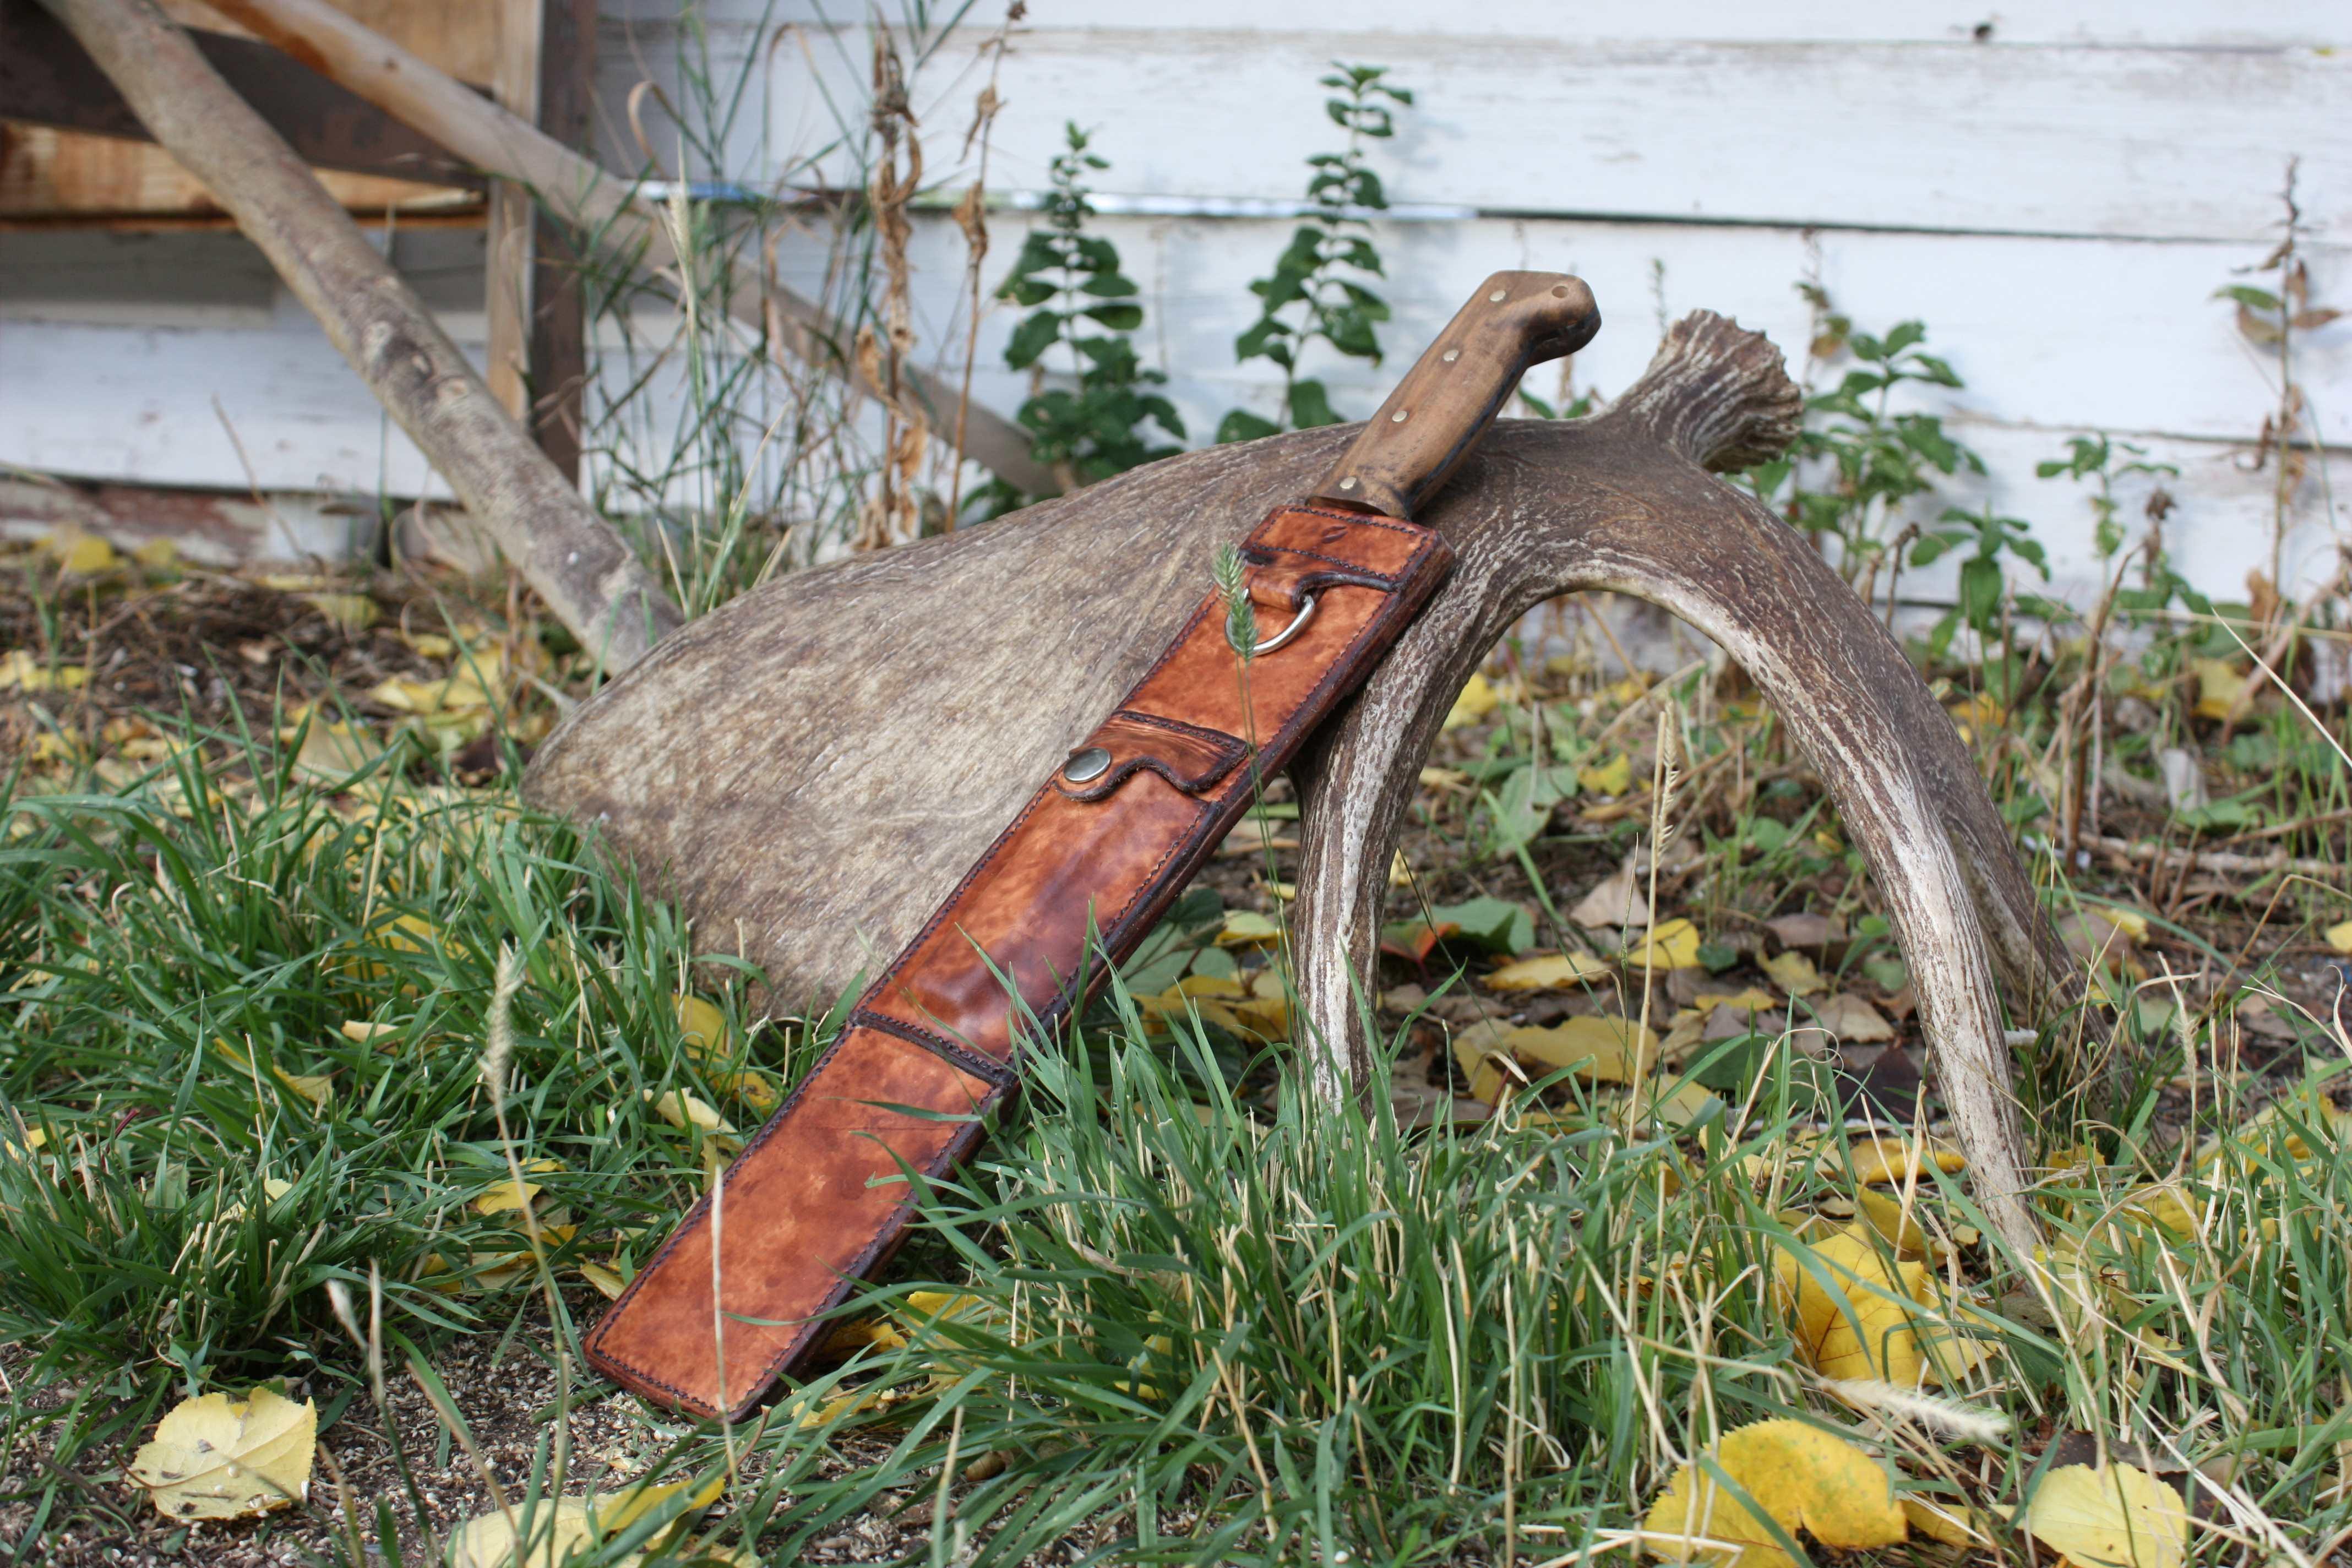
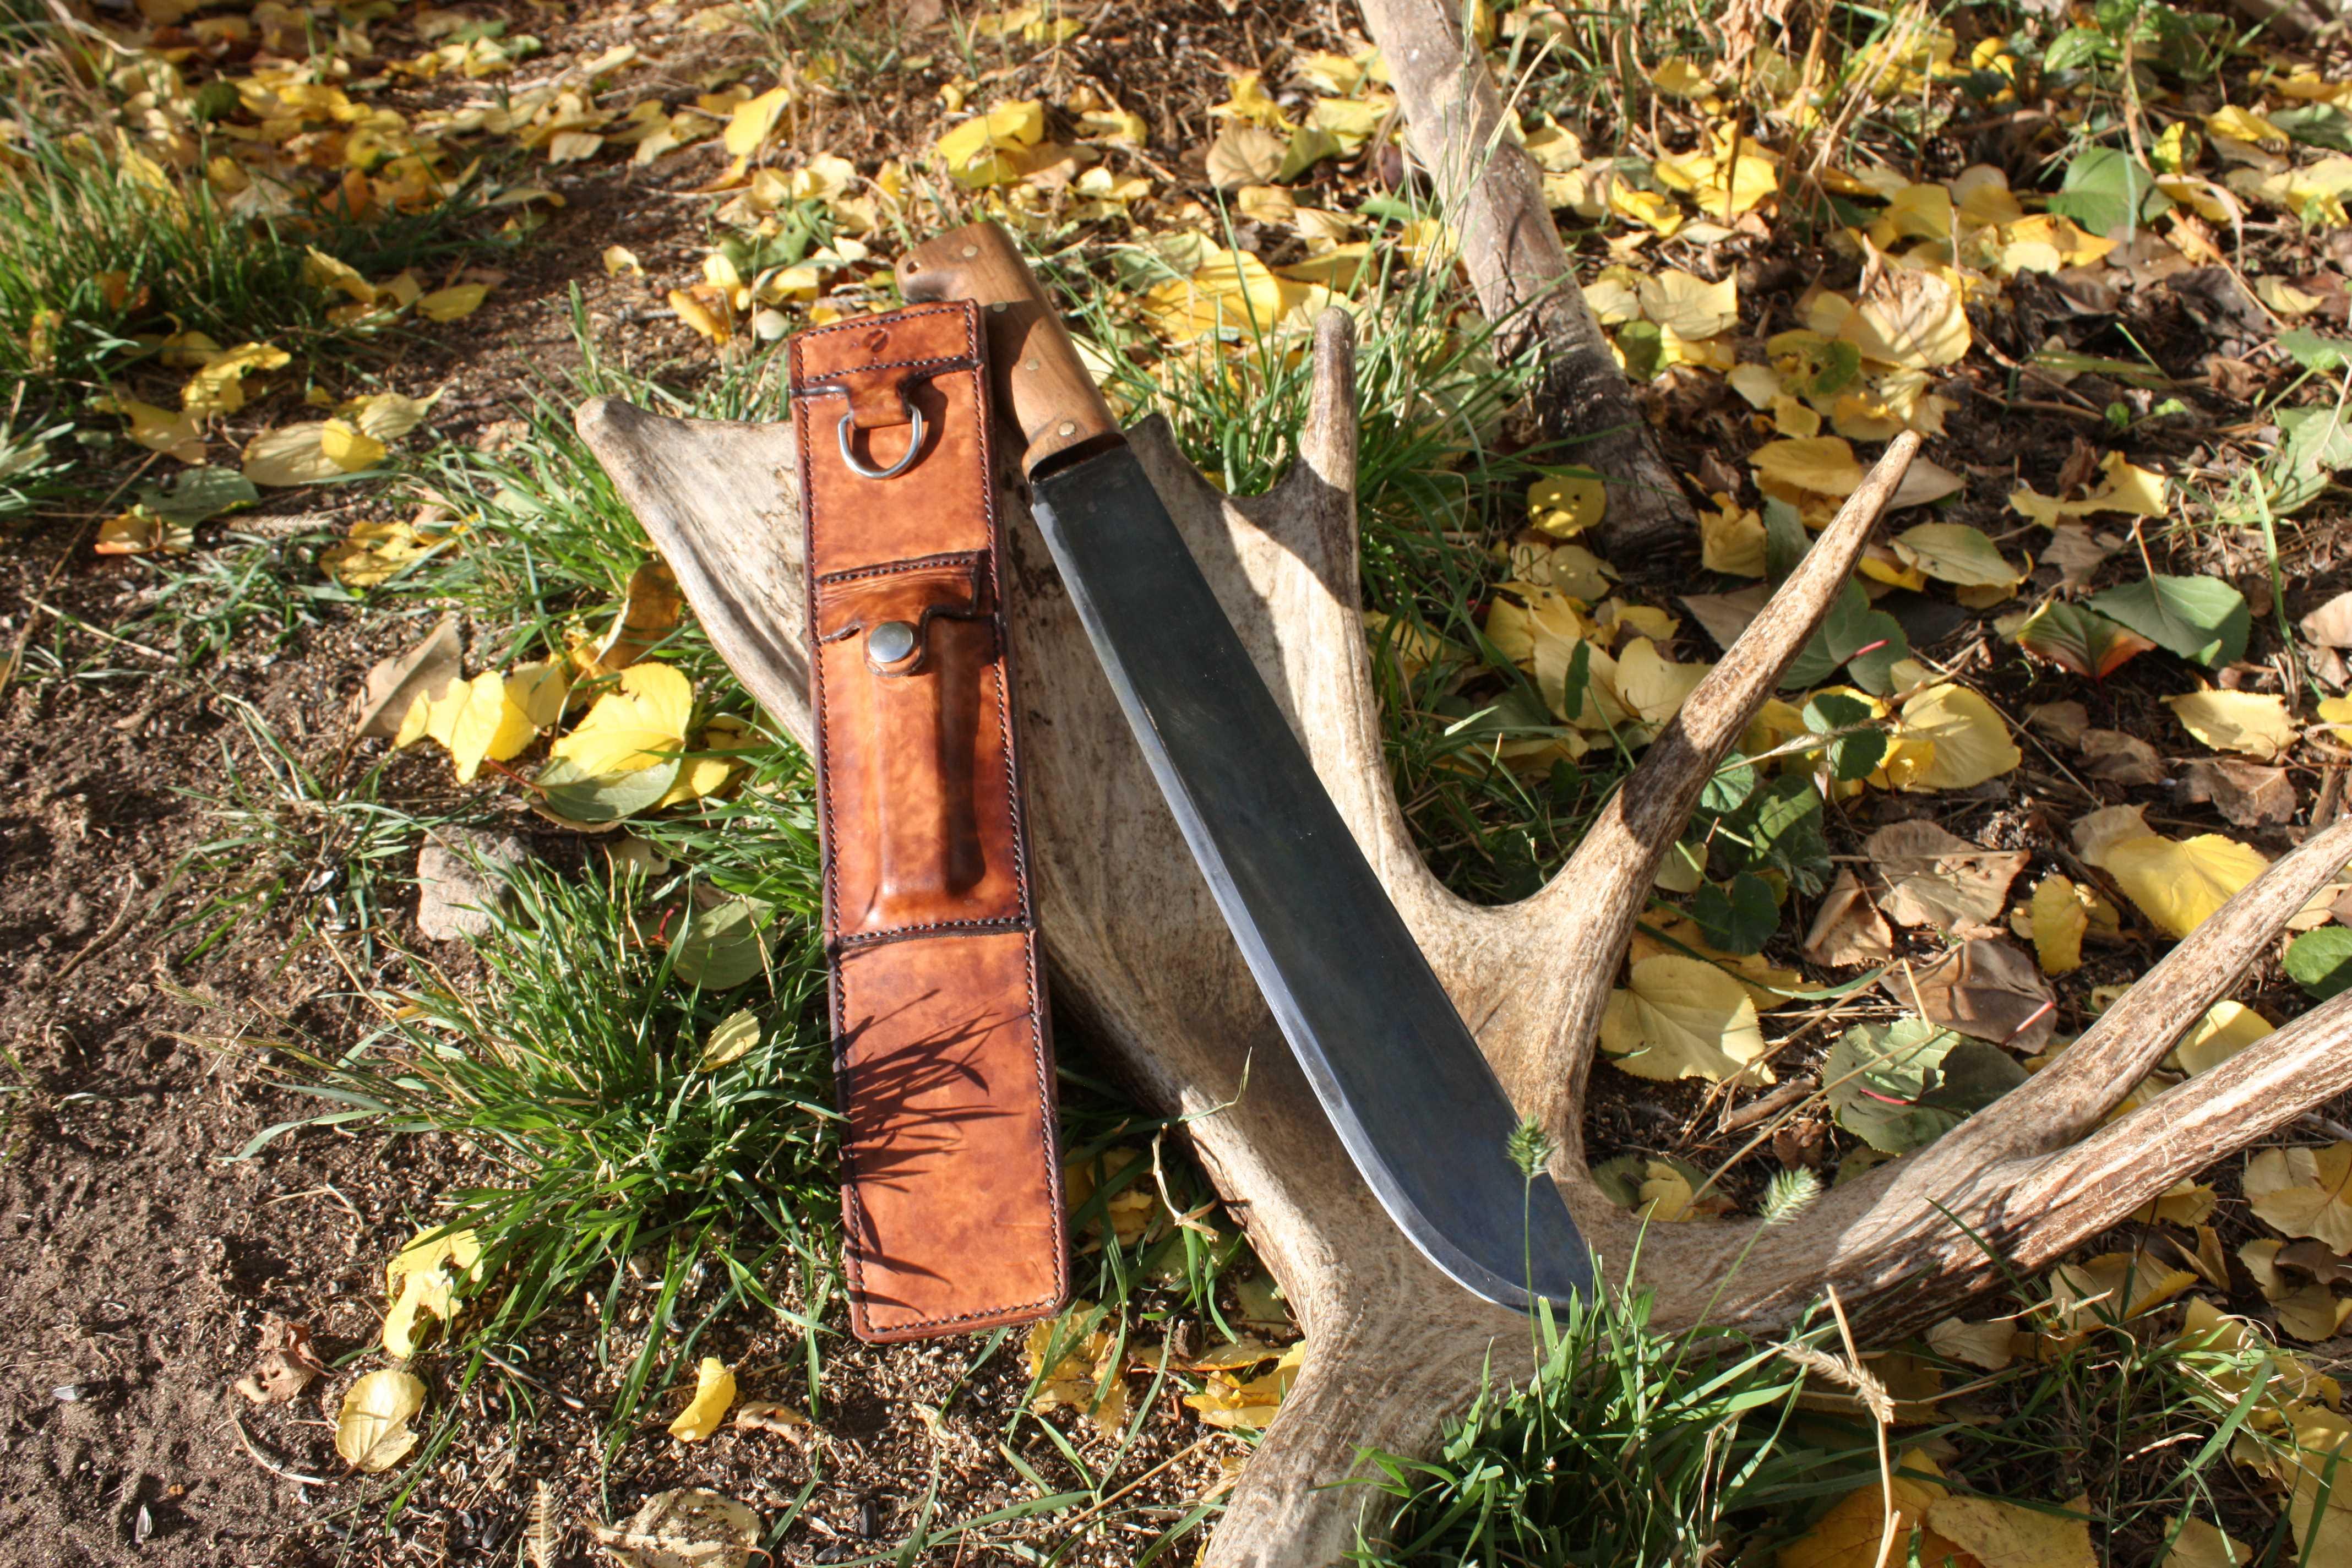
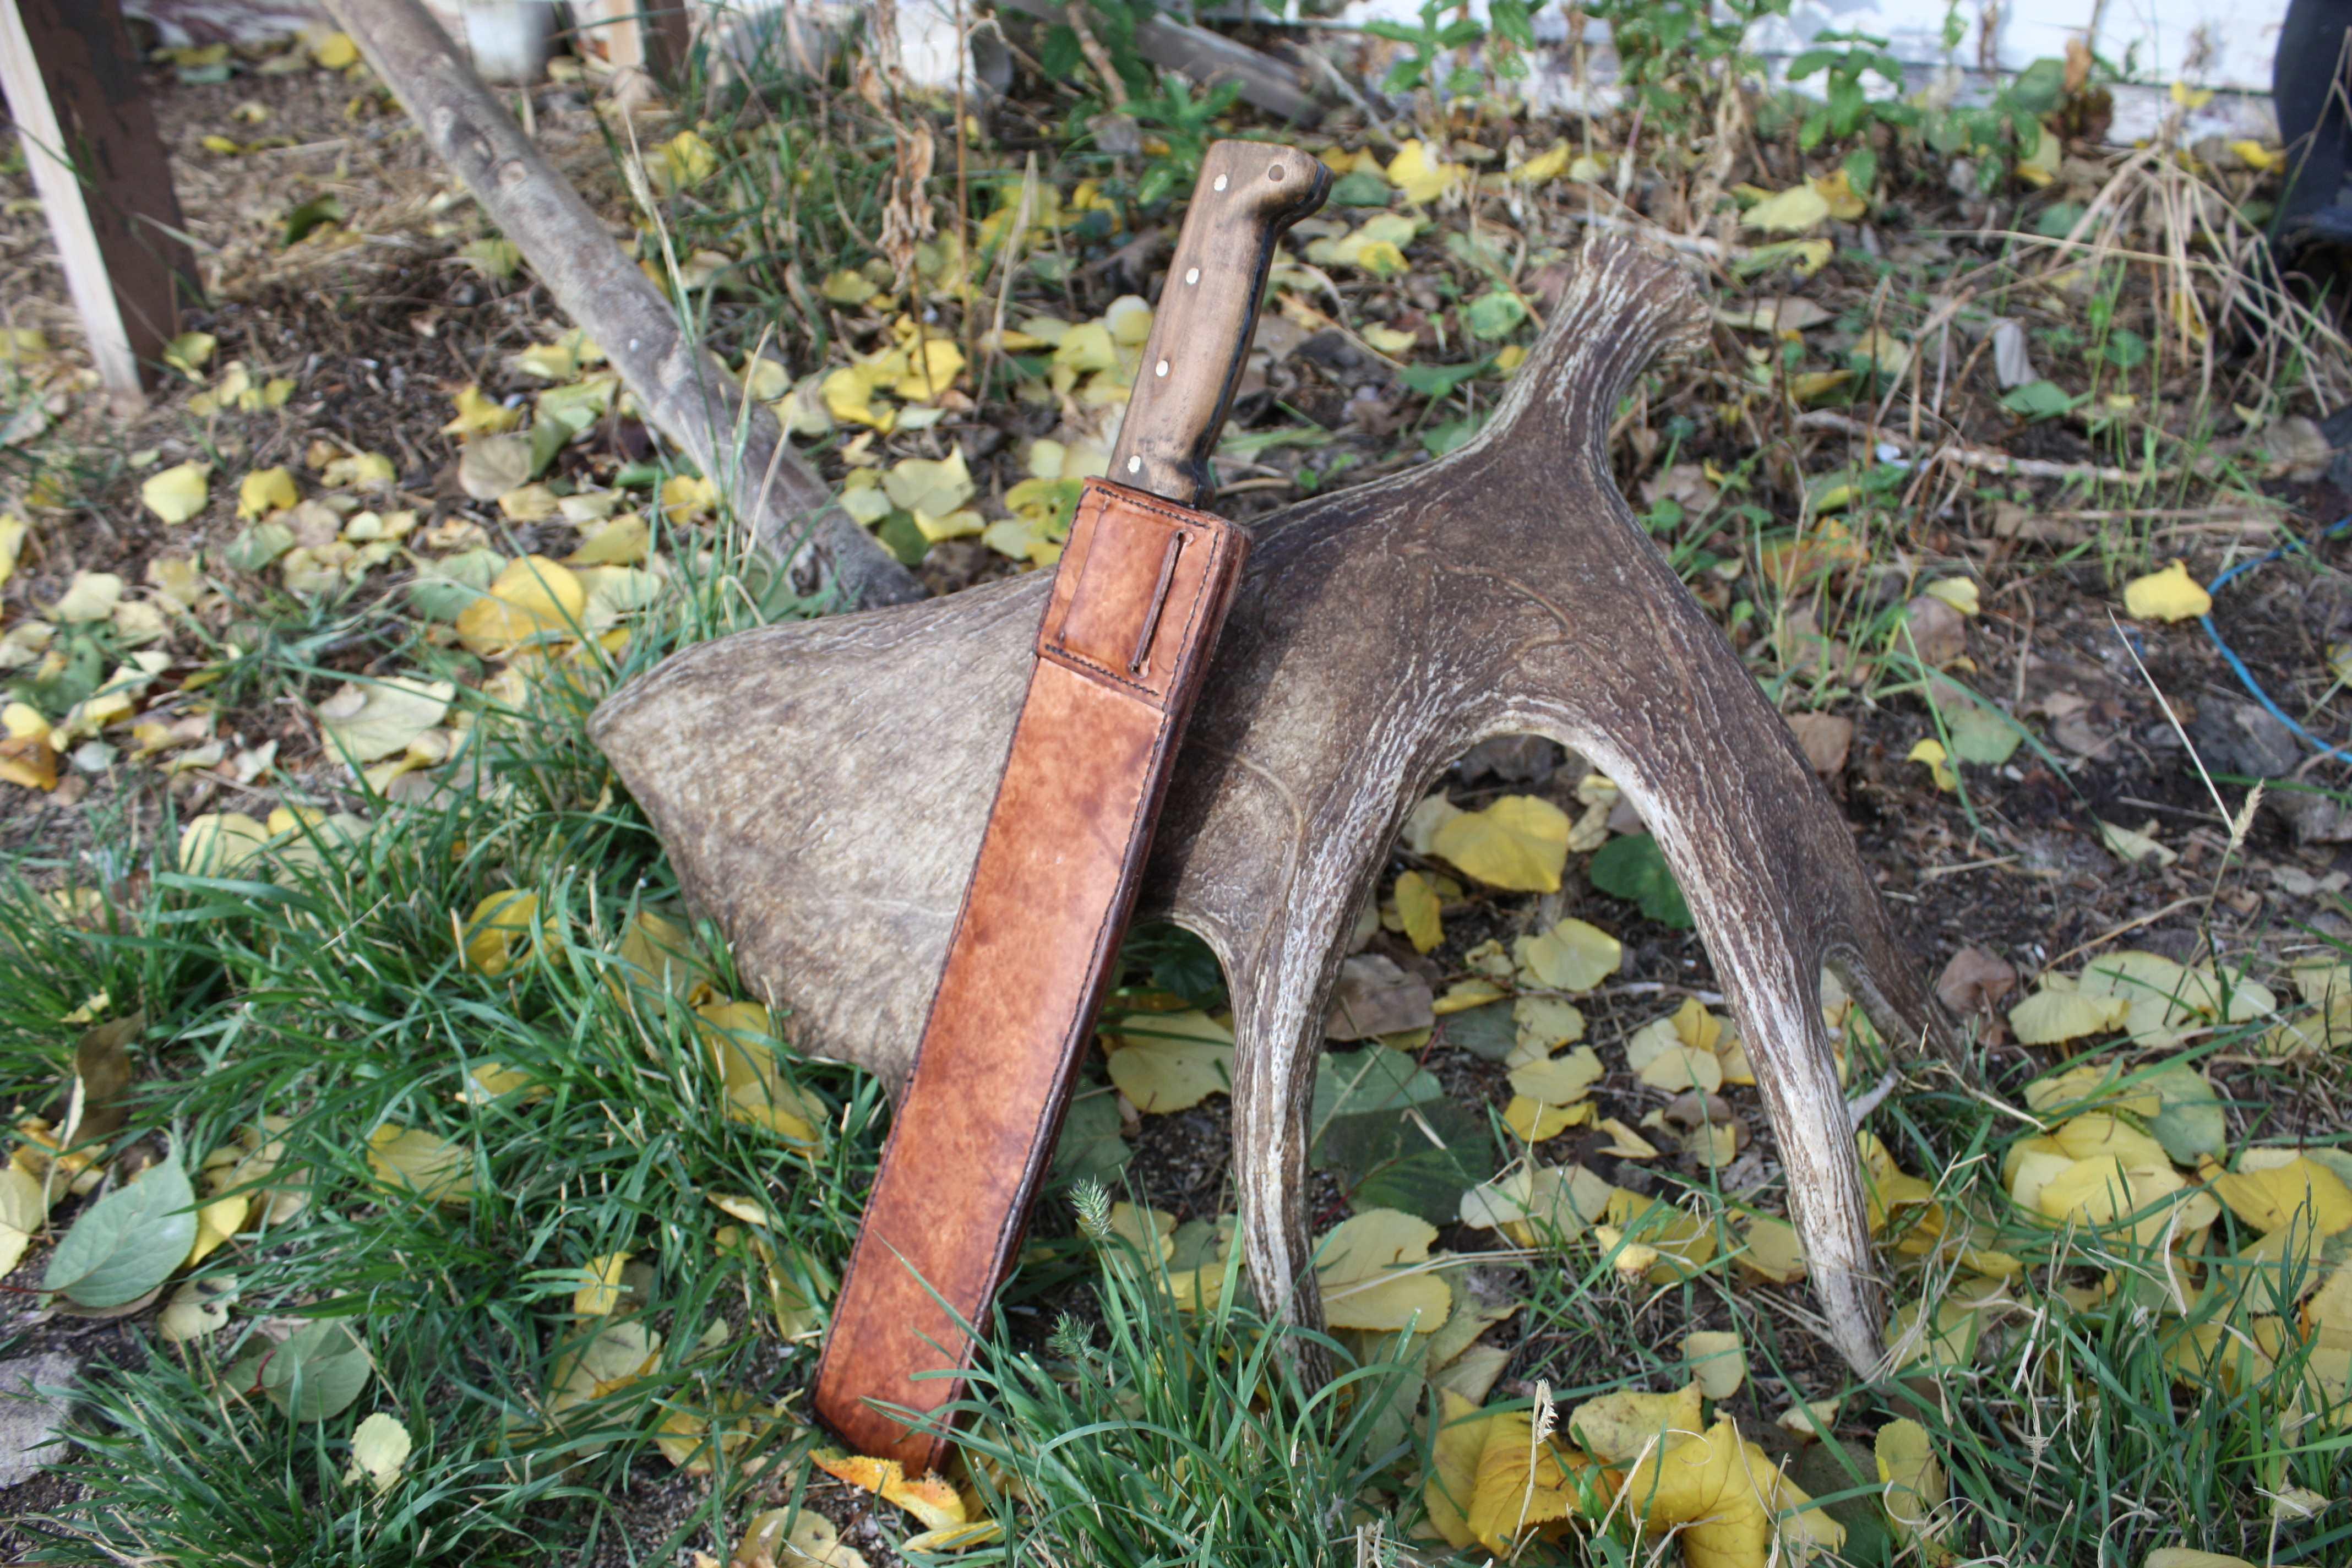
Finally did something!! It's been a while, but it sure felt good to get back to doing a few things. The Machete is 1095, cold blued, with an apple wood handle, and a 13 1/2" blade. The sheath is about 7/8 oz, Mottled bison brown stain, and finished with Feibings Mink oil. Dang, when I pulled that leather out of the box and that wonderful aroma of tanned leather hit me, i was hooked again lol.
- Today
-
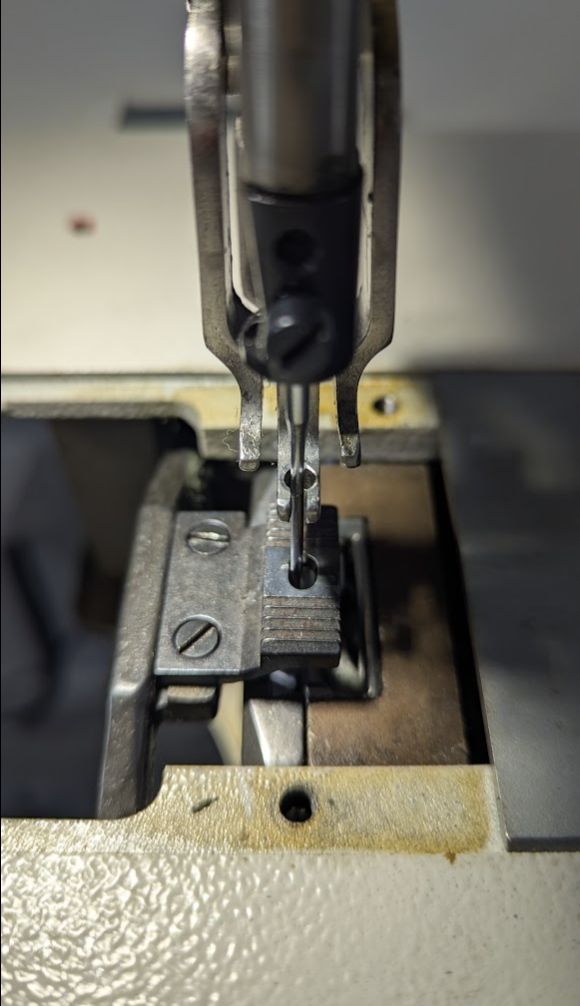
Hello CowboyBob, thank you very much for this documentation. The needle to shuttle clearance seems fine, I believe the needle to hit the feed dog, as I can clearly see impact marks on the feed dog and also if you check on picture you can see that needle is too much on the left when going through feed dog hole Also, mine being a flat bed version, so I believe adjustments will involve parts that might differ
-
Your designs are unusual and memorable. One does not forget them. :-)
-

Hello from Ukraine – Leather Pattern Designer
BlackDragon replied to Olena TS's topic in Member Gallery
Welcome to the forum! These are neat designs. They would sell fast at local fairs. -

Hello from Ukraine – Leather Pattern Designer
GatoGordo replied to Olena TS's topic in Member Gallery
I really like this bag but would prefer a cat rather than a dog. Any plans to create a feline version? -
Here's how to adjust needle to shuttle clearance 441 needle to shuttle clearance adjustment.pdf 441 Engineers manual.pdf
-
Hand sewn versus machine sewn, hand first.
-
Hello, I bought a second hand HighTex CB243 which I believe is a Juki TNU-243 clone. The machine stiches great, timing seems OK but I keep braking needles again and again... At a point where I am reluctant to use the machine It looks like either feed dog, either needle bar is off and I believe this to be the origin of my braking needle issue... I looked into TNU-243 service manual because machine did not come with any manual and it does not show how to move from left to right the feed dog or the needle bar.

-
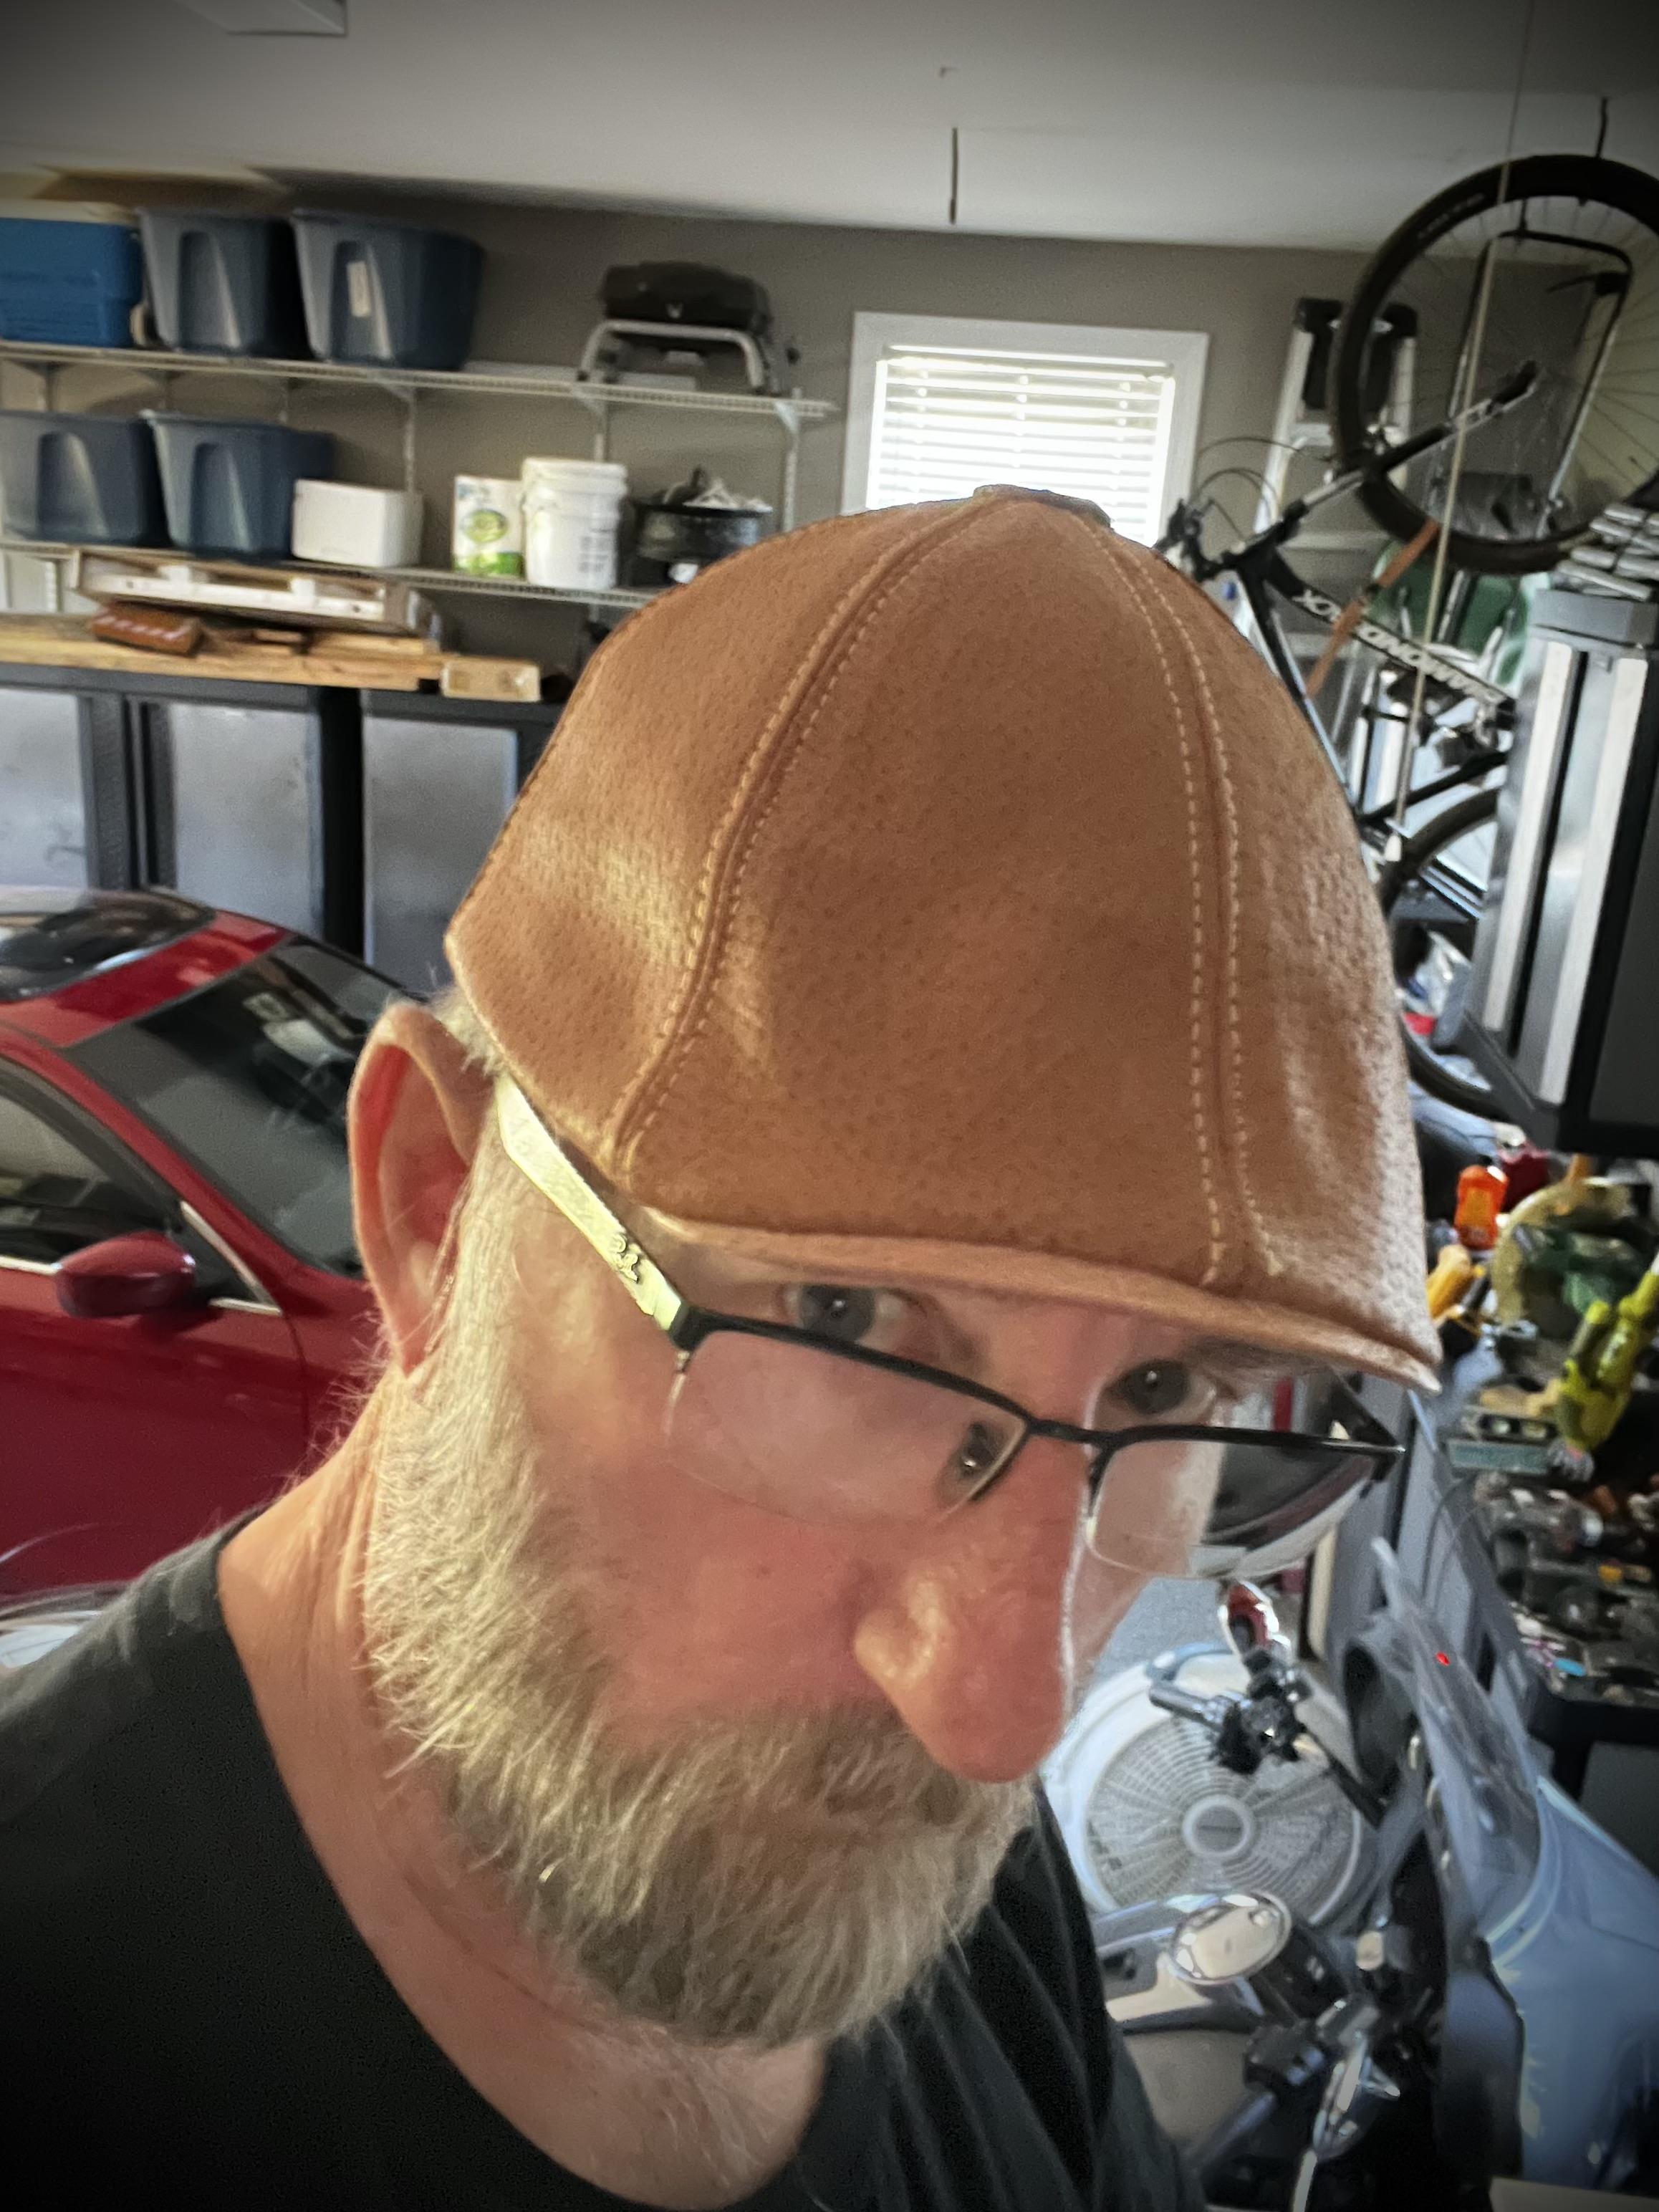
Ha ha ha…..thanks I’ll watch out for slippy ground. For now I’m just making hats with my machine, I used to do them by hand but punching hundreds of holes per panel in a 7 panel hat was too much. Today in the mail I’ll be receiving some 90/40 and 100/16 needles. Thanks again! Dano
-

Hello from Ukraine – Leather Pattern Designer
Olena TS replied to Olena TS's topic in Member Gallery
Thank you! Yes, I also have a shop on Etsy: https://www.etsy.com/shop/LeatherPatternTS -
Hello from Ukraine – Leather Pattern Designer
Olena TS replied to Olena TS's topic in Member Gallery
Thank you for the warm welcome 😊 -
Bearing in mind that I've never shipped such a thing, I'd want to palletize it on its side, strapped and padded. The arm on top would be off and probably the hand wheel and pulley. I'd be calling LTL carriers. I *think* FedEx has a freight division. Remember if you go this way, it'll be moved around by forklift so build blocking and bracing to withstand such handling. When I received my large 441 clone, it was completely set up, standing on a pallet with wooden blocking and bracing, Styrofoam, shrink wrap and every manner of way to keep it safe. So, it's done all the time. Yellow Freight hauled mine from Texas to Maine. There's a type of pallet called, I believe, a CHEP pallet that's much stronger than a regular pallet. I'd be on the lookout for one. They're used regularly in grocery stores. a quick image search will turn up plenty of pictures. I would avoid a plastic pallet. They're strong but quite slippery. I bet we'd all be interested in pictures and how this goes for you.
-

Just got a Consew 255RB. It needs an oil pan.
Constabulary replied to Stagesmith's topic in Leather Sewing Machines
is there an oil pump on the underside or are there hanging wicks into the pan that suck up oil (I don´t think so)? So if not it is a manual oiling machine (basically). I think the hooks run in an oil bath but is is a closed system. I think you can use random oil drip pans. But maybe you can post pictures from the underside of the machine. -

Just got a Consew 255RB. It needs an oil pan.
Stagesmith replied to Stagesmith's topic in Leather Sewing Machines
The Consew part number is #15080. I can find a few listings for it but nobody seems to actually have one. it is a full pan not a drip tray. The 206RB is just a tray, but the 255RB is more like a gas engine oil pan. -
I have shipped a patcher from Germany to the US in a custom build crate but that was just the head w/o stand and it is A LOT OF work cause you have to do a lot of internal bracing so that the machine cannot move round in the crate. BTW shipping the DIY wooden stand makes no sense. Not worth it IMO. Other that that look for a double or triple wall cardboard box large enough for the machine + 2" - 3" space to all sides of the machine and fill the space with cut so size Styrofoam boards and bits. Do not use bubble foil or Styrofoam chips. The machine needs to sit very tight in the box. To save on the box size (shipping size) I´d remove the arm lever (just two pins that go out from rear to front) the hand wheel, front wheel hub and wax pot. Maybe the from tension and lock screw too (better safe than sorry). I have shipped machines with UPS to the other side of the pond and they all arrived intact but I have some experience in shipping & packing up heavy things.
-
Just got a Consew 255RB. It needs an oil pan.
Constabulary replied to Stagesmith's topic in Leather Sewing Machines
I think it uses just a "plain" drip pan and a a drip can with oil reservoir, right? I guess the one for the Singer 211 should work but I´d check with a consew dealer they may have one or can order the correct one. See pictures here: https://consew.com/products/consew-model-255rb-3 Or check the parts list and google the parts number and machine model -
 Kelley joined the community
 -
I just got a Consew 255RB and I'm trying to get it set up, but it uses an internal oil system that requires an oil pan to catch the run off. I can't find one for this machine, but since everything is a copy of a Singer I'm wondering if there is another pan that would work. I'm seeing lots of Juki pans on eBay. I have a metal fab shop and could make one from scratch, but it's going to take a while to fabricate that shape. Also the real ones have the pass thru for the knee lifter. Any help would be appreciated
-
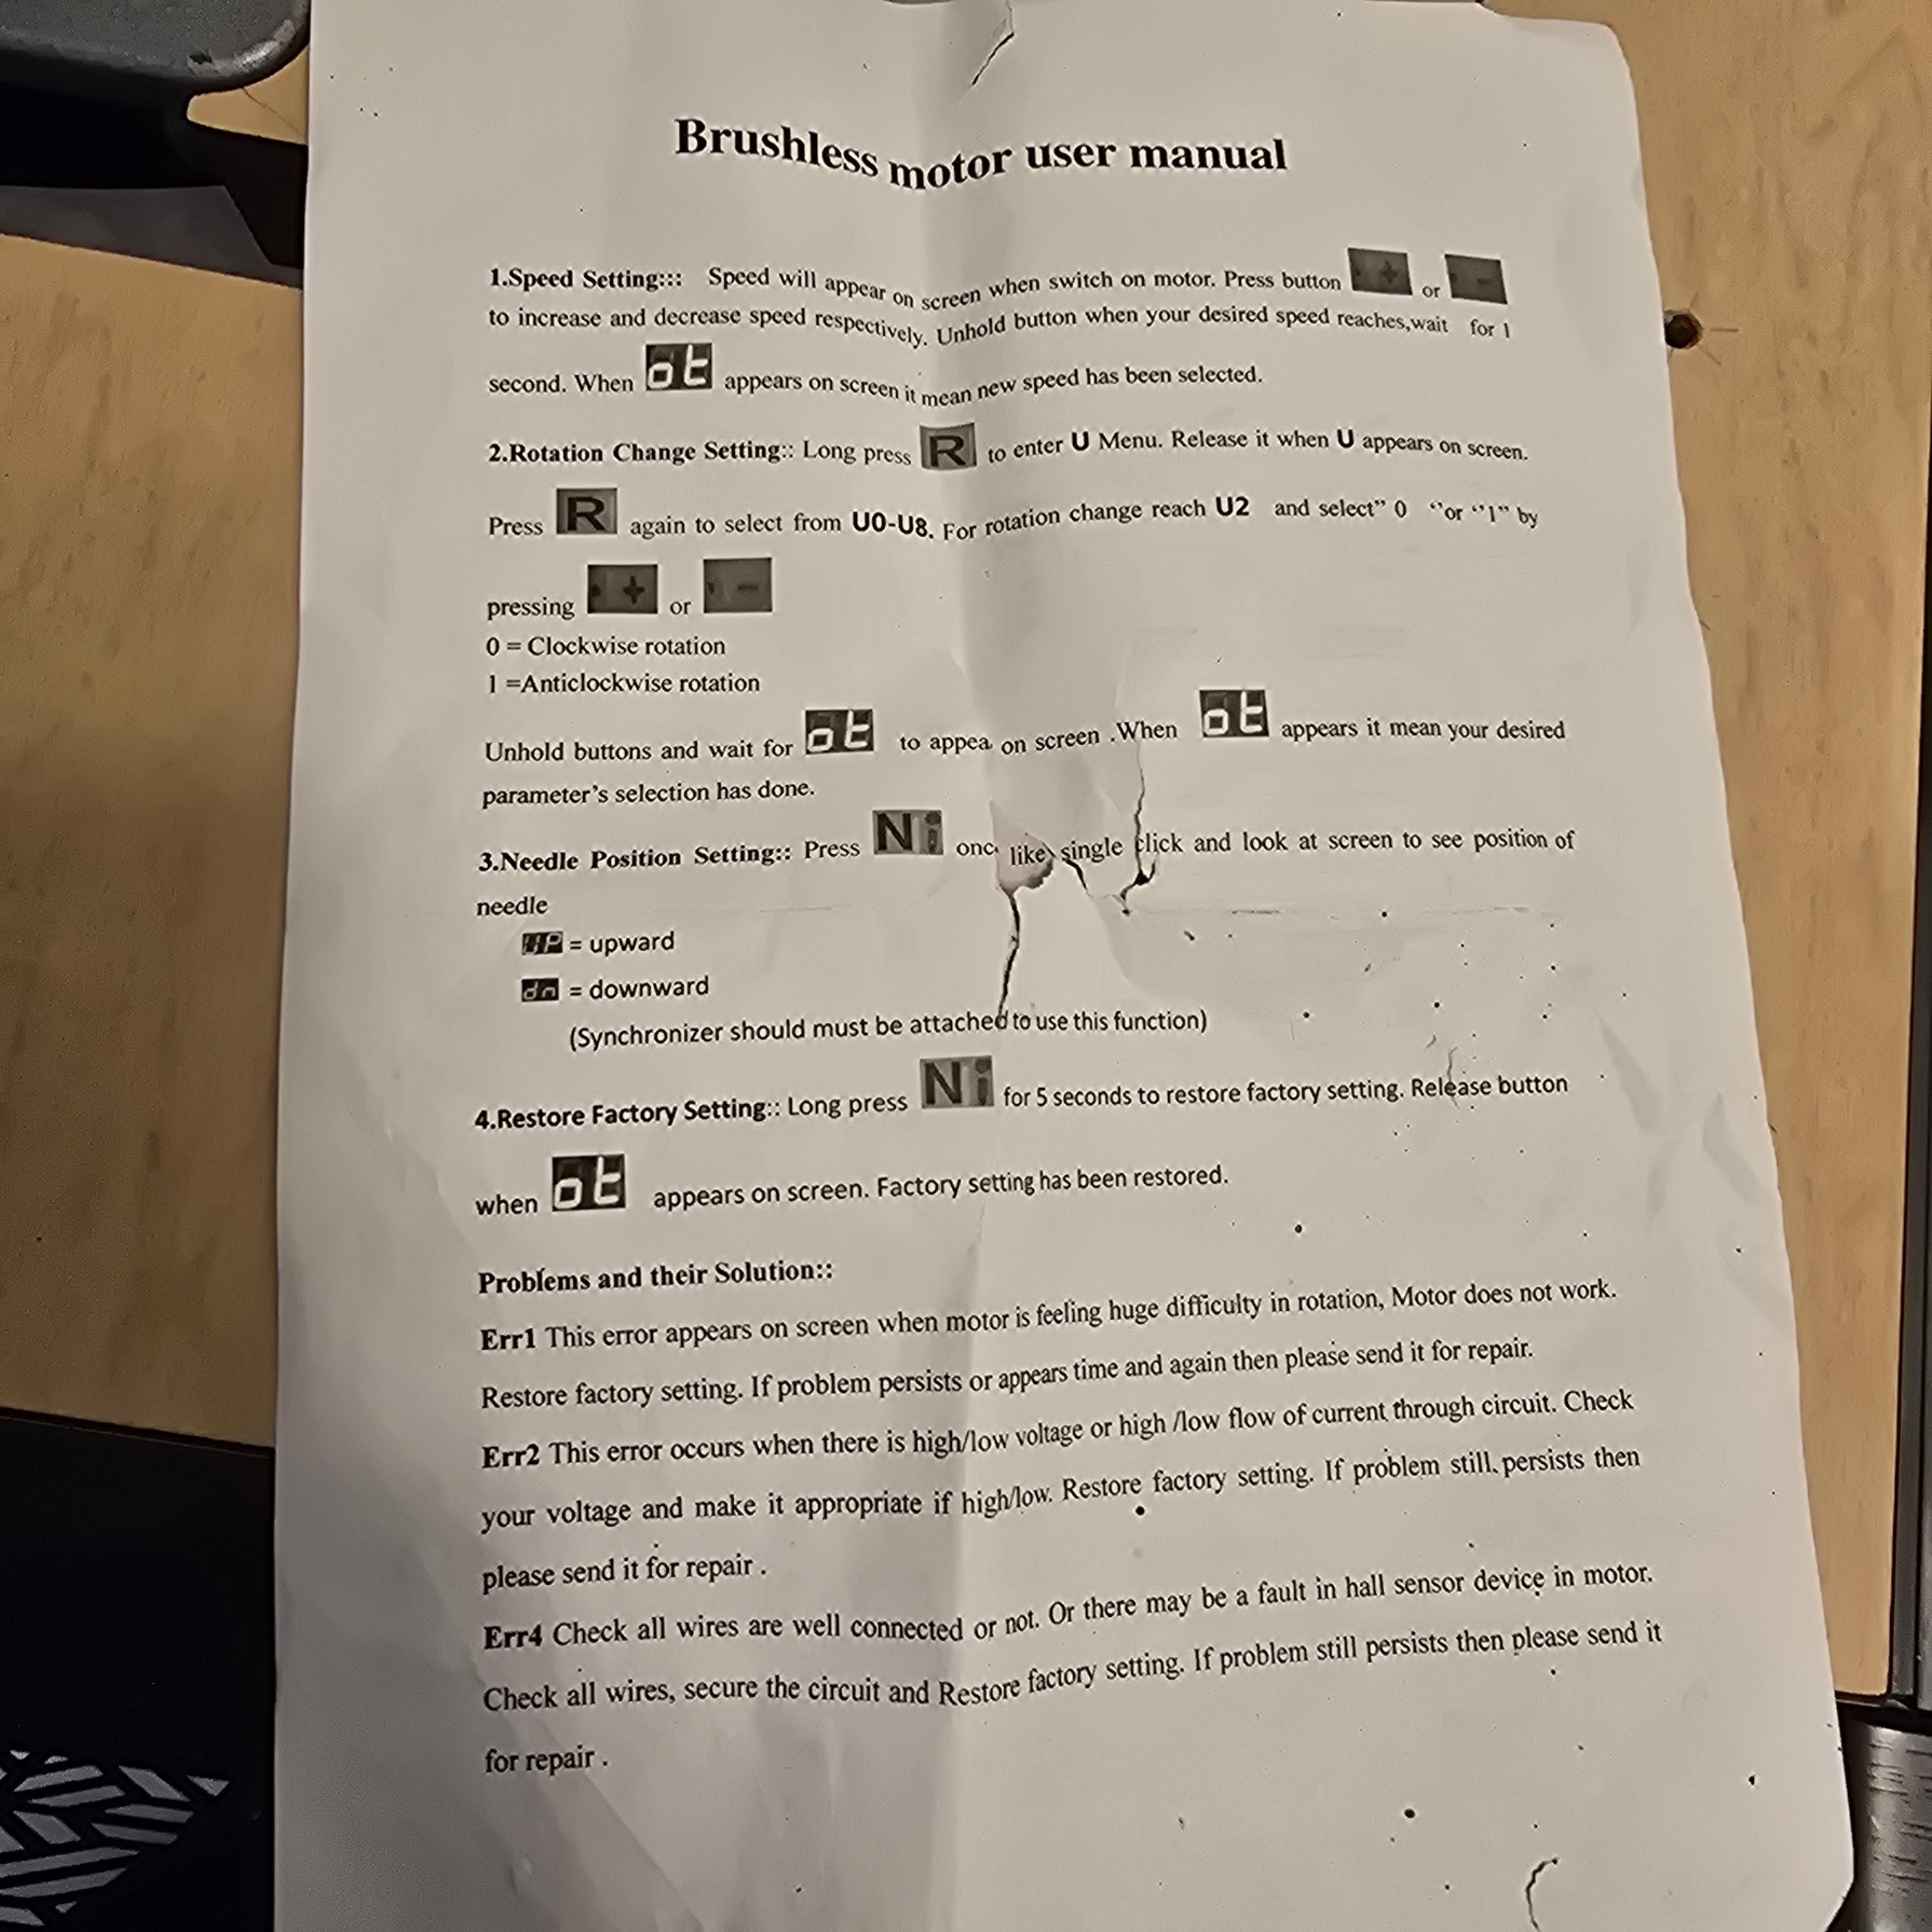
Wowza. Even better deal 😀 Here are my notes from my "consew" digital servo controller. Based on my notes, I'm assuming the minimum speed is not adjustable, so my memory is probably wrong there. Default settings: U0: 45 | (Maximum "maximum" speed that can be obtained by using the arrow keys by end user) U2: 1 | (Reverse) U3: 12 | (No discernable difference, though the PDF calls this the "location parameter") U4: 0 | (Delay between pressing full throttle to when it instantly goes to full throttle.) (Note this is not the "slow start" I would prefer) U5: 8 | (No discernable difference) U6: 5 | (No discernable difference) U7: 0 | (Not adjustable) U8: 0 | (Not adjustable) From PDF that used to live here: https://www.consew.com/Files/112347/InstructionManuals/CSM1000.pdf CSM1000 Dual Display Controller Operating Instructions 1) The Speed Setting; UO Press R; Display UO, Press M to adjust; Display the number 5 to 70; {5 represents a minimum speed of 500 rpm, 70 represents the maximum speed of 7000 rpm}. Example 1: You need 3500 rev/min Press R: Display UO; Press M to adjust; Digital display 35; Press L to save. Example 2: You need 500 rev/min Press R: Display UO; Press M to adjust; Digital display 5; Press L to save. 2) Upper and lower needle position set; U1 Press R; Display U1; Press M to adjust; Display number 0 to 1; {0 for the next stop pin; 1 for the stop pin}; Press R to save 3) Reversing settings; U2 Press R; Display U2; Press M to adjust; Display number 0 to 1; {0 clockwise; 1 is the reversed}, Press R to save. 4) Location parameter setting; U3 Press R; Display U3; Press M to adjust; Display the number 8 to 20; (The smaller the number, the more slowly, but the positioning is more accurate; The bigger the number, the faster the location, the more not allowed), Press R to save. 5) Slow start setting U4 Press R; Display U4; Press M to adjust; Display the number 0 to 9; Press R to save 6) Other display instructions: {1}When the motor stall failure occurs, when it display E1, the motor does not work, press the R key to recovery; Many times, it is recommended to reduce the load or contact your dealer. {2}When the stream or under voltage fault occurred, when the motor display E2, the motor does not work, press R key to recovery, many times, it is recommended to reduce the load or contact your dealer. {3}When the motor has the Hall signal error, it display E4, check the motor and controller plus connection is intact, press R key to recovery many times, if not, please contact your dealer. 7) Restore factory settings: In the U mode, press the M button for 3 seconds or more. The set parameters are reset to the factory default state. ®
-
It has a chain to a knee lift, pretty cool. I attached the single document that came with the servo. I'll look into the pulley, thanks!
-
The guy I bought this from seemed to think it had reverse, but I was pretty sure these didn't have that. He works as an upholsterer but hasn't used the machine in a while, so I wonder about that. I'm happy to do the poor man's reverse for now, as my projects are not my main income and are sporadic at best. Half the joy of this machine for me is the machine itself and《tinkering》:)
-
Thank you!
-
Glad you got a machine. Now you are going to have to learn the "poor mans reverse". Three stitches forward, turn the material 180 degrees, sew three stitches, turn the material back 180 degrees and do your seam. Rinse and repeat at the end of your seam. This method will lock your seam at the beginning and at the end. kgg
-
I moved your post to leather sewing machines. I think the guys here will have more experience shipping and transporting sewing machines safely.


.thumb.jpg.6e903dd66163ad5672f00f144058c571.jpg)