All Activity
- Past hour
-
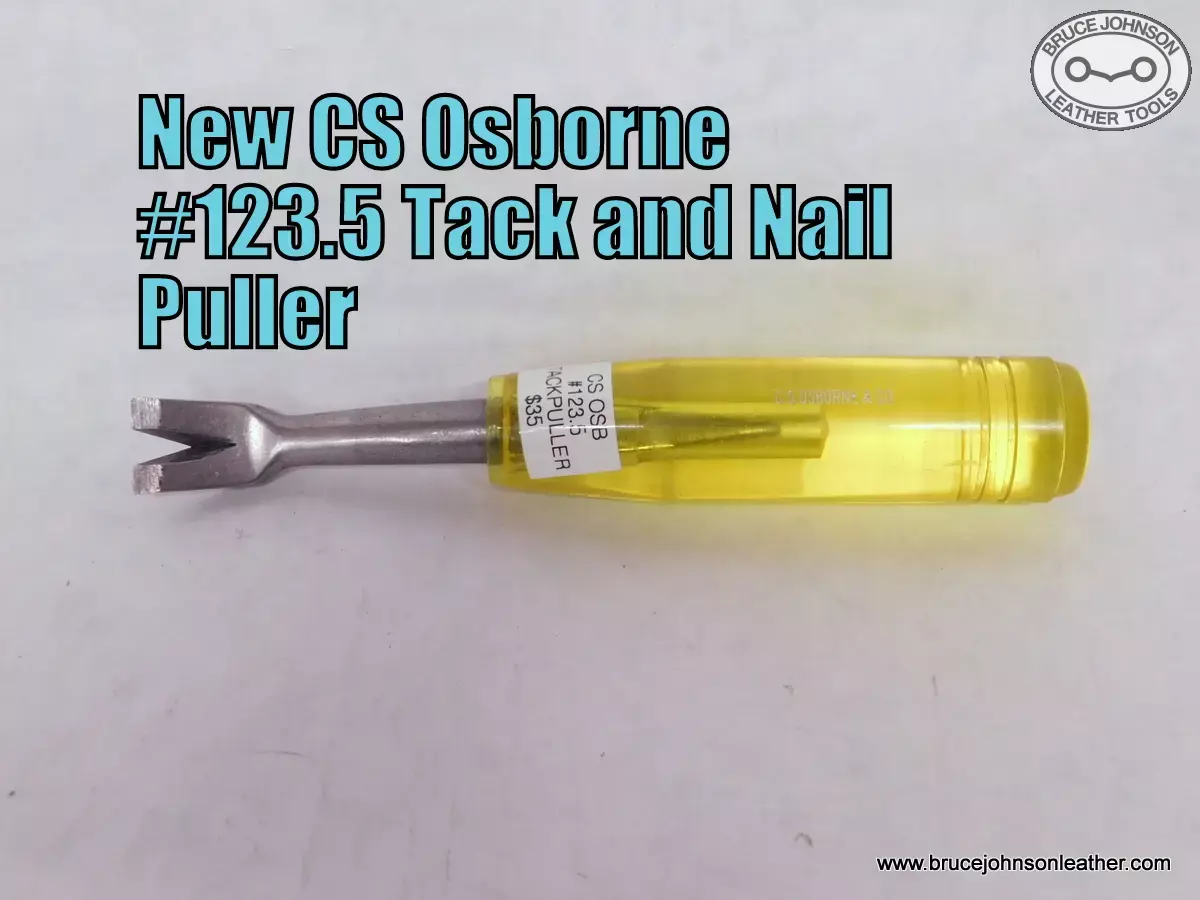
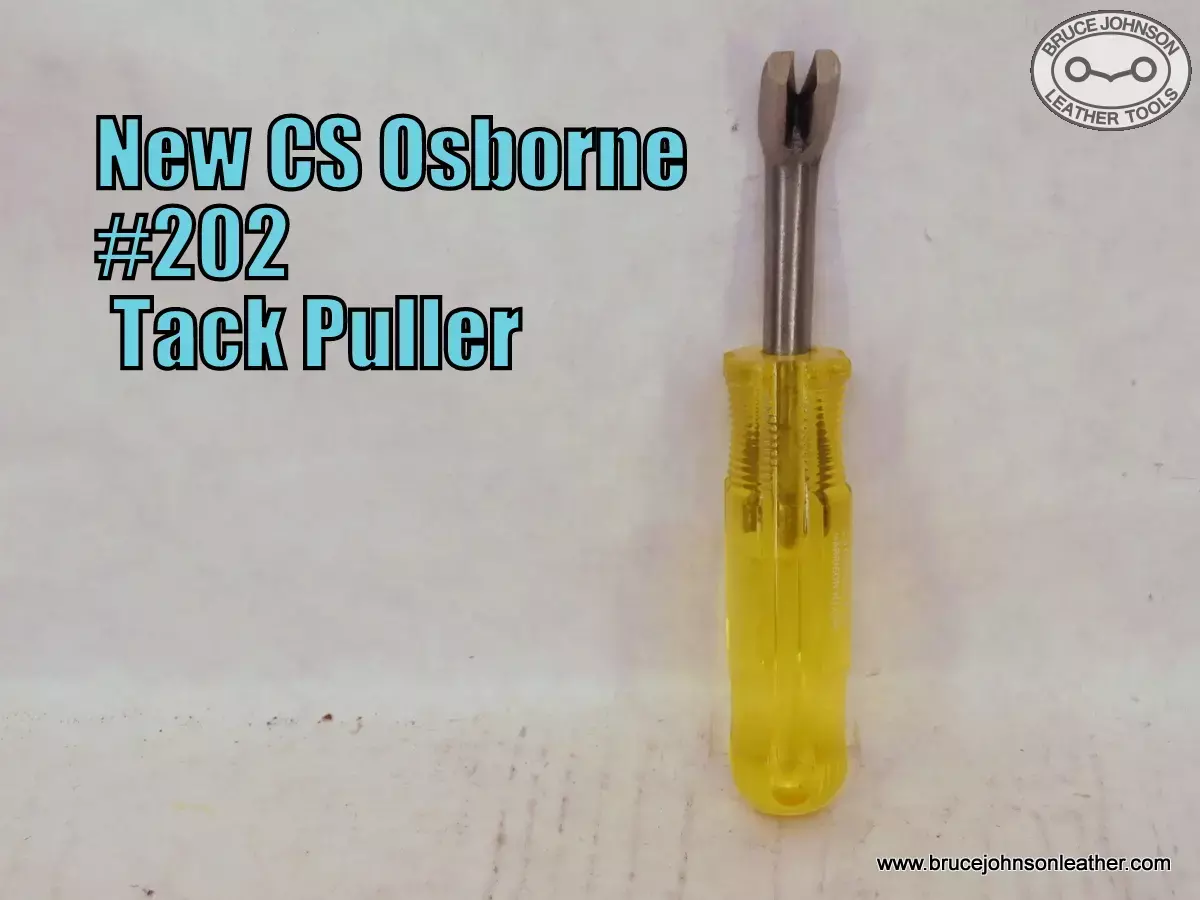
Yes You can clean and condition a saddle without totally taking it apart. If that is the purpose then you are as far was you need to go in the front end. If you are taking apart totally, then to get these rigging nails off then first remove the screws. I always have better luck lifting the nails from under the leather with a heavy tack puller. Once you get them lifted a little then you can go on top of the leather to pull them the rest of the way out. Otherwise you can chew up the leather around them trying to get that first bite. Here are the two I like and now carry for sale. If they are ring shank nails, be ready to say bad words and all bets are off.
-
Well, it's good to see you again. Are you still doing leatherwork? Life does come at us fast. ~J
- Today
-
Thank you
-
Great advice, @Dwight Thanks!
-
This tack puller has worked well for me on English saddles. https://a.co/d/hplCLS2
-

DIY servo motor with wide speed range
nejcek74 replied to Gymnast's topic in Leather Sewing Machines
At extremely low speeds the power of the motor is extremely low, so there is no point to engineer a motor that would be extremely powerful to overcome that. It's better to use a different gear ratio. In the production operators are skilled, and speeds are high. With a combination of needle positioner and other automatic controls low speeds are even less needed. Outside of repairing stuff and hobby users there is not much need for such motors, we should be lucky for that what we have :)))) -
You can add just one tiny thing to make the whole rig just a bit sharper looking. Whether you use rivets or chicago screws . . . put them thru the outside piece of the leather for attaching the little belt around the holster . Doing that will get rid of the unsightly screw heads and rivet heads on the back side of the holster. Not a serious critique . . . just one of those things that will separate sellers . . . especially if you are at a show or something . . . where others there are showing their wares. You can show that your holster is "cleaner" looking . . . which can result in an extra sale . . . and a slightly higher selling price. Also if you use a buckle . . . put a keeper on the little belt . . . or use a closed buckle . . . makes it look more realistic . . . and again . . . just one of those things that sets you apart from the run of the mill makers and sellers. Always remember that even the slightest "upscale" idea can push your wares out if front of the crowd. John Bianchi here in the states was the guy who perfected that idea. He could almost have designed a cardboard box to carry your gun in . . . and would have had 100 sales sight unseen. May God bless, Dwight
-
Years ago I never paid any attention . . . but the producer and / or director of Bonanza and a few others . . . must have been anti gun people. None of them carry even one extra bullet . . . blank belts all the way around. Didn't notice it until I got into holster making . . . then started watching . . . goofy if you ask me. May God bless, Dwight
-
 Thanks for this I'll have to do more research on this. Just to be clear this is for keeping leather in a museum/conservation environment, not a working environment.
 -
I actually watched a video of his to get started. I'll search his YouTube page for more that get into details.
-
Cooling, you can run a servo at very low speed (its just a motor), but you have to current limit so you don't over-heat it, and when you current limit, you lose torque. By requiring a minimum start speed, you assure that someone can't run at very low speeds for any length of time and destroy the motor. At that minimum speed, the cooling design parameters are met. (A stepper motor is designed to remain stopped with the current being sufficient to hold the designed load and not destroy itself, though many systems drop to a lower current when stopped, as you don't usually need the full current to hold the load when stopped. Many DC servo systems do the same when the load is stopped by current limiting. That is not necessary on a sewing machine and would be more expensive to implement.)
-
Don Gonzalez has a couple videos on breaking down a saddle and cleaning. He gets into a lot of detail and shows you the tools he uses, some he made himself. https://www.youtube.com/@DonGonzalesMaker/search?query=breaking down a saddle
-
I am deconstructing an old saddle of mine. First time, no help but what I get online. Are there tricks to removing the tiny nails that are in old thin leather without tearing it? Also, my saddle's skirts are sewn together. I was advised not to cut them loose and just take it apart together. Since I have never done this before, I don't know if I will be able to really clean and condition the leather unless I cut them loose. Any advise?


-

Gunsmoke rig
chuck123wapati replied to Dwight's topic in Gun Holsters, Rifle Slings and Knife Sheathes
i haven't had a Matt Dillon rig since i was about 8 or 9 lol I still have my Fanner 50 but the holster is long gone. It sure sounds like a fun project. He shot someone every week so he needed a lot of bullets. I still watch the show and check out the holsters. Some of the bad guy holsters are pretty cool too. -
Glad you were able to stop by. Seem a little slower on here than it was several years ago. Lots of sewing machine questions.
-
Very clean looking. Great job!
-
He probably needed all those bullets to help make him look more regular sized - He was nearly 6'7" tall!
-
 SherriTRN joined the community
 -
I have had several industrial machines over the years, mostly Singers of various types (eg 166, 154 etc) a Pfaff and a Seiko, I've lifted them and moved them around while building/fitting tables and never had any trouble lifting them - and I'm not particularly strong. I've just about met my match with the CB4500, however!!! The arm through the gap, as Al suggested, has worked for me.
-
What do I want to make? No idea yet. I've watched many videos on how the die steel is shaped using bending tools/machines so figured I needed one. Me being me means I have to make one. The concept is simple enough it just needs three things - a means of applying sufficient force to bend it, (force applied to the end of the sliding tube by a lever/handle), a means of keeping everything square/vertical while bending it (hence the square tube to prevent any twisting of the die) and the right shaped dies to get the bends (right angles, curves etc). The shapes needed can be determined by watching the videos. Bear with me, hopefully at the end you will be able to appreciate the full extent of my genius - or realise that I just confirmed I'm an idjit with no idea!
-

Sewing machine stitches slanted-CB4500
Wizcrafts replied to Crest's topic in Leather Sewing Machines
Please look at the package that the needle came from and let us know the designation on the needle. For instance, a System 794 or 7x4 in Schmetz S Point, or a 4-sided Diamond, or 3-sided Tri point, or an LR or LL twisted wedge point. The first 3 give a straight stitch line, but with a different visual front to back length on top. The last two are made with a left or right twist on the tip of the needle. While the needles can lay the thread differently based on their geometry, the only ones that might try to push the leather sideways are the LL and LR slanted wedges. Personally, I avoid slanted needles. My preferred needles either have a diamond or tri point, or an S point, which is an inline slicing wedge. If you sew a stitch line with each of these two types, using the same stitch length and tensions, The S point stitches will appear closer together and submerged, compared to the diamond shape needles. Then, there's always System 7x3 round point needles that poke a round hole and are made to sew fabric and synthetics, and create a straight stitch line with good visual appearance between the ends of the stitches. Now that the needle geometry has been discussed, there is something mechanical that could cause the strip to move sideways as your sew. That is a misaligned or loose needle bar and inside foot mounting frame. Normally, this frame is installed with a minimum of sideways clearance to keep it sewing straight. If some impact knocks the frame alignment out, it may sew off the center line. Look to see if your machine has an L shaped bracket screwed on at the bottom of the moving frame that contains the needle and inside foot bars. If present, make sure it hasn't loosened or moved to the left and giving too much clearance to the moving frame, which might be called the "rock frame," or such. -
 Very interesting... love it!
 -
I can't see your vision dikman. What is it that you want to make with your dies? I used to buy a pattern, precisely cut out the wooden core and using the pattern and the core Id bend it around the nails until it fitted.
-
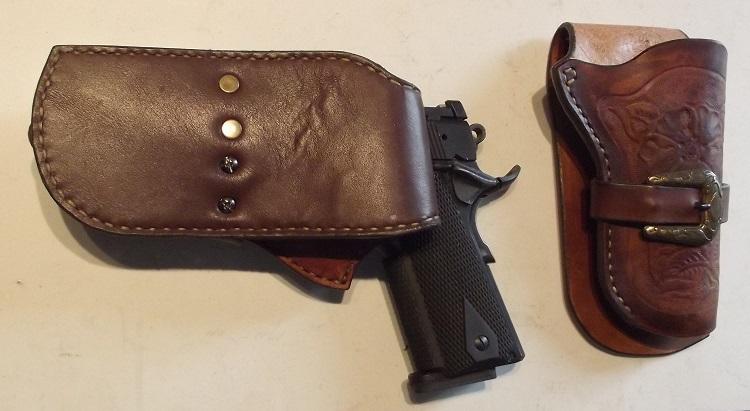
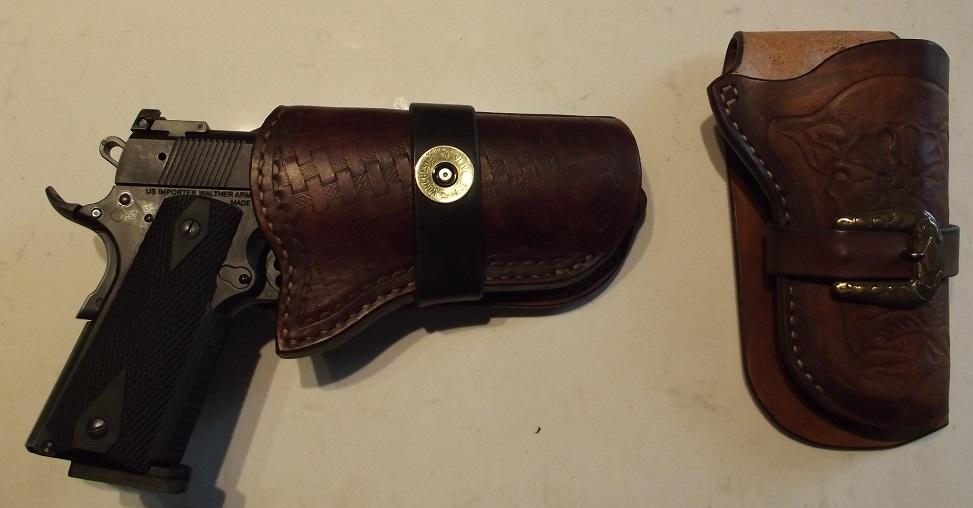
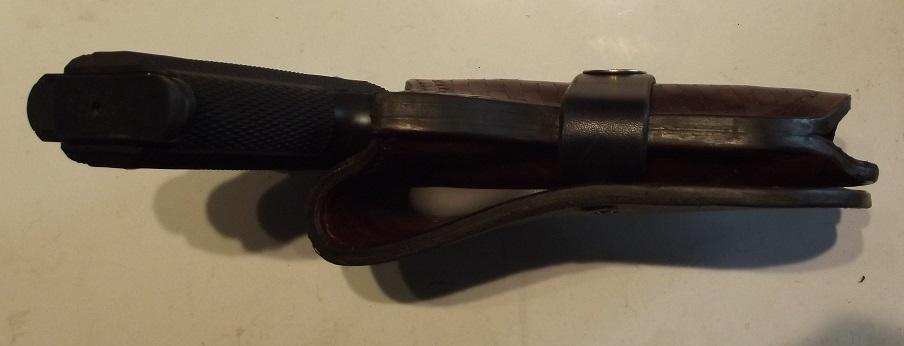
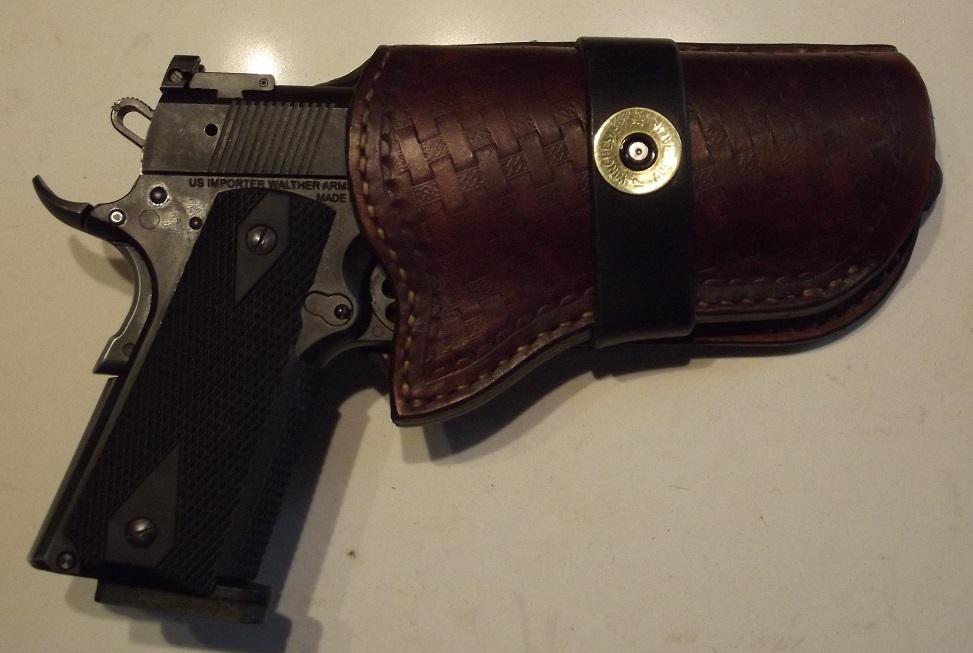
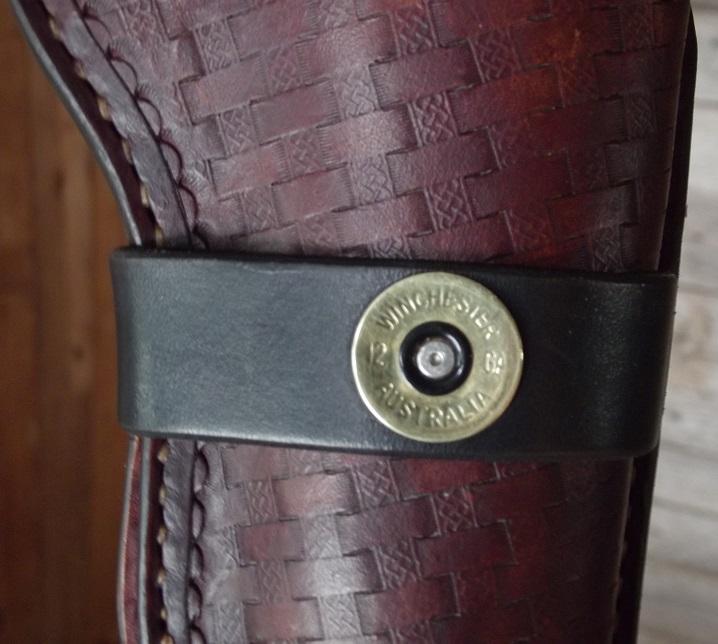
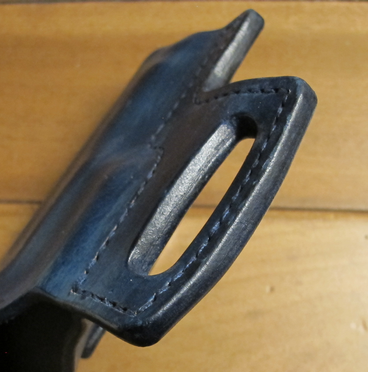
This is my second 1911 holster.....lined / double leather, black strap to match gun, 12ga shell because this is a three gun match...12ga shotgun, 1911 45ACP, and 40 cal + lever gun. Roger
-
If I may make a couple of suggestions? I would suggest that after you have glued-up your holster, you use some sandpaper on a small sanding block to gracefully level the irregularities on the edges of your holster. Use sandpaper wrapped around a dowel for tight curves. I use a paint stirring stick to do inside the belt slots. Then, use a #2 edge beveler to knock the edges off of all outside edges and the long side of the belt slots and sand them again to round them off. Don't try to go around the tiny curve in the belt slots. It is not needed and often does not come out looking good because the beveler gouges into the leather on the corner. Also, it appears that you may be using only a 4-tine stitching chisel to make the holes. I would recommend getting a 1 and 2-tine chisel to enable making more graceful curves in the stitch line. Use 4-tines, only if it is truly for a straight line. You can use a stitching wheel to mark the spacing for stitches on a curve for the 1 & 2 tine irons. Make sure that the TPI (threads per inch) of the wheel, matches the TPI of your chisels, e.g. if you irons are 6 TPI, the teeth on the stitching wheel should also be 6 TPI. So, look for that. After your holster is glued together and the edges are trued-up, set a pair of dividers for 3/16". Place one point to ride on the outside edge of the holster with the other point scribing a line in the leather, to follow for stitching. Do it just firm enough to be able to see it when stitching. This will keep your stitches equal distance from the edge all the way around. If you are using a strong contact cement, like Weldwood or Barge, you may not need to stitch around the belt slots at all, unless you just want to do it for style. I never do and have never had any separation of the layers, even after 5 years of use. Example...
-
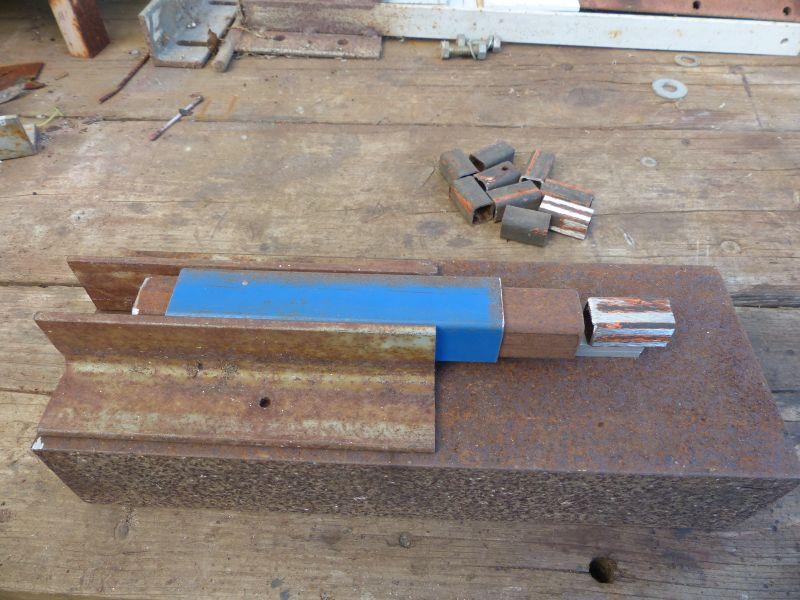
Scratching around and this is what's coming along. the base is a lump of heavy channel iron, the blue piece will be welded to the angles which will give it some bottom clearance, the rusty square tube will slide inside with a handle on the left. I'm not sure whether I will need to make a compound linkage for the handle. The little square piece on the right will hold one part of the die and will slide into the other piece with a locking pin to hold it. This way I can make interchangeable dies. The other half of the die will be attached to round stock and will fit into a hole in the channel base. At least, that's the theory. Worst part of the job next, removing all the rust before welding, wire wheels and sandblasting I guess.