All Activity
- Past hour
-
That is very nice of you @NerdyLeather. It must have taken you so long to do it. Thank you. Thanks for converting it into pdf form @Johanna
-
Ahh. That makes sense. Putting it in the correct position would have validated the use of the ruler though. Surprised they did not think of that.
- Today
-
Thank you.
-

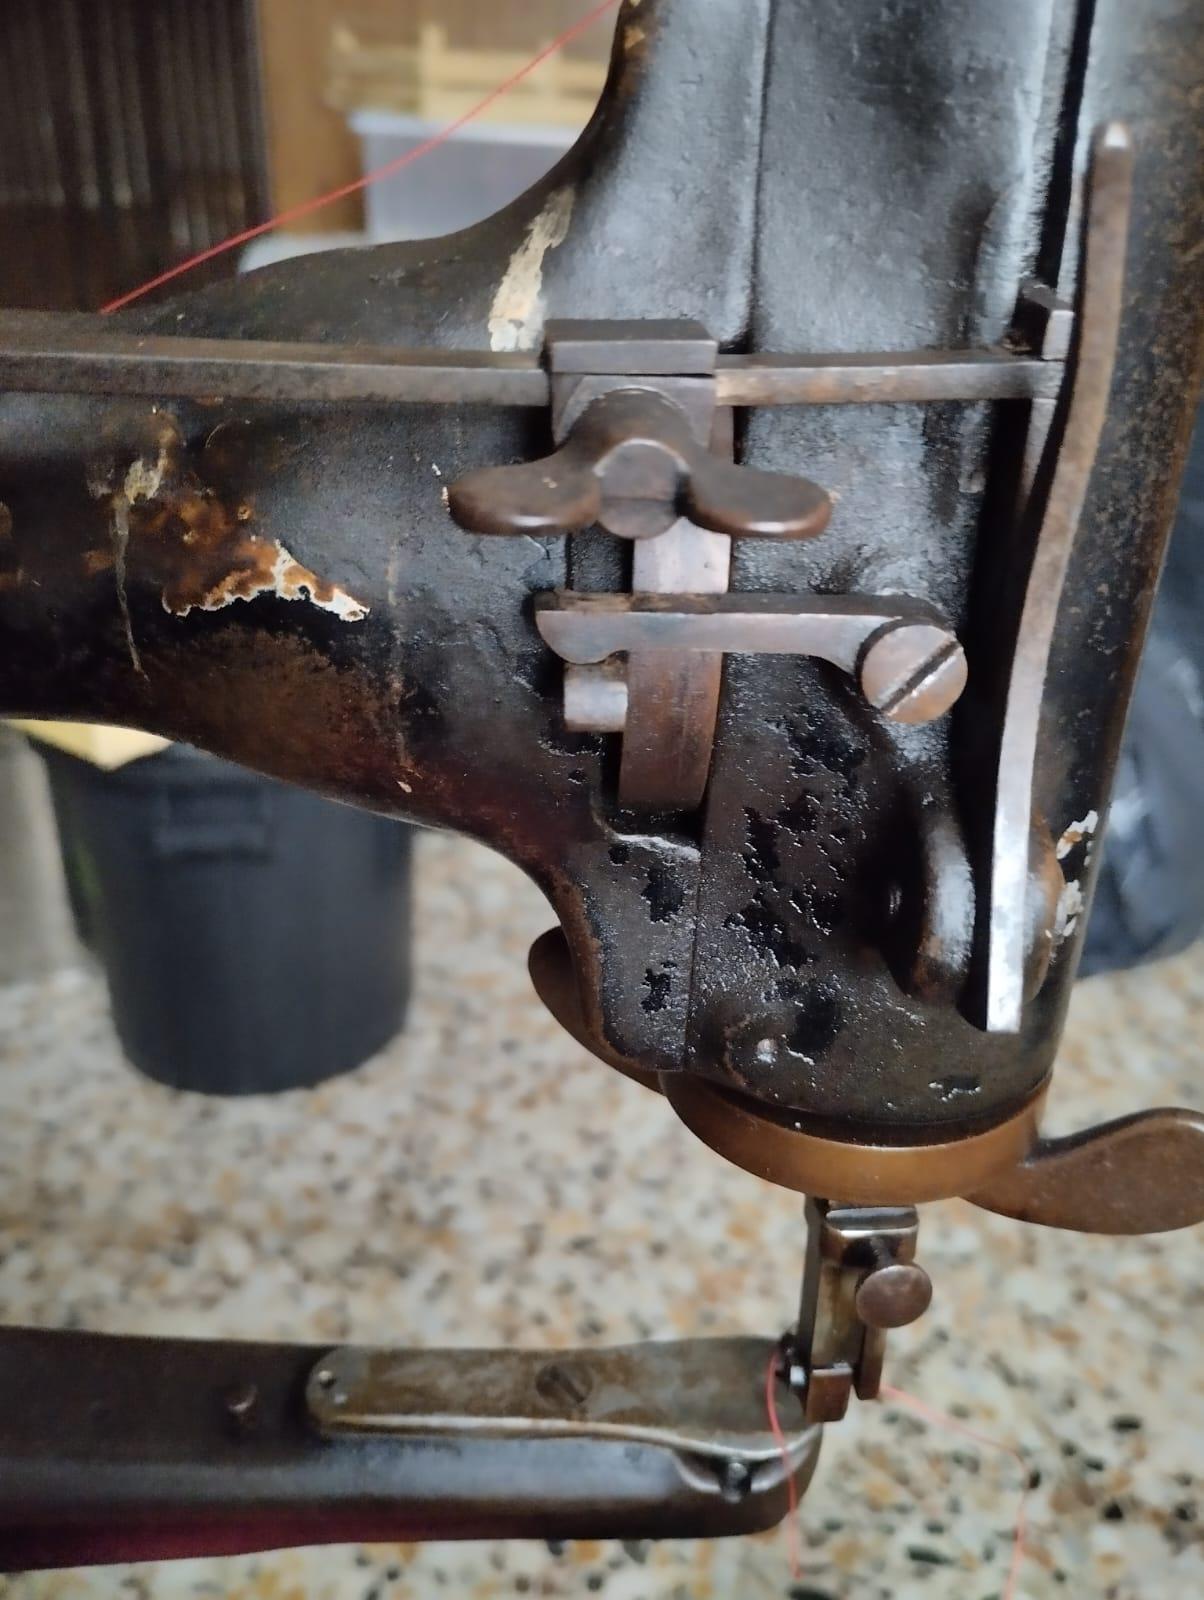
Singer 29k1 presser foot doesn't work
Constabulary replied to MelissaViarengo's topic in Leather Sewing Machines
you probaly have chosen a short stitch lenght or the bell crank lever is worn down (or both). Maybe teeth on the presser foot are dull / worn down. Also theck if the "gib" on the stitch lenght adjuster is installed correctly. See pictures here: -

Singer 29k1 presser foot doesn't work
MelissaViarengo replied to MelissaViarengo's topic in Leather Sewing Machines
Hi! I fixed the tab and I will post pictures but It still doesn't take back the fabric, I tried with two layer of leather and also with only one but it still has this issue. Also I don't know if it has to be like this but the tab moves if I push up the bar with my finger. I don't know if it's also part of the problem but even if it was screwed in the previous position that was incorrect, the tab moved free as I moved with my finger. Also the presser foot is up in the photos.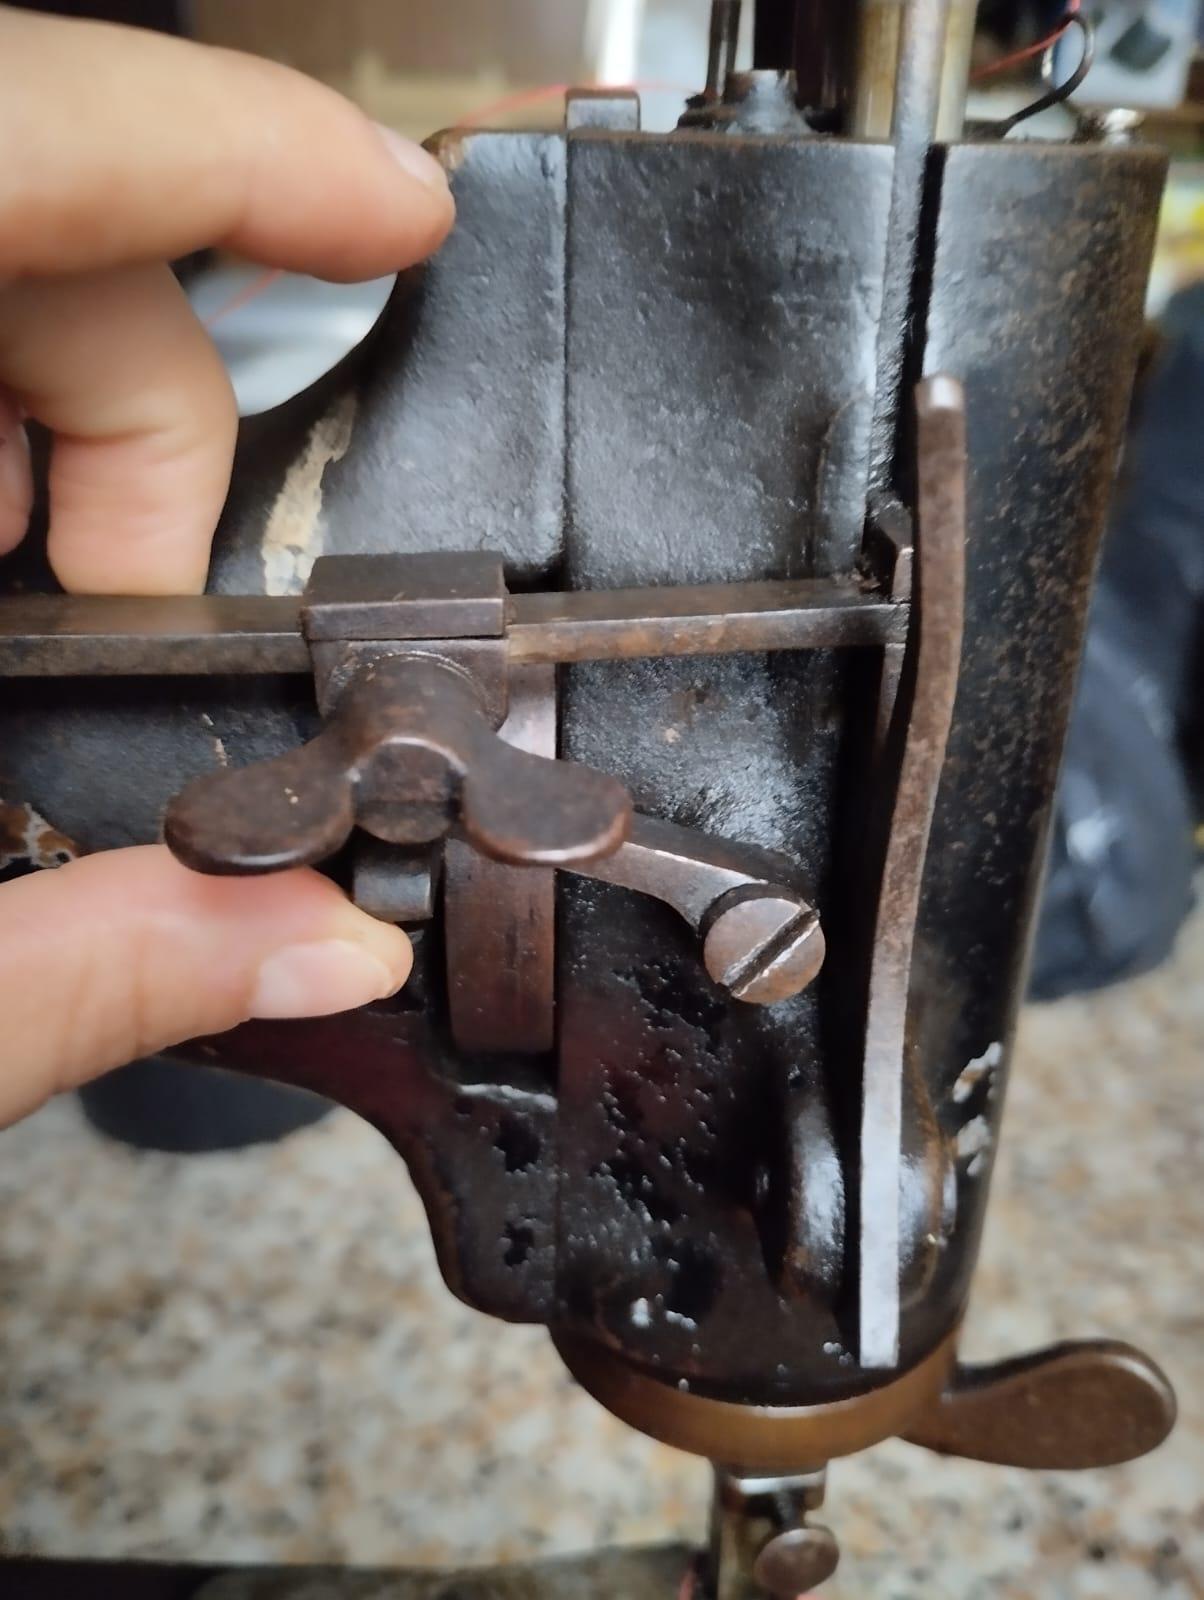
-
Yep, and if you want to cut out multiple items a die will be far more efficient. My 10w cuts leather ok but 'tis a wee bit slow. I'd like a bigger (better) one but the pre-built units, in an enclosure, are for me prohibitively expensive. Anyhow, I've been spending much time (including with Lego ) trying to figure out the best method of getting suitable leverage for the bending end of the jig. I've discarded several ideas (I really wanted to use a cam arrangement but I don't have any steel big/thick enough to make a cam) and think I've got one that should work. I was going to make the handle upright and push forward but looking at a commercial unit they have the handle sticking out the back and you push down, which looks like it might be more comfortable,. Tomorrow looks like welding day.
-
You're quite right, of course, Dwight, but playing Devil's Advocate here, once someone has a clicker die and some means of applying the needed pressure then it's very quick to cut out multiple pieces and you don't even need any power (or computer) to do so. And not everyone wants to mess around with lasers and such, which is precisely why a colleague is teaching himself how to make dies. Me, I've got all that computer stuff, 3D printer, laser and small cnc engraver, but I'm currently getting a headache trying to build a die bending thingy. The only reason is 'cos I haven't got one and want to prove to myself that I can make dies. It's a problem I have, once I get an idea into my brain........ But for getting a design out fairly quickly yeah, your method is great.
-
US Naval Leathercraft Manual - Leather History - Leatherworker.net.pdf I turned this thread into a pdf for those of you who are on limited connections, or want to review it offline.
-
That's cool! Thanks for posting it!
-
I use my Laser Engraver for logos. It won't cut leather efficiently. When I use it I have to leave the room and it's not quick. I know you can buy more powerful Lasers with cabinets that will cut leather but what the cost of those is I have no idea. I do know that whilst you're cutting one I can cut five with these.
- Yesterday
-
This is what we had before Al Stohlman and later, the internet. Thanks for sharing. This brings back some old memories of how little we had before the Reis family bought the Leathercrafters and Saddlers Journal, before the IFoLG. One of the oldest tradecrafts in the world, and it almost died out quietly, except for us diehard enthusiasts.
-
Toxo . . . go to the other thread about clicker dies and no press . . . find my post on page two . . . lots of good ideas for you there. Long and short . . . you can make something much better than a clicker die on your computer . . . which will do a better job as well. I have done both. May God bless, Dwight
-
Answers in no particular order (), a fellow member of my shooting club also dabbles in leatherwork (I think I got him started!) and has found a source of die rule, although only in 1 metre lengths - but it aint cheap! Nor will the postage be! You are right, by the way, about getting things here, it's not like the US!! The banding steel I've got is high tensile and if I use the method of making the shape out of wood (backing block) and screwing the steel band to it I'm pretty sure it will stand up to the pressure of the press. Case hardening, an interesting idea but the steel band is factory coated to resist corrosion and it could be difficult to remove, also heating the thin steel to the necessary temperature is likely to deform the shape once made. Forges, I have a coke and a gas forge so heating it is no problem and I have several different size anvils, rather the problem is how thin it is (0.7 mm), I've managed to burn/melt much thicker stuff in the coke forge!! If the info I found is correct (and I think it is) the banding steel has 0.2% carbon, 1.2% manganese and a small amount of sulphur. So tough, ductile but can't be hardened, and it's very springy. Anyhow, I appreciate you taking the time to think of possible solutions.
-
Let me ride this rodeo out of town . . . and start a new one. You obviously have a computer . . . and if you have ANY photo program . . . you can take a photo of ANY SHAPE you want . . . fill in the shape with black . . . and go to your 300 dollar 10 watt laser engraver. It may take two 30 second passes to cut out your shape . . . but it will cut up to 8 oz in two passes. The neat part is you never EVER have to get another clicker die. They are a thing of the past with a laser engraver. I use mine to cut small stuff any time I want an EXACT shape . . . the engraver and Adobe Photoshop Elements 2.0 (5 dollar program on Ebay) . . . are all I need. My bed is about 14 inches by 14 inches . . . so I can cut anything that size . . . and as many exact copies I want providing I have the leather. You do have to rig up a fan to take the burnt leather stink away . . . but that is the worst . . . and it is not hard at all. AND THE BEST PART . . . When you get done with cutting stuff out with the laser engraver . . . you can then waste a couple days . . . and as much corrugated brown cardboard as you can scrounge up . . . learning how to do roses . . . buildings . . . automobiles . . . horses . . . any shape you want . . . for any drawing you want . . . on your laser engraver. The cardboard mimics leather fairly well . . . so you can get a good idea of your settings needed . . . then do a small check piece of leather . . . then do a large picture or drawing or whatever your heart desires. If you really take your time . . . you can do photographs . . . army patches . . . custom book marks . . . billfolds . . . purses . . . and if you let your daughter play with it for a while . . . she might teach your wife how to use it . . . they can make the decorated front of the purses . . . you can do the rest . . . and you have a whole brand new product line. Or you can just put names on the key fobs . . . that'll work too. May God bless, Dwight
-

How to Lift a Sewing Machine Safely
MyOldHyde replied to friquant's topic in Leather Sewing Machines
You bet! Hoyer is a big manufacturer of medical transport devices and I think first made the patient lift, hence the name. Now this is showing off... how I got in and out of my truck! Hey, when you're 70, 250lbs feels like 500!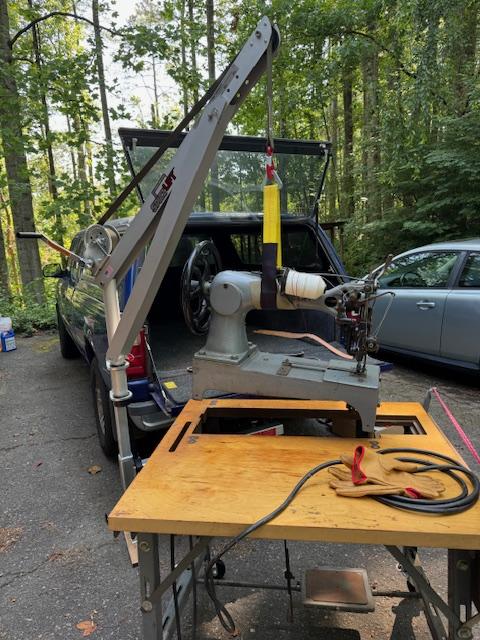
-
 Thanks for your opinion JLS. I have to agree, I think 6spi is excellent for most holsters. I am regretting spending so much money on the 5spi irons. Should have tried some cheap 5spi irons first. Live and learn! Love that brown holster you are showing there.
 -
That had to take a long time to post and I’m sure everyone here appreciates it! I wish I could get a copy of that book, wow!😃
-
I second the notion that the best water repellency you can get is with Resolene (or Mop & Glo cut 50/50 with water). This is an acrylic film layered on your leather. It can be damaged and it is not 100% water proof forever but it is far better than any other top coat for this purpose.
-
 Tobby joined the community
 -
Hi Judo, I am interested in the Landis 5 in 1 (item 19), do you have a price in mind for that item? Also, would need to ship it to Charlotte, NC. Thanks! Tobby
-
 TriciaT joined the community
 -
Fitting a Paso Fino
TriciaT replied to firephil's topic in Choosing the Right Saddle for the horse(s)
Hi there, i have a Pasofino and use the Imus 4 beat gaited saddle that works quite well. My horse is about 15 hands. Be sure to watch directions on where to put the saddle because it’s much more forward. Good luck! -
Wot he said It must have taken you ages Thanks for doing it and sharing it I'll peruse it all properly later when I have some more time spare
-
I get 'lift-the-dot' fasteners from a sailing supplier. I don't need no special tool. They have wee tabs which go through the leather and a backing support plate which I bend over by pushing on them with a screwdriver than lightly finish by tapping them down
-
Was going to suggest "Pull-the-Dot" brand snaps but just discovered that they require a special tool to set them. $124.
-
The perfect oval punch.
wizard of tragacanth replied to bsshog40's topic in Leatherwork Conversation
Did you find a punch? If not, here is my recommendation. Most belts are 1 3/4" wide, so add a little and make your punch 1 13/16". Most belts will fit 1/4" slot but give it an extra 1/16", so 5/16" wide is good. So, final answer is, minimum... 1 13/16" by 5/16". BTW, I use a 4lb. hammer for this punch. You are in Texas, so I would recommend Texas Custom Dies... good people. http://www.usacuttingdie.com This is the style that I have. If you have a clicker, that's different.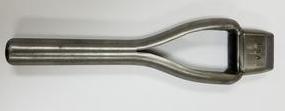
-
Fully agreed. Leather work takes me to a different place.