All Activity
- Past hour
-
Im in Texas. I did manage to get the manufacture to add a 50mm pulley to Amazon. So I have one on the way.
-
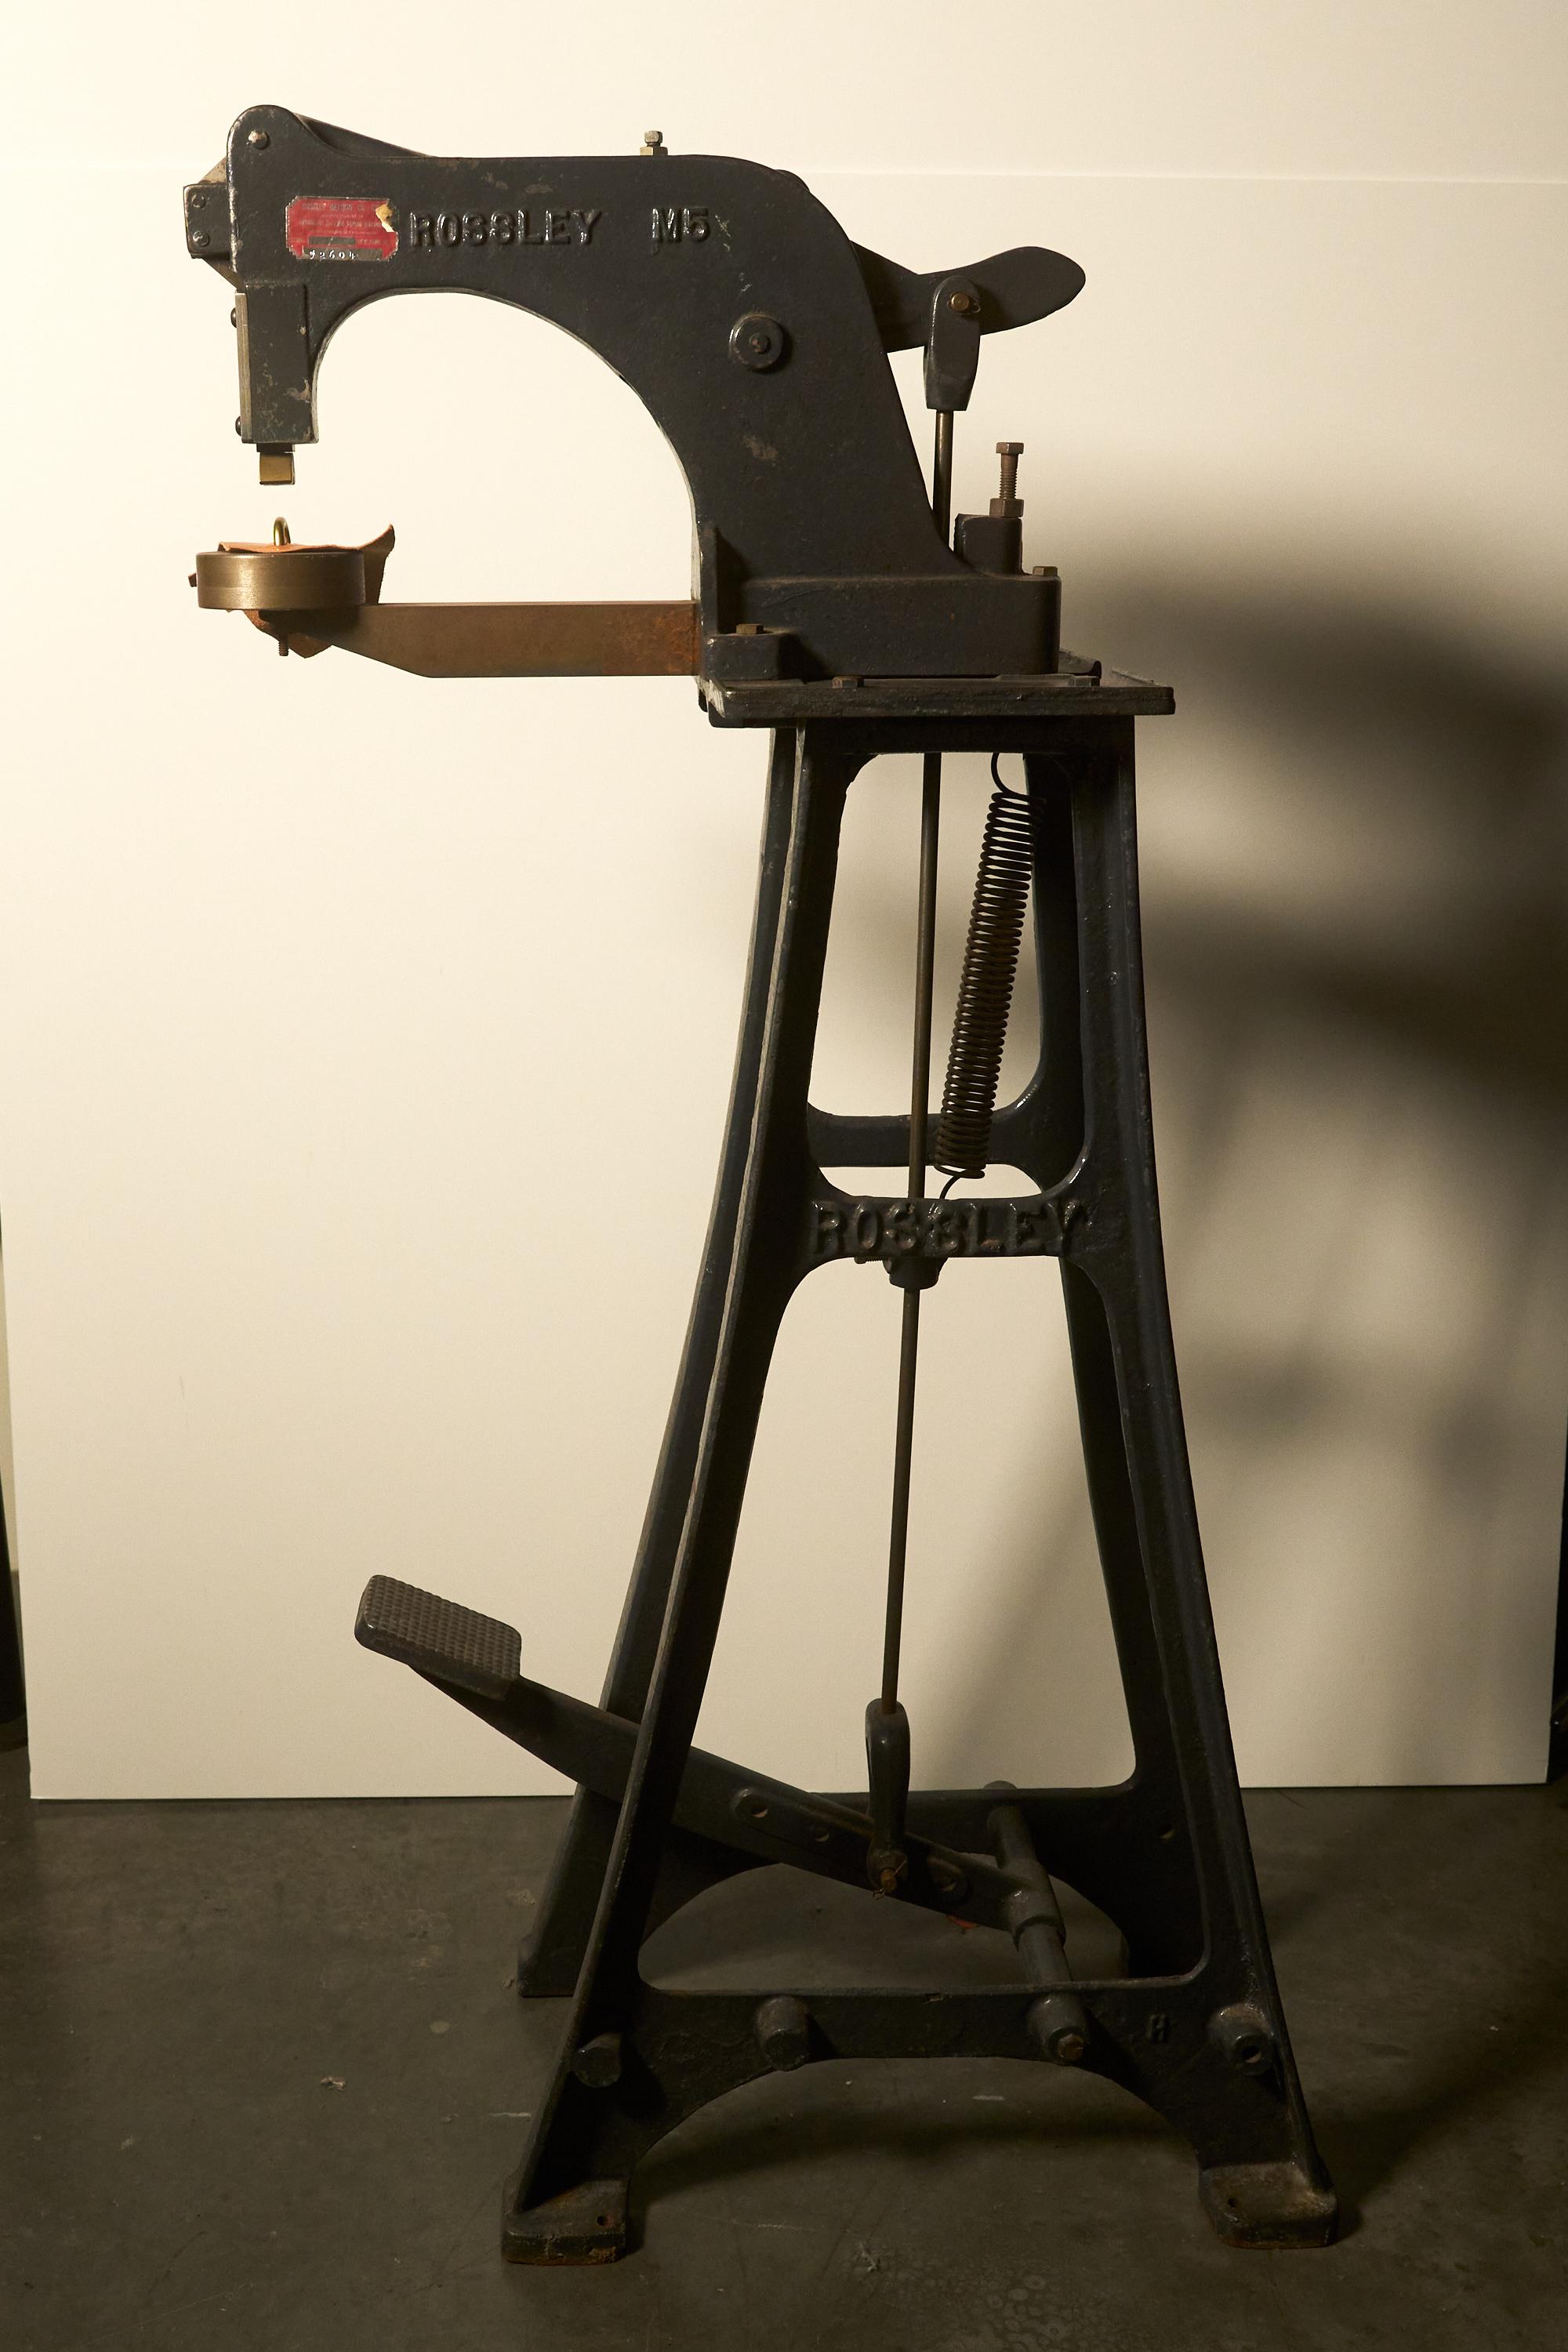
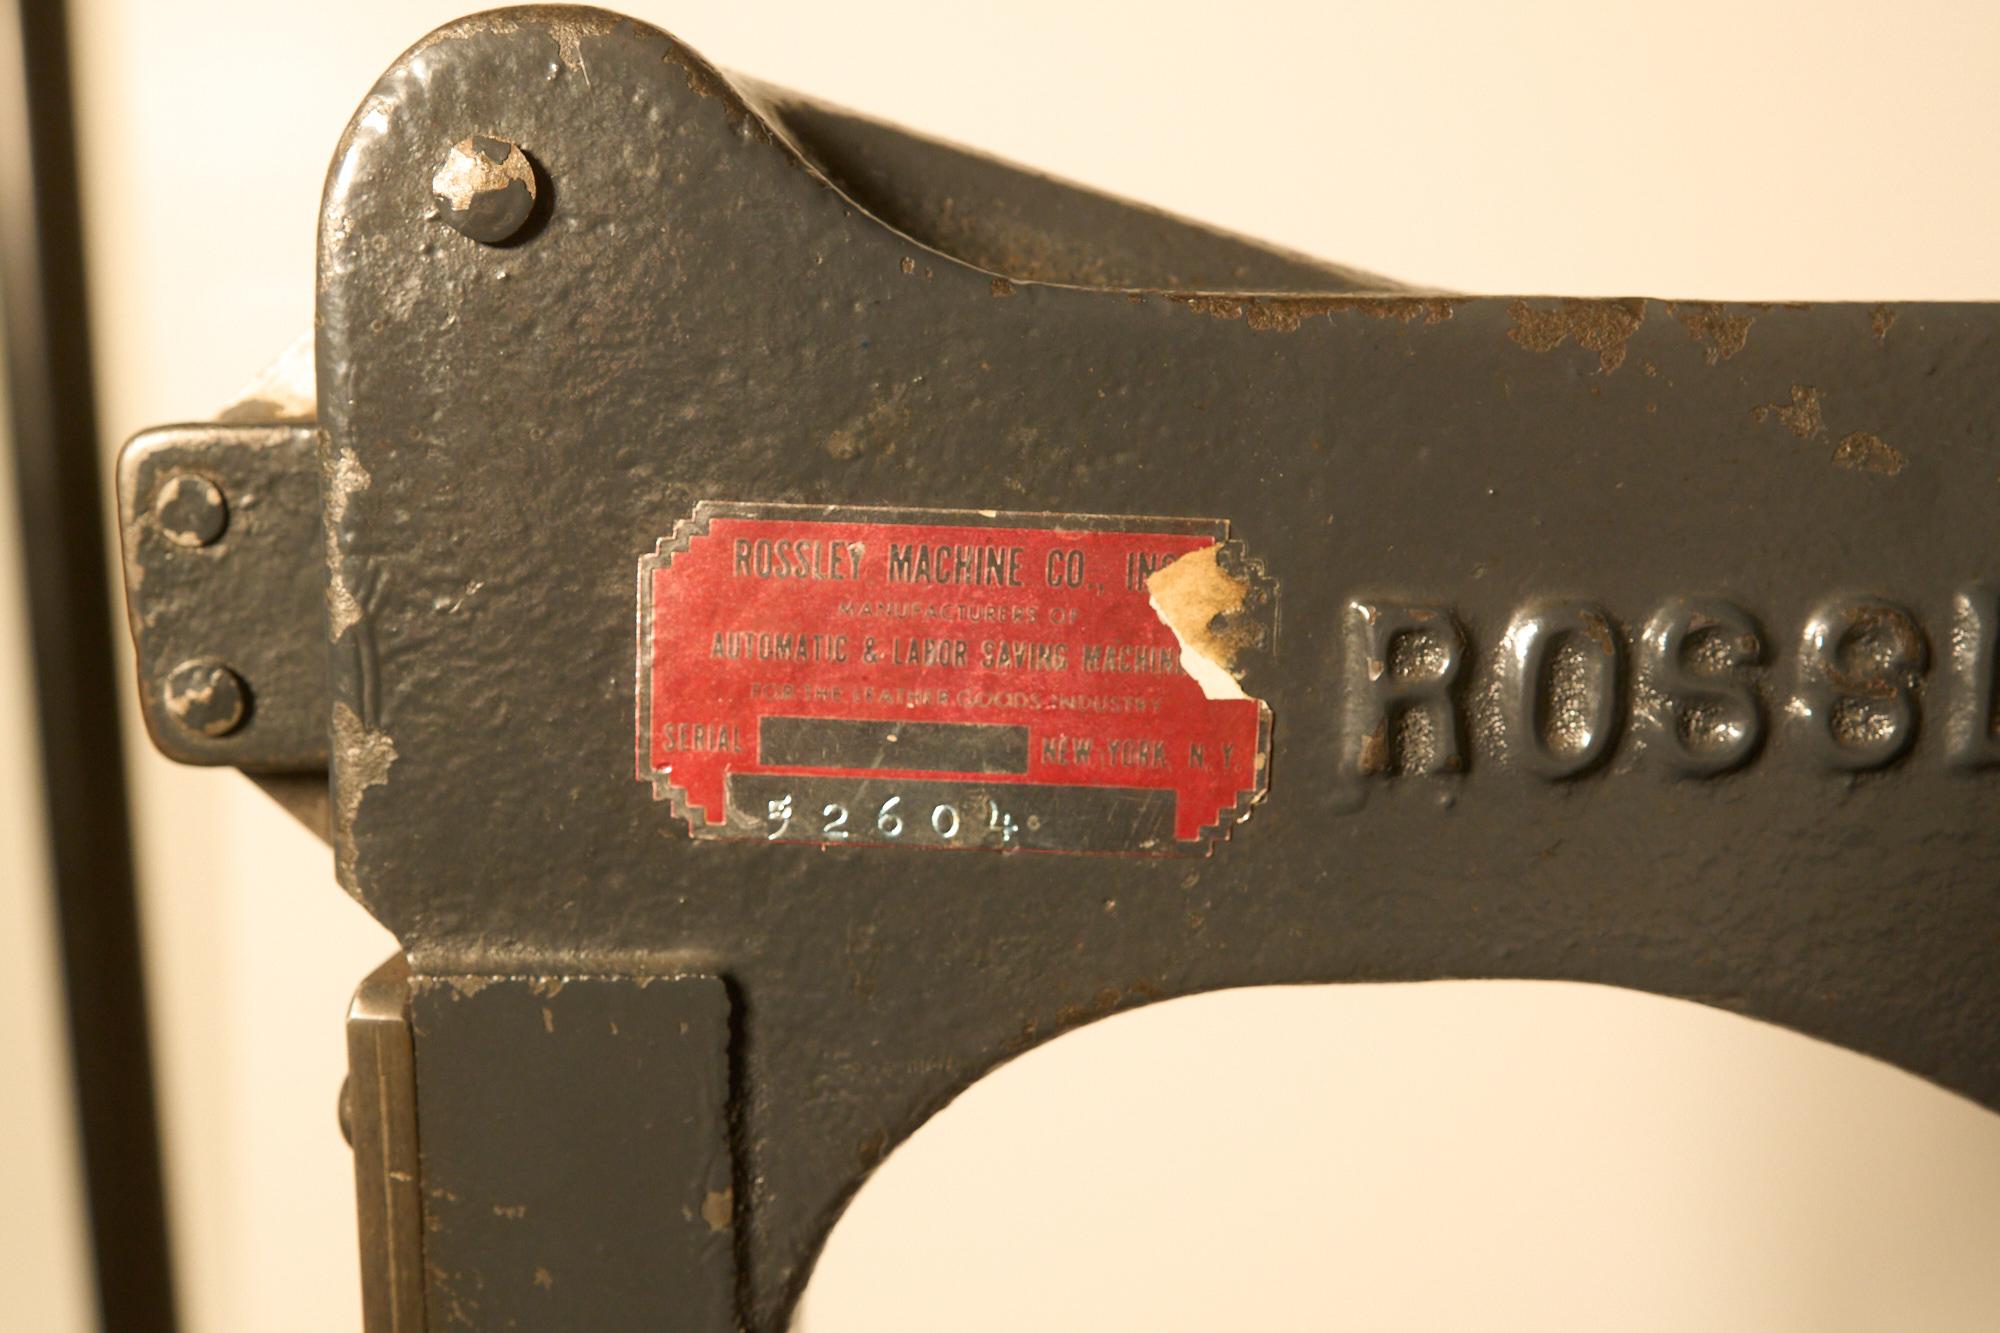
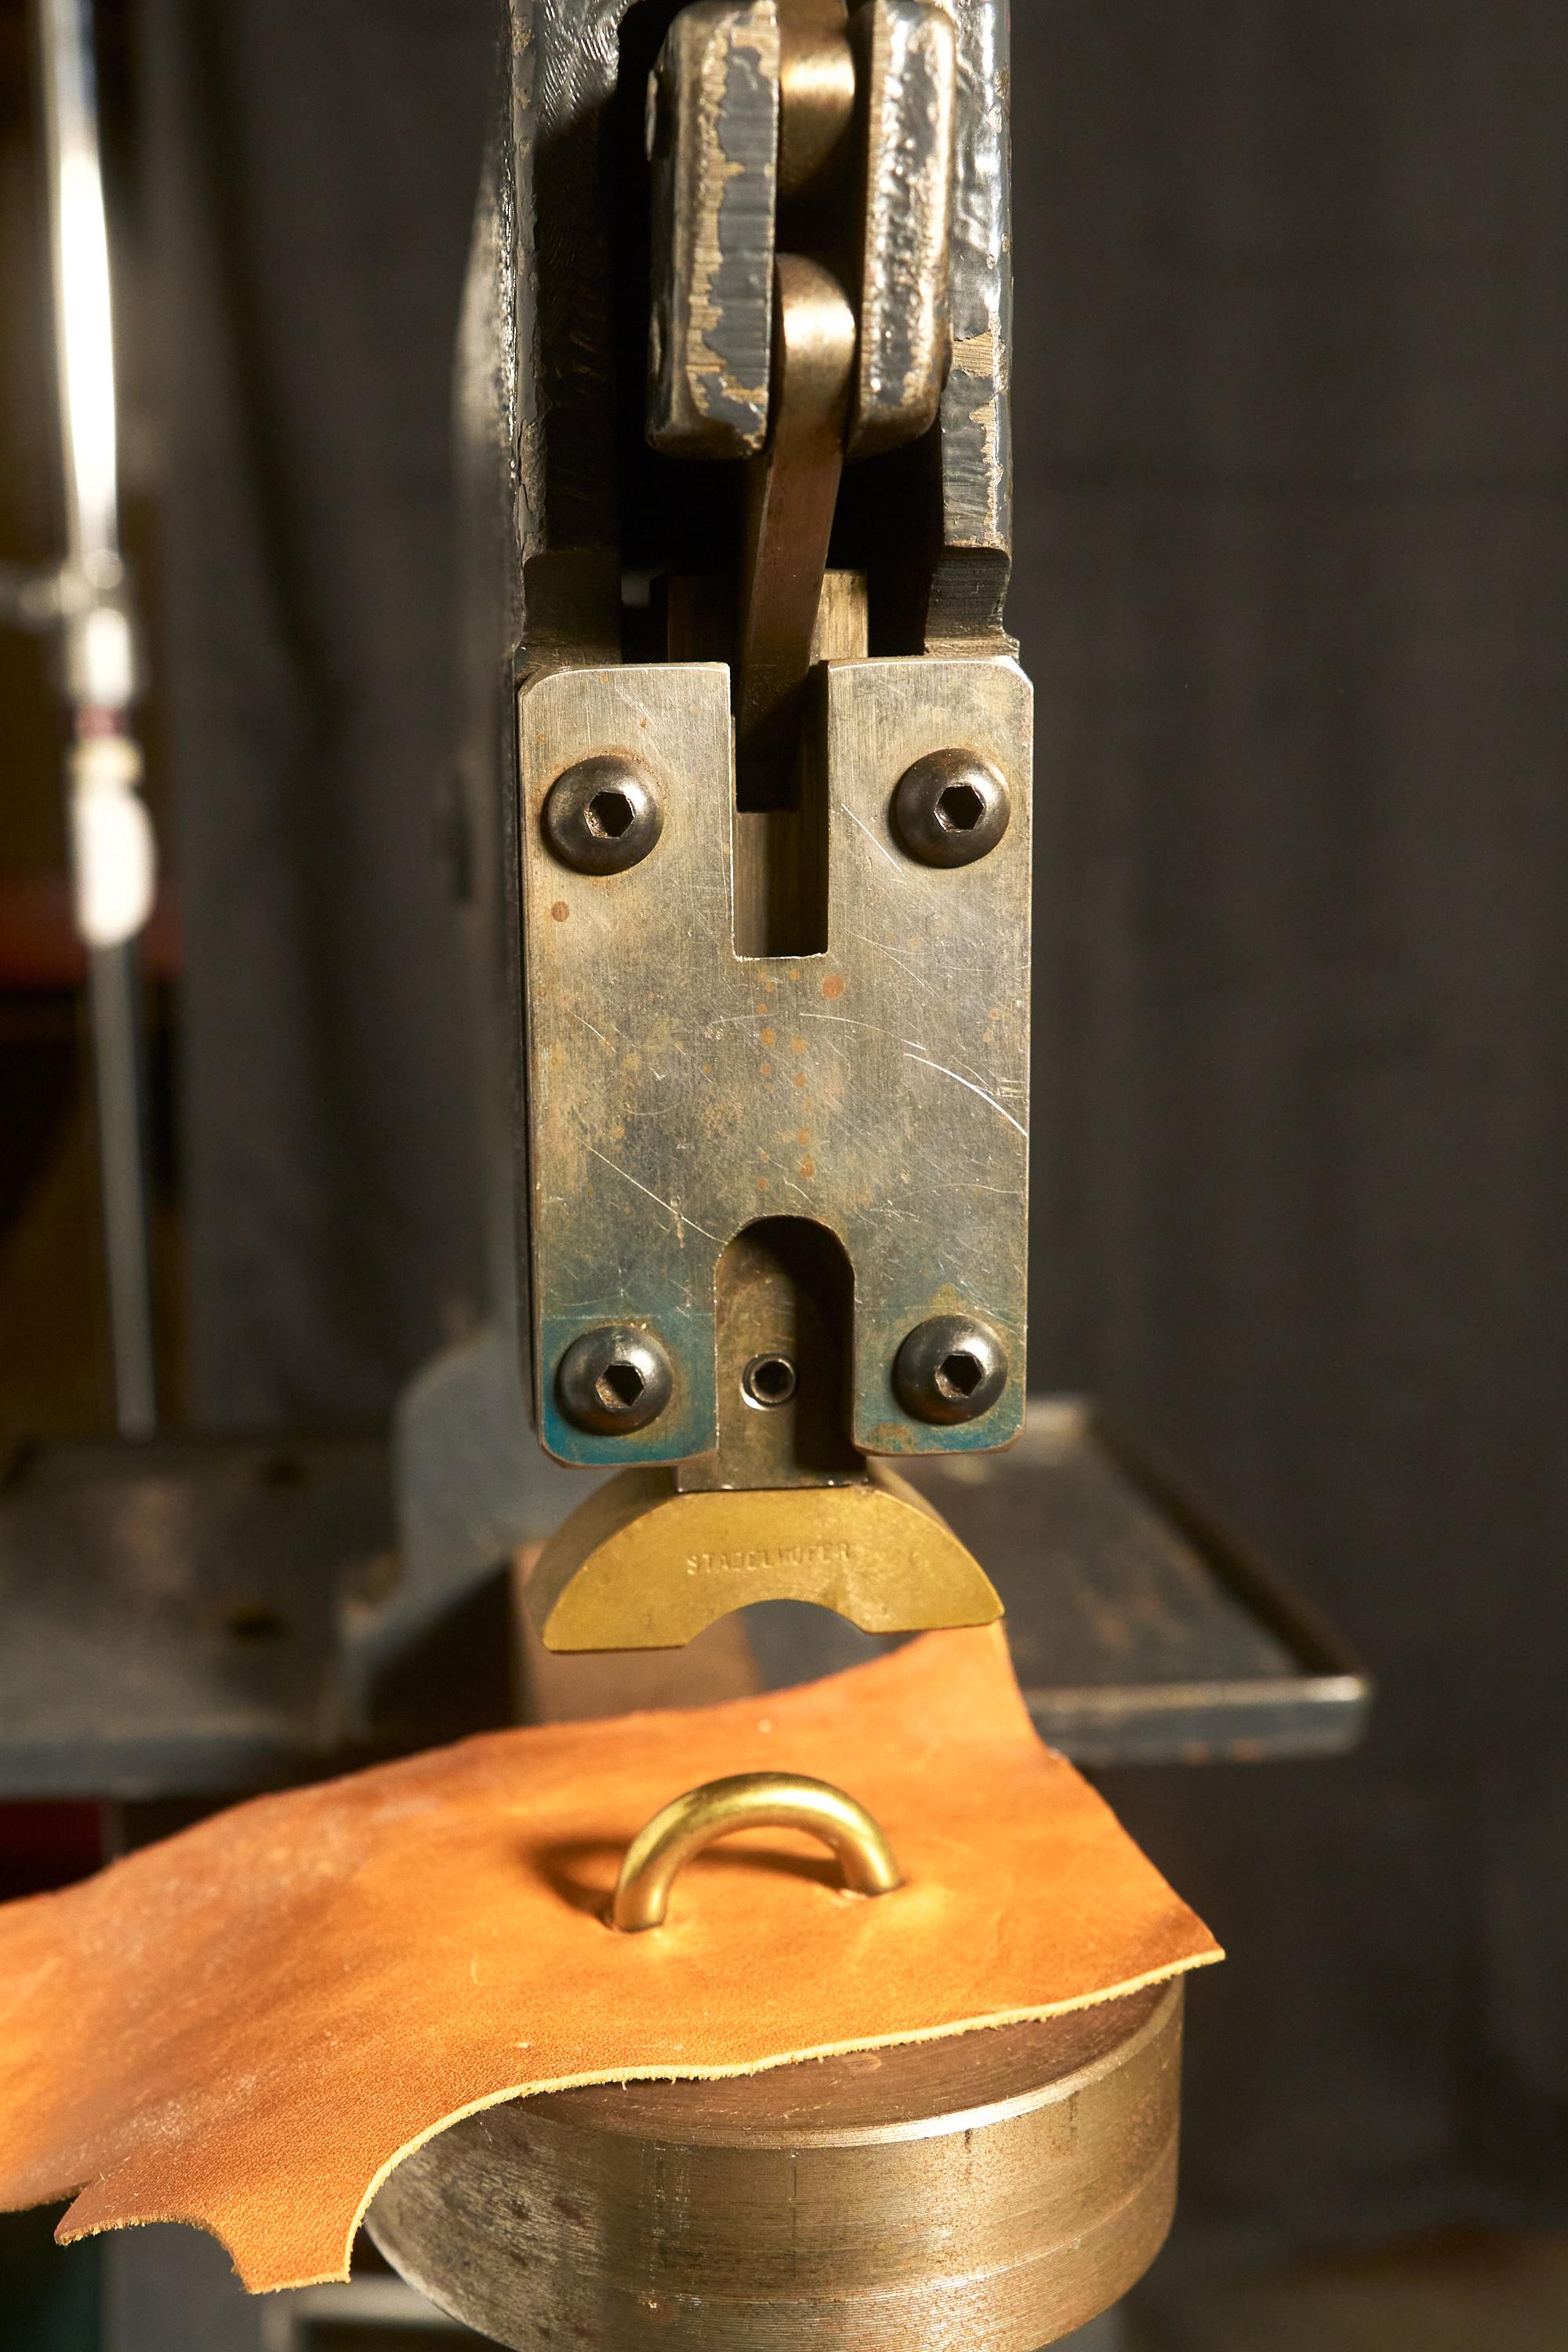
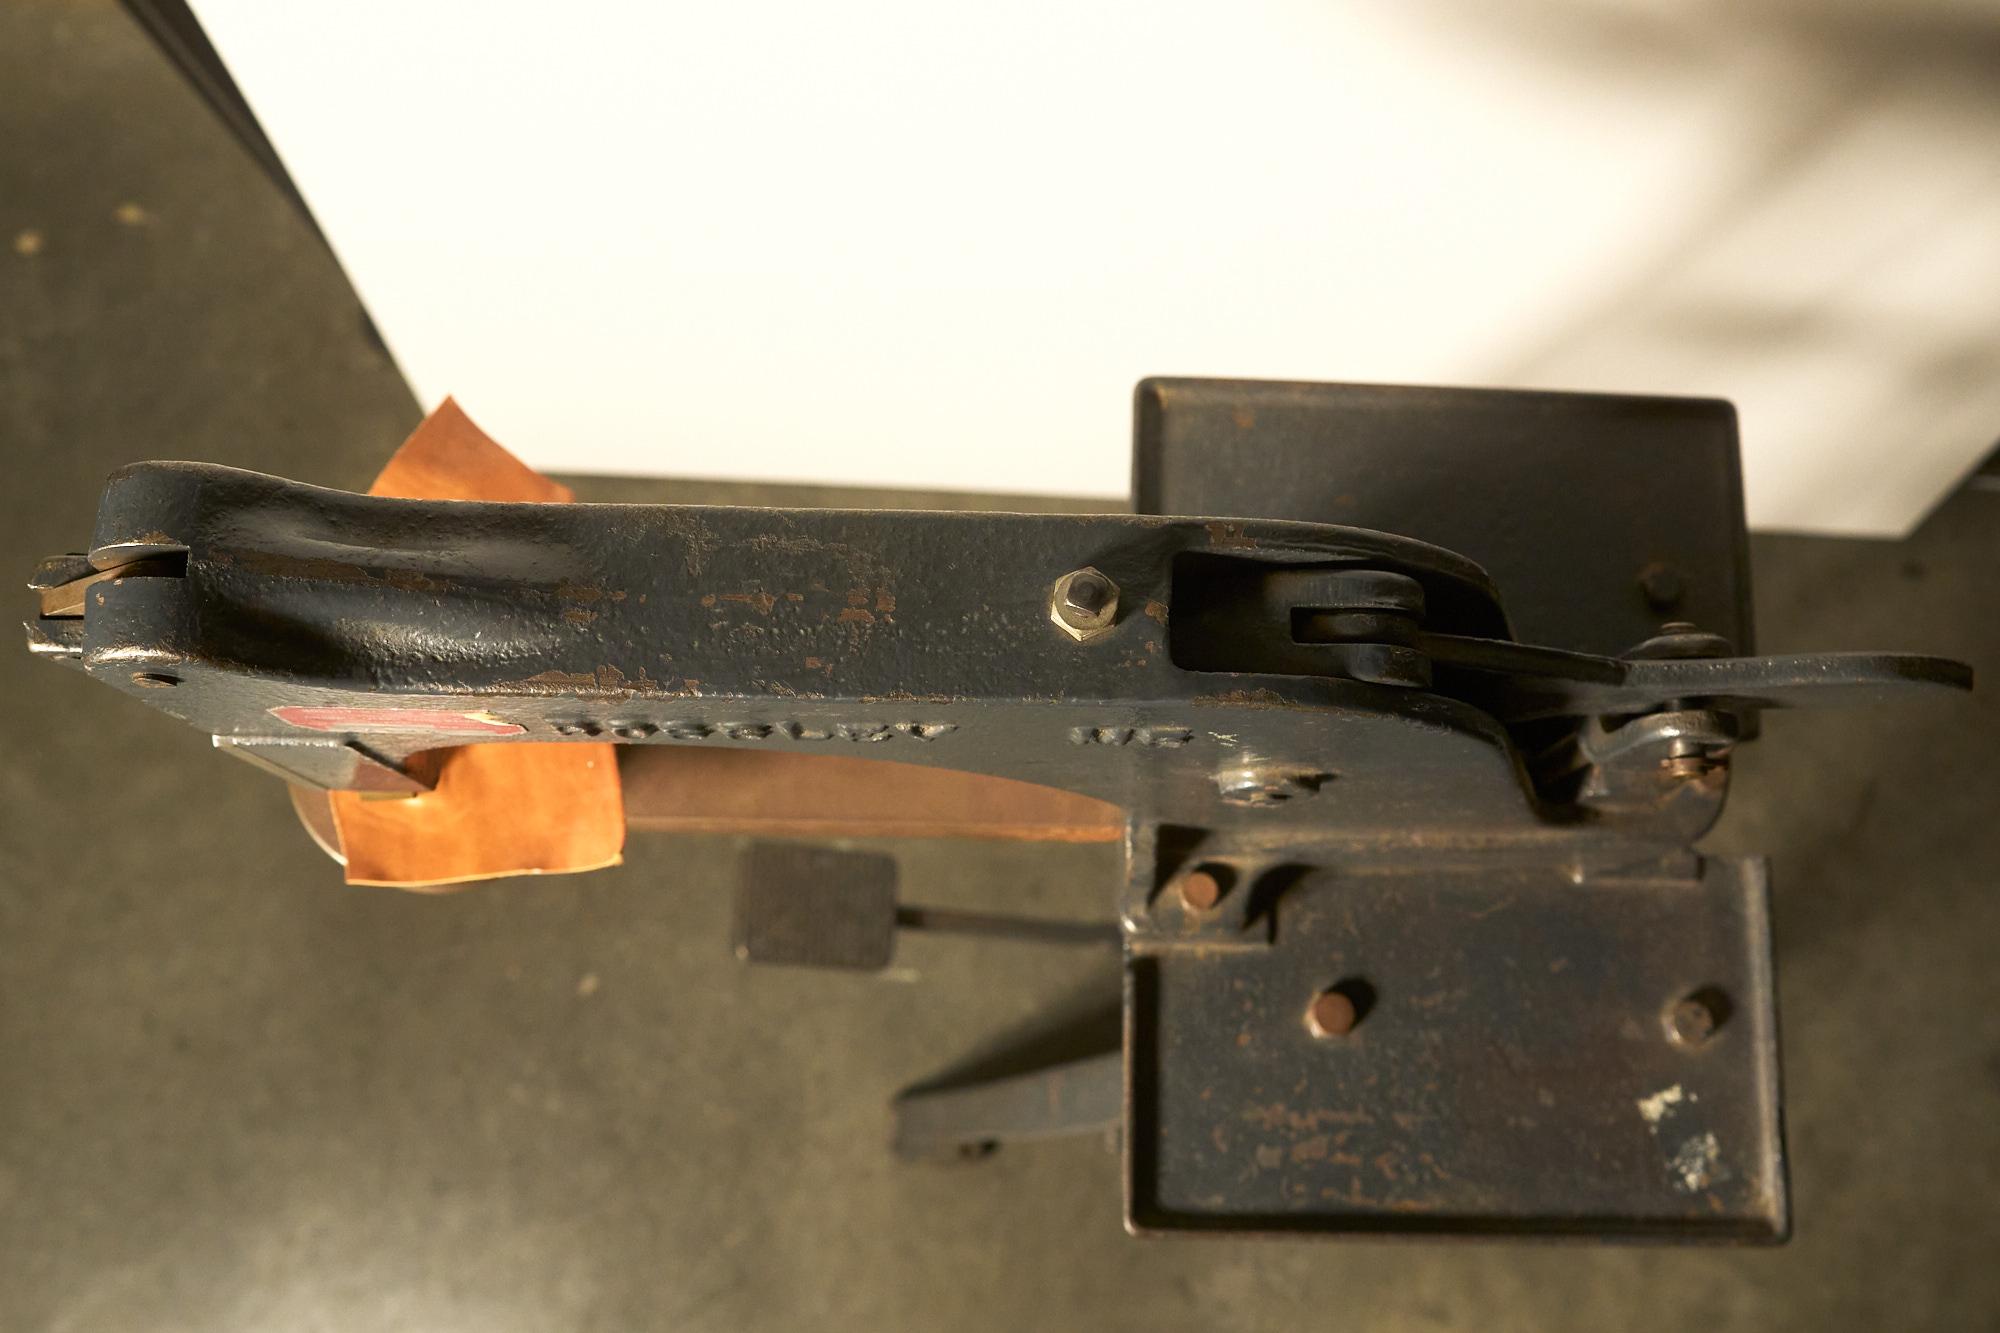
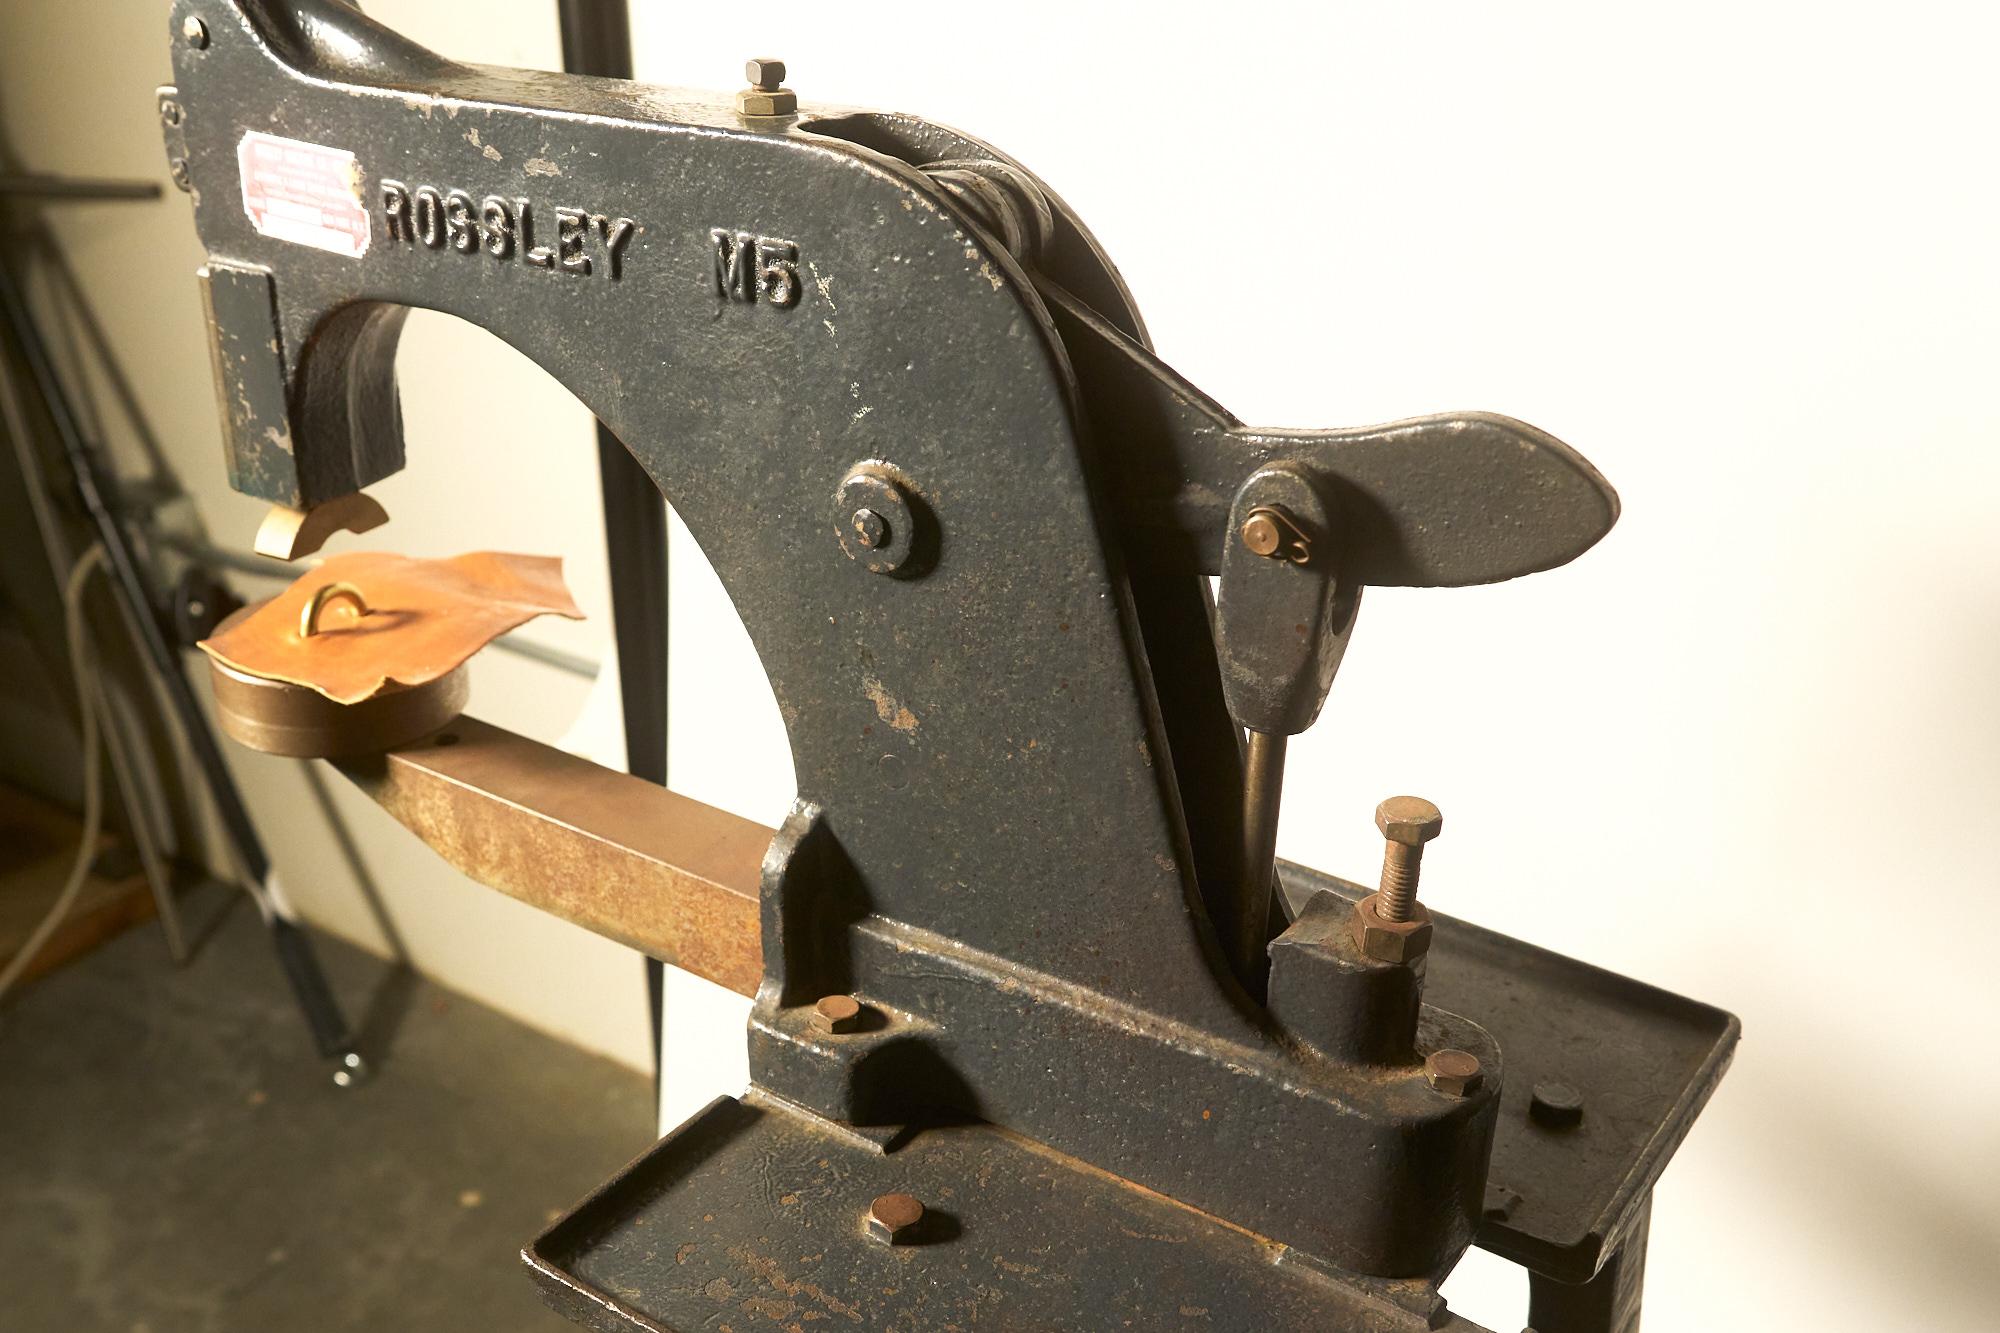
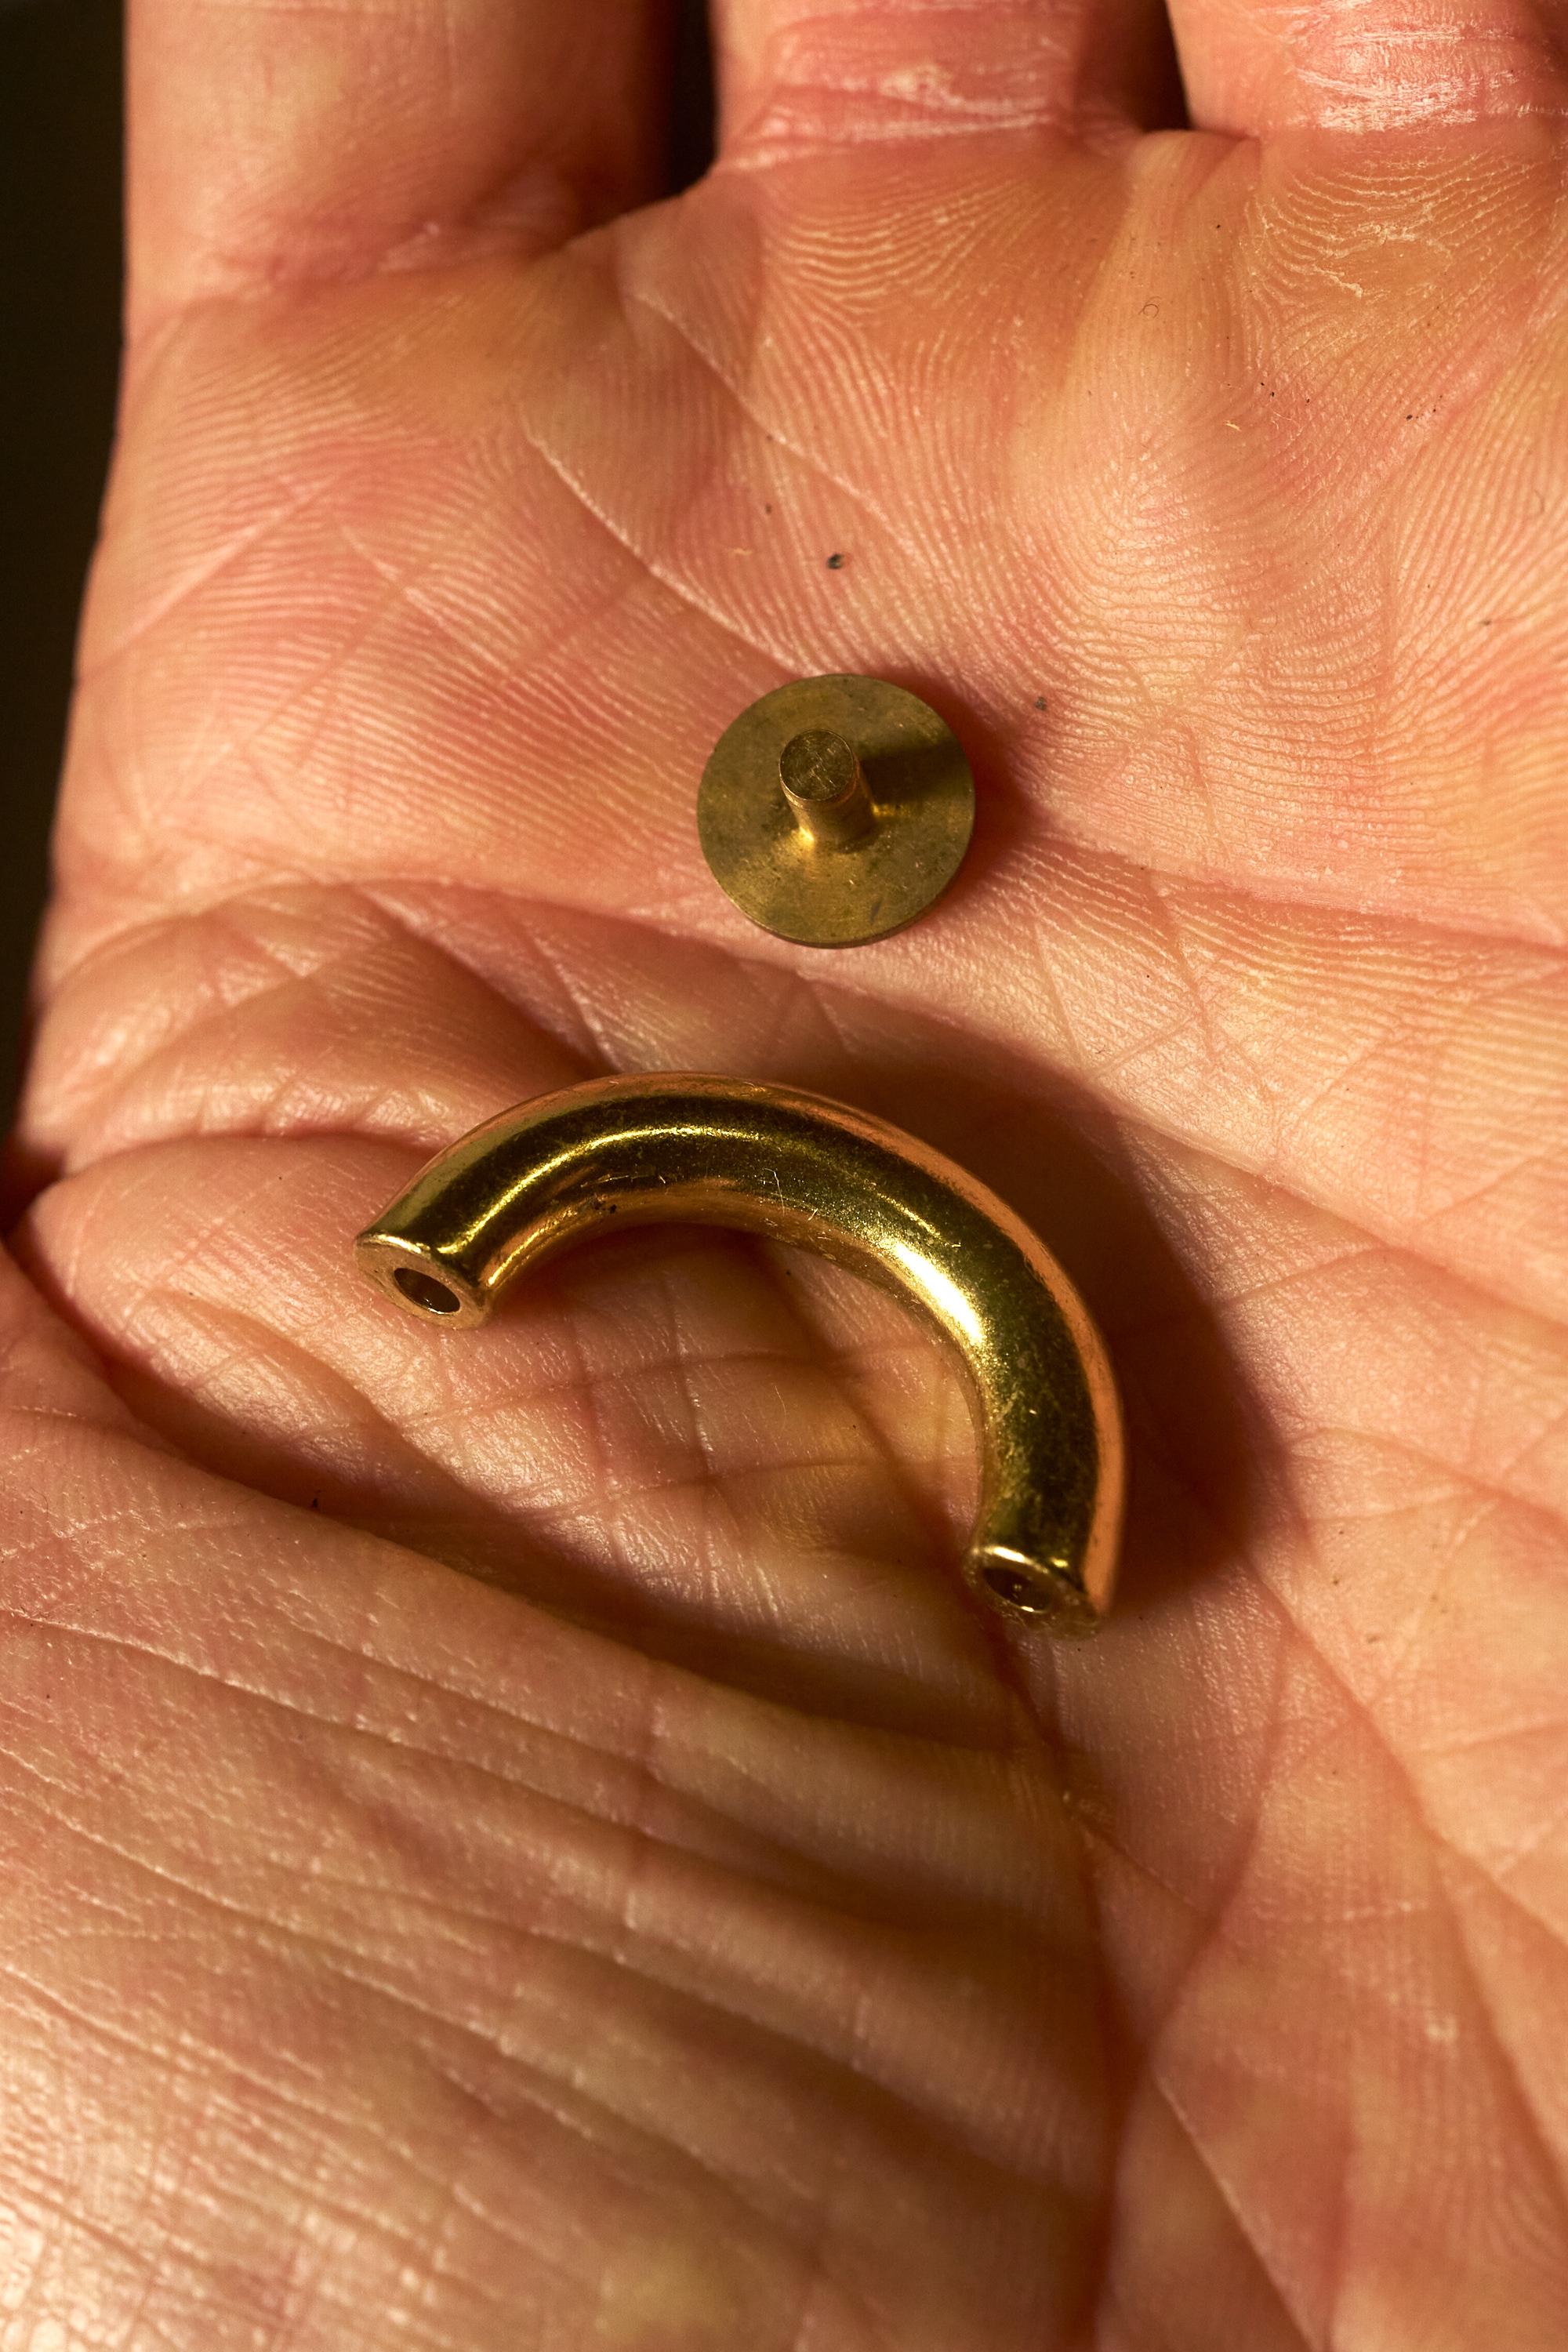
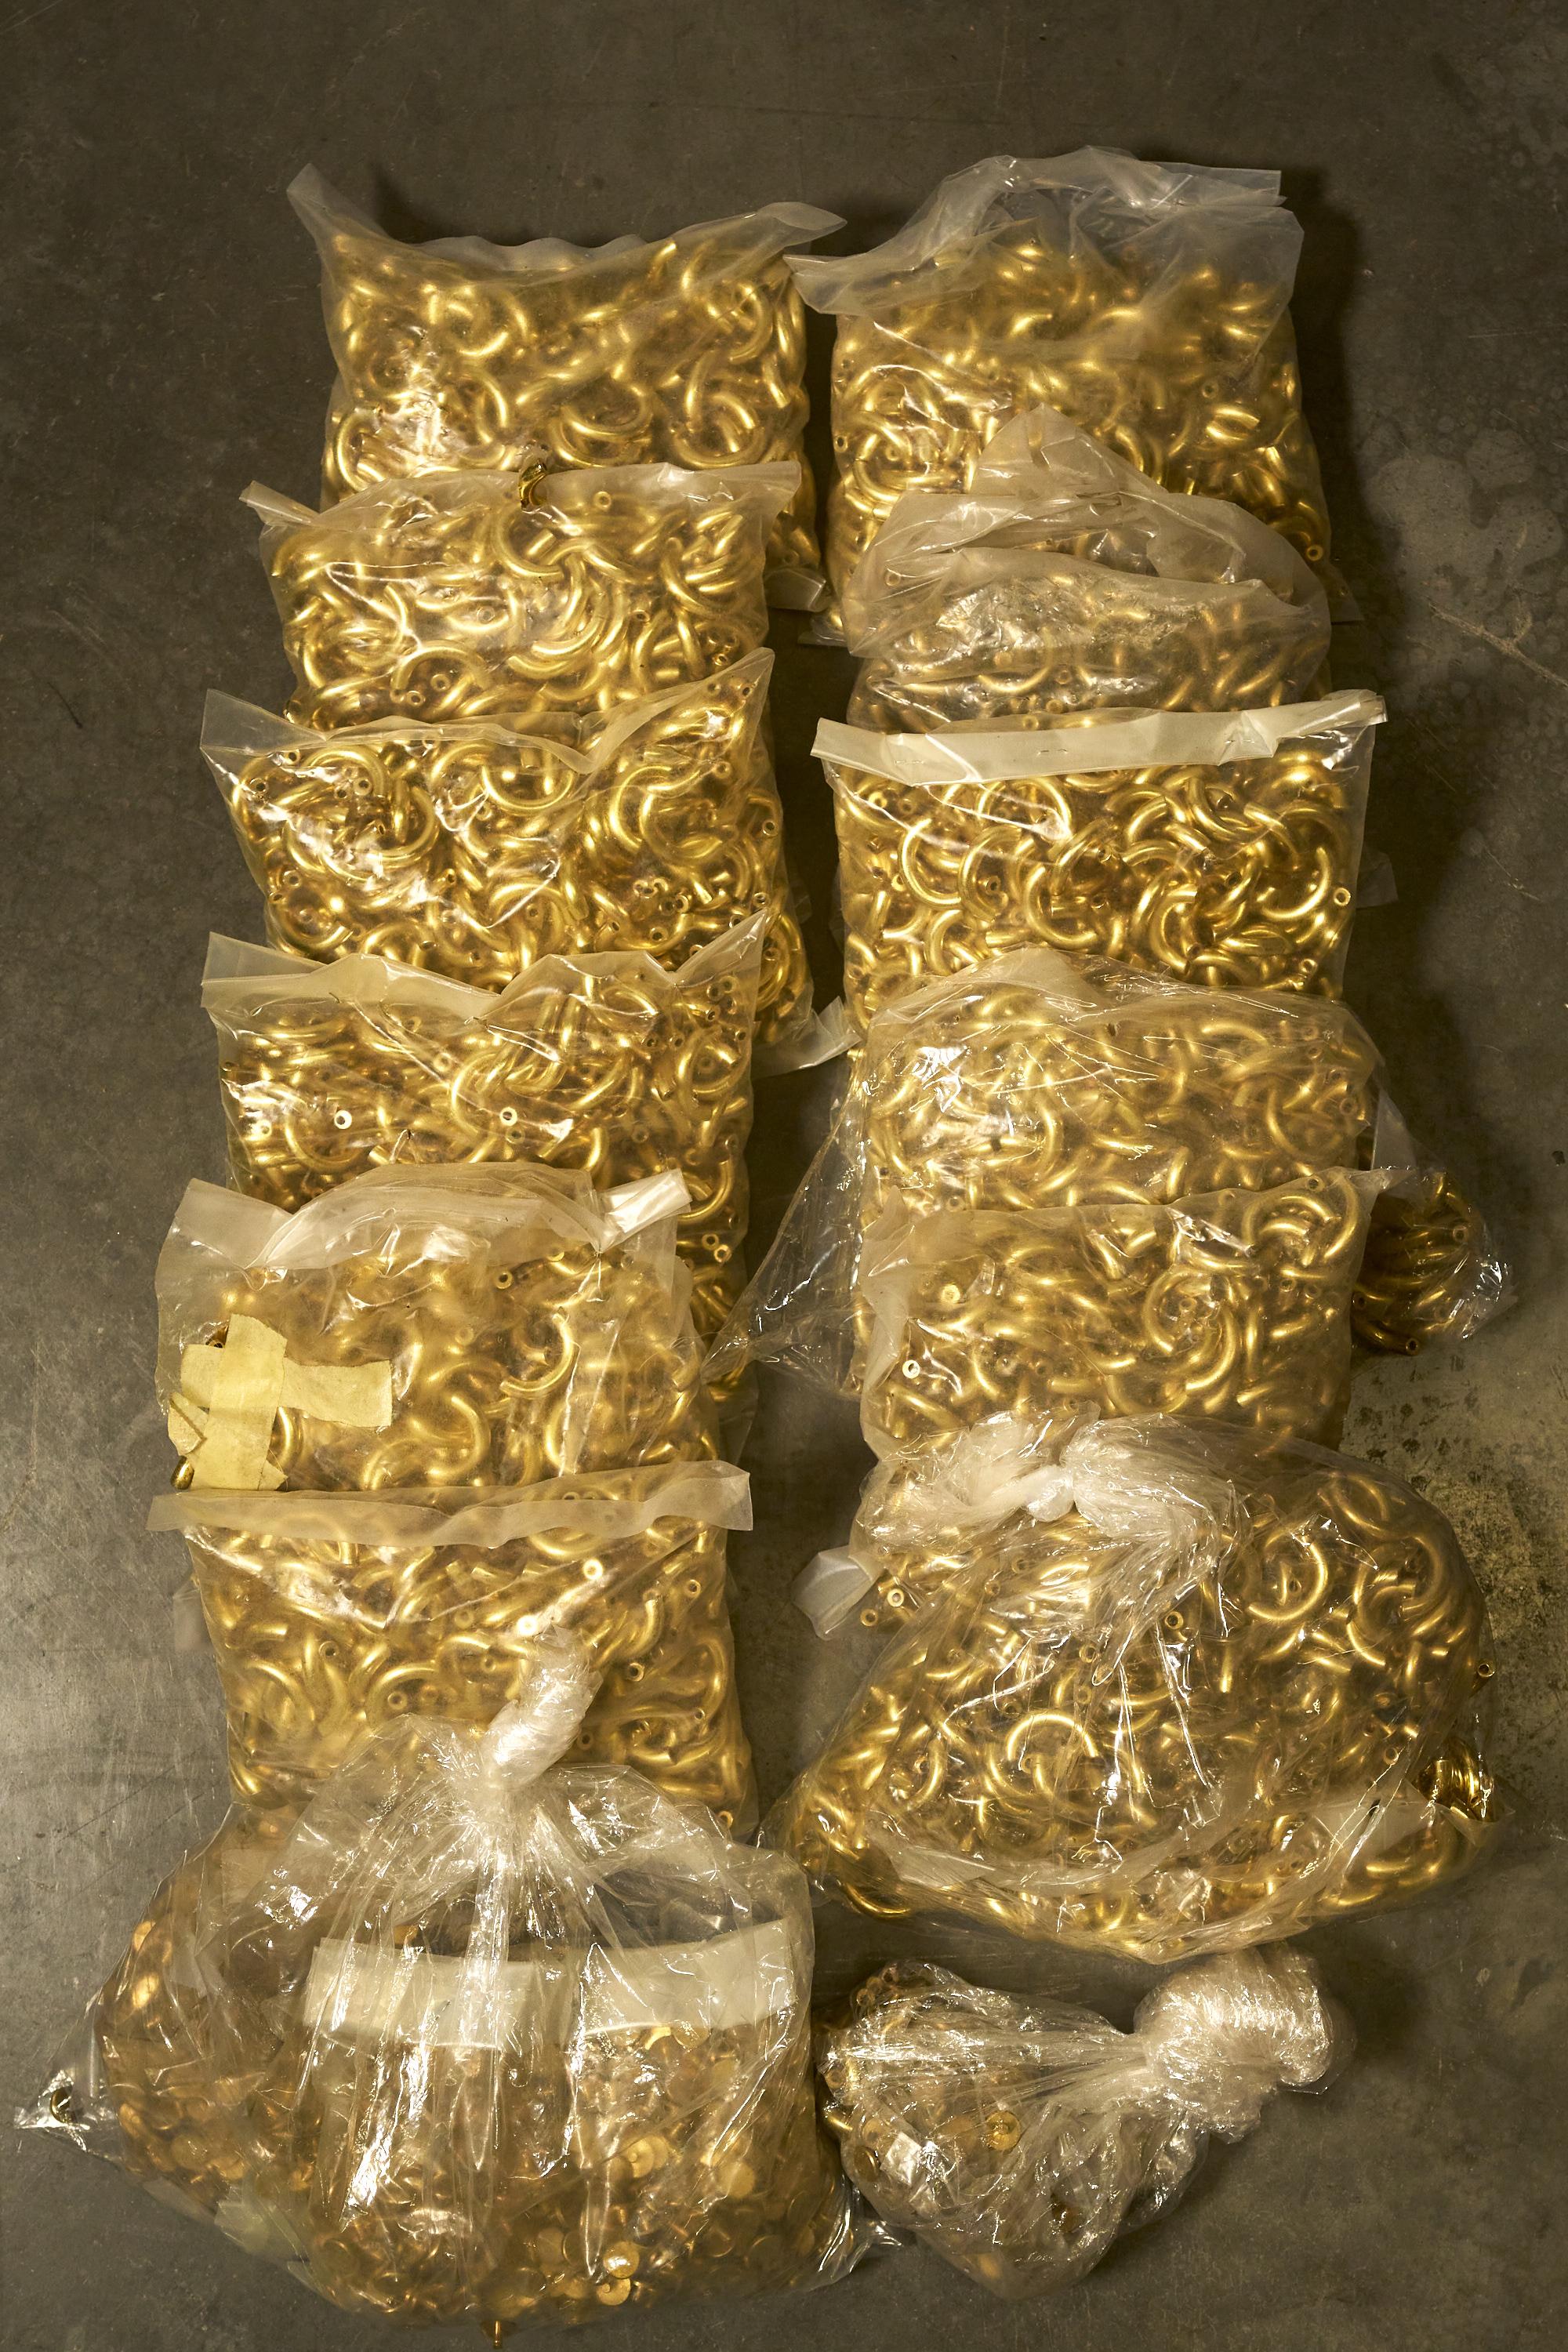
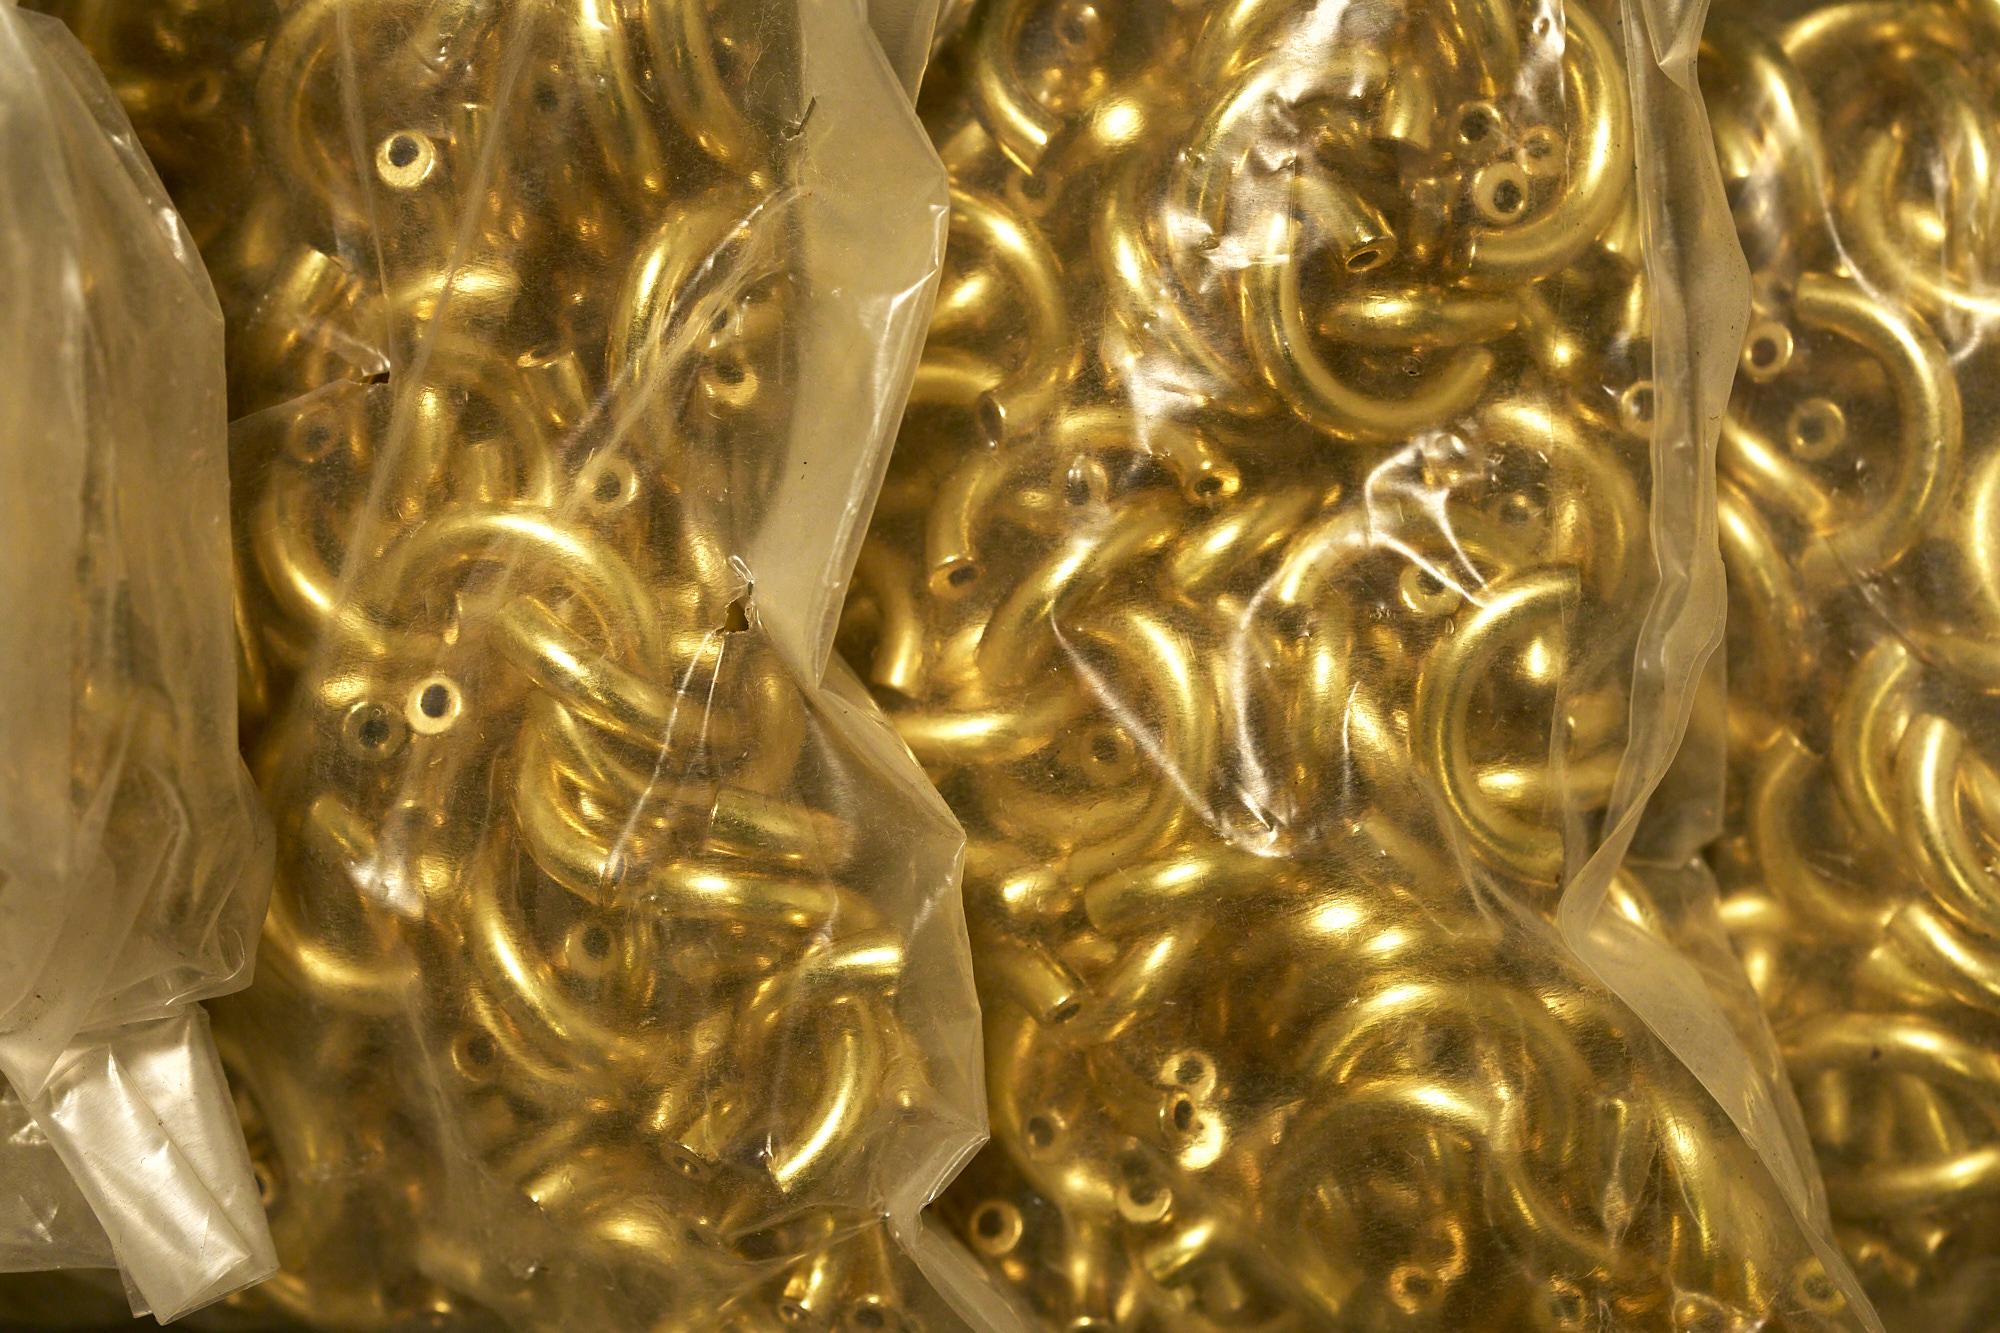
This is a medium to lightweight Rossley kick press that has been outfitted to attach solid brass arches to various materials. It comes with the brass arch and the brass post rivet that holds it in place. Great machine that can be adapted to other uses. $400 complete with arches.


-
This is a strap combiner, made to fold leather strap of different gauges together. Can be set on a table and motorized, or used by hand. $100 These machines are all part of a small business downsizing. They are located in San Francisco. All priority will be given to pickups. I will crate and ship only as a last resort. Alternativly you can have a local crate person pick this up and handle all the crating and shipping. This will be a bit expensive in SF, but these machines are rare. Please take a look at the other listings.


-
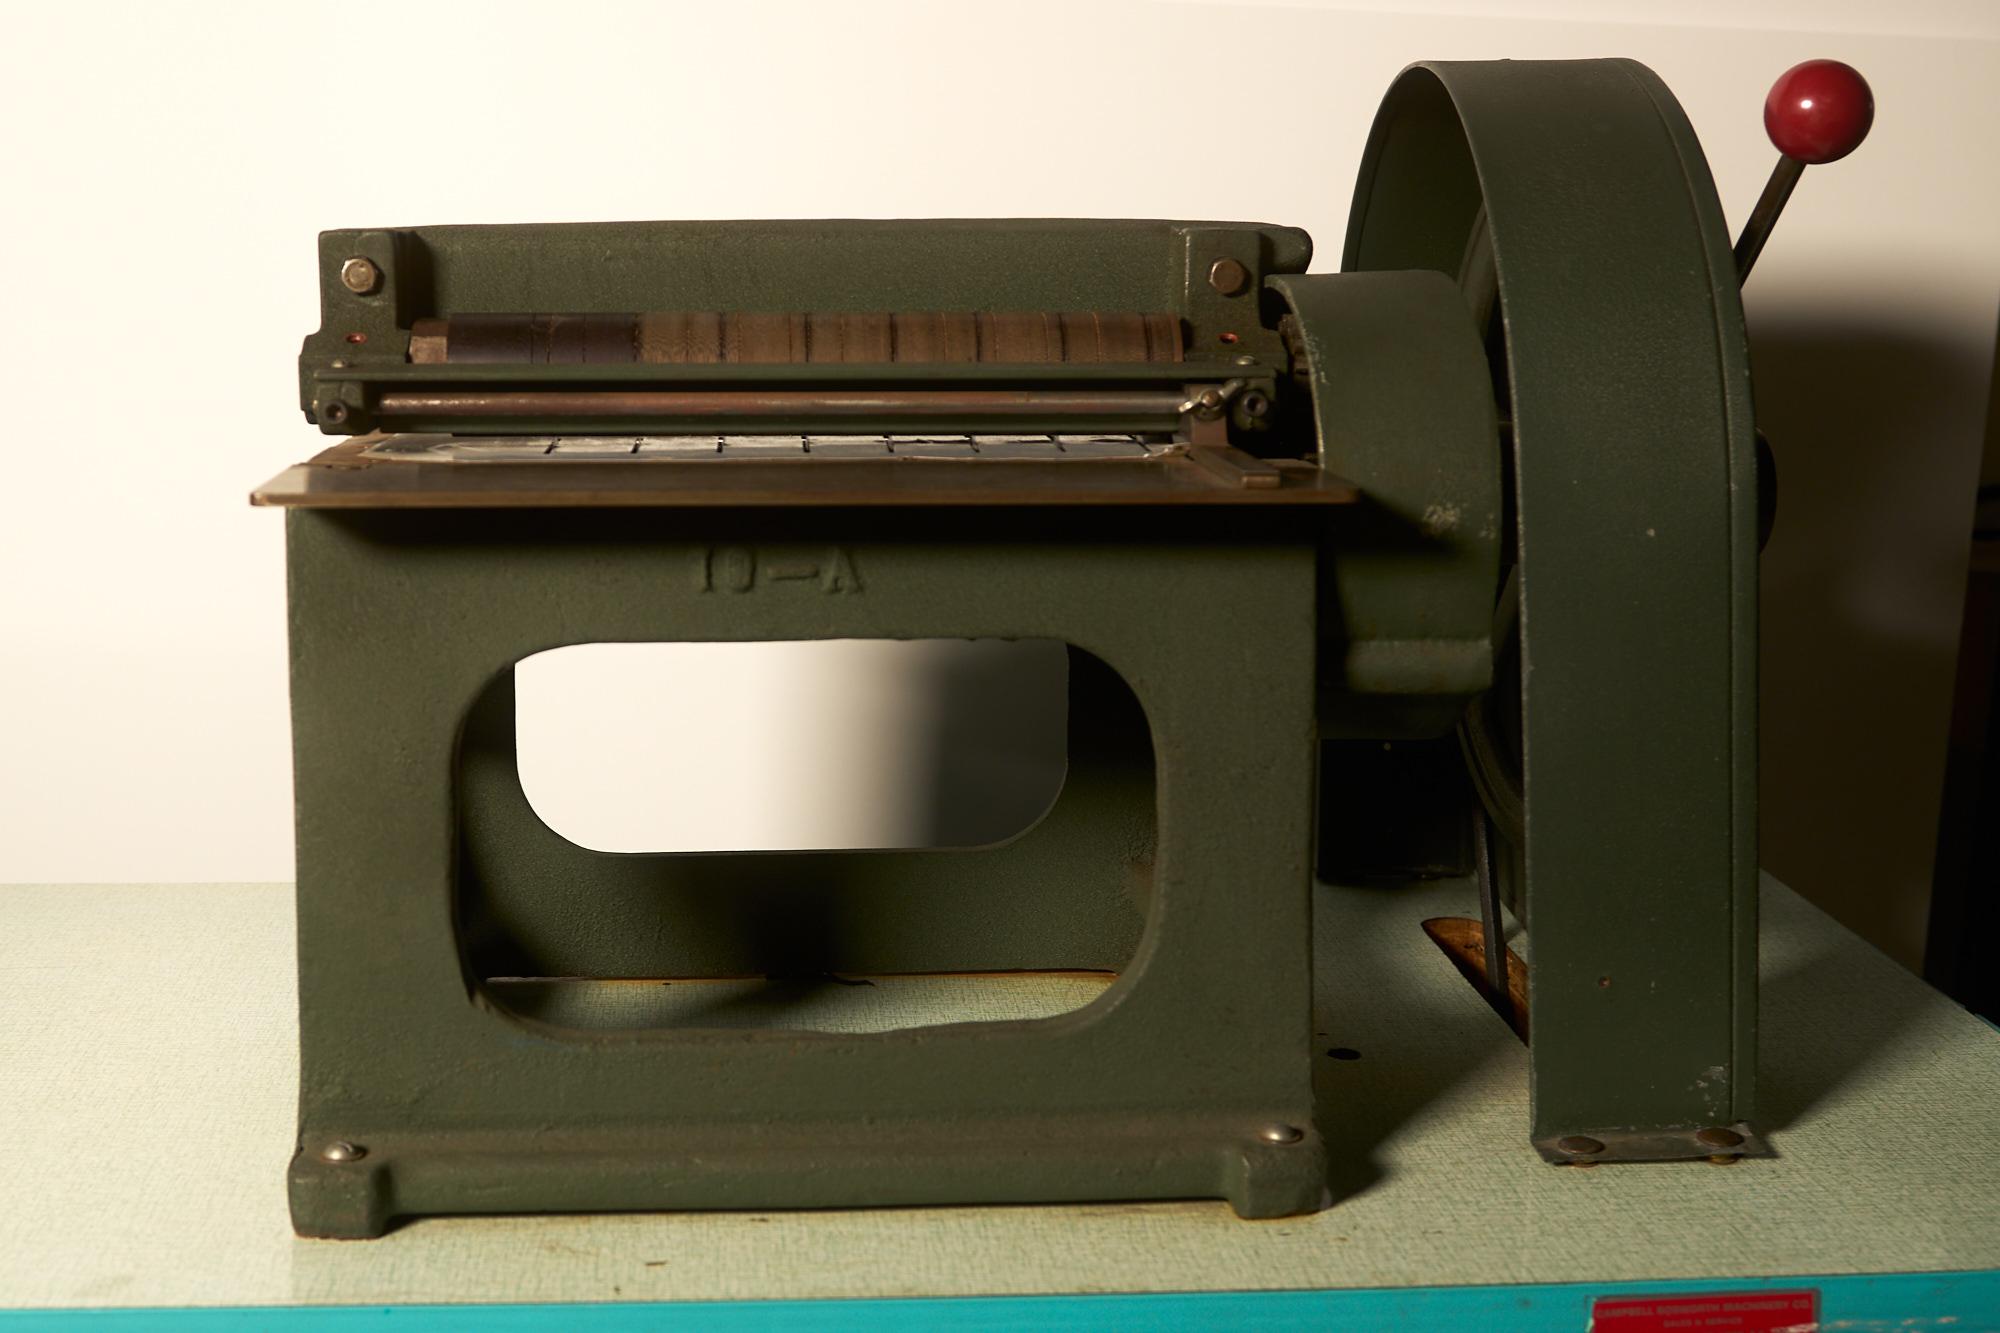
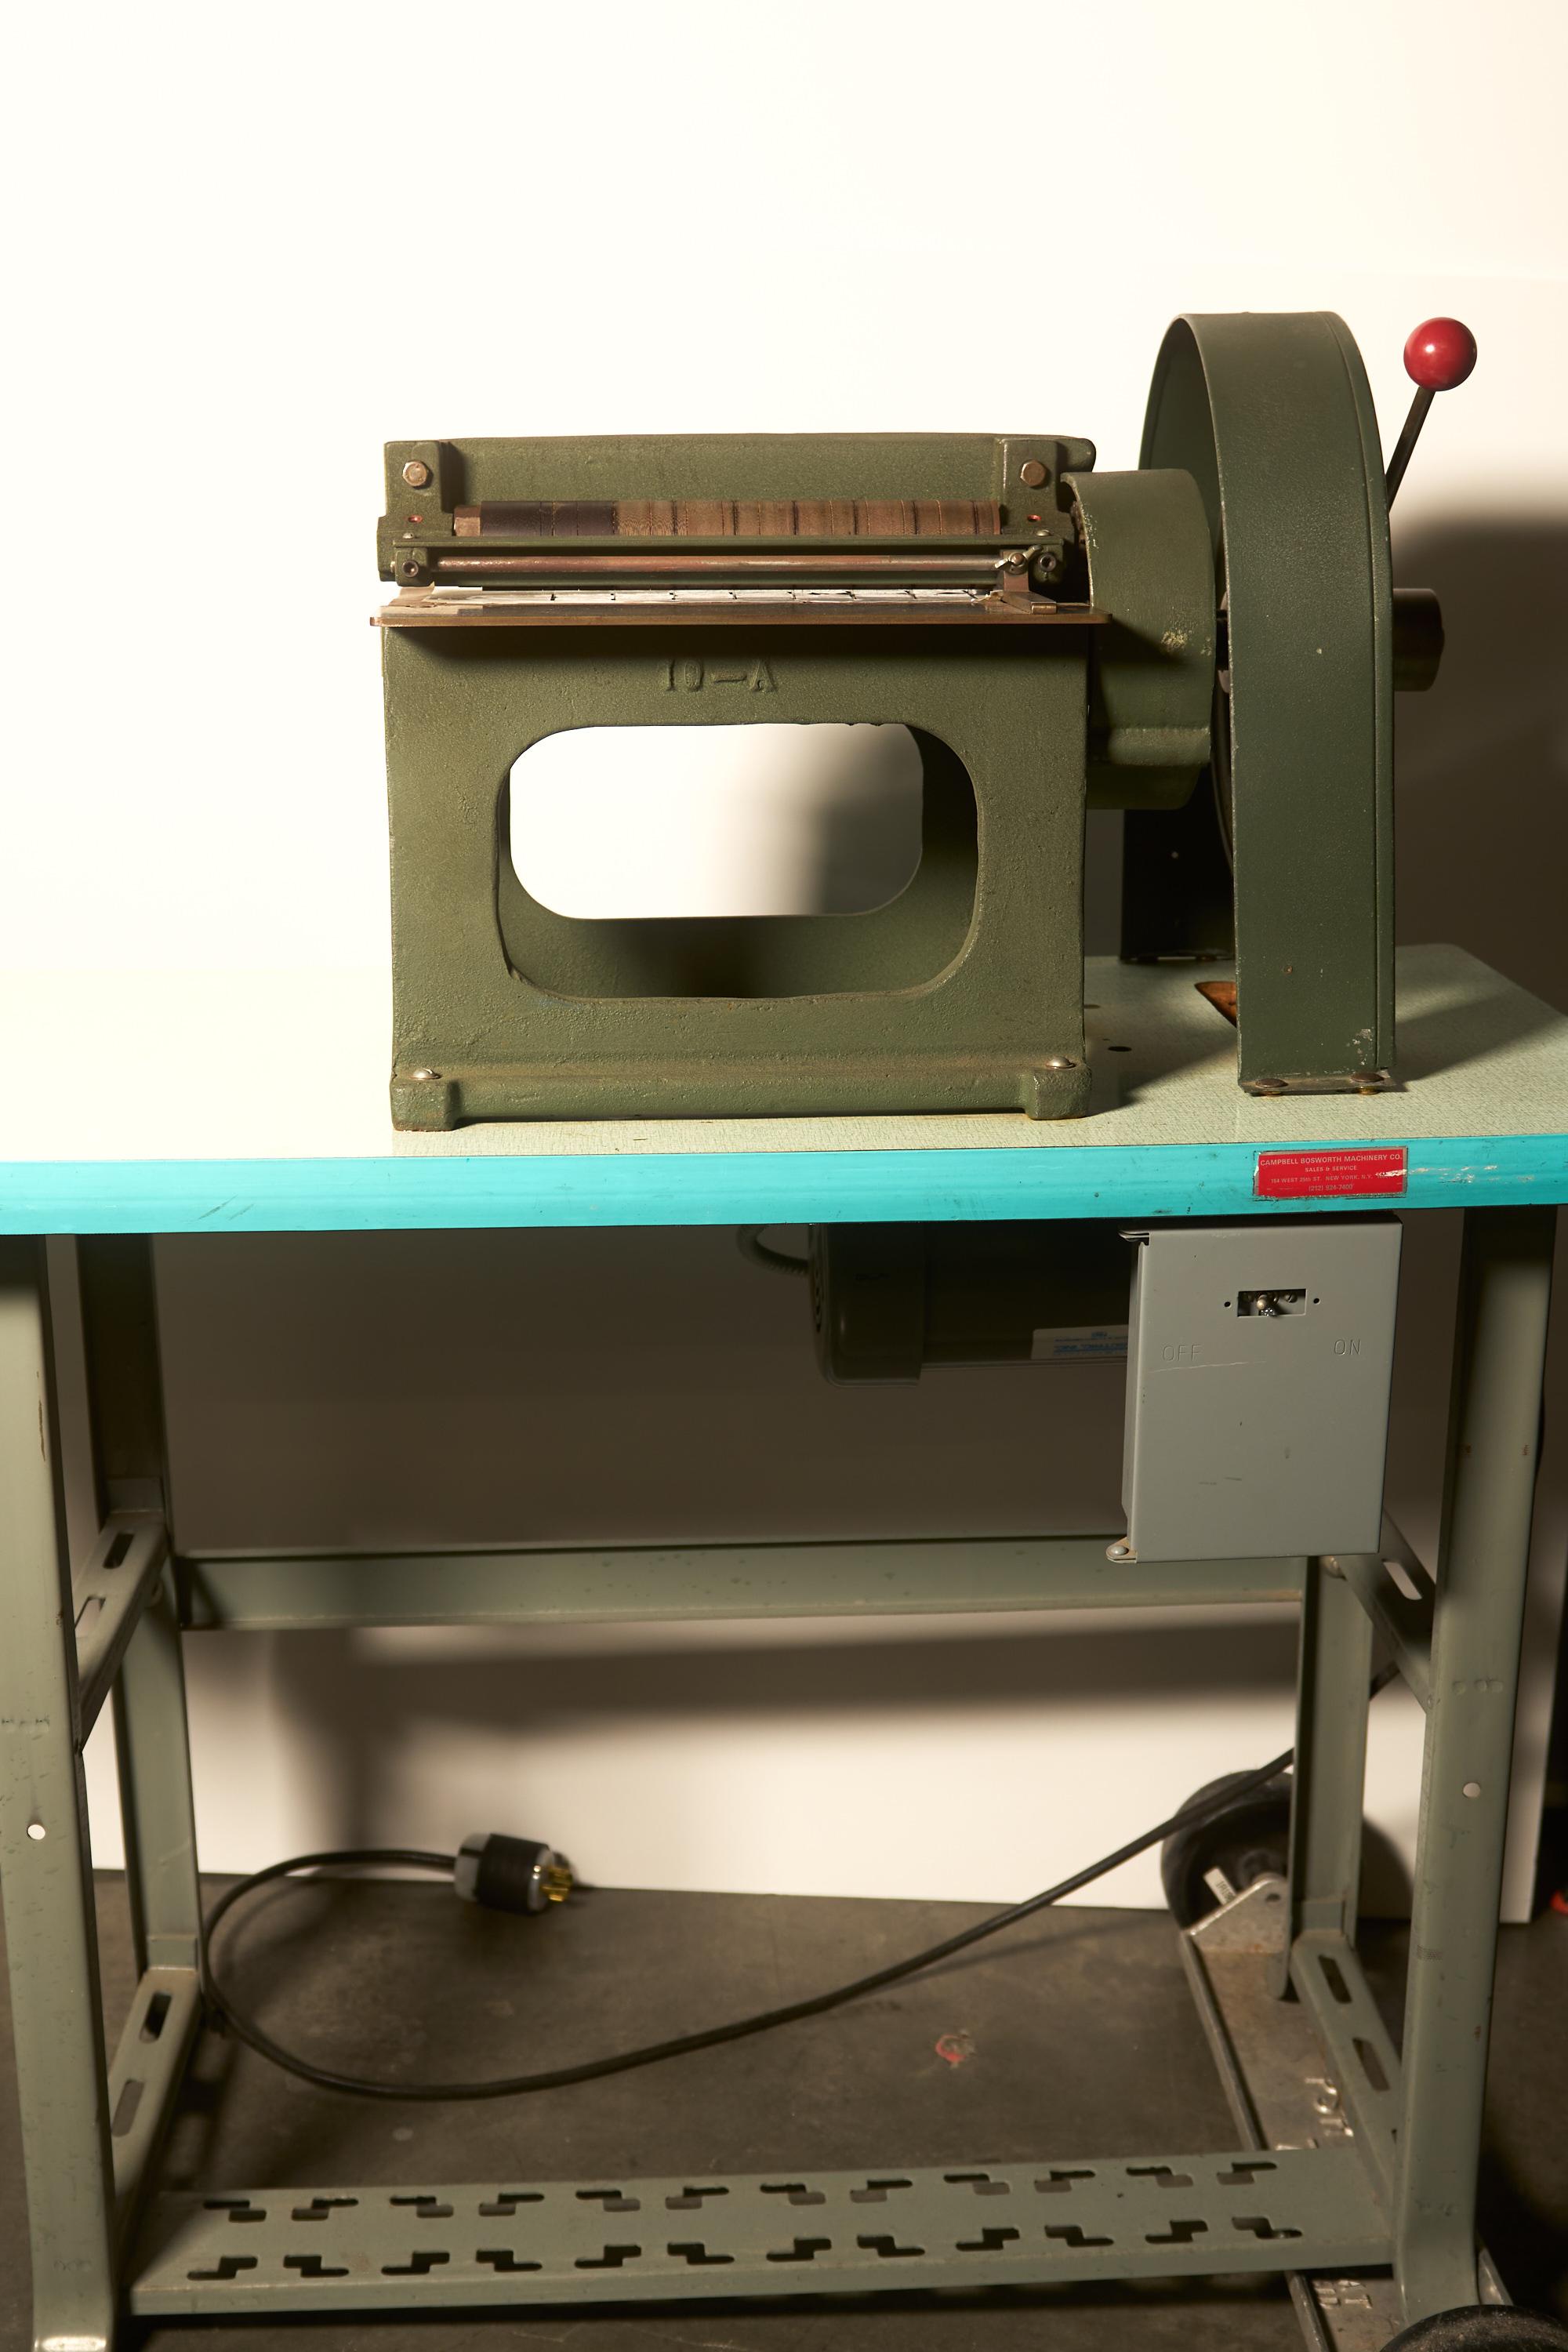
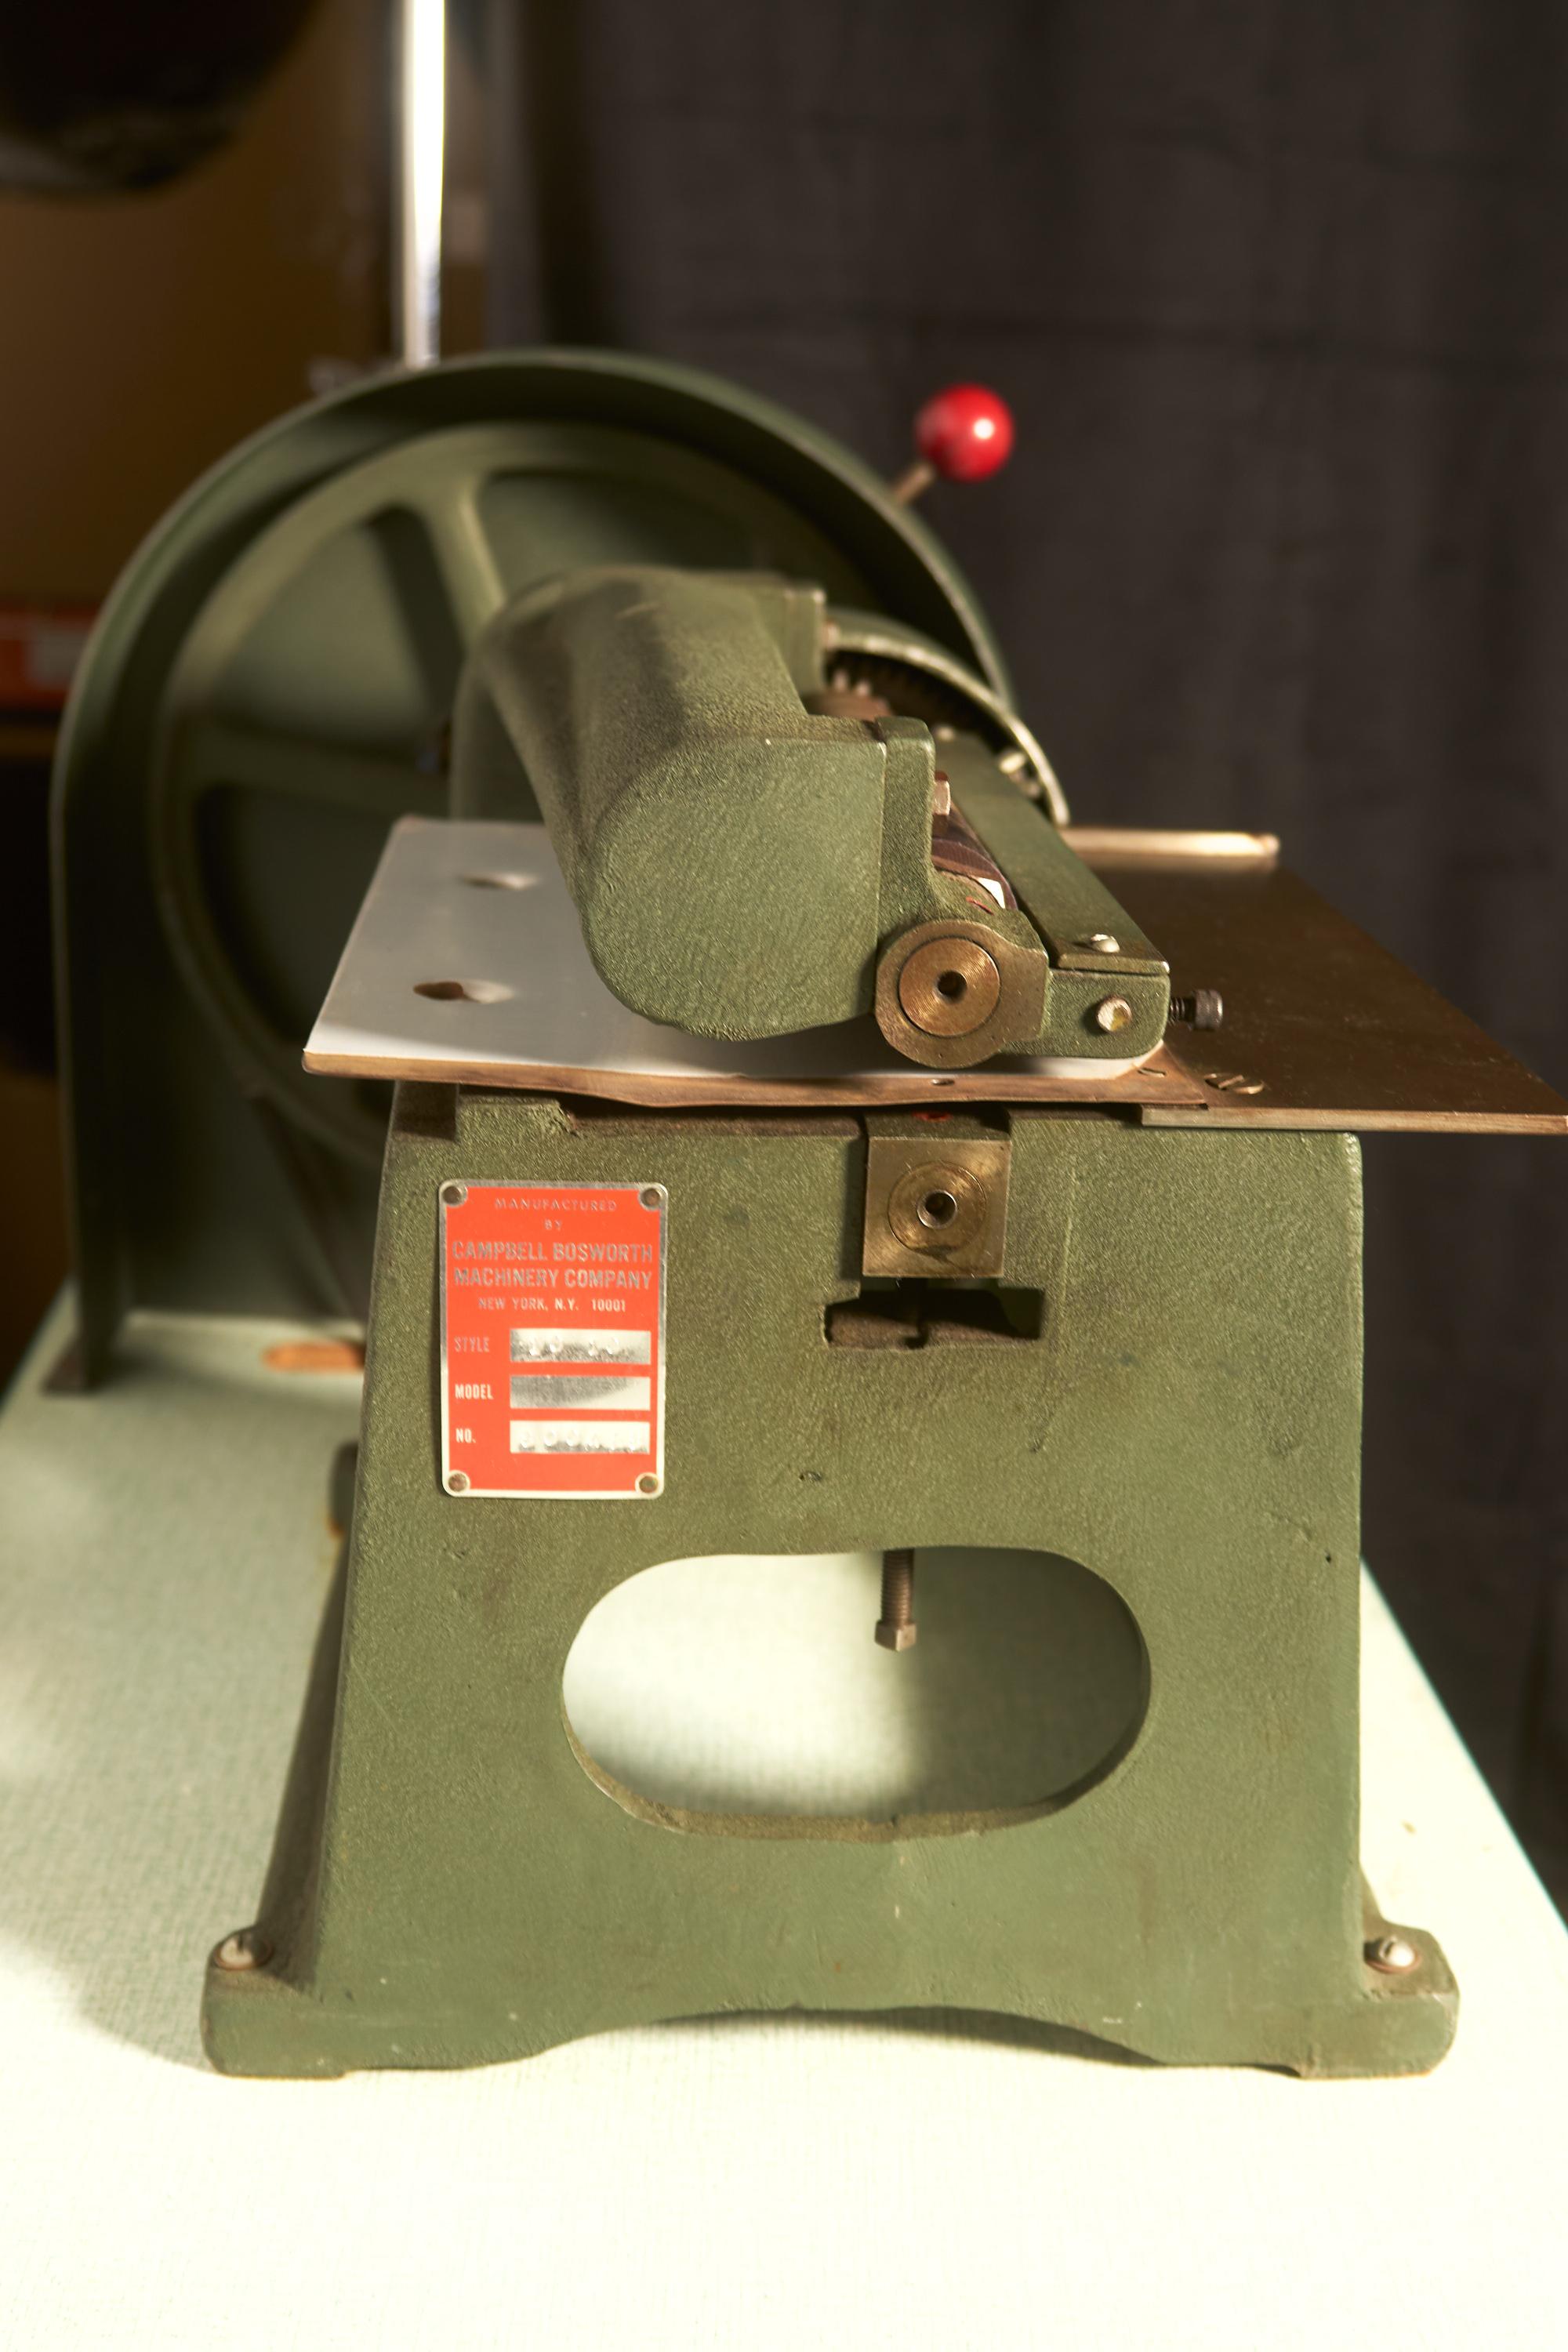
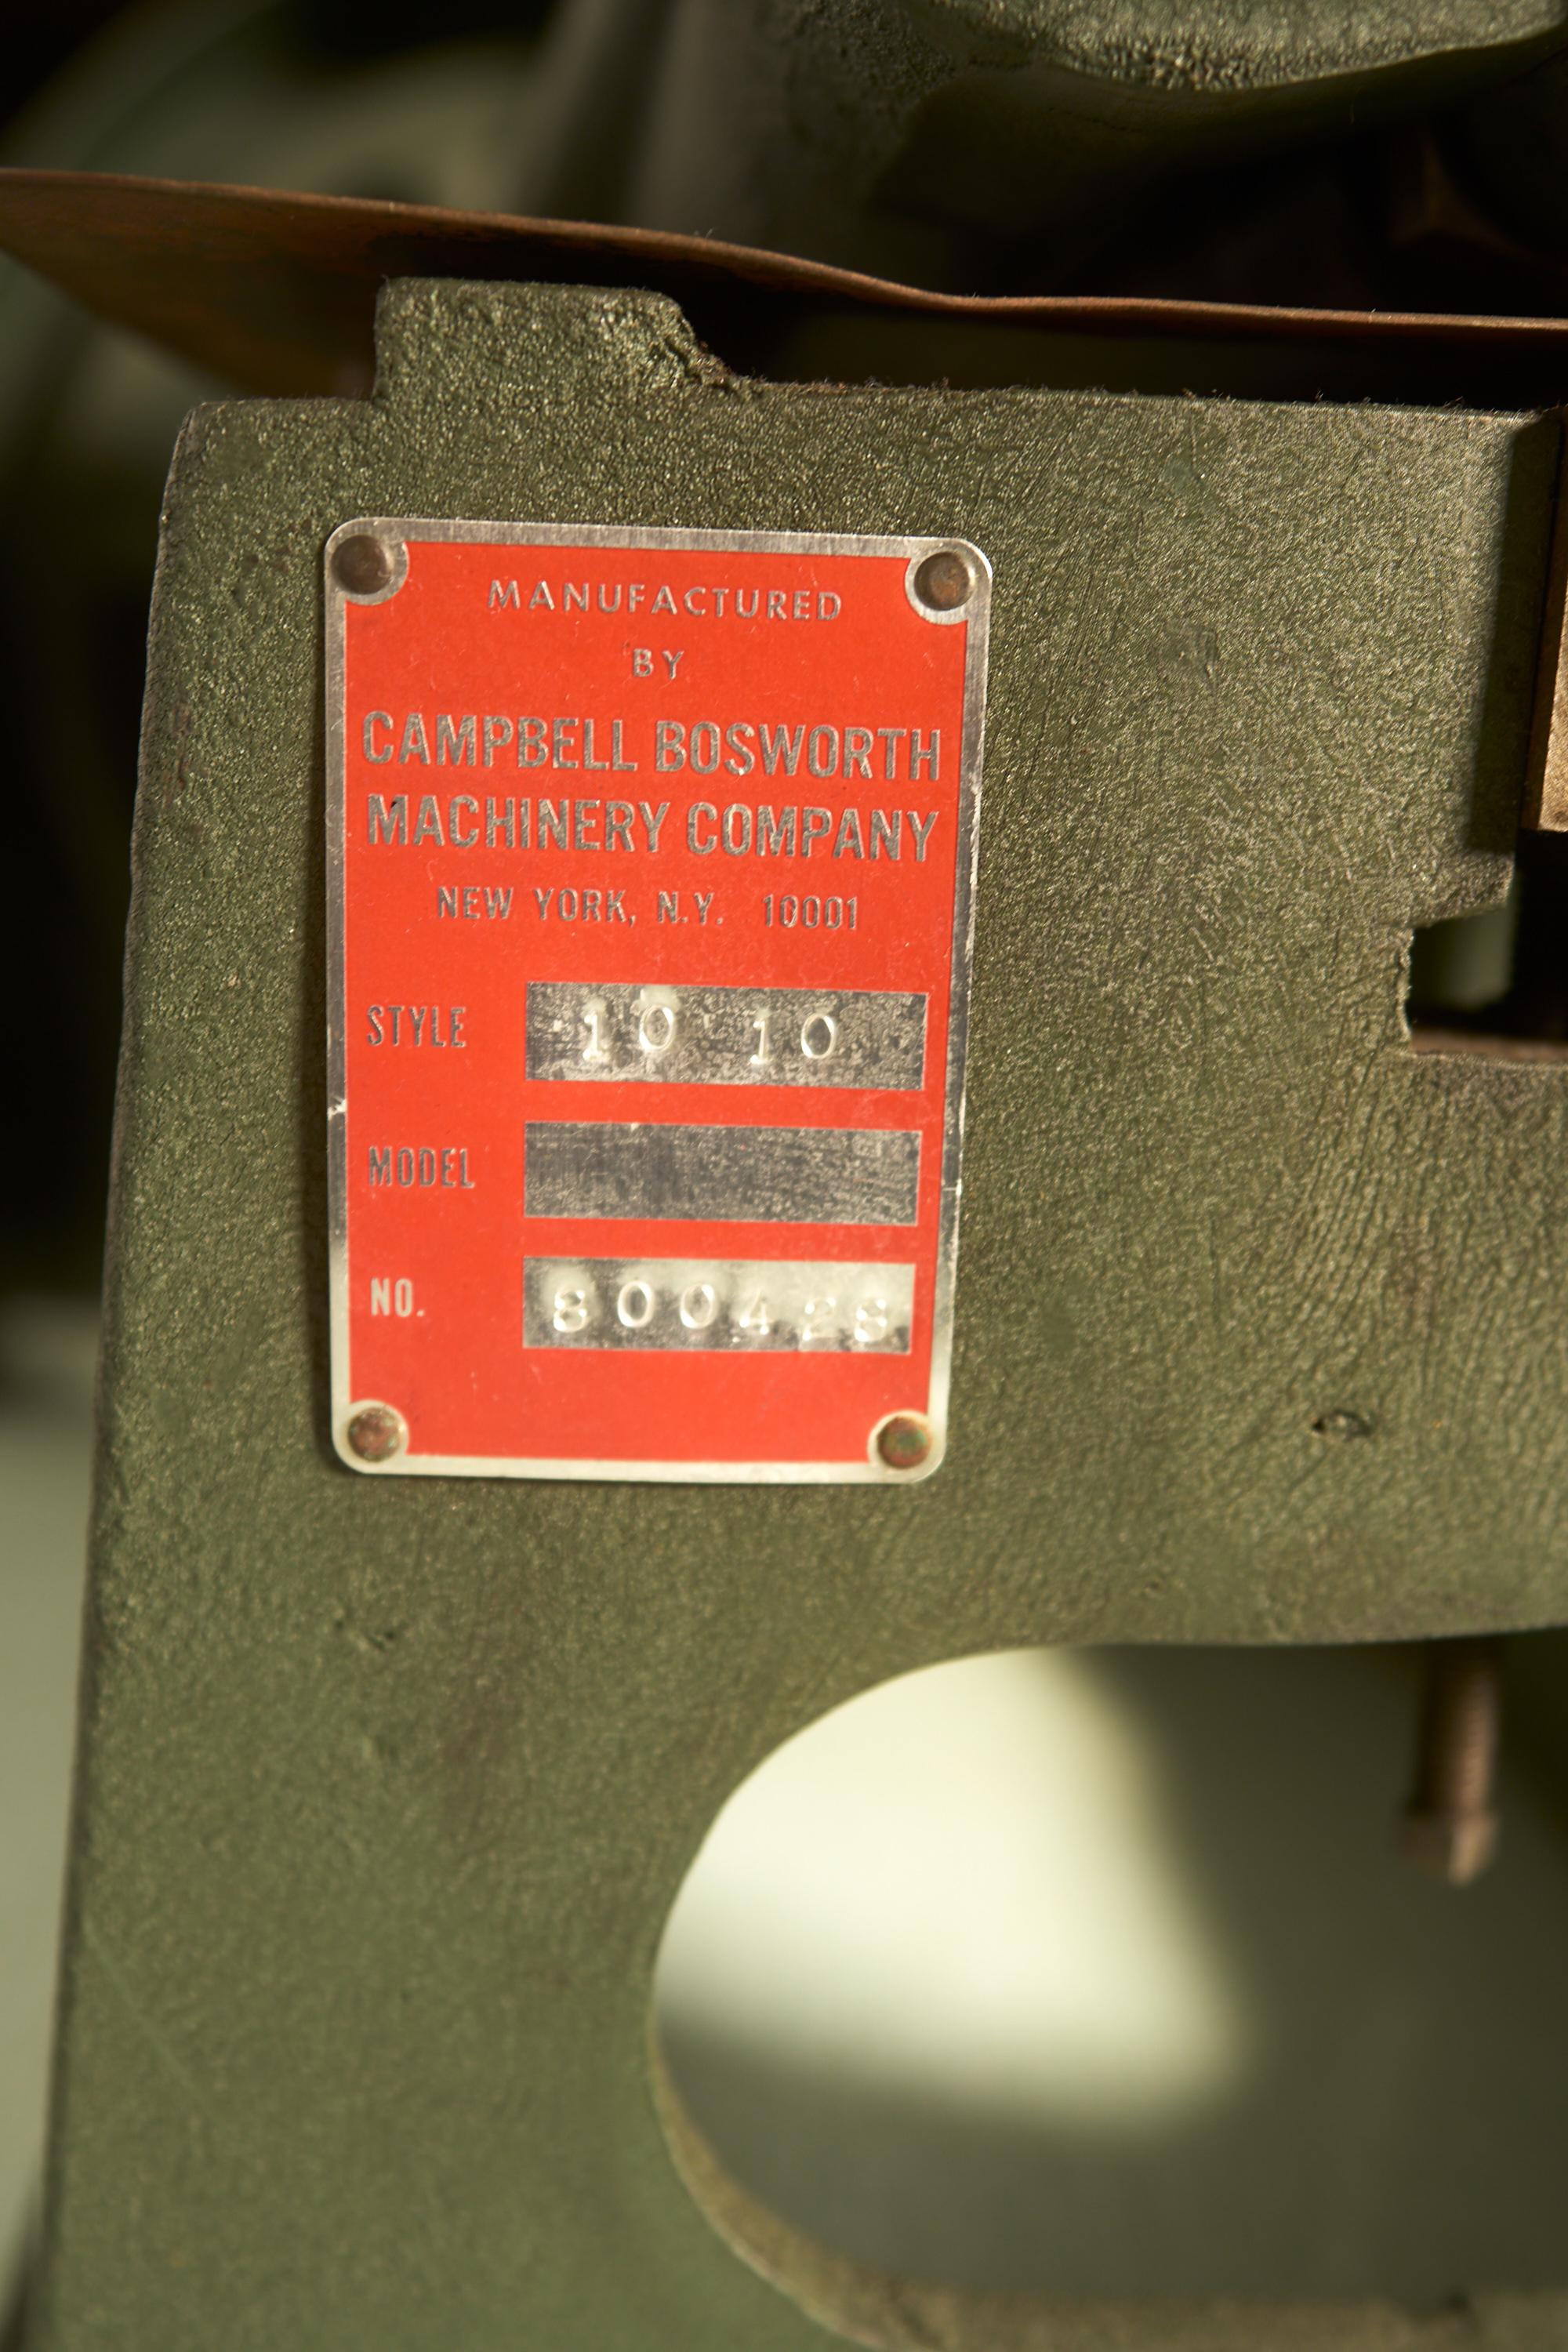
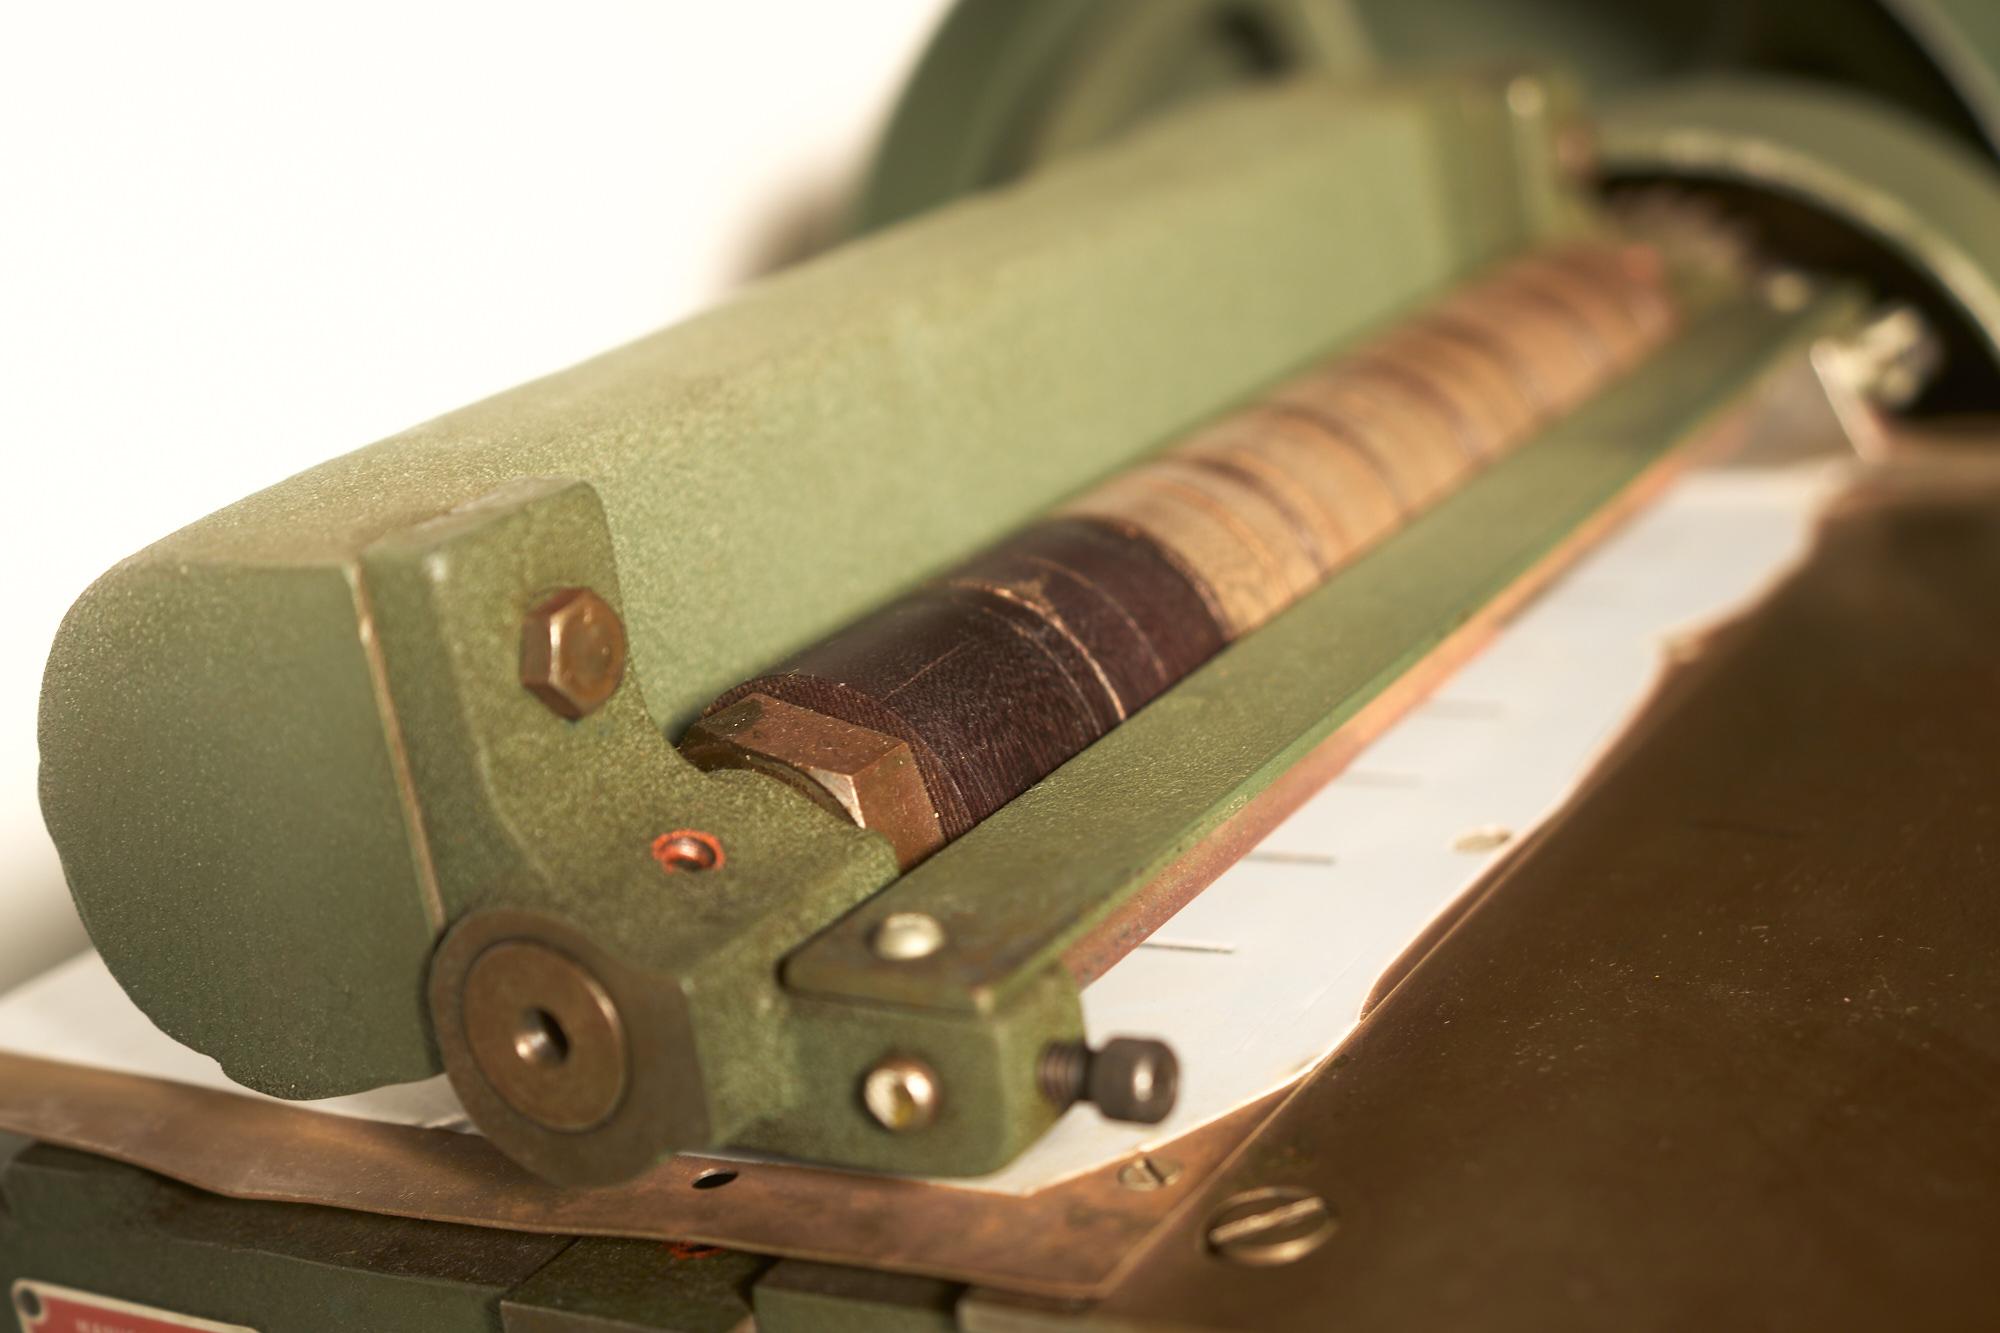
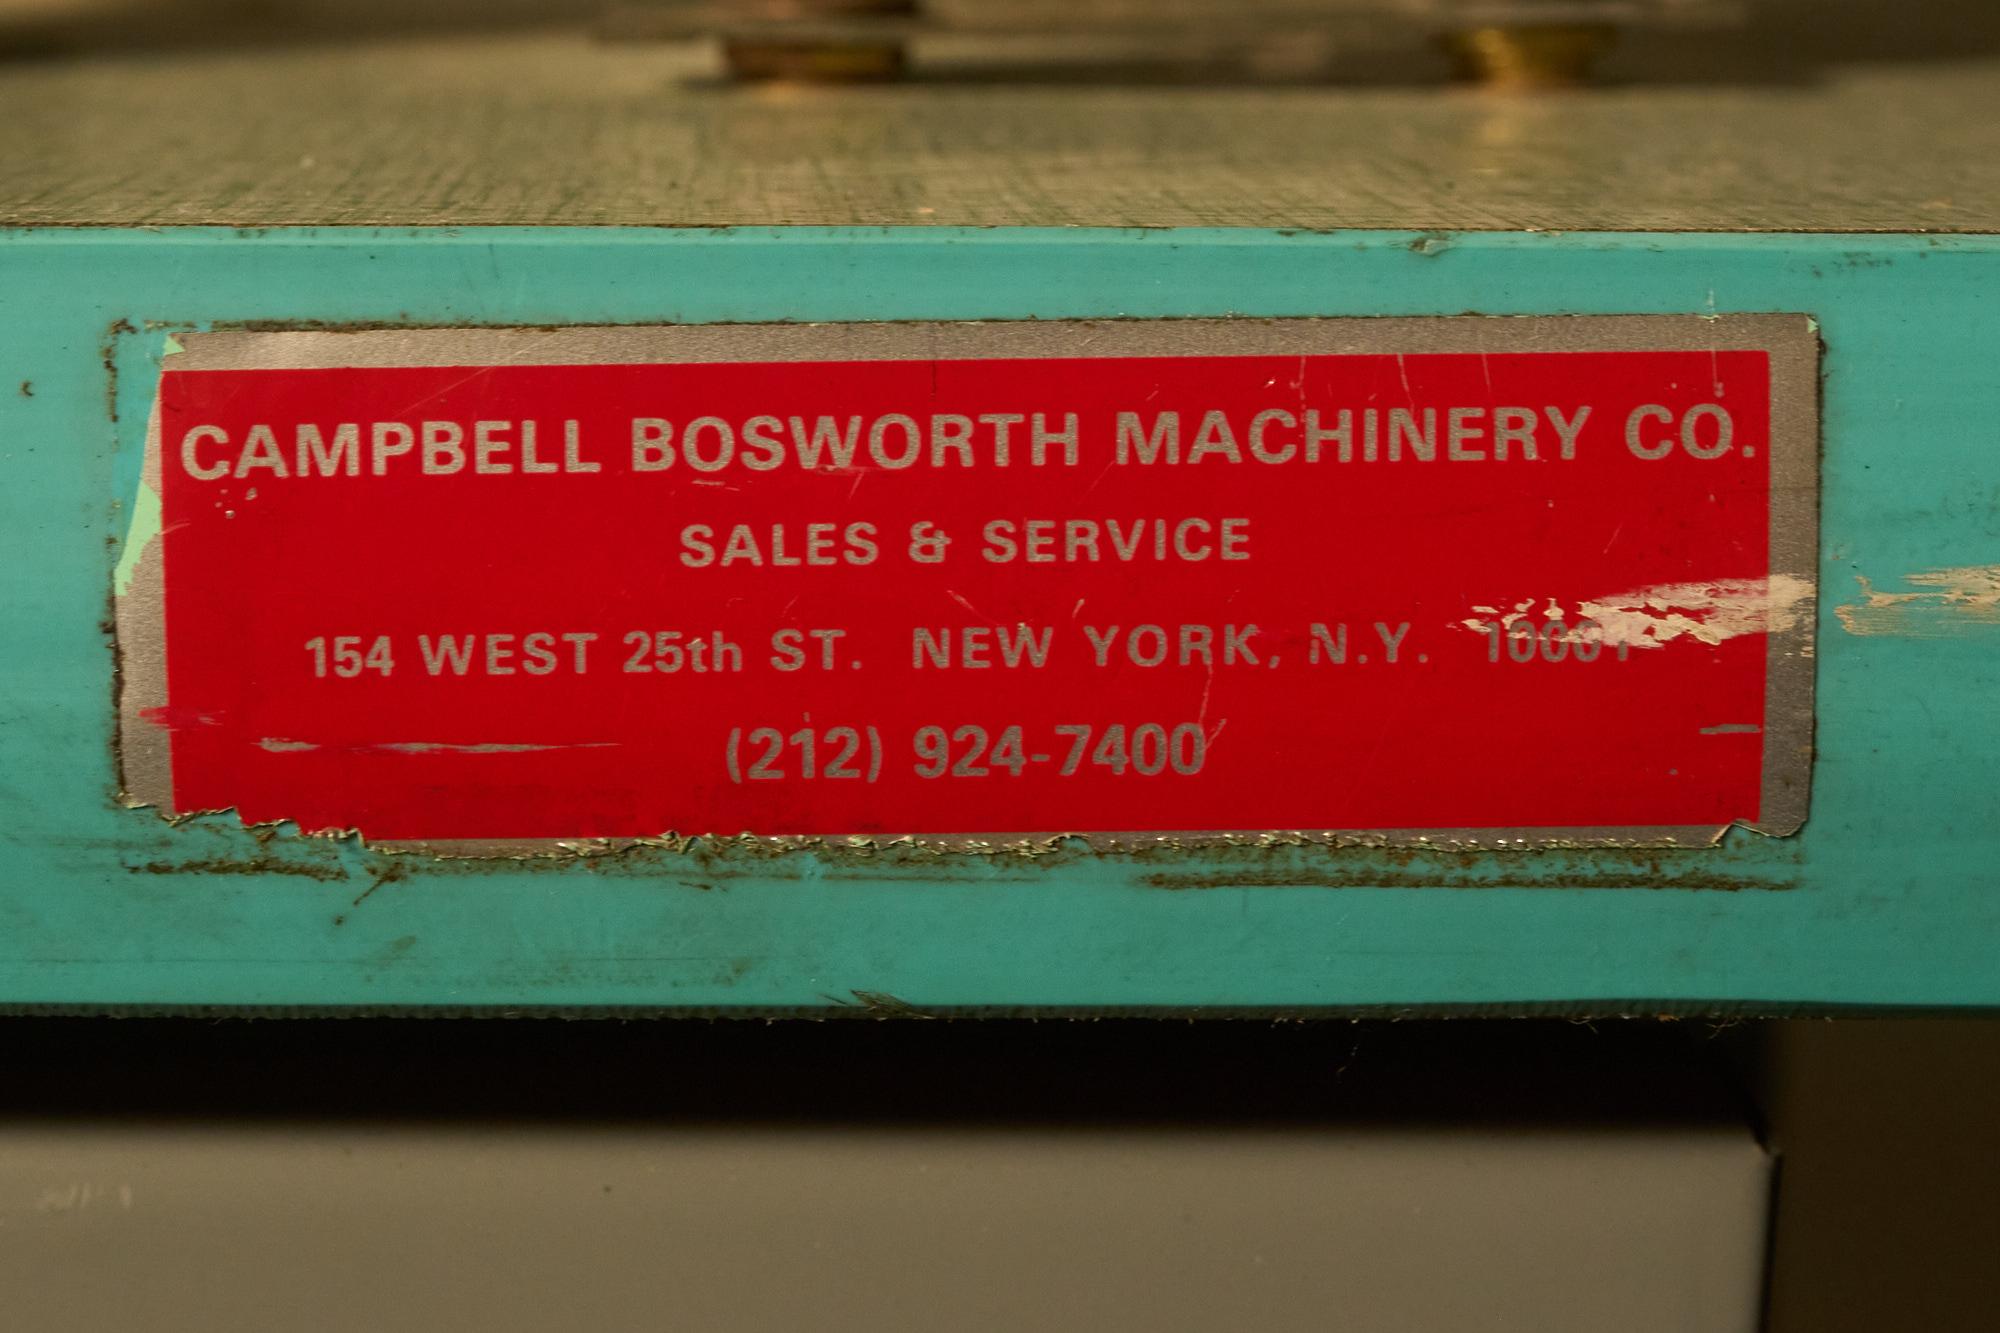
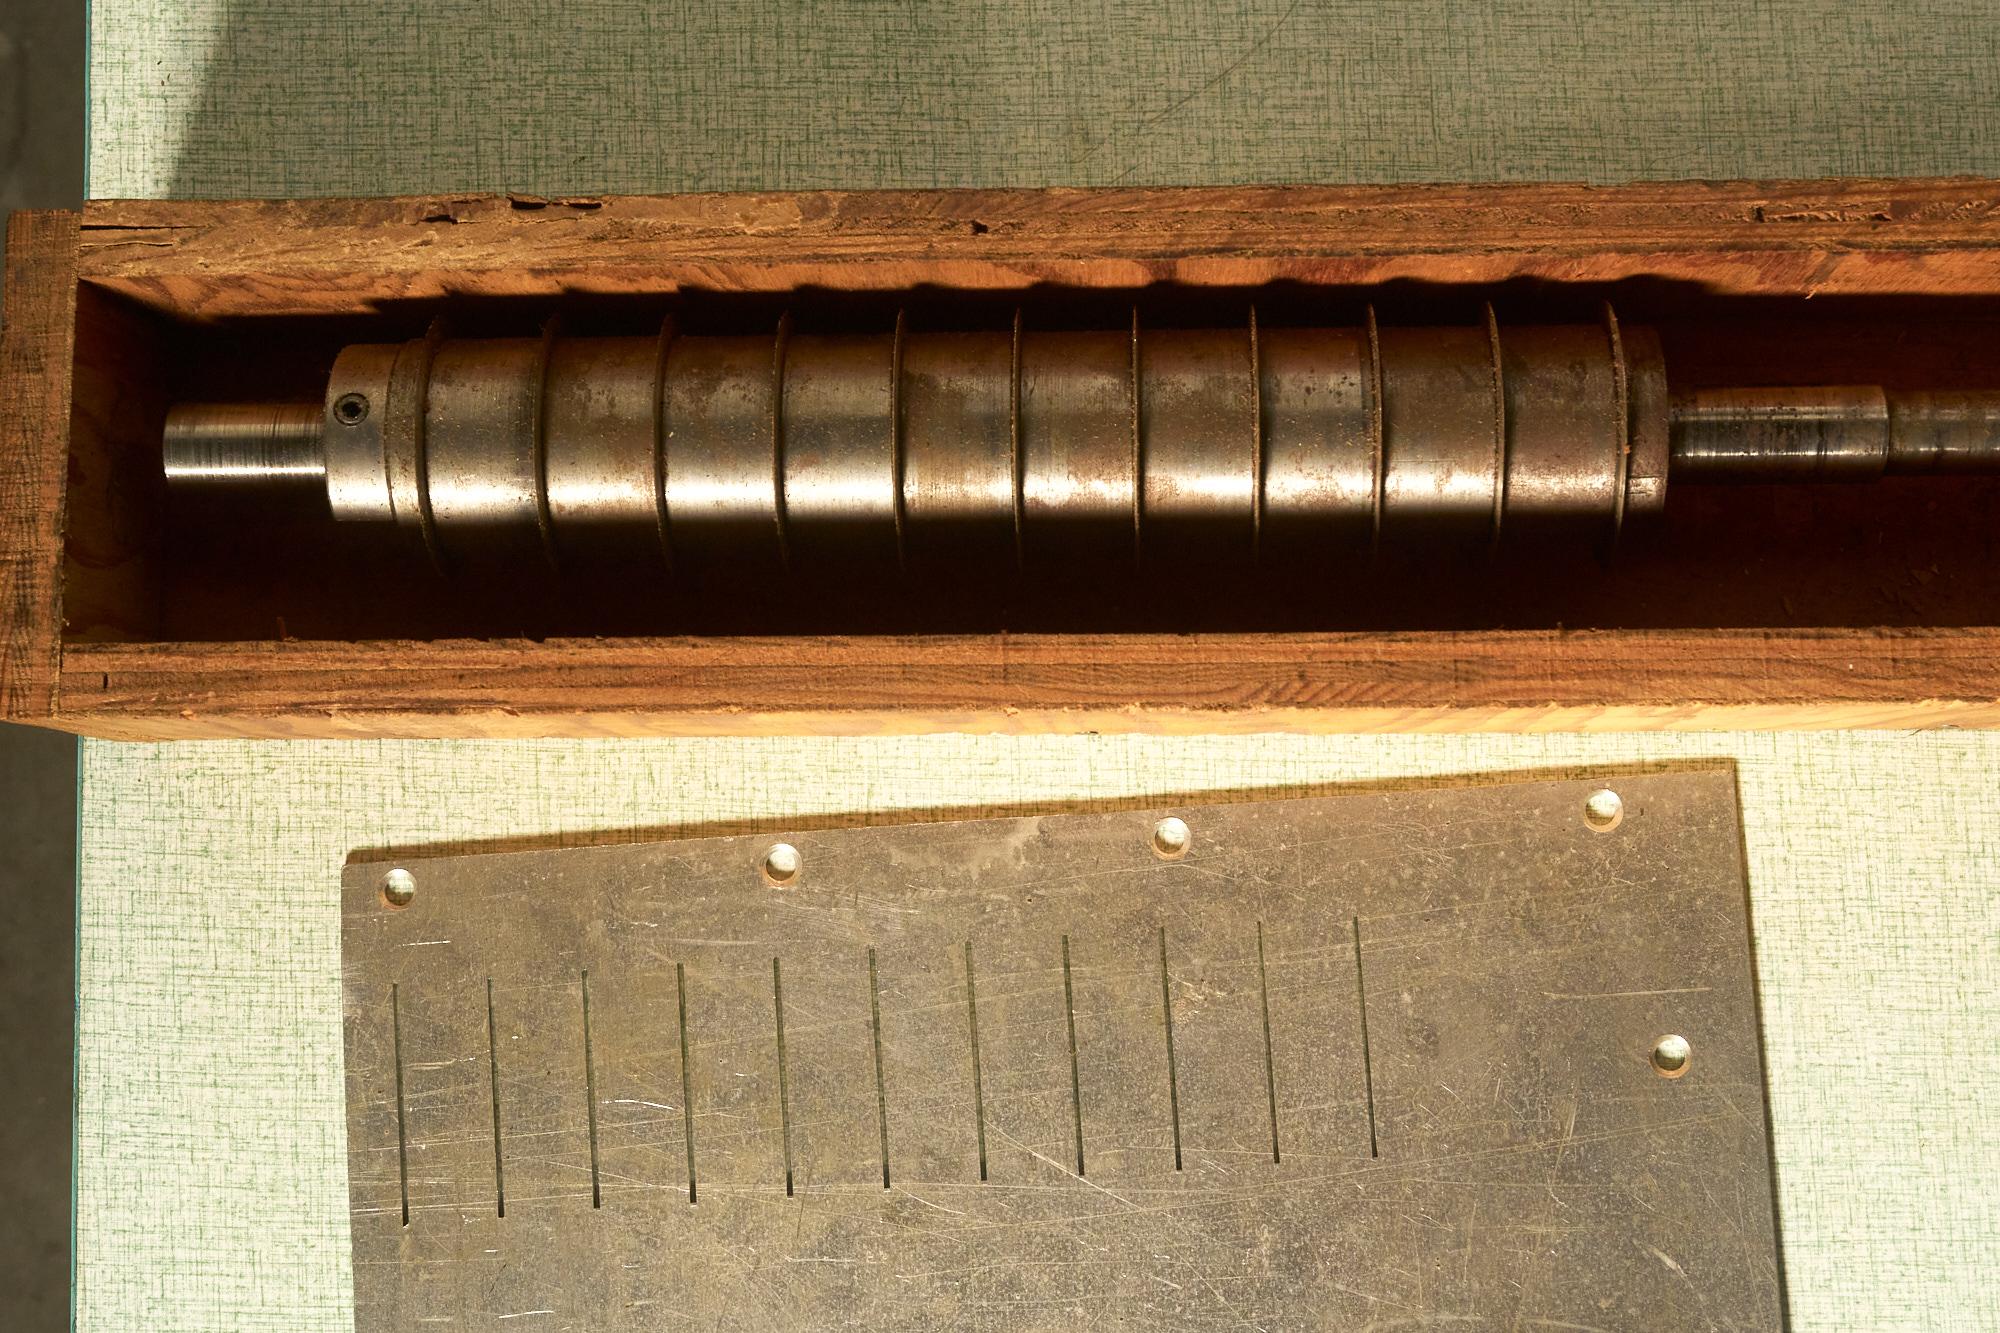
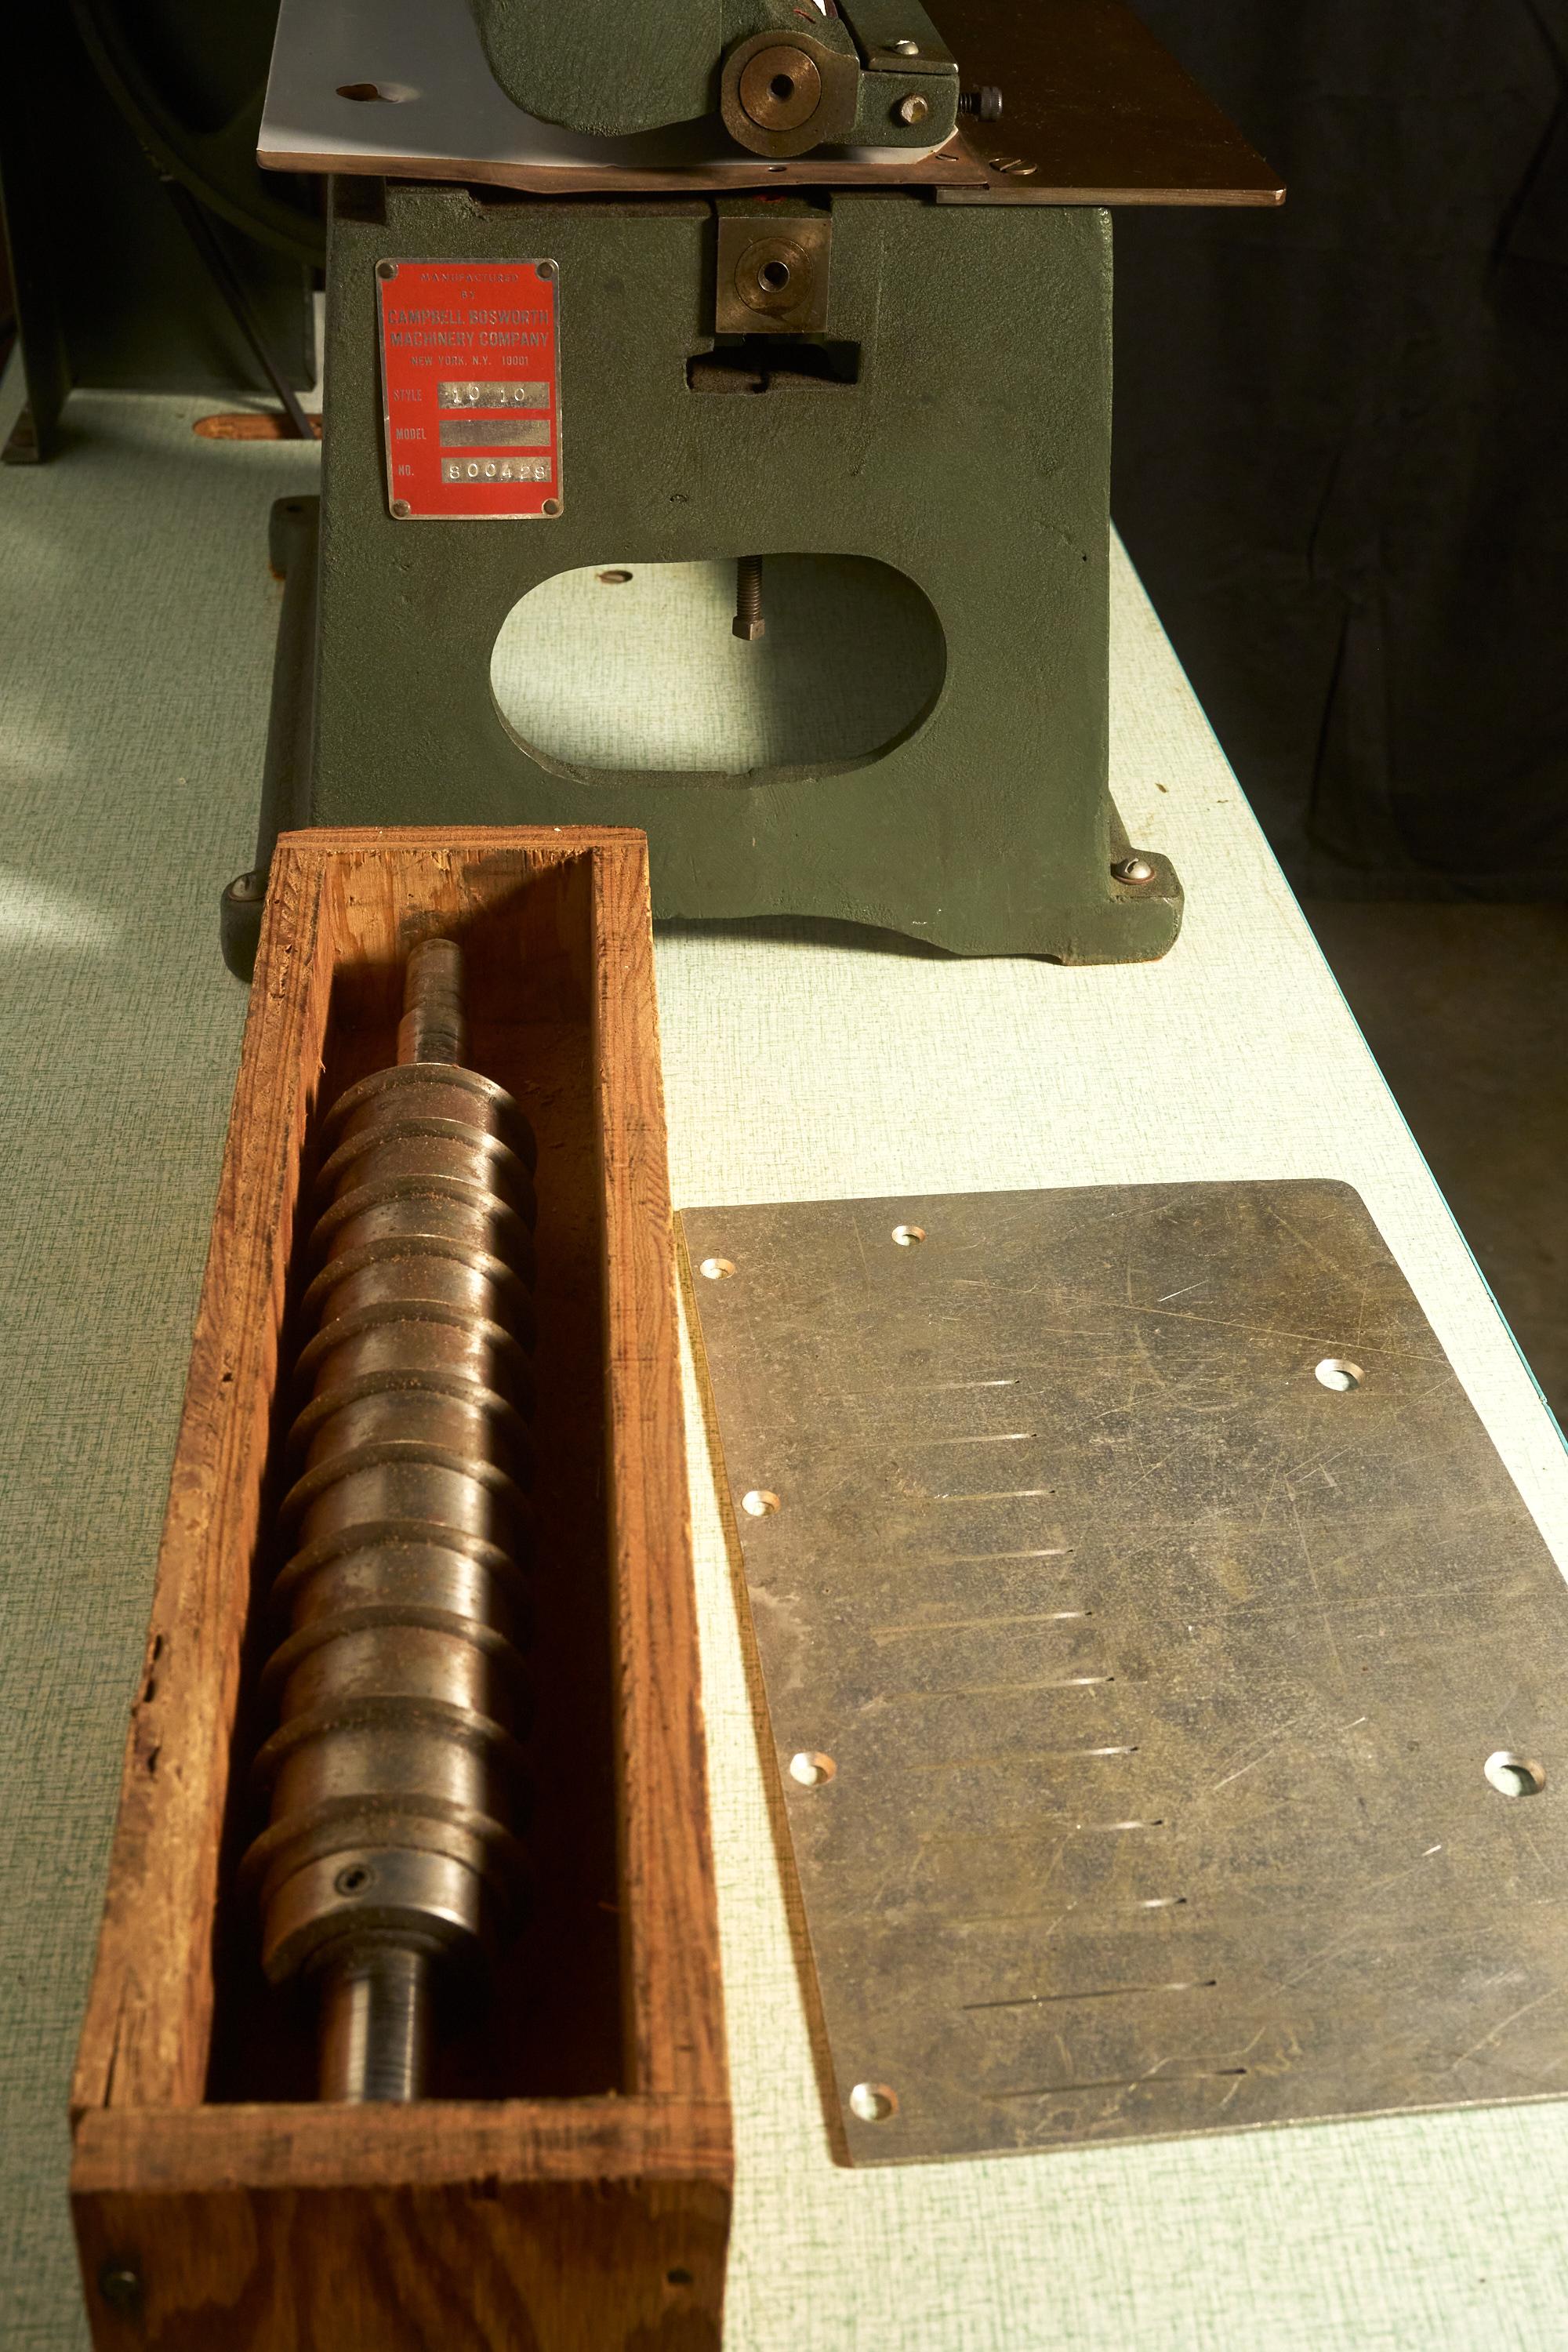
Leather strip cutter or belt / strap cutter. cuts leather into different widths. Comes with knifes and a bunch of spacer - THE WIDTHS COORDINATE WITHT THE DAN RAY LEATHER BINDER I AM ALSO LISTING FOR SALE. so you will have a 1" binding and a another width. 220v 3 phase (can change motor easily) $1000 These machines are all part of a small business downsizing. They are located in San Francisco. All priority will be given to pickups. I will crate and ship only as a last resort. Alternativly you can have a local crate person pick this up and handle all the crating and shipping. This will be a bit expensive in SF, but these machines are rare. Please take a look at the other listings.


- Today
-
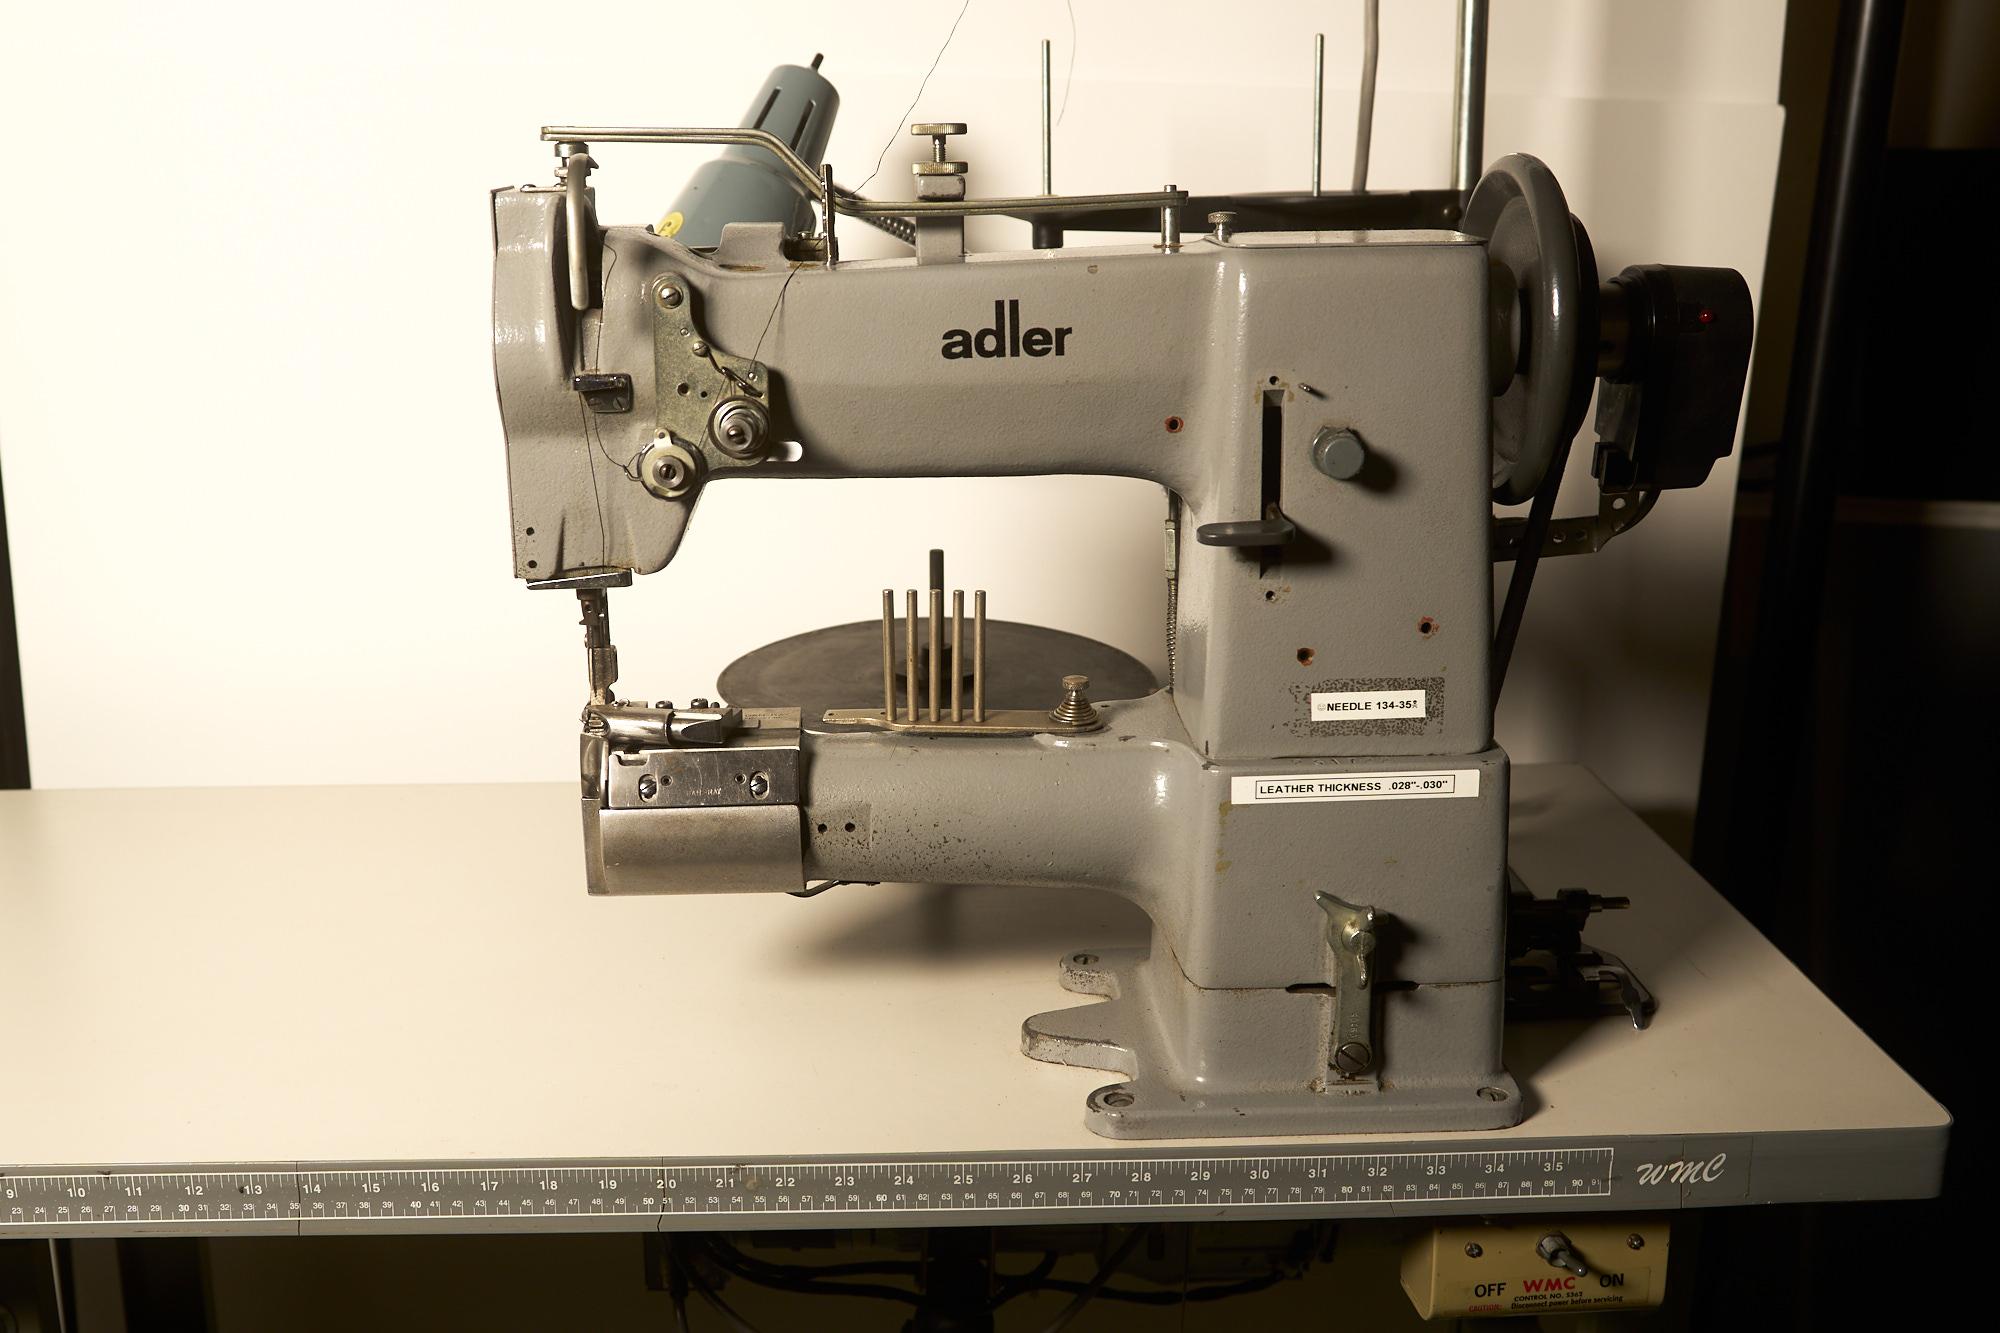
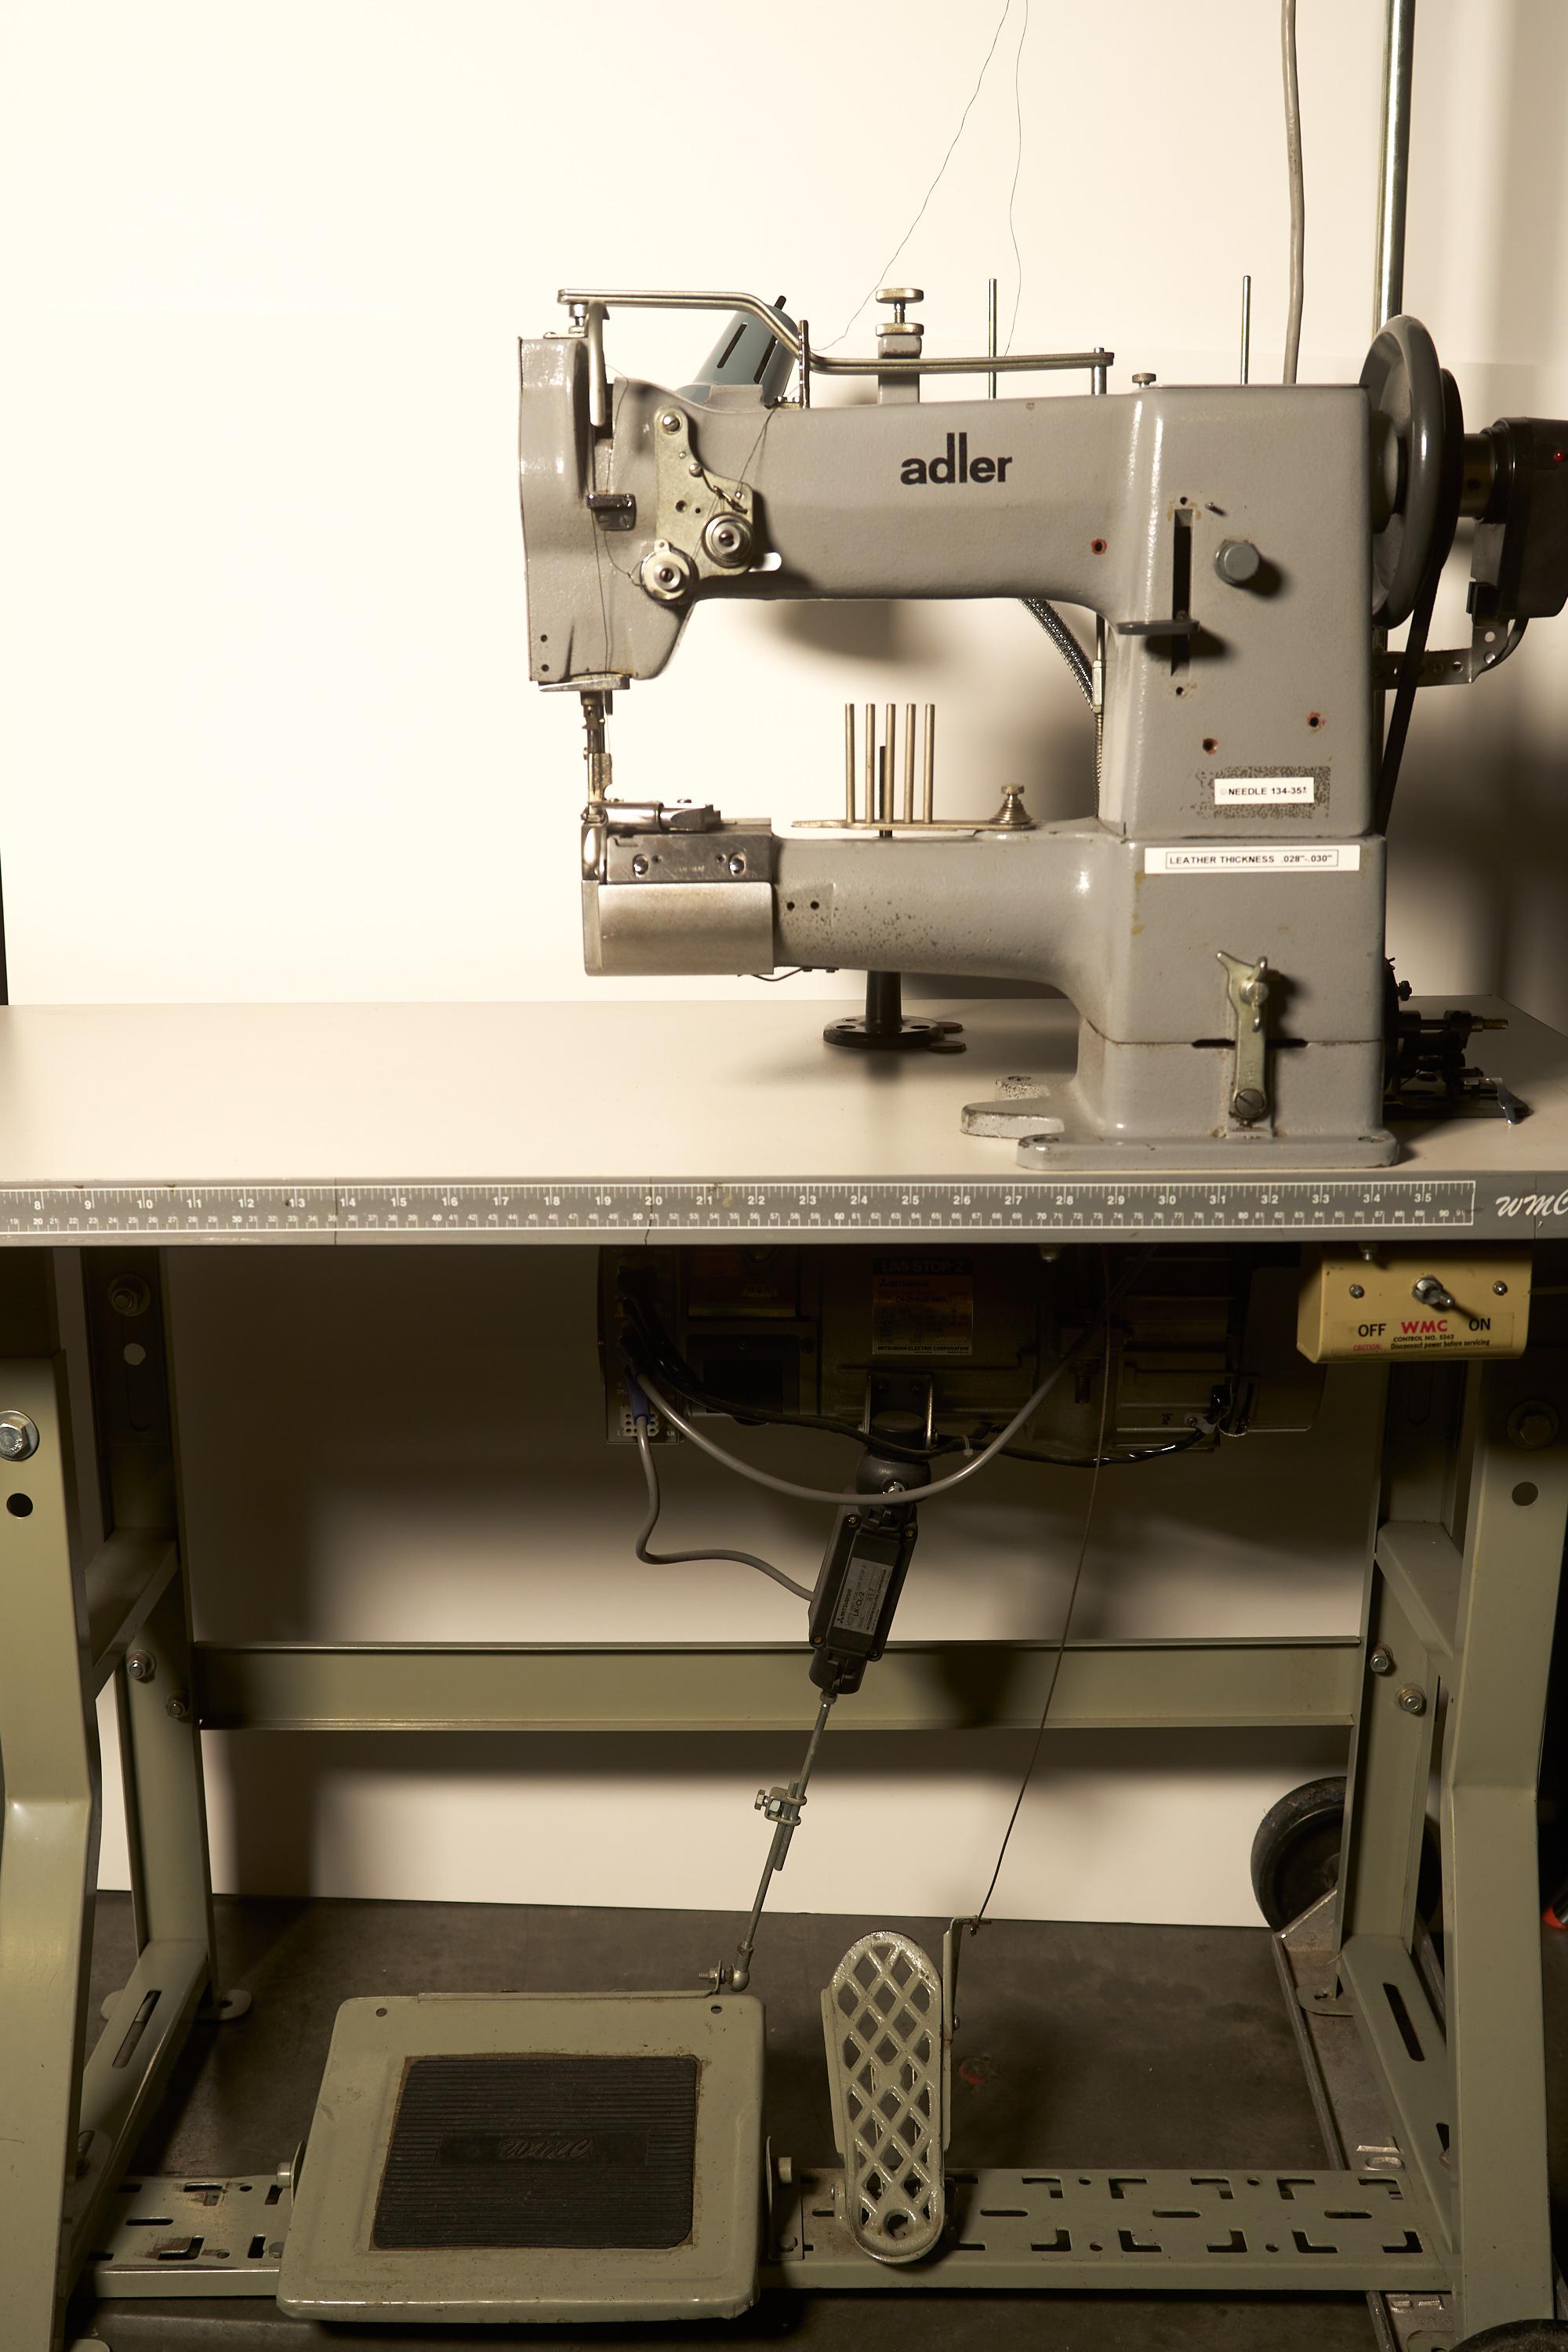
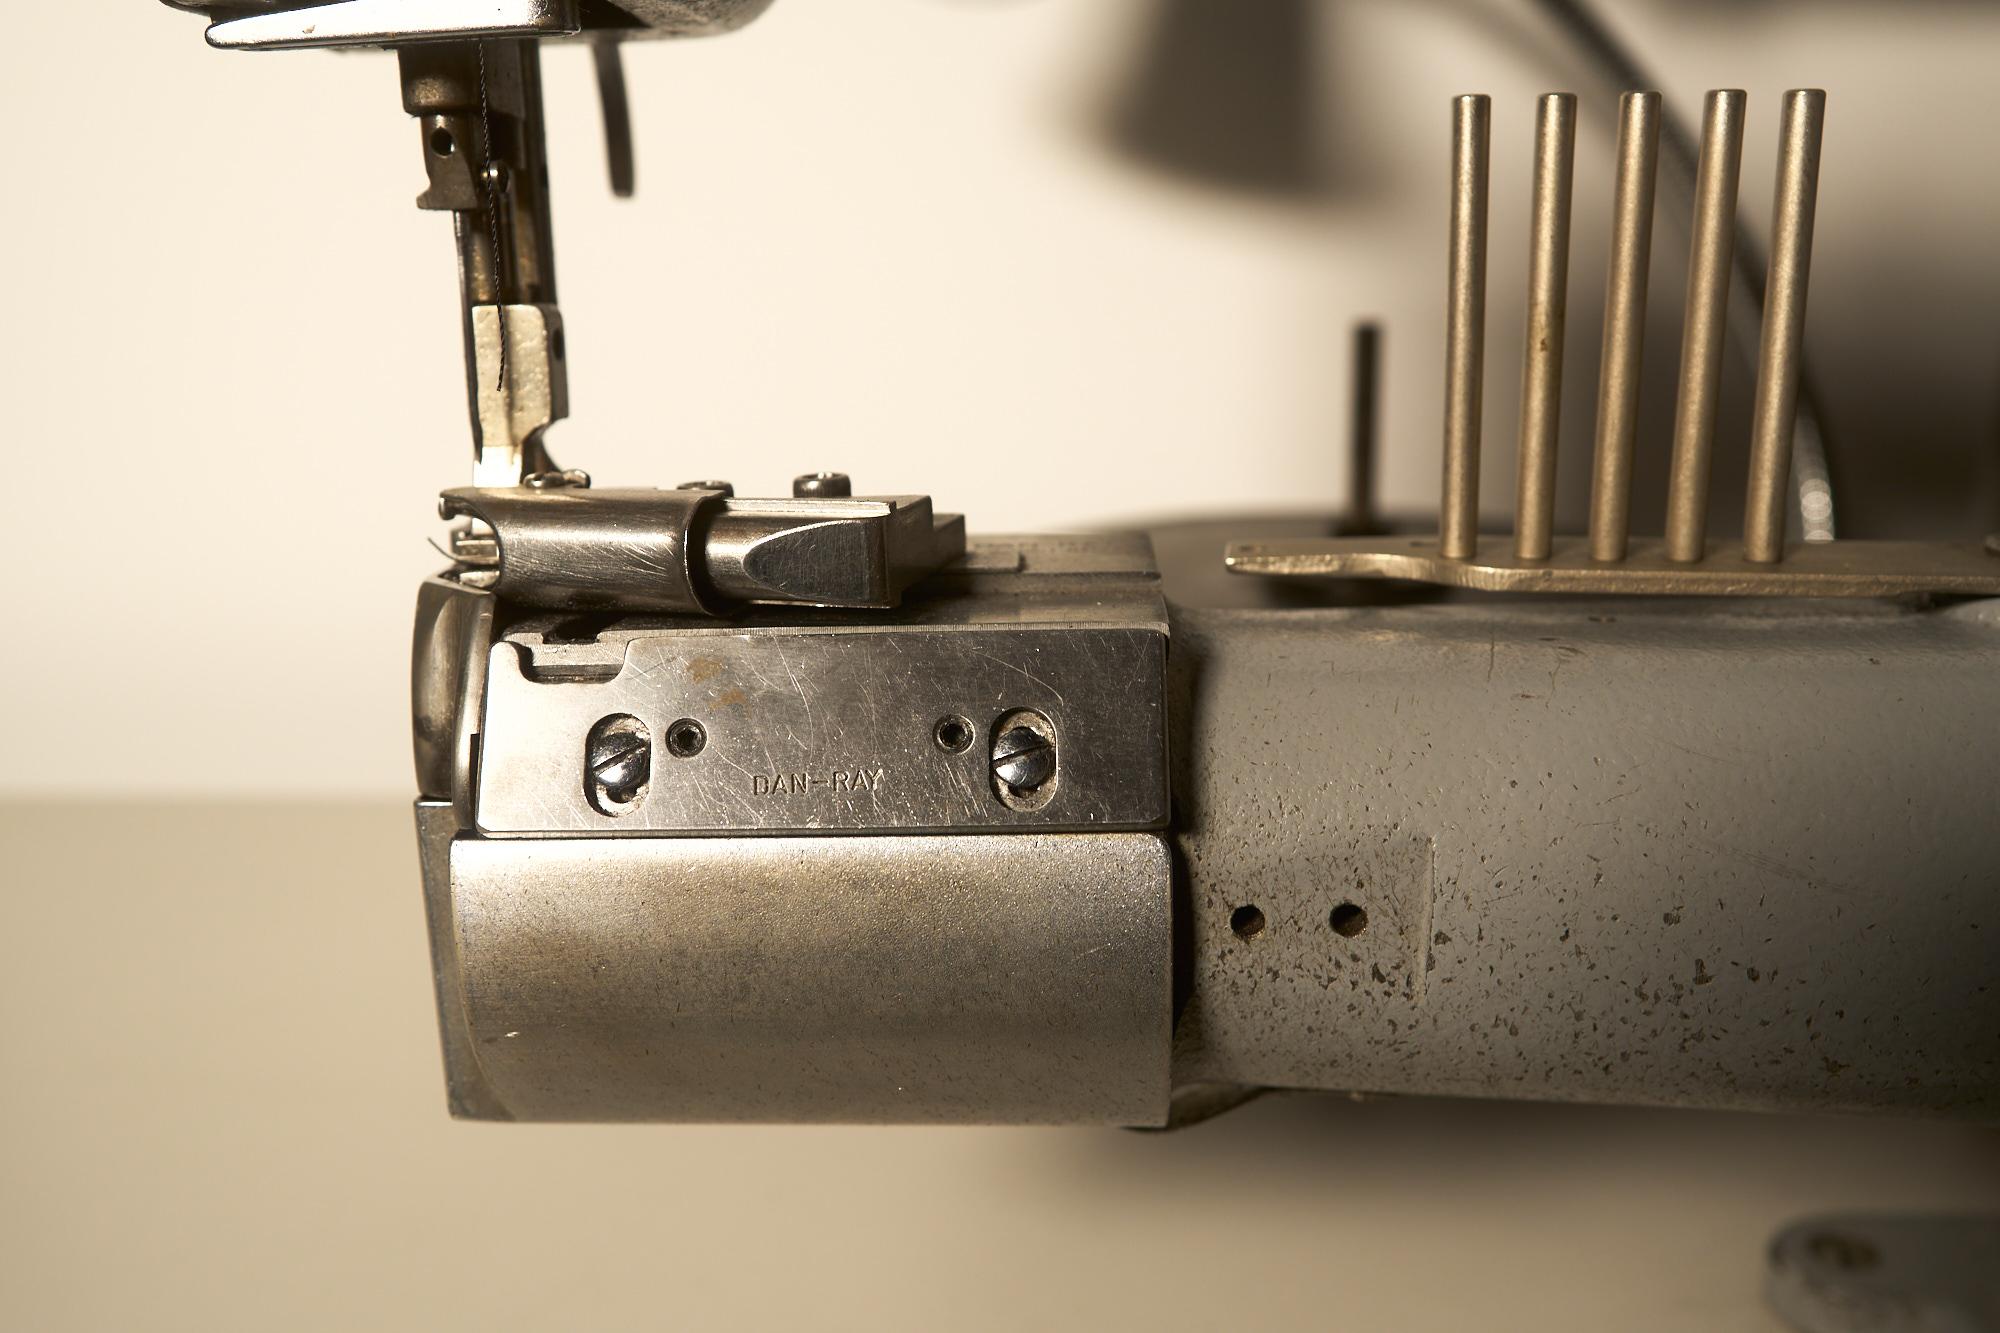
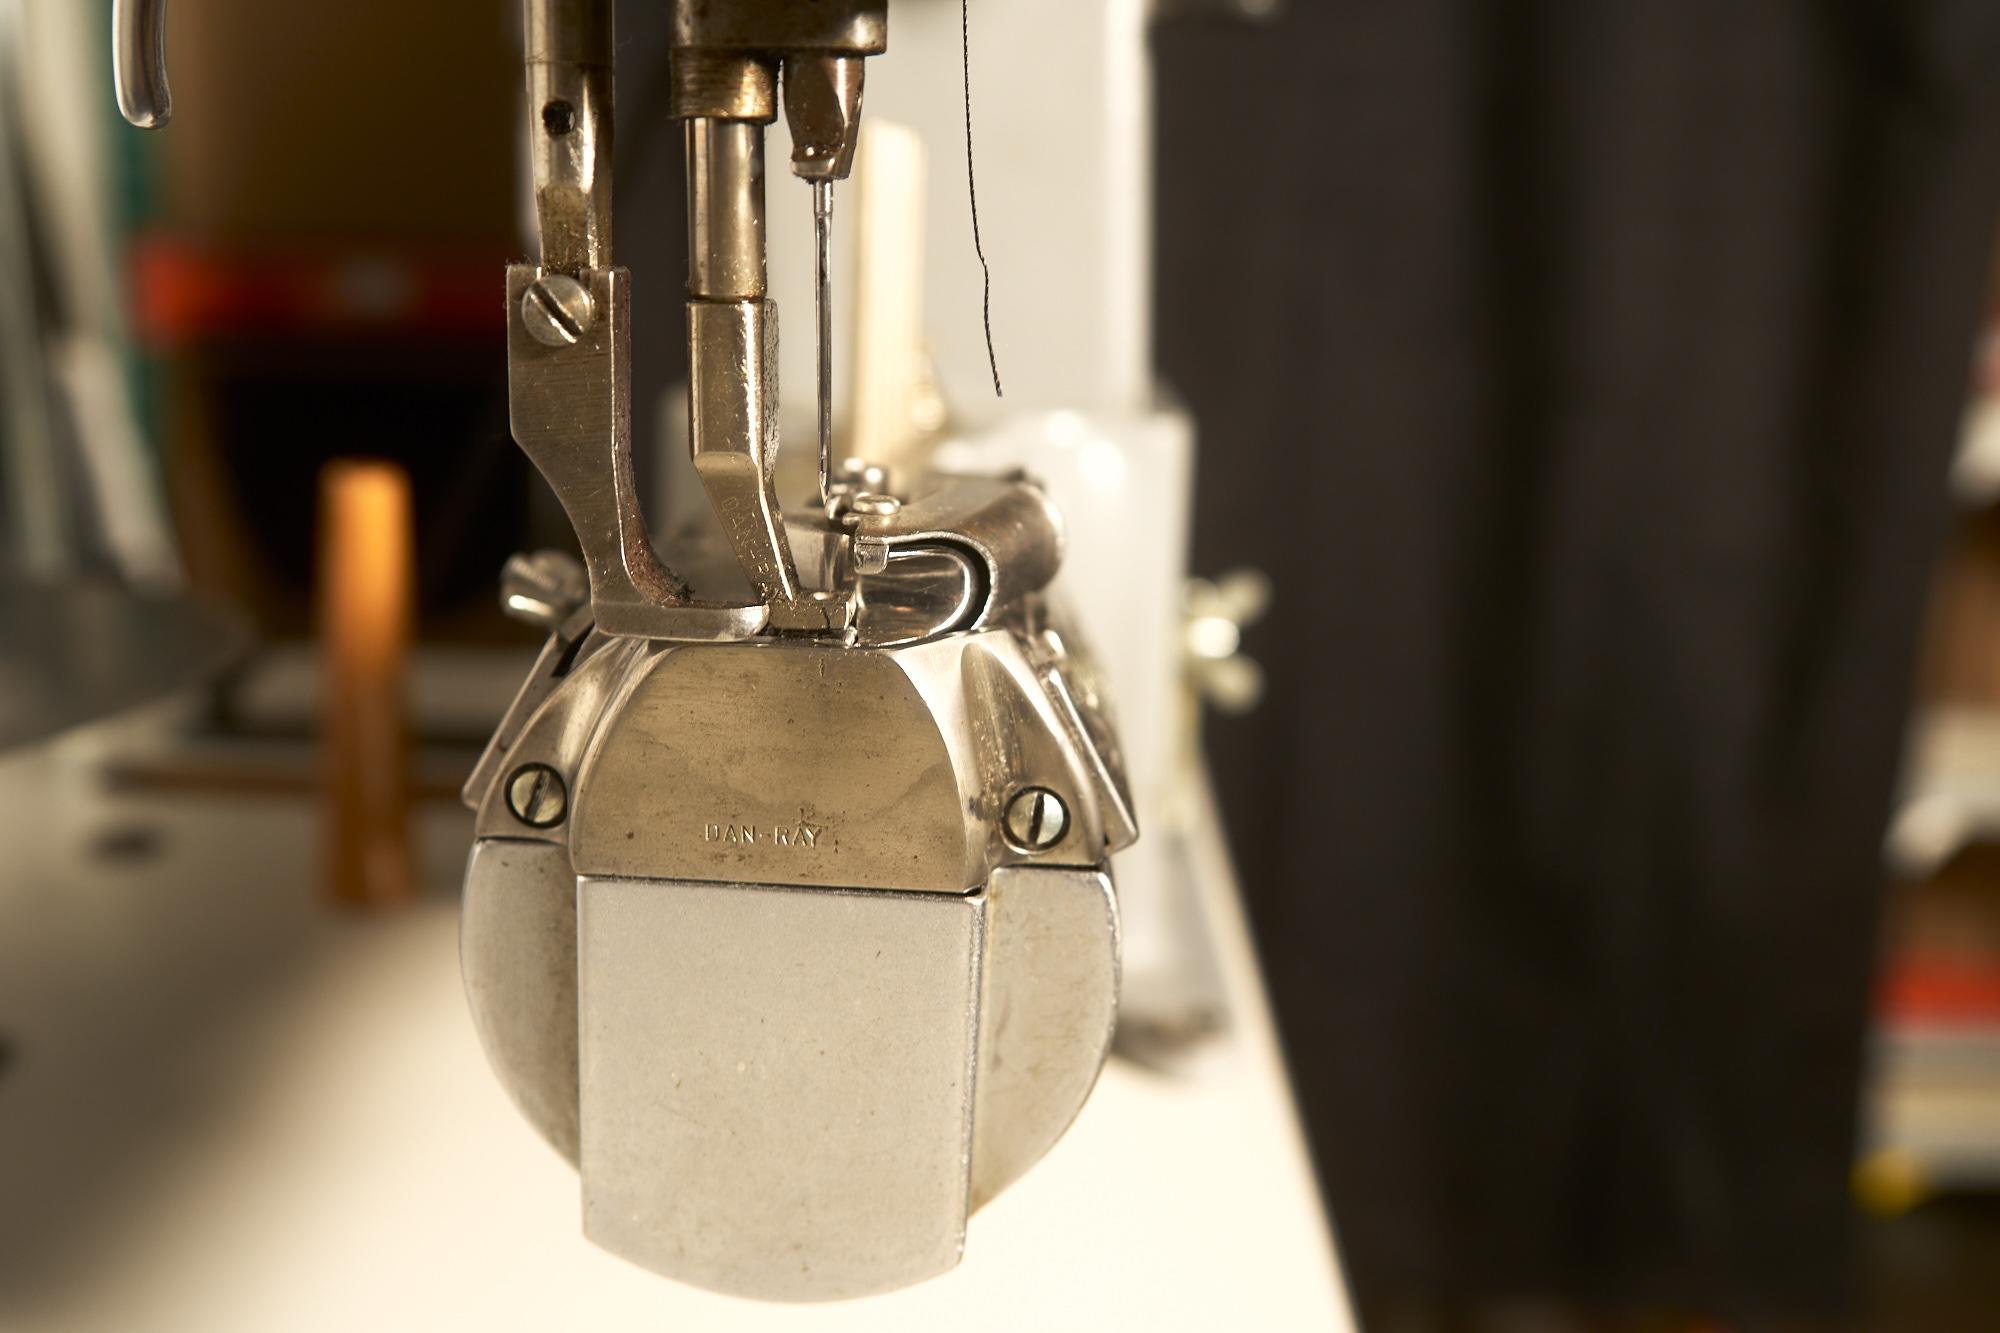
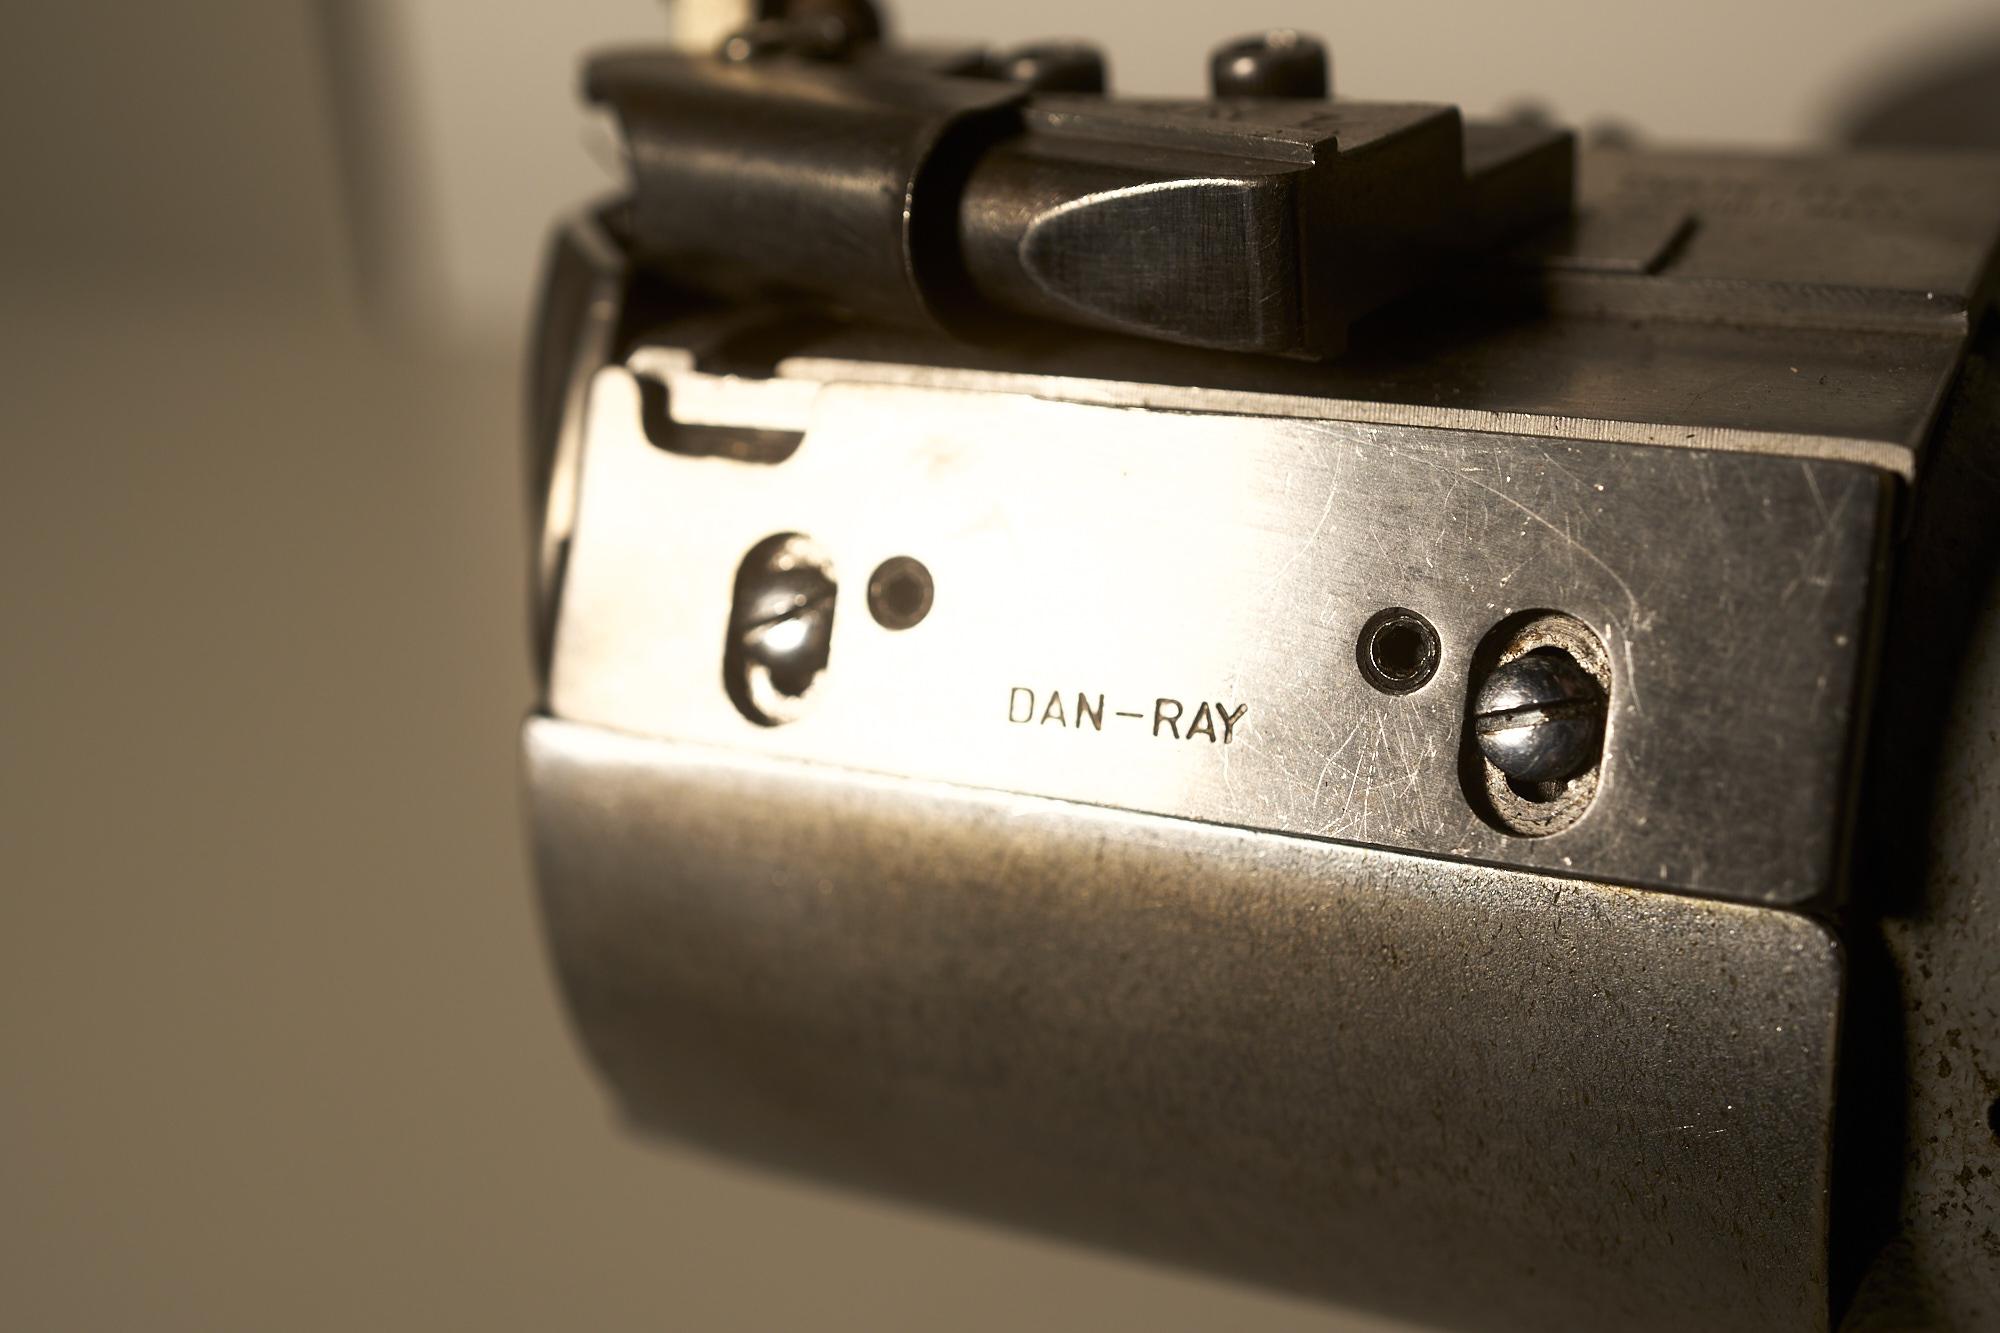
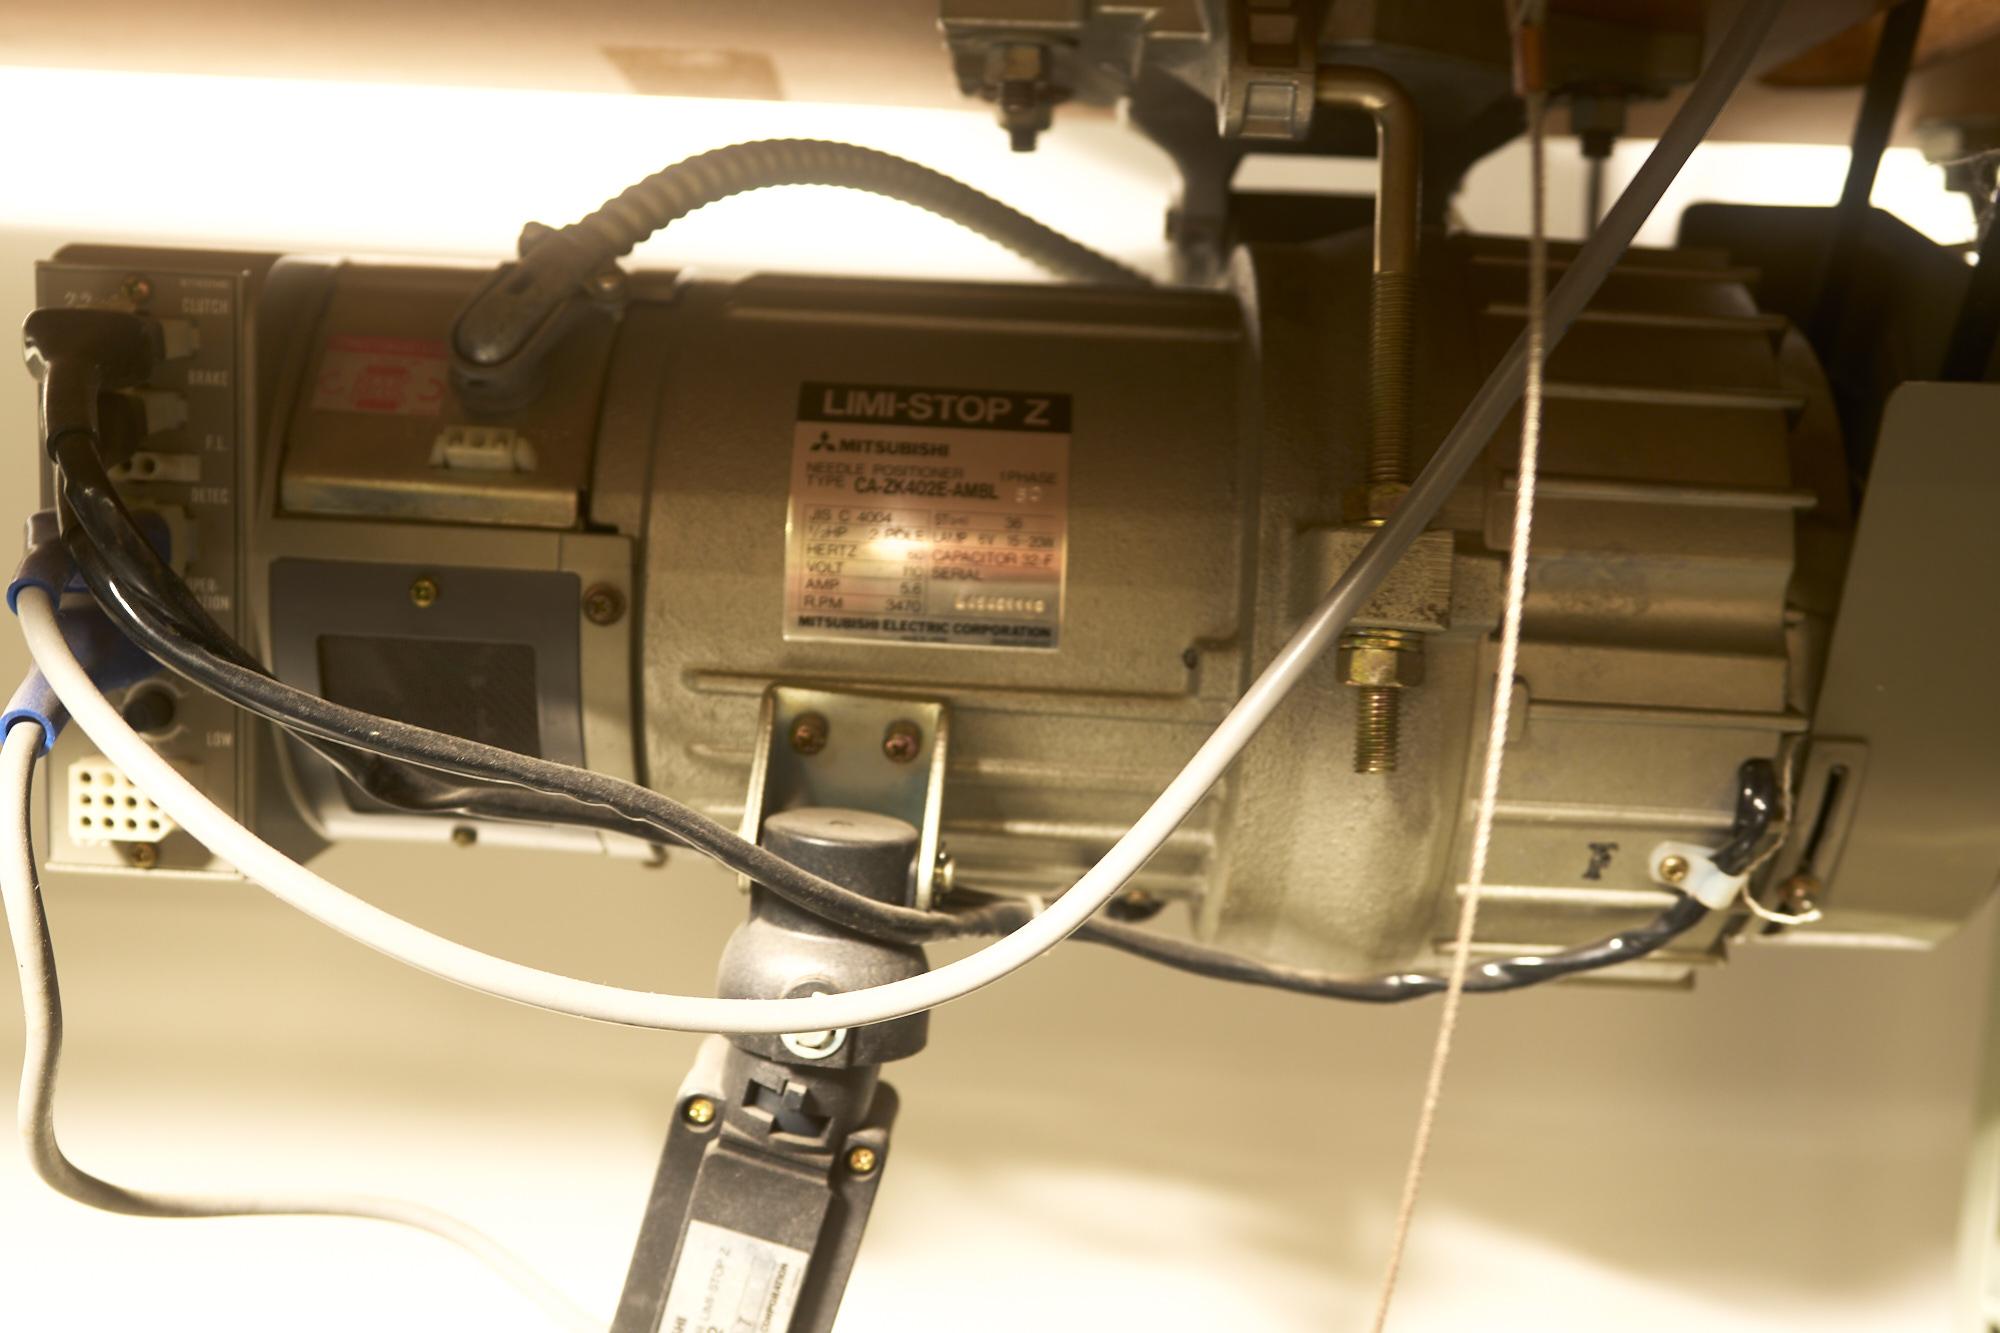
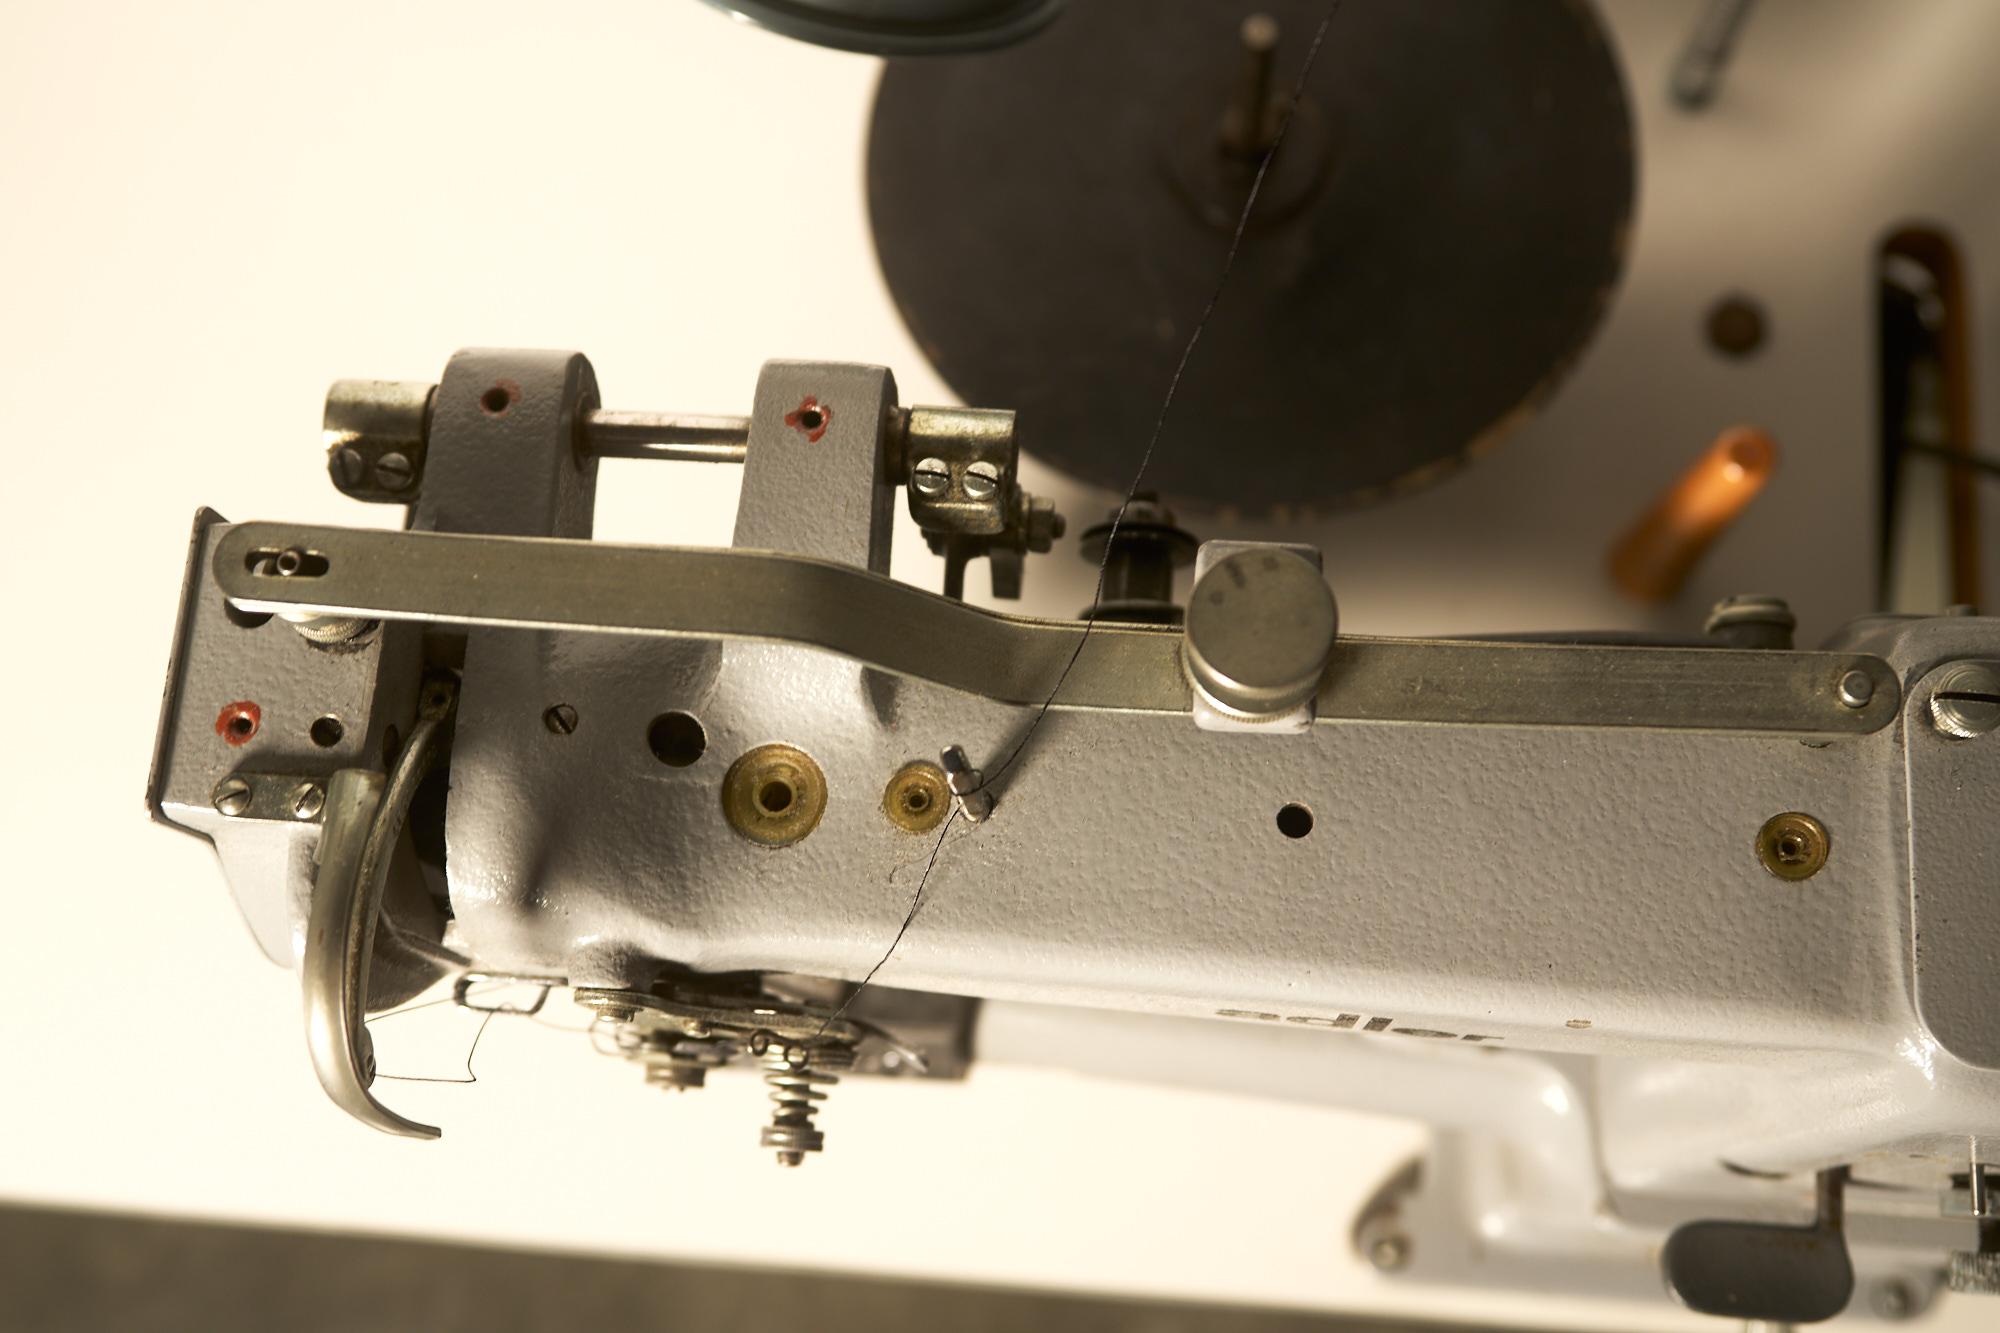
Dan Ray leather binder/edger. This is a custom setup machine for leather binding such as done on Coach bags in the 1980-90's. Needle position Efka motor. Made in Germany: $1800 (you will need the Campbell Bosworth 10 10 leather cutter that I am also selling to go with this machine) These machines are all part of a small business downsizing. They are located in San Francisco. All priority will be given to pickups. I will crate and ship only as a last resort. Alternativly you can have a local crate person pick this up and handle all the crating and shipping. This will be a bit expensive in SF, but these machines are rare. Please take a look at the other listings.

-
.thumb.jpg.327685d8c1787fa894323fed9a6b2dac.jpg)
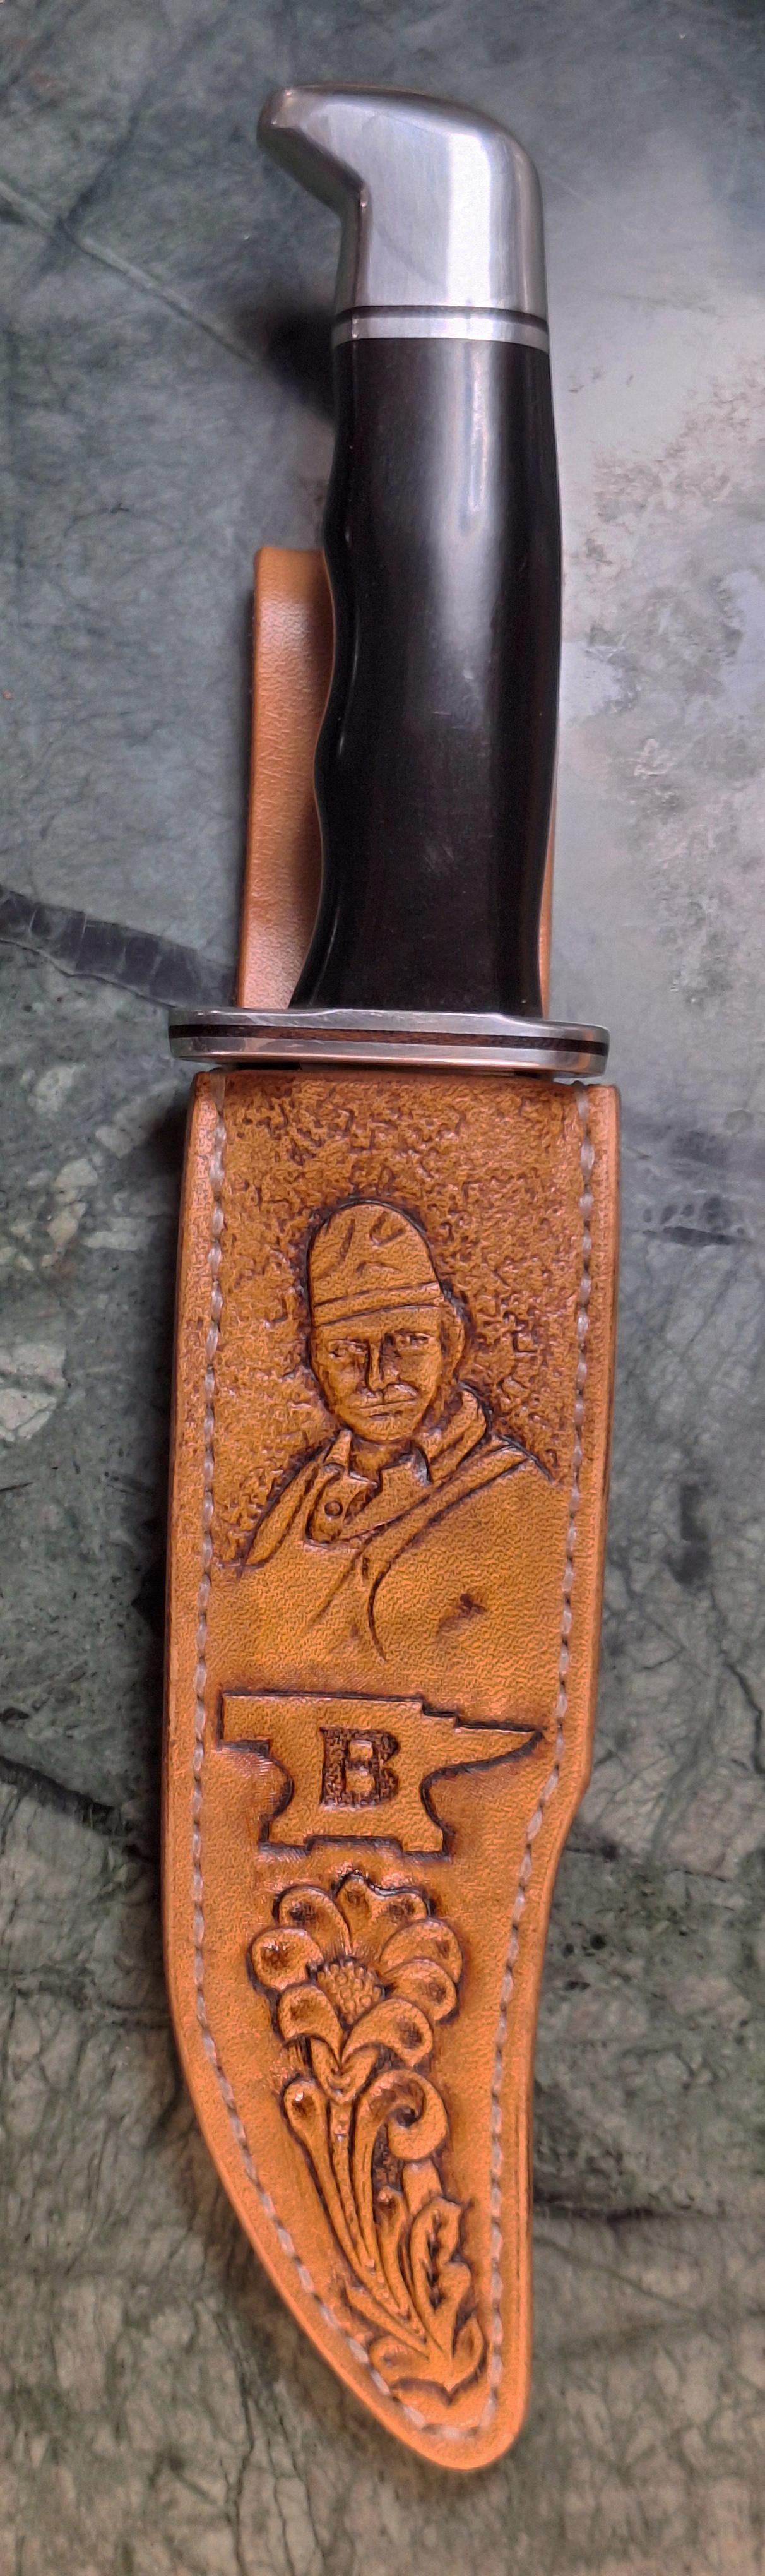
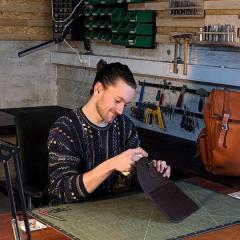
Desert bighorn holster is finished
DoubleKCustomLeathercraft replied to DoubleKCustomLeathercraft's topic in Show Off!!
Thanks chuck. I'm happy, the client is even happier. It's a win -
It does, it will happen in time. Thank you, just "a dog with a bone" my wife calls me one.
-
I would tackle this problem with a munltimeter...
-

Seems I broke my Juki-LS-341, again... (Bobbin Shuttle)
Wizcrafts replied to Yoshi888's topic in Leather Sewing Machines
That part is known as the "latch opener." It should be set to pull back on the bobbin case as the thread goes around it, then let go after the thread knot is pulled up past the notch in the throat plate. There is a small amount of wiggle room in that cutout for the little tab on the bobbin case/shuttle to move forward and backward. Pulling it back at the right moment frees the thread to go up without hindrance. It should not be set to pull back hard against its stopped position. Leave a tiny amount of clearance at the pulled back position so you don't break anything or wear out the pulled parts. -

Desert bighorn holster is finished
chuck123wapati replied to DoubleKCustomLeathercraft's topic in Show Off!!
that came out really nice!! -
Man, that must suck having the knowledge right there and not being able to get to it. With your natural talent, your work could get much more refined easily.. Keep up the good work!!
-
Thank you for your response.
-

Seems I broke my Juki-LS-341, again... (Bobbin Shuttle)
AlZilla replied to Yoshi888's topic in Leather Sewing Machines
I can't get that video to run this morning but it sounds like you're talking about what I would call the "case opener". A finger that contacts the bobbin case at exactly the right time and pulls it counterclockwise (in my machines) to be sure the needle thread clears when exiting the tab area under the needle plate The tab keeps the bobbin case from spinning around. If the machine is sewing, it can't be too far off. If the opener was holding full pressure all the time, the thread would hang up on the side where it enters the tab area. That said, it should have some float - I could see it accelerating wear on some parts if it's under even slight pressure 100% of the time. On my machines, the case opener finger itself has a slot on the end, where it screws down. I think there's even a spec to set the clearance. I know that doesn't tell you exactly what to do on your specific machine, but the concept is the same. Unless you're not talking about a case opener. If not, ignore everything I just typed... 😃 -
Seems I broke my Juki-LS-341, again... (Bobbin Shuttle)
Yoshi888 replied to Yoshi888's topic in Leather Sewing Machines
Also not sure it is completely the right term but it's whats referenced in the manual. It is the part on the bottom left of the video that holds back the thread after the hook released it across the bobbin. To my understanding it should be kept there a bit longer so it does not get entangled with the bobbin mechanism. But currently it basically releases the thread instantly after it passes above the bobbin case. -
spring flowers and good food
chuck123wapati replied to chuck123wapati's topic in All About Us and Off Topic
yup I ve done much harder work. Like getting it in the truck this year lol.
-
I would try spraying it with Febreze, then if that didn't work, maybe a cold or slightly warm tumble in the dryer with a dryer sheet or two.
-

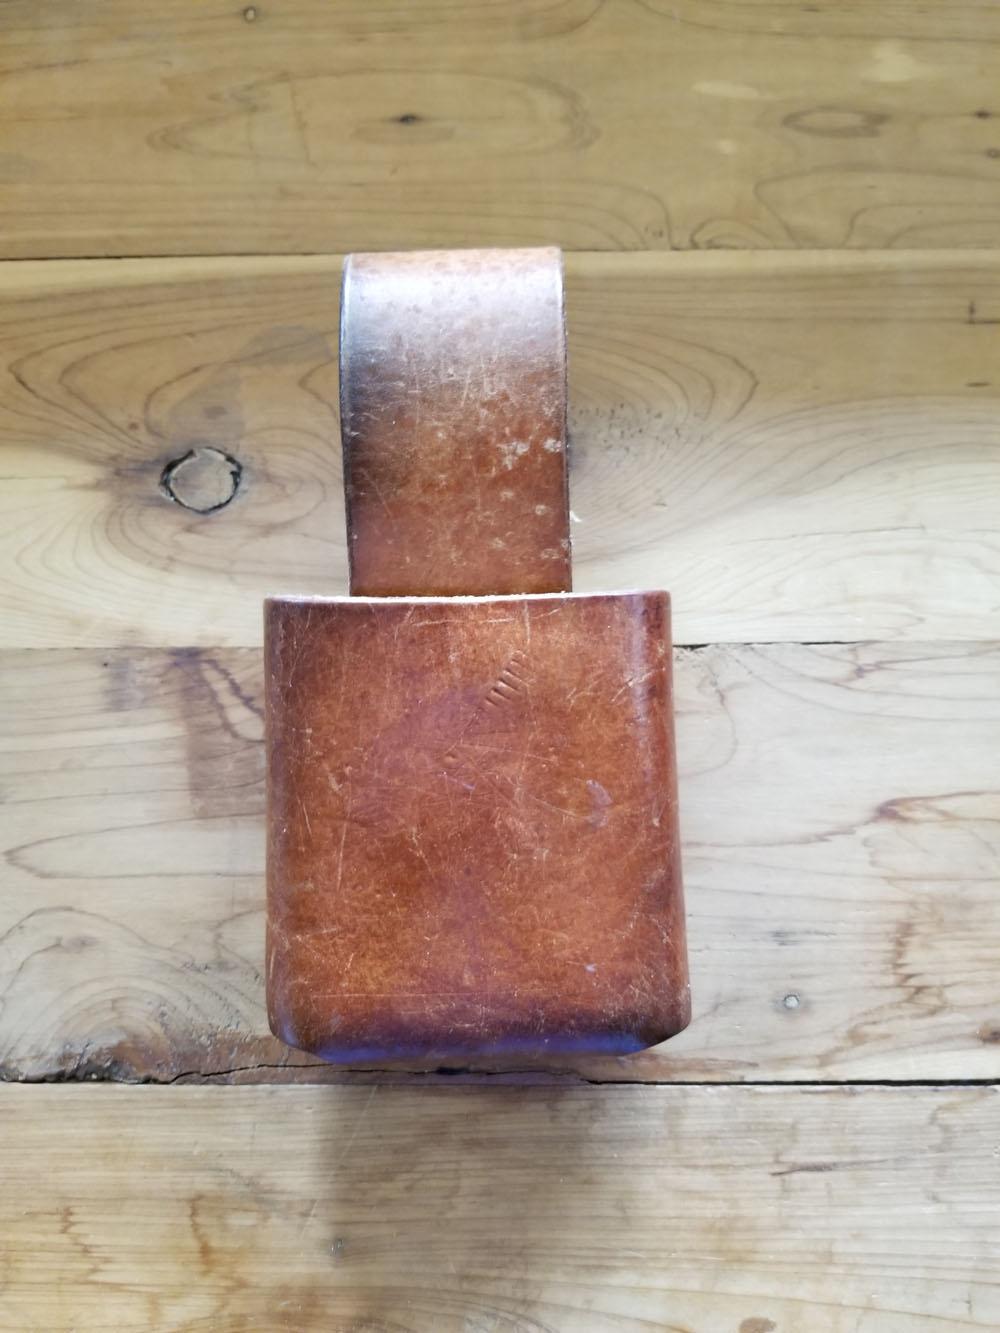
Help with square corners on wet molded pouch
Dwight replied to bigsig11010's topic in How Do I Do That?
I use two different ways to make boxes . . . the first you see as two pieces of wood . . . the leather is placed between the pieces . . . about 4/5 oz . . . WET LEATHER . . . and it is then placed in a vice . . . it takes about 10 minutes for it to partially dry and take the shape. That will hold a single stack 45ACP mag relatively loosely . . . which is the desired effect. The second way is the leather cell phone case. The bottom 2/3 of an inch or so is solid leather . . . cut out . . . and glued together . . . the inside width of the cell phone case. Once that is made . . . it is taken to a small belt sander that makes all the edges flat and level . . . then it's fastened with contact cement. I wore it for a number of years . . . my new one is made the same way . . . May God bless, Dwight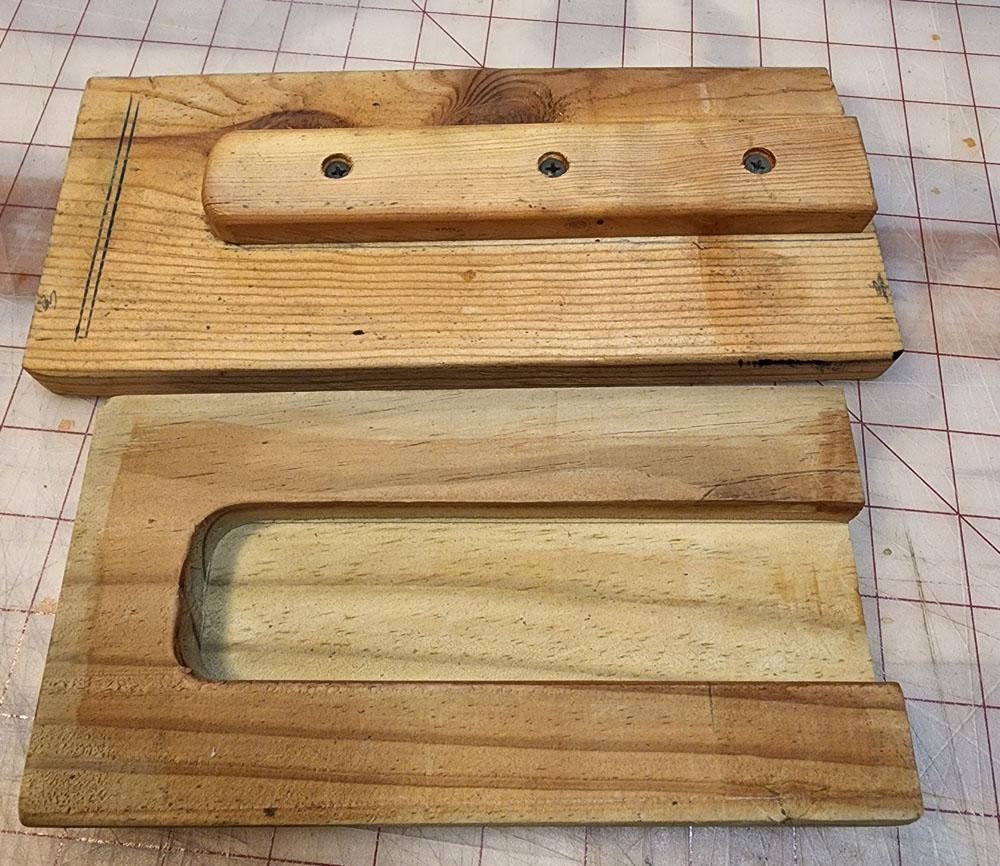
-
 Chicoinn joined the community
 -
Thank you! I was down in Arthur last weekend and wanted to stop in but time was a factor. We were picking up a nice John Deere wooden wheel farm wagon east of him about 25 miles and were in a hurry. I'll be heading down to that area in a few weeks and will make it a point to stop in. He's kept my Landis Nr.1 in parts, shuttle, needles and knobs.
-
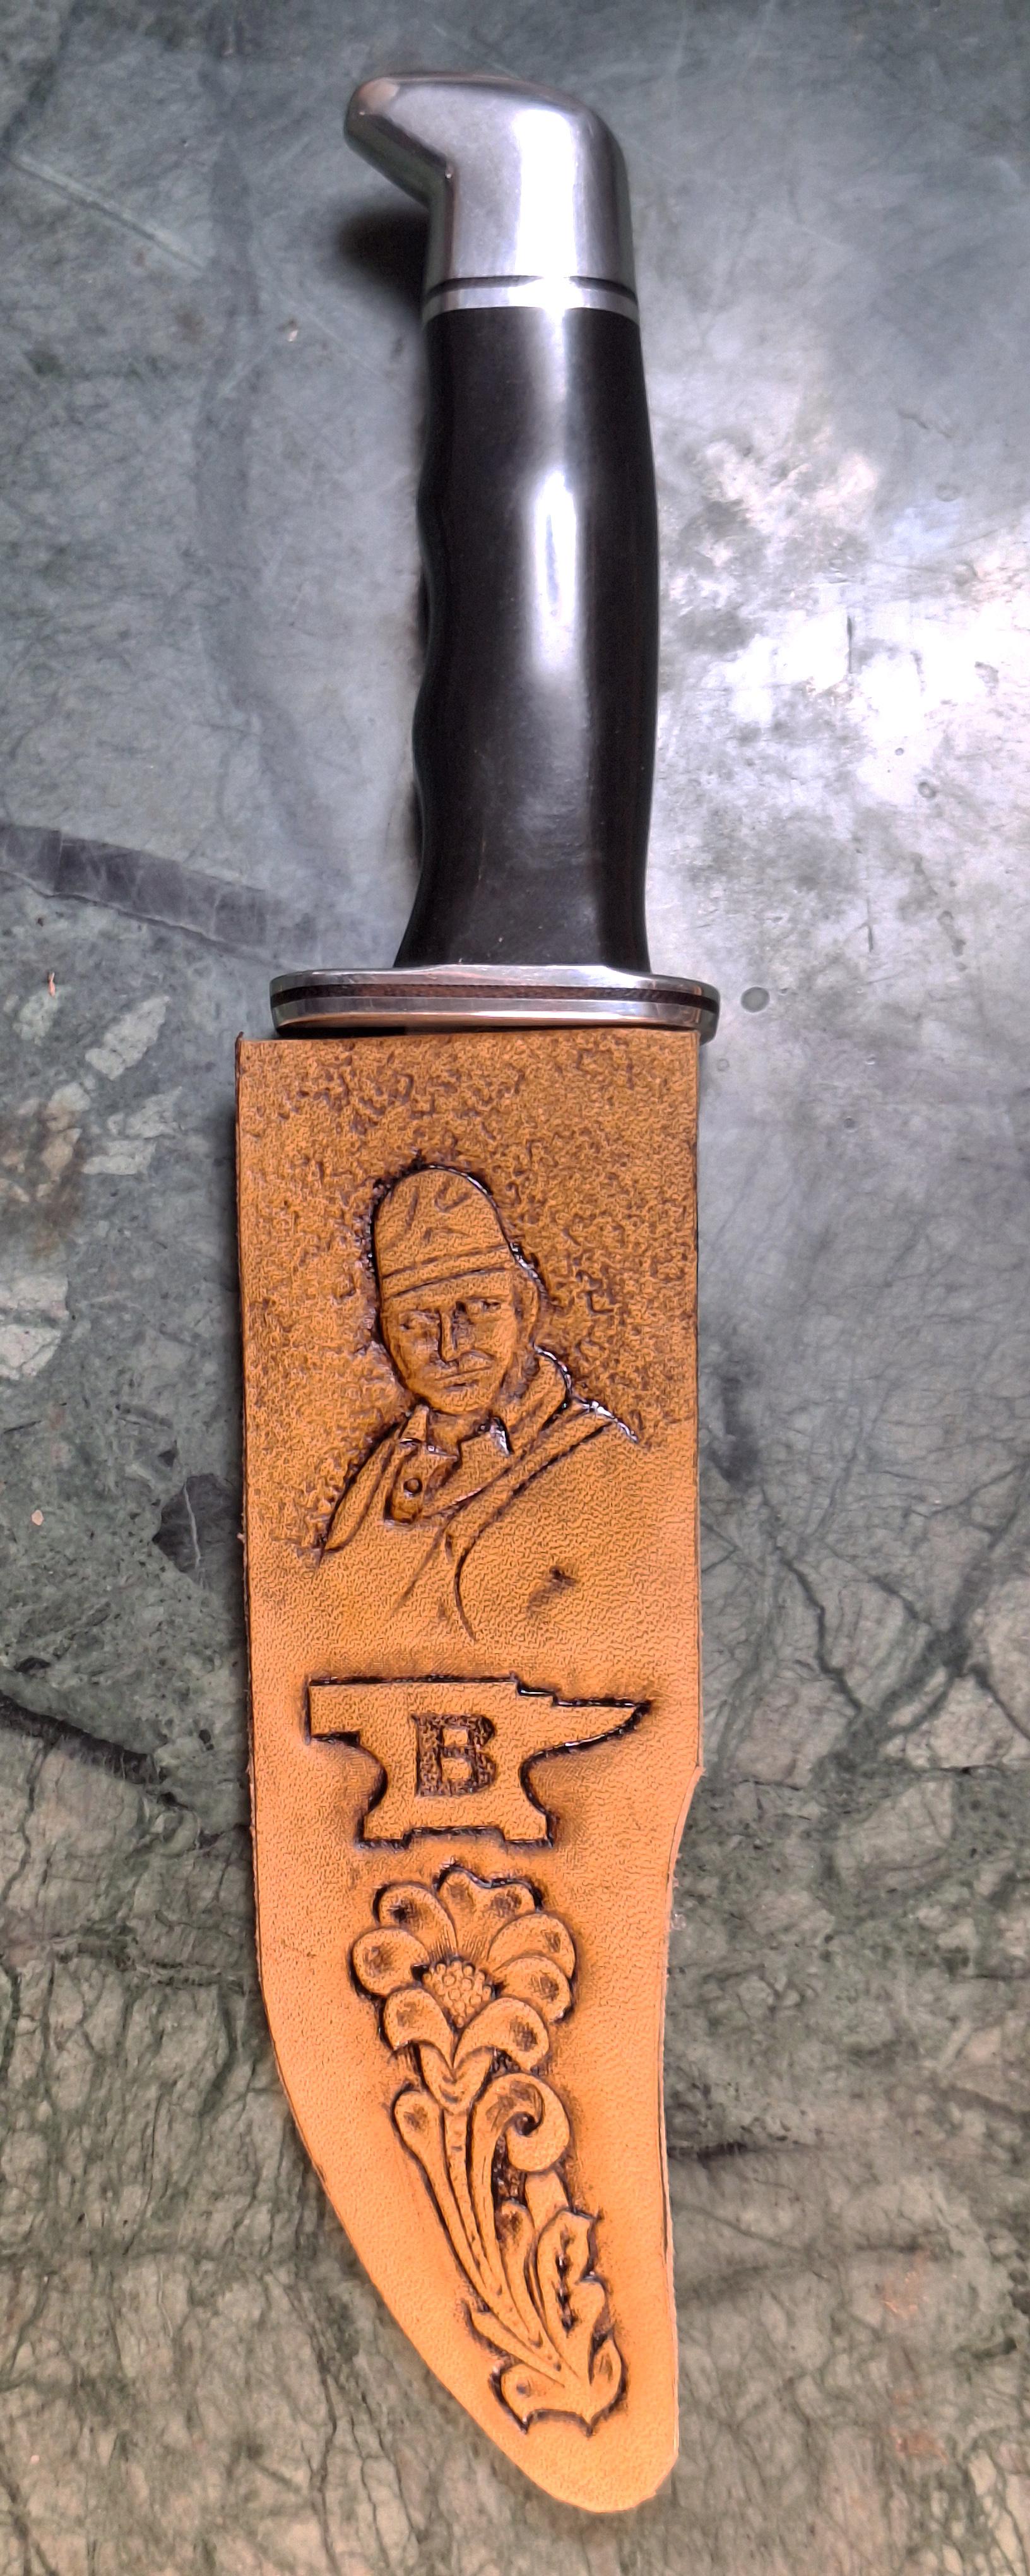
Thank you, got both of them in boxes somewhere from the move. Thank you, google can be a friend. Started on a Buck 119 sheath to go with the Bowie.
-

Desert bighorn holster is finished
Dee Fieret replied to DoubleKCustomLeathercraft's topic in Show Off!!
Hey Y town! My old stomping grounds were Youngstown, Boardman, Poland and Columbiana. I'm new to leather working and interested in learning leather tooling. Any advice on direction? -
 PaulF joined the community
 -
Don't have first hand knowledge but from what I've seen you could do it with a straight fabric strap. One end around the wrist a couple times (maybe velcro) then wrap around the bar a couple times. The grip is only to hold the strap in place. You're lifting with the wrist. Ask any boatman. A round turn and a half hitch could almost hold the Titanic.
-

Help with square corners on wet molded pouch
kgg replied to bigsig11010's topic in How Do I Do That?
I am assuming you are trying for something like the following photo where you have pouch attached to a shealth: You seem to be trying and fold under the bottom of the pouch during your wet molding. I would approach it using a form where the wet leather is placed over the shape form that has the side edges extending about twice the height of the form, place the wet leather over the form and clamp one side down, form the leather over that side and then move to one of the other sides and clamp. I would probably use a 2 inch "O" ring to shape the leather. Let dry for about 24 hours and then damp wet areas that need to be reshaped. This topic shows the shaping tool I would us. kgg
- Yesterday
-

Help with square corners on wet molded pouch
toxo replied to bigsig11010's topic in How Do I Do That?
Where's the bottom "wing"? You need to unfold the bottom, then trim oversize all round so you can re wet it and clamp all round. Then force it around the corners with a bone folder or similar. Got to be wet. After drying and stitching, trim to final size. -

Help with square corners on wet molded pouch
fredk replied to bigsig11010's topic in How Do I Do That?
Try using a small spring clamp on the corners; to pull the sides together. Use pieces of scrap leather between the clamp and your piece to avoid the spring clamp leaving an impression of its jaws on your piece One of these, that depending on the size of your piece. but I'd go as large as possible But you'll not get perfectly tight corners without cutting the leather -
Go to google . . . search for "youtube: leather carving shadows I haven't done it . . . but anything I need info on . . . that's how I get it. May God bless, Dwight