

All Activity
- Today
-
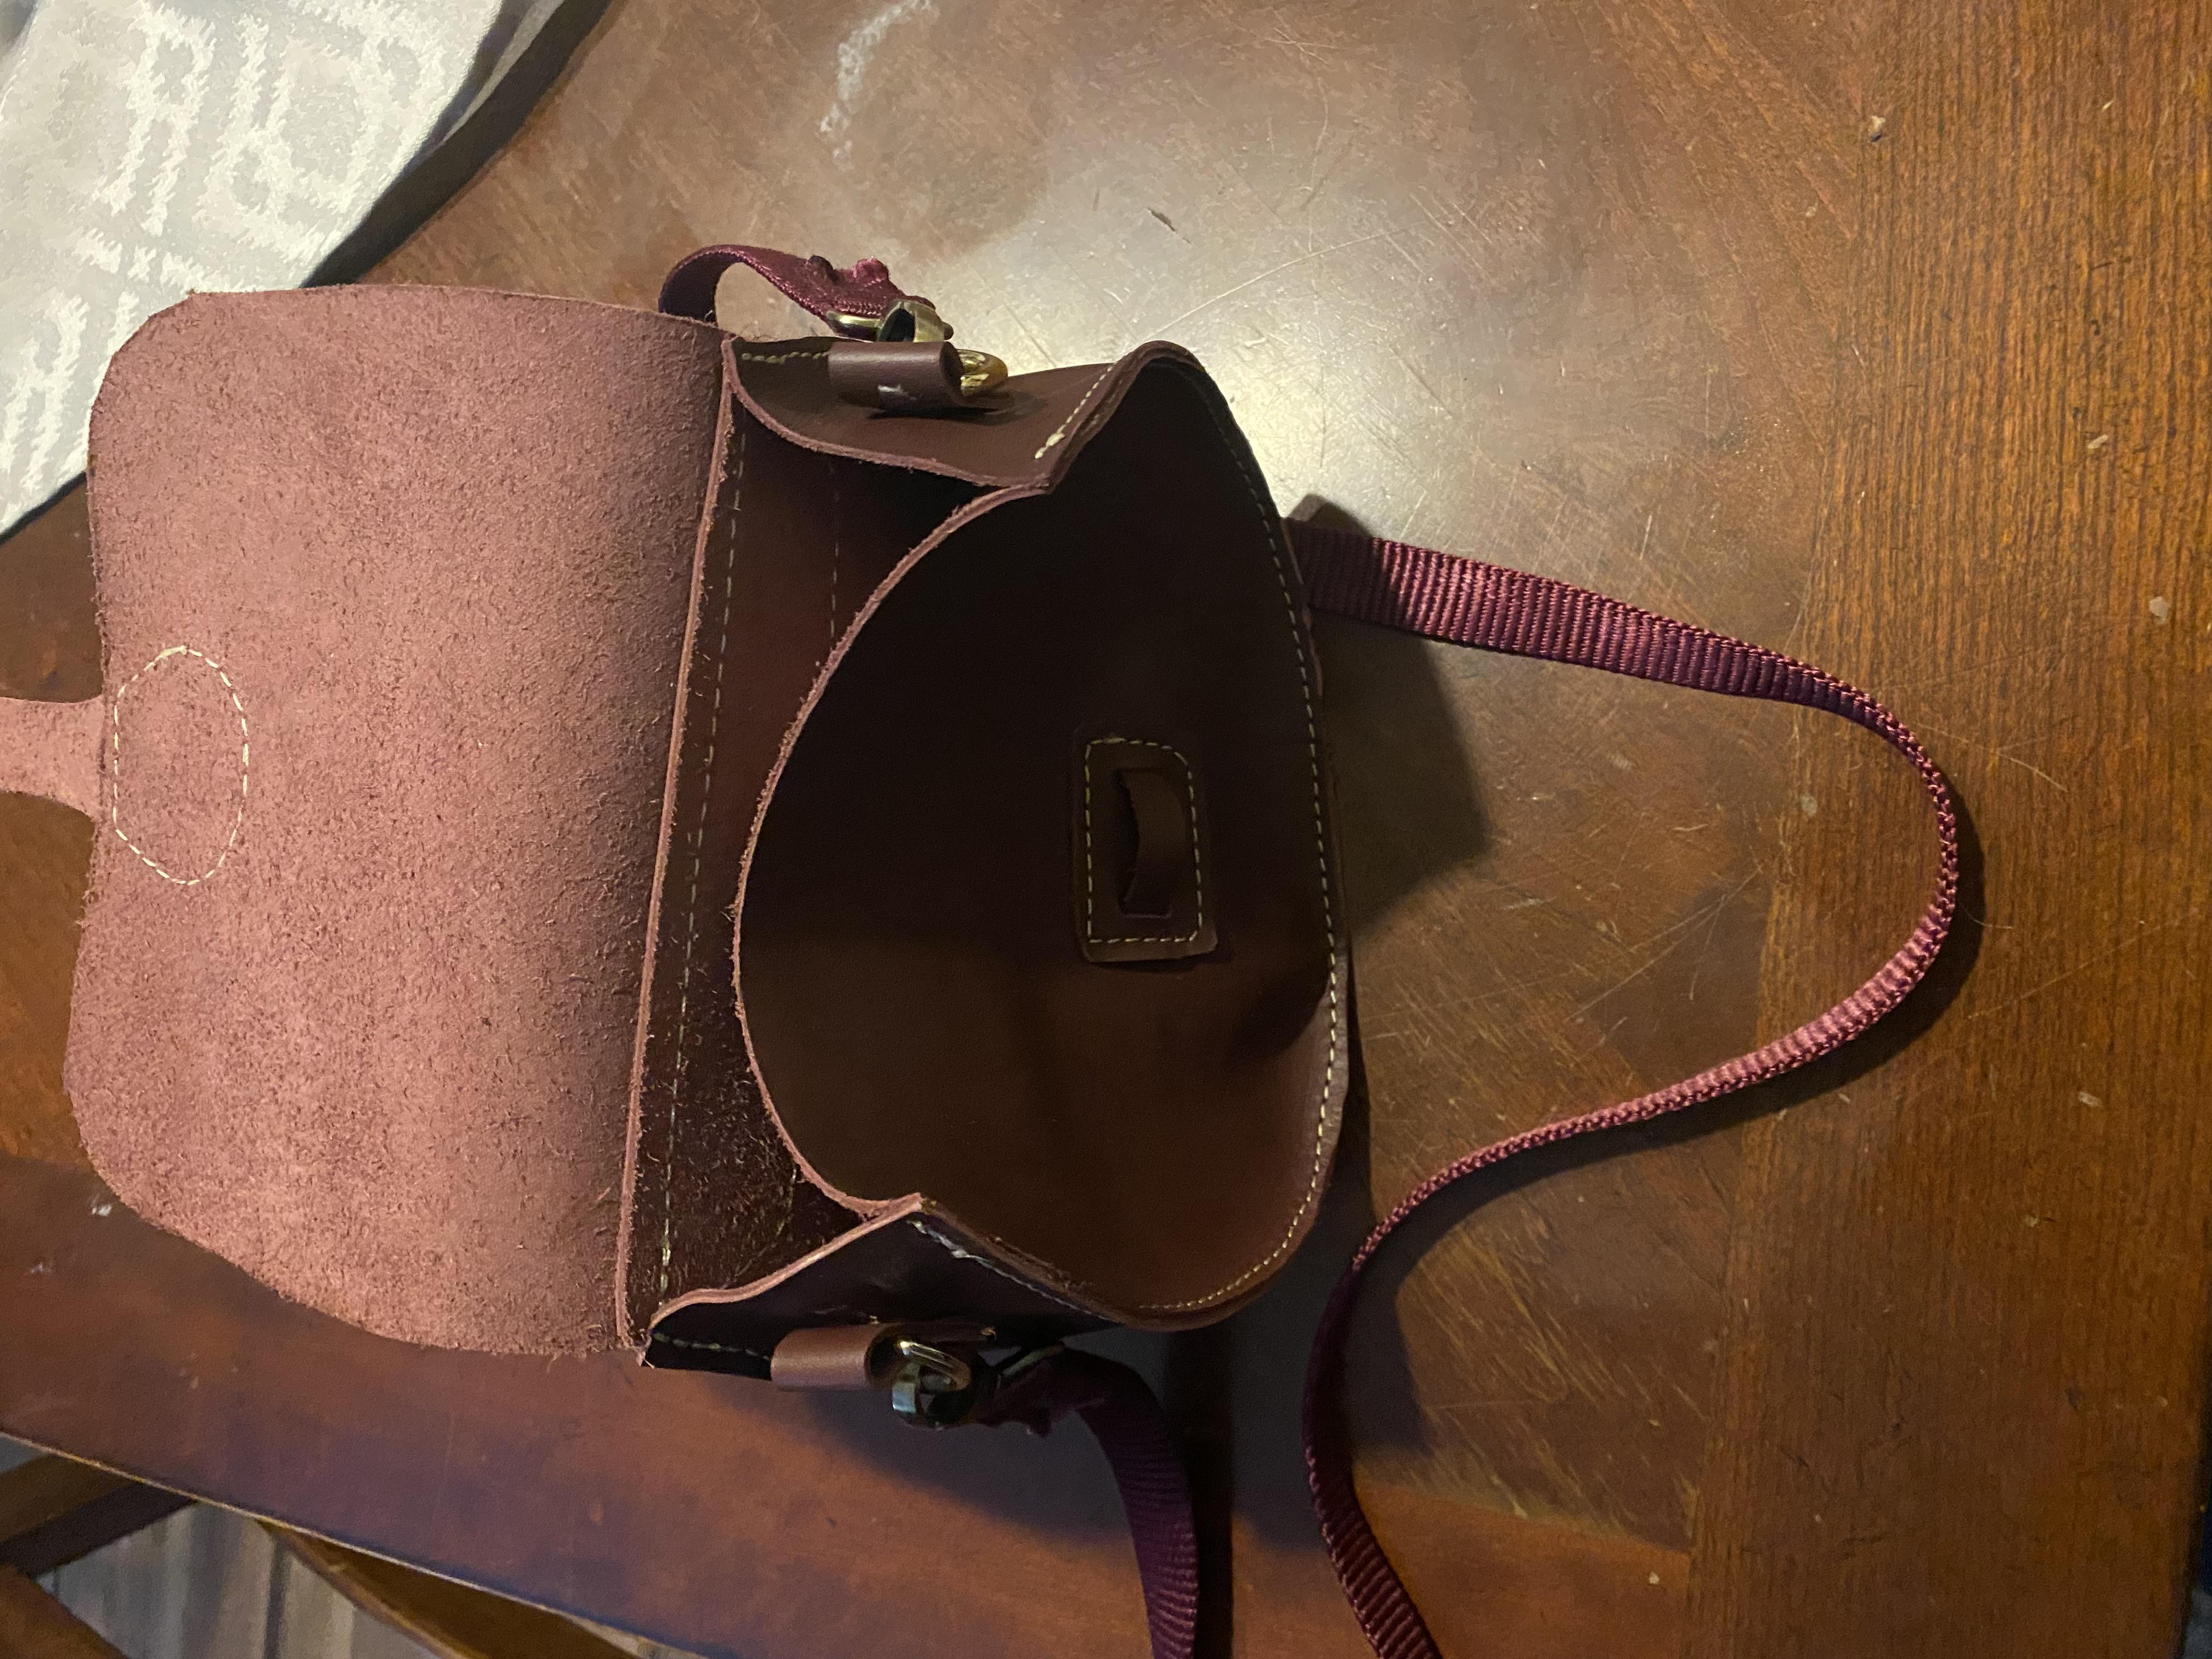
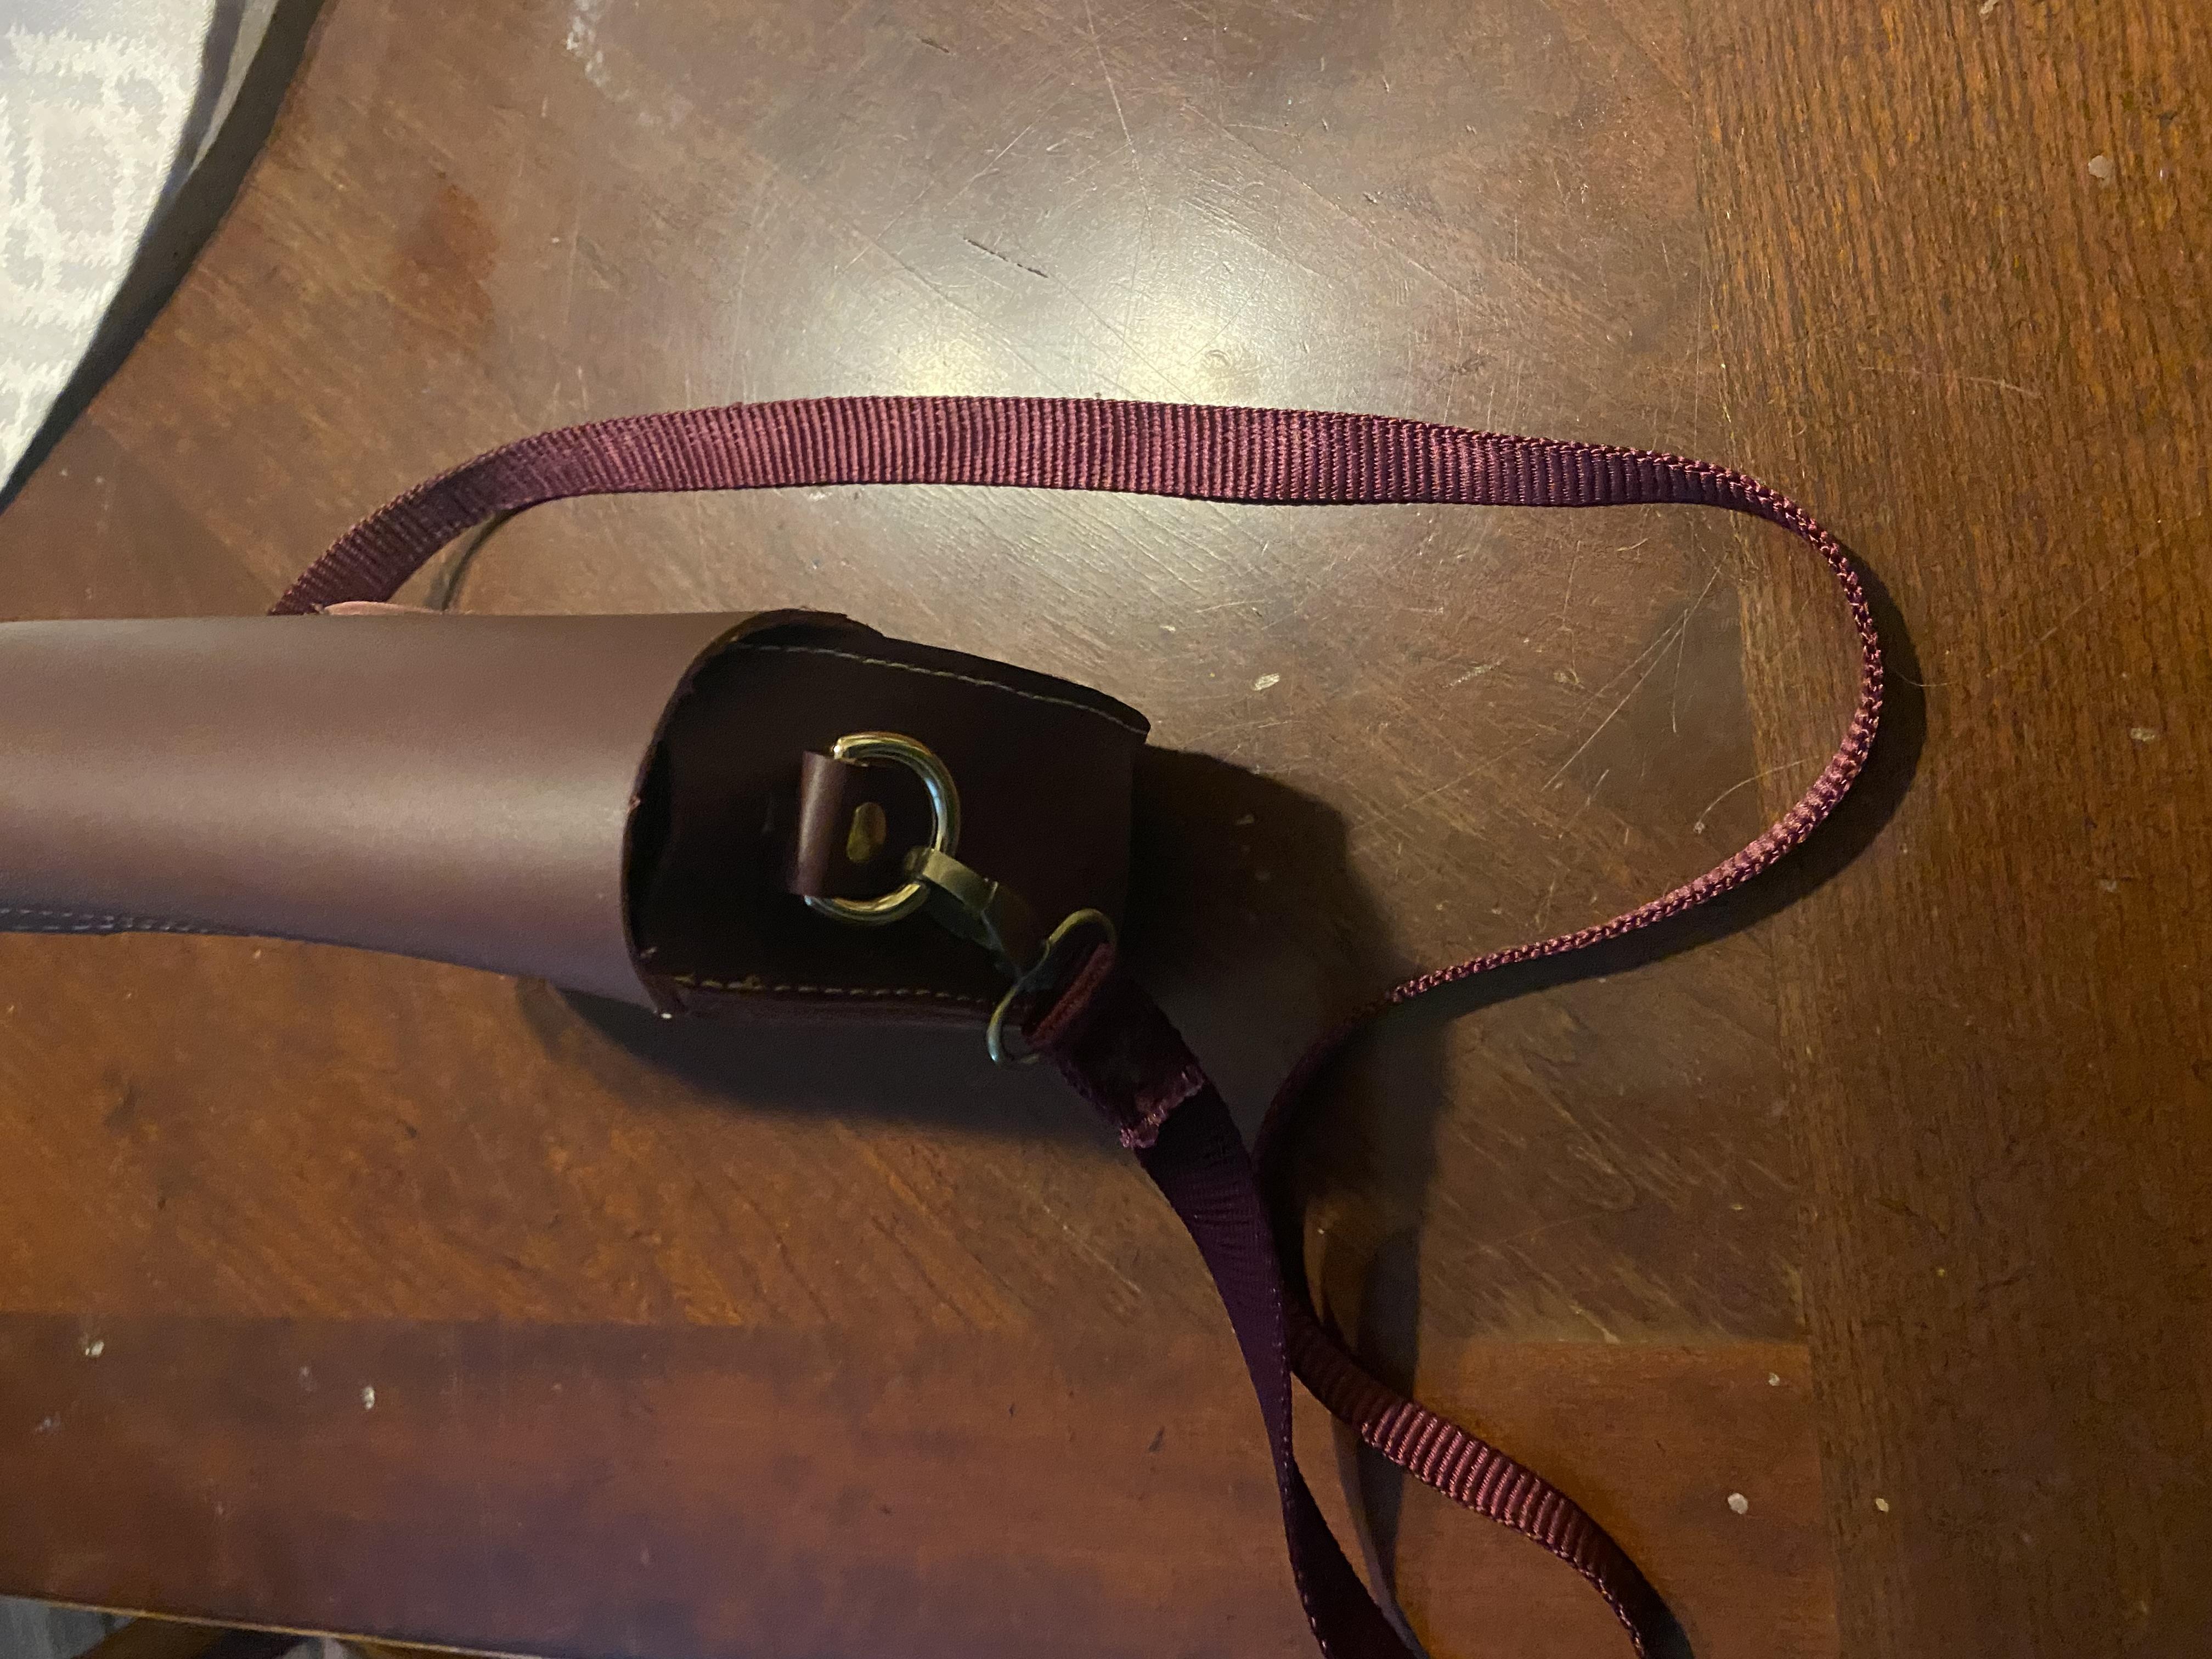
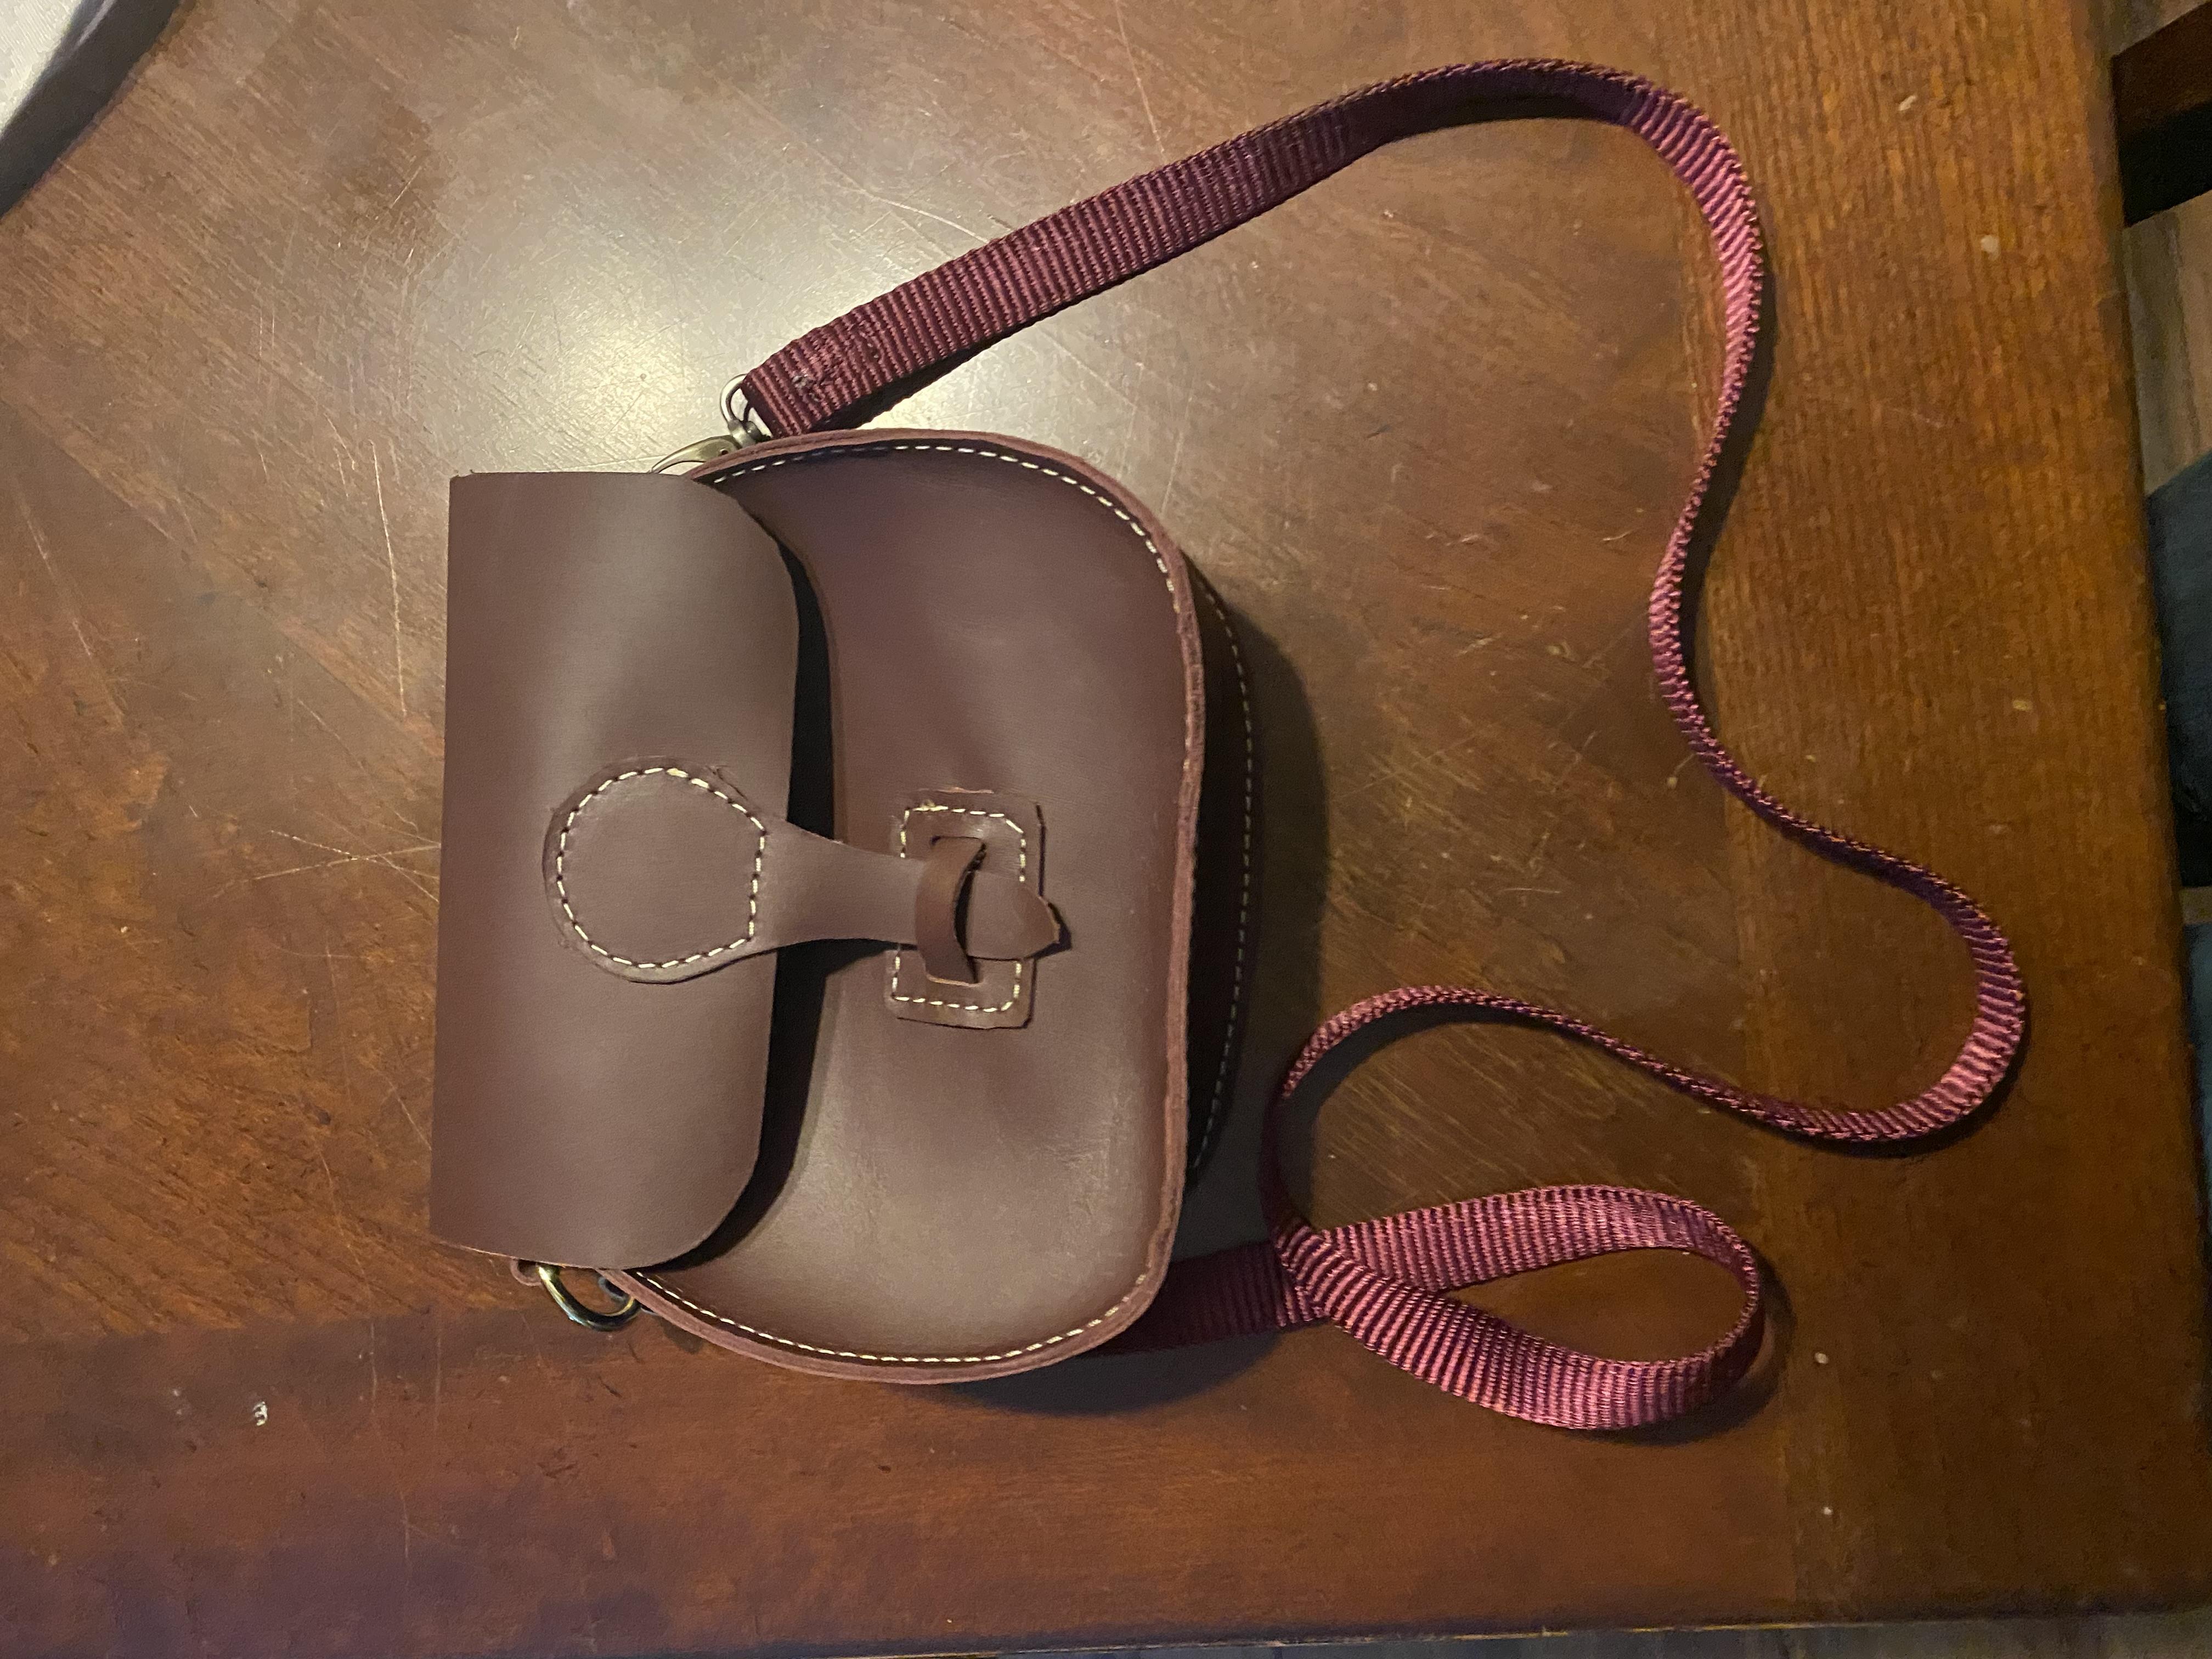
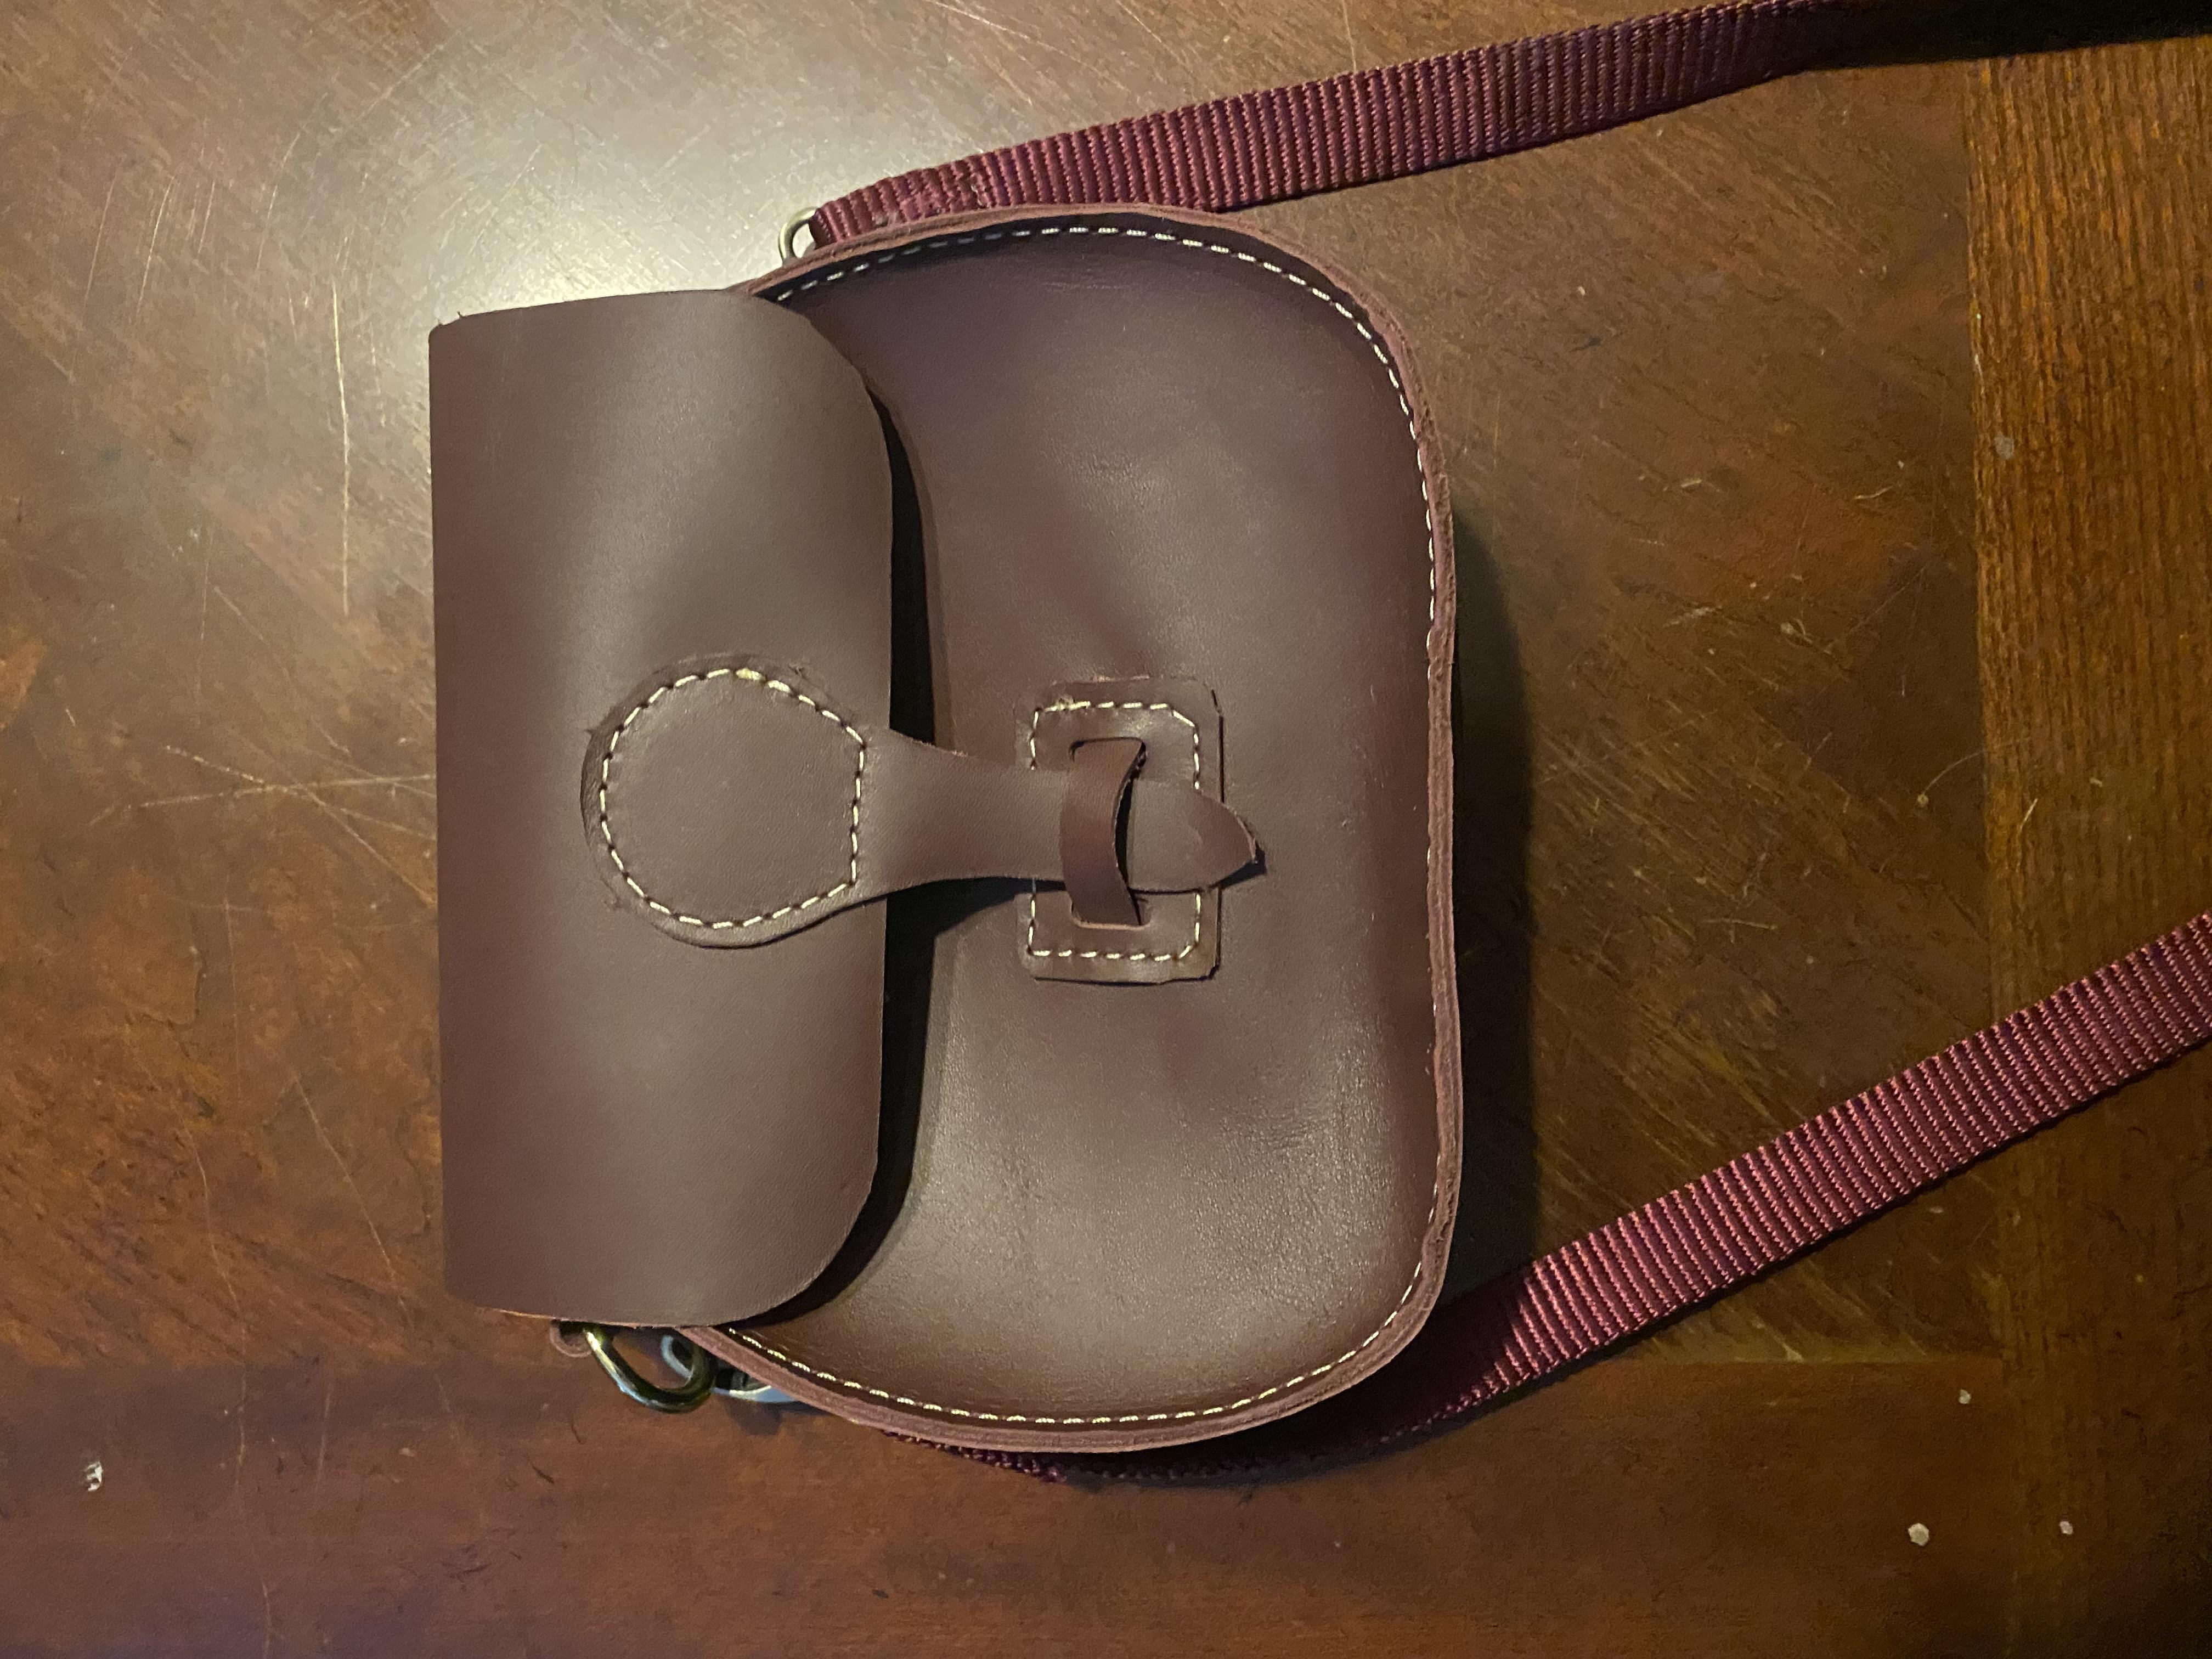
You have a good design on your bag. I would use leather on the shoulder strap and maybe put a small tab on the tongue of your bag closure that locks into the loop to help keep it closed in case of a spill. Keep up the good work.
-
Thanks for the tips. I like the felt idea I think I’ve got some pieces from a saddle pad where I cut a wither relief out that might work. Maybe I’ll take the plunge and get some tokonole next time I’m in town.
-
Hello my name is Holdyn Pilant from Plarcustoms, I wanted to know if people like the bag I have been working on I’m trying to perfect it but I just needed some insight and some tips.
-

Problem with leather splitter/skiving machines
Dwight replied to Coloradoguy's topic in How Do I Do That?
Uhh . . . yeah . . . reading it myself again . . . I don't know . . . brain out in left field . . . I guess I was just going as I usually do . . . as I always take the blade off . . . clean the grease off it . . . put it back on . . . then adjust the depth . . . as most of the time, what I did last time isn't what I need this time. And that is why the blade is not over the center . . . I just stuck it back on from the last use . . . after I greased it up. I actually used to use it a lot more than I have lately . . . as I've been taking a micrometer with me to see truly what thickness leather I'm buying . . . and it has cut down on my time on the splitter. Thanks for both points . . . especially the blade position as I know better . . . just didn't do it last time I put it back on. Glad someone is watching over me . . . May God bless, Dwight -
 TomRiva joined the community
 -
My favorite dye applicator is a small block of needled felt held in a clothespin. About 3/8" thick x 1-1/2" x 3/4". I bought the felt from Beiler's Manufacturing for a repair job and found it holds a lot of dye without dripping. Other applicators I have used are a block of Magic Eraser foam, and a regular wool dauber with the loose fibers removed by singeing in a flame. When dyeing an edge I hold the strap vertically so any drips tend to run down the edge. You might find it easier to dye the edge after an initial round of burnishing with saddle soap so that the applicator runs smoothly along the edge. I typically start with dyeing the edges, waiting a few minutes for the surface to dry then adding a bit of saddle soap and burnishing with canvas or a power burnisher. If needed, I'll do a bit of light sanding with 320 or 400 grit abrasive paper while the edge is still damp. I finish with tokonole or Martin's Edge Solution. Ron's Tools sells an edge rub solution that I have been meaning to try.
-

singer 211G256 worn inner foot presser bar
ledburner replied to ledburner's topic in Leather Sewing Machines
Has any one got any advise please? Singer 211G256? Thanks in anticipation Dan I'll try to post a video. -
Fred, love ya man. in a Bro man kinda way,
- Yesterday
-
Back from Sheridan and catching up. First off, It'd be hard to find that part commonly. I don't have any, sounds like Campbell-Randall doesn't, so that leaves Eli Schlabach or Jim Brainerd. On the American crank splitters that blade holder is cracked on them more than other makers. Not real common but an observation some of us have seen. Usually just to one side of the center hold down bolt. Some have said the machining and casting were probably slightly off and the tightening the bolts that hold it to the frame stresses it. Most Americans work just fine since the blade is held by the side hold downs and that center bolt. These blades are rigid and don't flex so they act like a splint across that crack. A good repair and the right adjustment should be OK on yours. As mentioned above, there are the tabs on the bottom roller bearing blocks. There is a set of directions for Landis 30 floating around the internet that say to set the blade edge against those tabs to just kiss, run the backup stop bolts to the back of the blade, then back those bolts off to let the blade slide back slightly - 1/4 or half turn I think. Tighten the center bolt and side hold downs. That keeps the blade from grabbing those tabs as the bottom roller floats up and down with thickness changes in the split. That is a good starting place for me. Every splitter has a sweet spot as mentioned for the leather you are splitting. If the blade is too far back then it doesn't completely split all the way and hangs up at the end. Some splitters have some variations in roller position and tabs and the blades need to be even further forward than the stops let it. With those, might have to grind those blades ends back a little to get that blade pushed up there further. Rare but have had a couple like that, at least one was a Champion and both might have been. An old chipped blade worked great, but a new even blade did not until it was tipped a fraction. I set mine usually with a scant 1/16" gap between bottom roller and blade for heavier leather. My thickness gauge is a motel key card. Flashlight and eyeball. I get some people that buy these to split thinner leather or taking off a very small split, On those I go less gap to the bottom roller and drop the top roller down to get some feed pressure between the rollers. They were designed for shoe soles but can be tweaked for thinner leather.
-
I guess it is just a matter of what we were taught in school. Like 'among' and amongst' or 'smelled' and 'smelt' Anyway, do describe your experience here if you do wax some leather for a punching mat.
-
SUP, I've always just used "smooth". Anyhow, it's an interesting idea you have there. I have plenty of paraffin wax that I bought to re-wax a jacket and don't have any other use for it, plus plenty of beeswax, plus some old hard leather from a very old saddle, might have to give this idea some thought.
-
Your wallet looks fine to me. It is leather, after all and once was on a living creature. It cannot possibly look like factory manufactured smooth plastic. 🙂 Therein lies the charm of leather though.
-
3-4 mm at least. I got 2 huge sides of splits during a Black Friday sale but they are of different thicknesses. I just cut them up from one side, and make usable pieces. The current one is one of the thinner pieces, because the split has a very variable thickness all through. Without the wax, they gradually get floppy. Let's see what happens with the waxed one.
-

Problem with leather splitter/skiving machines
bruce johnson replied to Coloradoguy's topic in How Do I Do That?
Back from the Sheridan leather show this afternoon and catching up. I had a guy bring one of these splitters to my booth to sell me or trade. He was not getting along with it and it was doing what the complaint was here. Once we looked at things and for his needs the one he has is fine. he just needed help. #1 - of course the blade needed sharpening. He took it to a guy sharpening at the show. Now he knows what sharp is. #2 - the blade adjustment was like this in the picture. Serious question - are there directions that show to adjust the leading edge of the blade that FAR back from the top center of the roller? I find it really odd that I saw this on his and now in this picture. That blade edge should be centered over the top center of the roller. This picture and his were too far back and naturally will cut a strap in two easily. I showed him Osborne #84 and #86 I had for sale at the show. I told him how to center it and the light came on. #3 - pulling leather through any pull-through splitter other than a Chase pattern splitter. The leather in front needs to be lower and direction of pull in back needs to be lower than the edge of the blade. The leather almost needs to wrap around the roller slightly to feed correctly. The Osborne #84 has a hold down rod that locks in place, Looks like this Tandy doesn't latch down. Some of the knock-offs do, some don't have a hold down at all. #4 Dwight, I am not understanding your recommendation to loosen the large Allen's that hold the blade to adjust the up and down on the blade. They should be used to set the position of the blade edge in relation to the top center of the roller. Once that is set, they don't need to be touched for anything other than removing the blade for stropping or sharpening. As the blade wears then they go further back in the slots to maintain that blade edge/top center roller position. The thickness is adjusted with the limiting screws and black knobs only, the knurled is a jam nut to help hold that setting. Set them to the stop height, and that's it. For a lap skive they can be all the way up to taper out to a feather edge. Otherwise set to thickness and like you said, pull the leather as you push the handle to start the level skive. Once the the roller tops out against the height adjusters then you can tighten that side knob to hold position and use two hands to pull. Some can just hold that handle forward and pull with the other hand for the whole split or level skive length too. -

Removing molding marks?
larry1096 replied to larry1096's topic in Gun Holsters, Rifle Slings and Knife Sheathes
As I mentioned, he posted the boning process on this very holster. No idea if this like to the Instagram video will work, but I'm going to give it a shot: Instagram video of Jason Ingle boning the holster in the photo (Hopefully.... :) ) Larry -
 What kind of cutting dies do you have
 -
 I agree with Bland. Your latest photo tells me that the rigging is placed around the 3/4 position, and the rear strap on the rigging dee is attached around the back of the cantle. When going down a steep embarkment, your weight leaning back should be sufficient to keep the saddle in place. The saddle looks well made and well designed. To make the modification that you are asking about, would easily be $350 and more to reproduce something that would blend with the existing design.
 -
Thank you for letting us know Hugs. Brian
-
This is a clever idea What thickness of leather are you using for your stamping pad?
-
Two hunters hire a pilot to fly them into the Canadian wilderness, where they manage to bag two big bull moose. They come back to the plane and start loading it, but the pilot tells them it can only take them, their gear and one of the moose. "That can't be right," say the hunters. "Last year we shot two as well, and the pilot let us take them both. And he had just the same sort of plane as you." The pilot doesn't want to be outdone by his rival, so reluctantly he gives in and they stuff both moose into the plane. The pilot lines up, opens the throttle, and starts the take-off run. The plane bounces into the air, but it just doesn't have enough power, and down it goes, crashing into the trees. Somehow, surrounded by the moose and all their clothing and sleeping bags, the two hunters survive. They clamber out of the wreckage. "Any idea where we are?" one of them asks. "I think we're pretty close to where we crashed last year," the other replies.
-
help from the masters..... Is the machine fixable?
Frodo replied to MattiJoy2's topic in Leather Sewing Machines
I agree with tig offer the Dude $100.00 cash be prepared to walk out -
I only use wax on pieces of splits that I use as pounding boards. I do not stain or dye those pieces. But when using wax to harden leather, certainly. As @fredk has explained in another thread, 'This was one of the ways that leather armour was made, from the early Roman times up to the 19th century. see cuir bouilli' So a new use for an old technique. New to me, anyway. Isn't that nice? 🙂 😄Certainly more illustrative of the result than boring old 'smoothen'.
-
 ShortApacheWrangler changed their profile photo
 -
 I appreciate your input. I live in hill country and am riding at an incline more than I am on level ground. I'm not sure what the threshold is for riding that is too steep for a single rigged saddle. This is what it looks like in the front. Pardon my lack of knowledge, but would the part that I've circled be removed and altered to add a rear cinch or is it simply adding on in the back to what is already present? (I am trying to envision how much visible difference would be done to the saddle, the cost would be worth it to me as long as the saddle didn't look half cobbled together or majorly changed in appearance.)
.jpg.5175a4c250712039115ce18e1d452efe.jpg)
-
Beware of using wax before staining.
-

Removing molding marks?
Hags replied to larry1096's topic in Gun Holsters, Rifle Slings and Knife Sheathes
That is likely done in a press with minimal hand boning. -
Removing molding marks?
larry1096 replied to larry1096's topic in Gun Holsters, Rifle Slings and Knife Sheathes
That's what I would have thought, but Jason posted the video of him tooling this holster on Instagram (which I don't know how to link to, unfortunately.) I wonder if there's a post tooling step to 'emboss' the leather back to that untouched looking condition, like pressing it AFTER boning? Larry


