All Activity
- Today
-
All the sites I find these are Japanese. One name I found them under is pattern clip but I cant find them in the US
-
.thumb.jpg.6e903dd66163ad5672f00f144058c571.jpg) I moved your post to Dyes, Antiques, Stains, Glues, Waxes, Finishes and Conditioners since it is a finish for leather edges.
I moved your post to Dyes, Antiques, Stains, Glues, Waxes, Finishes and Conditioners since it is a finish for leather edges. -
What browser are you using?
-
200 is a successful request, so that's an odd error. Maybe try again in a few hours. You'll need to make a new response to this thread.
-
Thank you. kgg
-

Shoe Repair Machinery for Sale in Covina, CA.
AlZilla replied to Shoe repair daughter's topic in Used
@Shoe repair daughter Go ahead and start again, since the edit window is closed on this one. I'll delete this thread as soon as I see the new post. I'll Follow you so I get notified of new posts. Thanks for taking care of it! -
It appears the price went up from the $9.99 CAD when I ordered it to $10.69 https://www.amazon.ca/Airbrush-Splitter-Disconnect-Regulation-Compressor/dp/B09XDYFG93/ref=sr_1_1?crid=3Q6F555AR3IIX&dib=eyJ2IjoiMSJ9.wE4XqJHbKH9dn79iiZk-EH1t-_Jmt1oZ7neTJr9ZKPxohuZnpVvwpU1yIvUXgiwOzoTAebFLHjntt9ZW0wvYsVeALoPaLkJPHr2218LLQuSBgPGUvBEporcPt_4adYb7yizB6HVkyOu5hy1C7qAQZIAyuzV8xGNNiZUlYiL_lE_tzm58kUgZYrBseG8m_Oy8BtJrtV5_dM_4h7ZvHL_g_V9xVBNCaGzdkGUX-Pz5328KvUKLdM22rGWoJyq4BTIypNIs3C3KPV4BOEbcOmVCsqA89TlC0sSNQ5n5DptkaqY.UTa_EHjXPEQqqPzvA02-2XfKfSD_5cp3R5p6ffLqCmA&dib_tag=se&keywords=Tiiyee+Metal+Air+Hose+Splitter%2C+3-Way+Cross+Lever%2C+Quick-Connect%2C+Silver%2C+6.3+mm+%2F+0.25+inch%2C+Airbrush+Adapter&qid=1758242082&sprefix=tiiyee+metal+air+hose+splitter%2C+3-way+cross+lever%2C+quick-connect%2C+silver%2C+6+3+mm+%2F+0+25+inch%2C+airbrush+adapter+%2Caps%2C206&sr=8-1 kgg
-
Unknown server error. Error code -200
-
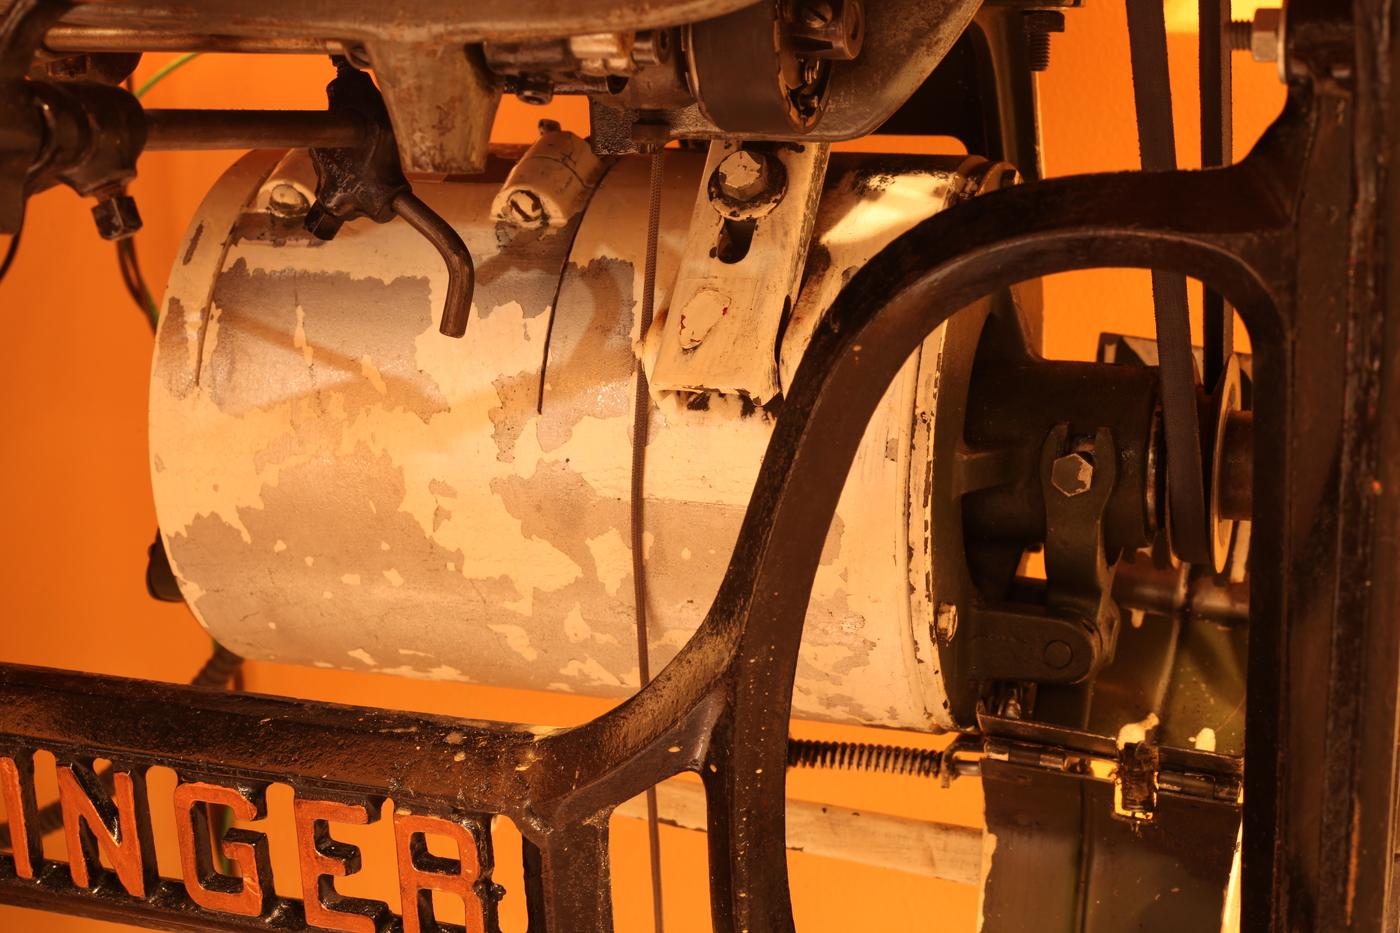
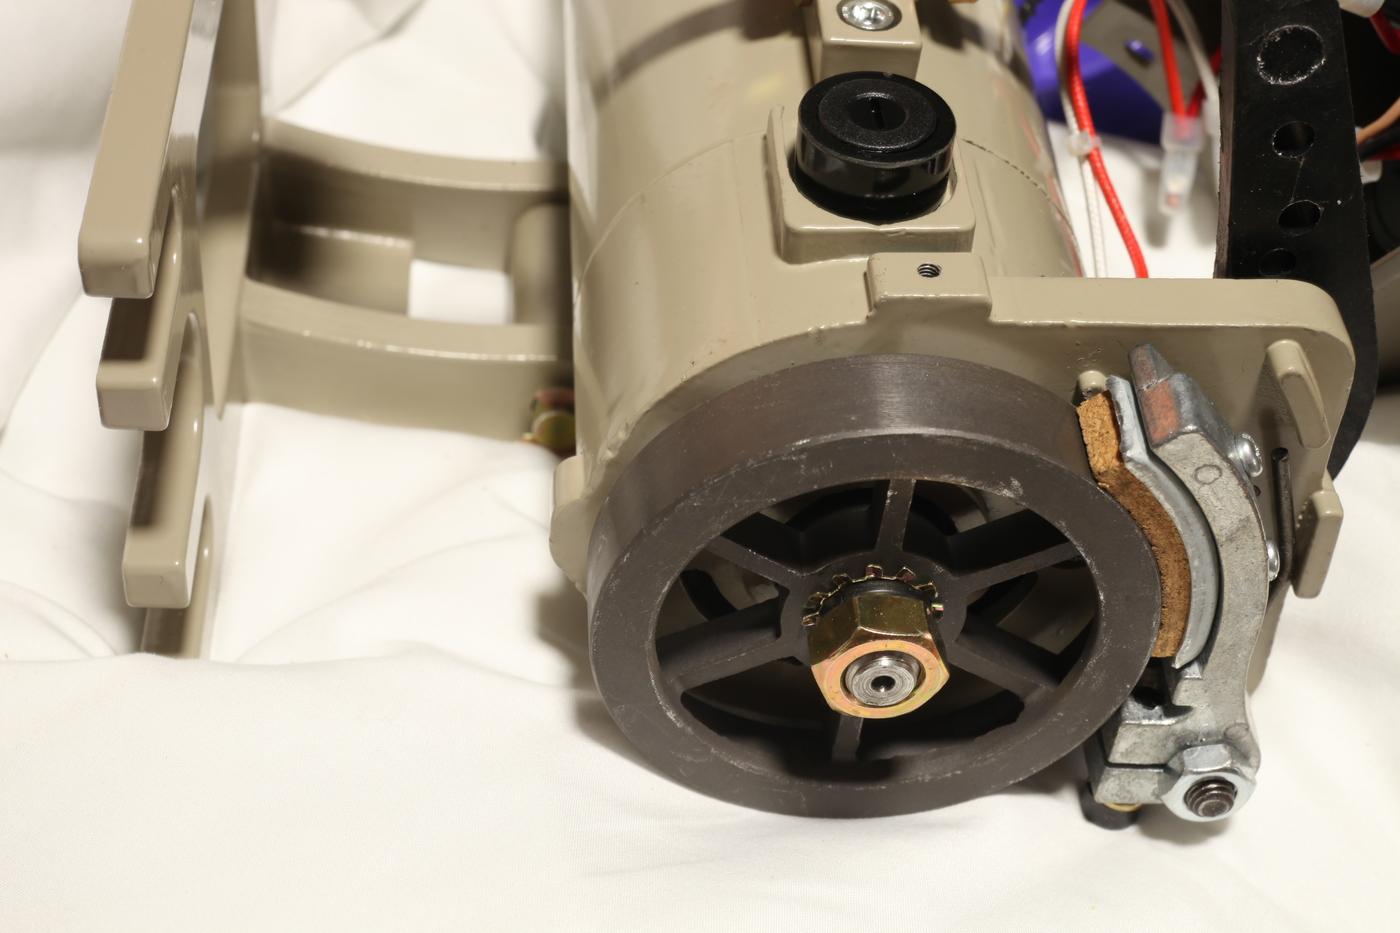
The brake in a clutch motor is to stop the sewing machine when the "go" pedal is released even through the motor continues to run. In a servo motor the motor stops rotating when the "go" pedal is released so a brake in reality isn't necessary when sewing at slow speeds. At high speed sewing it would be possible to get some run on. kgg
-
could you put a link to the three way outlet splitter ($10 CAD)? I'm not searching with the correct terms. Thank You. Love the 3D printed holders
- Yesterday
-
Is the brake optional on a clutch motor? I've been working on my clutch motor skills. In part to be better qualified to write this blog article: https://leatherworker.net/forum/blogs/entry/516-option-c-clutch-motor/ , and in part to satisfy curiosity. I've greased the pivot points and the main slide sleeve to improve the control and feel. I've slowed it down. I've backed off the slack adjuster in the brake far enough that I can consistently release the brake pressure when I want to use the hand wheel. But I keep asking myself, "Do I really need this brake?" The universal motor with triac speed control (aka "analog servo" aka "brushed servo") that I had for a few weeks also came with a brake shoe that activated whenever I was not on the gas. With that motor, I liked it better after I removed the brake shoe entirely. So I've been wondering, what is a straightforward way to remove the braking effect from a clutch motor, and are there any known downsides to doing so?
-
Thank you. You know me, no machine is complete until it has been 3Ded. I do use quick connectors on my other compressors but had difficulty finding them or this setup. Thank you. No method is the best it just depends on what will work best for the project. kgg
-
Nice setup, I knew you'd find some way of 3D printing something for it! The holder is very neat, by the way, if using jars it should be better than the hook-type thingy I have. Amongst my airbrushes is a Paasche like yours, very simple to use (and clean) and great for general use. It does require a higher pressure to run than internal mix units but for coverage work, as opposed to detail, it's a better brush to use. Rather than use an air splitter I fitted quick-release adaptors to all my brushes, simple to swap them and I only have one hose to avoid tripping over! Good writeup.
-
What error message do you get when attaching
-
Howdy, in my perpetual search for new and different fabrics for bag liners I found a reasonable source for affordable linings at Fabric Wholesale Direct. For a number of my bags I use the following lining: https://fabricwholesaledirect.com/products/ottertex-300d-solution-dyed-pu-waterproof-hexagon-grid-ripstop-fabric?variant=40771585638515 They have other rip stop fabrics as well that are quite nice as well. I have found that watching the people that do fabric sewing can teach a lot about bag making techniques and sources of fabrics.
-
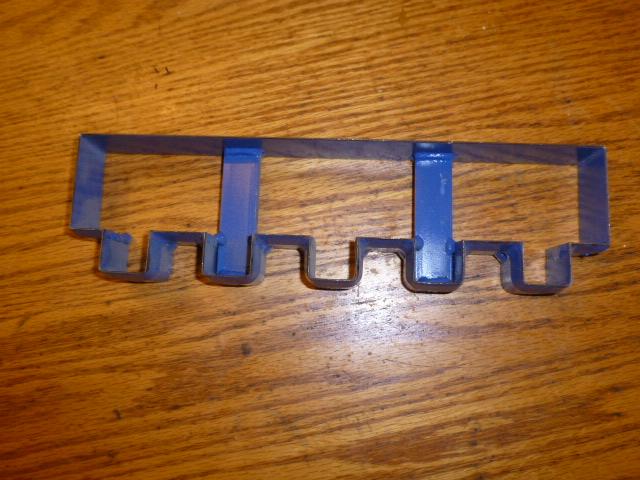
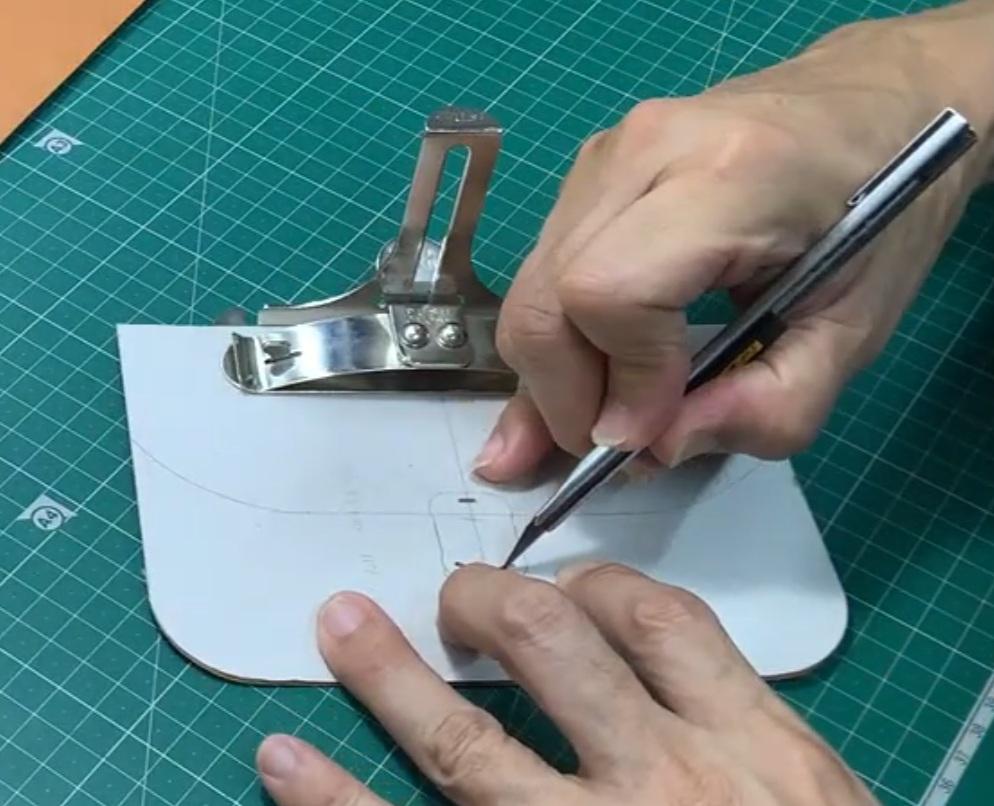
Howdy, I was watching a makers video and saw him using an interesting clip to hold things together. I like that you can fasten it without disturbing the placement of the work pieces. Any ideas of what it is called and who may have these available in the US? This is a still from this video at the 17:28 time mark: https://youtu.be/o74-mQeuHoc?si=EppX-JVTkYWTm1QF
-
 beutel joined the community
 -
While not specifically for leather, I fell in love with this machine when I got to use it at a friend's shop years ago and stupidly forgot to get a good pic of the model number. It's a double needle walking foot and his had a folder attachment. I made the big dome cover with it, basically a flat felled seam but all in one pass. It's a Juki, and it was green, but that's all I've got. Again, the photo won't attach either as an attachment or as a link. It's only 153kb.
-
 andromeda joined the community
 -
Nice set up. I really want an airbrush and the knowledge/skill to use it. I spray all my dye thru a DeVilbiss Finish Line HVLP auto paint gun. Just a great big airbrush. 55-60 lbs pressure. Any less it wants to get spotty when spraying really light. Tried the spray bottles and little sprayers at Home Depot. Not even close. I do understand what Dwight is saying about it being more like a topcoat. I use sheepskin for black and many coats usually. Everything I do is the same dye with black around it. I started spraying the dye when I made those backgammon boards in my albums. I was using veg tan for the fields, so I made a template 1/32" bigger than the points/pips and taped the stencil to the raw veg tan. Sprayed very light probably 10 coats at least so it wouldn't bleed past the stencil. No cuts in the fields. The guy was professional player. The blue on the outside of the Braves board is sprayed and it turned out pretty even. I get up to a 12" pattern if I want and total control how much dye. Almost everything has a coat in all for directions and then some. I haven't really noticed the sprayed dye being a problem with all the stuff my wife and daughter have. I still understand what Dwight is saying.
-
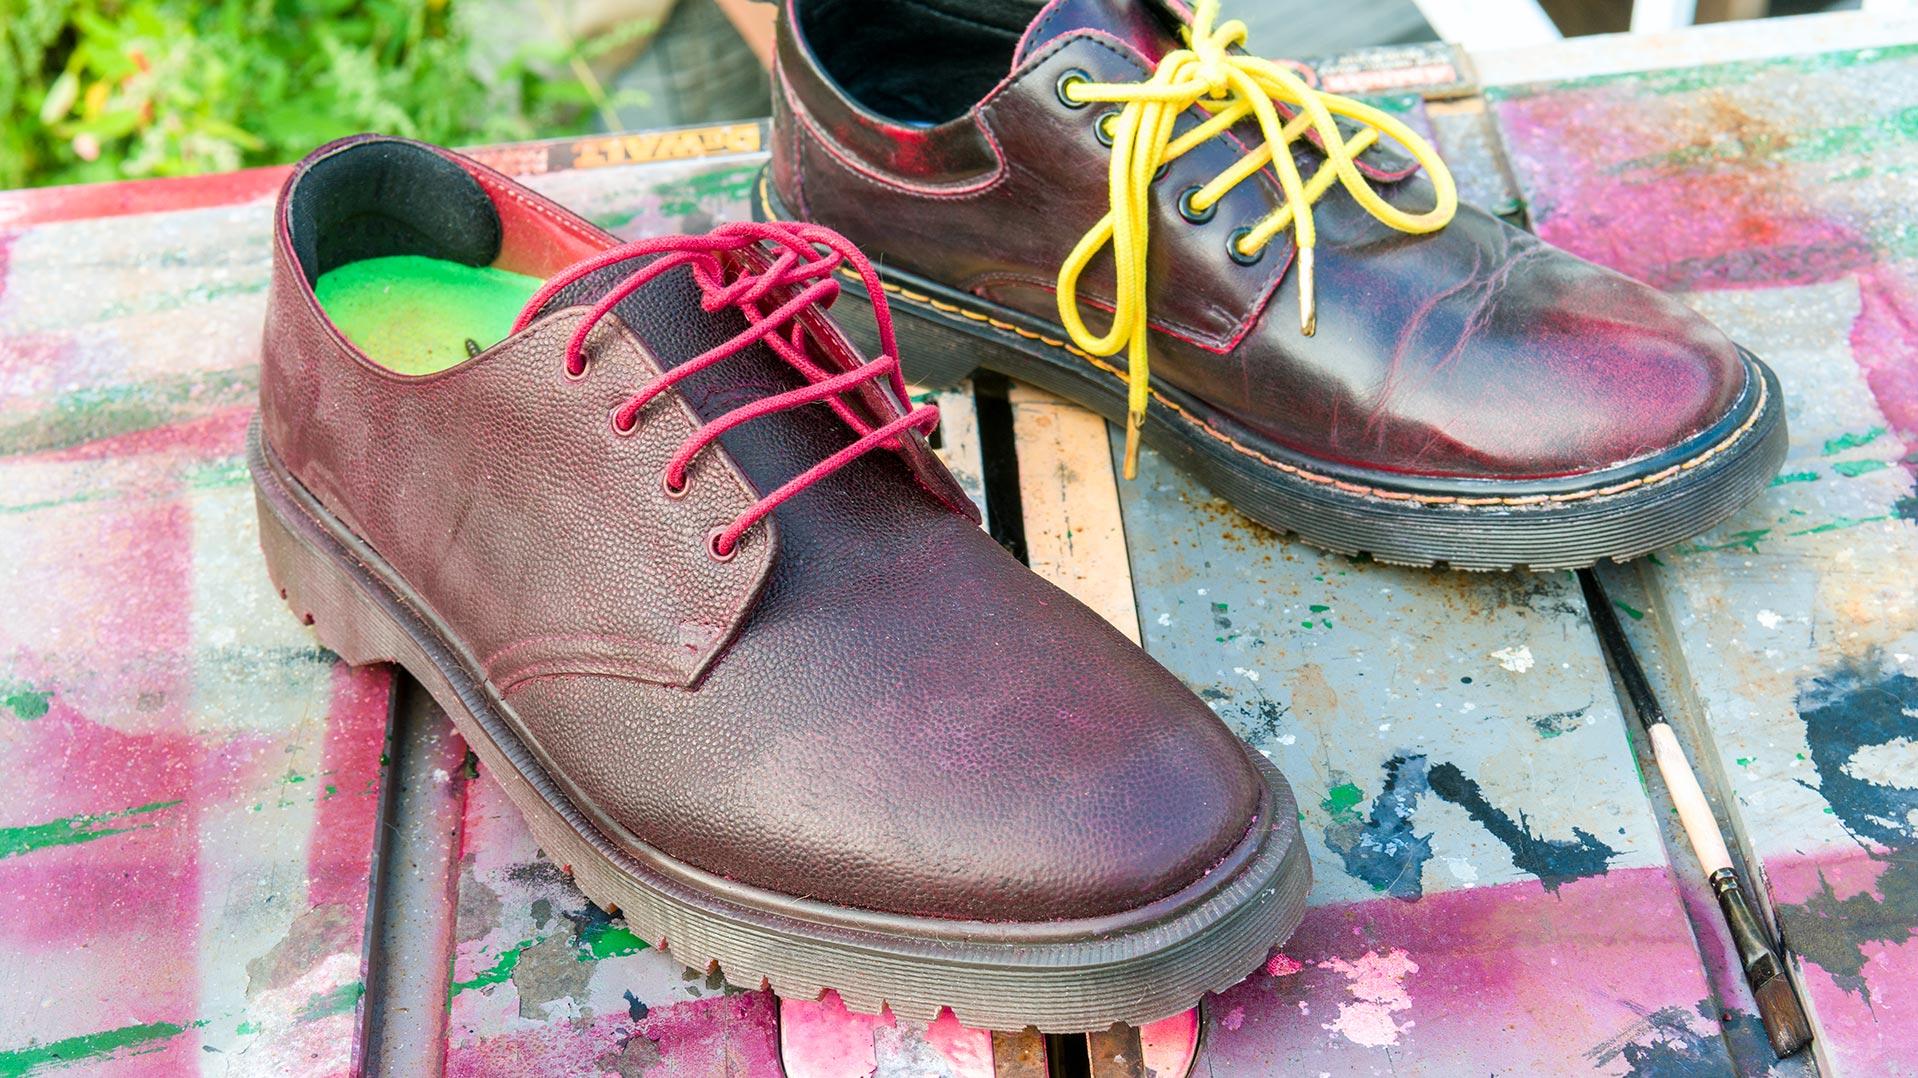
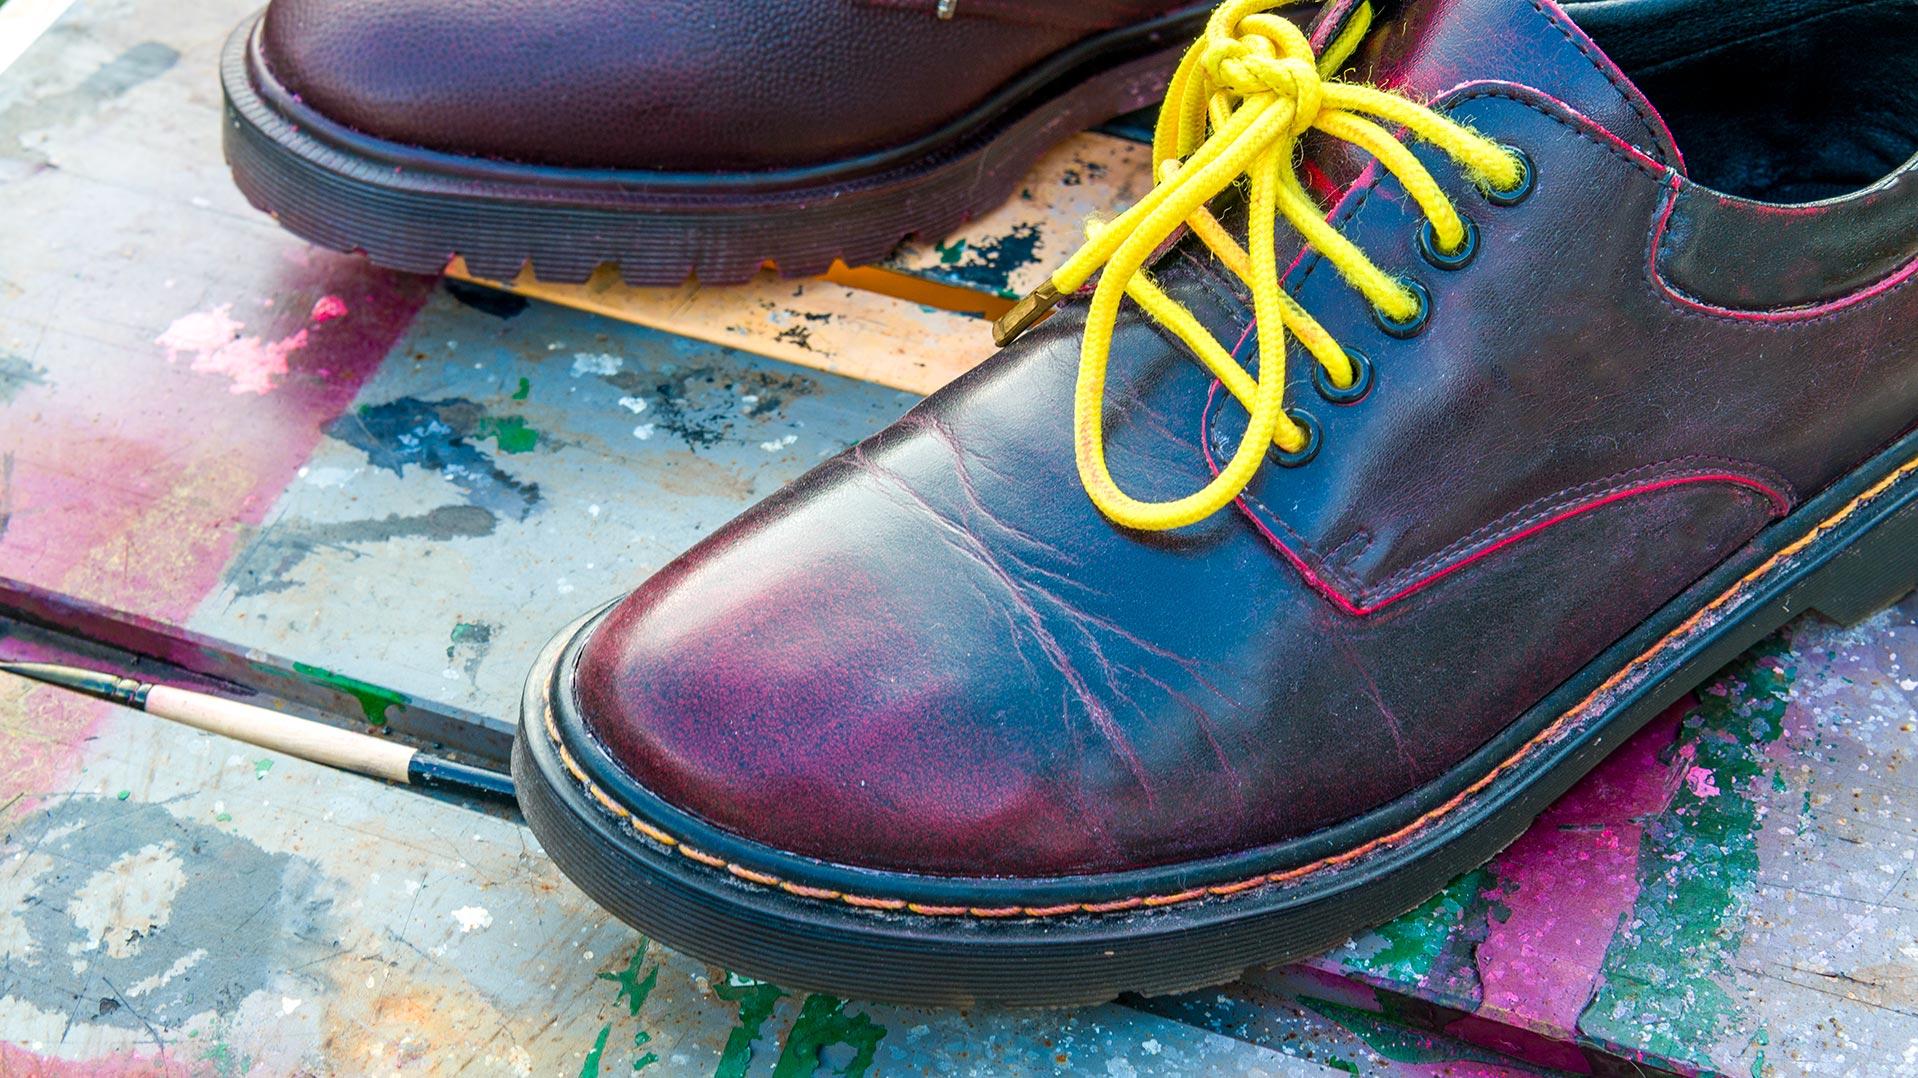
This how I do it in a nut shell: i) Apply Jojoba oil. The oil is undiluted and applied with +30 psi to the veg tan. Wait 24 hours. My theory is that with +30 psi the Jojoba oil is forced in the leather and causes the leather fibres expand to allow for better dye absorption. The reason I don't use Neatsfoot oil is there is a possibility of it going rancid and degrading stitching over a period of time????? ii) Apply the dye. The dye mixed with 99 percent rubbing alcohol at a 50/50 ratio and applied at +30 psi. Wait 24 hours. On the shoes (done August 2023) I used a Paasche airbrush with a psi setting of +45 psi. iii) Apply Jojoba oil to the veg tan. Wait 24 hours then finish. Here is a couple of photo's of one shoe from each pair of shoes (done August 2023) after two years of wear. Like @Dwight mentioned you can do some nice fading which can be seen being a lighter tone on toe and darkening to the body of the shoe. kgg
-
Thank you, I will do that
-
Thank you so much for this very thorough list!
-

Adler 67-gk373 upper tension assembly replacement
Michiel replied to Numby's topic in Leather Sewing Machines
No, sorry later i found an adler assembly and changed it. the paff assembly did fitt but i had to modify it a little bit -
In multi layers or thick leather move up one size from the needle size recommended. EX for V138 I normally use a #23 but in thick I would go #24. kgg
-
 That would be amazing. If you do please let me know, and how much you are asking for them
 -

ammo holder
Cumberland Highpower replied to Thadrick's topic in Gun Holsters, Rifle Slings and Knife Sheathes
Long ago I used to make Shotgun shell belts (20ga only) and I did a similar thing. On mine the loop was essentially "closed" and the shell had a stop of sorts that way. The bottom looks pretty similar, although with 2 slits showing per shell rather than your 1. What I used was a die that cut a piece for 5 shells at a time and stitched them to the belts. Usually a total of 4-6 and then I would stitch a flap that would cover the 6 and secure with a stud when folded down over. Basically fully enclosed from the elements. I got the pattern idea from a Russian shell belt 20 or 30 years ago. If I stop at my old shop sometime soon I'll take a photo. There's a 30 year old prototype still hanging on the wall....!!! EDIT: I guess I have the die that I used here at the new place: