All Activity
- Past hour
-
That's amazing. He shouldn't even have to come down off a ladder for lunch lol. Beautiful craftsmanship!!!
-
You did a beautiful job on that belt. I was just joking, there's so much stuff on that belt I was thinking you could possibly get a holster behind the hammer holder in the small of the back, just joking around. You did a great job on that. I would wear that belt in a heartbeat, my friend.
-
I learned this from you quite some time ago. I wondered what that little wheel looking tool was all about. It does make a huge difference.
- Today
-
 I'm about to head out the door but a couple of quick thoughts ... Sounds like it's hammering. Definitely needs cleaning and oiling internally. Especially the hook area. A dull needle could contribute to that sound. The slow start could also be related to lack of lubrication. But very often that slow start means the motor and/or foot controller need to be serviced. This is all easy stuff to do. I'll recommend going to you tube and looking up Andy Tube he has hundreds of videos, mostly on old Singers but it still applies. Also Vintage Sewing Machine Garage. I'll check in here later this evening and see if we have any updates from you. Oh, the stitching is probably a simple issue as well. It starts with cleaning, oiling, checking your thread path, using new thread and needles, things like that. It's all very Zen. Sit with the machine, go over all the parts of it, study how it works. Become One with the machine . Ommmm...
 -
I don't have a photo from the back, but the circular piece has slots. There are two straps and they simply pass through the circular piece. I placed the slots at 90 degrees because it seemed like a good idea. They should be closer to 60 degrees. I'm not sure what you mean by holster. Randy
-
 As it is an old home sewing machine, do you know this forum: https://www.victoriansweatshop.com/ they have some knowledge there
 -
 I took a video of how it works and sounds. It's amazing the last time I pulled it out the needle was hitting the shuttle. Now it works . I think it still needs to be oiled because sometimes when I hit the peddle I gotta turn the hand wheel to get it go. This time I didn't need to. VID_20260122_002212670.mp4
 -
I also just pulled it out to take the videos and photos requested and oddly enough she is actually stitching. But the stitches are uneven Im hoping it's just tension. Also when first hit the peddle I got turn the hand wheel by hand and then it starts to run.

-
This is the machine

-
Nothing but beautiful . . . May God bless, Dwight
-

Fender repair...
Brokenolmarine replied to Brokenolmarine's topic in Saddle Identification, Restoration & Repair
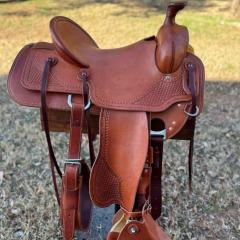
They looked pretty bad originally.... but I was told they aren't all the same, and finding matches might be hard. Wouldn't want to have to buy a new set of stirrup straps just because the blevins are ugly, when they aren't seen while riding. (I guess) They can clean them the rest of the way... if they like. -
Fender repair...
Brokenolmarine replied to Brokenolmarine's topic in Saddle Identification, Restoration & Repair
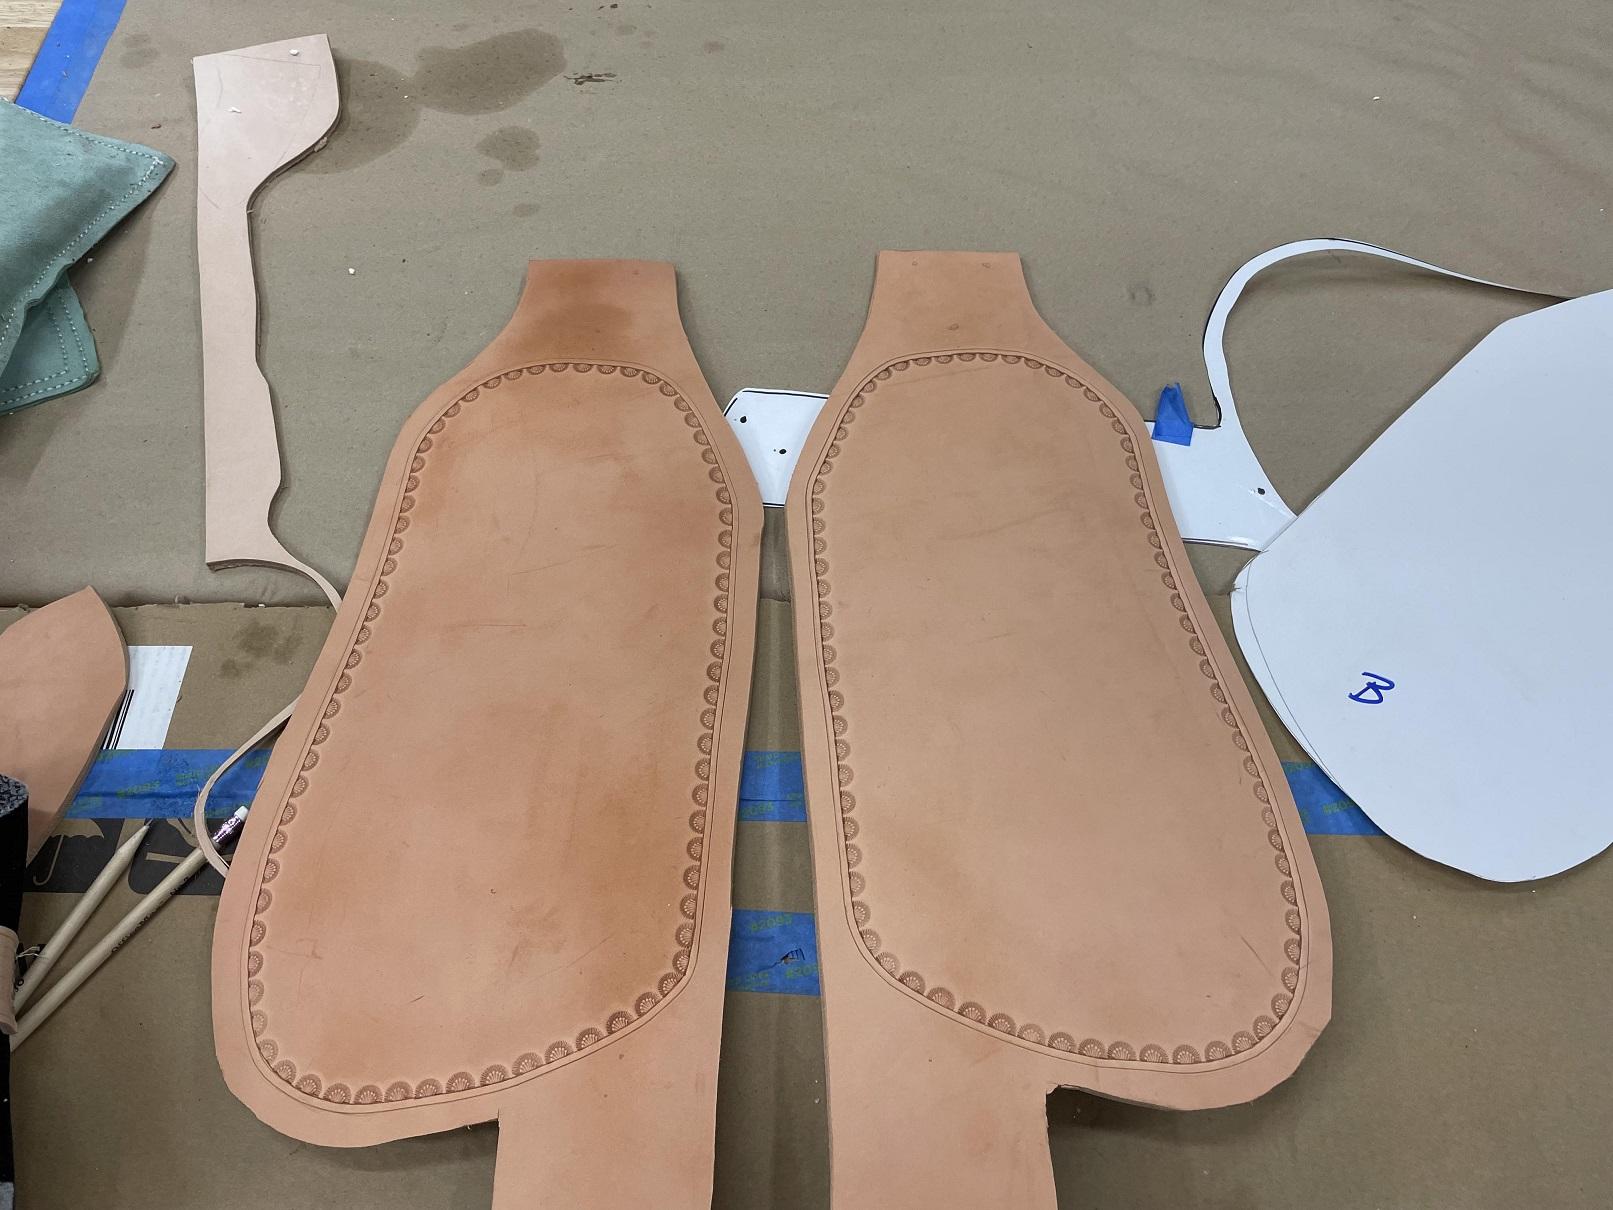
Back at it again, I carefully stamped the tooling pattern around the inside of the border, AFTER I cut the inside line deeper with a swivel knife the blade of which I had re-sharpened and polished. I now had a clearly defined sharp reference to work from. Each stamp was checked before I struck it and EACH strike was firm and careful. I wanted to avoid a glancing blow or a bounce, both of which could ruin the entire line. In the picture below you can see the border, as well as my Maker's Mark at the bottom of the leg on both Fenders. Again, Careful Placement, and then even more careful in the strike. Too much work to blow it now. A closer look at the border pattern. This is what she wanted. I would have gone with a Serpentine Pattern myself, but then... not my saddle. LOL. Next session, I'll work on dressing up the edges in preparation for applying Watco Oil or stain. There are some spots I'll want to smooth out the "Line/Flow" of the edges so that we can burnish the edges. I'll take a couple scrap pieces and make test panels for stains for color comparison. The owner of the saddle finally sent pics to assist with color match, though she isn't too concerned. I like to try. I did get to do some Clean Up work on the blevins, removing old glue, rust, staining... We'll be reusing the old beat up ones. They tell me they can't be seen, So why not.

-
Hi everyone, I’m looking to pull the trigger on my first industrial machine: a refurbished Juki LS-1341 from a local seller. It’s fully overhauled with a digital servo, needle positioner, and compact table. My primary focus is leather bags mixed with outdoor technical fabrics (Cordura, ripstop, canvas) and lightweight liners. I plan to keep my domestic HD machine for very light work, but I want this Juki to handle the 'medium-to-heavy' range. My Confusion: I’m seeing a lot of conflicting information regarding the needle size compatibility for the LS-1341, particularly on the lower end: • Juki Junkies: States a range of #19 to #24, mentioning that anything smaller (like an #18) requires re-timing. • Other Third-Party Dealers: Some list the range as #16 to #24 without mentioning any timing modifications. • Cobra Class 26 (Clone): Rated for #12 to #25, even though it's the same basic design. My Questions: 1. Lower Limit: Can I reliably run a #16 (Nm 100) or #18 (Nm 110) needle for sewing Tex 45 or Tex 70 thread through Cordura/liners without skipping stitches or hitting the hook? 2. Needle Systems: Does the choice between 135x17 (fabric) and 135x16 (leather) impact the timing tolerances for smaller sizes? 3. The 'Re-timing' Myth: For those of you with an LS-1341, have you had to physically move the hook closer to the needle (adjusting the needle-to-hook clearance) just to drop down to a #18? I really want a 'do-it-all' machine for bags, but I'm worried that if I'm forced to stay at #19 and above, I'll be punching 'drainage holes' into my lighter technical fabrics. Any insight from long-term 1341 users would be greatly appreciated And if there are any recommendations for other machines that might fit my needs better im all ears!
-
 just an other option - a thread oiler / lubricator may help too.
 -
Fender repair...
Brokenolmarine replied to Brokenolmarine's topic in Saddle Identification, Restoration & Repair
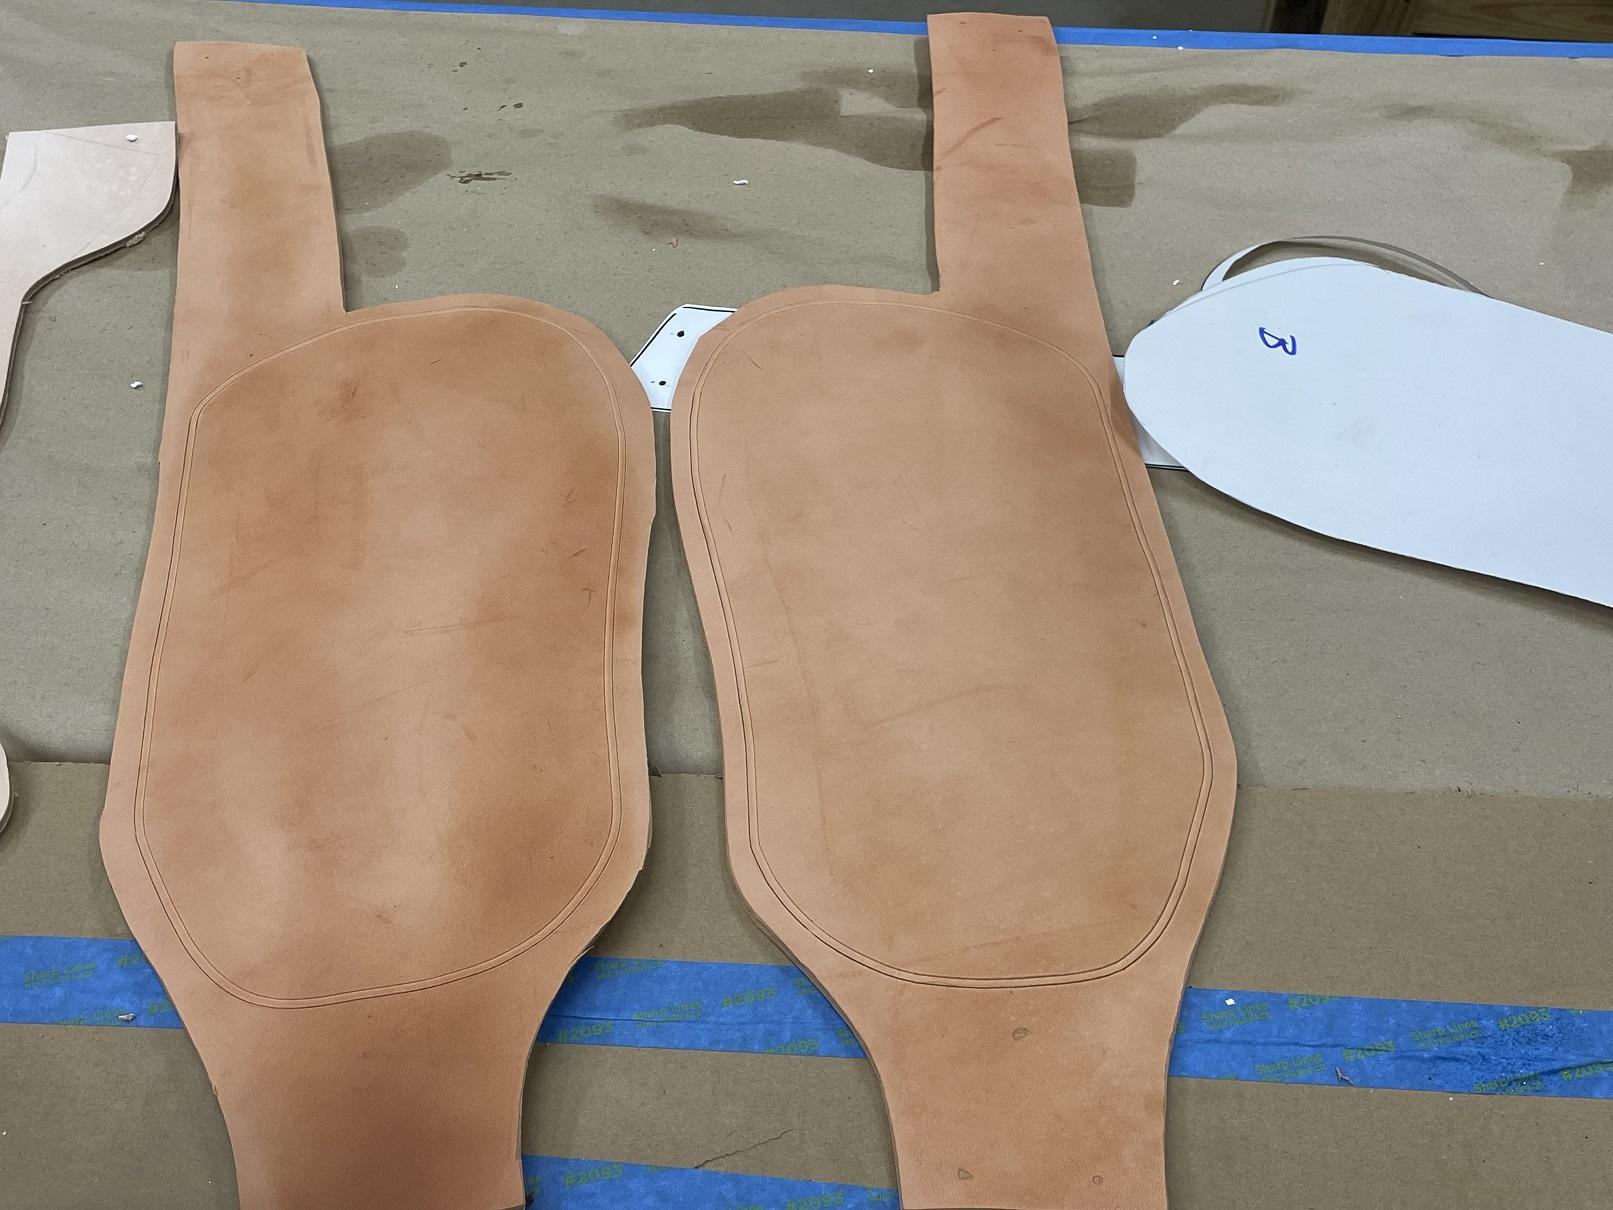
I came out after breakfast the next morning and checked. Success. The Fenders were flat and ready to tool. I used the template to carefully, and LIGHTLY pencil in the pattern. Using a double border swivel knife, I cut in the border. This is detail work, the pucker factor was HIGH. This type makes my arthritis scream, so I was done for the day. BUT, I didn't blow it. Not bad for a Broken Old Marine. I left this to rest while I rested the hands overnight.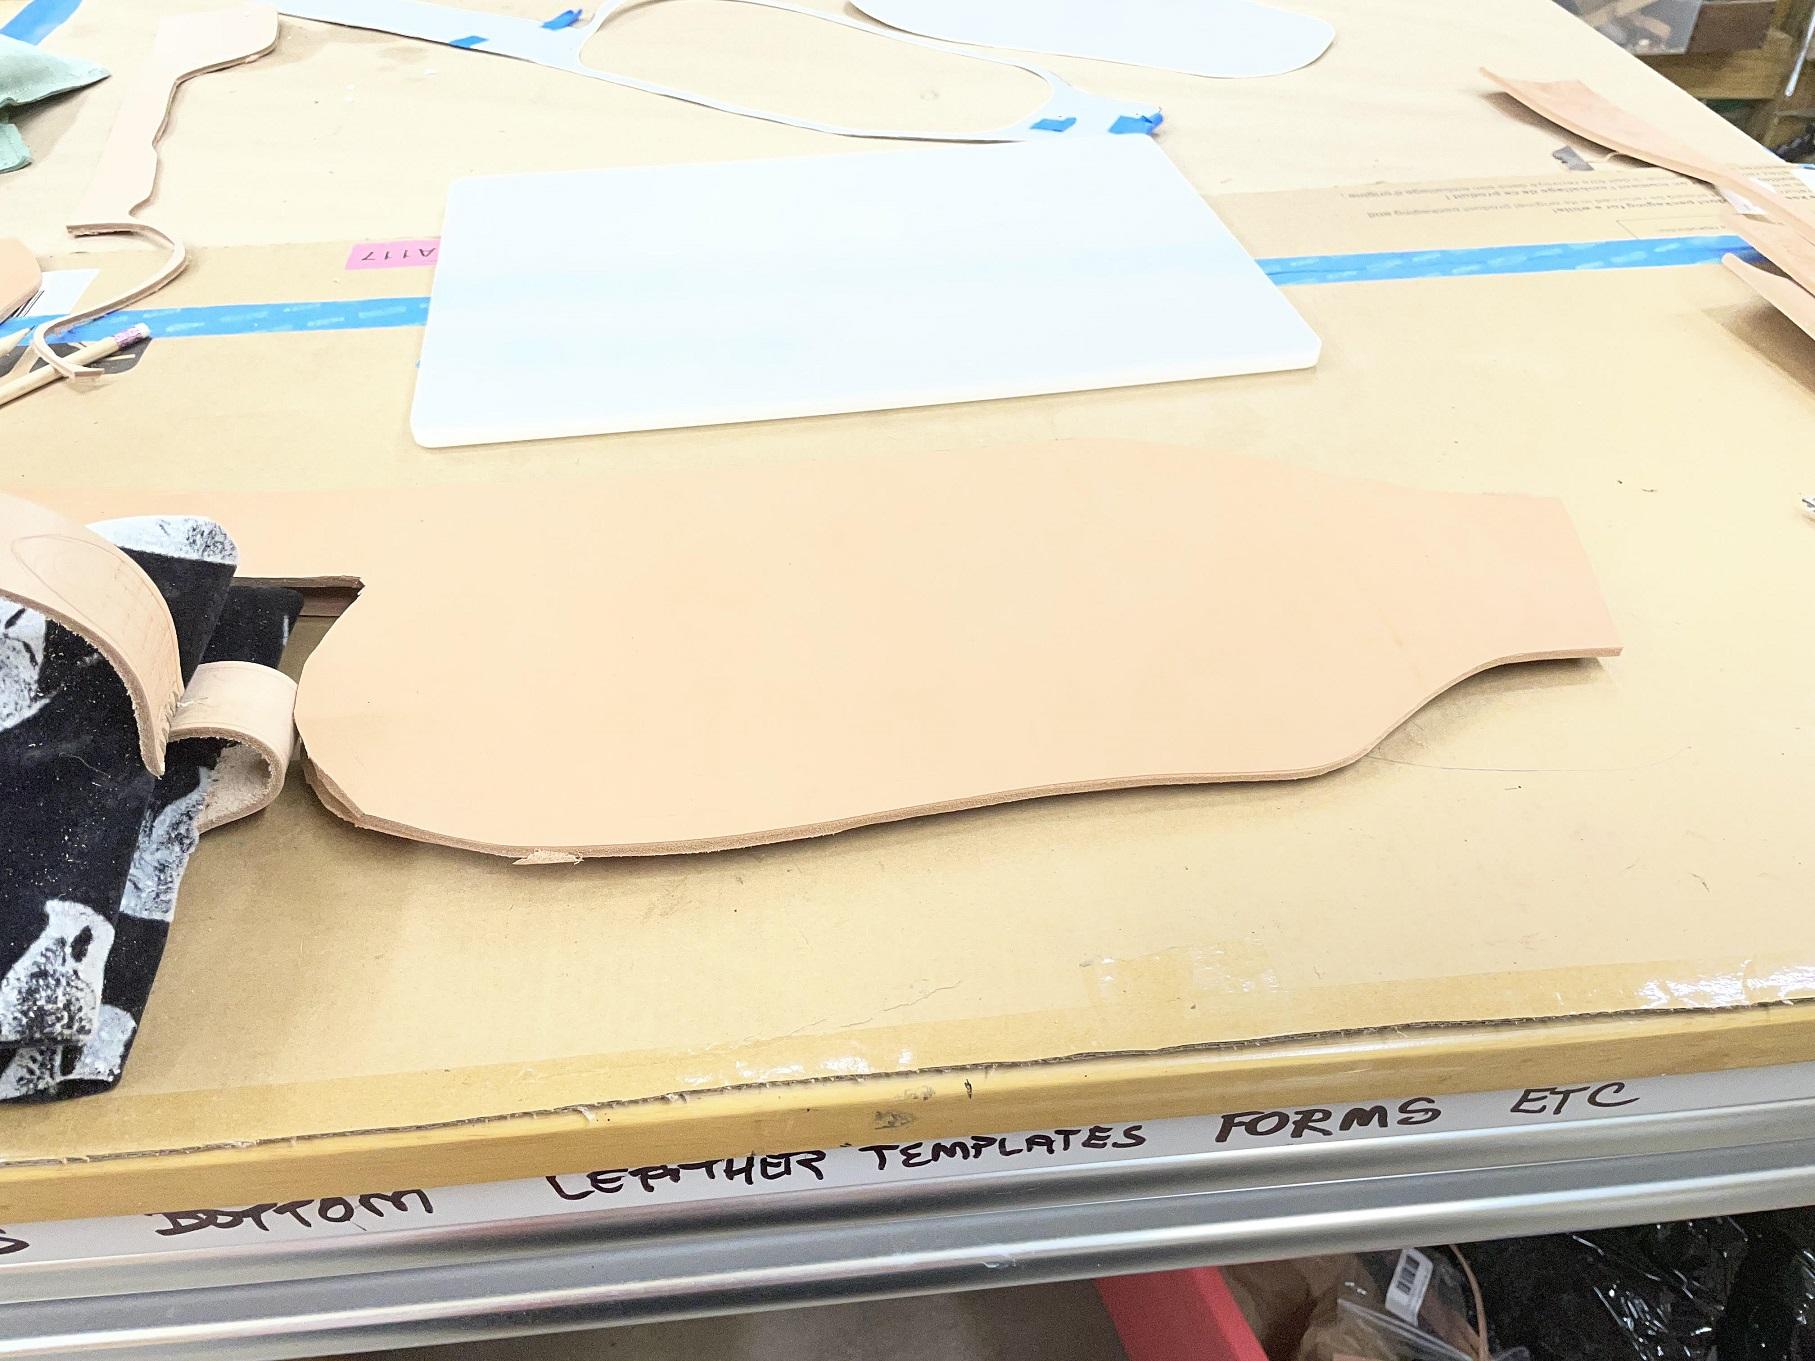
-
Fender repair...
Brokenolmarine replied to Brokenolmarine's topic in Saddle Identification, Restoration & Repair
I have made some progress in the past few days. I used the original template for the fender, and cut out a border template. It would allow me to insure the border I cut into the one side, matched the border I cut into the other. Why? Since you can't see both fenders at the same time when they are mounted on the saddle? Hey, just the way I do things. I try and do things the right way... or as best I can. However... before I can actually transfer this pattern to the fenders... there is an issue. They still retain a curl from the shipping. As I did with the original fenders, I sprayed them down with a generous mist, and weighted them down on the bench and left them for about six hours, then checked them. They had flattened considerably, but would benefit greatly from a second treatment. I repeated the process and left them overnight.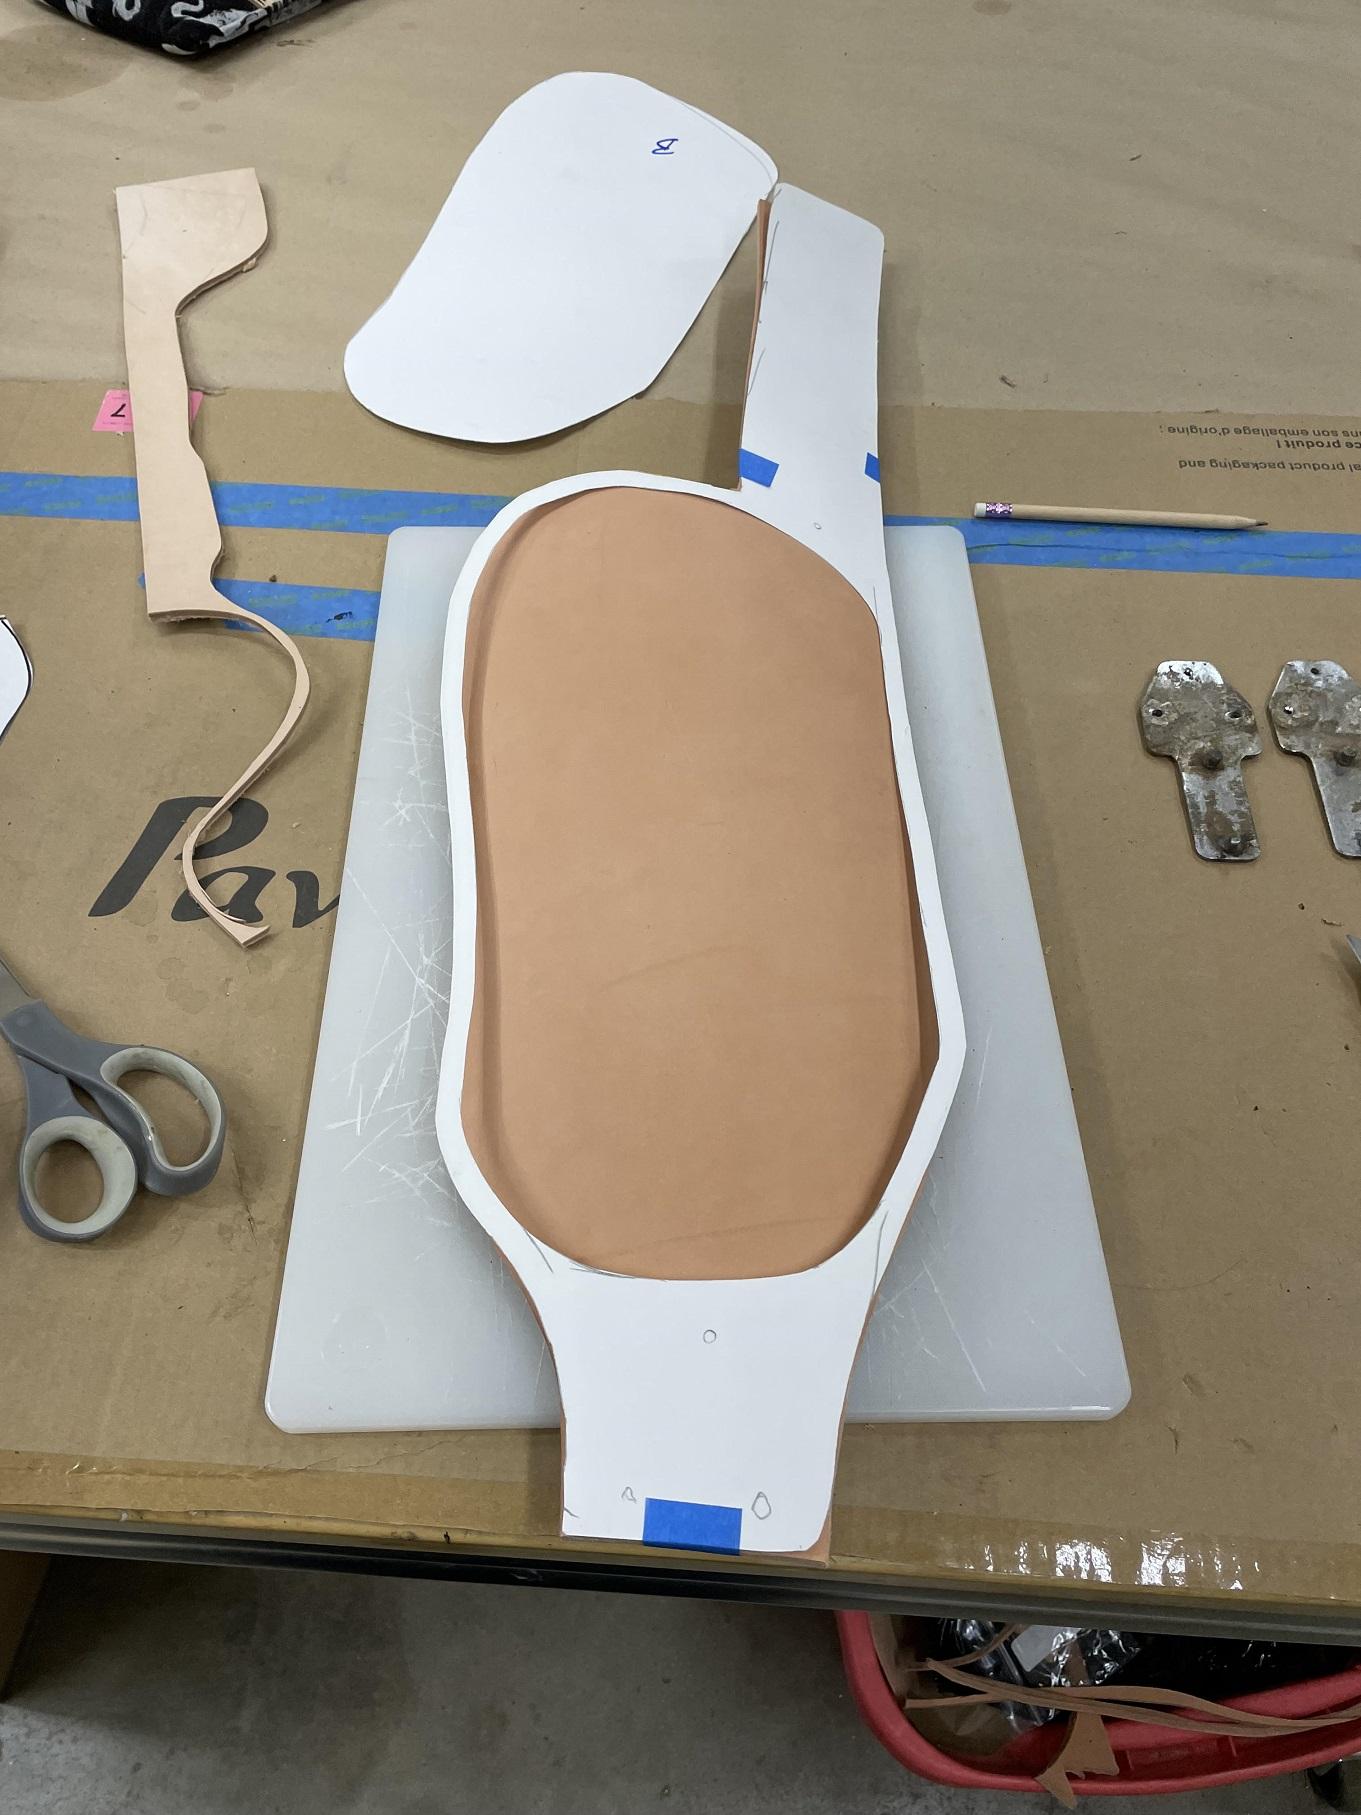
-
Holy moly those are beautiful
-
 My thoughts: i) #20 needle is for V92 thread not V69. reference chart ( https://www.tolindsewmach.com/thread-chart.html ). An incorrect sized needle for the thread size can cause skipped stitches as the loop sometimes does not form properly which gives you skip stitches. ii) With a fabric backed material I would try a 135 x 16 x 18 to cut through the vinyl rather the 135 X 17 x 20 rather then punching through with an oversized hole. Think of it more like trying to punch a hole in piece of paper with your finger rather then a needle. The fabric needles are meant to push apart/separate fibres so as not to weaken the fabric where as the fabric on your vinyl is probably more for stability to help it from over stretching. kgg
 -
You need to list a price in USD as well as photos and description of their condition. Will you ship, where to, who pays. See the marketplace rules here https://leatherworker.net/forum/forum/70-announcements/
-
Thank you, I really appreciate your impute. Great advice.
-

Swiss Saddler Clam Drawings
ClaimedVacancy replied to ClaimedVacancy's topic in Leatherwork Conversation
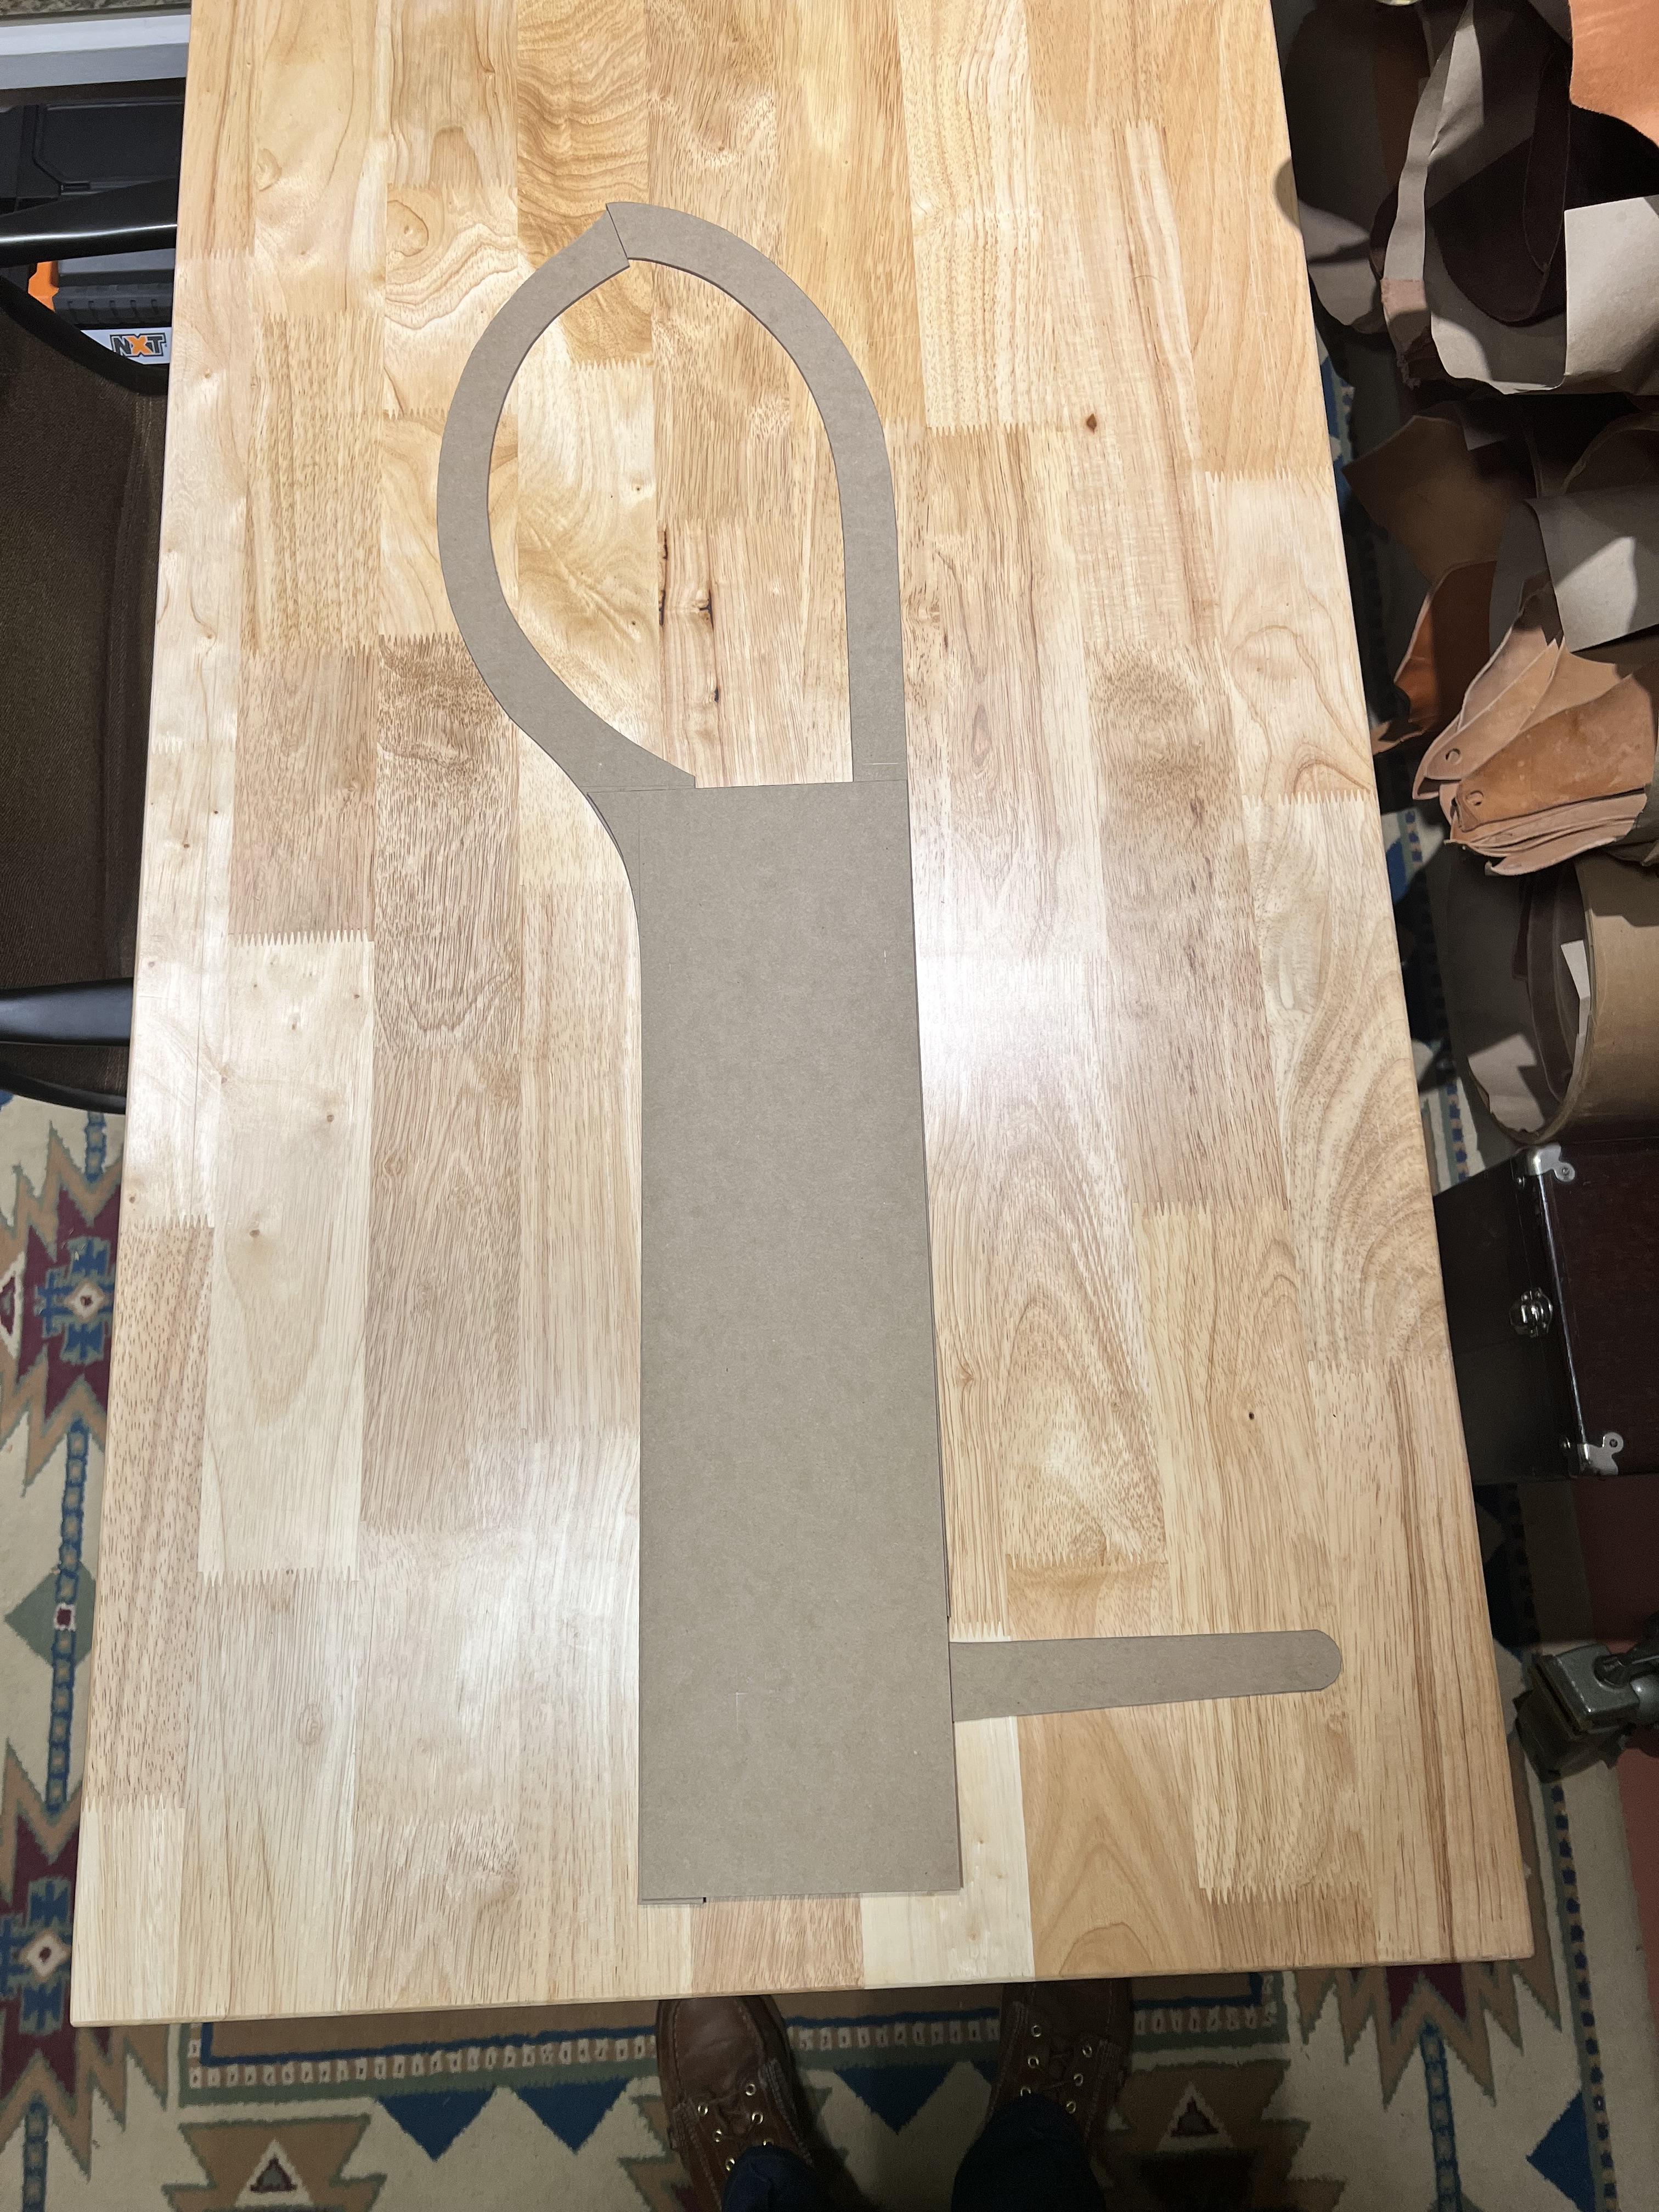
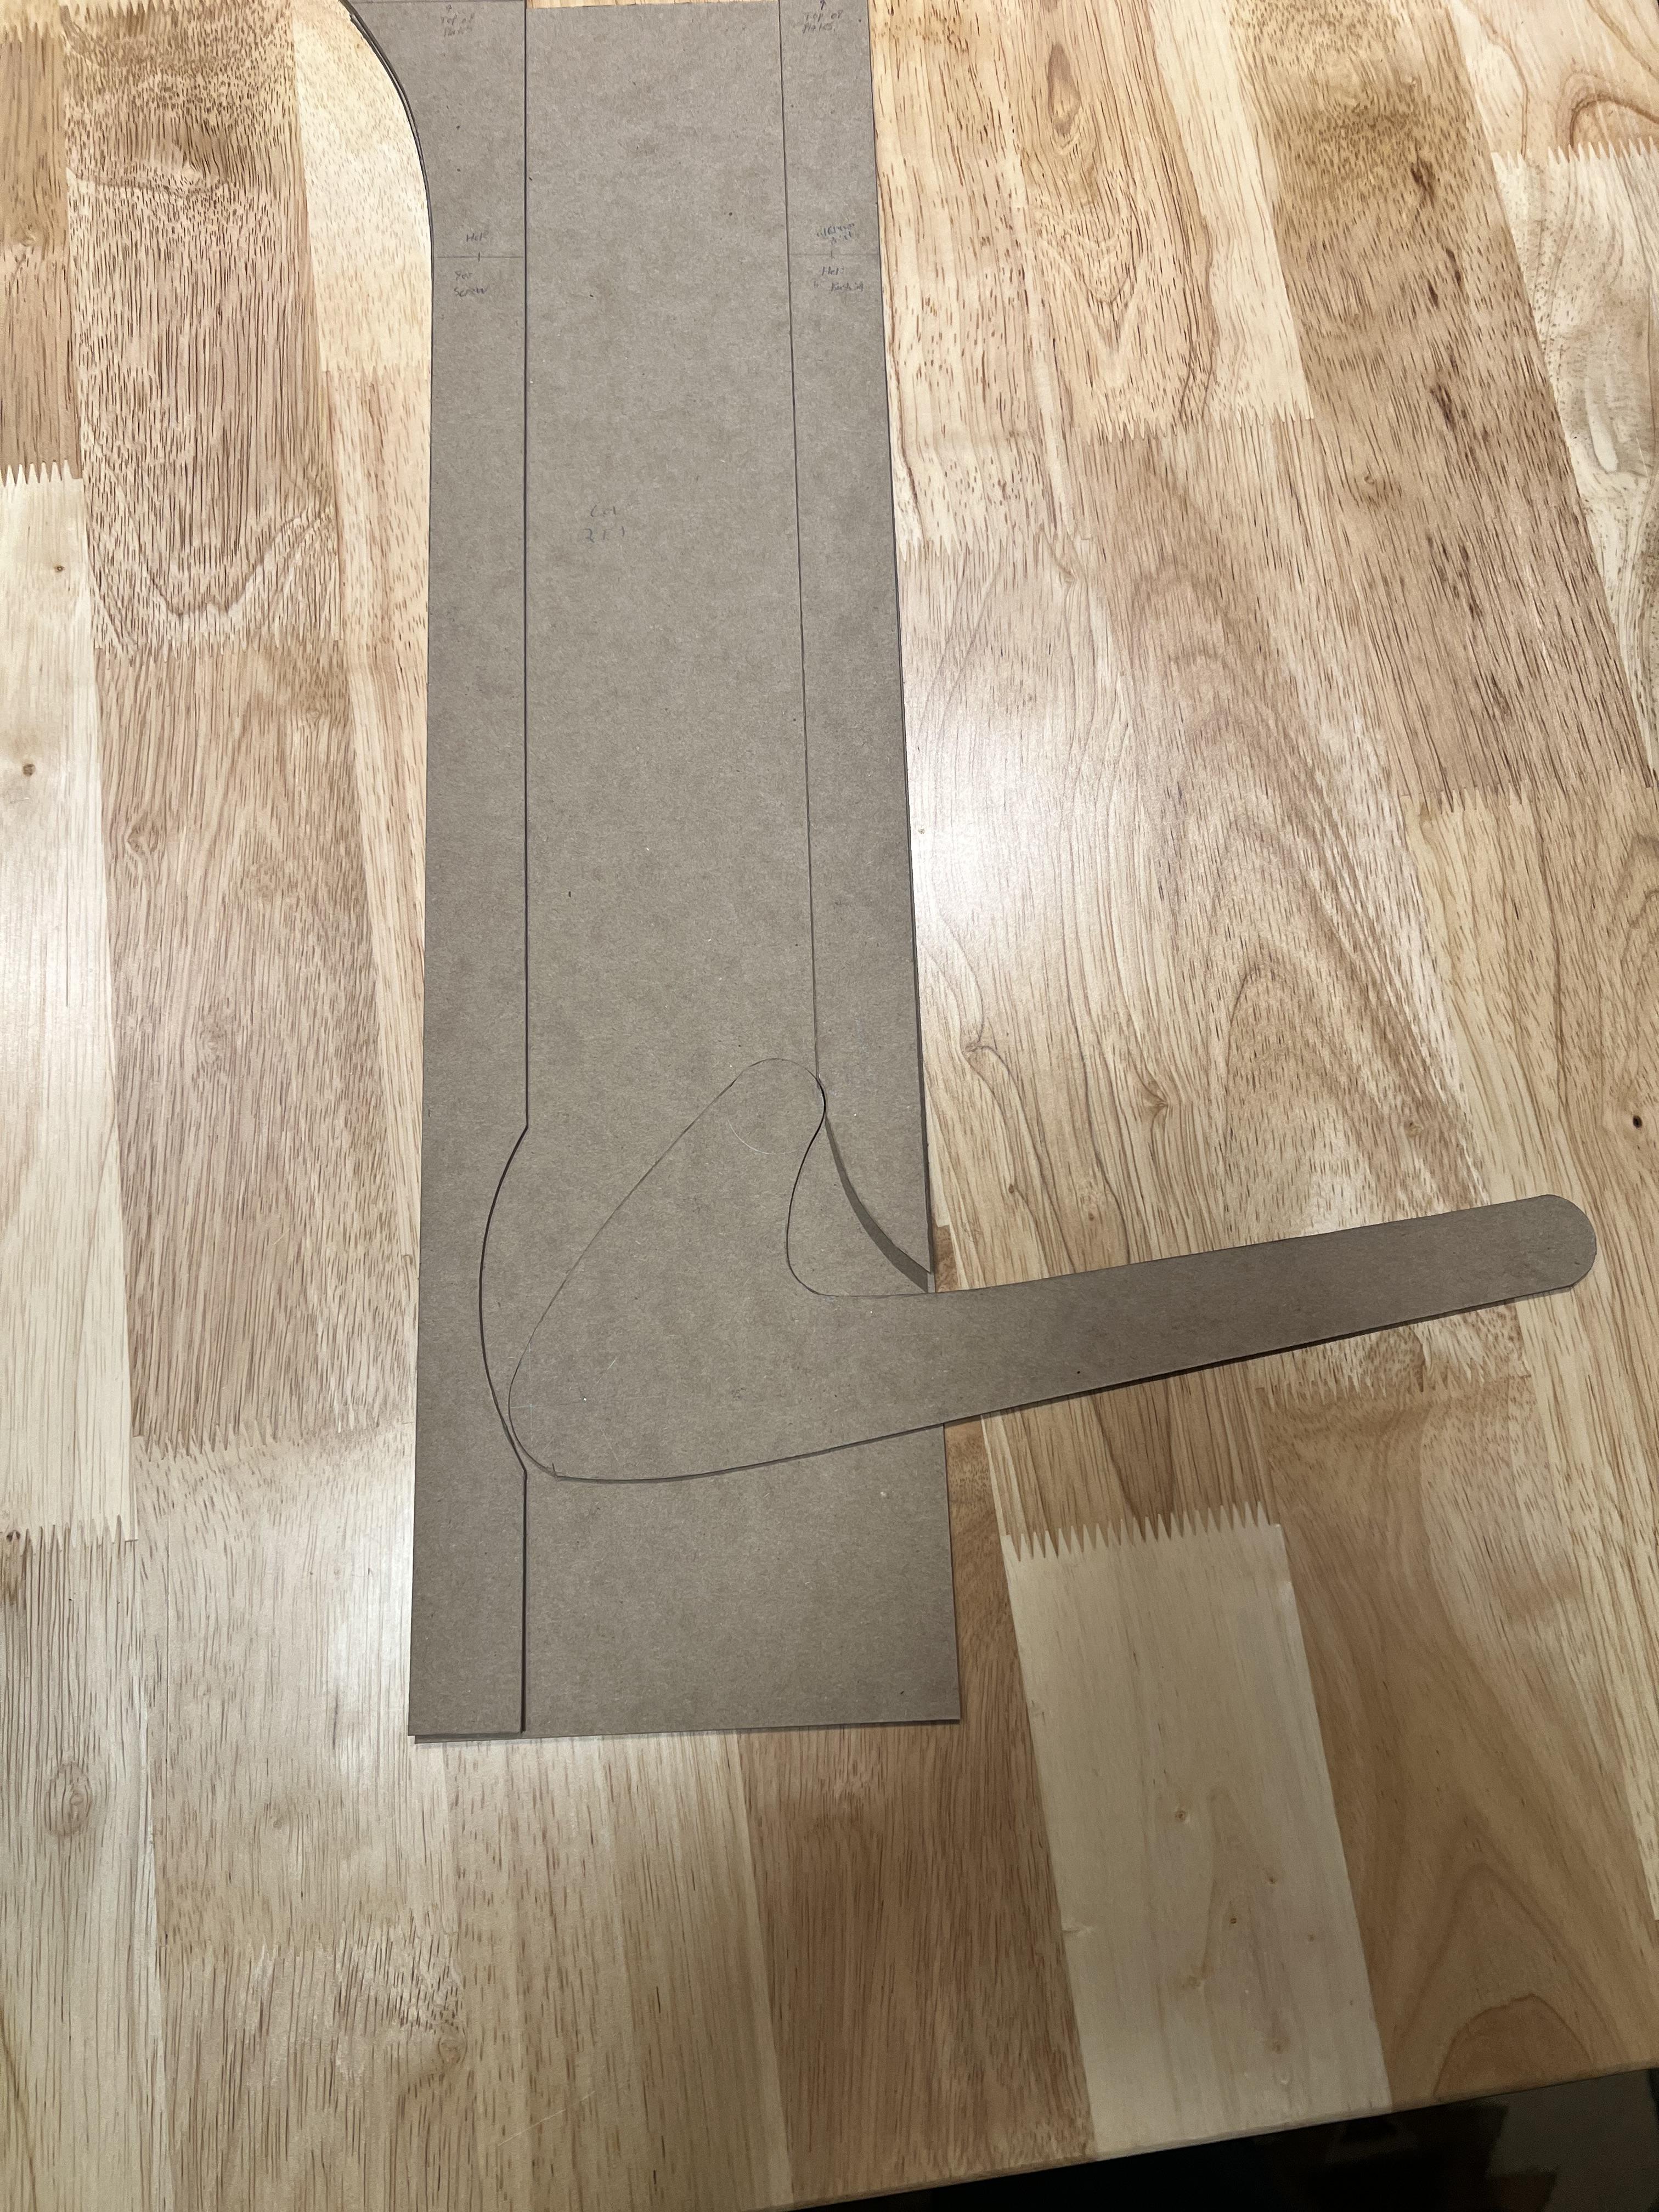
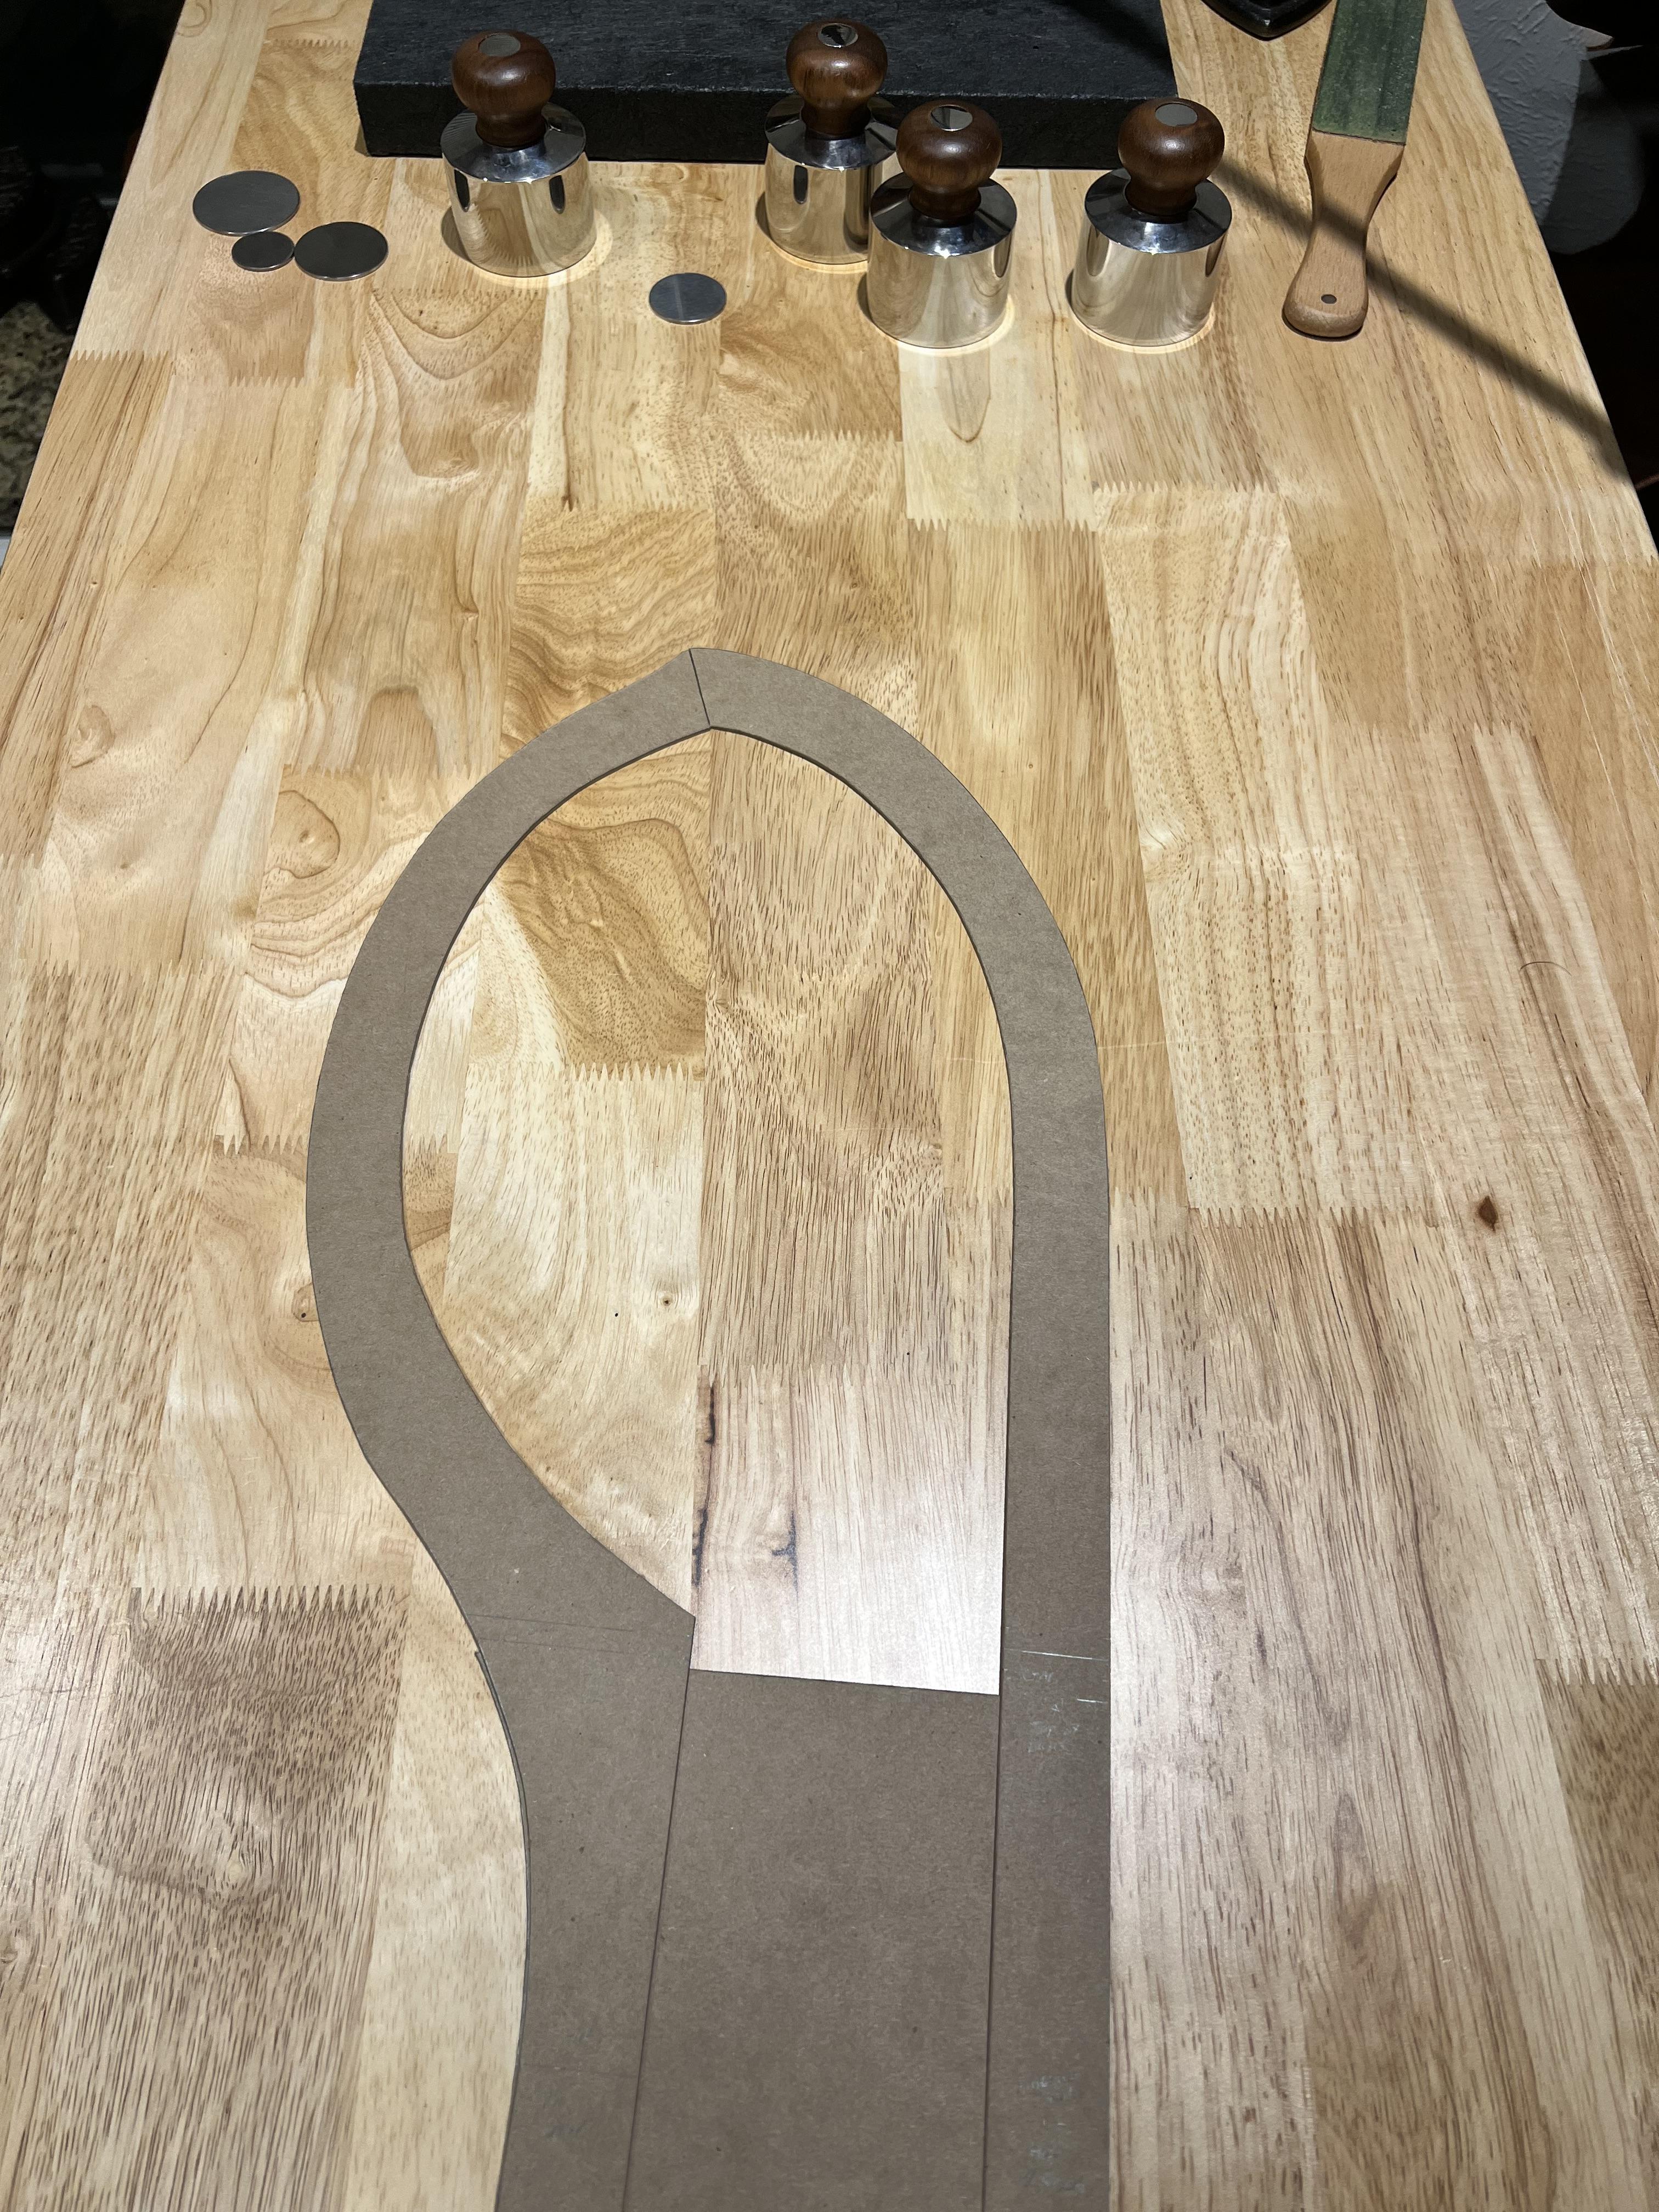
Update: Template has been cut out. Now to cut pieces of birch ply, glue, shape and trim, drill and fixture together. Hopefully everything beds well, but i expect some geometry to be out a bit. Im expecting to use some beryllium bushings for the pivot points such as the right arm and foot lever. That way i can get muchhhh greater life out of the working holes. The left arm is stationary, and the cover plates will affix to them accordingly. Ill need to create the friction lock trip. Ill be making that out of mild steel. Flat stock and just bent at the appropriate areas for the piece on lever. The guide rail at the foot lever ill have to create a mount for that, but its straight forward. The spring at the top, also straight forward. Ill drill holes for a small nub on each arm where the spring will rest. This is what will push the right arm open when the friction lock is disengaged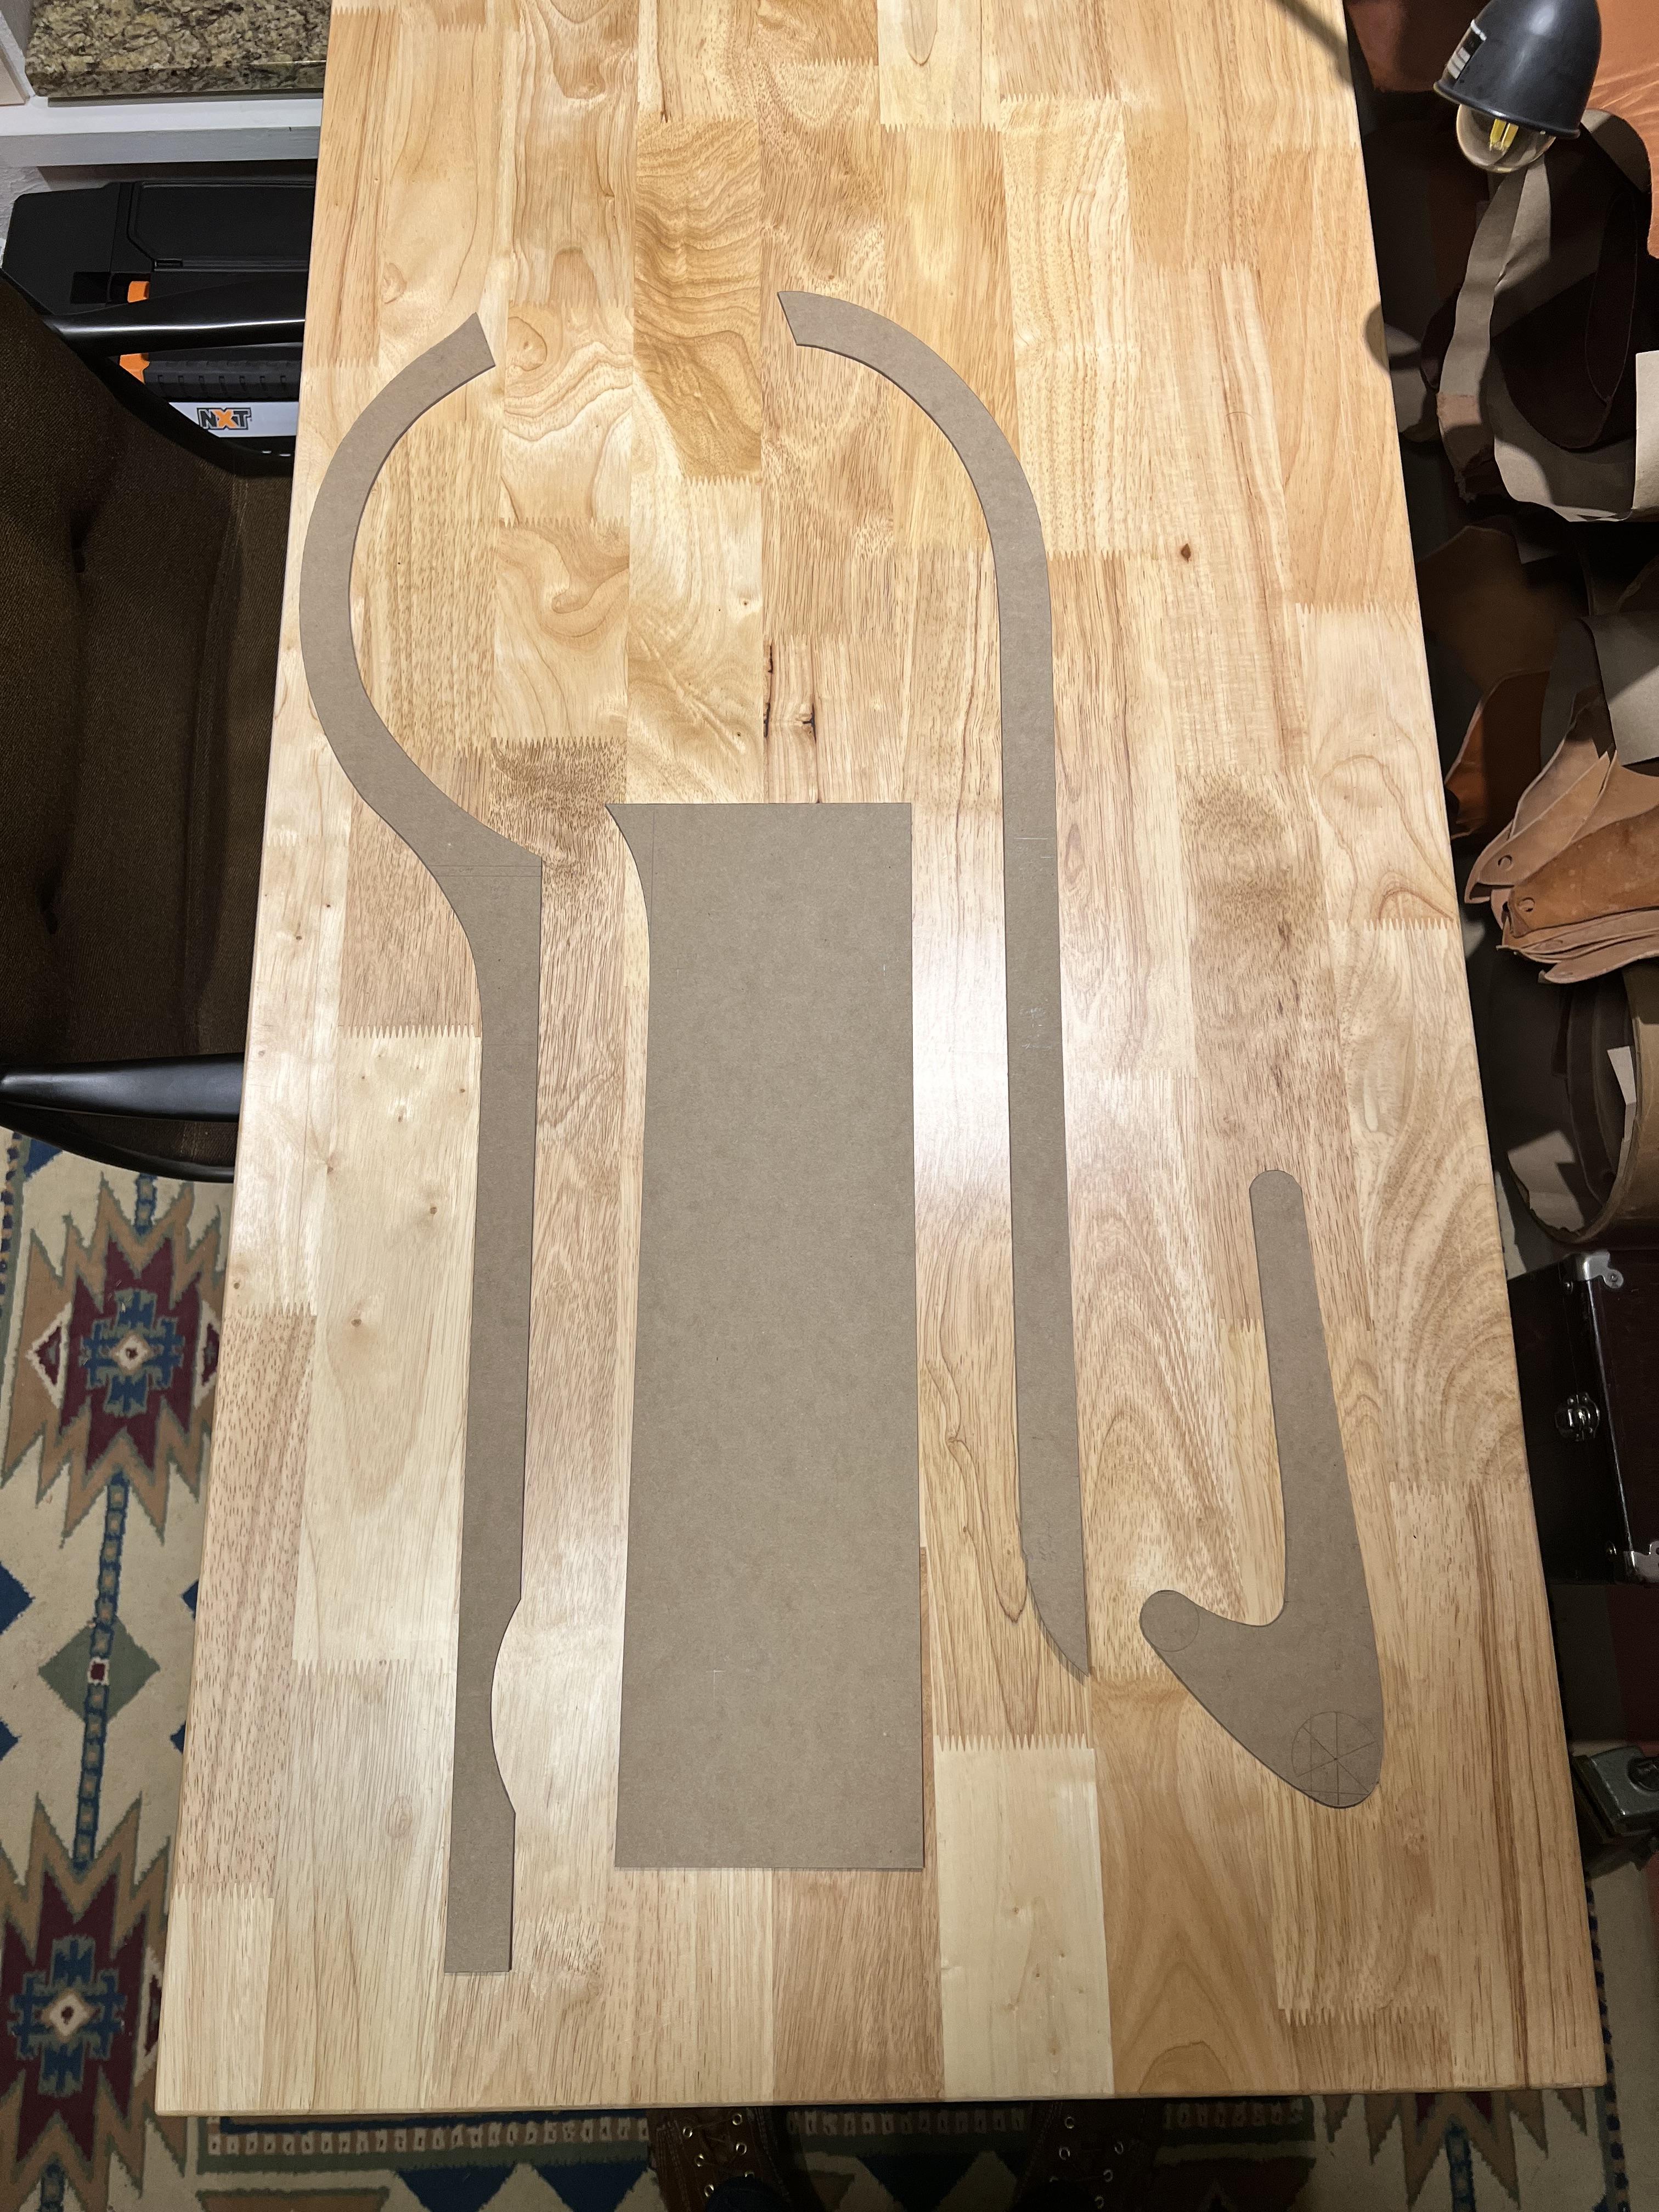
-
I don't see a holster anywhere on that system?
-
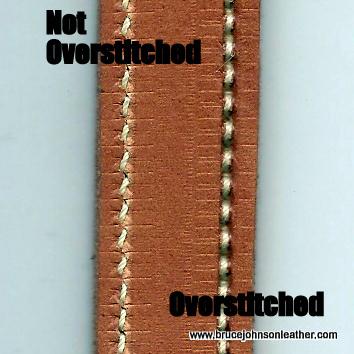
Yes, but only in the sense of the older hook and awl machines. They have an awl that prepunches the hole followed by an needle that carries the thread. They can pull a tighter stitch by nature and a cleaner looking bottom stitch. I know that is not your question but it is my answer. As far as the closed needle machines I don't think that one particular machine will shine above the others once you get to decent machines. The variables of thread size overall, one size smaller thread in bobbin vs same thread top and bottom, needle size, type of needle (straight vs slanted), stitch length, leather thickness and consistency, chrome tan will pull in tighter than veg tan, bottom feed dog, tension top and bottom, and probably more all affect the appearance of the bottom stitch more than the model and mechanics of the machine. We have three closed eye machines - Ferdco 1245, Ferdco 2000, Cobra 26, and have had others. I can make one look better than the others if the others aren't set up optimally. I can make them all look the same too with the changes above. What does improve the bottom stitch on all of the closed eye needle machines? Overstitching. Roll the bottom side stitch line with the appropriate size overstitcher. It sets the stitches, rounds the stitches between holes, and gets as close as you can get to the top side appearance. It is the 2 minute time difference that makes a big appearance difference. This example I did on the fly several years ago. I purposely put an old needle back in the machine to get some "blowout", probably 207 thread, 9 or 10 SPI, same size thread top and bottom. hard leather, heavy presser foot pressure. I think it looked pretty rugged right out of the machine. The right side looked the same as the left in the picture but was then rolled with an overstitcher. All it needs after that is the presser feet marks rubbed out to be pretty nice appearing stitching.
-
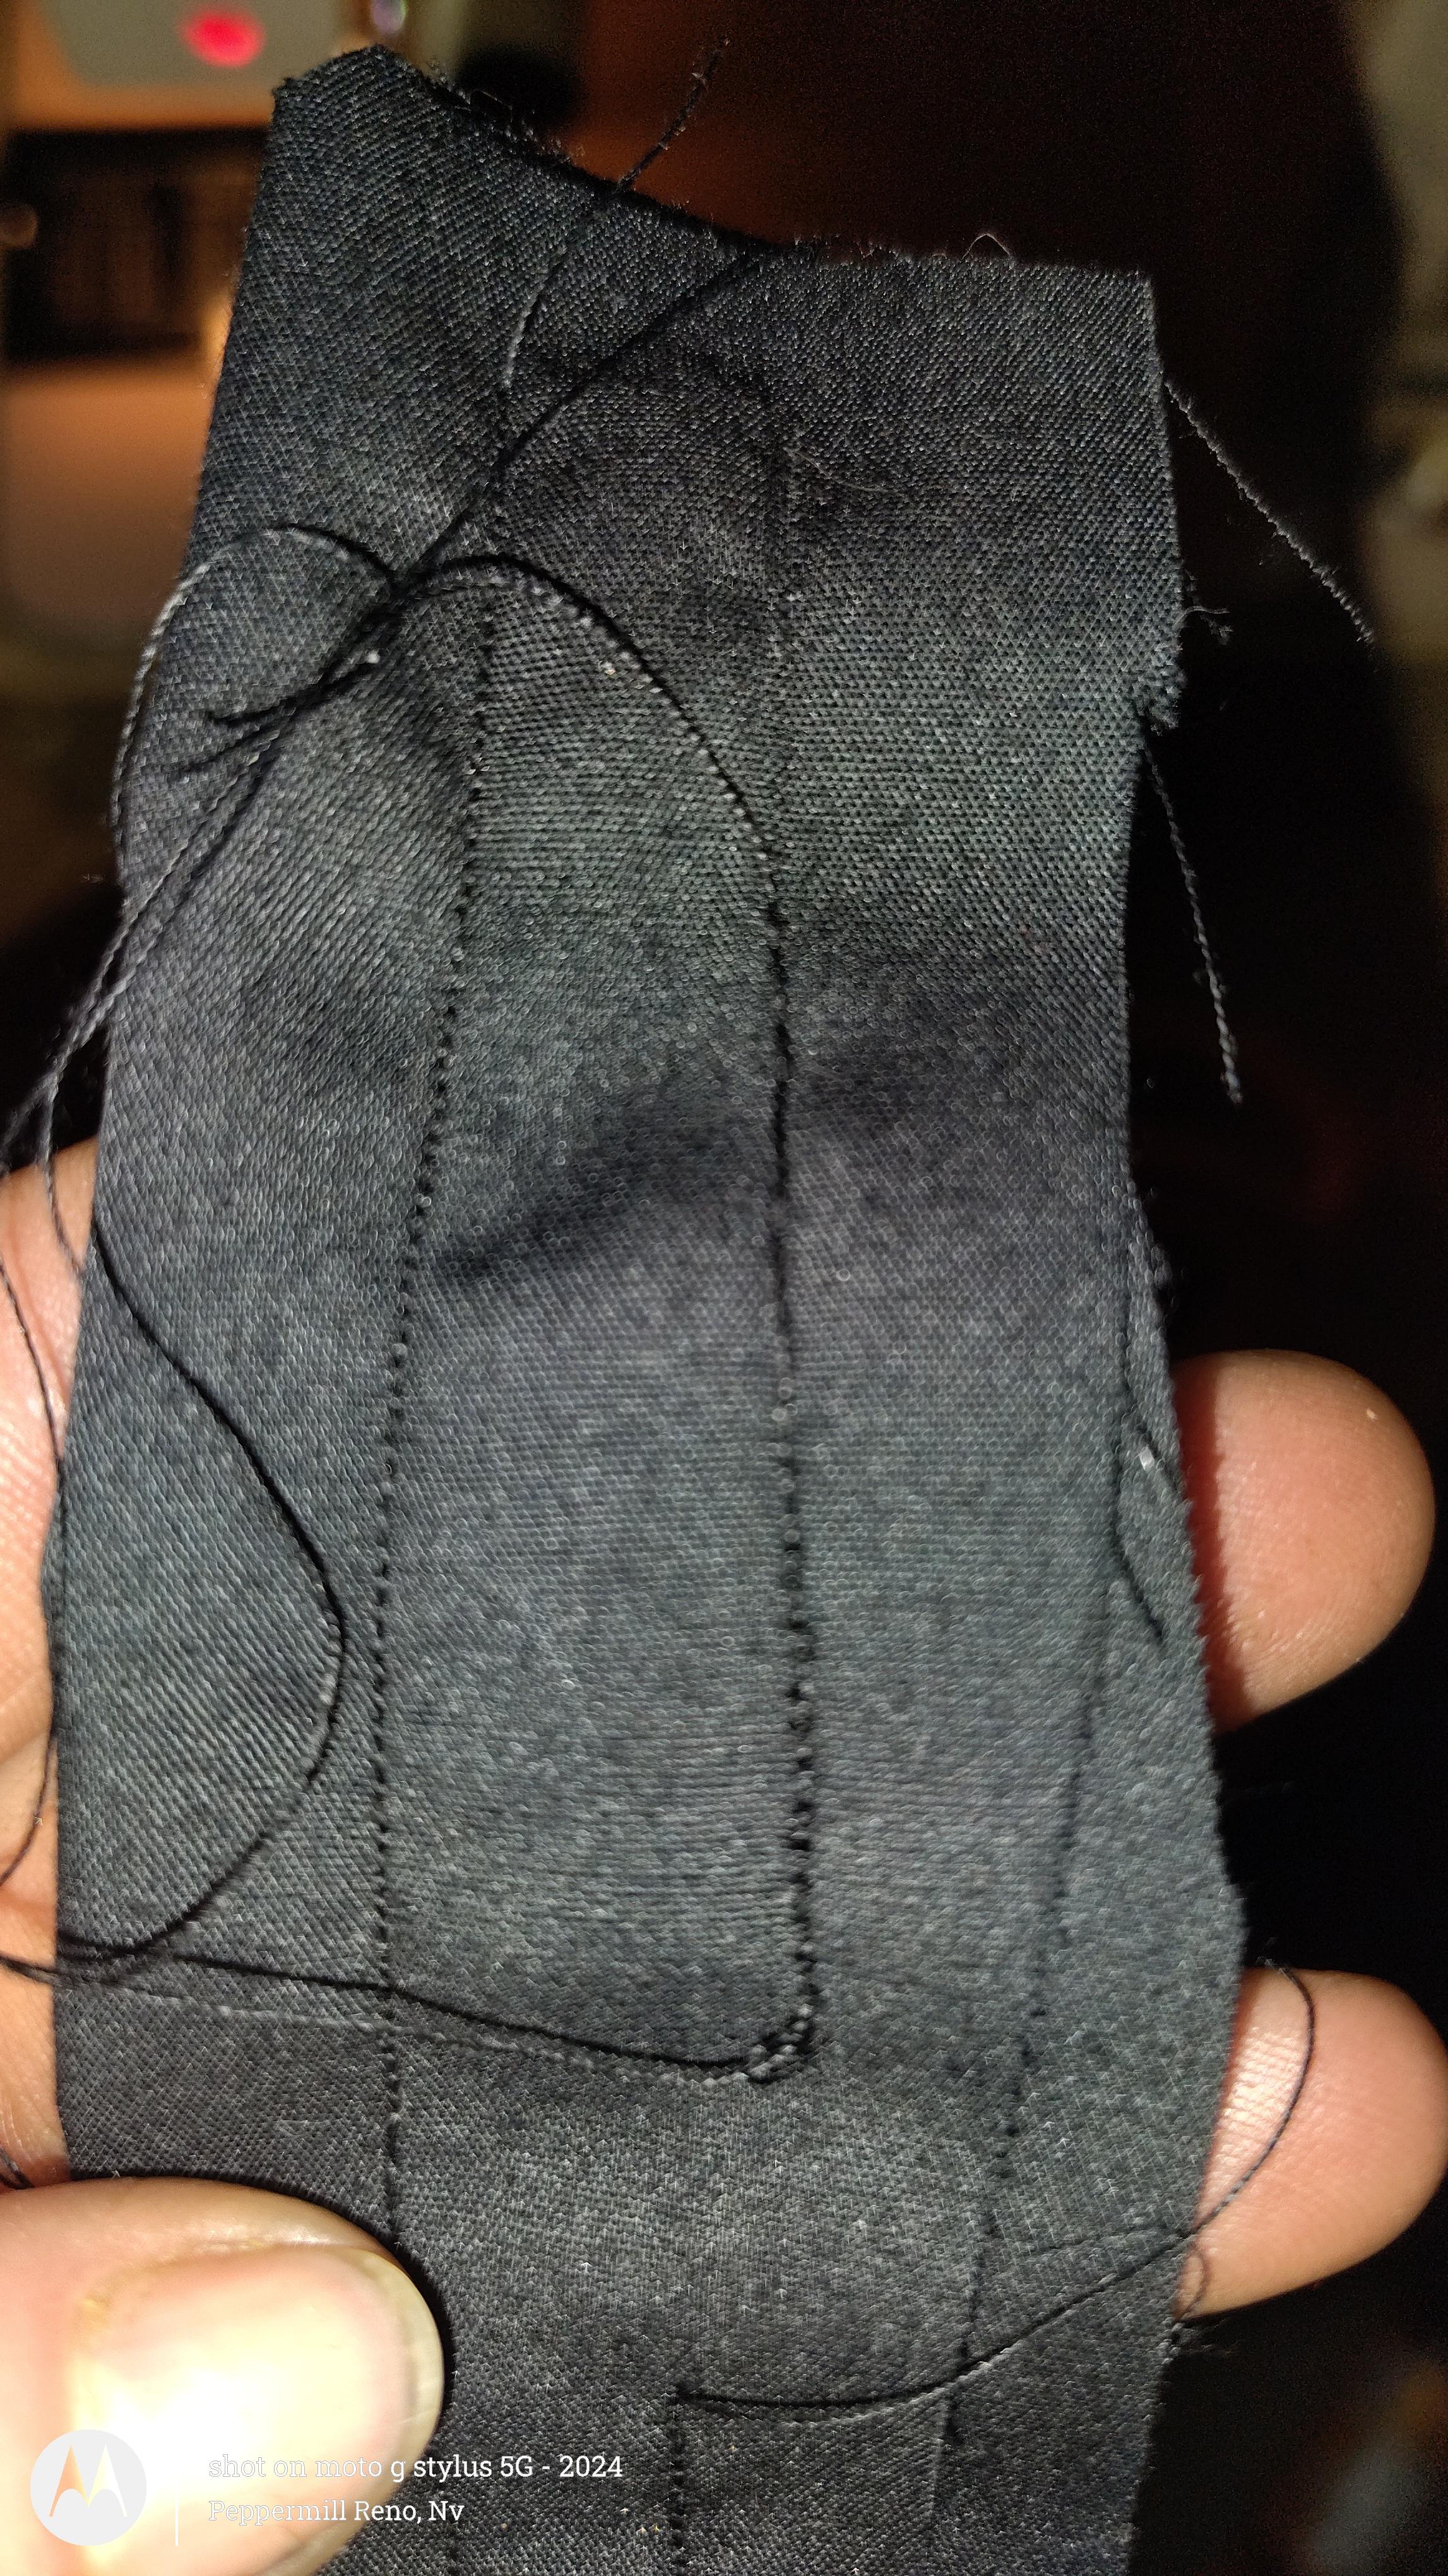
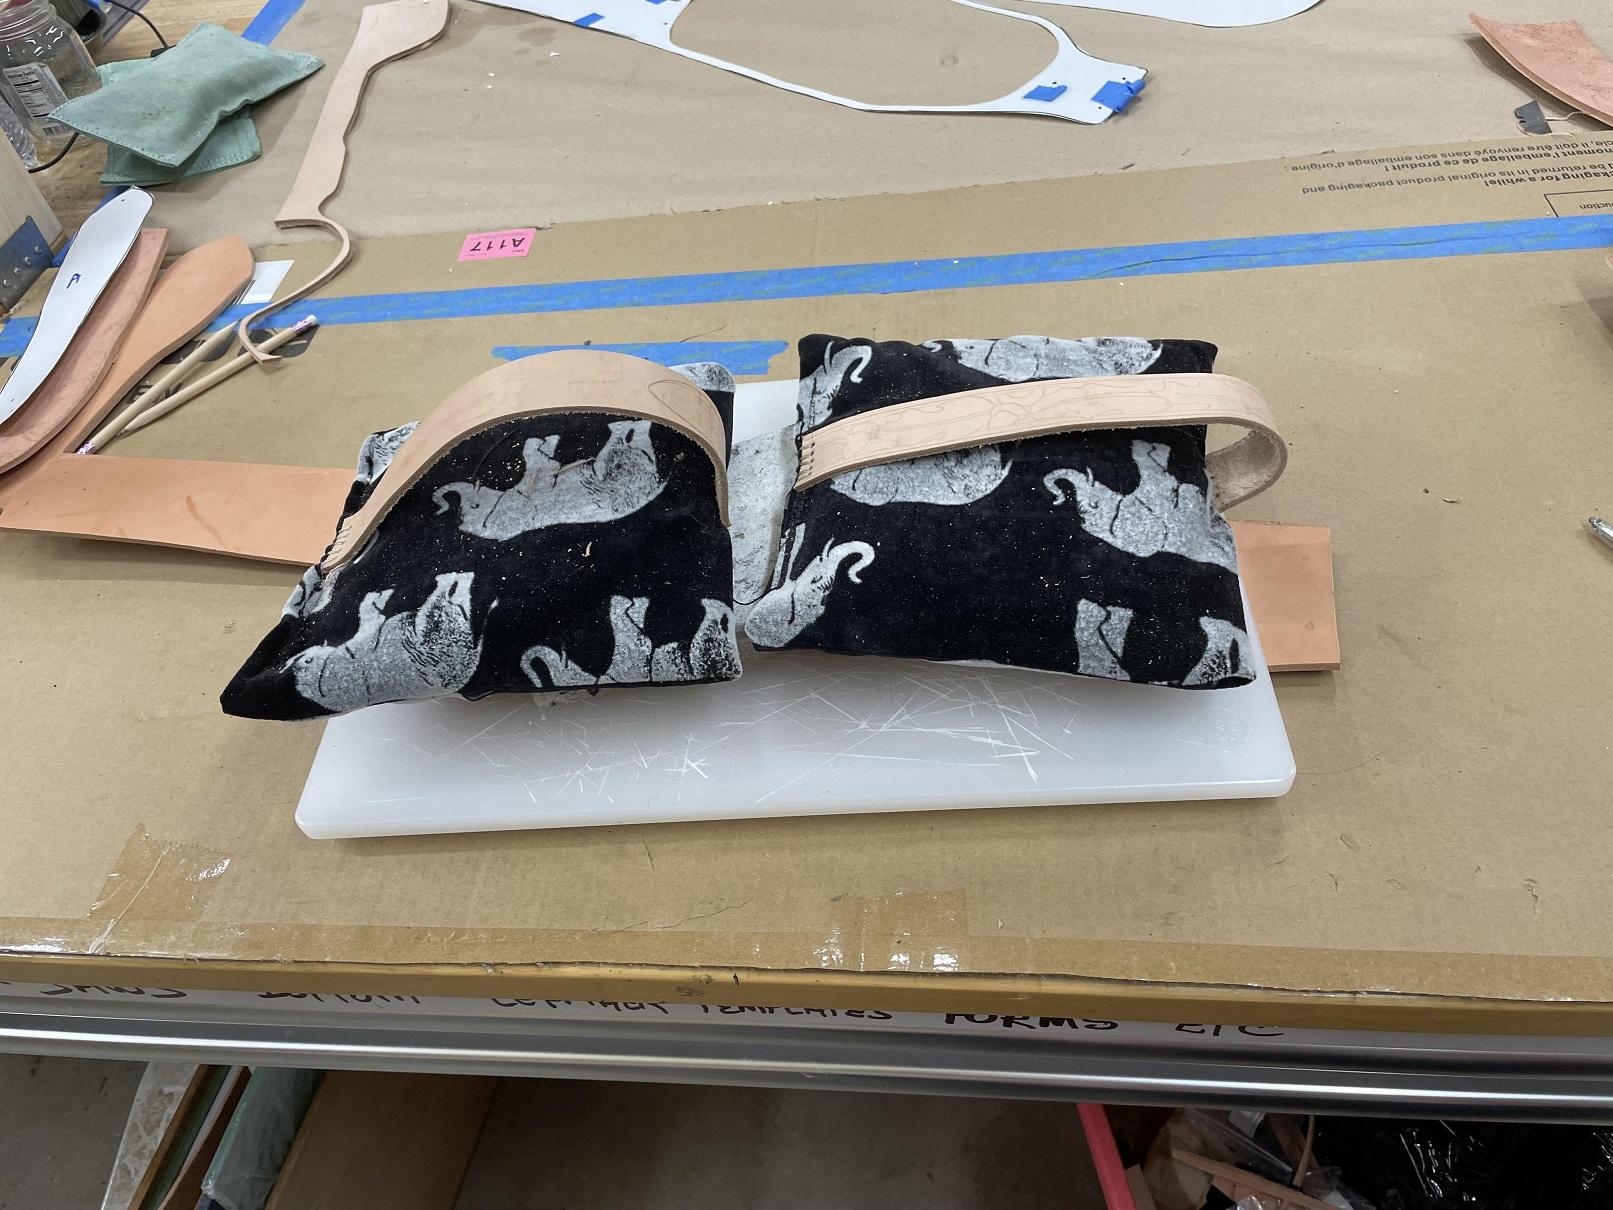
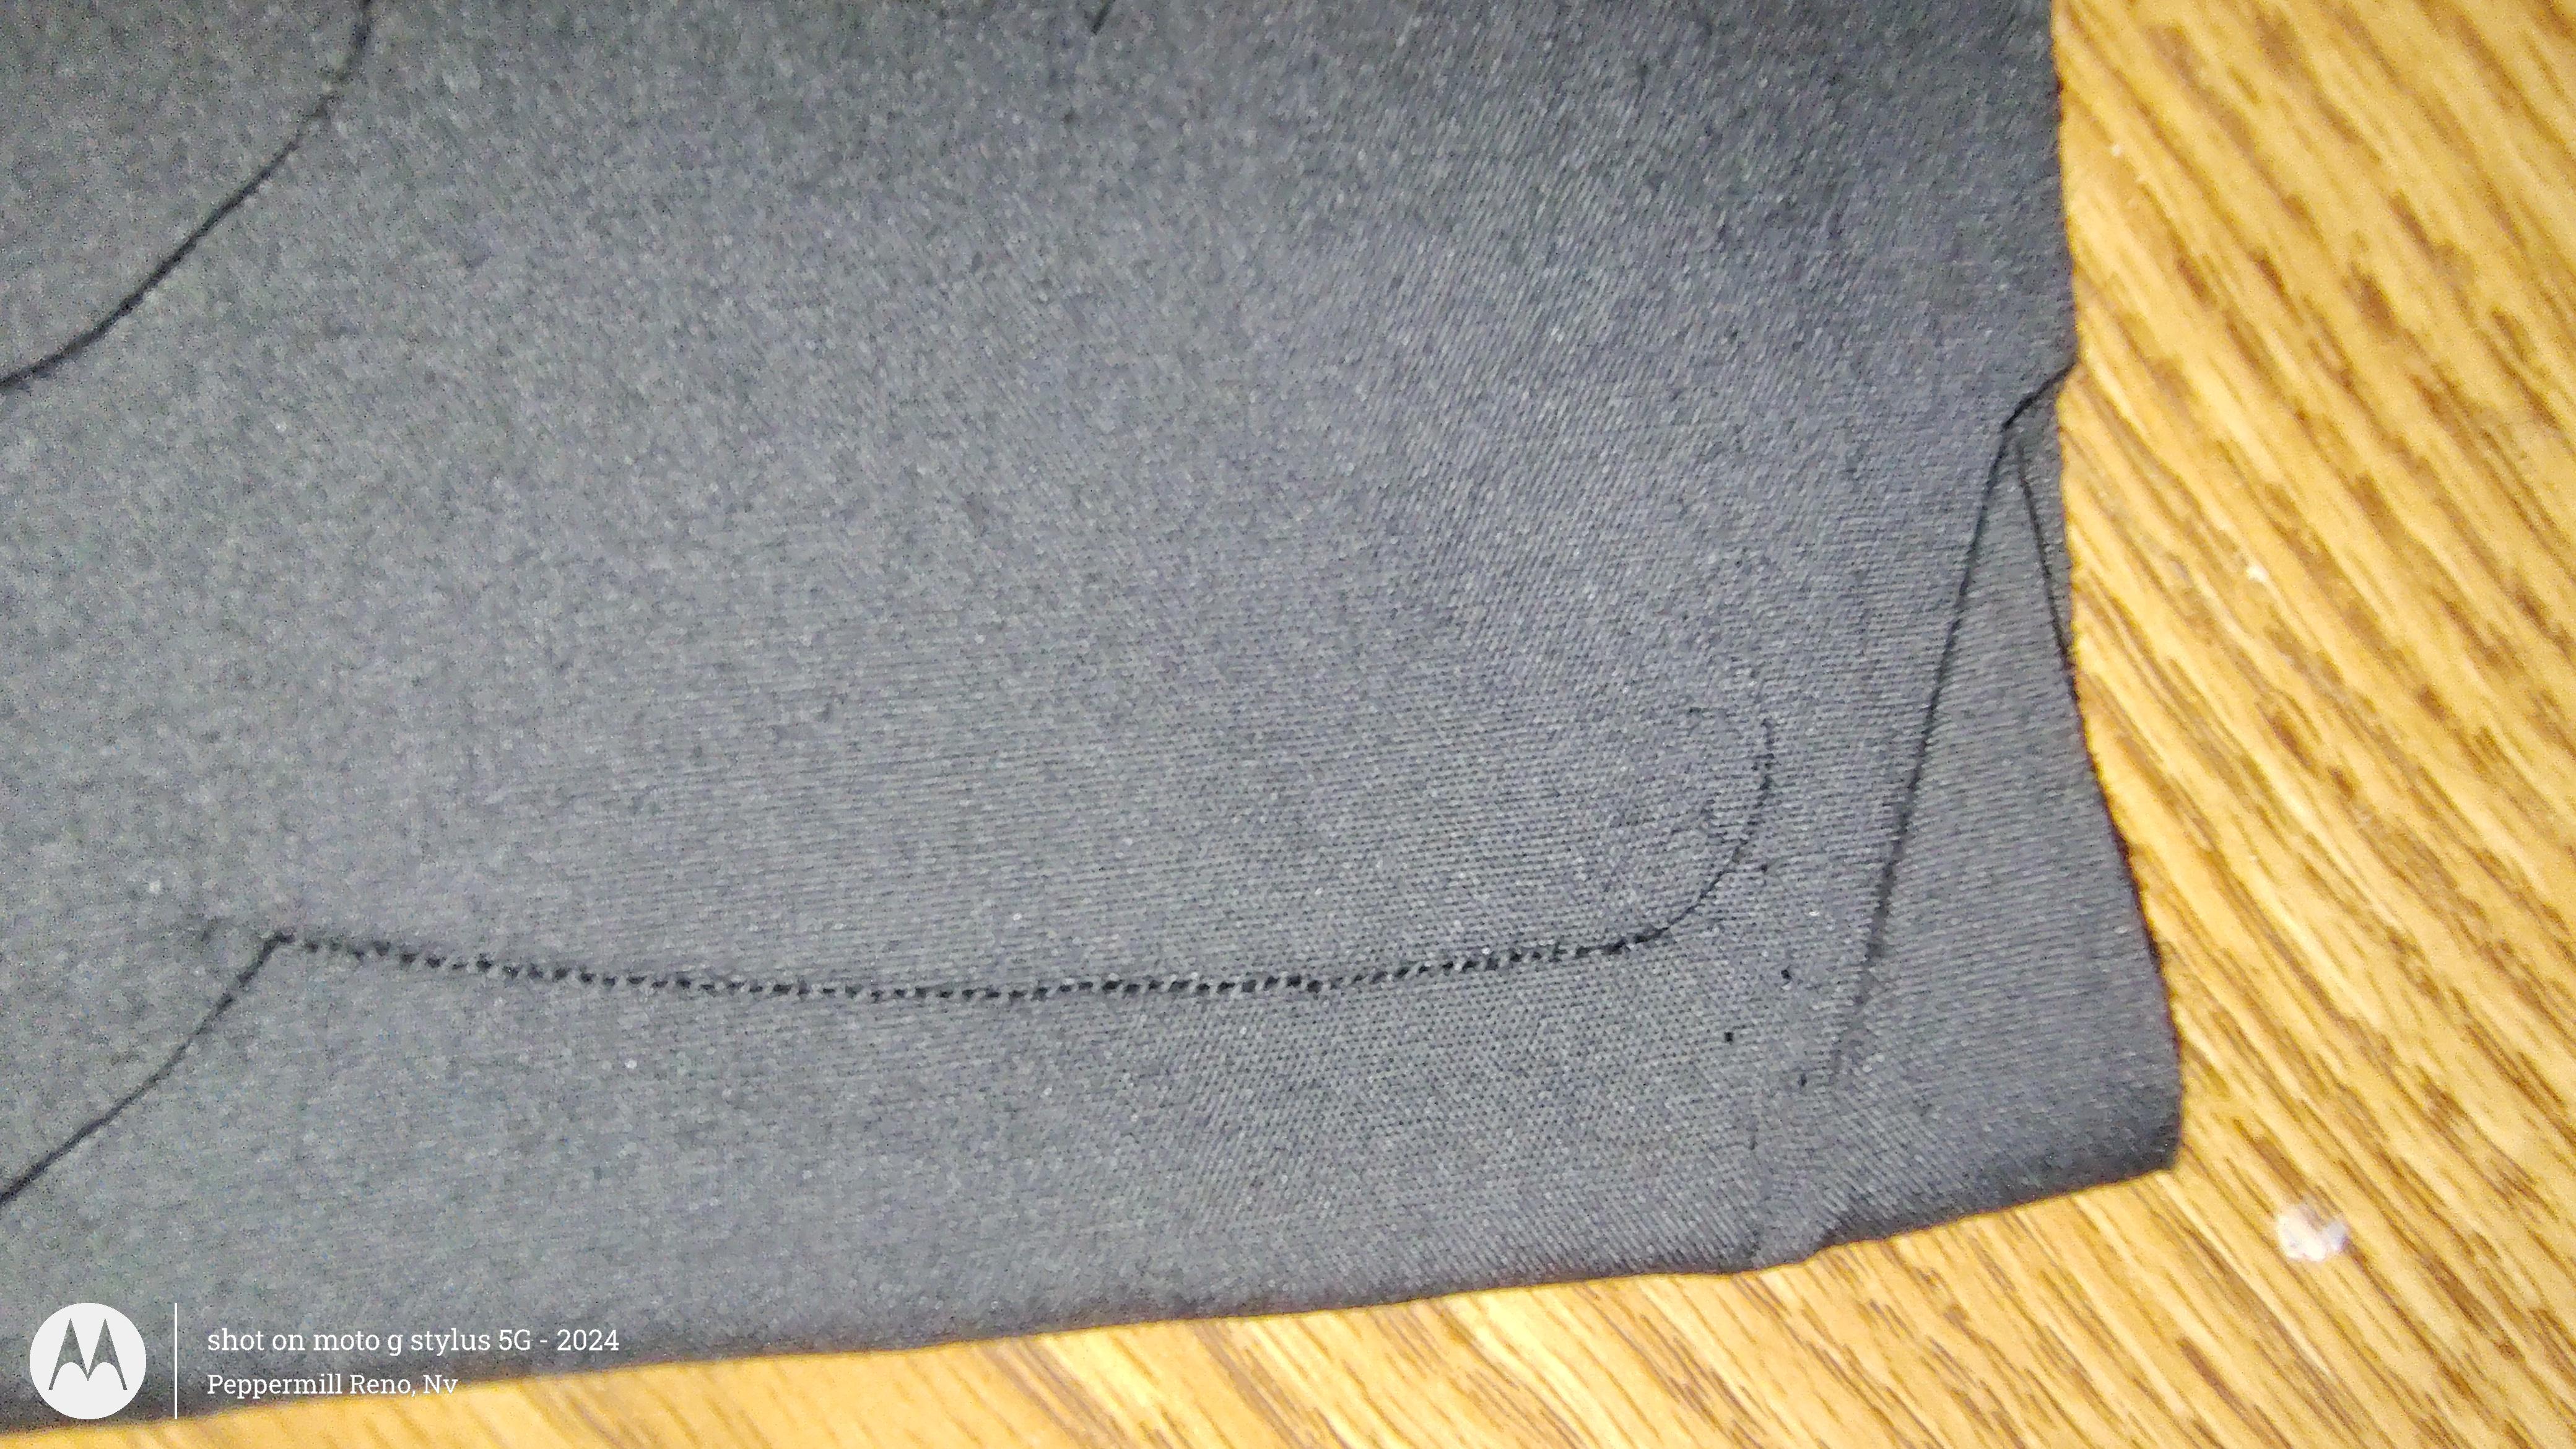
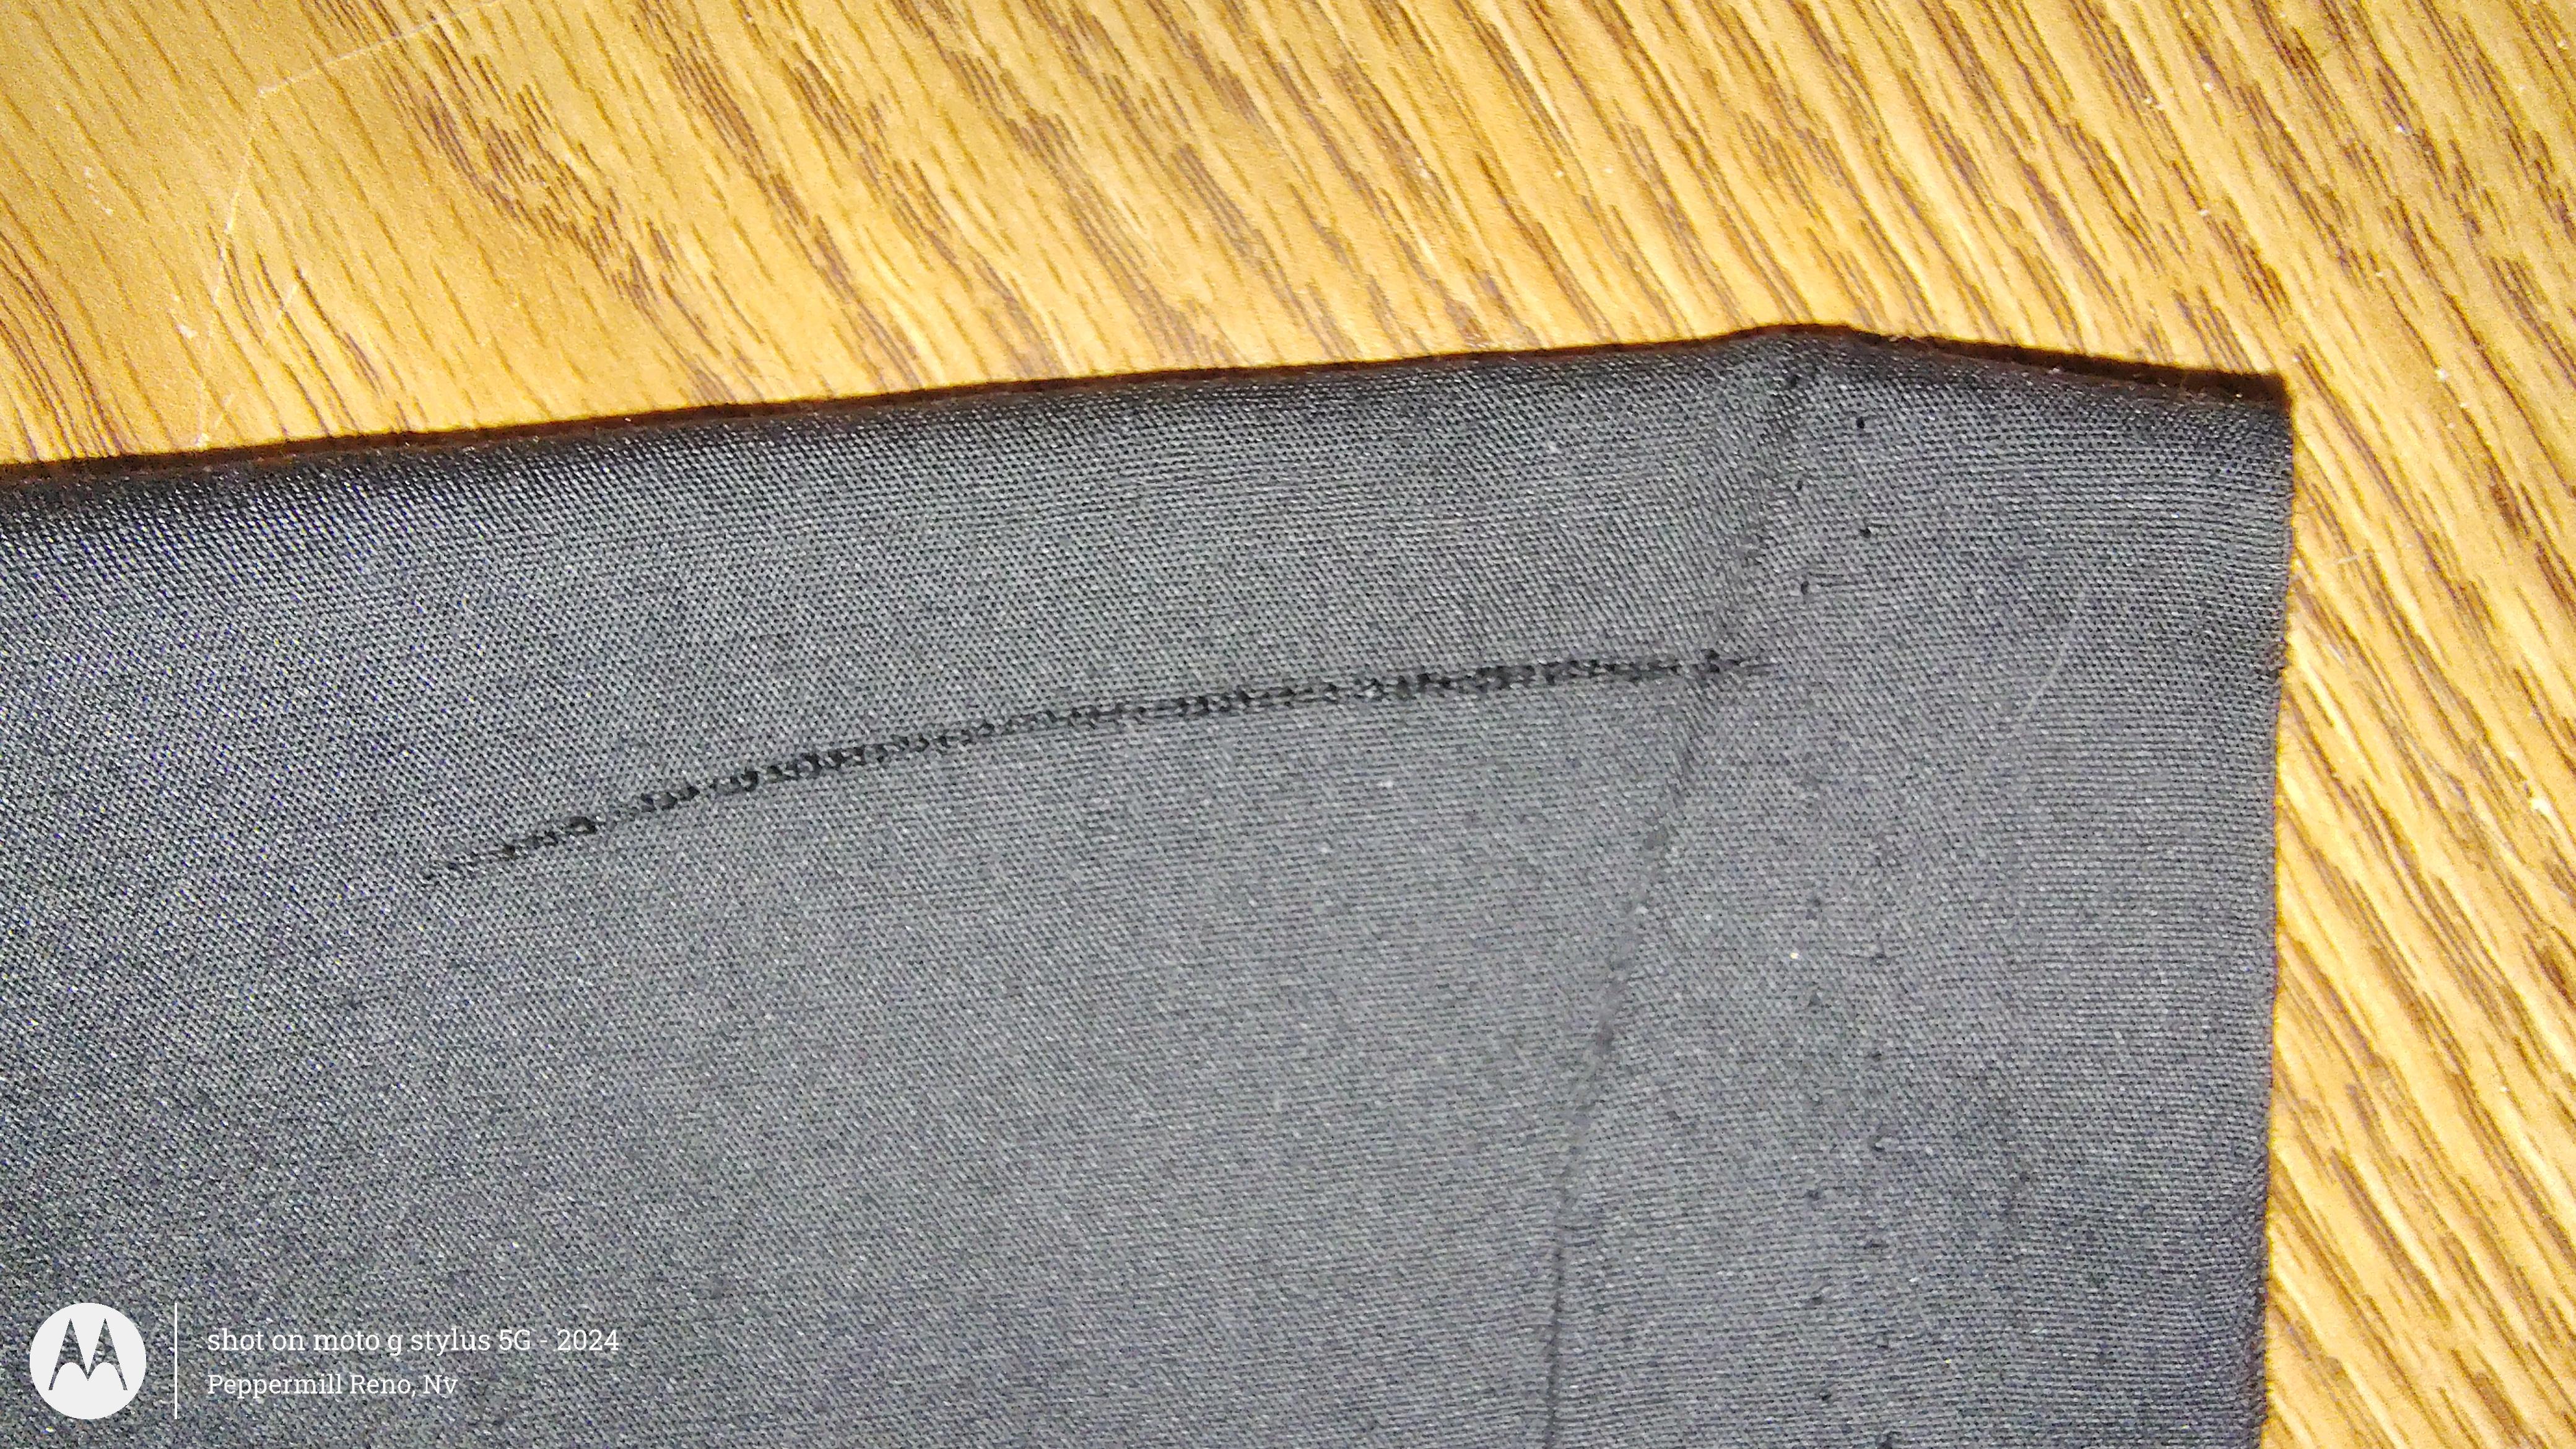
 Ok, congratulations are in order for missing some stitches. Especially that last photo of the prototype cushion! 🌠 An informative exercise would be to put something like that cushion seam back under the machine so we can see some skipped stitches as they form. Then tilt the machine head back so you can see the underside of the machine. Get a good light or a flashlight, and reading glasses if they help. Then turn the handwheel by hand to make slow stitches, but watch what's happening from underneath. Pay attention to what it looks like when it actually makes a stitch, and to what happens when it skips. Let us know what you see! (More to come)


.thumb.jpg.be873fe3cafed424774b187cfb1a470f.jpg)
.thumb.jpg.6e903dd66163ad5672f00f144058c571.jpg)