Spinner
-
Posts
1,373 -
Joined
-
Last visited
Content Type
Profiles
Forums
Events
Blogs
Gallery
Store
Everything posted by Spinner
-
Dremel Question For Anybody That Uses One
Spinner replied to pete's topic in Leatherwork Conversation
Hey Pete, 1500 rpm is really slow in the dremel size world. For dremel burnisher bits like the ones from http://www.leatherburnishers.com, the halfway mark is good for burnishing. Due to the smaller head size, the higher rpm will help generate the friction heat needed (more speed - less pressure). Most dremels are rated at a top speed of 30-40k so you're likely doing about 12-15k at the halfway mark. On drill press burnishers, due to the larger diameter and usually larger channel width the recommended speed is about 1100-1500 rpm (second step on most pulley style drill presses). Cheers, Chris -
Not a problem, glad to help. Be sure to show off the armor when you get it made. Side note, for making breast cup forms without doing a whole upper body cast you can fill a sock with rice or beads to the appropriate fullness and then wrap in saran wrap (to keep moisture from the wet forming out). The nice thing about that instead of a hard cast is that you can move the filler around, compress it, etc to get the exact style of cup you want (full cup, push-up, etc). By the way, the airbrush & airbrush set I was talking about is on sale right now: http://www.harborfreight.com/deluxe-airbrush-kit-95810.html http://www.harborfreight.com/1-5-hp-58-psi-compressor-and-airbrush-kit-95630.html
-
Check out Harbor Freight for a decent airbrush. They have a model that is based on the Badger 155/200 that runs about $20 and can be hooked up to compressed gas cans in lieu of a compressor. If you have a little more budget, then keep an eye on their sales as they have a airbrush kit that includes the same airbrush along with a small tankless compressor and hoses for around $100. they also send out 20% off coupons regularly if you get on their ad mailing list. As far as the breast area, what issues are you having? Are you using a mannequin to wet form? It appears to me that the two main cup halves would be attached and formed with the upper breast plate and then once partially defined, the top center piece could be attached for a final fitting. From there is the attachment to the spaulders and so on. In the absence of a dress form or mannequin, having someone help you do a paper mache casting of yourself and then filling that with plaster of paris to make it rigid is an economical way to go. Chris
-
I'm thinking airbrush. It's very common to see items called hand dyed and use a variety of techniques. It also appears to be dye base colors (white & blue/green) and then hand painted acrylics for the decorative patterns. That semi-metallic/irridescent silver isn't possible with dyes, it would need to be a top coating type of medium like a stain or acrylic. I'm also thinking airbrush was used due to the overspray, which wouldn't happen with bristle or rag. If you look closely at the chestpiece section, main panel you can see where the overspray collected in the wrinkles of the leather when doing the fade out (blue shadow effect on the inner most ridges). It's a common thing to see this when doing fade outs to the inside versus the outside of the piece. At first I thought it could simply be lighting/ambient color reflected from one of the other pieces like how snow looks at early evening but then realized that it's a flat finish & none of the other pieces show a hint of reflecting ambient colors at any angle.
-
Kate's got the right idea with the bristle brush (aka Stippling brush). They can most commonly be found in art/craft stores with the stenciling crafts. It's is also possible to do via airbrush. The technique involves turning the air pressure down low (1/2 or normal or less) and then triggering for a large load of paint causing the stippling effect. At the low pressure, the airbrush doesn't atomize the dye/paint nearly as much and ends up spitting it out instead of a controlled spray. Another cheap alternative is a tooth brush. It can be used as a traditional stippling brush for controlled areas/effects and if you want a wider, even more random pattern, load the tooth brush with dye/paint and then run your finger over the bristles like fanning a deck of cards. The 'snap back' action of the bristles will cause them to make a nice chaotic spray pattern but again, this is for less controlled results. Hope that helps! Chris Bottom book: "The Main Technique of Coloring Leather". Drop Peter a line via his email below, he gets them sent out fairly quickly. Worth every penny of the $20. I own that one and the "Australian Leather Carving" and refer back to them when I need some inspiration. (image is linked via Peter's website). He also produces one of the nicest modeling tools I have seen but doesn't advertise them as they are made in small lots and the wait list is usually a batch or so deep. I got one a year ago and it handles 95% of all my modeling tasks.
-
Yeah, when it's ready you can set your hand on it and it just feels dry & crusty almost if that sounds right. The rolling pin works well. Something that might help also is Barge makes a thinner for their glue that helps greatly in getting smoother coverage. It also helps revive that last bit since usually around the 1/3 left in the can mark it starts to thicken.
-
Easy way to explain it, while gross is pretty accurate: looks like you wiped a runny nose on the leather and then didn't clean it before it dried. All you're looking for is a fairly thin & even layer across the surface of the leather. For heavier applications, simply wipe your brush across it again in another thin layer. Wait for the two pieces to get almost 99% dry (both sides should be coated) looking and then press together. If the piece allows for it, a good beating or sandwich between two heavy objects will help form the bond.
-
No problem. If you discover and American craftsman that makes a quality metal set, let me know. I've searched and there just aren't any.
-
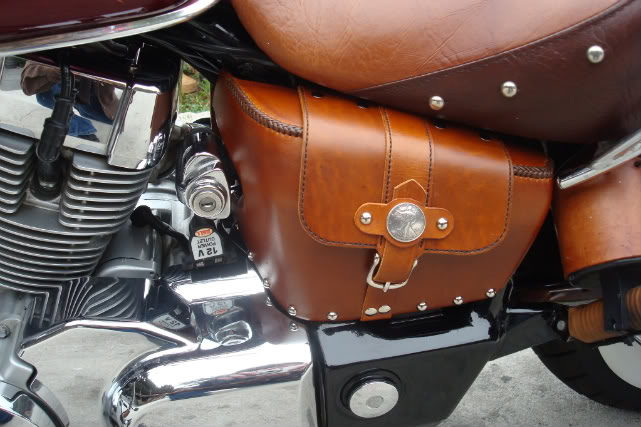
Just to clear up a misconception - if you clean the smooth surface properly with alcohol and let dry completely, contact cement holds extremely well. I use Barge cement to glue leather to smooth, painted surfaces quite a bit and haven't had a single failure in 3 years. These pieces are on motorcycles near the engine so they get lots of heat, wind and moisture on them as well as being bumped around and such. Just make sure to apply a good even coat or two to each surface being joined, let it tack up to being almost dry to the touch and then press together. The bond created is actually pretty darn hard to break under normal circumstances. Cheers, Chris
-
Available via Etsy: http://www.etsy.com/listing/74772932/golden-mean-calipers-small-114cm A New Zealander makes 3 sizes of metal calipers, look pretty nice too. Not a bad starting price either.
-
A Few More Recent Pieces...been Busy!
Spinner replied to Spinner's topic in Motorcycles and Biker Gear
Thanks Tina! -
It's an older thread but still pretty relevant as far as knife makers go. To add to the list here are two I have bought great knives from: Knipshield Custom Knives: http://www.knipknives.com Leather Wranglers: http://www.leatherwranglers.com
-
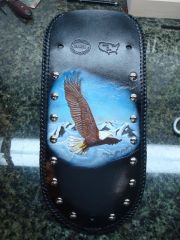
Soaring Eagle fender bib complete
Spinner commented on Spinner's gallery image in Our Leatherwork Galleries
 Thanks Tate, I don't know about flawless but I appreciate the sentiment!
 -
A Few More Recent Pieces...been Busy!
Spinner replied to Spinner's topic in Motorcycles and Biker Gear
I actually have one of the GWS color pamphlets on the wall of my shop, I'll see about scanning it so you and everyone else can check out the color range. Good fun stuff. -
A Few More Recent Pieces...been Busy!
Spinner replied to Spinner's topic in Motorcycles and Biker Gear
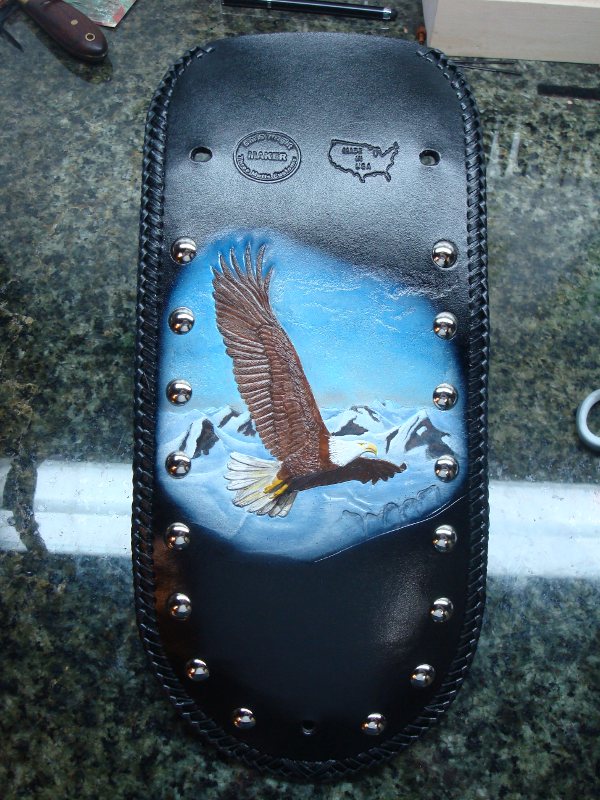
Thanks benlilly! That one was a fun deviation from the norm. Thanks Odin! I did use acrylics to color the tooling. I use two brands currently, Golden Fluid Acrylics and GWS:Citadel Acrylics. Both have great lightfastness, are very durable and thin easily for airbrush use. I used a combination of air brush & normal paint brushes on the eagle bib background to get the fades & transitions. For the finish, I use Super Sheen sprayed on in 4 light coats, letting it tack up in between each coat similar to automotive clear coating and then let it dry/harden in a warm room for 24 hours. The GWS:Citadel acrylics are my latest find. They are usually used for painting models by tabletop game players (Warhammer 40k and such games) and are very durable as such. The models are handled constantly during games and the colors stand up to a good beating. They also have 145 different colors so finding/mixing custom colors is a snap. Some of their line even have texture to them (sand, snow, etc) and can be built up while others work like ceramic glazes and are a translucent top color for stained glass like tinting. Only drawback to the GWS paints is they are fairly expensive but so far have been worth it. -
Thanks, I'll give you a buzz later tonight when I get to the shop. I won't be able to make to Sheridan but that probably works out...gives me a bit more time to figure out which I want next, the Round knife, the Deeter or the Tanto...decisions, decisions!
-
Hey Paul, Is the Cr203 the green bars you have on the http://www.leatherwranglers.com website or something else I might want to check out? Been using the green bars for 2 years now and like the results. Haha, just reminded myself I need to order a 1/8" angle blade from you too...speaking of ordering, when are yuo going to list the new knives like the Tanto on the website?!? Cheers, Chris
-
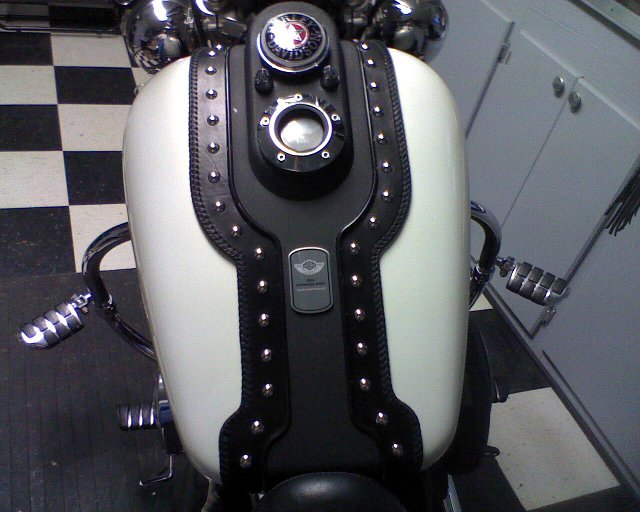
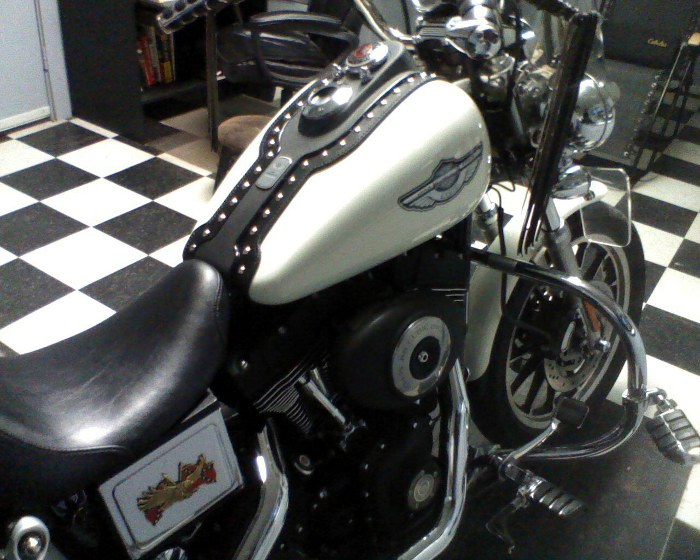
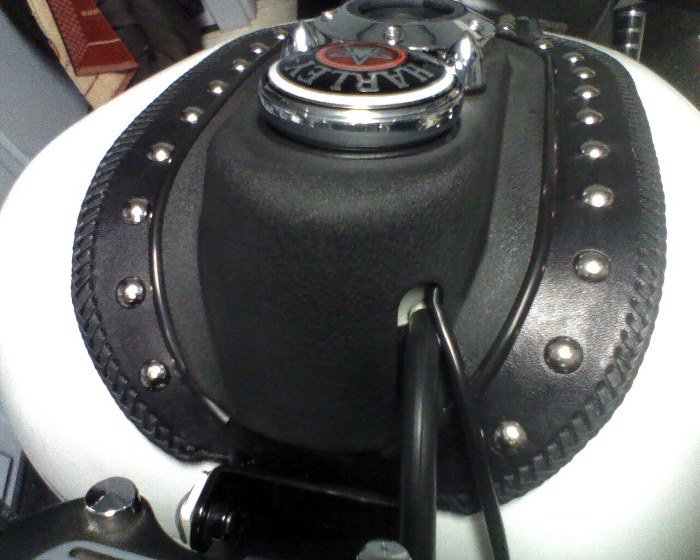
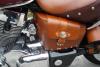
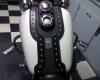
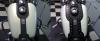
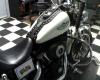
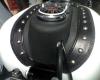
Got a few more pics back so here they are to share, comments & questions welcome as always. Cheers, Chris Shadow Aero 750 whaletail tank bib with celtic trinity cross tooling in ultramarine blue acrylic. A memorial message is cut in below honoring the owner's brother. 2007 VTX1800F Whaletail tank bib with 12mm chrome spots & "VTX Knight" logo tooling in Hot Rod Yellow acrylics. 2007 Harley Davidson Road King Classic rear fender bib with 12mm chrome spots & soaring eagle tooling in various acrylics. 2003 Harley Davidson Dyna Superglide (FXDX) tank bib with 12mm chrome spots. This one was a custom job per the client to fit under & mimic the OEM dash. He had some tank weld/paint repairs made at the lower mounting bracket that sparked the idea (versus a full gas tank paint job).


-
From the album: Three Mutts Customs pics
The final pic of the WIP pics for the Soaring Eagle rear fender bib. Made for a 2007 Harley Davidson Road King Classic.© © Three Mutts Customs 2012
-
Same here, only I use card stock (I have easy access to it) for the same reasons. I started out with a leather one and once I was told to try this I found the heel and edges of the blade came out much truer than using leather.
-
Sold My First Tooled Dog Collar On Etsy!
Spinner replied to lightingale's topic in Marketing and Advertising
Congrats on the sale. The color stage is what will kill you on price. If you're looking to make money & a livable wage then look for ways to minimize the time spent like doing solid color or using inlays, colored lacing, etc. instead of dying/painting the color. I do quite a few full color pieces, some rather large paintings and more often than not the color ones kill me on profit but they serve as awesome advertising when they are shown off. To be honest, the reason why it sold so quickly is it was probably underpriced in the purchaser's eyes. For pricing, I set some rates for my shop that I know are comparable to the market in regards to skill & time and look how that translates into a price. if the item looks to be seriously overpriced then I either look for ways to speed up the process or adjust the pricing accordingly. Hopefully, after awhile you get to the point where your skill level and product quality is good enough that the price stops to matter to the buyers. -
Now that is some clean, crisp tooling! the lines are very straight, which is not an easy thing to do. Great work!
-
Removing Or Minimizing Scuff Or "bruise"
Spinner replied to SimonJester753's topic in All About Leather
Looks good Simon. I agree with Jack, a good wooden burnisher whether hand or powered will give you a better result than plastic and won't widen under the heat that is created. http://www.leatherburnishers.com is a good resource for cocobolo dremel & drill edge burnishers and if you check out the FAQ section, there are tips about solutions to use instead of gum trag, speeds, etc. I also agree that most folks like the copper adornments & rivets and if it makes it act & look stronger, all the better. My only comment would be to make sure the belt or collar is wider than your conchos. Aside from looking like the collar was cut a little too narrow when they overlap, they can also lift a little during movement and trap the dog's neck hairs and give them a yank when it moves the opposite direction. Cheers, Chris -
When you order from Springfield, call in the order instead of using the internet. Their website is good, but it uses the same shipping calculator that most other websites do. When I call in, I get charged actual shipping versus an estimate and it comes out cheaper. I imagine it's the same with most web vs. call orders anywhere.
-
I have a number of shears, scissors , etc and I love my knife edge Ginghers. I have the 8" dress maker's style (all metal) and they work wonderfully on the thinner and softer leathers as well as veg-tan.