Spinner
-
Posts
1,373 -
Joined
-
Last visited
Content Type
Profiles
Forums
Events
Blogs
Gallery
Store
Everything posted by Spinner
-
Support A Fellow Leathersmith Reach Her Goals
Spinner replied to CicadaLeatherDesigns's topic in Getting Started
Yeah, and I can't for all certainty say how they do either. Part of where I'm coming from is my background with this stuff. I read proposals for my boss (a local venture capitalist) and have to give a report on what they do and don't say. While her request does discuss the right things like you mentioned, it includes 'fund my life' requests that kill the spirit of it like "buying a camera, building her own e-commerce website (versus using the pay to play prefab store she's in now), etc." It's goals are also open-ended and immeasurable as the 'goal' is to have a successful business, but by whose metrics & timeframe? There isn't one stated so now the request becomes subjective which creates a disparity between her and her supporters due mainly to varying perceptions. As for the commerce side of it, I'm sure that goes on. Kickstarter has been abused like that pretty much since inception. Which begs another question on the 'project'...if the goal is to improve quality and design, does that mean that folks supporting the project receive their reward based on the existing inventory of designs (which is my assumption) or one of the new, improved designs that they are actually there to support? You may have realized by now that at least for my part this is more educational now for folks, including Mia, who might read this versus bashing on the OP. All in all, I think the main issue folks here were having (going back to the original issue raised i the thread) isn't that they think she's trying to sell them something, it was the oddity of asking the very people she plans to compete with (directly or indirectly) for help in establishing/improving that competition for business. Now, it was mentioned that competition was a BS excuse and while geography and style may inhibit that competition, we're also talking about the internet. That means search engine rankings, pay per click advertisments, etc. all have to be considered. As an example, let's use Cheryl as vendor A (sorry Cheryl ) and Mia proposes her improvement project. Cheryl chips in and gets a token in return. For arguments sake, we'll say their products are of similar quality & execution & style so what we're left with is marketing. Cheryl has a good web presence so on and so forth. Mia, using her funds builds a web site of equal quality design but uses what's left to hire a good SEO firm which gets her site into higher rankings on Google, etc. thus directing traffic to her site before they'd see Cheryl's and ends up with the business. Now, I'm not saying that Mia couldn't do that on her own without the project, or that one donation by itself could kill a business and of course, Cheryl has access to the same resources if she has or can find the funding. Long story short my point is simply that's where the consideration & hesitation comes from. Helping to improve another's business that will add a layer of dilution & competition to an already saturated market is not a sound business decision no matter how benevolent. -
Support A Fellow Leathersmith Reach Her Goals
Spinner replied to CicadaLeatherDesigns's topic in Getting Started
I agree Jack, every question answered does have that potential. And just to confirm, I'm not arguing either, just talking here. So in response, asking a question on how to do something vs. kickstarter...asking how to fish vs. asking for help to create a new fish. This is neither, it's asking for help to buy the fish store. This particular scenario is a request for venture capital to establish a business without providing the normal financials, qualifications or experience a VC proposal would normally contain. Speaking of which, the question of whether or not this qualifies for Kickstarter came up earlier and based on the description compared to the Kickstarter project guidelines, it's a direct violation of Kickstarter's Guildelines in various areas. It's obvious the reviewer didn't read through the whole 'project' as Kickstarter is meant to finance individual projects or creative works, not start-up businesses. The fact that it's a Staff Pick just adds to the dubious nature of the "review" process. And yes, there are many so-called 'projects' like this on there...but that doesn't make any of them right or a non-violation. Kickstarter even states that they do miss some and they rely on the community to report violations that occur. http://www.kickstarter.com/help/guidelines (see #1, 2.1 & 3.2 ...you have to expand the design & tech to see 2.1) Now if this had been a request for say, "help me with this project, my goal is to design and create a new style of saddlebag never seen before" then I'd be all for it and probably contribute just to follow the effort and hear back on how it panned out. My pleasure Cheryl, glad it helped someone. -
Support A Fellow Leathersmith Reach Her Goals
Spinner replied to CicadaLeatherDesigns's topic in Getting Started
I knew of Kickstarter before all of this and while it's a viable way to start a business the issue many have here specifically is this: Funds are being solicited to start a business that will potentially be direct business competition for those being asked to fund it. Essentially, if funded and started with funds from any leatherworker, that donation creates an entity that very well could pull money out of that same pocket later on through lost sales. Also, to be noted is that products don't get exchanged until the $25 mark. Until then, the reward is a note, a mention and the warm fuzzies and that does equate to a handout however one chooses to spin it. -
Support A Fellow Leathersmith Reach Her Goals
Spinner replied to CicadaLeatherDesigns's topic in Getting Started
I share the same sentiments above. The problem lies in the fact that you are asking for help/crowd-funding/monetary assistance whatever you want to call it from folks you plan to directly compete against in the global leatherworking market with the same products that literally everyone has made at one point in their hobby/career and many likely still make. Not to mention the upteen different mass producers and big box stores they already have to compete against for those sales. That aside, you mention the help you have already received from the forum however you have yet to make any contributions to the forum (verbally or monetarily) to help others or the site itself before asking us to assist you in this way. To put it mildly, this post is brazen and simply inconsiderate. There's my 2 cents regarding the post itself, take it as you will. As for getting your business off the ground, while I won't be contributing monetarily I'll happily extend the same feedback, knowledge and advise I have shared with others in classes so you may find your way to working toward earning the business venture you're seeking...let's address the business proposal and the products separately: Business proposal (I work in Finance for my day job so I see a number of these each year. I also run a successful leatherworking business so I know the costs of what you're looking to do.): + You did well in not only describing yourself and your products. + The pictures are good quality and you added personal notes which helps the contributor feel connected. + /- You outline the business wants/needs very well (camera, domain names, etc) however you don't give the same treatment to the leatherworking tools even though the proposal feels like it's more about the tools. - The amount requested is inflated by about 25% or you aren't researching your business needs well enough to find competitive pricing on the items (or like most folks there are a couple 'want' type purchases/upgrades in there with the 'needs'). - Again, while the proposal gives the feeling that the leatherworking tools are the main point, of the wants/needs listed the business expenses are approximately 162% more than the leatherworking tool upgrade expenses based on your current product offerings. (that includes expanding your tool set to include a 10 pc set of Barry King tools, a Bearman maul, a Knipshield detail knife, an entire side of grade A Herman Oak 8oz, and dyes, buckles, rivets, etc. to create a good pile of your products). - your representative product line-up and materials used are pretty standard fair for a leather goods website which indicates extensive competition both domestic & foreign, handmade and mass produced. At least one new/unique design would speak volumes of future potential success. Product Offering: I assume the reason you need to request funding is due to slow/lack of sales to finance production. As someone mentioned previously, you obviously already have tools to have produced the items listed on the websites. Wanting higher quality tools is something almost every leatherworker I know goes through, whether it be for function, beauty or speed. However, for the items you currently produce it appears you'd be better served by the addition of a small handful of additions to your toolbox rather than upgrades. + decent variety of general leather goods + marketing messages & product descriptions are well written - For the level of refinement of your products your products appear to be overpriced, a few cases are very much so. Doing some market research on items of similar quality and materials would present price points that will be more easily justified. For one such example, some friends of mine hand make some similar products in a similar, handmade fashion from their home based shop but have made it their mission to set the bar in regards to quality and materials at premium but still reasonable prices for what the client receives: http://www.chestermox.com. Take a minute to look at the stitching and edge detailing as well as their cuts, etc. and you'll see what I expand on below. - regarding refinement: - the first thing someone will look at with an item like those offered is the stitching as it is the highlighted detail. I say highlighted detail because there are no other distinguishing features of the products and the stitching color is in high contrast. First thing that will be noticed is the irregular and crooked stitches. TIP: A stitching groover would be a great addition to your tool arsenal. It will help keep the stitches in line and also recess them to reduce wear. Also, the thread size seems a bit thin for a product that highlights and brings attention to the stitching in both design and product description, but that is just my opinion. - The second thing that will be noticed are the edges. Your edges are not edged, sanded or slicked/burnished. The rough , unfinished edges will fray/tatter quite quickly under daily use and are nearly impossible to make "water resistant". While the common marketing buzzwords for this are: "natural", "rugged", "worn look"; but to those buyers with leather buying experience it simply says "unfinished". TIP: Burnishing can be done cheaply by hand with a rag, some water and soap (see Bob Park's tutorial for free here: http://leatherworker.net/forum/index.php?showtopic=18101 together with an edger and some sand paper they would create a whole new, more complete look. Powered burnishers can also be purchased but not necessary to get started. - color selection: it appears that the buyer only has the choice of natural russet which will seriously limit sales. TIP: Just adding one or two colors would add variety (people like to have choices) and give an expanded look to your offering. Using pre-dyed leathers will cut time cost - dying your own will cut down on materials cost choose which works best for you & your shop budget. - proper leather conditioning: while it appears from the descriptions that you have found a final finish that works well, judging from the wrinkles that formed on the folds of the wallet, the leather was not oiled well enough during construction. This will accelerate the cracking/wrinkling/tearing of the leather at the fold through use. TIP: the cheapest solution is extra virgin olive oil. Available at any grocery store, doesn't darken the leather much and will help the wrinkling issues while extending the item's useful life. Neatsfoot & Mink oil are also available options but cost more per unit. While I don't agree with the posted request as noted in the first paragraph, hopefully you'll find the information following it helpful. I'm not being mean-spirited and simply knocking your plan & work, the information above is sincerely meant to help you in making your dream of creating a business happen. Hope you find some of it useful. Good luck! Chris -
Maybe it's like Charmin...double the softness for delicate behinds. Nice work AMMO, the aged, mottled look came through nicely. Chris
-
Yeah, lacing can be fun...you might want to look into running shorter lengths and splicing during the lacing. I've been doing that ever since my newbie days when someone mentioned it to me while watching me struggle with a 12 ft length of lace on a long run. I lace in 4ft sections now, doing a 1 1/2" hand splice when I get to the end. Makes it much easier to manage the lacing, twists and keeps it off the floor (and the dog). The other benefit is since the length of lace passing through each hole is shorter you don't tend to get as much stretch or fraying by the time you're at the end. Makes for a tighter, cleaner braid.
-
Very nice, I like the understated two-tone with the black lacing. Speaking of which, looks like you mastered the applique lacing we talked about.
-
I Need Help With Market Research For Business Plan
Spinner replied to DoubleC's topic in Marketing and Advertising
Hey Cheryl, One thing to consider in all of this is your target geographical location. You mention getting established there and your items being shown locally but thinking about it from the grant reviewer's perspective, how far will your specific area take you? While sales could be good to begin with, you'll eventually hit a wall when the market becomes saturated, especially if your products are not throw away items that wouldn't be replaced regularly. They are going to want to know what your next steps plans are like expanding your product line (forgive me but I only know of the 'eye' jewelry and guitar straps you've mentioned) and eventually expanding your sales area. Obviously the internet should be a given, either your own website or at least starting with Etsy and the likes. My area is a bit different in that So. Cal is so spread out but tell you what, if I had to depend on local sales I wouldn't be able to buy dye for my next piece and that's with a huge motorcycle market here...of my 63 orders this year so far only 1 has been 'local' with everything else going out of state/country. So just make sure not to limit yourself to a certain locale. Cheers, Chris -
I Need Help With Market Research For Business Plan
Spinner replied to DoubleC's topic in Marketing and Advertising
It may not help your plan/question but here's a bit of input from the bike end of the leather spectrum. I've found that Design and Quality are the top two considerations for motorcycle gear. Materials not so much because if they made it to me, I already know they're looking for real hide and the grade kind of follows the idea of quality in my mind. Price is a consideration but for those folks that are seriously looking at the products and know my reputation, price ends up being the last question they ask. My prices aren't crazy expensive like DB but my average ticket range is $250-$400 so it's not pocket change either and seeing as how I'm backlogged 2-3 months usually I could probably increase them more if I wanted to. I guess I'm middle shit too...LOL. Admittedly, when I first started out price was the biggest question since folks didn't know me, my work or the quality so I had to beat the other guys with the money. Once I had enough product out there and word got around I was able to raise prices to a more comfortable level and business has actually increased along with the materials, quality, value and price of my work. I think that's a natural progression that most small businesses take unless of course the craftsperson behind the business has a following already and is simply transitioning to the realm of profession vs. hobby. As for myself, it's all about quality & design. if both of those things exceed everything I can get elsewhere I'll scrimp & save to find the money if need be. Think about the mauls, swivelknives, custom maker stamping tools we all drool over & buy. Are there cheaper alternatives to each of them? Yes but most of us are willing to spend, in some cases, 10 times that amount to get the better item (Tandy std. swivel knife vs. a SK-3 or Tangleboss)...provided it's a true quality rather than perceived. -
cool deal, that's the best thing is to keep your hands going on the leather...too easy to forget the little things! Hope hubby heals quickly, surgery sucks. Don't forget to post pics when you're done adjusting. As for me, same as usual - busy as a one armed paper hanger. Just posted a big update thread and have more coming soon...
-
Hey David, here is a quote from another thread, might be what you're looking for...
-
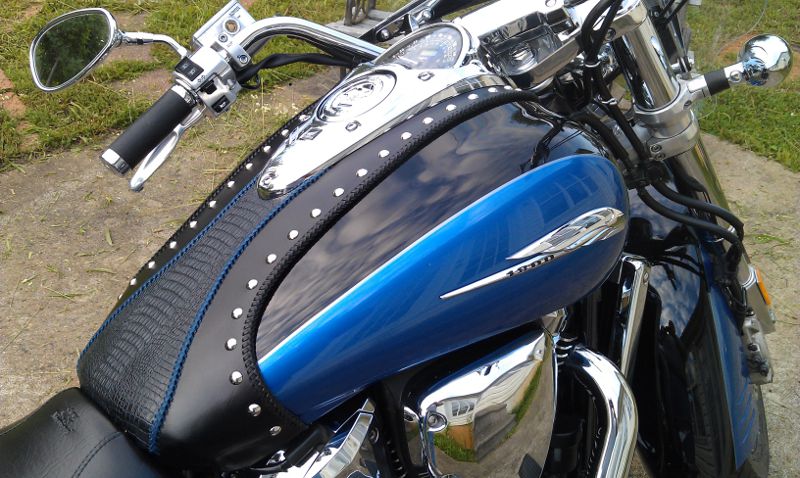
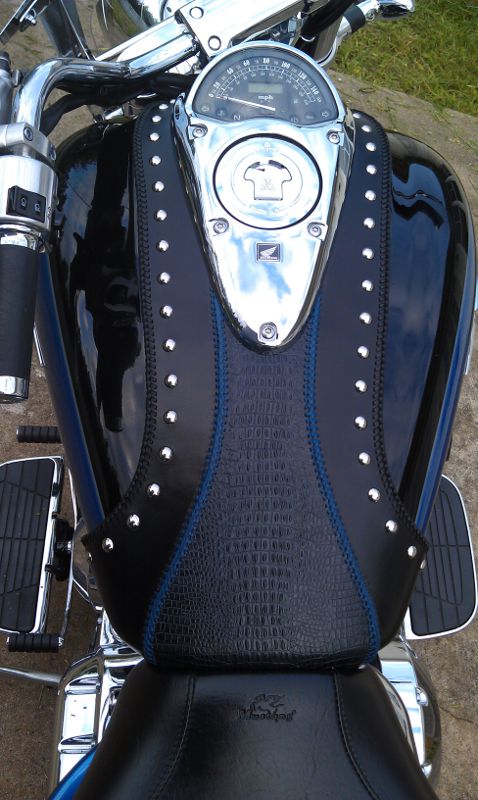
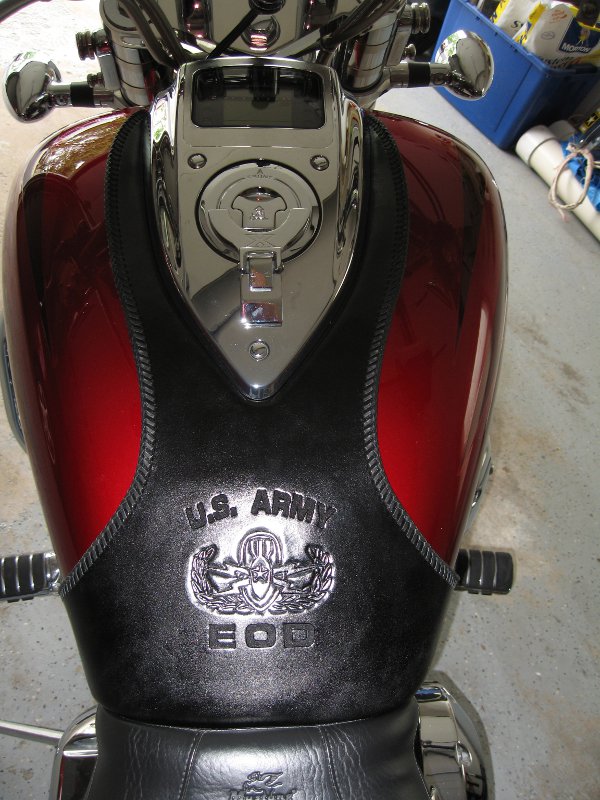
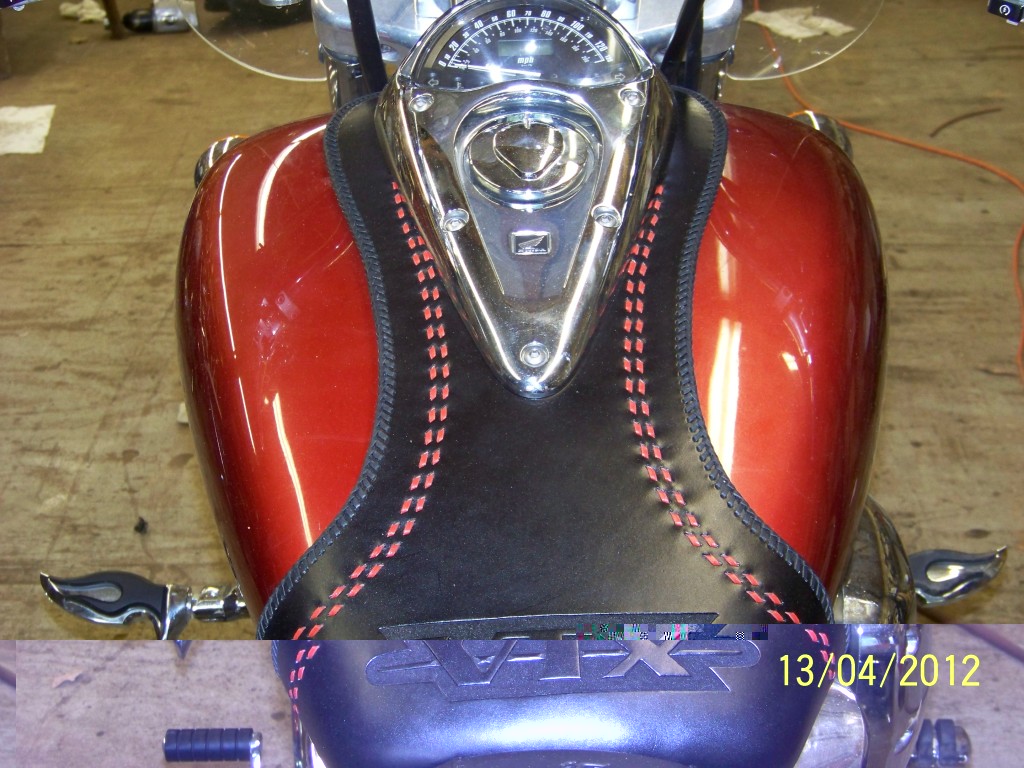
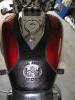
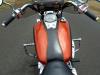
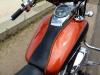
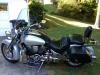
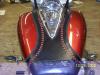
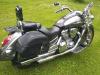
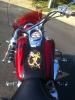
A few more pics that came in... 05+ VTX1800R whaletail tank bib with gator embossed cowhide overlay with royal blue applique lacing to hide the seams & 12mm chrome spots. 2002 VTX1800C Full sett - whaletail tank bib with V-twin Engine & "Evil Twin" colored tooling & chrome spots; rear fender bib with chrome spots, VTX1800 colored tooling & chrome spots and maker plate and leather wrapped side covers with V-twin engine & "Evil Twin" colored tooling and red round braided edges. There is also a backrest that I added chrome spots to and a VTX logo leather patch but it's not shown. 2006 Shadow Aero 750 - whaletail tank bib with chrome spots and leather wrapped side covers with custom storage pockets and V-twin engine conchos 2007 VTX1800F - whaletail tank bib with U.S. Army "Senior EOD" badge & lettering. (EOD = Explosive Ordinance Disposal)


-
Thanks Cheryl, appreciate it!
-
Last post, just a few more pics... This one was a donation for a themed bike that was 'returned' to it's owner (had to sell it) at this year's East Coast Gathering at Bulldog's in VA. Can you guess the theme? (sorry for the darn fuzzy cell phone pic...it's all they had on hand right then) 2006 Shadow Aero 750 with the new "Hula Style" Flarecut tank bib. The client asked for "more curves" and him being from Hawaii the name seemed to fit...

-
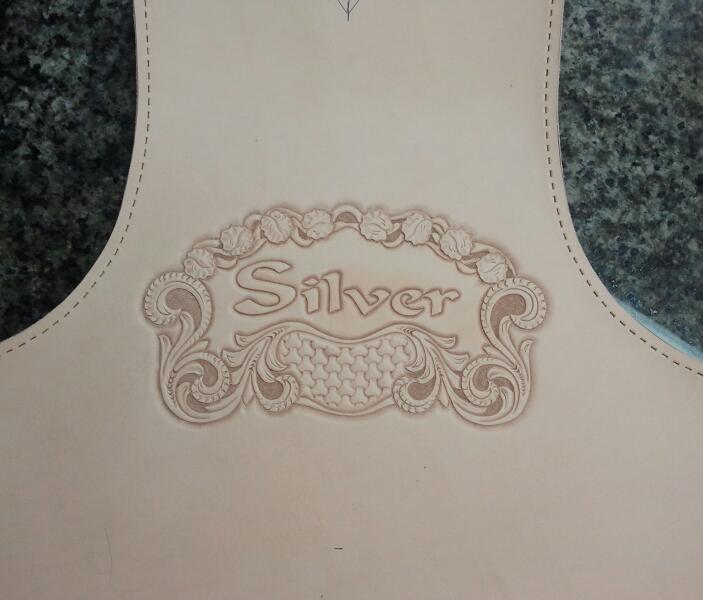
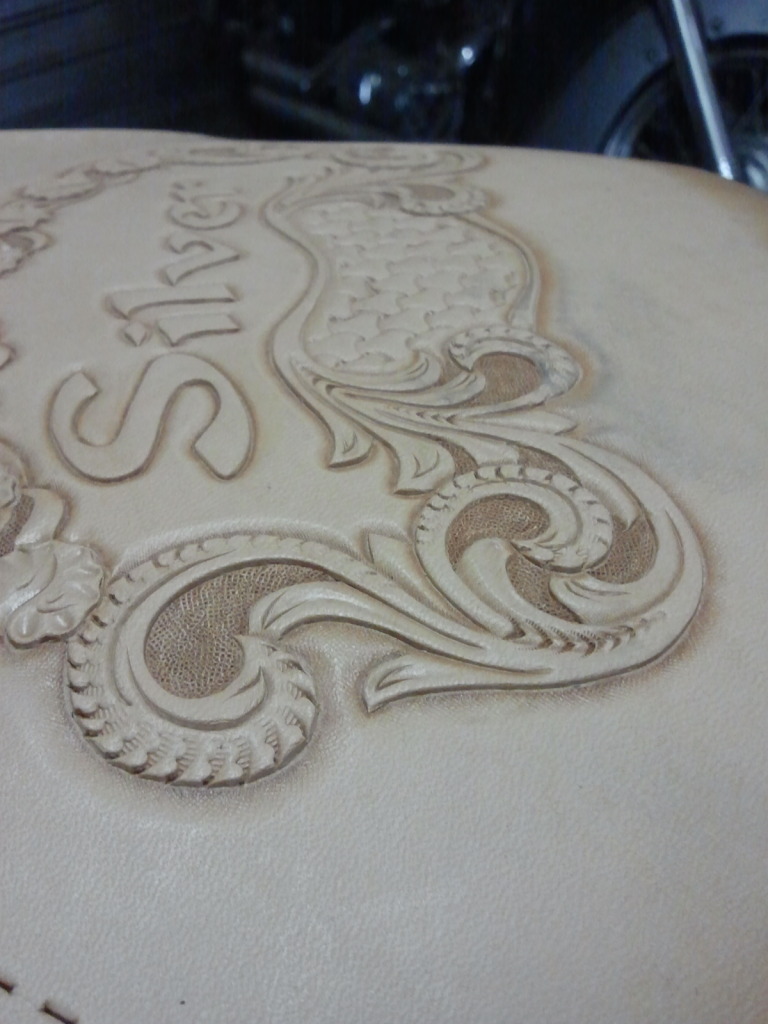
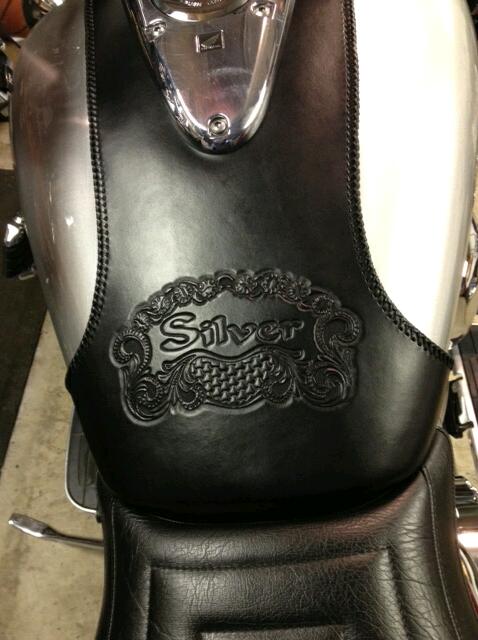
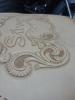
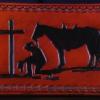
I also had my first request for a full blown Sheridan style carving on a tank bib (minus the flowers). Since I'm still learning the pattern side of it, King's X helped me out with the design and did a great job on the drawings. This was my first real attempt at a full Sheridan tooling project...need some more practice but it came out pretty nice and the client loves it. The black is nice because he wanted it understated from afar but detailed when up close. The bike is a silver 2005 Honda VTX1800N, hence the name. Enjoy! Chris

-
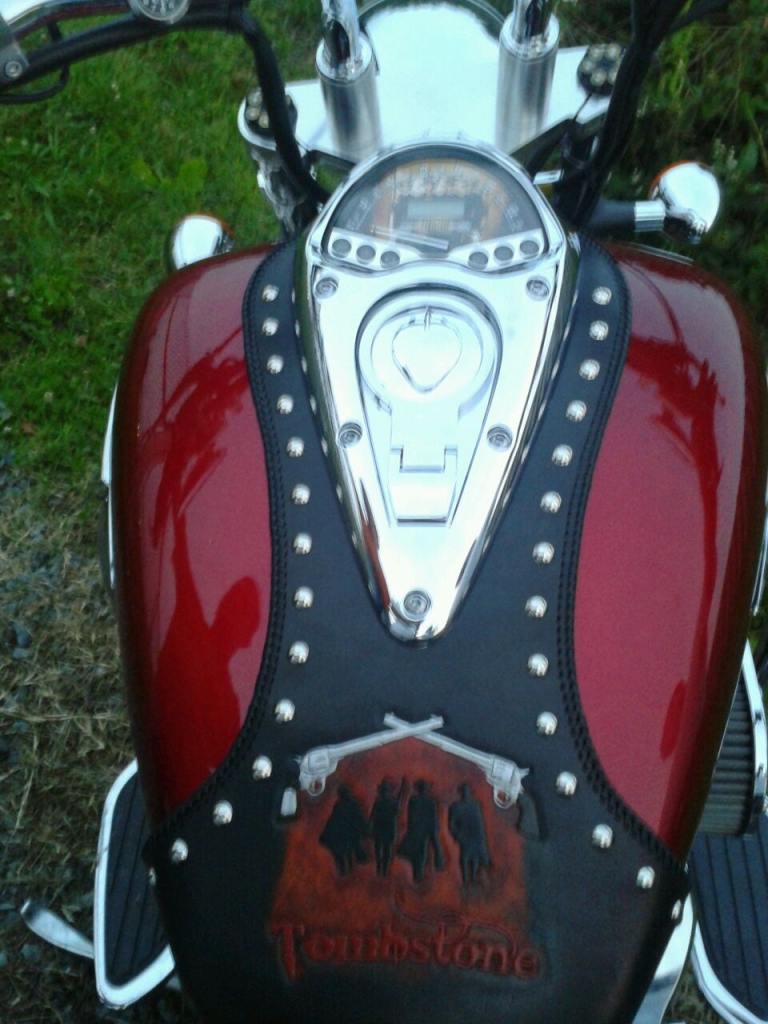
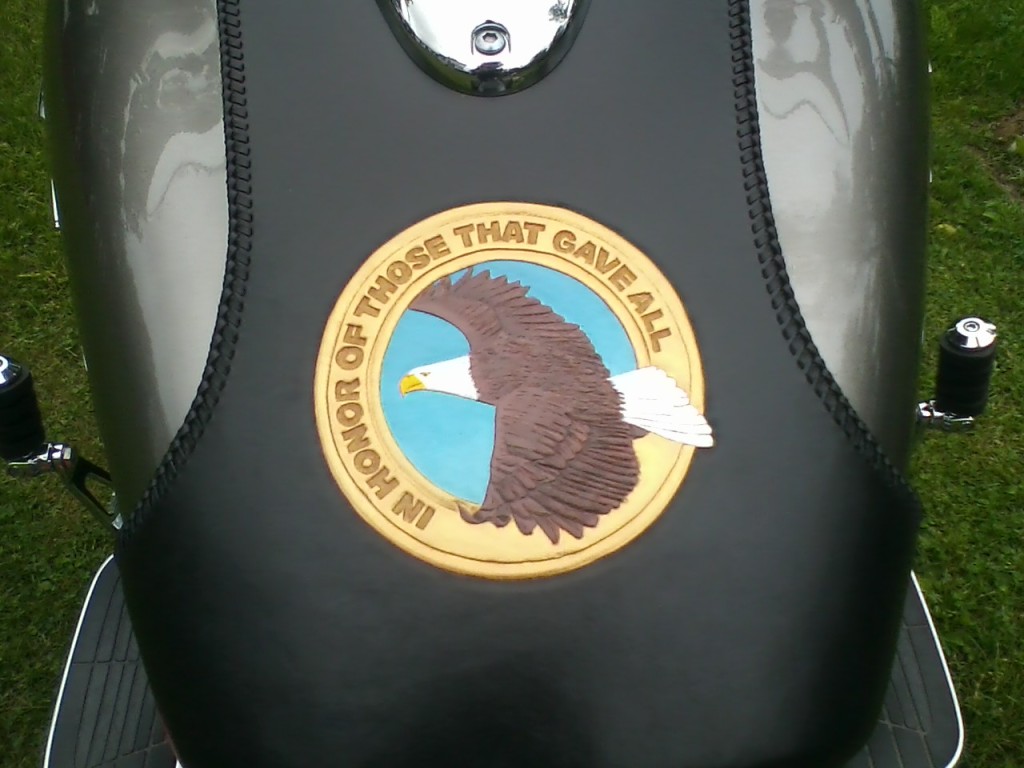
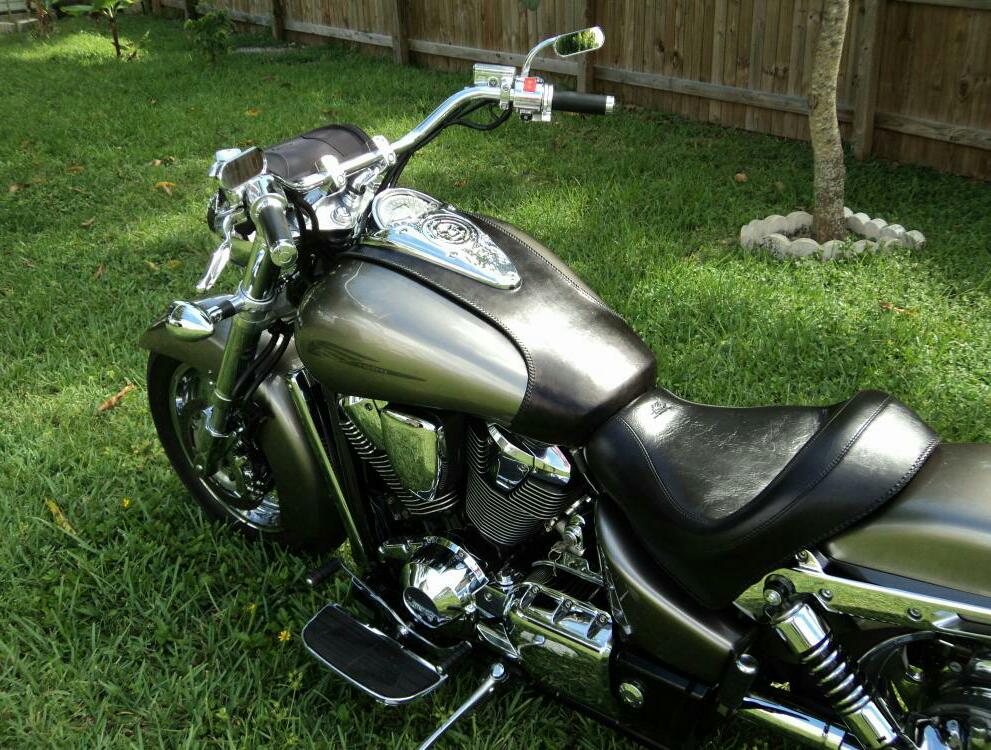
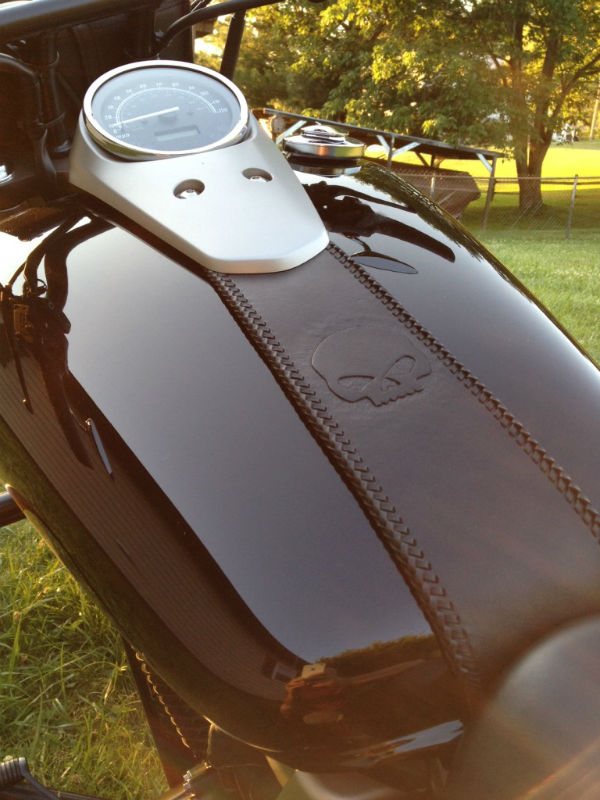
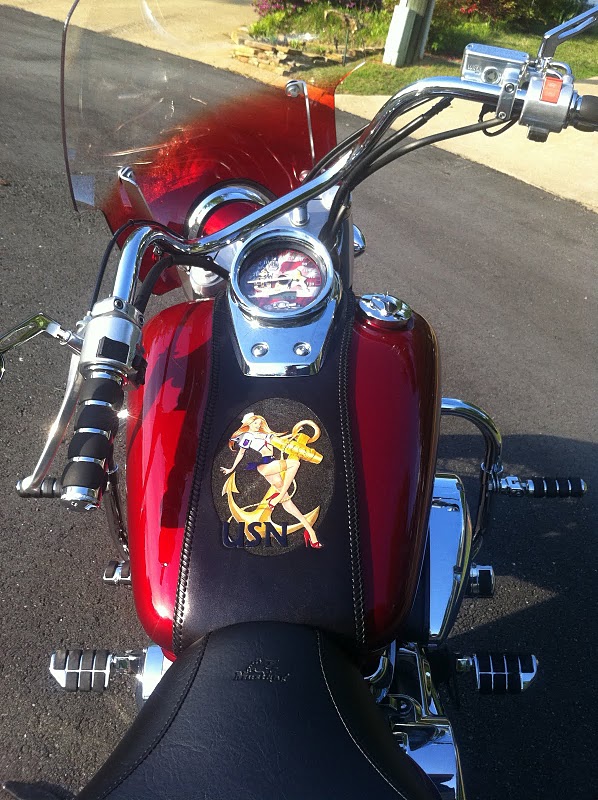
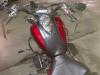
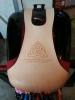
It's been a good while since I last posted work so I thought I'd throw up a few pics. Unfortunately, this is not the full list of projects from the last month as it seems only about 20% of folks send installed pics back for the website. Anyway, here are a couple of the ones that did... Cheers, Chris 2006 Honda VTX1300R whaletail tank bib with red buckstitch 2005 VTX1800R whaletail tank bib with black buckstitch 2002 VTX1800R whaletail tank bib with "Brass Ring" memorial & soaring eagle full color tooling 2005 VTX1800N plain whaletail tank bib (with dash area view) 2007 Honda Shadow Phantom Slimline tank bib with skull tooling This last one was a tank bib I did previously, the USN Navy pin-up. unfortunately the bike is no longer with us, so the client has be deconstruct it and turn it into a vest backpatch and sew it on for him:


-
I saw you stopped by this morning so I thought I throw you a heya...how's the armor making going?
-
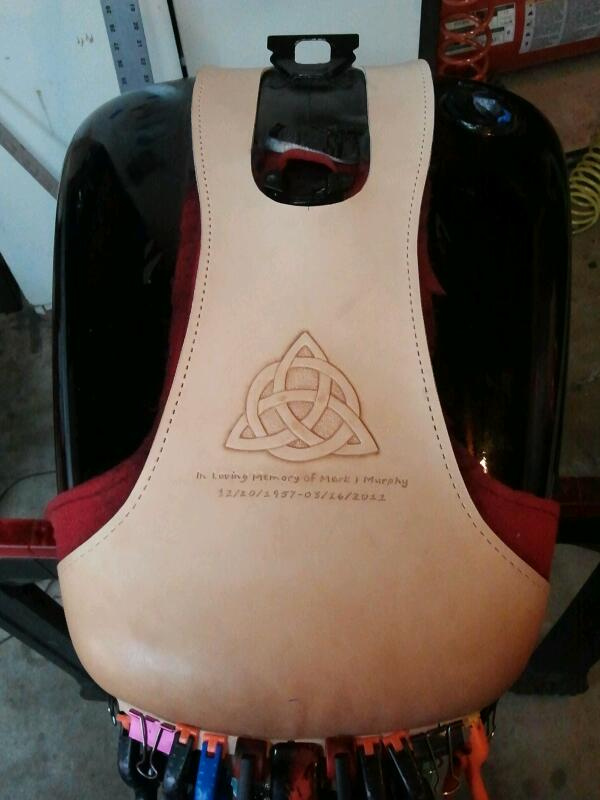
Here's a simple trinity knot I did late last year, hope the pic helps. Chris
-
Hey Ray, If you end up not being able to find the color you want out of the bottle, here's the not-so-secret recipe I created for wine/burgundy about a year and half ago and still use. Works nicely and switching dye brands should only require slight tweeks to the formula. I do a lot of custom color so I prefer to mix my own when specialty colors are requested unless I can find the 'perfect' color in a bottle. http://leatherworker.net/forum/index.php?showtopic=28055 Cheers, Chris
-
I don't see why it wouldn't Rod. Before I knew any better I asked for a sewing machine for Xmas my first year of leatherworking. My MIL bought me a $300 Viking/Husqavarna Emerald 316 from Joann's. I picked up a spool of 69 thread and some leather needles and happily sewed my way through garment, pigskin and cowhide up to 10oz for a year before I found out I "was doing it wrong". Granted, my Techsew 2700 puts that little viking to shame but it still has a place in my shop and is still used on occassion for fabrics and quick projects I don't feel like changing the Techsew around for (it's usually set up for 138 or 92).
-
Nice looking gear, keep it up! As for oil, it will do a couple of things. First it will reduce the squeak. It also increases the flexibility of the leather by lubricating the fibers, which also helps keep the leather from drying out prematurely. As for when, I like to oil during dying but depending on the piece and technique will oil before and/or after dying as well. During dying you ask? Yep, I dye mainly black as I cater to the motorcycle industry so I have found that applying my first two coats of dye, letting them set for a few hours, oiling and then applying my third coat of dye produces a nice deep black with excellent dye penetration. On lighter colored leathers I typically oil before I dye, letting the piece set for an hour or so in between so the oil isn't fresh and cause the dye to bleed more than it already wants to. I try not to oil after dying simply because the oil rag wants to pull some of the color with it and I learned my lesson long ago with an oil rag putting the wrong color where I didn't want it. As for resolene use, I have found that using the soft, lint free polishing cloths from auto parts stores work great. Run it under water for a second, wring it out so it's just slightly damp. Then using a 50/50 mix of resolene & water I apply with the damp cloth in a circular motion, never stopping longer than it takes to re-wet the rag with the reso solution. On multiple color pieces, an airbrush works nicely but to get a soft sheen you want to set your air a little higher and your finish mix lower. Apply 3-4 very thin coats letting them tack up in between. If you use a standard air/solution mix (similar to an aerosol can) you'll get the harder/shinier finish that resolene is typically know for. Hope that helps! Chris
-
Hey folks, I've gotten a couple of requests to make a vintage baseball wallet like the 200 piece limited edition of run that Coach did earlier this year (their run sold out in 3 days). I have a pretty consistent backlog of 3 months for my motorcycle leathers so most folks looking for a custom wallet are looking for someone to make these. I did help the first requestor research what was involved so he could be better prepared when getting quotes and such. here's what I found: The Coach run was made from gloves that were 70+ years old. They spent a year scouring ebay and other sources snatching up any gloves that were old enough and in good enough condition to use. Each wallet takes approximately 1.5 baseball gloves to make (sometimes 2 depending on the leather quality of each). They were made in a patchwork fashion, the palm and back made up the majority of the outside and the remaining palm, back and fingers were used to make the guts. Even the edge trim was from the gloves, it was simply skived to be thin enough to wrap the edges. The wallets were priced at $348, which sounds expensive but they did explain a bit why. Aside from the price of the gloves which at times was pricey, a large part of the project was deconstructing the glove to retain as much usable leather as possible and then they put the leather through a lengthy process of oiling & conditioning to make sure it would be workable and last once put into use. Also, since the gloves would not be all uniform size and shape each cut pattern adjusted during the making as a standard pattern didn't always work. Combine that with color matching the various gloves to each other for the closest matches and you can see how it could become a decent sized job. The couple of folks I have talked to I have referred to others from LW.net and such in the hopes they might find some extra business and possibly a new offering. Just thought I would post my research so the process wouldn't have to start over if you get a request. Here's an article with a good collection of the pictures from the Coach wallet announcements & ads: http://www.psfk.com/...ve-wallets.html Cheers, Chris
-
LeatherBurnishers.com is now the official home of Ed & Beary LaBarre's popular BearMauls leatherworking mauls! http://leatherburnishers.com/BearMauls.html
- Show previous comments 1 more
-
On the shipping info page it says The online shopping cart will be installed soon, so as long as you can pay by pay pal, that would be the best. there is also an email address if you have any questions...
-
IP - Yeah, I've mentioned this to Ed. As LNL mentioned, shopping cart should be online later this month and Paypal will be an option so hopefully that will help some. From what I hear, Beary is buried in orders so it seems to be going OK.

-

Ya that will help some but for example I sen a few emails and never heard a single thing back so I gave up. If I would have had a number to call I would have. Anyway to each his own if he stays busy then I wouldn't change a thing.
-
This should help get you started: http://leatherworker.net/forum/index.php?showtopic=38246&st=0&p=237075&hl=airbrush&fromsearch=1entry237075
-
I don't think there's anything wrong with your sale Tim. Holiday sales are an option for every business owner, large or small. Unfortunately, some folks don't feel the same way about small business/custom makers having sales as they do the big box stores. The one time I ran a small sale around my 1 year anniversary I had a few folks say similar things, "why didn't you tell me you were going to have a sale?" or "I'm mad because I paid full price a week/month/18 years ago and now you have a sale?" While I appreciate the desire to get the best price possible, do you think those same folks call Home Depot, Walmart, etc. and complain that they weren't told about a sale that was coming up before it is announced to the public? Likely not. Think about it, if you called the clients who bought in the week before the sale was announced and offered them the new price or a refund of the difference they'd be thrilled...but the moment they mention the great deal somewhere the guy who bought 2 weeks ago is miffed and so on. Ya just can't please everyone, especially in the 'age of entitlement' we're living in currently. Chris