Spinner
-
Posts
1,373 -
Joined
-
Last visited
Content Type
Profiles
Forums
Events
Blogs
Gallery
Store
Everything posted by Spinner
-
No problem Dennis, glad to help. Here's even more alternatives via a thread I did on testing the new Tandy printable film: http://leatherworker...showtopic=34899
-
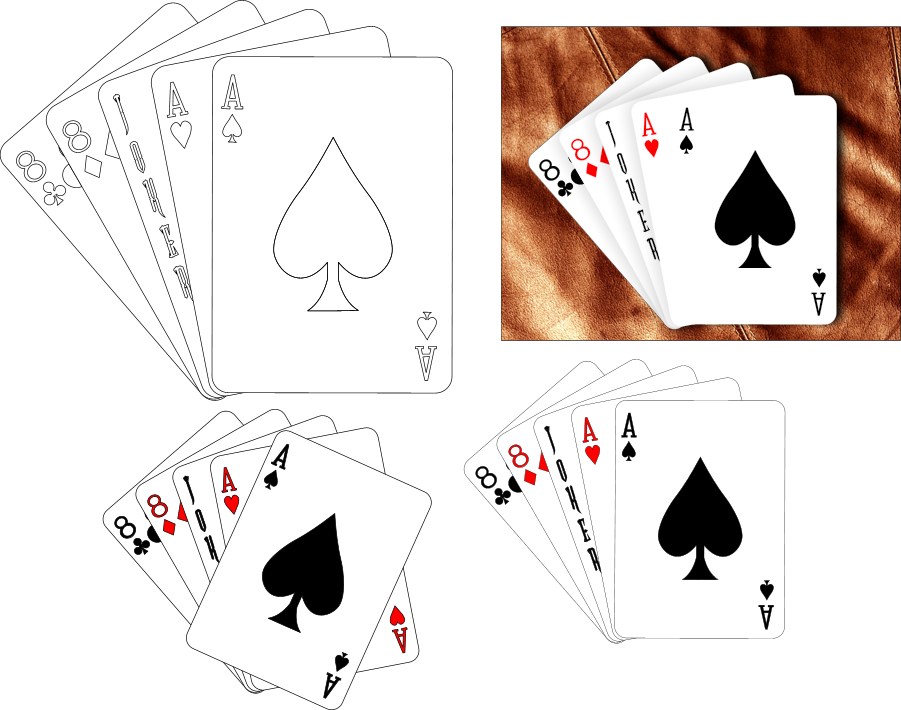
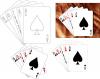
Nothing spectacular, but here is a drawing & rendering I did tonight for a bib I'll be tooling tomorrow. Client asked for this version of a "Dead Man's Hand" All 3 color views are based on the line drawings and simply manipulated from there...lines, shadows, backgrounds, etc. Cheers, Chris
-
Briefcase Divider Material ?
Spinner replied to TZHunter's topic in Satchels, Luggage and Briefcases
At Tandy it's called Bag Stiffener and is very stiff/dense. At Joann's it's called "interfacing" and you'll want to look for Heavy or Extra heavy weight to make the divider stiff. If the interfacing isn't stiff enough, a piece of file folder glued between two pieces of interfacing should do the trick. the file folder/cardboard makes the glue easier to apply and gives the fibers more to grab with helps keep them from separating. (tips from my quilter M-I-L) -
Good info guys, thanks. Question though, have you tried it in an inkjet and laserjet printer? I know from previous art classes that not all vellums will hold onto toner/printer ink (smudge like crazy). If it does, HIdecrafters version is the clear winner in price even with shipping.
-
As promised, the minute the local Tandy got these in, I picked up a pack and brought them home to test. http://www.tandyleatherfactory.com/en-usd/search/searchresults/3503-00.aspx My previous guess was correct and it's pretty much (and possibly the same stuff repackaged) as Graphix Computer Grapfix Film http://www.shopatron.com/products/category/527.0.1.1.20214.0.0.0.0 It comes in a pack of 6 sheets for $6.99 (Elite Club or Wholesale members) or $9.99 retail. Not cheap by any means, but it is definitely a time saver. I have a number of patterns I have either scanned or drawn directly with my computer and normally I'd have to print and either retrace or line the back with tape and even then it's only good for 1-2 uses or takes 20 minutes to an hour to transfer to tracing film. I don't know about other folks, but minimum charge in my shop is $25/hour. The printable film has a smooth & a textured side, the textured side seems to hold the printing very well and no smearing on either an inkjet or laserjet and visibility is great. Here's a picture of a previous computer drawing I did of a popular patch and then resized it 50% and then printed onto the film. Long story short, if you're like me and have patterns on the computer already and want to quickly & easily transfer them to tracing film, this is a good product and the price is easily justified in time savings. Prices on the six packs are about equal between Graphix & Tandy when you figure for shipping vs. going into a Tandy store but Graphix has more options in sizes, quantity and actually has their version split between inkjet & laserjet/copier so they may be a bit more optimized for each type of ink/toner. Cheers, Chris
-
Briefcase Divider Material ?
Spinner replied to TZHunter's topic in Satchels, Luggage and Briefcases
Tandy and most fabric stores sell "bag stiffener" material that works pretty well. It's a fiberous material that generally has some level of hard wax or resin impregnated into it to make it stiff. They make some that can be ironed, is washable, etc. wrap some of that with lining leather and it should give the same effect while keeping real leather throughout. -
Yep, that's the same stuff. The problem you're having is not with the product but with the process. Finishes applied over water based paints (watercolor, acrilyc, etc.) should be sprayed on, not wiped. Anything with a fluid medium equal to or harsher than water (basically every finish out there) will pick up, smear, smudge, disolve, etc. a water based paint if you try to wipe it on. On thing that can help is to use the finish in question as a thinning medium for your last coat or two of color...the color becomes a tint for the finish and helps lock in the color a bit more. The better solution is to simply pick up an inexpensive airbrush from Harbor Freight or TCB Global (Amazon store) to spray your finish on over painted items. Chris
-
I had replied on your gallery posting but I'll say again, this is truly awesome. The color, the forming, the shape/style, I like everything about it! Chris
-
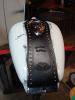
Here's a quick one that I did to show a prospective client what a custom bag I was designing would look like on her bike. I took a stock photo of the bike and then added in the drawing of the bag to the photo so she could see it " in action". And here is a Steampunk/clockwork bi-fold wallet pattern I did a while ago but never got around to making:
-
This all made me curious as drafting mylar is basically the same thing, except drafting mylar is general 1-2 mil thicker than what Tandy sells but Tandy's won't hold printer/copier inks or toner well (smudges) whereas drafting film works just fine. So in looking for 3mil drafting mylar online, converting to sq. ft. to make comparisons easier, it would appear that Tandy's tracing film isn't that far out of line in pricing. Tandy Tracing Film: 20" x 10y roll for $33 = 50 sq ft = $0.66/sqft Dick Blick Art Supply: Drafting mylar 36" x 20y roll for $106.46 = 180 sq. ft. = $0.59/sqft GrafixArts: Drafting Film 3mil 36" x 20y roll for $122.84 = $0.68/sqft Alternative Materials: GrafixArts: Biodegradable Acetate: 25" x 50' roll for $37 = 104 sq ft = $0.35/sqft GrafixArts: Dura-Lar 3mil: 20" x 12' roll for $8.21 = 20 sq ft = $0.41/sqft Grafix Plastics is one of the largest creative plastics manufacturers in the US, I've used their Frisket Film and Incredible Liquid Mask for years for painting. I have a gut feeling that this is where Tandy get's their tracing film from (especially since Graphix is one of the few suppliers that makes 20" wide rolls). A sheet of copier paper is 4mil thick so the 3mil films would be about right. Graphix also makes a "Computer Graphix" film that is inkjet and laserjet printable and comes in a 6 pack of 8.5 x 11 sheets - exactly what Tandy is going to carrying soon (direct from Graphix is $6.69 per 6 pack) In looking at the products/prices, I'm thinking I'm going to give the Graphix Dura-Lar a try when I get some extra cash and see how I like it. It's serves the same purposes as Tandy's tracing film (tear resistant, heat & moisture resistant and accepts pencil & pen easily) and is 2/3 the cost.
-
I agree Bobby. I don't use an alternative, just threw one out there to try and help the OP. I, like you, like the fact that I can draw it once and use it many times as needed. I'm really excited about Tandy's new version that has one side that is printable directly from a computer printer. I do many drawings on my computer and this will cut down quite a bit of time by cutting out the paper to film tracing process! Chris
-
Hey STS - Funny you should bring this thread back to life yesterday, as I just found the drawing last night when I was unpacking a box in the new shop. Hopefully I can get back to it soon. Hey Bobby, It's definitely not Sheridan by and of itself, which is why I called it "....inspired". I kept (and still do) looking at Sheridan style & Graver Scrollwork patterns, trying to find something besides flowers and scrolls that would fit the same curving, looping, overlapping flow of Sheridan...I plan on adding other elements as I go along so that it's not just a big dragon orgy, things like water, bonsai branches, koi, etc. are a couple of things I thought of last night. The interesting thing will be tooling it...to do it correctly, I can already see the need for not only my usual figure carving tools but bringing in some of the floral tools like petal lifters as well. Now if I can just get my workload back under control, I'll get back to this finally and see if I can't get it onto leather one day! Chris
-
I get bored at work quite a bit so I'll make some doodles for you later today to see if I can help. Mine came along similar to Mike's, I have three dogs and I also mainly work in three mediums (leather, wood & metal). I wanted something that would fit/stick with my clientele, mainly Harley & large Honda cruiser riders, so I came up with "Three Mutts Customs" which has worked out. The hard part was coming up with a logo that worked not only as a maker's mark but also on letterhead, stickers/decals, shirts, hats, etc. After two months of playing with designs and getting some input from a design college student I met on Etsy this is what I came up with: Same thing for my leather burnisher website, I wanted something that was eye catching, recognizable but simple to execute. In the end, the best and most straight-forward logo was simply a burnisher & leather edge in profile: Until I can put up funds for another custom maker's mark though, this is what folks find on my work:
-
dragonheadcolor2.jpg
Spinner commented on Mrs Barry Hicks's gallery image in Our Leatherwork Galleries
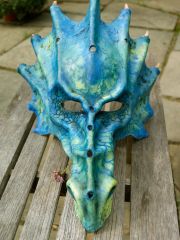 This is so awesome looking! I checked the other pictures, it looks to be one solid piece of leather (except the horns)? The color looks very cool too, gives it an ancient dragon look. How much do these cost? Chris
 -
Welcome HS. While you're at it, check out Tandy's new education site: http://www.leathercraftlibrary.com/ they have some good videos, patterns, etc. Also check out Paul Barnett's website: http://www.paintingcow.com he has some great tutorials and if you sign up for the newsletter (discontinued) you can access the previous articles that have some great technique and project tutorials. As for the tool bags, etc. Veg-Tan will stand up perfectly fine as long as you finish it off with a good quality finish/protective top coat. Resolene and Leather Balm with Atom Wax are two good ones. Pecard makes a great motorcycle weatherproofing dressing that can be used over them to further the weather protection. As for tools, many of the tools on ebay are simply Tandy tools that have been used and then sold by folks that inherit them/buy them at estate sales. When buying lots you'll usually end up with many duplicates or ones you won't be able to use. Best bet is to just go to Tandy directly, buy the right tools the first time and then as your learning curve expands you can invest in better/more expensive tools. Now is a good time for it also, as Tandy is coming out with an improved line of tools and many of the current stock are on clearance.
-
Definitely depends on what you're looking for. Obviously Tandy Leather Factory carries leather and can be found near most major cities and online. They carry a wide variety of grades of leather starting from scrap for practicing on up to their Royal Meadow which is pretty decent but not top of the line. Next up would be other dealers like Springfield Leather that carry imports like Tandy but also handle C grade Hermann Oak. From there you can step up to folks like Sheridan Leather Outfitter, Goliger Leather Co, and others that carry Hermann Oak A & B grades. From there you're talking about Tannery direct, i.e. going straight to the top with either Hermann Oak or Wickett & Craig A/#1 grades. Unfortunately, Hermann Oak will only sell in lots of 10 hides or more which most folks can't afford to do. Wickett & Craig will sell single hides and will split them to whatever thickness you want. W&C also has overstock specials most of the time (it's usually their C & B grades) where you can get a whole hide for $107 plus shipping (about $4.50 per sq. ft). Pricing depends on the tannery/brand, thickness of the leather (in oz.) and what grade you want to work with. Generally you're looking between $2-4 per sq. ft for the lower grades/imports on up to $8-9 per sq. ft for the A grades of H.O or W&C. Hides average 22-25 sq.ft from most places. Springfield and some Tandy locations will cut hides in 1/2 of the more popular sizes & grades if someone can't afford the whole thing. P.S. - nice ride!
-
I agree 100% about the dauber and not wiping down. The funny thing is, the manager didn't even take the time to learn about his own product. The label is very specific in stating, "Apply using a sponge in a circular motion. Allow to dry. Buff." Maybe I'm just weird this way but I tend to follow the recommended instructions as it usually means someone tested it to find the best way to put it on but then again, I also buy specific brushes for acrylic painting versus watercolors & oils and have 5 different airbrushes, each for a particular type of color spraying. Could be that I'm just a bit OCD with tools and such.
-
I agree with you both on different points... The waterstain is meant to be rubbed in continuously with a sponge whereas dyes work best when flooded. However, the results even when properly applied were the same for me. The Waterstains make for a great top coat and have some very nice color depth, they simply don't penetrate. But, as I mentioned in another post on the forum, I don't believe they are meant to penetrate otherwise Tandy would have called them dyes, not stains. Stains by definition are a top coat, meant to give more vibrant colors due to larger pigment particles. Due to their larger size though, the pigment fills in on the top and in the pores of the leather but not the leather cells themselves. This causes them to reflect (or absorb) more light making them more vibrant & lightfast but also makes them more vulnerable to abrasion. A dye uses a colorant with particles much smaller than a stains pigment particles and can therefore penetrate the cell structures. This gives a more durable & transparent color but this also causes to "pick up" some of the leather's color as well which is why black dye applied directly can have a golden tint to it. I do agree that on something that is subjected to more use and daily wear like a seat or wallet that folks are better off with just straight dye. But items that aren't likely to be abraded as often like a clutch style purse, notebook, bracelets, etc. that the waterstain over a coat or two of dye will provide richer color and the undercoat of dye will provide more visible "protection" as the item endures normal wear. Long term, I'll likely stick with Pro-Oil Dye for my projects but for those folks that don't have access to it or simply want to be more eco-friendly I think the Waterstains will be a good addition to the eco-flow dyes as a top coat providing the more vibrant & consistent colors they have been seeking. The more I think about it, I am starting to believe the Waterstains are meant to finish off/compliment the Eco-Flow dyes, not replace them...they are simply two different animals in the coloring world.
-
Thanks McJeep & tatehunt! Very true, not often a Honda breaks down, at least mine anyway. That's just the name everyone knows them by, but she wanted it for her wallet, cell phone & house keys (and registration).
-
This is slightly off-topic, but I had a thought this morning while re-reading this thread...the TurboCarver II is very precise and small with almost no tearout due to the high speed (400k RPM)...makes me wonder how it would handle in leather for doing extra fine lettering. I know it will take the grain off the area but using a sealer like resolene afterwards to stiffen any exposed flesh fibers should result in an interesting & different background. I will have to try this tomorrow!
-
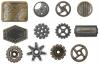
I happened to catch this in their recent buyer's guide flyer, nice to see them trying to get ahead of the game. Tandy's the first supplier I have seen that is doing more than just one gear concho and calling it Steampunk...a new belt buckle (upper left) along with 7 new concho styles, I can see these will be a good seller in the right market areas - i.e. where maker's faires and cons are held.
-
Actually, Iron (Ferrous) Sulphate is the commercial version called a "Striker" used in tanneries to do the same thing. According to a thread over at LeatherChemists.org, copper sulphate, ferric chloride and titanium potasium oxalate are also used to produce shades of brown.
-
Contact Cement Failure
Spinner replied to steelhawk's topic in Gun Holsters, Rifle Slings and Knife Sheathes
There is a 'super glue' that is flexible enough for this application by the way. It's made by a company called Stickfast and is carried at specialty woodworking stores like Rockler & Woodcraft if you have one nearby. There is specifically a grade called "flexible" and works very well for repairs on such things. (they also make thin, medium and thick) The real name for this type of glue is cyanoacrylate adhesive (AKA CA Glue) if you ask for it. -
Thanks for the feedback Ben. I thought that might be the case as some of the examples I have seen on various engraving websites have minute details that amaze me. Unfortunately it will be quite a awhile before I could afford a graver as I need a sewing machine more right now...always something! Chris
-
Only other suggestion I have is as I mentioned above, hit it with at least one good coat of regular dye first to get a base color down. It will help if the piece gets scratched as the Waterstains only penetrate 1/64" average & 1/32" maximum from what I can tell. Here's a picture (under shop lights) of the bib I did tonight with the Waterstains. ( Black Pro Oil dye base coat, 2 coats of Black Waterstain, neatsfoot oil, Leather Balm with Atom Wax followed up by Pecard's Weatherproof Motorcycle Dressing). Now to do all of the lacing...