Spinner
-
Posts
1,373 -
Joined
-
Last visited
Content Type
Profiles
Forums
Events
Blogs
Gallery
Store
Everything posted by Spinner
-
Hey Andy, do yourself a favor, like I did, and order a handful of PA004 (the middle size one) and then regrind them to the various backgrounder shapes. You'll be glad you did. I now have 6 or so of them reground to various profiles and use them all the time. Chris
-
Out of the bottle it's a little thick for an airbrush but it is water based so it can be thinned easily. I'd only add as much as you need to to get it to spray, too thin and it will behave like airbrush paint and have no penetration at all, just be a top coat. If the airbrush isn't a necessity, this stuff goes on easily with a soft sponge and I didn't have any lines or gradations in the application. It applies evenly and then you simply let it dry for 5 minutes or so and then buff it. Very little rub off.
-
I did end up picking up a bottle of black and a bottle of the matte finish. So far I have only been able to play with it and then took a chance and used it on a full bib. I have to say, it's easy to use, makes a great deep color and buffs to a nice low satin sheen. Penetration is a bit less than I'd like for motorcycle gear but the other test, applying it over two coats of Pro-Oil Black resulted in a very nice color and good penetration to boot. I'll take a picture tomorrow of the bib in the sun. Topped it with Leather Balm with Atom Wax and it's become the color and finish sheen I've been trying to achieve for quite awhile. I'm going to make some vinegroon soon but in the meantime this combination makes for a very nice & durable color system. Short answer, it's pretty decent stuff and much better than the regular eco-flow products. +1 to Tandy for getting it right.
-
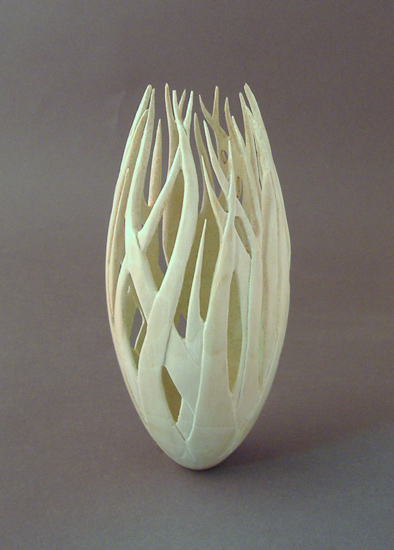
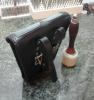
Thanks Casey, I'm going to have to play with this some. I actually have a TurboCarver II with metal etching burrs and some folks on their forums have done some cool things with them in softer metals. I may play with that first to see how I like it and then work up to the big boy toys. I did a good deal of 3D relief woodcarving on my woodturnings years back so between that and leatherwork I may have a good headstart. "Tormento del Viento" - relief/filigree carved White Birch vase:

-
Thanks Joel!
-
Everything looks great Tina, but as others have mentioned, that scroll holder is top notch work. Excellent idea on using an old map, the tooling and color on everything is very easy on the eyes. hey Skye, Those pebble tools are available a couple of places but the most common are from Springfield Leather: http://springfieldleather.com/product/6489/Stamping-Tool%2CPA005/ There are 3 different sizes (the other two are shown below on the same page).
-
Uneven Dye
Spinner replied to nervjiggy's topic in Dyes, Antiques, Stains, Glues, Waxes, Finishes and Conditioners.
Another option to try (I hate daubers except for edges) is to use a scrap of sheepskin with the fuzz trimmed down to about 1/4". Saturate the sheepskin with dye and rub it into the leather using circular motions -wax on, wax off- to avoid lines. As katsas mentioned, going in multiple overlapping directions (up, down, let, right, diagonal) also helps quite a bit. -
To make life in Cal even easier, simply get a resale license for free from the BoE. Allows you to buy most banned items if you know what stores carry them and as long as you pay & charge sales tax when necessary there is no real reporting required. Sav-Mor Leather in downtown L.A. carries Fiebings Pro Oil Dye, Spirit Based Dyes as well as close to the full line of Angelus colors in-stock.
-
I do this fairly regularly on my motorcycle gear (until I get a batch of 'roon made up) and one thing that I found that helps greatly is to let the blue dry completely before applying the black. If the blue is not dry then the two colors tend to blend versus the black going over the blue and as you found simply make dark blue. Let it sit for 24 hours and then hit it with 2-3 coats of black (letting dry in between) and it should darken much easier. The oil dyes take 2-3 times longer to dry than water or spirit based dyes not considering humidity. Chris
-
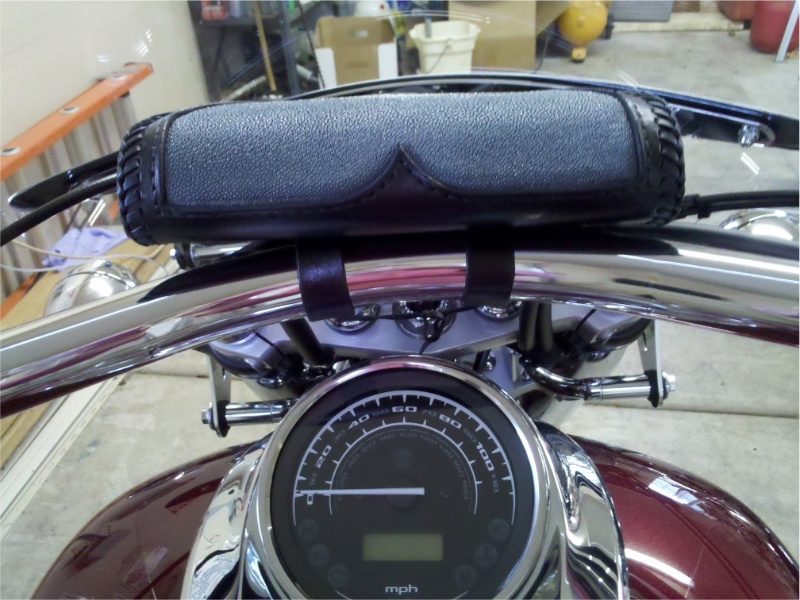
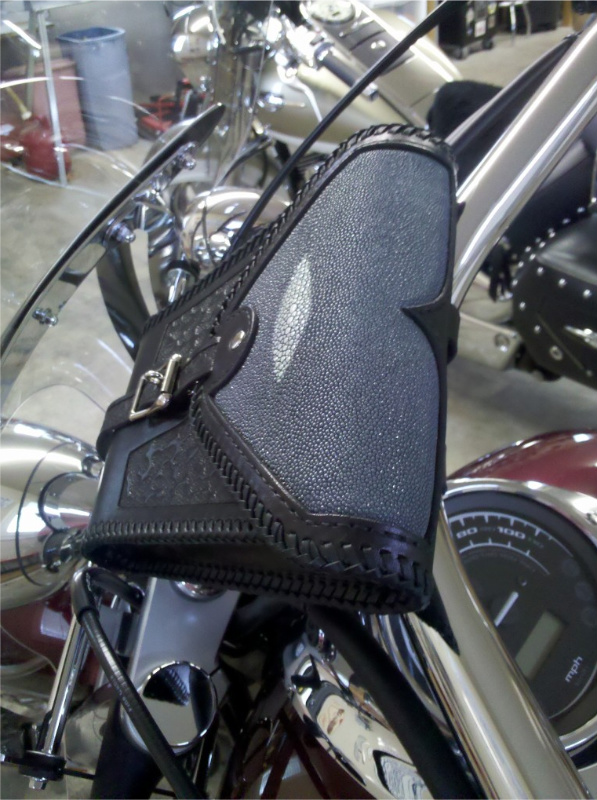
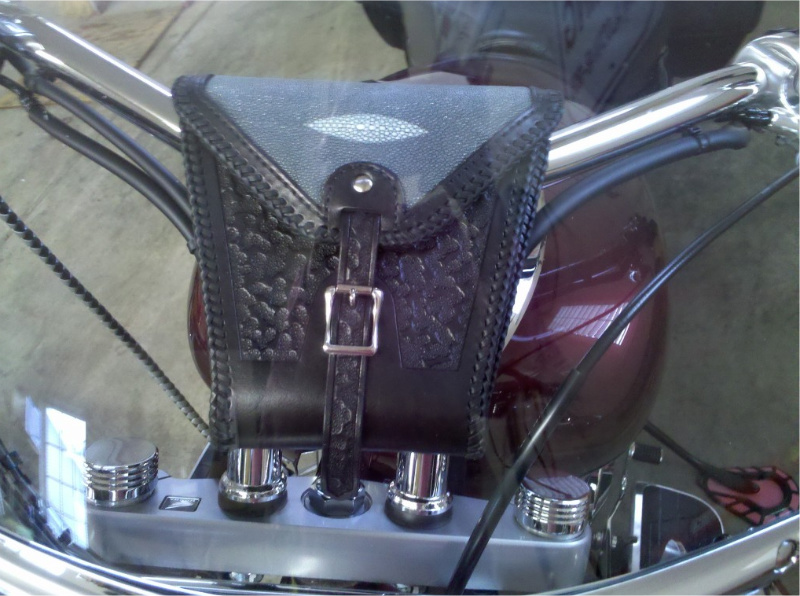
Got an email from a VERY happy client today, she sent some pictures of the bag mounted on the bike:


-
Looks very nice Casey. What tools do you use for engraving? I've always been fascinated and have done woodcarving so it may be right up my alley (like I need another hobby!) Chris
-
The main difference is the size of the pigment/colorant used in the two. Stains are essentially very thin paint. The pigment is larger and use a binder so they tend to stay on the top of the surface. The color is deeper and more lightfast because the larger particles can absorb & reflect more light but they can also be more easily removed (on purpose or accidentally) due to their weak penetration. The main drawback is that because it is a surface coating of sorts, it can "fill in" some of the leather grain's finer details. This gives a more uniform color surface but when layered on can take away from the natural look & feel of the leather. Dyes penetrate deeper due to the fact that the colorants (pigmentation material) is much smaller than those used in stains so they can work their way further into the leather's cell structures. The drawback is that dyes tend to need many more coats to achieve a similar color depth as the colorant is absorbed & penetrates and dispersed throughout. Dyes are transparent by nature so some of the underlying materials color will tend to come through (this is why leather dyed with just black dye can have a golden tone to it). Dyes don't build up, they simply darken as more colorant is penetrates the cell walls and therefore can take more abrasion than stains and doesn't build up on the surface so the nature feel & look of the leather grain remains. Short version: Dye: Pros: deeper penetration, better durability, no surface build up, can be blended with finishes that use the same carriers/solvents to create tinted finishes, longer shelf life Cons: not as lightfast, can be more difficult to clean up, less intense colors, can leave a residue (see also USMC Black), longer drying times Stain: Pros: more intense color, better lightfastness, generally easier to clean up, blends/hides imperfections, generally dry faster, little to no residue/rub off Cons: very little penetration, hides/distorts grain patterns, can not be used as a tint, shorter shelf life due to pigment/binder separation, less durable (scratches show underlying material easier)
-
Thanks guys, I'm already looking at ways to improve the design/speed up the construction to see if I can get a handful made before Christmas in both types...we'll see what happens.
-
Never fear Mike, another mad scientist is here! I picked some up today along with the Matte finish to do some testing with. The sales girl at Tandy was nice enough to open a bottle for me to check it out before buying and just a quick wipe with a paper towel gave a nice top coat but very little penetration. Stuff doesn't want to rub off though, I even wiped out my knife and scraped the grain side to see how bad it would scuff. So I bought some and will be testing it tomorrow including a few tests with spraying, mulitple coats, different finishes and seeing if it will go over other products like the Pro Oil Dye, etc. Results to come soon! Chris
-
Thanks Roo! The purse idea was a common thought today as I showed it off at work. i may have to start making more with shoulder straps, doubling the price and calling them designer handbags...I'll be rich! LOL. On the Chaos tooling, in a round about way you actually inspired it. Way back when you did your display seat and turned me onto the pebbler tools; ever since then I have been playing with them developing a way to plan out a random looking pattern. It's now my second most requested tooling technique.
-
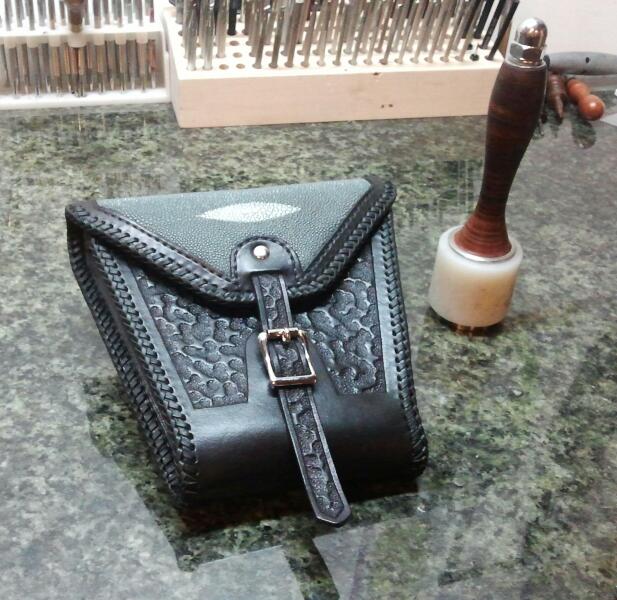
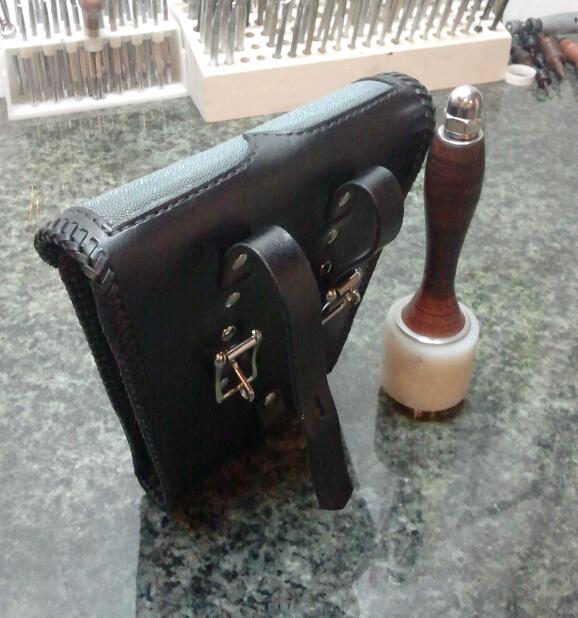
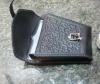
A new customer asked me to make a handlebar tool bag for her 2010 Honda VT1300CT but she didn't want the typical roll style tubular bag. She asked for something low profile but still capable of carrying a decent amount of stuff. As things progressed, we talked about doing my chaos tooling pattern on the flap, then that progressed to stingray inlay when she started talking about a gray & black color scheme. In the end I designed a wedge shaped bag that tapers both on the width and the thickness. Stingray inlay on the flap and the chaos tooling pattern on the body with matching tooling on the flap strap. The outer body is 6oz. cowhide with 4oz goatskin lining on the inside of the flap. Gray Stingray from Ostrich Market (great service btw) for the inlay, kangaroo for the lacing. We also decided on lockable roller buckles for all three straps so she can lock the items in and lock the bag to the bike if desired. The inside of the bag is also lined with gray fabric and I carried the point that appears on the flap and front tooling to the inside where the goatskin & fabric meet. Thanks for looking! Chris

-
You can also use thinned acrylics like Antiquing Gels. Seal the leather well, let the sealer dry completely (2-3 coats, dry overnight) and then brush your color into the tooling impressions. Before it can dry, use a slightly damp sponge or rag wrapped around a flat item (aka Popsicle stick) and wipe the paint away from the non-depressed top area.
-
This made me chuckle, remembering some grief I gave an old roommate of mine. He got a fairly new Harley and after a few days in the garage he was happy to announce, "look it doesn't leak oil...yet". So I grabbed a bottle of oil off the shelf and poured some on the ground while his back was turned and told him, "look, now it's a real Harley". The next day I found a pile of rice under my Honda...when I asked about it, his reply was, "yeah, looks like your bike is leaking now too."
-
New shop space is huge and coming together...now to finish unpacking, assembling and sorting all while working on client projects...woohoo!
-
Three Mutts Customs Shop
Images added to a gallery album owned by Spinner in Our Leatherwork Galleries
The new shop space (2011) -
-

From the album: Three Mutts Customs Shop
The new 3MC shop space. Still under 'construction', needing more shelves a new bench to be built and two more racks to put together. I needed to start working on client projects so it was thrown together but the amount of space is awesome. For reference, the current "tooling bench" in the back, center is 47" long x 28" deep.© © leatherworker.net
-
Thanks for the advance testing Shooter. Sounds interesting so far. How about second applications? Have you tried to apply a second coat over the first now that it should be dry and if so how did that go if water was previously beading up on the surface? How about drying time compared to spirit & oil based dyes? Price compared to those also? Sounds like Tandy may be finally getting on the ball! Chris
-
An airbrush is more expensive...initially. Over the long term, if you plan to leatherwork & spray your colors & finishes a starter airbrush set will cost much less than prevail over time. You can get a starter kit from Harbor Freight for $89 that includes a compressor, airbrush, cups, wrenches and hose for $89. http://www.harborfreight.com/1-5-hp-58-psi-compressor-and-airbrush-kit-95630.html For a Preval sprayer, you need to buy the jars (one for each color or finish) and the compressed air bottle. The compressed air bottle will last long enough to spray one jar of color (about 4ounces) and after that it gets very spotchy and unreliable. The Air Bottle (called the Power Unit) $9.99 and the jars are $2.99. That's $12.98 to spray 4-6 ounces of liquid, maximum. Want to be able to spray 2 different colors or a color and a finish? You're looking at a minimum of $26 since you can't clean the power unit and cleaning the jars means wasted color. An airbrush can be cleaned as often as needed, colors can be swapped out easily and on the off chance you need to clean out a jar there is less waste as the cups are smaller (due to airbrushes being more efficient). The air compressor will spray as much as you want, simply plug it in. The nice thing also is the air pressure is variable to give different effects (solid, large area, stipple, fades, etc.) All it takes is the equivalent of 6 prevals to get a working airbrush set-up. It hurts a little more in the beginning but in the end, you'll actually save money, time & frustration (not to mention overspray). Chris
-
Give Springfield Leather a try. I believe they sell most of their leather by the square foot. I do know for sure that they sell certain grades of their veg-tan by the sq. ft.
-
woohoo! Beary custom maul is ordered with a nicely figured Amboyna Burl handle! (pays to have a nice collection of exotic wood handy)