TTcustom
-
Posts
351 -
Joined
-
Last visited
Content Type
Profiles
Forums
Events
Blogs
Gallery
Store
Everything posted by TTcustom
-
I can only reinforce what Bara and Echo said. This was the same procedure I followed. I used cotton balls for a while but the flannel "gun patches" worked best for me. Soft flannel cloth or diapers seemed to be the most popular I seem to remember. Keeping the polish to a minimum in the creases was important. All of the cheating methods would wind up giving you a cracking boot that was useless. Pretty cool that this is the methodology around the world.
-
Hidecrafters also has heart stamps.
-
Your statement is true but knowing the particulars of my application and how it was utilized I have no fear about the safety of my feet. Thanks for your input though.
-
My top is covered with black neoprene rubber. It is 3ish' x 2' and has a 12"x18"x3" stone set into it. I only painted the sides for aesthetics. since I am a rough carpenter this was like putting a bow on a pig. The top was framed with 2x4's and covered with 3/4" MDF. I have zero bounce and low noise when tooling. It is all about the mass! I think I posted a picture of it here somewhere.
-
Thanks Doc! Now if I can only figure out the mystery of the horn wrap. Me and the Stohlman's aren't seeing eye to eye. I can't believe that this horn is any different from anything they had seen.
-
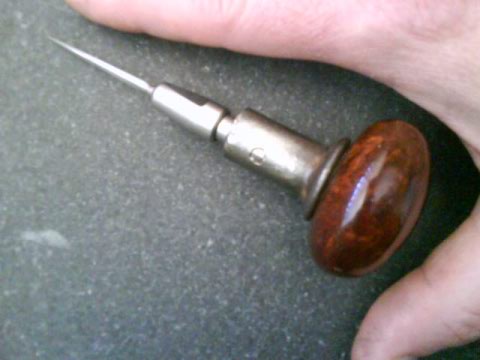
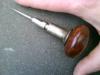
I split apart the handle of my osborne stitching awl, it was overtightened. Since I can't throw anything away and I had my horn caps to stitch I remade it using a small antique door knob for the haft. The Osborne collet insert fit in perfectly with a little drilling and locked in positively with a 8-32 stainless socket head screw. So I guess I am green, not cheap!
-
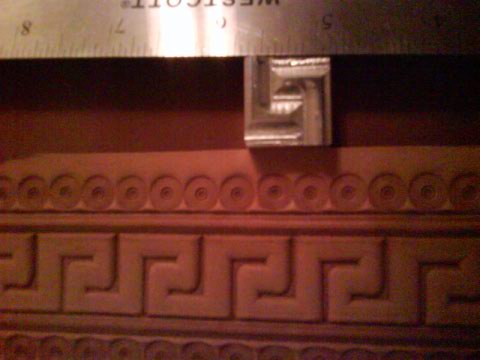
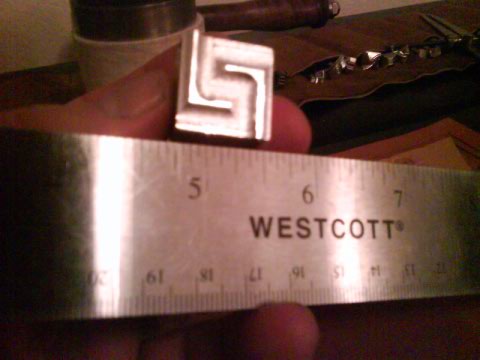
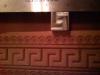
Made this stamp as a quick and easy way to do the borders on my saddle and stirrup leather. Needs some minor tweaking I think but I like how it turned out.
-
I am starting on my saddle and now I have more reason to get some of my stamp ideas into metal. This is the stamp I am going to use on my stirrup leathers and as a general border around the skirts. I made this prototype out of a 1 inch aluminum block. I am pretty happy with how it looks and next will final machine one out of stainless.


-
What the heck happened to Hidecrafters? I was just on the website (tried IE and Firefox in case it was a browser thing) and I could not place a online order. I wondered if this was just me or is there an issue with their website again.
-
Wow really excellent! I wish I didn't have a dozen different projects going because I would add chinks to that list... oh what the heck now I want to make myself a pair!
-
I did the same thing as Pete. I put some barge cement on a strip of leather and then wrapped it around a cord. I put a stitching groove in it and hand sewed it. I am a glutton for punishment I guess and I don't have a machine. When I was restoring a car a few years back I need a door seal made from the same material I cover the seats. I took the material to the upholsterer and he had a "half foot" on his sewing machine. It was like a normal presser foot but with one side almost ground off. He wrapped the material around a foam rope core and then could sew super close to the core with that foot. I hope Steve from Cobra machines sees your question because I am sure he or one of the many sewing machine users could answer it best.
-
WOW!!! That is just amazing. Thanks for sharing pictures of them.
-
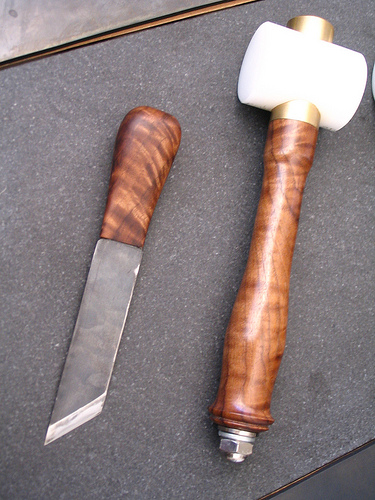
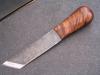
Man that is a good question you asked. Where did I get the How to? I wanted to make a knife a long time ago and read about and researched how to make knives. I met local people that make knives and that is where I got my how to. This knife is nothing fancy. a flat rectangle with a 45 end. The material I got online from a knifemakers supply. Some epoxy and sanding then tada skiving knife!

-
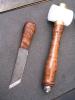
Ritch, It is flat on one side and beveled on the other. I was making my version of a Osborne #469A skiving knife. I was lucky to have some nicely figured walnut on hand to make the handles with. Bentley, Hey I got my saddle tree and got started on it Saturday. I guess now I will have a chance to put all my new tools to use! somawas, If I can do it you can too!
-
I made a skiving knife like the Osborne # 469. The handle is the left over walnut from my mallet handle. It wasn't until I was putting the finish on the handle that I realized they make left and right versions of this knife. Now I wonder if I should make a left version?
-
I had a bit of knife blank steel left over and so I made a right hand skiving knife with a walnut handle.
-
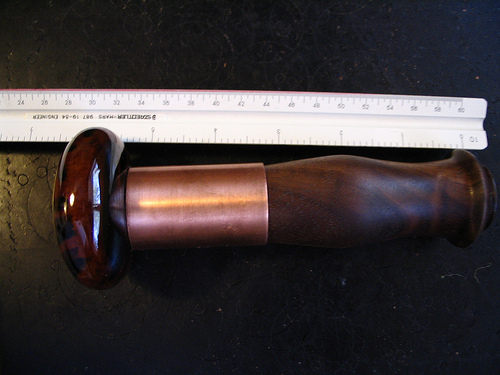
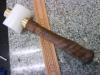
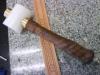
I goofed and posted the picture of my Walnut wood handle mallet elsewhere. But for continuity sake and to be annoying I 'll post a picture of it here.
-
I had to give away the first mallet I made to a good friend but I made this one for myself and I made the handle match my bouncer handle.

-
New Leatherworker, Please Comment
TTcustom replied to Grov's topic in Purses, Wallets, Belts and Miscellaneous Pocket Items
You're doing good stuff there. I just have to echo what Tom and Johanna said with one additional thing; stay away from the donuts, just saying... :D -
LOL Ed appears to have produced some more fine items for sale and has posted here. If you don't make one for yourself he is the man to see! I just finished another mallet for myself with a black walnut handle and I think that I will be keeping that. It matches my bouncer. Pictures soon to follow.