


JLSleather
-
Posts
7,378 -
Joined
Content Type
Profiles
Forums
Events
Blogs
Gallery
Everything posted by JLSleather
-

Mold Gun Storage
JLSleather replied to Frankqv's topic in Gun Holsters, Rifle Slings and Knife Sheathes
Pretty sure this was a CD / DVD rack in it's day. Found in thrift store for $3. Holds about 100 guns. But I'm in the process of building something more substantial that will hang on a wall, freeing up floor space (even though this only takes about 1 foot out and 3 feet wide). I'll upload a sketch of how to make it if anybody's interested, though I imagine it's simple enough anybody can do it quickly without my input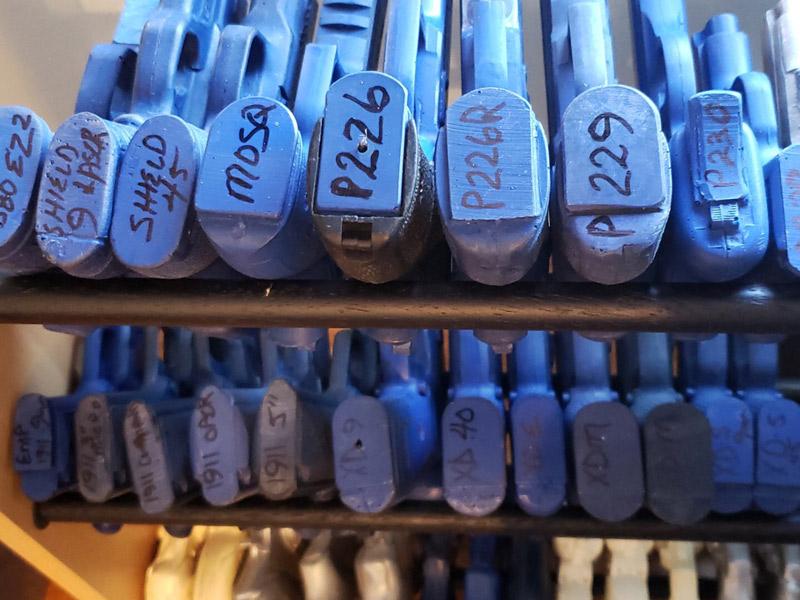
-
The LCP 1 is included at https://www.etsy.com/shop/JLSleather?ref=seller-platform-mcnav§ion_id=19233123
-
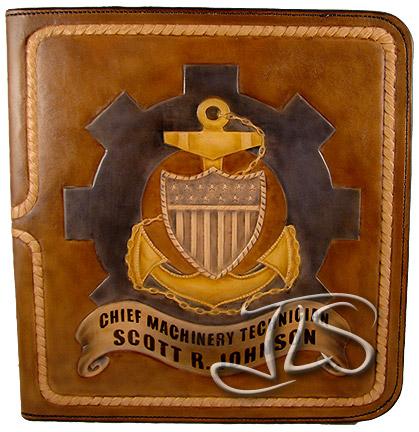
If you're covering large areas, just apply the 'stick-em' to the back of a piece of card stock then stick the card stock to the design. Don't even need to "glue" the whole piece.. just maybe 1/2" along all edges. Some of you may have heard of "masking"? Leather people like to call it "resist" or "block", but it's the same thing. And, no need to find an art supply store and spend the morning's wages on something to "mask" with. Most places have a small bottle of RUBBER CEMENT which works great for this. An 8 oz bottle is a couple bucks at any hobby lobby or home improvement store, and lasts a LONG time. Note I have tried a couple different versions of "painter tape" as well - from the blue stuff in paint stores to "pro" stuff sold in art stores. SOme are better than others, but a few can leave a residue that can be very difficult to remove, so I don't recommend those unless you're familiar with them. The insignia in the center of this notebook is about 5" x 7" (just the yellow gold part). I assure you I did NOT "paint" that with latex Because it's largely "straight", the rope was "masked" (or "frisketed" or "blocked" or "resist"ed) with TAPE (red art supply tape). And the lettering, which needed to be hand cut for the scroll, was done with... well... that's another time
-
One popular publication says a general rule is to gauge the distance from the edge equal to the thickness of the pieces being sewn. That's a good starting point.. and you can fine tune your preference from there. On my holsters, the outside stitch is "a strong 1/8 inch" from edges, though the holster edge is frequently 1/4" of material. But I'm talking about that distance from a FINISHED EDGE, not as some who might sew that close, and THEN finish the edge, removing material so the stitch is closer than that. Distance between stitches would be governed mostly by awl and/or needle size. Holes too close together is called a cut. Again, general "starting point" might be distance between stitches equal to thickness of material. Just to see -- I have sewn 2 layers of 2 oz (total thickness approx 1/16") at 22 spi. Using #42 thread and #16 machine needle. I did not use the resulting assembly - clearly a bad idea, but at least i knew. It didn't tear upon sewing, but it does with any stress at all.
-
Exactly the problem - for years. I have never found a white dye that WORKS - just too translucent to get a true white. So i don't do white, except in small areas of items that don't get "use", and even then I use PAINT. Some acrylics are a bit more forgiving than others, but I wouldn't use it on anything that will get flexed, stretched, bunched, scuffed....
-
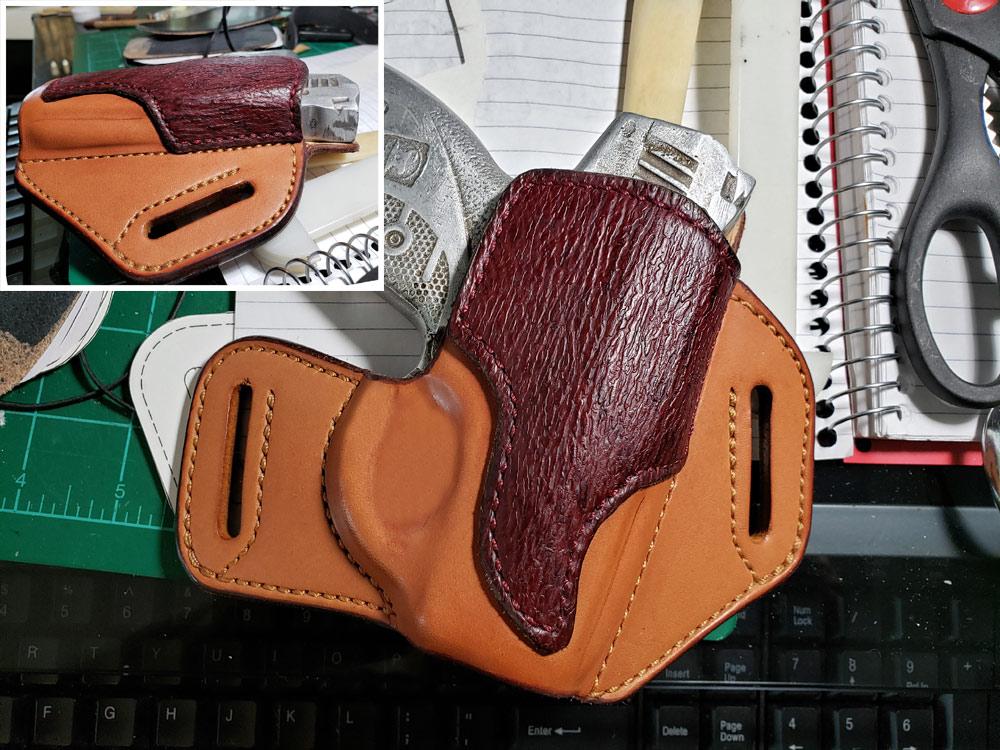
Yup, purdy tough. Shark certainly easier to work with (and less money).
-

From the album: Stuff 'n' things
© 2019 JLS Leather
-
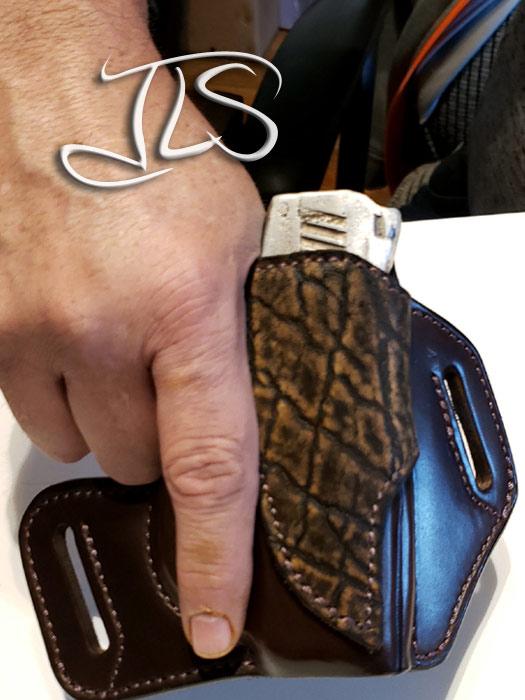
Hey, I 'get' it. Some folks not big on chocolate elephant. For those, may I suggest a cherry shark
-
Thanks I really like to TOOL leather too, but often holsters are made to be concealed ....
-
'Preciatecha fellas Oh, I didn't get picks of that part of it, but the back panel of this was lined with tooling leather after it was dyed.
-
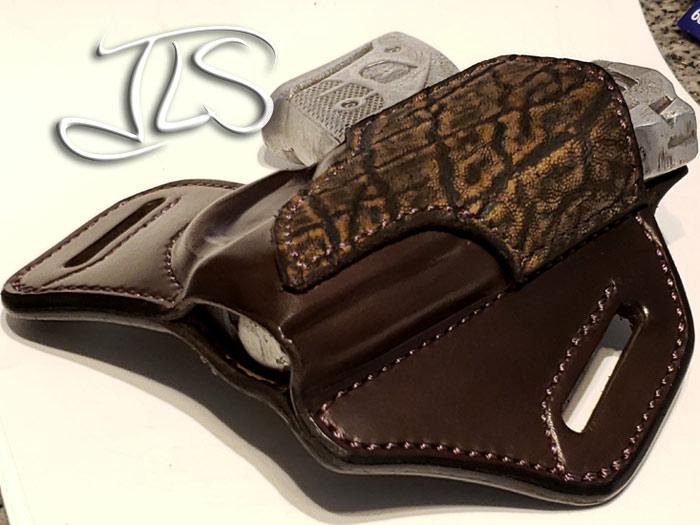
Uh, yah... elephant is a bit of a pain. Knife needs to be WAY sharp to cut cleanly, or the elephant tries to flex out of the way. Great LOOK, and DURABLE stuff, but just requires a little patience to use. The veg tan cow is easy to use.
-
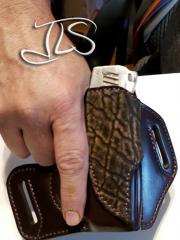
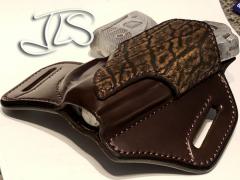
Curved panel holster for the Bond Arms Bullpup 9, by request in chocolate brown and brown elephant hide. Dark brown nylon thread a la CowboyBob (link below).
-
From the album: Stuff 'n' things
© JLS Leather 2019
-
From the album: Stuff 'n' things
© JLS Leather 2019
-
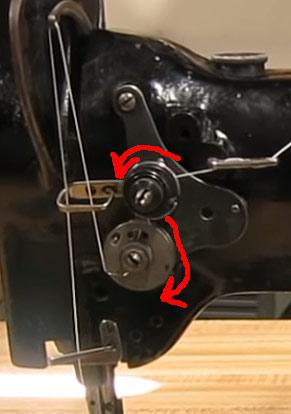
That "pin" in the top disks is to keep the disks from spinning around... the thread doesn't go on that. Looks like you have the thread direction right. Be sure it snaps down in to the disks (there should be tension on the thread if it's in there). And then, as rburson states, hold on to the ends of the thread when you start... keep some tension on the ends ... until you have a few stitches in the work
-
Yer thread path doesn't look right. See can we find a pic... The thread should come OVER the top set of discs (between them) and then go down the RIGHT SIDE of the lower disks. Go all the way around the lower disks to like 12:00 position, and the spring will "snap in" on the thread, then up to the take-up lever and back down.
-
Tan-Kote should do exactly that ... just a kote of very light tan. Natural leather with tan kote ALMOST the same color as natural leather BARE. If you had an issue, more likely it's with the leather limiting dye penetration. In a jillion years of doing this I DID see one time where there was some tan-kote "gone bad". Turned out it was allowed to partially freeze on a UPS truck (@!#$!). So I use it all the time, but never ordr it over the weekend in winter. Buff the dye before applying, and then it shouldnt' change much due to the tan-kote.
-
Agreed! And, another great piece Love the textures, and your color is always fun to see!
-
I sent an email. Didn't get it? Offer wasn't acceptable? Busy and haven't got to it yet?
-
Reduce inventory / save space >> no need to stock multiple thicknesses Save time ordering >>>> same issue... call tannery, order one thickness, and you're done Quality of goods >>>> Make ranger belts with billets lighter than main belt, or add straps to cases, etc.. by splitting the same leather for the main body, the color and texture of the entire project will match (nothing ruins a project quite like a billet that doesn't "quite" match)
-
Suggested tools for holster and belt making?
JLSleather replied to Maverick44's topic in Getting Started
Got a drill press? Chuck a machine needle in it and "press" the holes (don't turn it on). -
Suggested tools for holster and belt making?
JLSleather replied to Maverick44's topic in Getting Started
Oh, yeah.. Sam is THE guy to see for holster videos. There are a LOT of them out there, but cut through the NOISE 1000 guys are making and go straight to what is head and shoulders the best source of info on there. Far less "marketing spam" and more actual useful info. Here's one video I found very good. https://www.youtube.com/watch?v=SFsXw3gabqk#t=16 And another, where Andrews quickly and accurately describes how to make your own patterns for holsters - very well covered in 12 minutes. https://www.youtube.com/watch?v=5PdKDmcmu8k&t=2s -
Suggested tools for holster and belt making?
JLSleather replied to Maverick44's topic in Getting Started
SHop a little. You can get wing dividers at pretty much any store in the country.. often for $2-ish. Menards or Lowes will carry them. Harbor Freight probably got a coupon to get 'em free. I'd pass on that hollow slot punch - I've seen em and wouldn't own one if it was free. You'll find a LOT Of people (some of them right here on this site) who will go out of their way to charge you $10 for something that aint worth $2. I've seen utility knives ($6 off the shelf at the auto parts store) being called "leather knife" and sold for twice that. Not naming names (yet), but shop a bit or ask out loud. Don't take the advice of somebody just because he's on here, or has a web site, etc -- including from me. I'm all about the BUSINESS END of a tool. If it's supposed to CUT something, then I want it to CUT. Don't care about - and aint payin extra for -- cocobolo wood handles "crafted" in a $35k CNC or laser tool... pretty is nice, but only if it WORKS. IN fact, I'm gonna say a guy with wood tools could likely make that strap cutter in a hour with some scrap wood, a wing nut and a jam nut, maybe a coping saw to cut the blade slit and a screw to hold it in. That "strap cutter" is in fact 3 pieces of wood, a 10¢ blade, and 25¢ worth of stuff from the hardware store. It's marked purdy like, but hardly a "precision" instrument. A guy basically needs a "fence" to put the leather up against and a way to hold the blade right distance away (which you could do by putting a slit in the table and screwing down a "fence" for that matter). i bot the strap cutter, due to space available, but .... you get the idea. Somebody selling the "walnut and oak "checker board" conglomeration with high gloss urethane finish and hand polished surface" is wasting their time barkin' at me You see the trend. -
Suggested tools for holster and belt making?
JLSleather replied to Maverick44's topic in Getting Started
Strop? Nah, kaint find one here I use mostly x-acto and utility knife blades ... about 10¢, and when they're dull I get a new one. HOURS of time making belts and holsters because I'm NOT spending that time sharpening a blade. And, a fella with a wood lathe should have no trouble at all coming up with a burnishing stick in about any size/radius he might want -
Suggested tools for holster and belt making?
JLSleather replied to Maverick44's topic in Getting Started
strap cutter is a big plus slot punches are nice. Maybe a 3/4" and a 1 1/2". Snap setters if you're going to use snaps. cutting board? maybe a piece of masonite to cover a table - that way you can replace it easily when it's marked up. You "can" get a round knife, but don't need to. I'm made a jillion things, never owned a round knife (i've seen them, but didn't see where it did anything I wasn't already doing with something else) OH>>> don't forget your tools you own... sometimes a wood gouge is a nice tool to have on a leather bench. AND>>> don't forget leather! Yeah, some will laugh.. but I have personally seen a BUNCHA fellas get so wrapped in buying tools that they had no money left for LEATHER (tough to do leather without leather)