amuckart
-
Posts
577 -
Joined
-
Last visited
Content Type
Profiles
Forums
Events
Blogs
Gallery
Store
Everything posted by amuckart
-
How many have you done? It'll probably get easier after 20 or so.
-
Hands are just difficult to armour; "something that will take a hit from a longsword" and "not expensive/difficult to make" are pretty much mutually exclusive as far as I've seen. Lacrosse gloves are about as good as it gets. What you want are steel finger gauntlets with some decent low-profile modern padding inside the gloves, but finger gauntlets are expensive for good reason - ones that fit well take a lot of practice to make. Leather isn't really the right material for this job, it's strength/thickness ratio means it's very hard to get something that will provide reasonable protection without being even bulkier than lacrosse gloves. Not much help, I know, but there are reasons everything you've seen is either steel or costume accessory.
-
Nahh, I had a nasty bout of food poisoning a few years ago and it made me gluten intolerant. It really sucks, because I love beer and gluten-free beer costs more than cider and tastes like someone already drank it.
-
Yes, both in absolute quality (the sander leaves a fuzzy surface and edges) and in time. The sander might seem easy now, when skiving is a new skill you haven't mastered yet, but think about what you're doing when you do it with the sander, having to power it, presumably bracing the leather, and dealing with all the noise and dust, etc. compared to the few seconds lap skiving will take you with a sharp knife and a bit of practice. Now multiply that over your leatherworking lifetime... I taught myself to skive with a 'shoe knife', properly sharp, and a bunch of scrap, over the course of an evening. Half an hour of constant practice and I was getting pretty good, an hour after that I'd gone through a bunch of other types of knife and figured out which ones worked best, and then it was on to other sorts of leather. I've got a bunch of different knives now and every time I've gotten a new one I sit down and play with it in various scraps until I've got the hang of it. I still use the shoe knife a fair bit though. Now if I need to skive a strap end, or a fold over, or whatever, I just pick up a knife and do it. Of course, you also need to learn how to properly sharpen your knives, but in leatherwork that's already a non-optional skill.
-
If it were me I'd buy the thread and wax myself and get the client to buy the leather. It's best to get your own consumables since they'll last several pairs of shoes and give you materials to practice with. What you don't see much of on my blog is all the practice pieces I've burned through. I should probably put more of those up though. Whenever I've come across a new technique I've gone through piles of scrap working it out before trying it on a shoe. Fit is a bit harder, the two shoes I cut in half and put up pictures of ended up that way because the construction was fine but they just didn't fit the feet they were for. Beer in NZ has come a long way since you were here, you should come back and try the Mac's and Monteith's and the other specialist breweries around now. Sadly I can't drink beer any more, but fortunately NZ also does excellent wines.
-
Emailed. One of these days I'll get it online properly.
-
Hi Vince, Making wax isn't particularly difficult or messy provided you set yourself up right and use a disposable pot or a tin can to heat the mix in. I've got step-by-step instructions on my blog. The main thing is to avoid setting yourself on fire, so long as you avoid that you're fine. If you really want to make a mess, try rendering 2kg of tallow from suet sometime. I use shoemakers wax (code) for all my hand sewing these days, shoes or not. It's a bit of a pain at first but once you get used to it you won't want to go back. You can't build anything like as strong a seam without it. If you don't use it, get pre-waxed thread or use synthetic or the threads will rot out of your shoes in no time. The thread you want is 10/1, single strand linen shoe thread. I believe Campbell-Randall used to sell it but I'm not sure if they still do. I bought a lifetime supply off ebay a few years ago so I haven't paid attention to current sources since then. Leffler leather in Melbourne, Australia sell balls of Coats Barbour "Linen Single Shoe" thread in 12/1 if you can't find it anywhere else. Search their online store for THRSINLINSHO. It comes in 4-5oz balls which spool out from the middle. You taper the ends and ply it up yourself then add bristles (or a thin flexible needle). There are instructions for that on my blog too. If you can't find any of that you can use 3-strand dacron/teklon thread but I'm not sure if that can be had in small quantities or not. 12/3 is probably Ok. for closing seams, but you'll want something a bit heavier for the sole seam if you want the shoes to last well. I use 3 strands of #10 for my closing seams and 5-9 strands for the sole seam depending on the weight of the shoe. I wouldn't want anything less than 8/3 for linen in the sole seam. If you don't go the route of using single-strand thread you'll need to un-ply 8-12 inches and taper the ends then wax and re-ply it to allow you to put a needle or bristle on smoothly. It's well worth going through this process to save trying to haul a folded full thickness through awl holes. P.S: Purely for the sake of googling usefully, 'turnsole' is a flower. A turnshoe goes on your foot.
-
Which Glue If Using A Sewing Machine?
amuckart replied to Andrew Chee's topic in Leather Sewing Machines
Interesting, do you know if, and how, this differs from the seamstick tape sailmakers use? -
The other thing you can do is include a calibration card in your picture somewhere it can be cropped out that has white, black and 50% grey squares on it then use that in your photo software to set the white balance.
-
What sort of outer foot are you using?
-
I second the advice to go read Wiz' posts on the type of machine you need to sew leather. It'll save you a whole lot of pain in the long run.
-
Ahh, I see it now thank you. After a bitof googling "Qwik-fix", I think the official place to get that is from http://www.seweazi.com/singer.html
-
Unless you over-oil the stuff at the front of the head where the needle bar is and end up with oil dripping all over your work. Not that I'd know of course...
-
My Experience With A Factory-Direct Chinese 441 Clone
amuckart replied to amuckart's topic in Leather Sewing Machines
Me, not even close. Hell, most of what I know I've learned from posts by people like you, Bob, Wiz and Al Saguto over on the Crispin Colloquy. I'd never do this for money on someone else's machine. That's about right, but finding a copy of the Juki TSC-441 engineers/adjusters manual online made this particular one a bit less painful. Reassembling the cam stack on an old seized up Elna Supermatic without instructions or 'before' photos, that was masochism. -
My Experience With A Factory-Direct Chinese 441 Clone
amuckart replied to amuckart's topic in Leather Sewing Machines
I think there's value in showing what this option really means, and perhaps I'm naïve, but I'd be surprised if any vendors were disappointed I'm posting this (beyond the fact that they spent time giving me quotes and I didn't end up purchasing from them). There is real value in what you vendors do with the machines between getting them from China and sending them to the final owner. If I'd been in the USA I wouldn't even have looked at this option. This is not something that someone who wants a machine that Just Works should do, and if I hadn't already worked on a bunch of machines I would not have gone down this route either after what people have told me about experiences with these machines. I'm also aware I may still need to pay a professional mechanic to get it working for me and service it in the future, but I'm prepared for that if I need to. Ahh, I should clarify this point. I didn't buy this machine direct from the factory, I purchased it from a reseller in New Zealand (I have quotes and invoices for it from an NZ registered company). That reseller is not a mechanic though - he runs a business making and selling parachute rigging and canopies using Hightex machines. The machine was shipped to me directly from the factory in China, but as far as the warranty, and NZ consumer protection laws are concerned I bought it from an NZ company. Because I'm a private purchaser, not a business, if it isn't fit for purpose then the NZ vendor is obligated by law to sort it out. That's the only reason I did it this way, if I hadn't discovered that option I would have saved up and gone with one of the other options I had explored. Shipping the wrong type of motor was the factory's fault, the other bits were the freight forwarder stuffing things up. My machine wasn't as shipment on its own, it came in with other things the reseller had ordered at the same time. The freight forwarder received the whole shipment at the docks and rather than following their instructions they just sent three random boxes to me and the rest to GLH in Queenstown where the rest of the shipment was destined for. In hindsight I think it would have made more sense for them to send everything to Queenstown, sort and verify it and ship my bits back up to me in Auckland, even though that would have added cost and delay. Thanks. So far, so good. The real test will be feeding heavy leather through it under power though. Until I can actually use it to make things, I'll reserve judgement. -
My Experience With A Factory-Direct Chinese 441 Clone
amuckart replied to amuckart's topic in Leather Sewing Machines
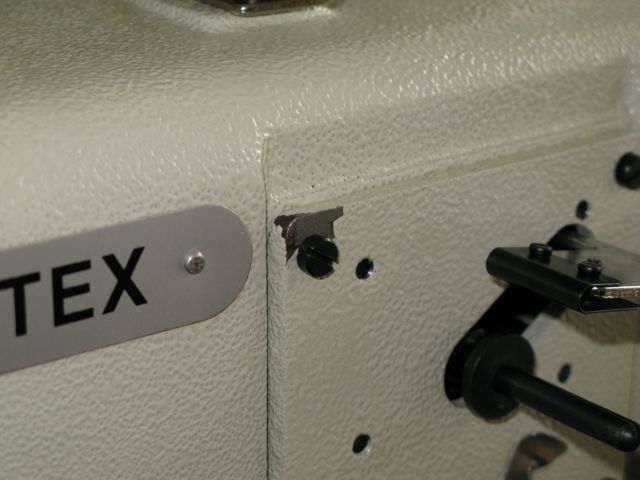
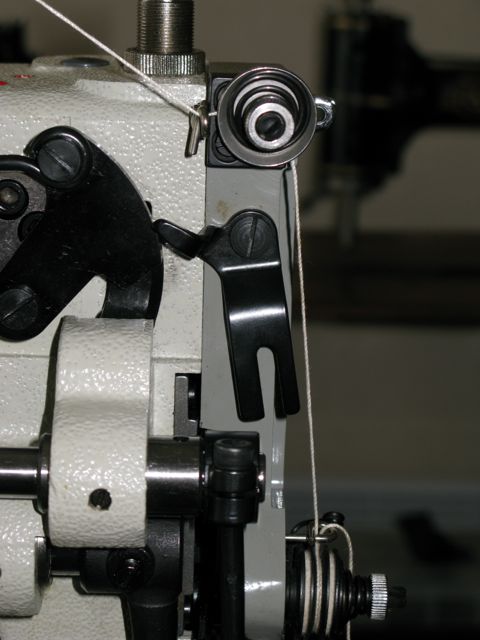
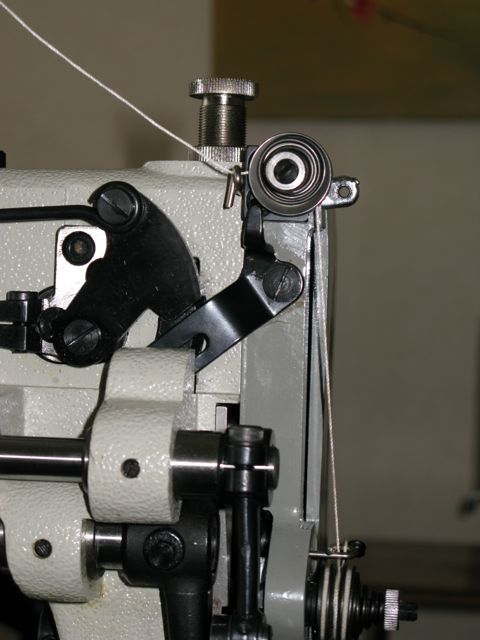
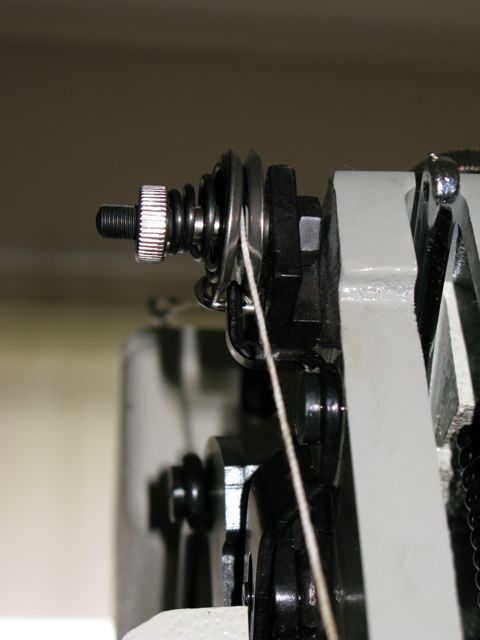
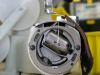
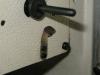
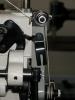
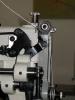
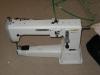
A Bit of Background Having read the comments so far, I figured that a little bit of background about me might help put this all in context. I got into leatherwork through medieval reenactment and pretty much hand stitch everything. Mostly I make reproduction shoes, but I want to start making more modern stuff including casework, as well as do some machine work on reenactment goods where it won't show. I'm strictly an amateur and don't need this machine in any particular timeframe, or for large-scale production work. I originally wanted a new machine that would Just Work out of the box, but research showed me that was something I couldn't afford. I am not a mechanic by any stretch of the imagination - I'm a Pointy Haired Boss at a telco where I spent 10 of the previous 11 years as an IP network engineer. I'm an inveterate tinkerer with machinery and a collector of sewing machines large and small (my house is approximately 50% sewing machines by volume). I've done a bit of metal work, made a few knives and a handful of tools. I can gas weld and braze, though I got rid of my torch because acetylene and bottle hire got too expensive for the amount I did it. I'm lucky enough to know actual mechanics who I can call on if I get really stuck, and people with machine tools if I need to modify or repair any parts (If you think rebuilding a sewing machine is a challenge, try a 100 year old steam tram!) This isn't the first sewing/leather machine I'll have worked on, but it is the first big compound feed one. Among other things I have rebuilt or refurbished several domestic treadle machines and a couple of crank splitters. I've serviced and tuned up a Seiko STH-8 for leather, and taken a Dania 150 curved needle outsoler from a frozen gunked up hulk to re-timed and working. I've also got a Pearson #6 and an A1 in pieces awaiting the soda blaster. None of those would have been possible without the expertise on this forum and the Crispin Colloquy. So, that's the context in which I bought this machine. This isn't a course I would recommend for someone without any experience servicing machines, or who needed the machine in a specific timeframe. If you can't set needle height and hook timing by eye, buy your machine from someone who has done the setup! I still don't know if I'll get the machine going, but if I can't I'll pay the mechanic I mentioned in my initial post to do it for me and watch him like a hawk. Reassembly and Tuning Having cleaned all the shipping grease off of the machine and liberally re-lubricated it with Syntex I got to reassembling the thing. Almost immediately after starting the reassembly I tossed out the screwdrivers that came with the machine - they're worse than useless. The tip twisted the first time I used the big one and they don't fit the screws properly. It was interesting to observe the build quality of the machine as I reassembled it. It is very much as I expected on a machine at this price point; the machined surfaces are even and clean and the castings aren't bad but are only machined on mating surfaces. The general fit is good and I didn't find any major loose parts or screws but there are minor bits of fit and finish that just need a little bit more time spent on them. The castings of the feet and needle plates are pretty good. They're finished to a high polish on the surfaces that matter but with the sort of polished finish that belies the fact that they didn't see much in the way of surface grinding to fine grit before going to polish. That doesn't affect their utility but it's an interesting contrast with the standard needle plate which is a fine and even satin finish and seems to be of a different quality, possibly because it's stamped from sheet rather than cast. The double-toe presser foot didn't want to go on the bar at first and needed a bit of filing before it went on, likewise one of the inner feet (they sent me two) needed going after with a 5.5mm drill bit before it would go on the presser foot bar. The paint shows evidence of insufficient surface prep in places. This isn't surprising on a machine at this price since good surface prep for paint is very time consuming, and therefore expensive. I think that's something which sets more expensive machines apart; the Highleads I've seen have had really good paint, and I've got old Pfaff and Seiko machines with paint that is still perfectly good (if dirty). The paint on the hand wheel was showing signs of light rust through when I unpacked it which cleaned off fine. Again, something I'm prepared to live with for a machine at this price point, and not out of the bounds of what I was expecting. The one place the paint on the body of the machine failed in a way that I might have to care about is on the corner of the bobbin winder assembly where the paint cracked off as soon as I got the screw even slightly tight. If it bugs me enough I'll take it along to the local powder coater with one of the loads of other parts I'm getting done and see if they have a coating that matches. The bobbin winder slipped a lot when I tried it at first. It is driven by a disk on the top shaft on the machine bearing on a rubber tyre on the inside of the bobbin winder mechanism. I got it working fine by loosening the grub screws fastening the disk to the shaft and moving it a fraction towards the tyre. The bobbin winder has a little thread cutter/clip that should cut the freshly-wound bobbin thread and hold the end until you do the next one. It had a bit of rust, having missed out on the shipping grease treatment and needed sharpening to actually work. A couple of minutes with a Dremel and it was sharp and clean. After checking with all the foot combinations I realised the outer foot presser bar was ever so slightly squint, not enough to interfere, but just enough to bug me on the bit I'll be staring at most so I rotated it so the feet all line up square now. That was probably unnecessary but once I'd noticed it I couldn't not straighten it. One part that took me a while to figure out was the tension release which wasn't connected into the foot raising mechanism when I unboxed the machine. It took a bit of staring to click as to what it was when it was just dangling off the side of the head: It's supposed to be connected like this: What it does is that when you raise the foot it wedges the main tension discs open so the thread can be pulled through, allowing the work to be withdrawn from the machine. The last oddity I encountered was the roller guide. The regular little plate that sits to the right of the needle plate has a rebate milled into it for a part it covers that isn't flush with the frame of the machine. The roller guide doesn't have that rebate so it's a bit fiddly to bolt on. Being the only one I've seen I don't know if they're all like that though. The slot in the guide isn't quite milled as long as I'd like so the closest the roller gets is about 5-6 mm away from the inner foot. At some point I'll take the part along to a friend who has a small mill and fix the rebate and slot the way I want. Aside from those relatively minor things, the machine went back together just fine and I have no major complaints with it. Getting it Sewing I can't really get it sewing properly until I have the stand and motor, but with the machine temporarily clamped to a table I can turn it over by hand and make sure it at least builds a stitch Ok and get the lift of the alternating feet adjusted etc. The only heavy threads I have at the moment are #6 linen and #8 core-spun cotton/nylon so I'm not going to do a lot until I've got some bonded poly and thread lube. The bobbins are cast aluminium and seem perfectly good. The hook is pretty much what I expected, which is to say I think it'll work with a bit of fiddling about, but I'll replace it with a Hirose one as soon as I've got the money. It intermittently catches the thread either on the spring or on the back of the hook as it counter-rotates. It's possible this is caused by a timing problem, but if it is it's one that's too subtle for me to work out just now since the timing looks fine to me. The finish of the bobbin case under the tension spring also leaves a bit to be desired and intermittently shreds the thread when withdrawing the work from the machine. This might well be operator error but if I can't figure out what I'm doing wrong I'll go after it with the dremel and polish the thread path, being careful not to sharpen any of the edges. That's about it until I get the stand, which to my frustration still hasn't shown up thanks to ill-timed leave on the part of the vendor's Christchurch staff member whose site the shipment is at.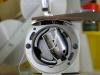

-
Unfortunately that's just a copy of the parts list available from the singerco.com site rather than an operating manual for the machine.
-
My Experience With A Factory-Direct Chinese 441 Clone
amuckart replied to amuckart's topic in Leather Sewing Machines
Absolutely. If getting this machine up and sewing had been at all time sensitive, I'd be stuffed since I still don't have the stand and the vendor told me yesterday that the factory shipped the wrong motor with it - sending a clutch motor instead of the servo I ordered. That's not a huge problem for me, because I have a servo I can pull off an under-used machine here, but if I didn't have that it would be a major annoyance. -
As far as I know there isn't one readily available but these machines are pretty simple so the basics of operation are the same as most any other non-reversing drop-feed machine. There's a parts list on the singer site, and there was a 3rd party service manual kicking around on the 'net some time ago, but I don't think it was a legal copy. What is it you need to know? I've got a bunch of photos of my one being taken to pieces if there's a specific area that would help.
-
Hi Dominic, I had a very quick look and nothing jumped out at me. My advice would be to send them photographs of the kind of work you do and see what they have that would suit. I think you would be best with a machine with a wheel foot rather than a walking foot machine because you can see what you are doing much better with the wheel foot. Wheel foot machines will feed garment leathers just fine.
-
Hi Dominic, You could, straight-stitch machines for garment-weight leather do not take a lot of energy to drive, but it would need to be a custom solution and it would be unlikely to work very well. If you want to have a hand-cranked machine you could use a good quality patcher. Your best bet for extreme control may be a good servo motor that is properly programmed to allow very low-speed work. A more important factor is relentless practice with the machine. It depends on the needles. Industrial sewing needles come in a huge number of different standards. The 100/16 is the metric/singer size, the 134-35 system needles the Pfaff 335 takes are available in sizes that will match the high end of domestic machine needles. According to the 335 brochure on Pfaff's site it takes size 80-100 needles. The Seiko TE-6 takes DBx1 needles that are available in metric sizes from 65 up to 160, so you've got no problem with the range there. I don't know what the range of sizes the machine will use is but I doubt you'd have problems with needles in the 80-110 range.
-
My Experience With A Factory-Direct Chinese 441 Clone
amuckart replied to amuckart's topic in Leather Sewing Machines
Hi Ross, Don't forget my local currency is worth less than the USD, and I'm having to pay taxes on arrival. A Cobra machine is US$2495 + US$650 shipping + around US$400 for the additional feet and plates I got in addition to the stock ones. That's over US$3500 before I've even paid the 15% tax and local shipping costs. After tax and exchange rates that adds up to over NZ$4800. The machine I bought was just under NZ$3000, at my door with all the tax and shipping paid. That NZ$1800 buys lot of my time to set up the machine and tune it. Even if I had to buy, say, a new hook and pay for a local professional to help me if I got really stuck, I'm still coming out ahead. I'm reasonably handy with machines so provided the machine is basically sound and absent any really serious manufacturing defects I figured I would be able to get it going even if that meant taking it all apart and reassembling it clean as my friends had to do with theirs. Yes, this was a minor gamble, given the variable nature of ex-factory QA, but I knew that in the event of serious defects (which I haven't found) I could call on the warranty through the NZ-based vendor and get them fixed. That was a not-insignificant factor in the decision. If I'd been buying a machine for full-time professional use I'd have spent the extra money and bought a Highlead from the local importer/mechanic here and gotten a higher-quality machine fully set up and with local support, but that option was getting on for twice what I ended up paying and I'm a hobbyist so that wasn't justifiable. -
If you're using LR point needles, try rotating it just a tiny bit so the edges are a little more in-line.
-
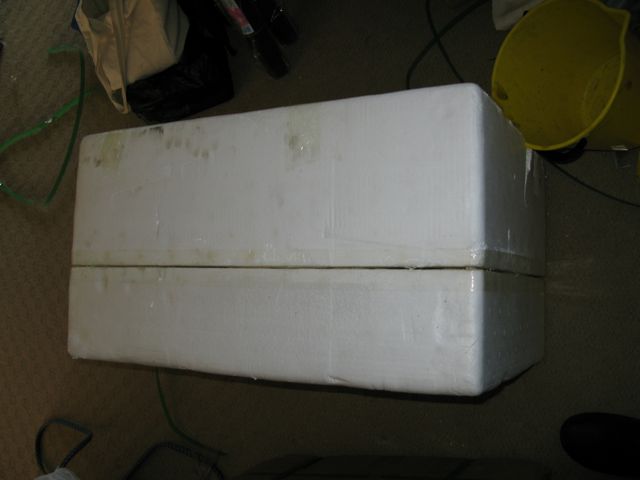
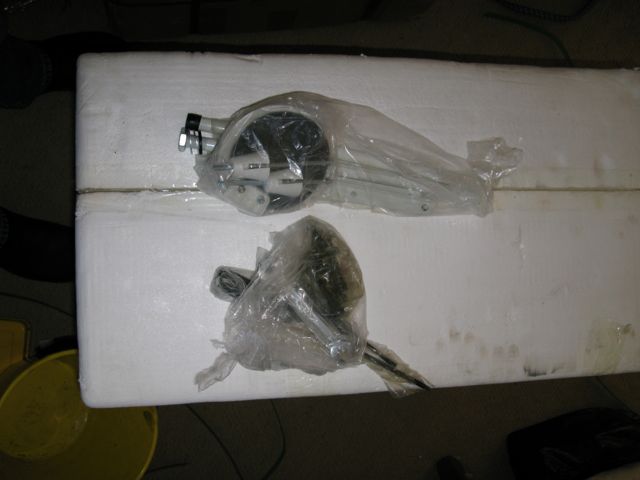
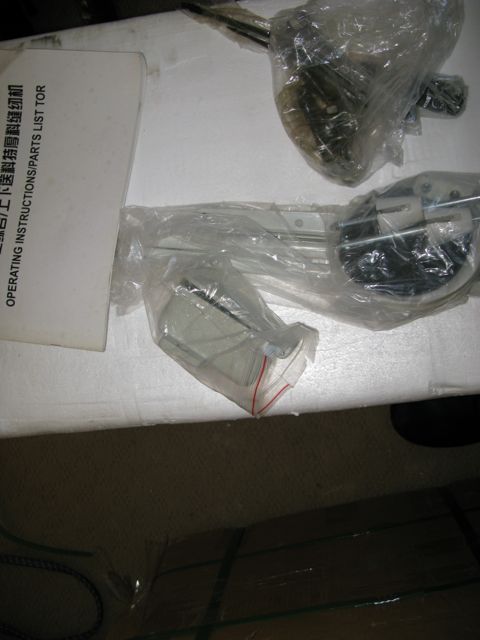
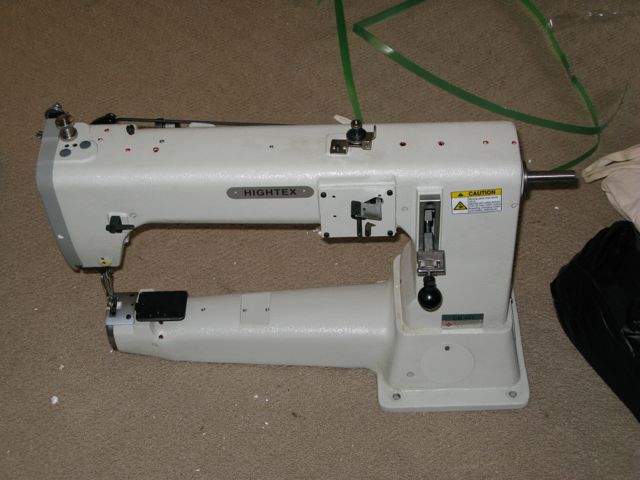
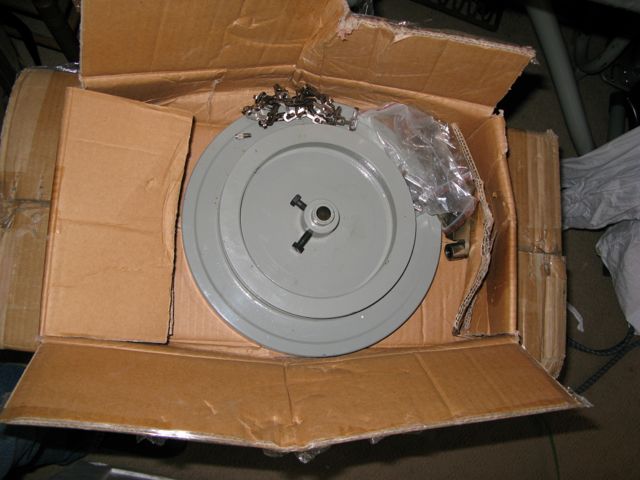
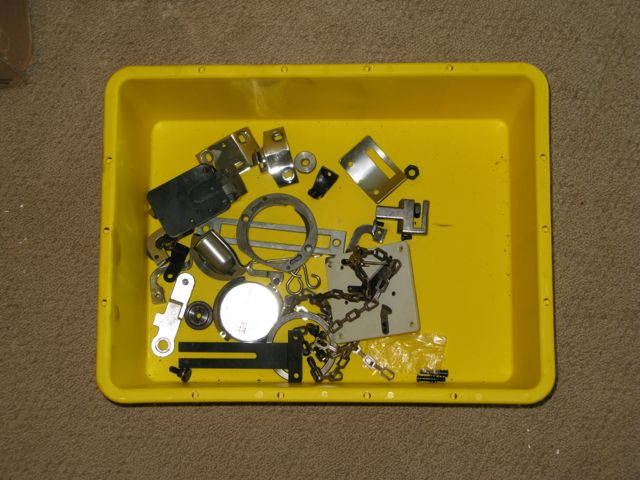
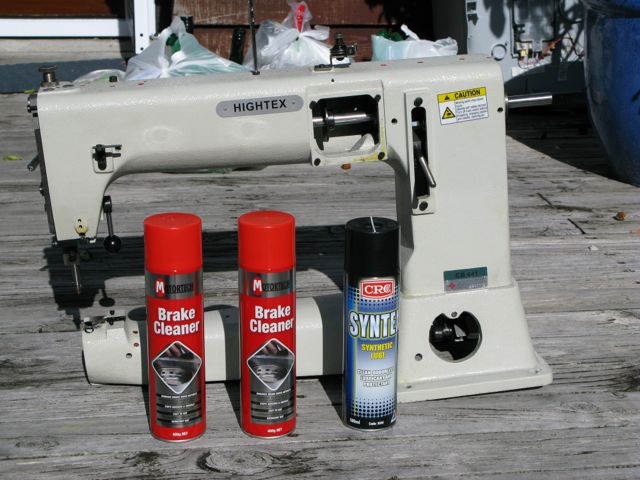
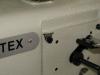
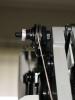
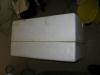
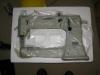
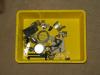
After my thread inquiring about the quality of drop-shipped machines from China I did a lot of asking around and checked the prices of a whole lot of options, including buying from Steve at Cobra or Bob at Toledo Industrial. I priced out buying a Highlead head from a local mechanic/importer (an old school chap who wears a tie and waistcoat in the workshop). I looked at a Seiko CH-8 that I talked to Dan at Campbell-Randall about feet for, and I costed out buying just a head and building a stand v.s. buying both. I even thought about just saving up for a Campbell high lift, but that fell into the Wife Acceptance category of "you can buy it, but you'll be sleeping in the garage with it". One day though... While I was working through these options people on this board, and all the dealers I pestered with questions were incredibly helpful so this is a public thank you to you Art, Wiz, Bob, Steve, Dan, Donna, and everyone who took the time to help educate me. A while ago I met someone in NZ who'd bought a Hightex (the brand Cowboy machines are badged with outside the US). Their initial impression of the machine was, to put it politely, that it showed no evidence of quality control. They also had trouble getting support from the seller, who wasn't based in NZ. That put me off the brand, but since then I found an NZ-based Cowboy reseller, and the owners of that machine stripped, cleaned, rebuilt and adjusted it and said it works well now. After covering and costing out a lot of options, I bit the bullet and ordered a 441-AE knowing it was going to come to me straight from the factory in China and need at least a jolly good tune up. I wasn't in for the same unbox-and-go experience someone buying a Cowboy from Bob would get but cost, and buying from an NZ-based reseller (which meant as a private individual I get the benefits of New Zealand's good consumer protection laws if it was a total lemon) were the deciding factors. The reseller I dealt with here is a manufacturer of skydiving equipment who uses a lot of Hightex machines. He was responsive and helpful, and barring the shipping being quite a bit over what he quoted, I found the whole process good. In the end the shipping was a small fraction of the cost and not a major issue. A hair under NZ$3000, tax and shipping included, got me the machine, stand, motor & speed reducer, all the optional feet and needle plates, sewing guide, and even a spare set of blanket feet to modify into an inline foot set. The only bit I didn't get was the table attachment. The next best option I priced out was over half again as expensive, and for that money I was prepared to sink the time into getting the machine working and paying for professional help if required. Delivery and Unboxing A couple of weeks ago I heard from the seller that the machine was in the country so I paid the shipping and taxes and started waiting for it to show up. Unfortunately the freight forwarders with the machine were muppets, but after ten days of "It'll be there before 4pm tomorrow, honest" it finally arrived earlier this week. That's when I hit the second snag, rather than reading the labels on the boxes and the instructions with the shipment, the freighters just put three random boxes on a pallet and sent them to me. I got my 441 head fine, but found two clutch motors and a Sailmaster zigzag machine in the boxes I was expecting the stand in. Annoying, but no fault of Hightex or the chap I bought the machine from. The machines arrived on a pallet in cardboard boxes. The boxes had taken a bit of rough handling but the internal polystyrene liners were undamaged. In the main box was the head, manual and parts, and a smaller box with the wheel and thread stand. Most bits were in plastic bags. The machine was greased for shipping and wrapped in plastic. They could have done a better job greasing and wrapping the hand wheel, it had some rust on it when I unboxed it. After checking everything looked to be there I stripped all the minor parts off, removed the shuttle race, bobbin winder and covers, and took it all out the back with a couple of cans of brake cleaner and some good synthetic oil (I use CRC Syntex on everything from featherweights to my Pearson, it's great stuff) (sorry about the recycling in the background) Before going after the bobbin winder with brake cleaner I took the rubber tyre off, but other than that I just saturated the machine and flushed everything thoroughly with the cleaner. It did the trick, the runoff was yellow-brown and had bits in. Two cans was just about enough but three would have been better. After that I carefully but thoroughly oiled the whole thing with Syntex, put the hand wheel on and it all turned over perfectly smoothly with no clunking or binding. Next, reassembly tuning and threading for the first time.


-
That's an old machine which lacks reverse and is probably going to be very difficult to find parts for. I don't know what second-hand machines cost in Italy but EU1060 seems like a lot for it unless it's had a complete mechanical rebuild rather than a basic refurbish and even then it seems like a lot for a machine that old. I think you'd be better off looking at the price of the Seiko and seeing if you can find one second hand, and if it fits in your budget I'd get one of those over the older Adler. The newer machines will last you longer, and the lack of reverse on the old machines just gets annoying unless you pretty much grew up with it. If a newer machine is out of your budget, check over the Adler very carefully. Hold the wheel and check for any play in the needle bar and shuttle carrier. Unless the're good and tight the machine won't sew consistently.