


amuckart
-
Posts
577 -
Joined
-
Last visited
Content Type
Profiles
Forums
Events
Blogs
Gallery
Store
Everything posted by amuckart
-
Parts Compatibility Between 29K Variants
amuckart replied to amuckart's topic in Leather Sewing Machines
Thanks Kel, I've got a good manual for my machine (thanks Smithsonian!) but it doesn't have the exploded parts diagram. I've never seen an exploded parts diagram specific to the '58, nor a list of parts that differ from the '58 to the '71, which as far as I can tell is functionally the latest model Singer made. I've found a good one for the 29k71,72,73 though and by the looks of things you *could* change a small bobbin to a large bobbin machine by changing out the needle bar, rocker arm, piston joint, entire rack assembly and all sub-parts, the main drive shaft and the main cam track wheel at the back. Possible, but not easy, cheap or worthwhile! That said, large bobbin patchers are like hen's teeth in this part of the world and even second-hand ones in sewing condition go for four figure sums, so it mightn't be so stupid after all if'n I ever get my hands on a second post '56 machine. I'd still like to know for sure if '71 parts will fit a '58. I need to replace the rack and pinion in mine along with the Feed Motion Ring Slide Bar and and Foot Bar, and those parts aren't so cheap I'm willing to buy them on the off chance they'll fit. -
I have a Singer 29k58 that I am finally getting going. I'm wondering if anyone can tell me whether parts made for a 29k72 head will fit a slightly earlier model? I need a handful of parts for inside the 'head', new foot lift parts etc. I'd also like to replace a couple of the internal driving gears because there's a bit of slop in this one. Not enough to cause real problems but I may as well do them while I've got it apart. Another thing I'm wondering is whether it would be possible to replace the entire rack assembly of a small bobbin model like the '58 with the rack assembly of a large bobbin model like the 72, thereby converting it to a large-bobbin model? (Assuming I can ever get the taper pin out to get the rack assembly off!) Thanks.
-
The 545-H4-6/01-CPLMN is the model. The basic model is a 545. If you google Pfaff 545 you'll find information on the basic type. If you google "Pfaff 545-H4-6" you'll find a heap of info.
-
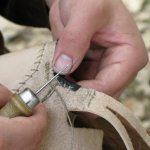
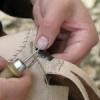
A quick google image search turned up this picture, which shows that the flap is lap-skived and stitched on.
-
Medium-low temperature, and keep an eye on it. If it starts to smoke, take it off the heat right away and let it cool then try again at about half heat. The other way to do it is in a pot in the oven at about 90 degrees (Centigrade) but make sure you're not using one with a plastic handle!
-
Get a cheap saucepan from a charity shop and use that. I pour waxes into a small muffin pan to cool. The sides are tapered so it's easy to get out. Tinfoil cupcake holders also work well.
-
Want To Learn To Make 19Th Century Footwear
amuckart replied to royalscot's topic in How Do I Do That?
Start with 18th century stuff, which is oddly better documented, and work from there. Get yourself a copy of Al Saguto's translation of M. de Garsault's L'art de Cordonnier which is currently the best book on pre-industrial modern shoemaking out there - probably the best resource ever written on the topic in English. If you buy it from Williamsburg, rather than from Amazon you directly support the people who made its publication possible. There aren't any useful published resources I'm aware of on 19th century shoemaking, but if you subscribe to the Crispin Colloquy and introduce yourself there, you'll find people who are most likely to be able to help you, including Jesse Lee Cantrell, who is part of an unbroken line of shoemakers and apprentices stretching back through the ACW period. -
Thin Sewing Awls: I Need A Recommendation !
amuckart replied to swivelsphinx's topic in Leather Tools
Awls aren't terribly difficult to make so long as you're willing to go through a few practice pieces. Start with some high carbon steel stock that's close to the size you want. For really small stuff 'music wire' from a model supplies shop is good. For bigger stuff I've used various things from spring steel offcuts and old allen keys to concrete nails from the hardware store. Grind off all the bits that don't look like the awl you want. Stare at the result, repeat until you've got something that works for you. The tip is the important bit, I've found that for really small stuff an oval blade works better than a diamond one, and is easier to make. -
Aaaand that @#!@#$!@#! link has broken again. The file is there, honest, my website software is just being a pain. I'll try and fix it.
-
It's probably due to wear in the parts that move the foot. The various parts that move the foot to feed get worn and slop. They also feed a lot shorter the thicker the material you're sewing. The best explanation I've seen for how the feed works, is this one, by Ken Jerrems: http://alasdair.muckart.net/files/KenJerrems29k13/KenJerremsSinger29K13.pdf He shimmed his one up with brass, but brass wears real fast against steel, so if you want to do actual work with it, talk to Bob at Toledo Industrial, and get the relevant parts from him.
-
What Is A Great Machine For Mid Weight Work?
amuckart replied to Prince's topic in Leather Sewing Machines
A wheel feed machine has a roller instead of a pressor foot. Modern ones have the wheel driven in time with the lower feed. Some also combine needle feed. The roller makes turning corners much easier, and because it is off to one side of the needle it's much easier to see what you're doing with decorative stitching. All the cowboy boot makers I've seen use roller foot machines for decorative work. -
Don't worry, it's not just you. They are brief and vague. The only reason I got as far with my 7441 is because I went in with a lot of familiarity with different machines already. If that'd been my first machine and the instructions were all I had, I'd have been completely lost. There's definitely a market for a well-written 441 operators manual, that's for sure.
-
What Is A Great Machine For Mid Weight Work?
amuckart replied to Prince's topic in Leather Sewing Machines
By my count you're up to three machines so far. For decorative stitching ou want a wheel-feed machine, for light to mid weight work the Cobra 3 is too big for you want something like a Seiko LSC8 and I'm not sure what you mean about "sideways stitching option". The thing about industrial machines is that they tend to be made to do one thing, quickly and well with a minimum of down time. That tends to limit their inherent flexibility. -
Singer Threads - Tap & Die Set
amuckart replied to Anne Bonnys Locker's topic in Leather Sewing Machines
Bob, Thank you! Information on Singer threads is incredibly difficult to find, the most usual response I've seen is "they're wierd and proprietary and there's no information about them". Do you sell the kits? Thanks again. -
You could make a small version of the angled jig on Brent's Sharpening Pages. It'd work well for swivel knife blades and fit any blade type you wanted to.
-
Juki 441 Clone Versus Adler 205-370
amuckart replied to Steven Kelley's topic in Leather Sewing Machines
The Cowboy should have this too. My Hightex 7441AE, which is the same machine from the same factory, has a part connected to the foot lift mechanism that spreads the top tension plates. Have a look at this post on my thread about the machine about midway through the post there are pictures of the mechanism. it doesn't disengage the lower 'wrap-around' tension mechanism though. -
Briefly. Maybe.
-
 All I can say is I hope you have really small hands! That thing's terrifying, I have whole machines smaller than that! What does it go on?
 -
Oil it lightly and leave it in the sun.
-
It's a Rafflenbeul outsoling machine. They seem to be more common in Europe than elsewhere. I desperately want one but I've never seen one in AU or NZ. As with most outsolers, they're good for boot and shoe soles, but basically useless for anything else because they have such a tiny throat depth. Googling for "Rafflenbeul doppelmaschine" will get you some info on them but the vast majority of it is in German.
-
Can Anyone Help Identify This Machine
amuckart replied to ELeBlanc's topic in Leather Sewing Machines
You have the feed dog for crepe soles, it's a different unit to the channel knife. I have the same on my one. Somewhere that sells needles should also be able to sell you a channel knife. I believe the channel knife also acts somewhat like an awl, there is a protruding bit on the left of the knife that aligns with the needle during the feed stroke, which makes a lot of sense in the context of hard outsole leather. This post at the Crispin Colloquy shows pictures of the channel knife. -
Feed Dogs On Q'stitch Colts (A 441 Clone)
amuckart replied to Handstitched's topic in Leather Sewing Machines
If you loctite the screw in, what do you do when you need to change feed dogs? Do you have to clean out the hole again? -
Can Anyone Help Identify This Machine
amuckart replied to ELeBlanc's topic in Leather Sewing Machines
It's an old Frobana/Gritzner. It looks filthy, but complete as far as I can tell from the pictures. I have a manual for it, PM me your email address and I'll send you a copy. It won't sew anything under about 1/4"/6mm thick. It's designed for outsoling shoes and boots, and that's all it's really good for. It's really good for that though, if you don't mind the two-cranks-per-stitch action of the machine, which gets real old real fast until you motorise it. Needles for it can be had, but they're about 8euro each. Google and you'll find the crowd in Europe that sells them. The needles are enormous and don't break easy and can be sharpened so you only need a handful. One down side of the needle size is that they cut a pretty big hole relative to the thread they'll pass, but in the aesthetic of their designed task (outsoling shoes) that isn't necessarily a problem the way it is for other leatherwork. It uses different needles to the Junker & Ruh SD.28. I have a slightly newer one that came to me filthy out the back of an orthotics shop. I degreased and cleaned it up well, and the foot lift release was still so siezed I didn't realise it moved until months later. I like them, they're built like swiss watches and work very nicely for their designed task in a package that's far more compact than a curved needle & awl machine. -
Singer 201 For Stitching 4.5Mm Leather?
amuckart replied to sukitawdry's topic in Leather Sewing Machines
IMO, you'll waste your time and destroy an otherwise great sewing machine. "Remarkably hefty" for a domestic machine is still puny and weak by the standards of an industrial machine designed to sew leather. You could do wallets and clothing weight leather on a 201 if you're willing to accept wearing it out faster, but 4.5mm is way out of its capabilities. Size 92 thread will look strangely thin on something that thick too. Have a read of Wiz's "The Type of Machine you Need to Sew Leather" thread, pinned at the top of the sewing machines forum. -
From what I've read the ensifer ones are made of hard rubber. They're just articulated with leather. I've got enough experience with WMA and leather to say I've never seen any leather, even hard rolled sole bend, that I would use for hand armour for bouting with steel swords that wouldn't end up as bulky as a lacrosse glove or worse. I'd use it for shinai, sure; rattan, maybe; steel no way, no how. The only things I've seen that will give you adequate protection and enough hand mobility to not stuff up the subtleties of technique are steel or equivalent metal, or kydex and the kydex is a bit dodgy IMO. By all means find a Milanese mitten gauntlet pattern and make it out of leather, but test it really really well before you trust it to protect you from someone else hitting you in the fingers.