barra
-
Posts
836 -
Joined
-
Last visited
Content Type
Profiles
Forums
Events
Blogs
Gallery
Store
Everything posted by barra
-
I have heard many and various explanations as to reference point, so many that it makes my head spin. Prior to the crash this explanation was offered and it was the one that I found the simplest. I am sure Bruce mentioned it something like this. Take the lowest point of the bar at the front (full). Take lowest point of bar at rear. Measure the distance between the two points. From this measurement you can find 7/8" the distance between the two measurements, 3/4" etc keep up the comments. I'm finding it all very informative. Barra
-
Ah the marvel of ergatrons. I Love the idea of being able to sit in Australia and listen to radio in another country. I have a couple of favourites on the computer back home. Lets see if I can remember them. I sometimes just use launchcast and pick from the various genres. http://www.cow97.com/ http://metalinks.com/txradio.htm (lots to choose from) http://www.warpradio.com/ http://www.usliveradio.com/country.html I also listen to go country 105 (the re-incarnated KZLA)
-
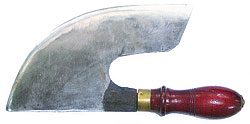
This is the Dixon bridle cutter knife. Your knife looks cool Scouter and for the price you can't go wrong.

-
Civil War (Federal) Saddlebag pattern, anyone?
barra replied to DeerCreekSaddlery's topic in Patterns and Templates
K. Time to bring on the big guns (LITERALLY) http://www.army.mod.uk/kingstprha/saddlers.htm Someones still making the trees, we just have to find out who. Barra P.S. Saddle-Bags The saddle-bags are composed of 2 pouches and 1 seat, the ends of the seat sewed to the pouches. Each pouch has 1 back, sewed to the gusset and upper part of inner front with a welt; 1 gusset, sewed to the back and to 1 outer and 1 inner front with a welt; 1 flap, sewed to the top of the back and to the seat by 2 seams; 1 flap-billet, sewed to the point of the flap; 1 chape and 1 buckle No. 11 A, sewed to the outer front; 1 billet and 1 buckle No. 11 A, sewed to the chape. The seat is sewed to the pouch by the same seams which join the flap to the back of the pouch. It has 2 holes for the foot-staples, and 1 hole for the saddle-bag stud; 2 keystraps, sewed to the seat near its ends; 4 lacing-thongs for the pouches. -
Civil War (Federal) Saddlebag pattern, anyone?
barra replied to DeerCreekSaddlery's topic in Patterns and Templates
Let me investigate further. I have contacts in the light horse world. I do have 2 genuine UP trees that I will get around to building saddles on one day but neither are swivels. I also know of someone in Canada who has something to do with UP saddles so I'll look there too. Let's see for starters you could try Mike Goodall in Canada (He used to come into the shop in Australia that I learned saddlery in) http://saddles.fsjames.com/ http://www.leathergoods.com.au/lighthorse.htm (They make saddles but I don't know where they get trees from) http://www.lighthorse.org.au/ (maybe someone on these forums can point you in the right direction) Barra -
Civil War (Federal) Saddlebag pattern, anyone?
barra replied to DeerCreekSaddlery's topic in Patterns and Templates
Someone here should be able to point you in the right direction. www.militaryhorse.org The Sub link below has a Mclennan area http://www.militaryhorse.org/studies/materialculture.php Barra -
I tend to use whatever contact is going. On a side note does anyone think dextrine/hide glue still has a place in this day and age for certain applications. I don't think that we would ever totally go back to it over modern contact cements but with hide glue you can reactivate it with the application of mild heat. With contact cement, yes you can apply wet to both surfaces and get a little lee way with repositioning before it goes off, however once it has gone off that's it, game over. Barra
-
Wait til I post the pics of the winning most stained coffee cup competition of this deployment. There is still a little time for further cultivation Barra
-
ahhhh Coffee or for my NJ friends CAWFEE. I do like my coffee. My work colleagues know not to bother me till at least the first coffee and not to ask for stuff til the third. Never been a real fan of the home Perculators but funny enough the cheap Mr coffee has been one of the best. They never deliver a hot brew and ALL dribble. At home I must admit I am a fan of the plunger. I grind my own in qantities for the one plunger at a time. In the workshop I do have an old Perc that goes 24/7 unless I'm using the hotplate to melt beeswax or warm oils (not in the coffee jug). I stayed in Cambria Ca a few years ago and on the way back to Newhall, stopped in boot barn Paso Robles. I was going thru the rack of Carhaart coats when I turned and there she was, the love of my life. Sitting there was THE biggest coffee mug I had ever seen. I bought it on the spot and used it at work until alas we had a slight accident. It has now gone where all good coffee mugs go to retire. My desk as a pen holder. Oh yeah it had meetings suck on it and I would take it to meetings too. Now coffee drinking in serious quantities in Australia is a relatively new thing. Being of predominately British stock we were mainly tea drinkers. I still chop and change from coffee to tea. I love my Dilmah. Coffee like we have today was not seen in great volume til the mass migration after the war. In the workshop I just grind up whatever I get on sale at the supermarket but my all time favourite comes from a micro roasting house in Cali. http://www.newhallcoffee.com/ I'm not a fan of the large chain coffee stores. 1 the price and two, call me old fashioned but I like my coffee to taste like coffee and not a mochafrappalatteechino'd hazelnut hot fudge sunday. Also beat me silly but give me my coffee in a china mug and not a cardboard cup with a sleeve. Barra
-
Proud Papa
barra replied to TwinOaks's topic in Purses, Wallets, Belts and Miscellaneous Pocket Items
Add those to the Good Stuff list. That is simply priceless. Barra -
Never sell yourself short. You are a skilled Tradesman. In my experience terms like Artisan and Leathercrafter conjour up images of cottage craft hobby type industries and people expect to pay for your time like it is a hobby. You are a leatherWORKer and as a modern society we are used to the concept of paying someone accordingly for their WORK. To add to what David and Bruce said. The mechanic or plumber charge what they do because they have earned the right. In most cases to get a trade you have invested as much blood sweat and tears getting your qualification as anyone who went to University. While we may inwardly baulk at the car repair price we pay it. It is also my experience that some people think that a saddler is a ye olde world trade and should still receive ye olde world wages. As said just because the item was originally manufactured in the third world does not mean you then have to base your repair price on what the third world pays. If that means your repair is more than the item is worth, so be it. Never be afraid to say no to a repair. If you are also a retail shop, it can be beneficial "sometimes" to under price the repair if you have dropped another job to carry out a customers repair on the spot. Making them feel like they are the most important person can reap more money out of them. As an example if you charge $15 for something you perhaps should have charged $25 and they end up walking out of your store with $100 of impulse buys, your a winner. They also leave feeling special and then the word of mouth spreads. Do not base your business on repairs. Treat them as a sideline to get customers into your store. Never let a person leave the shop with a repair without payment unless you have a seriously good relashionship with them. Also avoid the love jobs for family and friends. Barra.
-
Maybe it was Jeremiah Watt at http://www.ranch2arena.com/home.html
-
You have no Idea how true that is right now from where i sit.
-
I use a similar method and my technique would vary slightly depending on the strap width. I have found that for strap roundings up to about 1" wide, take off the edge on the flesh side for the length you want rounded with a fairly large edge tool, make a groove for your stitches to sit in then mark your stitches. Then moisten in warm water. If your doing a lot of rounding then the strap is partly molded on a rounding board. This is a plank that has had U shaped grooves routed of various widths the whole length of the board. A workable one size fits all alternative can be made with a block of wood about a foot long that has had a V cut out of the length. Line the V with thin scrap chap type leather. By placing the strap into the V groove you can commence the rolling by firmly rubbing with a suitable smooth implement like the handle of an edge tool or a bone folder. A few gentle taps with the tack end of a saddlers hammer also adds gentle persuasion. There is no real need to add a core because by only taking off the flesh side edges you have left the thick, firm leather in the middle and this forms your core (minimal splitting may be required). Stitch and then trim close to your stitches with broken glass or sandpaper and then use your favourite burnishing and/or edge dying method. Wider straps with thinner leather will need a core. Barra.
-
OK I have a few but one is a doozy. I have split the thumb open with a plough guage blade. For those not familiar with the blade it is sort of meat cleaverish. I have speared myself with a seat awl/scratch awl right thru my hand but for your viewing pleasure the doozy. I was in the Army and doing a bit of saddlery on the side. I was being an idiot with a sharp knife (we all know a blunt knife is more dangerous than a sharp one). Anyway major semi digit severing incident occurs. I just cleaned up the wound and stuck some sticking plaster on it. After a week out in the bush I thought I had better change the plaster. Well The now well developing pus matched my Army greens nicely. Off to the Doctor I am now forced to go to get it seen to properly. I come out with this bandage from hell that made using the hand at all rather difficult. That afternoon we were on the range firing 84mm anti tank weapons (bazooka in lay terms). This thing is a two person operated weapon that has a back blast danger area so it is equally dangerous from both ends. I fired a few rounds and then it was my turn to load. In goes high explosive anti tank round, back end is slammed shut and a slap on the firers helmet the split second you slam it shut lets him know it is ready to fire (remember back blast from bum end) As I tapped firer with right hand it took a second or two to work out why left hand would not come down. That God forsaken bandage is stuck in the back of an about to be fired anti tank weapon. I near knocked off the firers head with numerous stop, stop, stop taps on the helmet. I have included this story because the initial wound was caused doing leatherwork. Then there is the time Airforce buddy who caught his shirt sleeve in industrial sewing machine when learning to sew, panicked and put his foot down. This act then literally fed him into the machine. I have Open Range on DVD and might have another viewing tonight. Barra
-
Rsg3. I really like the simple yet effective bracket you have used for the pedal mechanism. How have you, Luke and any one else for that matter formed the bend in the timber for the jaws. I being the worst carpenter God ever shovelled guts into have tried numerous methods with varying degrees of success. Barra
-
One Ripper set of chaps mate. What did you use to lace. Is that red hide? Barra
-
I'm with Bruce. There are a multitude of contact adhesives/ AP cements out there. I just came across this info and i have posted it FYI For those customers that have been purchasing Leather Dyes, Stains, and Finishes Please read the following information in regards to the sale and shipment for Leather Dyes, Leather Finishes, Leather Stains and Leather Adhesives in the state of California: Please be advised that due to the California regulations limiting the VOC (Volatile Organic Compounds) content in retail products, none of the items listed below may be sold to a retail customer. The items bound by the new VOC (Volatile Organic Compounds) regulations and can only be purchased for commercial or manufactual use and cannot be re-sold or placed on a retail shelf at any time in the state of California. The following products manufactured by Fiebing Company Inc., in the sizes specified will not be for sale in the State of California as of June 2007, Although we may be granted an extension until December 31st 2007. Bulk and larger sizes of these products can be sold to manufacturing companies in the state of California but can never be sold as retail products to customers or shipped. The leather dyes, leather finishes and leather adhesives manufactured by Feibings and included under this new law: 7 ounce Fiebing's Reptile Cleaner (Aerosol) 5.5 ounce Fiebing's Boot Slip (Aerosol) 6.5 ounce Fiebing's Boot Stretch 5.5 ounce Fiebing's Water and Stain Protector (Aerosol) 10.5 ounce Fiebing's Water and Stain Protector (Aerosol) 4 ounce Fiebing's Silicone Shoe Kote 4 ounce Fiebing's Leather Dyes (All Colors) 4 ounce Fiebing's Professional Oil Dye (All Colors) 4 ounce Fiebing's Leather Stain (All Colors) 4 ounce Fiebing's Antique Finish Paste (All Colors) 4 ounce Fiebing's Dye Reducer 4 ounce Fiebing's Deglazer 13 ounce Fiebing's Saddle Lac (Aerosol) 11 ounce Fiebing's Leather Sheen (Aerosol) 4 ounce Fiebing's Composition & Neolite Edge Ink (All Colors) 12 ounce Fiebing's Silicone-Lanolin Saddle Oil (Aerosol) 4 ounce Fiebing's Leather Balm 4 ounce Fiebing's Shoe Stretch 4 ounce Fiebing's Spot Remover 2.5 lb. Fiebing's Silicone Boot Polish 4 ounce Fiebing's Edge Dye 5.5 ounce Snow-Proof Water and Stain Protector (Aerosol) 10.5 ounce Snow-Proof Water and Stain Protector (Aerosol) 5.5 ounce Kelly's Water and Stain Protector (Aerosol) 10.5 ounce Kelly's Water and Stain Protector (Aerosol) 4 ounce Kelly Cobbler Dry Cleaner 5 ounce Kelly's Suede Renew (Aerosol) 5 ounce Kelly's White Shoe Foam (Aerosol) 11 ounce Kelly's Instant Shine (Aerosol) 4 ounce Kelly Cobber Leather Dye (All Colors) 4 ounce Kelly Cobber Suede Dye (All Colors) 4 ounce Kelly Cobbler Waterproof Heel and Sole Dressing (All Colors) Products that are not Fiebings that will no longer be compliant with California's new Standard as of January 1st 2007 include: Barge Cement 2oz (Contact Cement) Barge Cement Quart (Contact Cement) Barge Cement Thinner Quart Barge AP Cement Thinner Gallon Tanners Bond Rubber Cement 4oz Tanners Bond Rubber Cement Quart Tanners Bond Contact Cement 4oz Tanners Bond Contact Cement Gallon Tanners Bond Cement Thinner Quart Dr. Jackson's Water Protect Spray 10.5oz (Aerosol) Neat-Lac Leather Finish Pint Neat-Lac Leather Finish Quart Neat-Lac Leather Finish Gallon Neat-Lac Leather Finish Gallon Neat-Lac Leather Finish Spray 11oz (Aerosol) Super Shene Spray 11oz (Aerosol) Tandy Pro Dye 4oz (All Colors) Tandy Pro Dye Quart (All Colors) Tandy Pro Dye Solvent 4oz Tandy Pro Dye Solvent Quart Tandy Pro Dye Pack Master AP Cement Gallon Master AP Cement Thinner Gallon Master Quickshine 13oz Spray (Aerosol) Barra
-
Keith. Thanks very much for the explanations. I am now armed with enough info to research hardware further and I totally get the rivet doming explanation. Your right, there are enough styles to blow your mind. I do like to add what are essentially minor little touches to my work in order to set off the job. Barra
-
Bruce. That is what I was trying to say, but somehow my version now looks like total gibberish. Barra
-
My understanding is they were developed so that a rope would not catch on the cantle. Sort of an up and over ramp if that makes sense. Barra
-
I actually have 2 questions and am going to make two distinctly seperate posts. My first question is on rigging hardware. I have relished these posts for a while now and have tried to absorb information like a sponge. Just to recap post crash, the western saddle is a new concept for me. I totally get the various rigging styles, flat plate, in skirt, D ring etc. I get the concept of full, 7/8, 3/4 rigged. I know a 3 way rigging plate from a ring and a ring from a D. what has added mild confusion is people are now referencing numbers. It's a 550 or a 777 etc. Are there any good reference sources to explain saddle rigging hardware. Keith. You made a couple of suggestions regading Steve's saddle that I am not 100% sure what you meant. 1. I usually have the top of my cut-out inside the ring to be about the bottom of my skirt, and rivet the ring a little higher in the flat plate. Q. What do you mean by cut out? 2. I'm still not 100% sure what you meant by doming of the rivets. Thanking everyone in advance. Barra
-
Would like info, please
barra replied to hpfarms's topic in Saddle Identification, Restoration & Repair
Could It be A Cullen instead of Culler Barra -
TM. Try http://www.thehcc.org/ Check out the texas photo and Crispin colloquay (SP) links as well there are a couple of others under the where are the bootmakers topic. Barra
-
For the technology challenged leather workers
barra replied to TwinOaks's topic in Leatherwork Conversation
So this is where they moved the joke folder. Mate that was truly funny. Barra.