Josh Ashman
-
Posts
1,183 -
Joined
-
Last visited
Content Type
Profiles
Forums
Events
Blogs
Gallery
Store
Everything posted by Josh Ashman
-
Skirting is generally sold by the side, which is what you'd want. Yes, the fenders and jockeys would be cut out of the same leather and you should be able to get them from one side. Where the pieces are cut from the hide is critically important. Pick up the books John mentioned above and they will give you a bunch of insight on where to cut what and things to look for and think about when cutting saddle parts.
-
I agree with what John has noted above and will only add that drywall screws are also a good choice. I use galv box nails and blue tacks to some degree, but the drywall screws are handy and easy to get back out when needed. Ol toot also mentioned them a while back and he has much more experience than I do. Good luck!
-
 If it were me I'd use 11/13 oz skirting leather. If you bought a full side you'd have plenty of leather to replace both stirrup leathers and both fenders. You could also buy pre-cut leathers and fenders if you didn't feel up to cutting them. I wouldn't replace just the one side and I wouldn't reuse the stirrup leather on the side you did replace. I'm not sure that you couldn't replace the saddle for the amount of money you'll put into repairing what you have, but if it's an exercise in learning there wouldn't be a point in that. If you make your own, ensure that once you rivet the bottom of the leather and fender together at whatever buckle you use that you fold them where they will go over stirrup itself before you rivet the top of the fender to the leathers. If you make them flat then the fender will be too tight when it goes around the stirrup. Good luck with your project. Josh
 -
Mexican loop question
Josh Ashman replied to dikman's topic in Gun Holsters, Rifle Slings and Knife Sheathes
I make the slots 1/8" wider than my flattened paper pattern on each side, so 1/4" wider overall. And I make my paper pattern with the top center of the pistol laid on a fold line then "rolled" to one side and the edge of the holster 3/4" from the edge of the pistol. -
Mexican loop question
Josh Ashman replied to dikman's topic in Gun Holsters, Rifle Slings and Knife Sheathes
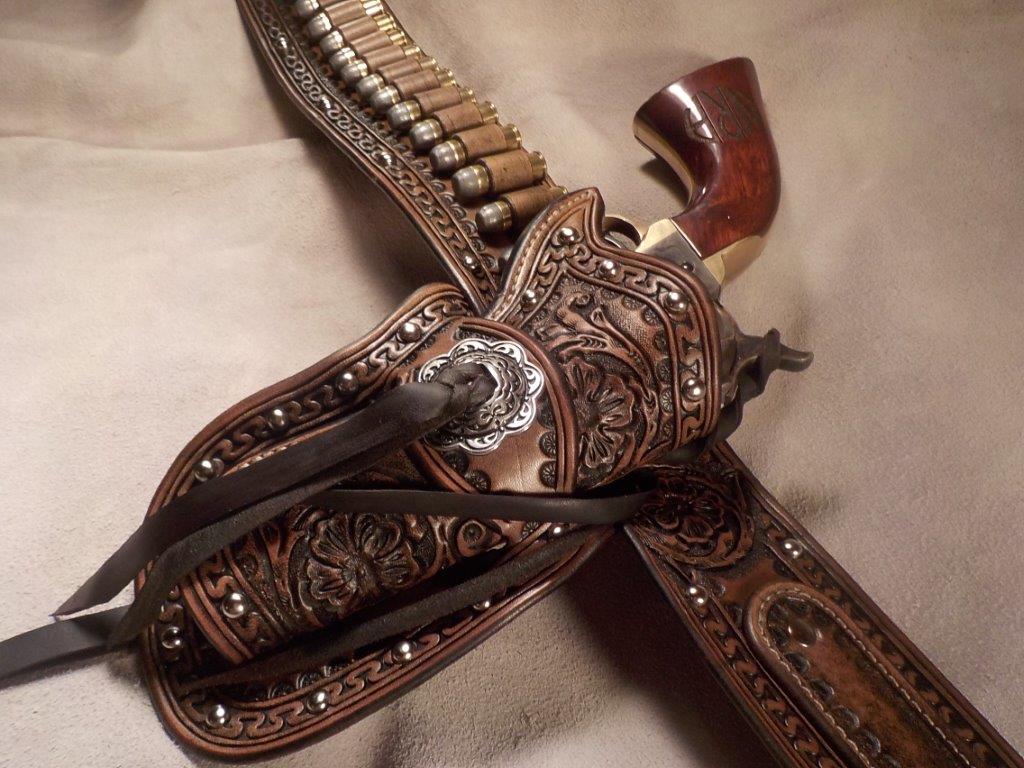
Thanks Fred! I rolled through some old pictures and found a few more examples. Here is one that is a little more "period correct". It's a single layer with a laced mainseam. Here is one that is lined. As you can see the skirt and loop edges are all sewn. It's been a while since I built this one, but as I recall it was a real PITA to get stuffed through the loop. It didn't help that it was super short and I had the cartridge belt loop so tight. You can build them however you like.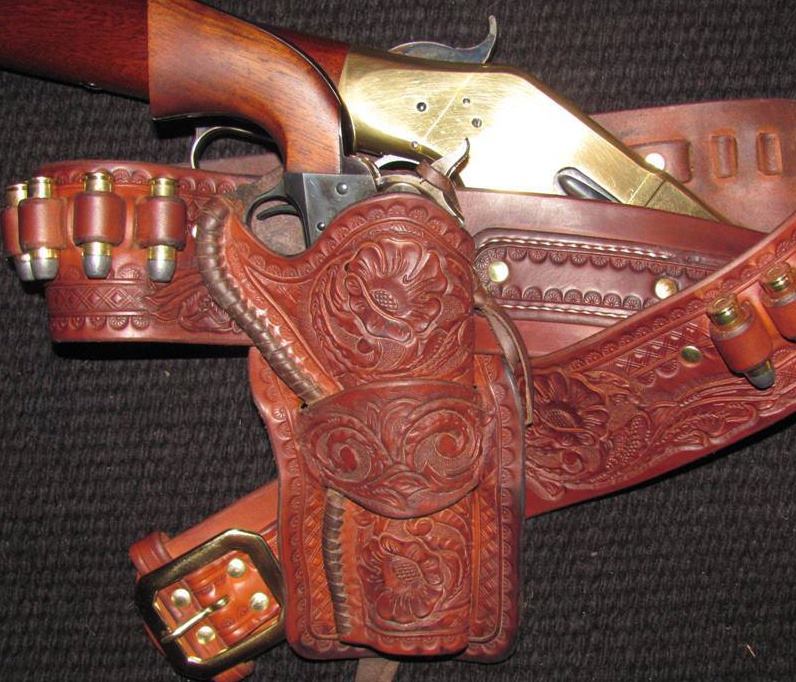

-
Mexican loop question
Josh Ashman replied to dikman's topic in Gun Holsters, Rifle Slings and Knife Sheathes
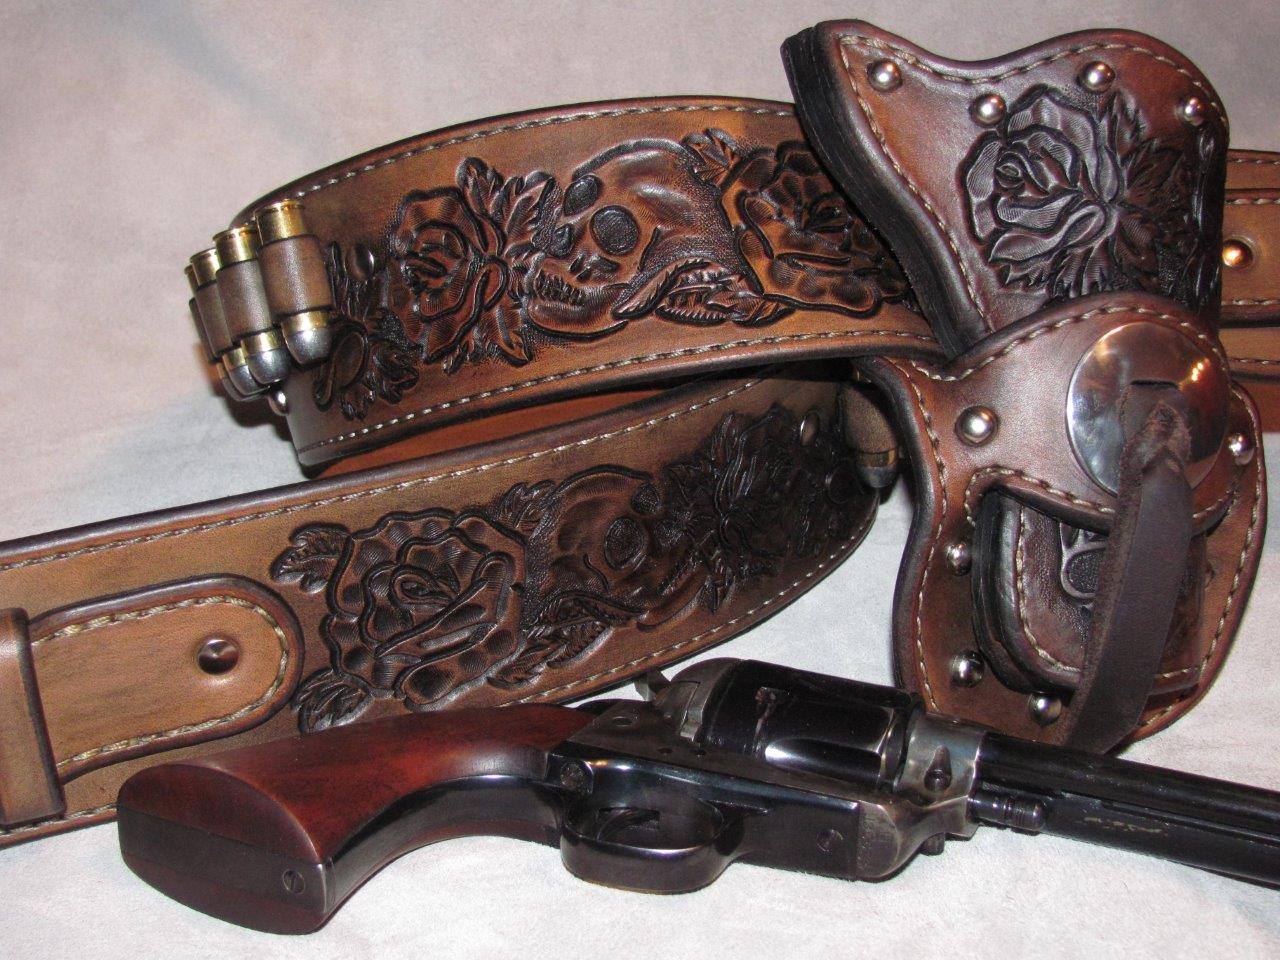
I've made many of this type of holster from a single piece of leather. I generally use 10/11, but 9/10 wouldn't be noticeably different. The pros and cons versus a lined holster with a comparable total thickness are minimal in my opinion. Basically it just comes down to personal preference. Although it is probably fair to say that a veg tan lined holster would be a little more work and would be considered to be better due to the smooth leather against the gun and being more rigid. If you're using good quality leather these will be somewhat minimal as the flesh side will already be fairly smooth and at 10 oz it'll be plenty rigid whether it's one layer or two. Most of the old holsters I've seen are single layer but not all of them. One of mine for reference. Good luck on your project. Josh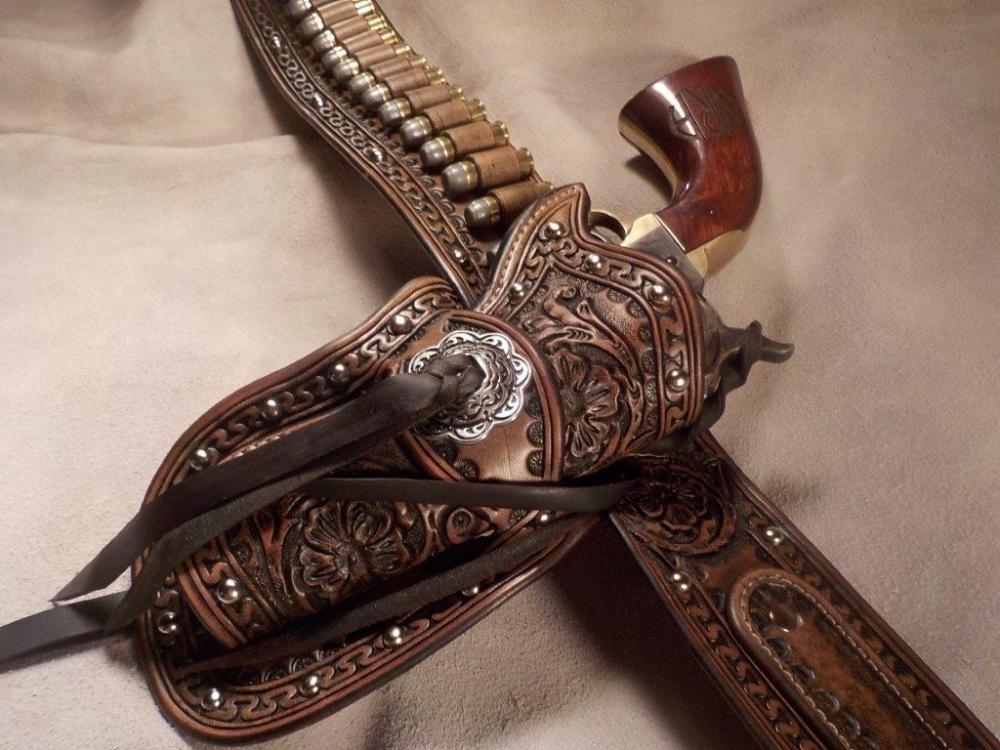
-
Mexican loop question
Josh Ashman replied to dikman's topic in Gun Holsters, Rifle Slings and Knife Sheathes
Good looking holster Bobby! Out of curiosity, do you end the liner before you make the loops in the skirt? Semper Fi -
Mexican loop question
Josh Ashman replied to dikman's topic in Gun Holsters, Rifle Slings and Knife Sheathes
Again, just my 2 cents but a total thickness of 13/14 is fine to be bent and formed, it happens in saddle work all of the time. A person could certainly make a lined loop holster with leather that thick. That said, if it were me I'm not sure I'd want to. I like a thick, hefty holster as much as the next person but a total thickness of 10/11 seems plenty thick to me, especially if it were made up of 2 layers back to back. Your project so of course you should do as you want. I'd ensure to have it well cased when forming to make it easier to form through the loop. -
Mexican loop question
Josh Ashman replied to dikman's topic in Gun Holsters, Rifle Slings and Knife Sheathes
As for the size of the loop cut my standard practice is to make the holster pattern on vellum printer paper with the pistol centered on a fold line then roll it to the side and trace around the bottom edge. Pretty standard Stohlman holster stuff. I make the edge of the leather 3/4" away from the pistol outline. then when I make the slots for the loop I make them 1/8" wider than the flat paper holster pattern. When I cut the leather out I'll use a 1/8" punch at the ends of the slots and cut an even transition from the hole punch to the slot cut. I've not had a problem getting the holster body tuck back through the slots yet. I typically use 10/11 leather with a single welt. IF you are concerned about the holster being loose in the loop, which really bugs me, then you can tie a thong through the holster body and skirt behind it to keep the holster body from wanting to pull up in the loop whenever the gun is drawn. Anyway, that works for me. Again, good luck on your project! Josh -
Mexican loop question
Josh Ashman replied to dikman's topic in Gun Holsters, Rifle Slings and Knife Sheathes
My 2 cents would be to fold the holster back through the loop whenever you wet mold it. Obviously you'd have to dye it first, unless you're dip dyeing, then it's probably OK t fold, mold then dye. If you are already stamping then wet molding afterwords you won't loose any more definition then you already are. Good luck with your project! Josh -
My goodness Clyde that is one clean looking saddle! I'm in awe of how slick the buffed rough out HO looks and how flush you got the swell welts. Really just an outstanding job! FYI, your calf looks like he wants out . All the best, Josh
-
Looks like you're getting plenty of practice to me! I really like the Sheridan carving and the holster looks very functional in addition to the excellent carving, fit and finish. Really an all around great job!
-
Thanks Ron!
-
Glock 43 Pancake Style.
Josh Ashman replied to Mattsbagger's topic in Gun Holsters, Rifle Slings and Knife Sheathes
Nice job Matt! -
Looks really good Bruce, nice job!
-
Welcome to the forum George and good luck with your project! Your plan sounds like a s good place to start. I have made 1911 chest rigs and I have made one holster for a pistol with a rail mounted light (SR22), but I haven't ever made both. You might consider using a tension screw (8/32 screw, finish washer, T-nut on the back and rubber washer made of fuel line is how I do them, a Chicago screw back also works instead of the T-nut and looks more finished). Of course if your're closely following the tanker rig and put a retention strap on it the screw wouldn't be needed. It seems like by the time you make a pouch big enough to hold a full size 1911 with a light you might have a hard time getting it molded tight enough to have good retention. All the best, Josh
-
Thanks Billy!
-
Thanks John! I don't have the Stohlman pattern, but it's probably similar! I do have Will Ghormley's shooters bags pattern and it's kinda of like that, but with several main differences. The yoke on mine is 2 pieces, I think Will's is one piece.and I used an oil tan gusset with a rolled front as opposed to a veg tan "accordion" type gusset like Will has. I also added the gusset/front reinforcement strap. So, maybe they aren't a lot like Will's after all. I made the patterns for these to match the saddle before it delivered. Where we are in Missouri all day rides on the mountain aren't really a thing, most rides are fairly close and you're generally not too far from home. these basically just need to hold a small roll of wire, some pliers maybe a few drinks and a snack. Since they didn't need to be very big I made them to not go past the bottom of the skirts and I tried to get the corners curved to match the skirts. I had to deliver the saddle before I built these so I'll have to see how well that all worked out. For the finish, these got 2 heavy coats of neatsfoot oil and 2 or 3 good wipe downs with glycerin saddle soap. Really not much. As for the Chahin, it's OK. It's not great and I don't think it compares to Hermann Oak, but it's not bad. I got the sides from Weaver and they weren't very big and they had a bunch of butcher cuts. They were nice and thick and fairly firm. The flesh sides were good, not super ratty or anything like that and they seemed to me to be well tanned. They molded fine and the San Carlos border I put on everything tooled OK. I bought 3 sides for the saddle and bags and have about 1/2 of a side left over. The savings probably amounted to around $150 plus I didn't have to dye the leather to get the brown color my customer wanted. If I had to do it again I'm not sure I wouldn't go with HO and talk him into having it natural and letting it darken to brown with age. All the best, Josh
-
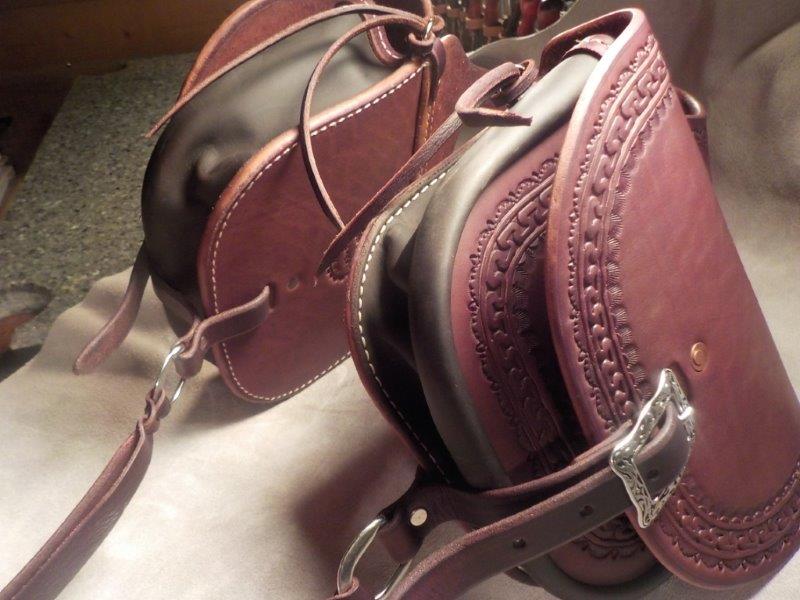
Thanks everybody! I've always liked adding a strap across the top of the gussets as it seems like a week point in bags. Carrying across the front of the pouch just looks nice. I'd like to say I thought of it myself, but I picked the idea up from Gail Mitchell. Not sure if he thought of it or saw it somewhere else himself. The D on the bottom strap gives an easy tie down point to keep them from flapping around too much. I'll see if I can get a few pictures of them mounted on the saddle the next time my neighbor that bought them rides by. Ron, yes sir they are indeed deep enough for a few beers and I wouldn't be surprised if they were put to that purpose this very weekend! All the best, Josh
-
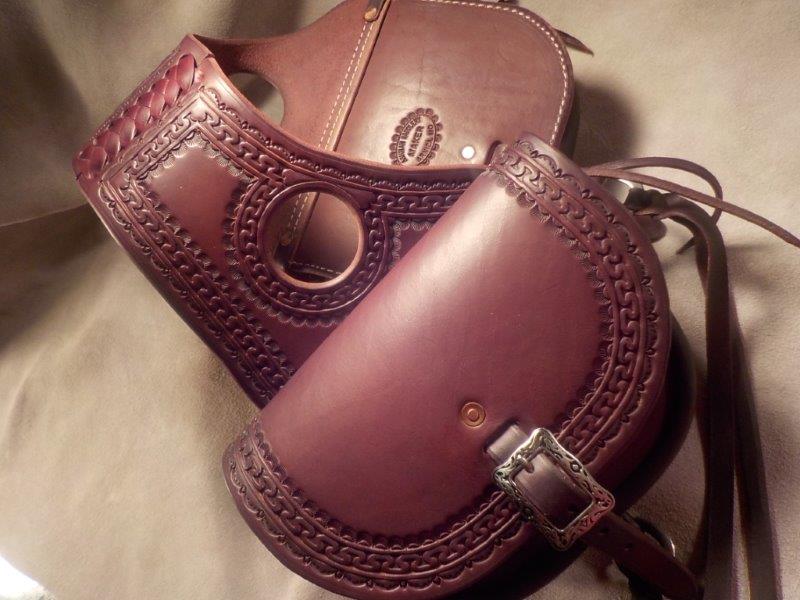
Just finished these up. They go with the saddle I recently finished and were built out of the same brown Chahin leather. The gussets were some scrap 4/5 chap leather I had and the buckles are JWP. Thanks for looking. All the best! Josh

-
Nice job Mike! How much did it end up weighing? All the best! Josh
-
Very nice Robert!
-
I think it looks great Ron! I'm so impressed with your cantle binding! And the ear cut looks really nice too. Both are real weak spots for me, so it's encouraging to see that you have them nailed down. Gives me hope that maybe I'll figure it out sometime too . That awl mar on the seat won't be too noticeable once the saddle has some more use. Is this one you built for yourself or is it for someone else? Really a great job and a nice looking saddle! All the best, Josh
-
thanks for the info on the wool stuffing Toot! That's a great tip! Have a great day folks!
-
Hey folks, hope you all enjoyed your weekend! We got 5" of rain here so it was pretty wet but still managed to get out a little. Ron, correct, I stuff it in as tight as I can get it just pulling off a hand full of batting at a time. After they're packed as tight as can be I'll let them sit overnight then try to stuff in some more. The Chahin seems to cut and tool OK. It all formed well for me and the edges glossed up well. Not as good as the HO that I used on my last saddle, but OK. John, thanks! As for why a slick fork with bucking rolls, that is a good question and I guess it really comes down to personal preference as much as anything. I like big wood post horns that are relatively low on the saddle and a Wade type slick fork gives you that. It's not uncommon for me to ride green horses that may buck a little or get spooky and the rolls can really help if you get caught a little off guard. Bucking rolls come off if you want where a swell fork is always a swell fork. Weight as mentioned by Oltoot. But it's fair to say that I just like them. A low swell fork with a wood post horn and leg cuts would do all of things I like about slick forks. Good info Oltoot, thank you! Billy, thank you! You're right about the rivet, it would have been better to sew the D. I'll have to tiddy that up on the next set. I agree that I have been saved by bucking rolls more than a few times. To my way of thinking slick fork with rolls, or swell fork is a fair question. Slick fork with or without rolls isn't a question for me at all. I've ridden that way enough to know I don't ride well enough, or have enough balance to care for it. Even a hard turn at speed on a good broke horse will make me miss the little reassuring bump of the rolls. On a young horse that might spook hard, or go to bucking they are a necessity for me. Have a great day everybody!