
Constabulary
-
Posts
5,797 -
Joined
-
Last visited
Content Type
Profiles
Forums
Events
Blogs
Gallery
Store
Everything posted by Constabulary
-
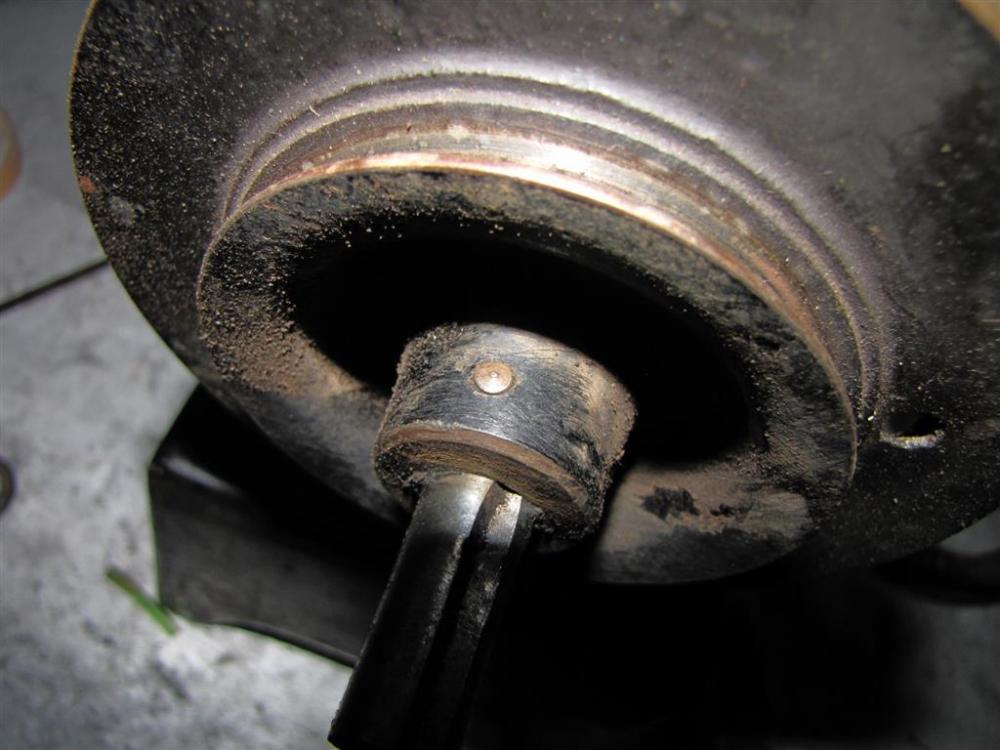
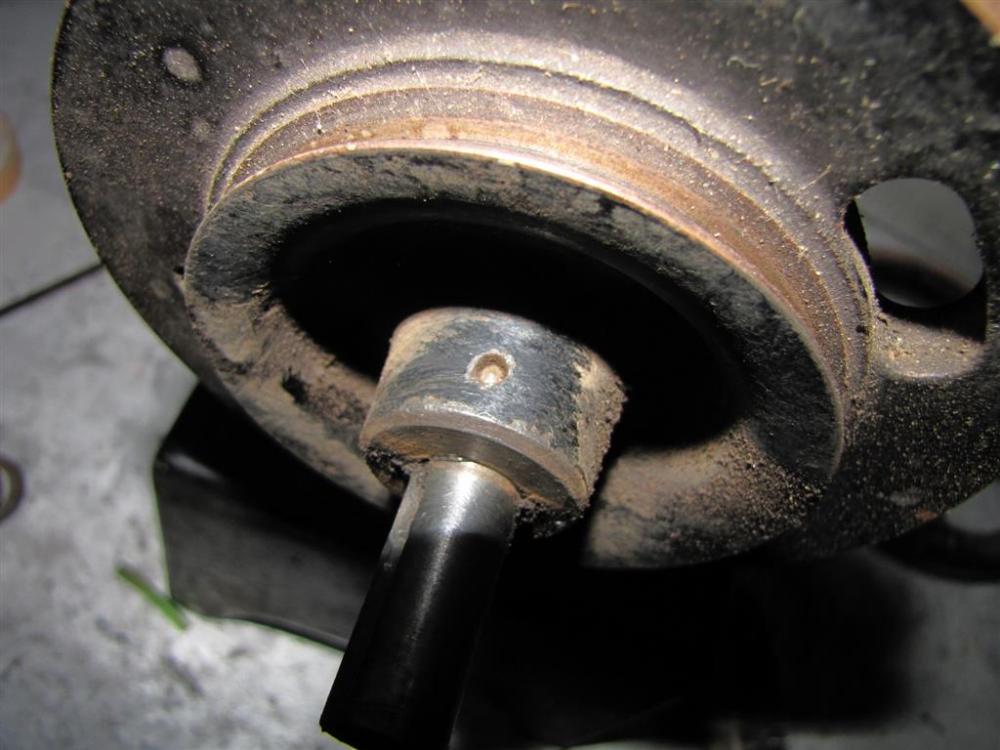
These pins are tapered and so are all other ins on the 29K. Usually the end that sticks out is the wider end so you have to tap it out from the narrow end. You also may need a gear puller for removing the pulley from the shaft. I´m just ripping apart a 29K3 so here are some pictures
-
I have replaced some wicks with braided hemp rope
-

Another 29-4 Problem Post
Constabulary replied to GreenwoodBowcraft's topic in Leather Sewing Machines
Thats why I have asked - this lever is sometime is installed the wrong way (with the bump up) or as in your case hangs down. Remove the blade spring, remove the screw of the lever but the parts back together and I´m sure this will solve your problem - see attached picture - this is how it should look. -
Another 29-4 Problem Post
Constabulary replied to GreenwoodBowcraft's topic in Leather Sewing Machines
Is the machine feeding the material meanwhile? I guess your stitch length is set on max. right? You know, sometimes these old patchers are very worn and especially the bell crank lever often is worn of on its tip. If the tip is worn off the machine is not feeding properly or produces only very short stitches. How is the gib of the stitch length adjuster installed? The flattened wedge has to be up. Please post a full views of the backside. These patchers are sometimes mystical. -
Singer 29K S.V. 3 Cobbler Leather Sewing Maschine
Constabulary replied to Constabulary's topic in Leather Sewing Machines
Yes, the 29KSV3 is mine. I just disassembled it for restoration. But I have to make 1 machine out of 2 because both have serious issues. I have another 29K3 (w/o SV). So if someone wants the empty 29KSV3 casting drop me a note. I will take the 29K3 casting as base for the new machine. -
Singer 29K S.V. 3 Cobbler Leather Sewing Maschine
Constabulary replied to Constabulary's topic in Leather Sewing Machines
Very nice! Thats how information can be gathered together. But regarding the PDF comparison list the 29K17 has top and bottom feed (seems to be an attachment for bottom feed) and it is a short arm too so I wonder what the difference between the 29KS.V.3 and 29K17 could be. Maybe the 29KSV3 is just a predecessor of the 29K17 before it later became a "standard" machine. -
Singer 29K S.V. 3 Cobbler Leather Sewing Maschine
Constabulary replied to Constabulary's topic in Leather Sewing Machines
Hi Jimi, sorry haven't noticed your post earlier. Sorry I don´t have all the parts number on mind so a picture would probably help. I have not checked all the parts lists. You are probably right I guess you mean this one #81914 or have you something else on mind?
-
Another 29-4 Problem Post
Constabulary replied to GreenwoodBowcraft's topic in Leather Sewing Machines
That is a quite unusual foot you have installed, I actually never have seen one like this before. I assume that your foot has no teeth / is smooth on the underside right? That's most likely the problem. The 29 Class machines are top feed only machines and usually need a toothed foot to feed the material properly. You could also try to increase the foot pressure. Give the thumb screw on the right end of the blade spring a few turns and try again. But it may have an influence on the stitch length but anyway give it a try and check the underside of your presser foot. -
Singer 29K S.V. 3 Cobbler Leather Sewing Maschine
Constabulary replied to Constabulary's topic in Leather Sewing Machines
The "bar" is spring steel and the earlier 29 / 29K all have them. I 'm sure Bob knows this type of spring very well. All ADLER class 30 patchers up to to current day have them. BTW - Adler class 30 and singer 29 / 29K are using the same spring - it is interchangeable. The 29K51 is the first one with helical spring. So all Singer patchers from 29K51 onward have this helical / coil spring and the earlier models have the blade spring. I have stolen this comparison chart from needlebar.org - see attachment. singer 29K class comparisons v02.pdf -
Singer 29K S.V. 3 Cobbler Leather Sewing Maschine
Constabulary replied to Constabulary's topic in Leather Sewing Machines
I always have 29K on mind and don`t even think of the 29 w/o the K suffix - sorry! That screw (thread take up adjuster) is pretty common - at least over here. Not sure when they have introduced it. I think the very early 29 and / or 29K came w/o this screw. -
Singer 29K S.V. 3 Cobbler Leather Sewing Maschine
Constabulary replied to Constabulary's topic in Leather Sewing Machines
Bob, I think you mean the small screw on the backside down left of the foot lifting lever, right? That screw is holding a spring that pushes against the foot lifting lever to hold it in place. You have to push down the lever to lift the foot. I have seen that on other 29K1, 29K3 and 29K4 as well. -
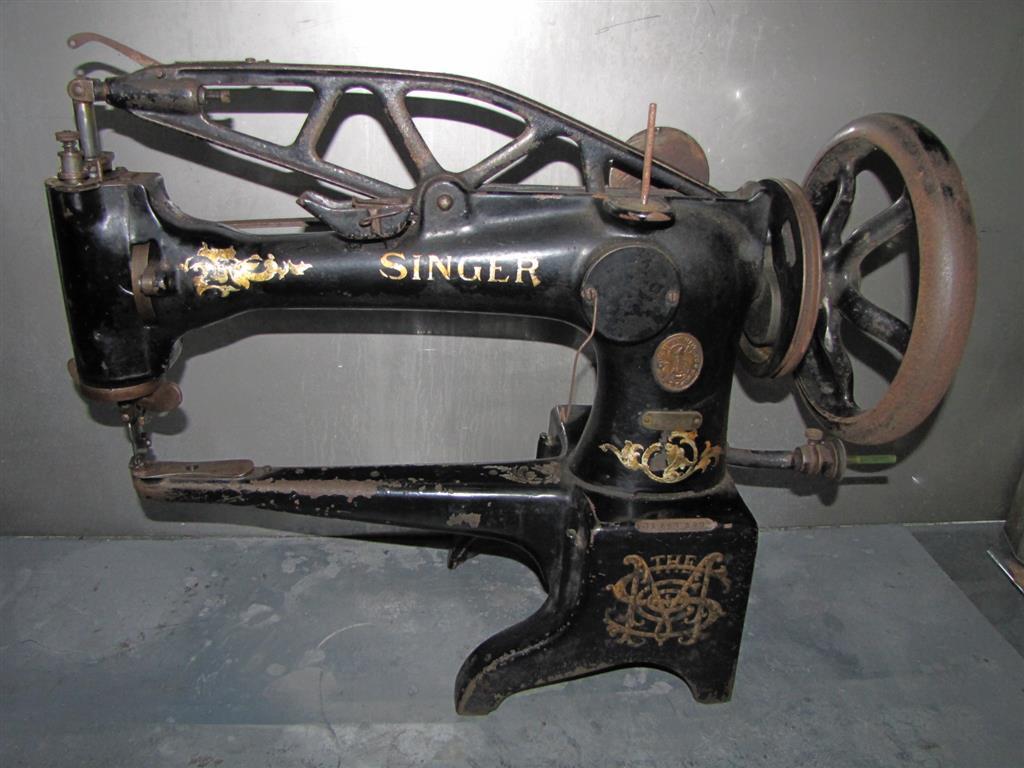
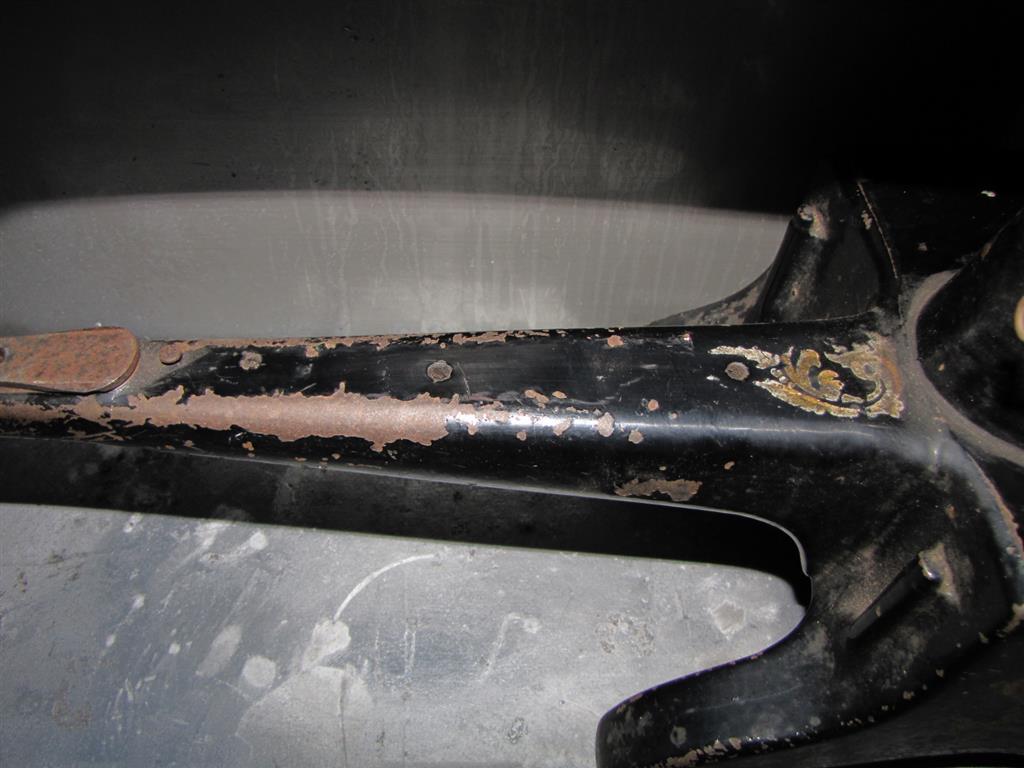
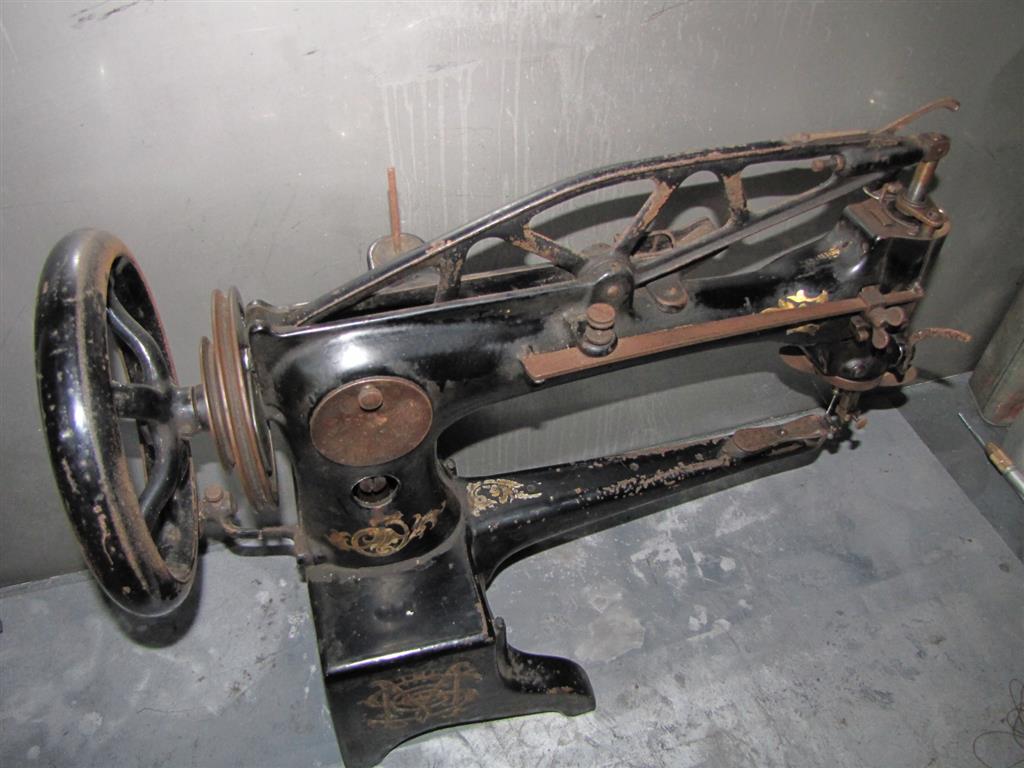
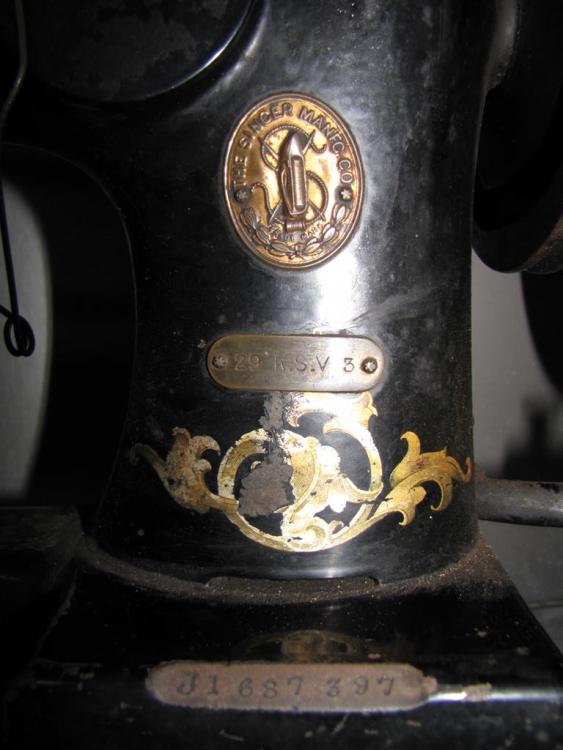
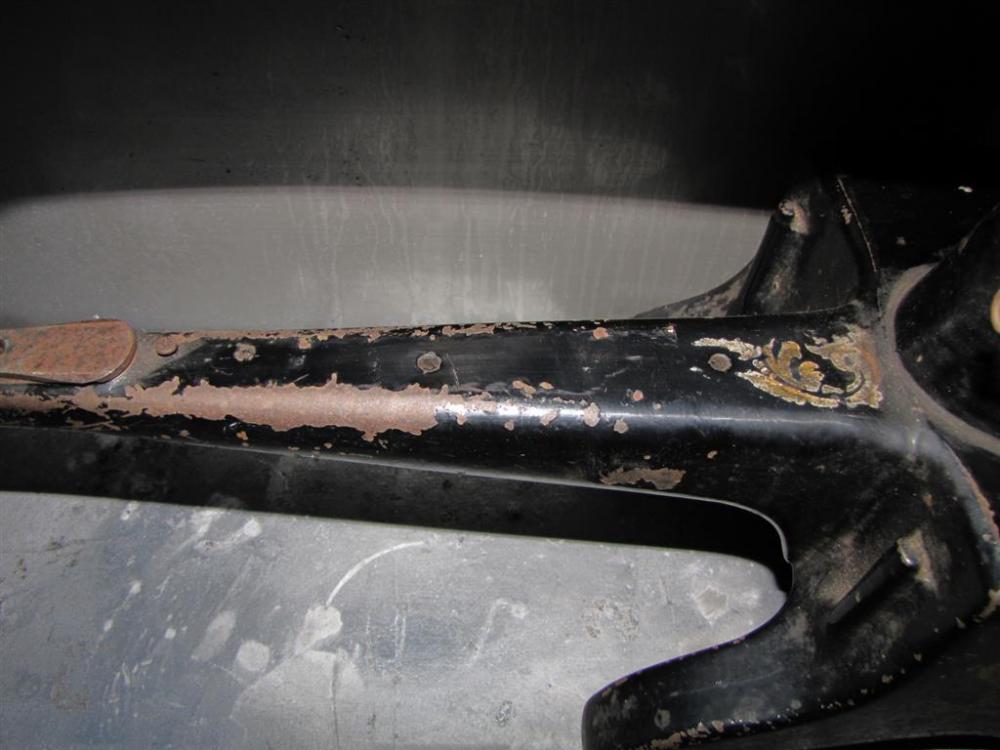
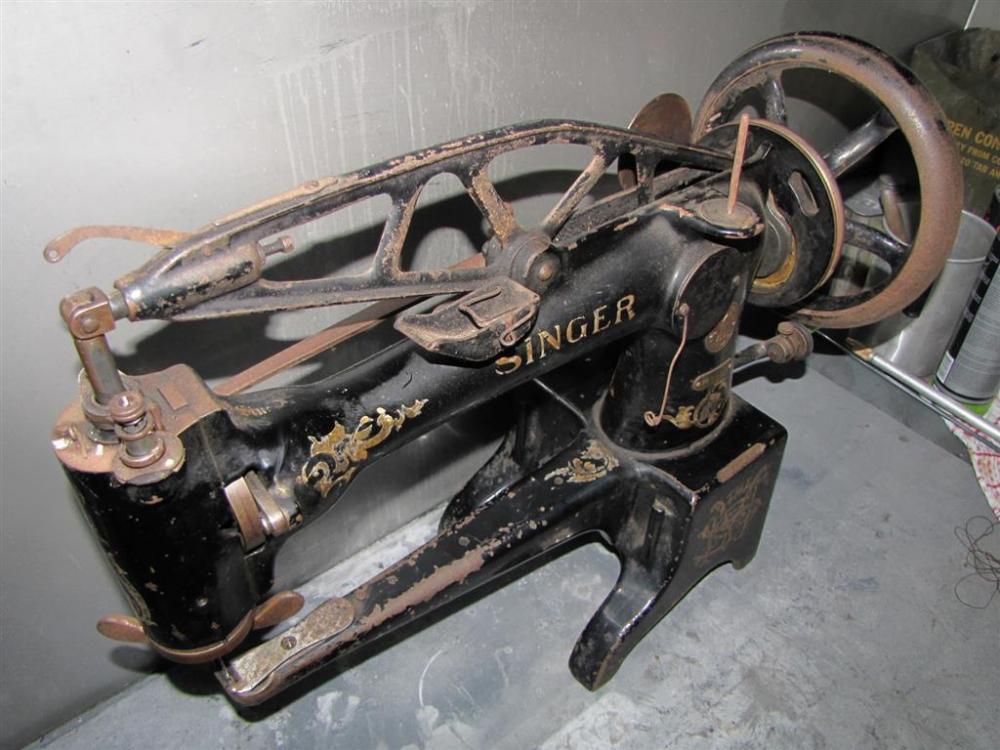
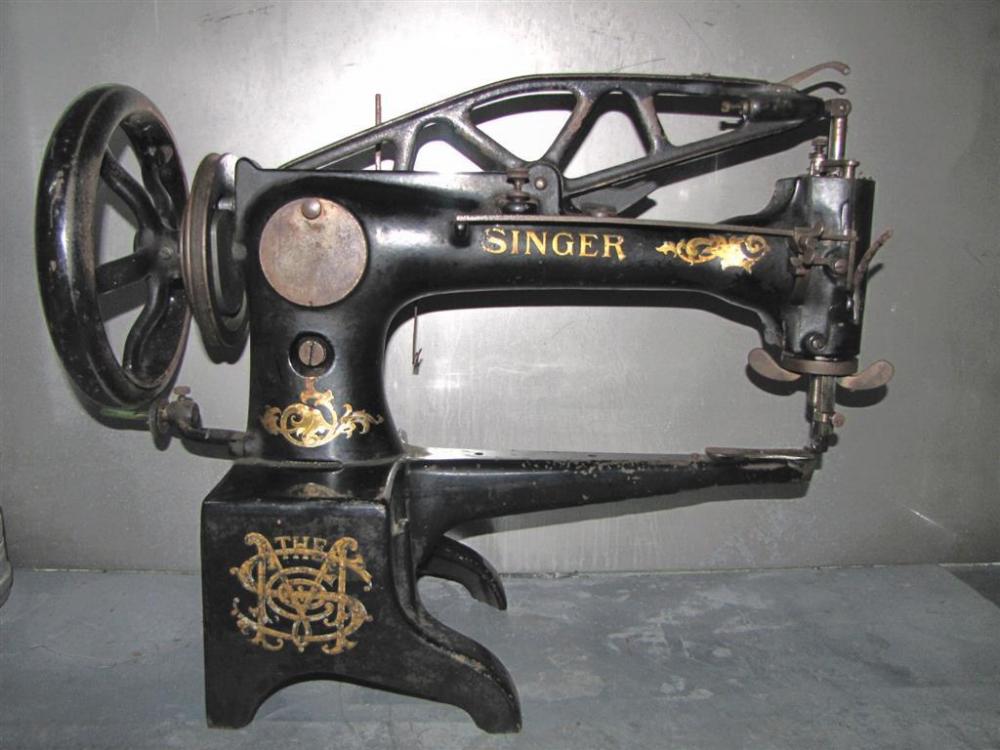
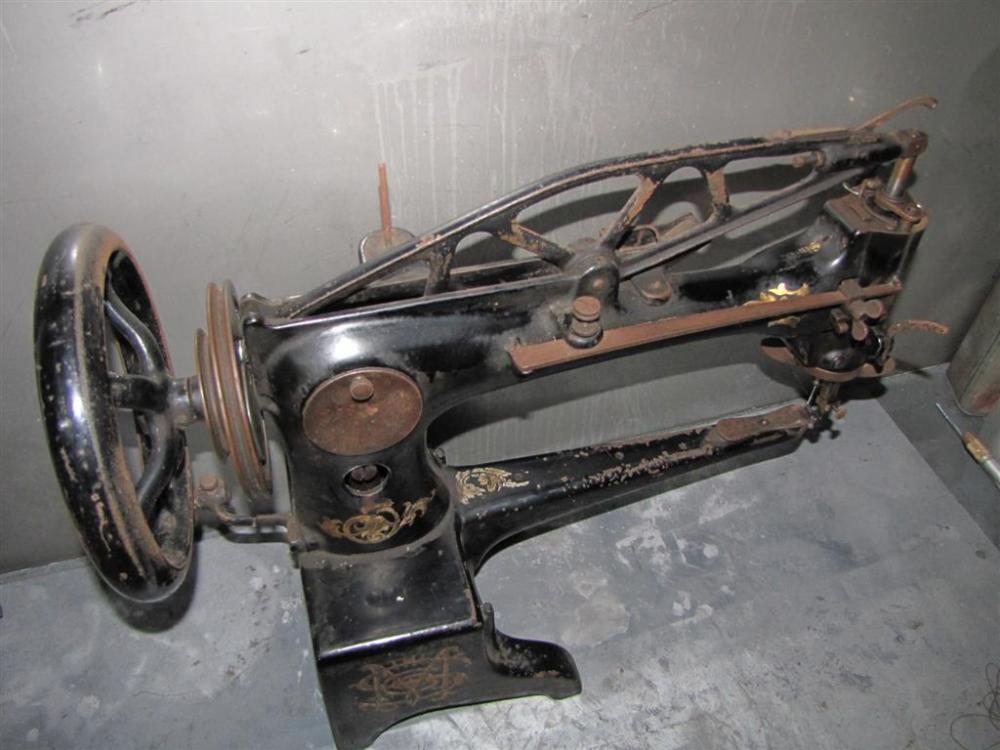
Last weekend I found this 29K (built in 1905) and figured the tag says 29 K.S.V 3 - so obviously a Special Version (or variant) of the 29K cobbler machine. The only obvious difference compared with a 29K3 is that the 29K S.V. 3 has two threaded holes in the lower arm. This most likely is for attaching a binder attachment. I have no proof for this but I guess the threads are for a binder attachment. I just wanted to share some pictures because there are not many of them around and even on Needlebar.org or ISMACS I wasn't able to find further information.

-
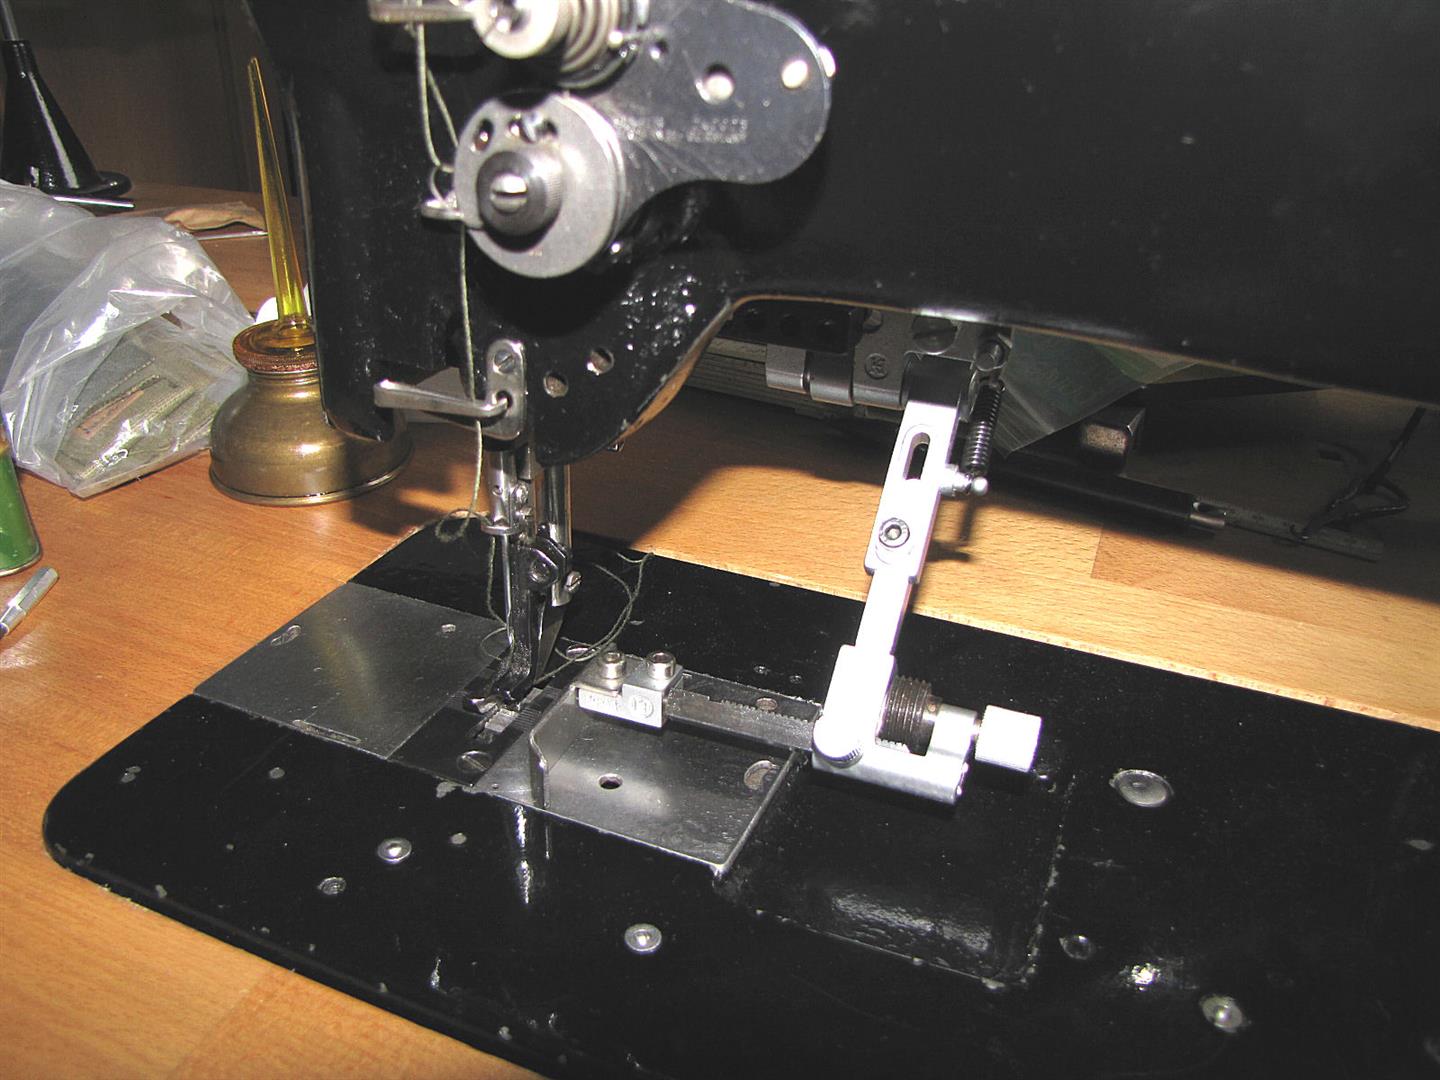
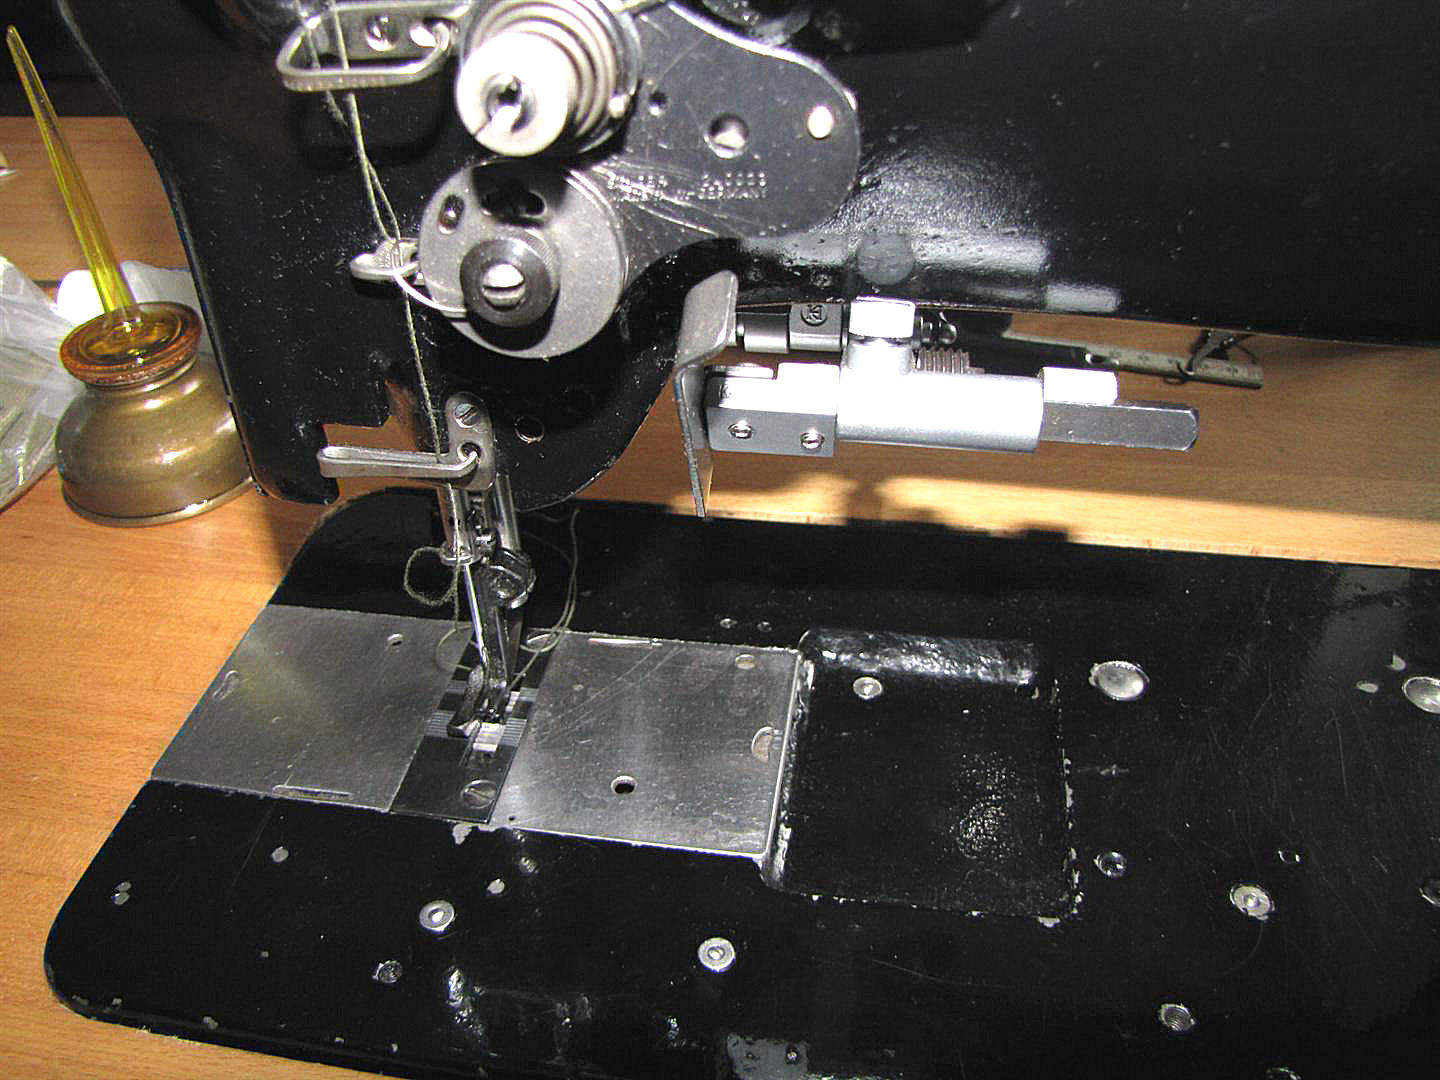
Useful accessories for walking foot leather machines
Constabulary replied to gigi's topic in Leather Sewing Machines
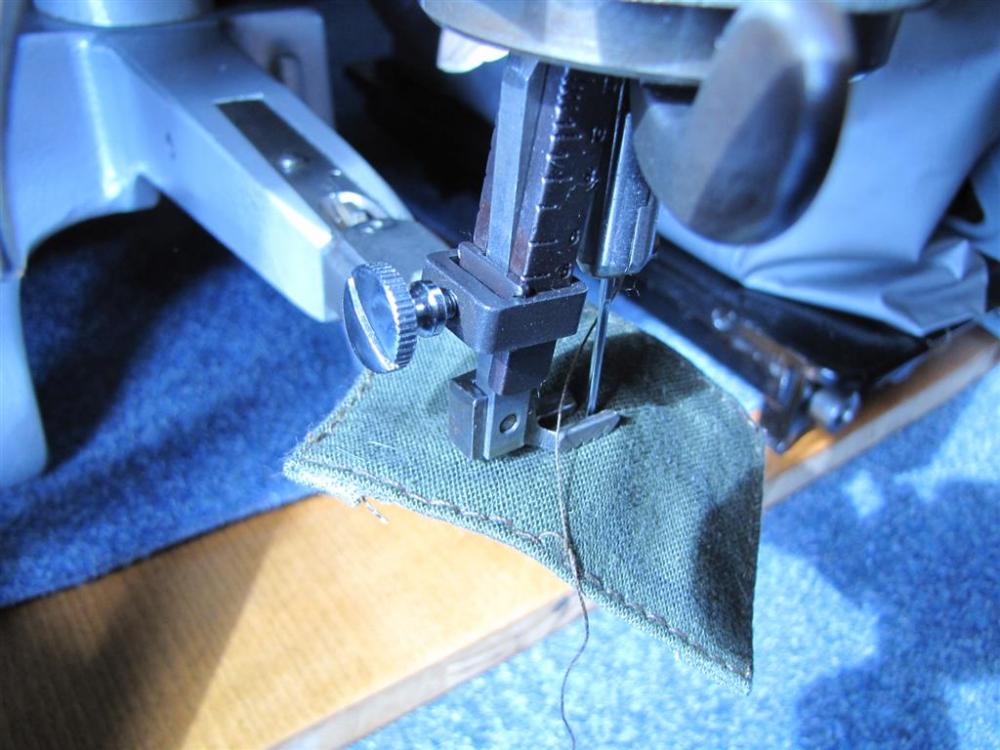
straight is more for long seams and the roller for rounded items like sewing curves and the like. -
Useful accessories for walking foot leather machines
Constabulary replied to gigi's topic in Leather Sewing Machines
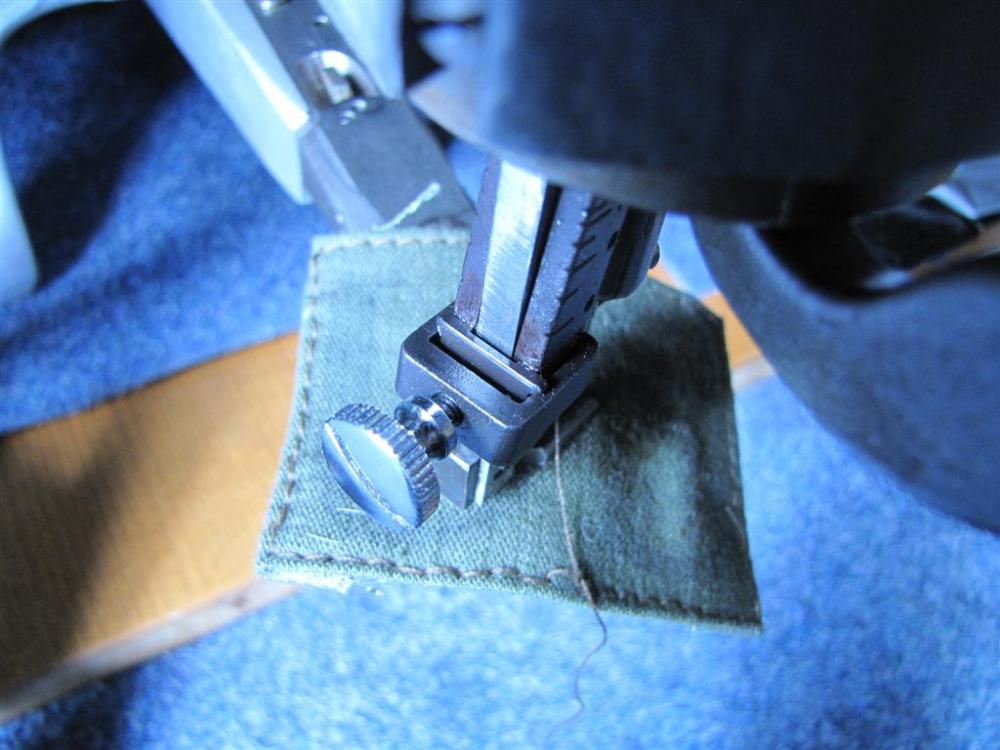
This is the drop down edge guide from College Sewing I told you about. It comes with a replaceable straight edge guide and roller guide tip. But you have to drill holes and tap threads.


-
That was one step. Please post more pictures or maybe a Video. There are several reason why a machine will not sew. Sometimes it is just a small detail. How is the shuttle threaded? Are you sure you are using the right needle?
-
post some more detailed pictures of your machine. Sometimes parts are wrong assembled (especially on the back side). I just have a very similar machine on my bench (a 29K3) which I have stripped down to the last pin.
-
Singer 133k17 threading and stitch length adjustment
Constabulary replied to sandyt's topic in Leather Sewing Machines
I have sent you the manual by Email - hope the file was not too big. -
The G157 is a "standard machine" with small hook and reverse there is nothing special on if not converted for special purposes. Stitch length should be approx. 4.2mm. Look for 211W157 should be the same machine but made in the US instead of made in Germany.
-
Are these machines any good for my materials?
Constabulary replied to OnkelMorfar's topic in Leather Sewing Machines
You probably need a new bobbin case fort he 138. Do you have a manual for the machine? -
What needle system are you using? Have you insert the needle correctly? Have you threaded the machines correctly? Do you have manuals for either machine? If the shuttle is too loose you probably have to adjust the small spring on the shuttle carrier a little bit. The spring should barely touch the shuttle and push it slightly against the side of the gear box. You can also move the needle holder a bit to the right maybe that will help picking up the thread. Loosen the screw above the needle screw and try to move the needle holder a bit to the right. If it will not move it is probably gummed up so you have to remove the holder and clean it an then try again. Some detailed pictures would probably help to find out what is going on.
-
I think there are no serial # data available from Adler. If it has an aluminum tag on the backside it at least from the 1970´s AFAIK. But maybe you can post some pictures of your machine.
-
Singer 133k17 threading and stitch length adjustment
Constabulary replied to sandyt's topic in Leather Sewing Machines
I have to look for the file. I had them on a separate hard drive which is crashed I hope I can restore the files. -
-
Seems you installed the gib on the wrong side. It belongs on the side with the thumb screw with the small notch on the upside - if you know what I mean.
-
Are these machines any good for my materials?
Constabulary replied to OnkelMorfar's topic in Leather Sewing Machines
Well these are high speed garment sewing machines. I´m sure they can sew leather of 3mm thickness but I´doubt you will be lucky with these machines. How much are the machines? I would not sink too much money in a garment sewing machine. Check out this thread it may help you finding a good leather sewing machine: