-
Posts
190 -
Joined
-
Last visited
Content Type
Profiles
Forums
Events
Blogs
Gallery
Store
Everything posted by msdeluca
-

Tell me about your "Hot Box"
msdeluca replied to Dwight's topic in Gun Holsters, Rifle Slings and Knife Sheathes
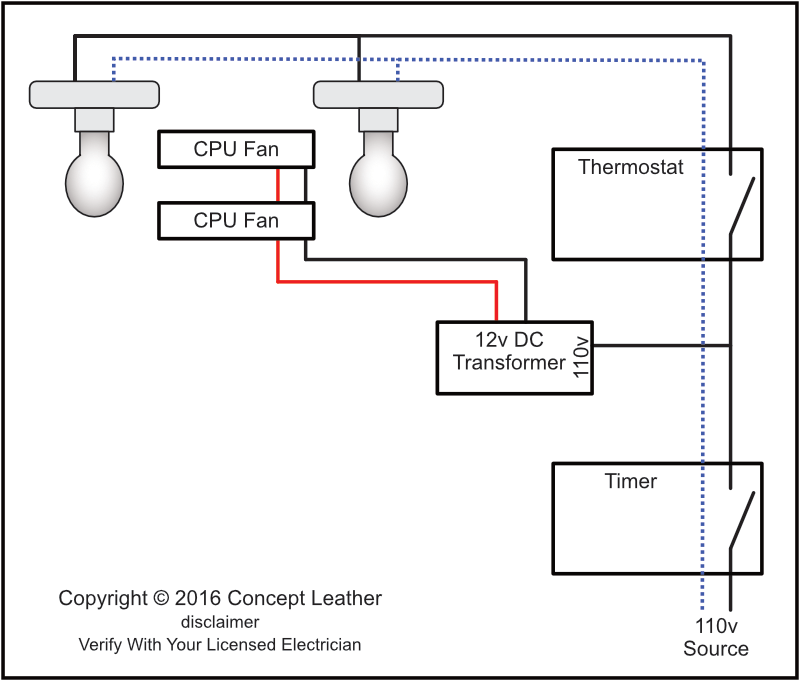
Updated the wiring schematic... Added a couple of PWM variable fan speed controllers and figured out the wiring on the MH1210F thermostat... -
Thanks for your comments. What is the clean up procedure for the airbrush. I bought the harbor freight one just to try, but haven't yet. It seems like the resolene dries so fast that it would clog the gun. I figured if I got any good results that I could buy a better one. The HF unit does get some decent reviews and it seems that spraying leather isn't that demanding a task. I've got old Binks conventional spray rigs that I haven't used in years... just saying that I've got experience spraying... just never with an airbrush. What brand do you like or recommend?
-
Thanks, Dwight, I respect your opinion... sorry to have misquoted you there. I thought it was you that i read doing that. I did use those acid brushes... just seems there has to be a better way. Some have said use an airbrush, which I have, but that doesn't get the Resolene into the holster and it just has to clog up an airbrush in short order. When you say "stuffed a but further down", do you mean to make the top of the holster come closer to the rear sight?
-
So, I saw this video someone posted where a guy had clamped an X-acto knife (with the blade pointing up) and used it to cut curves by simply pulling the leather through the blade. I was cutting a holster pattern with curves and decided to try the method... Worked Great!!! For some reason, I left the knife clamped in the vice (although the wee-small voice inside warned me to remove it) and proceeded to other tasks. At some point my hand swept across the knife and I felt a small nick. Ooh, I thought, "dodged a bullet." Then the blood started... The tip of the blade had punctured my pinky finger pretty deep. The wife said it would need stitches... she is a nurse. I had some woodworking super glue and decided to simply glue the cut back together. Worked Great!!! disclaimer: Don't Try This At Home moral: Don't leave really, really, sharp blades sticking up in the air.
-
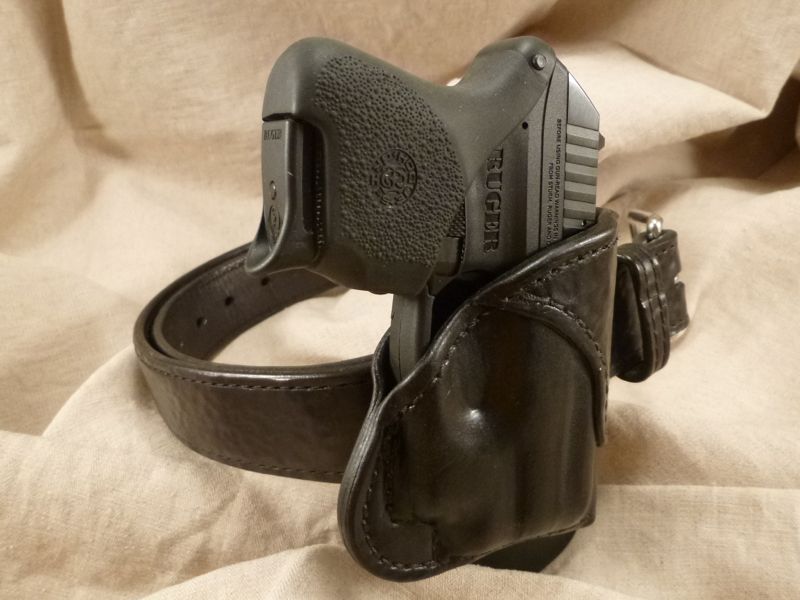
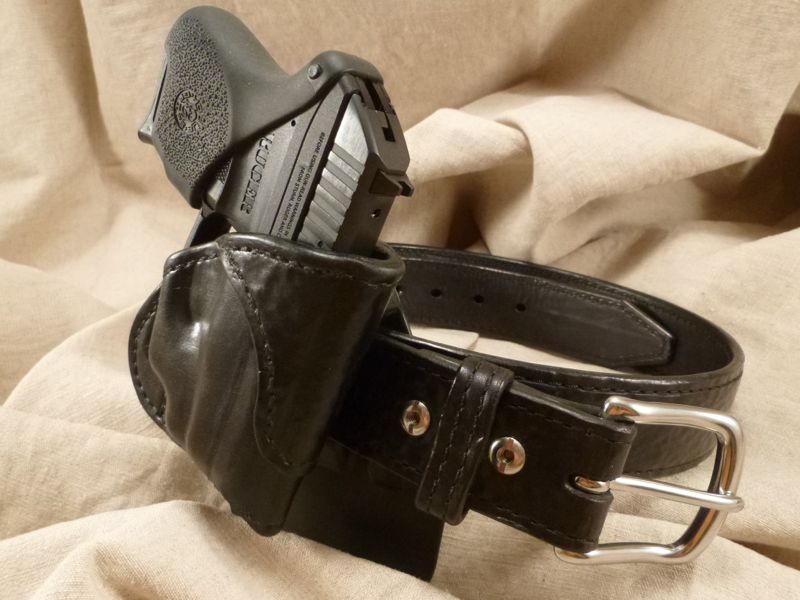
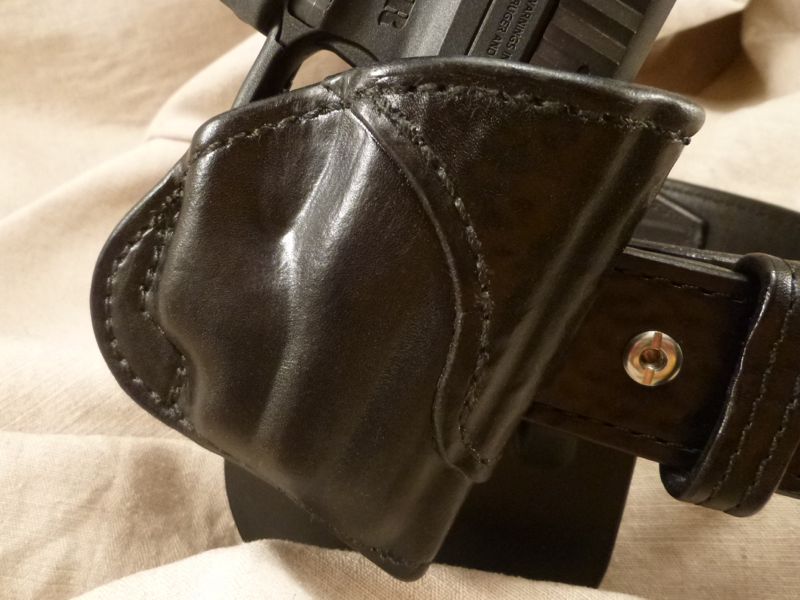
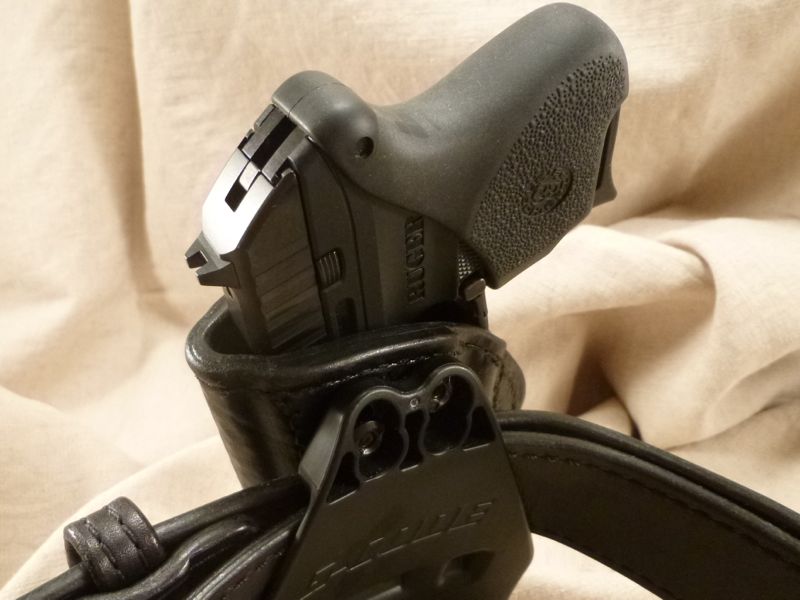
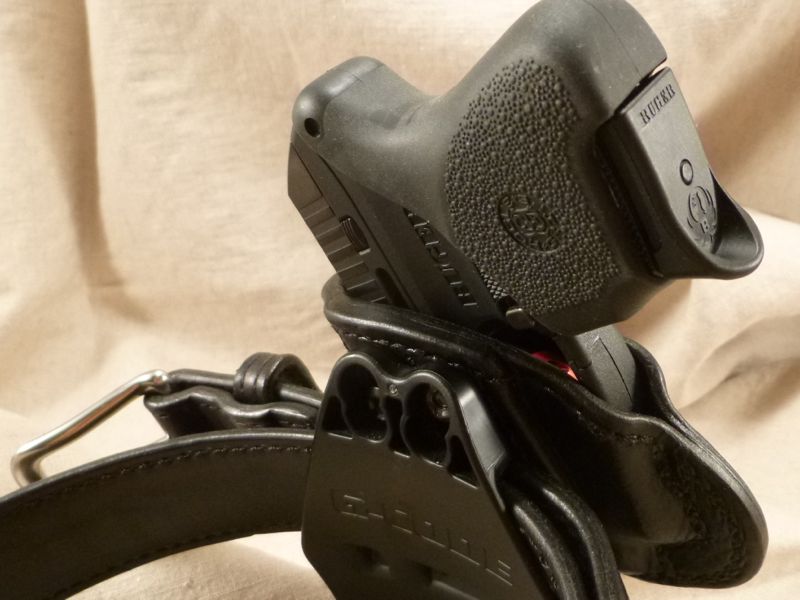
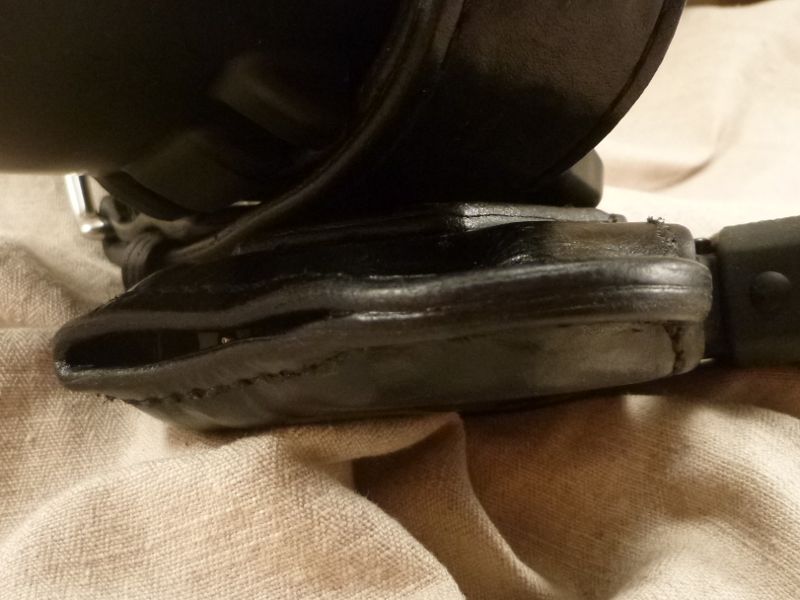
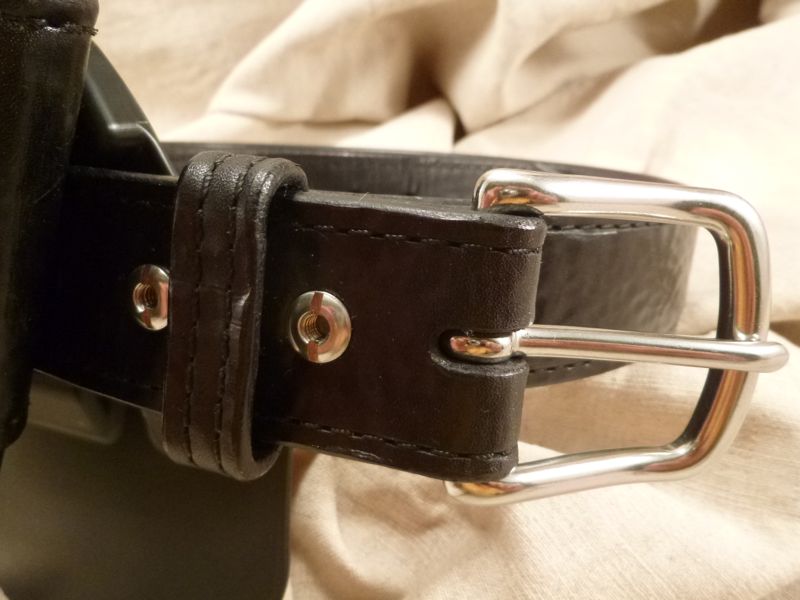
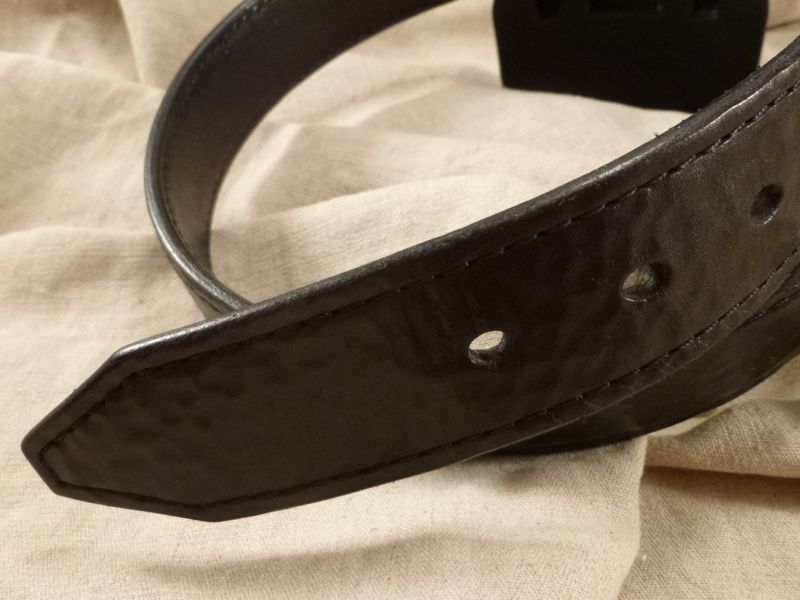
I bought an LCP-C 380, outfitted with a Crimson Trace and needed a paddle holster that doesn't seem to exist for the combination. Thought it would be a good time to try to make one. So this is my first attempt at creating a holster pattern from scratch, a lined holster, a holster with opening reinforcement, a paddle holster. I also wanted it to match, or at least coordinate with, my first gun belt that I made last year. The gun belt is three ply consisting of two outer plies of 6 oz leather and an inner ply of kydex. The paddle was purchased from G-Code. Belt buckle and chicago screws are stainless. Thread is 277 top and bottom. Stitched on a Cowboy CB3200. I'm pretty happy with the results, although not satisfied with the stitching on the holster (I think tension was too tight). The edging on the holster is improved over the gun belt. Used synthetic gum trag this time... liked it. Dipped in 100% Fiebings Pro Dye, 50/50 Resolene, and (on the holster) a final coat of Sno-Seal. I know Dwight uses Sno-Seal only... might try that next time. I'm just not sold on the benefit of Resolene and it is harder than hell to apply evenly. Tried dipping the holster in it this time, but still had to brush it out. Daubers don't work... maybe my dilution is wrong for it to sheet off after dipping... any suggestions are welcome.
-
I've been experimenting with a synthetic gum trag from http://goodsjapan.com/ using pretty much the method you've described with very good results. No smell... doesn't seem to bleed or affect dying of surface leather. Comes in clear, brown, and black. I trim my edges close with a knife, then wet them and let dry. This seems to allow for better edge sanding; don't get the edges curling up at the surface. Edge bevel, then dye the edge and let dry. Then synthetic gum trag and let edge set up (don't burnish wet). I then burnish with a cocobolo wood burnisher chucked into a drill press. Fine sand where necessary and then burnish again, this time with a 50/50 mix of paraffin and beeswax.
-

A Little Introduction Of Myself And A Couple Of Questions.
msdeluca replied to howitzergun's topic in Getting Started
I've been having good luck with http://goodsjapan.com/ for leather working tools. I recently bought an edge beveler and am quite happy with it. They say that they ship to all countries. -

Tell me about your "Hot Box"
msdeluca replied to Dwight's topic in Gun Holsters, Rifle Slings and Knife Sheathes
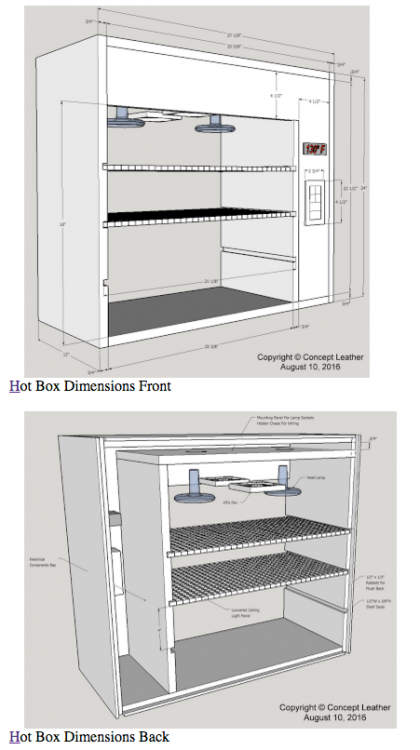
I thought about placing the lamps at the bottom and finally decided against it. Didn't want anything dripping on the lamps and didn't want hot spots coming off the lamps from below. Since heat rises, it will accumulate at the top (the reason for the boxed area at the top) and it is the fans that will circulate the hot air, more evenly, downward around the objects to be dried... I think the gap around the door introduces fresh air and allows some hot air to escape... possibly allowing for more even heating overall... maybe... Hell, Dwight, its all just a guess until you actually build something and see what the hell it does. Once I get mine built, we'll compare notes... I'm also hoping my design will allow from some jerky makin' (another reason for placing lamps above)... took some tips from some dehydrators... What could be better than jerky smellin' holsters... -

Tell me about your "Hot Box"
msdeluca replied to Dwight's topic in Gun Holsters, Rifle Slings and Knife Sheathes
About ready to cut wood... did some drawings and an electrical schematic. I blame Dwight... Click to go to full size images for printing. -

Tell me about your "Hot Box"
msdeluca replied to Dwight's topic in Gun Holsters, Rifle Slings and Knife Sheathes
Nice frankensteining Dwight... I'm waiting on my stuff to get here... decided to order a couple of 150 watt black heat emitting ceramic lights (no light, just heat...) http://www.ebay.com/itm/351606514580 -

Tell me about your "Hot Box"
msdeluca replied to Dwight's topic in Gun Holsters, Rifle Slings and Knife Sheathes
Dwight, I think he is saying that his oven has a built-in timer, which would solve your issue.... I have the same malady. I'm working on a hotbox design that utilizes a thermostat, timer, CPU fan, and a couple of light bulbs. The electronics will cost about $12, the wood and other misc. parts I've got lying around. Defiant 6.4 Amp Timer 120x120mm CPU Cooling Cooler Fan Fine -50-110°C 12V W1209 Digital thermostat Temperature Control Switch + Sensor ••••••••••••••• Optional Upgraded Thermostat LED Digital 110V Temperature Controller Temp Sensor -

Doc Holliday style shoulder holster
msdeluca replied to Otto6294's topic in Gun Holsters, Rifle Slings and Knife Sheathes
Isn't that a daisy... -
I order from these folks. Excellent quality... also has stainless. They are in Canada and ship to US... no info about Ireland. I've included their website, phone, and email. Their webpage is a little weird... you have to click on the "Place Order" tab to get to the sizes and and "Add to Cart" buttons. You can definitely buy from them direct. Hope it helps. https://www.chicagoscrews.com/Black-Oxide-Chicago-Screws 1-800-435-6623 infobook@mc2office.com
-

Tactical Leather Rig
msdeluca replied to Treed's topic in Gun Holsters, Rifle Slings and Knife Sheathes
Well... you're going to have to steer clear of gun free zones now... Good looking rig, thanks for sharing! -
Incredible idea and expert execution! Question: Is this supposed to fit your face?
-
Would have been interesting to note with your opening post.
-

Damn those lefties!
msdeluca replied to Boriqua's topic in Gun Holsters, Rifle Slings and Knife Sheathes
Gorgeous work even if it ain't right... -
Well, I've often been accused of over complicating things, but you may have outdone even me.
-

Machine beginner Renaissance Faire
msdeluca replied to Goblinworx's topic in Leather Sewing Machines
What an abortion...!!! -
Glad you survived and on the mend! We just bought an old jeep to restore and the Road King is on the auction block...
-
It's a problem... I was up sewing with my 3200 at 2:00 AM this morning...
-
Incredible art...!
- 34 replies
-
- silkfatblues
- croatia
-
(and 5 more)
Tagged with:


