


toxo
-
Posts
2,263 -
Joined
-
Last visited
Content Type
Profiles
Forums
Events
Blogs
Gallery
Store
Everything posted by toxo
-
Yes, you can notch the life out of the first fold because no one will see it. More careful with the second. Skiving might help as well.
-
Don't mess about with it Chuck. Some double sided tape and a double fold is all you need.
-
Great job Phil. Must've taken a while.
-
I'm no expert but at first glance it looks like the 246 has a moving plate on the arm which is usually found on binding machines. possibly the feed dog movement is side to side rather than an oval movement which gives more control over more types of material.
-
I would if I can find a pallet.
-
IIRC, the first time I changed the handwheel and motor pulley it cost around £40 all in. One big taperlock pulley and one motor pulley plus belt. This is the machine I've recently listed for sale and as well as the extra torque it'll do one stitch at a time if I want.
-
Here's an idea! Bolt a new pulley to the original one. We don't use our machines at commercial speeds and we're not talking precision engineering here. I wouldn't even bother changing the alignment. It might cause some wear on the inside of the belt but at the rate we use em I imagine it would take quite a while before having to replace.
-
I sometimes play "hide the sausage" with my two Westies! I sometimes get some strange looks when I say that to people. I cut up sausages into pieces and, once the dogs are out in the garden, I secrete the pieces around the house and amid great excitement they scurry around looking for them. It gives me great pleasure to watch them and I have to be vigilant to ensure the sharper of the two doesn't get them all.
-
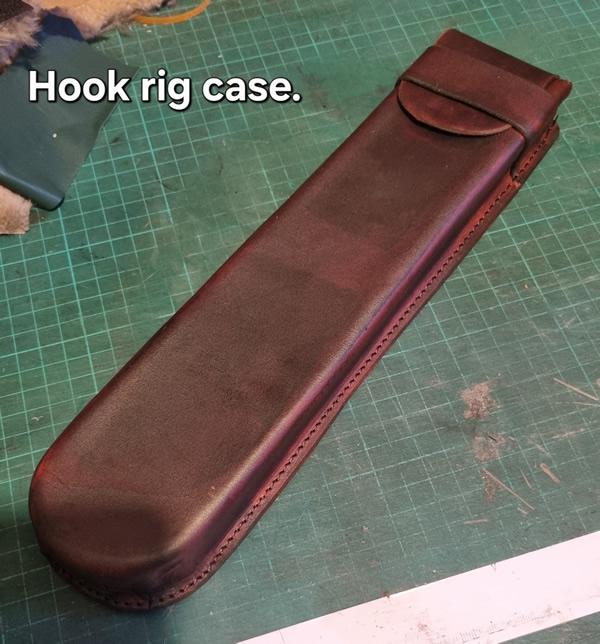
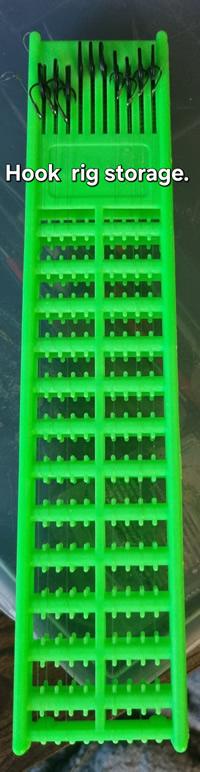
I bought some of these spring loaded hook length holders for fishing. They're great except for the hooks being vulnerable. So I made a case. I hadn't done any wet moulding for a long time and it gave me the flavour so I dug out my centerpin reel which doesn't have a case. So I found some old chipboard. Watch this space.....

-
What would your ultimate needle positioner/synchroniser do.
toxo replied to beefy's topic in Leather Sewing Machines
Did dust ever cause the optical sensors to work correctly ? No! It usually has a cover over it and looks the same as any other. -
What would your ultimate needle positioner/synchroniser do.
toxo replied to beefy's topic in Leather Sewing Machines
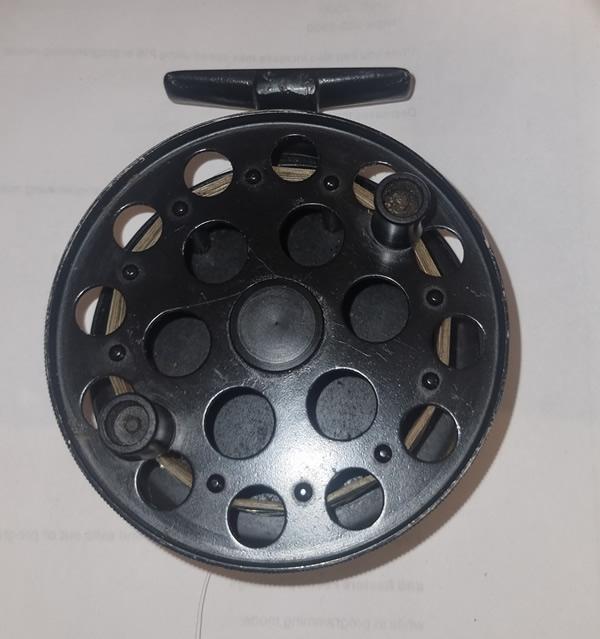
@beefyI haven't understood half of this thread so I just want to throw in my two penn'orth. Firstly the Chinese usually copy everything so I doubt that your servo won't do what all the other servos do. I still haven't got to the bottom of tuning my N/P because my machine came with a speed reducer. My China contact has asked for a video which I've sent and am awaiting a reply but Chinese holidays can be quite long. The N/P on my new machine has a N/P that I'm not familiar with so Im wondering if yours is the same. Here's a pic of what I'm gonna call "the old N/P". This is completely different from "the new one". The old one was a breeze to adjust (no speed reducer but a very big handwheel instead) As you can see, the old one can be adjusted simply by turning the relevant disc which breaks the circuit by way of a cutout. I'm thinking that you might not have seen this type. Forgive me if I'm teaching granny how to suck eggs.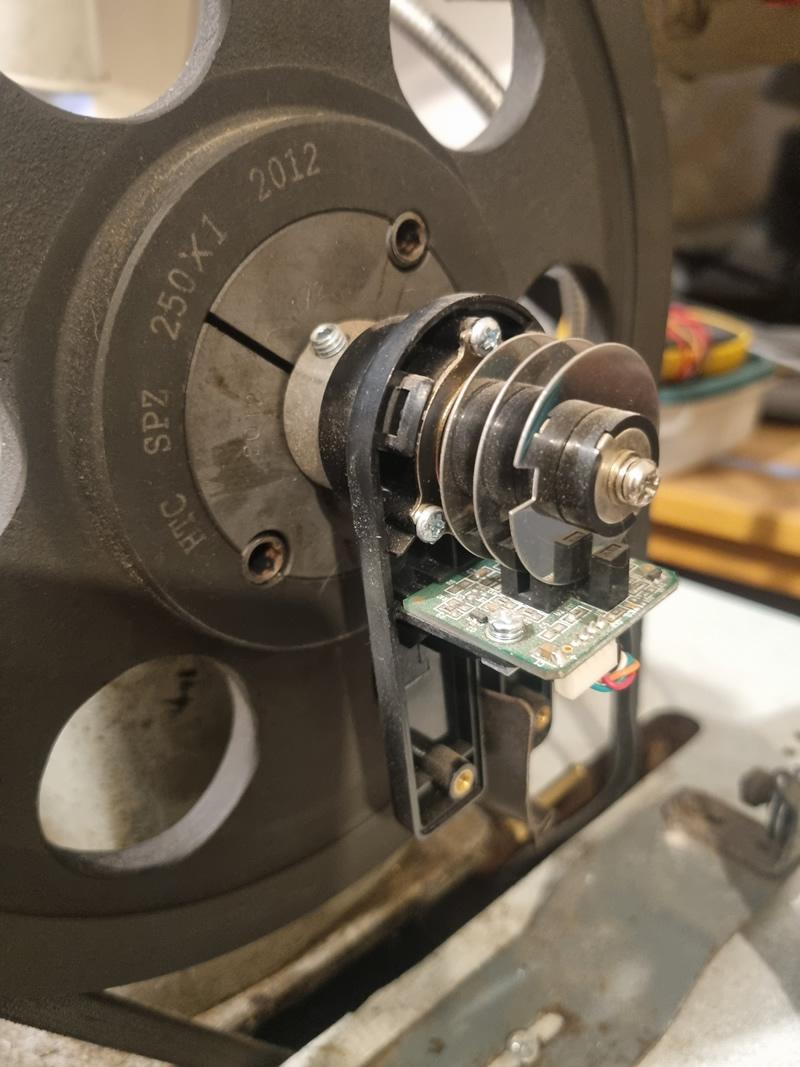
-
Just read this. Good job but I would just add an alternative to the backboard. I cut it a little bigger than needed. This enables the use of clips/clamps which are a little more forgiving and easier to move than the nails. Also holds in place if you want to glue before sewing.
-
Are needle positioners for brushless servo motor drives all the same
toxo replied to beefy's topic in Leather Sewing Machines
You don't say if you have a needle positioner installed but re the amount of revolutions, I think this is where my problem lies. The braking system on mine stops immediately I stop sewing. I know the braking system can be adjusted but haven't looked at it yet. Maybe it needs that little bit of freedom to get to the set position. My Chinese seller is asking me for a video so they can see the problem. I should add that my machine came fully built but without the N/P installed. -
Great job! Isn't it satisfying when a plan comes together.
-
Are needle positioners for brushless servo motor drives all the same
toxo replied to beefy's topic in Leather Sewing Machines
Tried it again with no joy. Then it occurred to me that the braking system must come into this. If I'm stitching slowly the brake is immediate and the needle stops wherever it happens to be in the cycle. If I go fast it wil stop in the down position ( where I want it) most of the time. -
Are needle positioners for brushless servo motor drives all the same
toxo replied to beefy's topic in Leather Sewing Machines
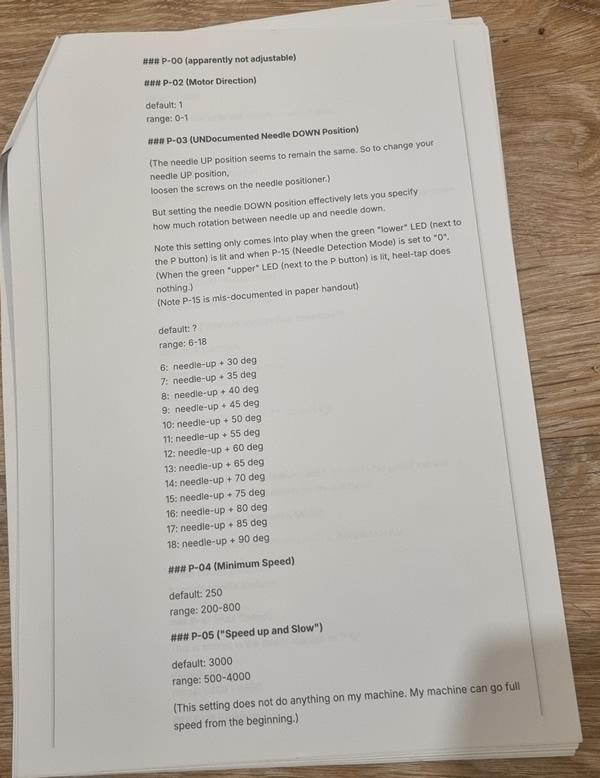
Which P-15 did you mean? This one? Or this one?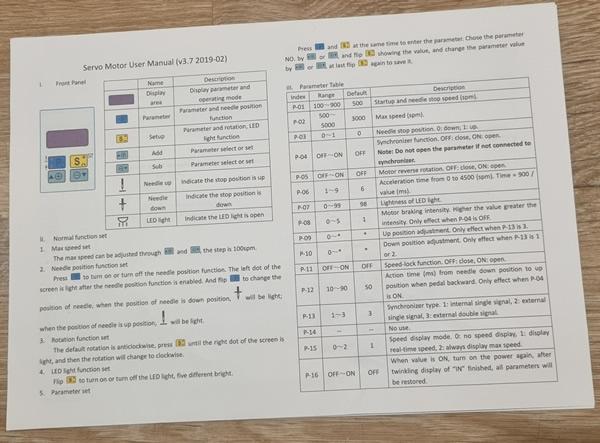
-
Are needle positioners for brushless servo motor drives all the same
toxo replied to beefy's topic in Leather Sewing Machines
After reading this thread I thought I'd have another go. Another waste of time. Tried every setting with the same results. Everything else works fine except the needle position. No matter what the setting, every time I stop the needle is in a different position,sometimes up - sometimes down and never up/down in the same place either. It goes slow enough that it's more of an irritation than a pain but short of ripping out the speed reducer and replacing the handwheel and motor pulleys, I'll live with it.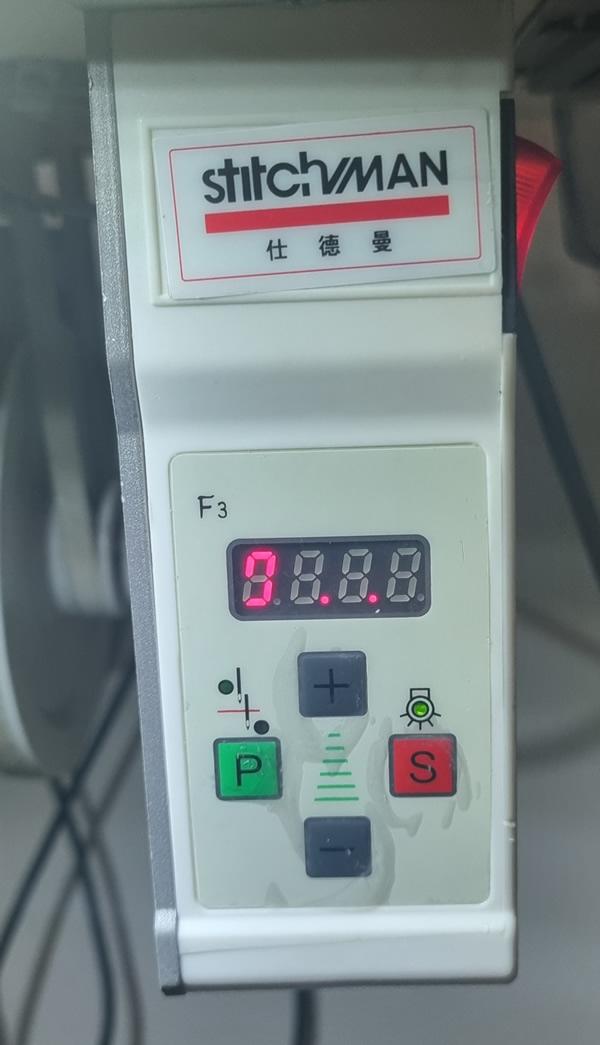
-
Are needle positioners for brushless servo motor drives all the same
toxo replied to beefy's topic in Leather Sewing Machines
On my previous machines I slowed it down by changing the size of the handwheel and the motor pulleys and the N/P worked fine. The new machine came with a speed reducer and the N/P doesn't work as it should. However, I've read somewhere that the N/P can be adjusted on the servo motor. I've tried this briefly with very limited success but I haven't tried it to death and it goes slow enough for me to keep putting it off. One day..... -
If you're looking for proper leather then I have to point out that a cow is only so long so yardage might be problematical. However, sites like Temu or Ali Express might sell rolls of what they call leather or faux leather. Might be cheaper than Ebay or Amazon. Be aware that some might be pre-folded to give a clean edge.
-
Hope everyone is having the best Xmas they can whilst sparing a thought for those for whom Xmas will never be great again. And let's hope that 2026 will be a productive year.
-
Just seen this on YouTube.
-
Price drop; £650
-
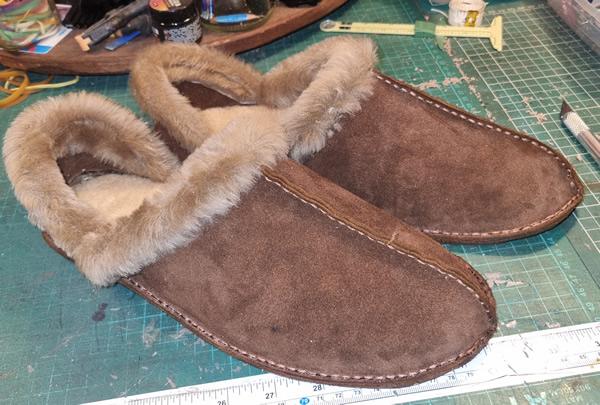
They now have a veg tan sole and a back. I didn't allow enough lean in on the back so it doesn't grip as much as I'd like so might put some padding around the top.
-
I've read about this drop test but it never occurred to me that the bobbin must be different to be able to do it. I always go with a try first. Because my hobby uses different types and thicknesses of leather I'll always test on a bit of scrap first to check tension and needle size. I'll always use the 45 degree slide test as a starting point for needle size and adjust if necessary.
-
Thanks Keith. Seems like a foolproof way to do it. I wondered if I was doing something wrong.