Nuttish
-
Posts
428 -
Joined
-
Last visited
Content Type
Profiles
Forums
Events
Blogs
Gallery
Store
Everything posted by Nuttish
-
Correction: the American units are "temperature controlled" soldering irons with custom machined brass tips.
-
Wild Bill is right. That's how it's done. Your little press is made out of cast iron — if you're doing a ton of riveting, I wouldn't trust the business end not to snap off if it's not supported by your bench or a piece of steel. It'll probably be fine for limited runs, but be very very mindful of any flexing at all. You might consider having Metal Supermarket or similar or a machine shop fabricate a piece of 1/4"+ steel plate more or less the shape of the entire footprint of your press with the same hole pattern.
-
You can find the correct size by using two round punches at various distances and connecting them by bending the leather and making a straight cut with a very keen razor blade.
-
I made one out of stainless. It doesn't work, I suspect because the steel obviously doesn't absorb moisture and cannot generate heat from friction. I want to say I recall someone saying something about dielectric constants of wood and phenolic or some other magical physics nonsense.

-
You can get a 3" thick granite surface plate for a machine shop on Amazon Prime for less than $50 shipped.
-
I ask Wickett & Craig to split to ~2 oz for me all the time. It's a fine weight for wallet and bag pockets. Depending on the leather, you'll want them to sand and repaste the backs, but that doesn't add substantially to the price. The best part is that they have no minimums. The bad news is that they take their time.
-
Concrete forms and a loft hanging from the rafters on chains.
-
Brake pad cleaner might spread it around until it's no longer visible. It takes ballpoint ink out of fabric. You might experiment by trying that with a marked scrap.
-
http://www.billykirk.com/collections/belts/products/no-117-mechanics-belt-black-with-brass
-
In order to ensure even penetration of whatever treatment you use, you must remove all wax and factory finish. There are so many processes used to finish leather, from various plastics to hard waxes, that you may need to figure out how to remove the coatings on your particular leather. Products like this are a good starting point - http://www.amazon.com/Angelus-Leather-Prepare-Deglazer-Oz/dp/B00EU322DQ
-
I mean you cannot wax and sand to get a progressively smoother finish. In my experience, you're committed to wax the moment you apply it. I've never had much success burnishing with wax so I can't give any insight into doing It well. All I know is I get lovely results with wyo Slik. The only wax I use is a mixture containing carnauba wax and that's over a final finish. I just trained someone to help deliver a large number of belts and refined my process to make it easier and more efficient. We're getting better results using cut sections of cloth backed sanding belts. They last longer and don't clog as easily. Start with 240, then 400, then first burnish with Wyo Slik and canvas. The leather will be thirsty for the first burnish and it's the most tedious step. Sand all the gloss and crocodile scales out with 400. Use 240 where necessary. Burnish - this will be super quick if you did it right. Keep going if you want. We're stopping to add acrylic at this point.
-
See http://leatherworker.net/forum/index.php?showtopic=67910#entry443057
-
They're offering two head units. One without "power regulation" — I read this to mean it doesn't regulate temperature, just the frequency with which it sends line current to the cartridge heater with something like a pulsating on/off switch. The other has "power regulation" — as it has a digital display, I believe this one has a PID in it with a thermocouple in the handle. These will maintain temp pretty accurately, but I don't think accuracy really matters all that much as long as you're in the ballpark. These machines are stupidly overbuilt. No wonder they cost a fortune.
-
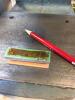
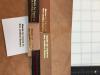
1. pull strap and belt sand edges square — this also compacts fibers — keep your paper clean or it will scorch. 2. bevel however you wish 3. 240 grit paper the curve you beveled to remove divots and high spots — take care to sand grain and flesh in a straight line 4. apply burnishing compound — you want to wet the fibers out but not apply so much they are dripping — I use Wyo Quik Slik by hand because it's faster in my jig than using a machine 5. rub the dampish leather back and forth in 2" sections with canvas or denim using strong downward pressure — you should immediately feel your canvas sticking from the heat and friction — if you don't, apply a tiny bit more compound — burnishing means using the heat generated by friction and pressure to make whatever compound you're using penetrate and compact the fibers — you should immediately see a nice sheen develop or you're not doing it right — stop here if you like the result, but it will get better and more durable if you continue 6. if you're using anything but beeswax or paraffin, sand with 400 grit, again taking care to sand the grain and flesh in a straight line — you're just knocking the sheen off and finding divots and high spots you may need to carefully re-sand with 240 7. Steps 4 and 5 8. sand with 600 grit 9. Steps 4 and 5 I don't like edges that are all that dark like some people do. You will get a much darker finish, or even burn your leather, by using a a grinder or buffer because you can generate a lot more heat and apply a lot more pressure. To finish up, I evenly apply several very light coats of matte clear Campbell Randall Italian edge paint with my finger in a nitrile glove. Then I burnish it with a beeswax/carnauba mixture to even the acrylic out and develop a nice durable sheen. You can of course do the same with a machine burnished edge. Top left = paraffin, bottom left = beeswax, bottom right = acrylic polished with paraffin, top right = acrylic polished with beeswax The shine is the same, but the acrylic is bulletproof Is shiny

-
Were you adapting an existing tool to this purpose or did you fabricate those parts? Nice tool!
-
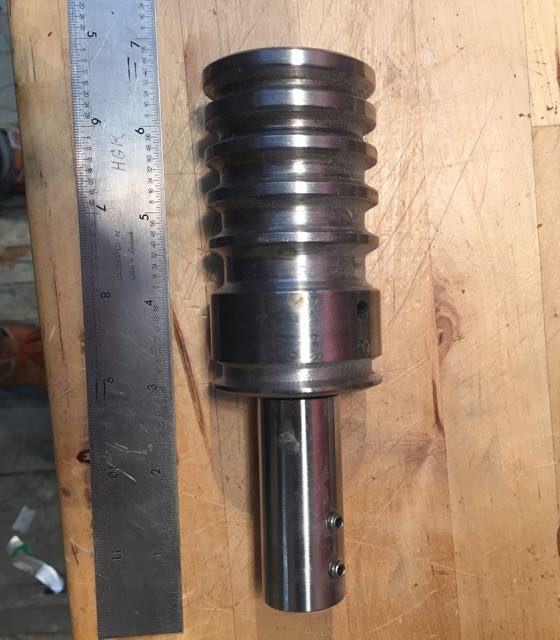
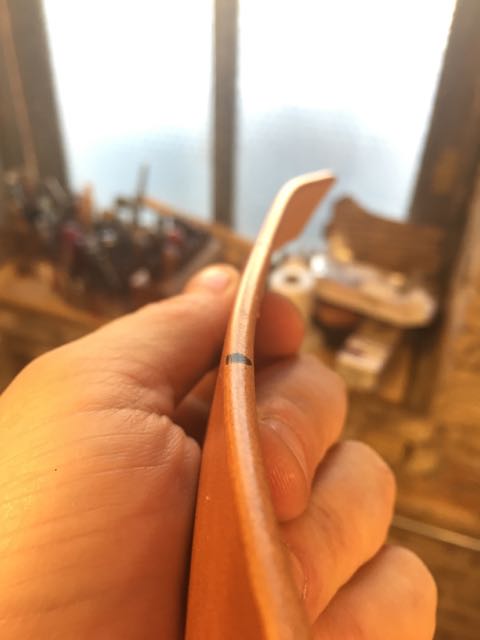
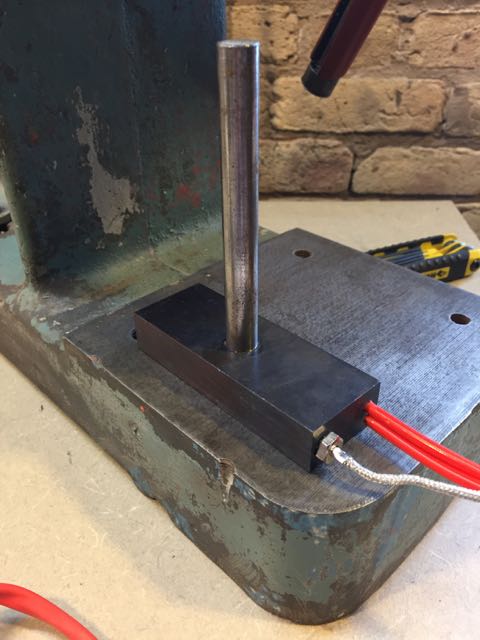
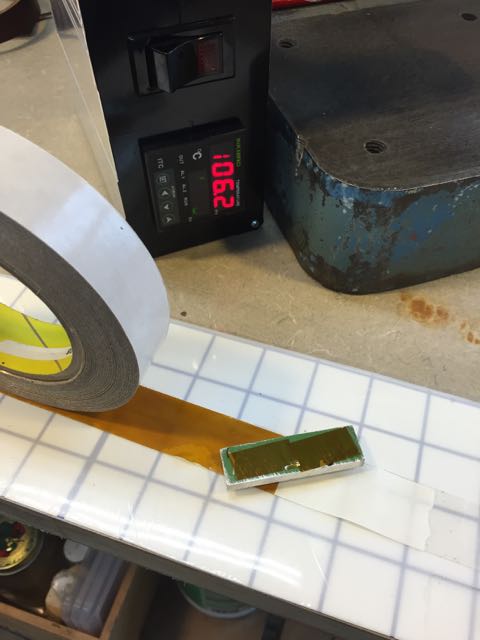
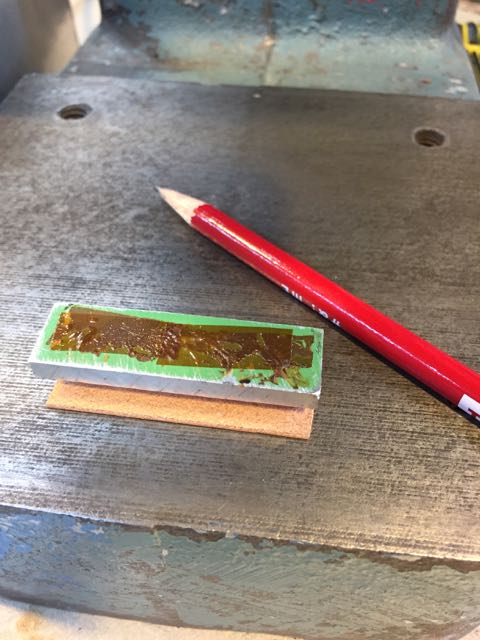
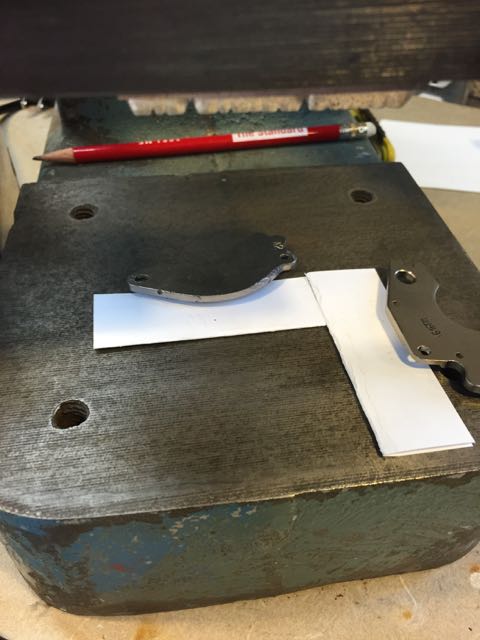
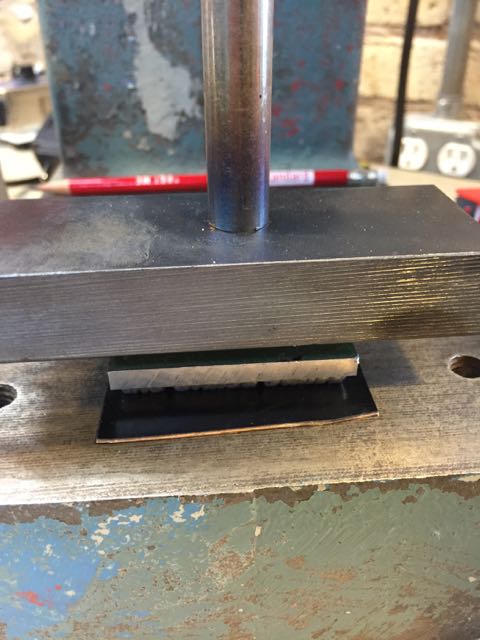
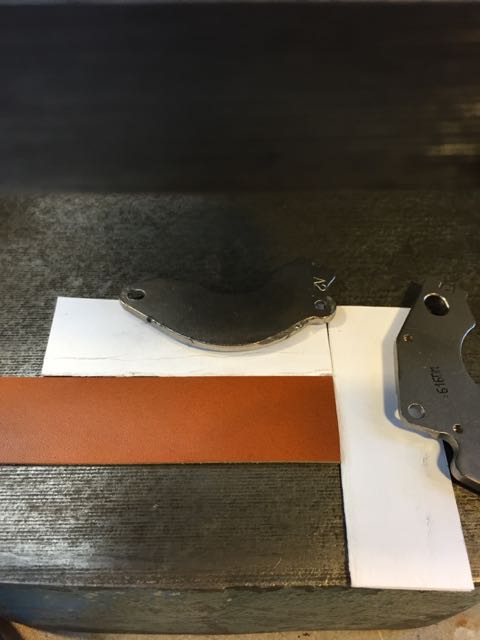
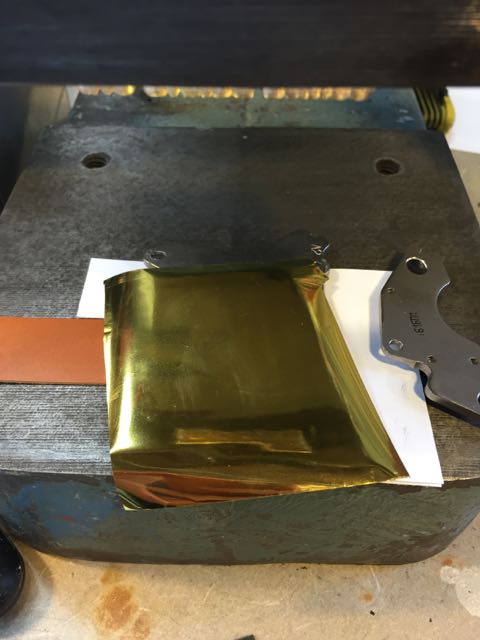
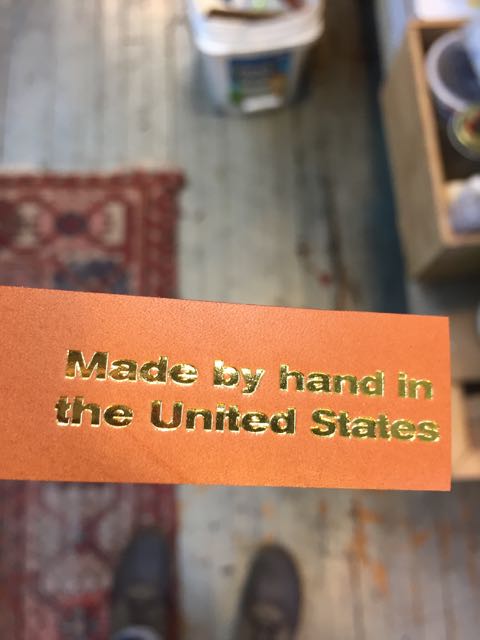
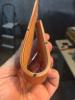
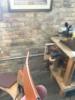
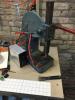
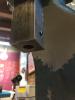
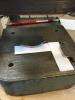
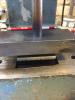
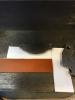
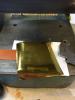
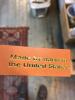
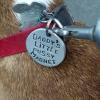
I have been fabricating a hot stamping machine in my spare time. My goal is to build an air operated unit at least as competent as the $3,400 Kwik Print 86A/A. Time will tell. Phase One consists of building the heating unit. I will not be held responsible if you attempt to build one of these yourself, which you absolutely shouldn’t do. Heat embossers are made of electricity and extreme pressure and heat and danger and you can burn your house down, maim yourself, and/or electrocute yourself if you don’t know what you’re doing. Don’t do that. Phase One — the heater The Kwik Print 86 A/A uses an air circuit to deliver up to 1 ton of pressure through a Bimba air cylinder to an OEM ram to which the chase and heater are attached. The machine uses a 400W strip heater and Ulanet Robo Temp. I suspect Kwik Print uses Ulanet heaters and the Ulanet Robo Temp pulsating on/off controller because they’re American made. They’re expensive and I don’t care where my components were made. Maybe you do. My machine uses a 300W cartridge heater and Inkbird PID with solid state relay and thermocouple. The advantages of a PID and thermocouple are that (a) they’re cheap as dirt ($37 delivered from Amazon Prime), and ( once tuned, they’re very stable. My cartridge heater was less than $8 delivered from Amazon Prime. 300W is probably over-spec’d. The arbor press Until I build the frame for the air cylinder, I’m using my Famco 2 ton to test the heating unit. I made absolutely certain to over tighten the press’s guides so that the ram will stay raised. ANY skin contact with the heating plate will result in a second degree burn. The ram has a ½” hole with set screw drilled into its end. The heater The heating plate consists of a stainless steel block large enough to accommodate any embossing die I can see myself using. It’s tapped for a ½” stainless rod that fits into the end of ram. I used a vertical knee mill to dimension it and drill/ream holes for a cartridge heater and thermocouple. The heater hole (red leads) needs to be accurate within a few thousandths for maximum efficiency. The thermocouple hole (silver lead) is tapped to accept the unit’s threaded flange. Mounting and registering dies The embossing die is attached to the heating plate with a piece of 3M heat activated tape. Registration is simple. When the heater is cool, place your work piece on the press with the tape-covered die positioned where you want it. Slight pressure will leave a non-permanent mark on the leather showing you where the die is. Use a pencil to mark the edges of the piece. Slide the piece out of the way without disturbing the die or you have to start over. Place the edges of straight pieces of card stock on your registration lines and hold them down with some hard drive magnets. Don’t worry about the magnets being tall enough to hit the heating plate. Foil stamping dies are taller. Turn on your PID and get the die up to temp. You’ll have to experiment with temperature settings based on the leather and foil you’re using. Gently lower the ram so that it comes in contact with the taped die — always make sure that the leather you used to register the die is under it so you don’t damage it. Magnesium dies are durable for thousands of impressions when properly cared for. Give the ram a little mash. Get ready to stamp by placing your piece against the registration guides. Stamping You can blind deboss (stamping without foil) or use foil. To use foil, cut off a manageable section and place it flat against your work piece. Stamp by lowering the ram in a deliberate manner — you will have to experiment with temperature, pressure, and the amount of time the die remains in contact with your work piece. It’s not hard to get consistently good impressions. Results on leather and paper are nice. Top to bottom left to right: W&C bridle grain, W&C bridle flesh, Brown Horween equine Chromexcel, W&C natural tooling, black Horween bovine Chromexcel, Mohawk 130# paper. Materials 8mm x 80mm 300W cartridge heater — $7.47 delivered — http://www.amazon.com/Mold-Heating-Element-Cartridge-Heater/dp/B00DN6BQCY/ref=sr_1_8?ie=UTF8&qid=1452723192&sr=8-8&keywords=300w+cartridge+heater Ink bird ITC-100VH+25A SSR+ K sensor PID temperature controller with K-type thermocouple and 25A solid state relay — $36.99 delivered — http://www.amazon.com/gp/product/B00RMDZVNO?psc=1&redirect=true&ref_=oh_aui_detailpage_o01_s00 Misc. Various lengths of wire, terminal blocks, spade and fork connectors, grommets, scavenged inline fuse, scavenged rocker switch, etc. Suitable enclosure — I had a nice extrusion and face plates 1 ½”+ ton arbor press Stainless steel square rod and round rod in whatever dimensions you want Access to a horizontal bandsaw, vertical knee mill, end mills, drill bits, reamer, taps dies, etc. Dies and tape 3/8” raised/wrong reading magnesium foil stamping dies from Owosso — https://www.owosso.com/Products/MagnesiumDies/FoilStamping.aspx 3M heat bonding film — $22 for 1” x 180’ from Owosso — https://www.owosso.com/3MBondingFilm.aspx Foil This is specific to your application so you’re on your own.


-
Yes, it's a big problem. Ideal settings will still char the inside edge and all the way down the kerf, leaving you to spend extra time sanding even if you paint your edges. You'll be spending a lot of time tuning speed vs. power to achieve an acceptable compromise. See if there's a hackerspace in your area you can join to fuss with a laser engraver before you start thinking they're a great idea.
-
English Bridle Belt Backed With Carving Leather
Nuttish replied to dutchvalleyleather's topic in How Do I Do That?
Bridle probably doesn't need to be lined, although you can do whatever you want. Your experiments will go better if you sand the paste off the back of your bridle and smooth out the flesh of your tooling leather. -
Do you mean a branding mark? Any outfit that makes magnesium letterpress plates can also make dies appropriate for hot stamping. These will be just fine for most cold stamping using an arbor press.
-
I know you bought a Mando, but to answer your question for others, Campbell Randall sells a better engineered unit for less than half the cost. It uses a Ulanet Robotemp, high temp soldering iron handle, and a clever and dead simple tip mount, rather than Mando's hand-wound nichrome nonsense.
-
It helps to run the tip of a bone folder lightly over the stitches to sort of rub the stain into the thread.
-
There will be no discernible difference in durability whatsoever for your purposes. Credit cards will not cut through Chromexcel. It stretches far more than bridle, but it's incredibly durable and perfectly suited for pouches and sleeves.
-
What Is The Best Metal To Use For A Stamp?
Nuttish replied to leathervan's topic in How Do I Do That?
Assuming you're talking about a makers or brand mark, get magnesium dies for hot foil stamping from Owosso in Michigan. They are suitable for cold marking as well. They are the industry standard for thousands of impressions. A 5x5 sheet of dies cut however you want costs less than a laser cut delrin mark and are far superior. All you need is a cheap Harbor Freight arbor press and you're in business. -
Mind taking some more detailed shots of the inside and business end?
-
Can't Get The Edges To Burnish Like Glass
Nuttish replied to CoteCraftworks's topic in How Do I Do That?
Has anyone tried PVA glue? I wonder if it would give as durable a finish as gloss acrylic and be more easily workable (no sanding/heat burnishing).