-
Posts
428 -
Joined
-
Last visited
Content Type
Profiles
Forums
Events
Blogs
Gallery
Store
Everything posted by Nuttish
-

Recently Picked Up Tandy Brass Solid Rivets And Burrs.
Nuttish replied to tanda4's topic in Hardware and Accessories
Dark Victory Armory makes nice quality tapered brass rivets in a variety of sizes. -
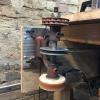
I forgot to add that bench grinders are ~3500 RPM, which is too fast for burnishing leather IMO. This is a lot more than you asked, but it's a relatively cheap way to get a more suitable machine burnishing setup and you can continue using your bench grinder as a motor: Someone at Campbell Randall told me about the merit of burnishing at slower speeds using their various Italian wheels. I use a single phase 1/3 HP motor on a 4:1 pulley connected to an arbor mounted vertically so I can switch wheels out on the top and bottom. In addition to $30 worth of salvaged materials, I needed appropriately sized reducing bushings to fit the wheels to my arbor. I replaced the bearings with babbitt metal. You can get thermally weldable urethane belt material by the foot at McMaster so you don't have to spend hours finding an off the shelf belt. An easier setup would be a cheap 3 phase fractional horsepower motor and cheap VFD so you can run it on single phase 110 with speed control, which you can't get with a single phase capacitor start motor. This would have been easier to fabricate than my setup because it wouldn't require machining the tensioner/mounting bracket that you can see in the picture. You could make the same thing out of wood with a table saw and router.
-
I have had no problems gluing lighter color unfinished flesh Dublin with Barge, but I recognize the oil and wax content of Dublin flesh is inconsistent from side to side and color to color. The backs are usually "dry" and easy to work with. The bellies are super stretchy with loose fibers that make it hard to glue. Shoulders toward the top are sometimes greasy. When I brush the glue on, I make sure that it's adequately penetrating the flesh, rather than sitting on the top. I let it dry completely, put my pieces together, and then go over the seams with a small brayer or whack them with a flat faced hammer. What color are you using? Is yours nicer near the backs like mine? Did you make sure to rub the glue in enough to penetrate? Are you hammering or rolling after the glue-up?
-
Use appropriately thin leather. It usually should not be the same weight as the outer. Depending on the temper, I go as thin as 2.5/3 oz, as with bridle I have split for me at the tannery. Notch the sides of your pieces and glue or tack stitch their bottoms to the pieces behind them to reduce the appearance of bulk on your side seams. There is a rudimentary pattern for a bifold wallet in the patterns section that describes this design consideration.
-
Osborne 66s are just fine and they're cheap. I think it helps to modify the face a bit by rounding the edges off more than the factory does to avoid marking your work. You could also similarly modify the face of a common bodywork hammer. You don't need a fancy hammer unless you feel like you need a fancy hammer.
-

Burrs On Copper Rivets After Doming. Solution Suggestions Please?
Nuttish replied to Tallbald's topic in How Do I Do That?
The rivet is the part with the head and shank. The burr is the washer. 1/8" is quite a lot of rivet shank to leave exposed IMO. You run the risk of bending it when you go back to peen or round the top over and it leaves a long nipple to dome. TinkerTaylor's strategy is super classy and conveys that the piece was definitely made by hand. Dimensioning: To get the more uniform look, cut your rivet to leave yourself about 3/32". You could use a jeweler's coping saw if you wanted. A Dremel is just as good. Pre-dome it a bit by sanding or filing a taper at the end. Polish if you care (sounds like you do since you're concerned about distorting the end of the rivet). This makes it pretty and easier to place the burr before you set it. Setting: • Don't set the burr so deeply that it deforms the leather more than just barely compressing the grain. You don't have to whack it in one go. Tap it down until you get it where you want. I think this will help reduce the "burrs" you refer too, since you have more control over making sure you set the burr straight down the rivet vs. gouging the shank by distorting the burr in any dimension. Doming: • The doming tools that come on Osborn hand setting tools suck. They make it too easy to mark your piece or further compress the rivet. • BondoBobCustomSaddles's tool is the way to go — the only thing I would add is make it out of a 1/4 x 2 grade 8 bolt. Grade 8 is tempered, so will be a more durable and safer tool. • Dome by carefully tilting the tool about 5 degrees per tap and rotating the angle around the rivet until you get the result you want. You don't have to whack the shit out of it. More taps is better and safer. -
Olive oil and beeswax.
-

Burnishing/hardening Edges Of Soft Leather
Nuttish replied to kipling79's topic in How Do I Do That?
Gum won't burnish leather with loose flesh. You'll have to impregnate it with plastic if you want it to harden. I should have said how I apply the paint. It's rather quick, not a pain at all. Roll clear acrylic on sparely with a Tandy dye roller or however you usually neatly apply paint; distribute it and rub it in with finger (nitrile gloves); repeat; sand however you wish. I guess you could also use Resolene or acrylic floor polish. -

Burnishing/hardening Edges Of Soft Leather
Nuttish replied to kipling79's topic in How Do I Do That?
For stuff with loose flesh like that, I edge bevel and then use the Italian clear acrylic edge paint from Campbell-Randall. You can sand it between coats to build a smooth and translucent finish. Here's Horween Cavalier, which is basically impossible to burnish. -
I echo posts about the stability of your work surface. In addition to marble countertop pieces, you can score a piece of broken headstone marble from a graveyard or monument company — they're upwards of 3" thick sometimes. You can smooth up broken edges with a bastard file. You can get a 9x12x3 B grade granite surface plate for a machine shop on eBay for less than $100 including shipping. Probably substantially less if you look around a bit. There are lots of used lithography stones for around the same price shipped. These will all be as stable as it gets if your bench is solid. Check out Fine Woodworking for simple woodworking bench plans.The laminated 2x4 tops are cheap and extremely stable. Like I've said elsewhere on the forums, you can make a cheap and super nice maul out of a length of 3 or 4" HDPE rod from McMaster and a piece of turned hardwood chair leg for the handle. Forstner a centered hole big enough for the leg, insert leg, screw leg in from the sides with a few wood screws. If you want a taper, turn it on an engine lathe, keeping in mind that HDPE flows, so you have to work carefully lest it slip out of the chuck. Not good. What is good is that you don't care about precision, so rechucking the thing as you work is no big deal.
-
Some neoprene will absorb shock and keep it from moving around.
-
Sorry, I don't follow your reference to a 1" wide strip. I should have given the dimensions. This is a bag with a ~5x12" ellipsoid bottom that is sewn directly to the "tube" of the bag. Since the bottom has no corners and can't be boxed, this is the only order of operations that makes sense. This is at least how I would make it out of canvas. I'm skiving all the way around the edge of the bottom and bottom of the "tube". The problem is bulk in the seam in the outside curves at the ends of the ellipsoid.
-
I'm looking for construction strategies for affixing a "tube" top to an elliptical bottom. Notching the "tube" piece, as with sewing outside curves in fabric, isn't working. The materials are ~5oz chrome tanned pullup and ~5oz English bridle. Any thoughts appreciated.
-
2x http://www.amazon.com/Motor-Extension-Grinder-Polish-Buffer/dp/B000OVNQXI + 1x http://www.amazon.com/Piece-Jewelers-Polishing-Compound-Assortment/dp/B0143B7I1A/ref=sr_1_1?s=home-garden&ie=UTF8&qid=1450108360&sr=8-1&keywords=buffing+compound+assortment
-
This site is genius. They should have a section called "Stuff Someone Made On a Laser Cutter".
-
Oh yeah. There's only one choice for a barista. Chromexcel. They won't care that it's hot and uncomfortable. Because hipsters and Horween. I'd suggest asking Maverick if they have any in ~3 oz. Anything heavier may make the piece too hot to wear all shift. It will be cheaper than Springfield.
-
Perhaps a Bisonette edger. I use them to trim and level the stitching allowance on rolled handles and interior seams.
-
That is a Kingsley hot foil stamping machine. Model M-60 or M-75. The badge will say.
-
You can make a workable jig with three pieces of leather. Two layers — the top has your punch holes centered for whatever width you need. The bottom layer is two pieces that center your strap under the holes stitched to the top. This is a step up from the standard single layer template people use. Makes it easier to crank blanks out without thinking.
-
I'm not talking about oblong punches. You'd have to make your own jig for those with three pieces of leather. I'm talking about Weaver round and oval punches. The Master Tools range are compatible with Weaver's adjustable centering jig. See: http://www.weaverleathersupply.com/Catalog/ItemContent.aspx?ItemNumber=29291&CatalogId=001&CatalogDetailId=42&NSM=Y
-
Because it's rarely true.
-
Weaver makes a centering jig for hand work that's compatible with their round and oval punches.
-
Maybe tell us how the apron will be used?
-
I find the Better Bag Maker helpful because it goes through the parts and construction of any kind of bag. Most of the principles will apply equally to a leather bag that requires inside-out construction. The book assumes you already know how to sew reasonably well.
-
You'll thank yourself for picking up some stones anyway. And if you don't want to spend a lot of money on a fancy maul, you can pick up a 1 foot length of 3" HDPE rod from McMaster-Carr for $20. It will whack things real good.


