-
Posts
99 -
Joined
-
Last visited
Contact Methods
-
Website URL
https://www.etsy.com/ca/shop/KaiVenemoreLuxuries
Profile Information
-
Gender
Male
-
Location
Vancouver, BC, Canada
-
Interests
Photography, woodworking
LW Info
-
Leatherwork Specialty
Men's Briefcases
-
Interested in learning about
Life
Recent Profile Visitors
3,950 profile views
5 Spice's Achievements

Member (2/4)
-
I realize that this thread has long ended, but I just want to stress how valuable Bruce Johnson's direction is here. I purchased a Landis 30 from ebay almost a year ago and have been struggling with it until this evening. I had sharpened the blade to a razor's point, cleaned and serviced the machine and adjusted every nut and bolt I could trying to get the splitter to do anything consistently. Just when I thought I had it working, it would show me otherwise. I don't even want to count up how much leather I've wasted trying to get it functioning. I have called it terrible names and was at the end of my rope when I thought I'd give it one last try before throwing in the towel. That's when I came across this post by Bruce. The fix was a subtle, simple one. By backing off the back-up screws a half turn and pushing the blade away from the rollers by just a fraction of an inch , it has turned my cast iron nightmare into a leatherworkers dream. I can easily split 9 oz down to just under 1oz easily and consistently, even at 5 1/2" wide! Bruce, I can't express how grateful I am for your knowledge and wisdom. I'm completely elated that "WE'VE" finally got this thing to work. Never thought a leather splitter would give me so much joy. Thanks Bruce!
-
I've purchased a few items from Levinus' list. Stand up guy, and the products are in great shape, just as described.
-
Thanks! I do all of my own metal and wood work.
-
It all depends on what you're looking for in a finished product. Personally, I don't like a loose lining. I turn the edges of the fabric, then adhere the entire surface to the leather followed by stitching. I find that cement just soaks through the fabric, so it isn't really the right glue for the job. Try Sta-put for thicker fabrics or interfacing for thinner ones. It has taken a lot of trial and error to get it to work to my satisfaction. There may still be some separation in the flap where the bag flexes the most, but it's manageable and generally non-existent when the bag is opened.
-
Thanks bob21804. I always line my bags, usually with high end men's suit material. Some of the english and Italian wools lend themselves very well to the design. What has happened lately is that customers are supplying the fabric that they want to use, and it always has a story behind it. I recently finished a bag for a client and we used his fathers favourite plaid shirt. I incorporated the shirt pockets into the bag as well. Turned out great. Thanks bikermutt07!
-
Thanks makitmama.
-
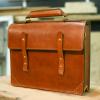
Just finished this briefcase and thought I'd share. Purpleheart and aluminum handle with a cotton vintage cloth lining. I tried to keep this one crisp and clean with as little fuss as possible. It's a lovely balanced bag to hold. The handle pivots very freely on the bag so no matter how you hold or wear it , it always stays vertical. By swinging the handle towards the back it creates a clever stand for the briefcase. Comments and criticisms are welcome.
-
Nice work! looks like you've been at it for a while.
-

Another red handbag
5 Spice replied to olenawills's topic in Purses, Wallets, Belts and Miscellaneous Pocket Items
Beautiful bag! -
Just finished this briefcase and thought I'd share. Purpleheart and aluminum handle with a cotton vintage cloth lining. I tried to keep this one crisp and clean with as little fuss as possible. It's a lovely balanced bag to hold. The handle pivots very freely on the bag so no matter how you hold or wear it , it always stays vertical. By swinging the handle towards the back it creates a clever stand for the briefcase. Comments and criticisms are welcome.
-

Horween Latigo bag, Saddle stitched
5 Spice replied to 9tpi's topic in Purses, Wallets, Belts and Miscellaneous Pocket Items
Exceptionally done! -

First Bi Fold With The Fileteuse
5 Spice replied to krominix's topic in Purses, Wallets, Belts and Miscellaneous Pocket Items
Looks great. Are you pleased with the results? -
You can profile soft metal with a wood router bit, you just have to work slowly and remove very little material with each pass. Use them just like you would an end mill; make a pass and drop the bit 1/32 and make another pass, etc, etc. It would be best if you could get some cutting oil onto the surface, but it's going to make a mess so wear an apron and a face shield.
- 19 replies
-
- briefcase
- laptop bag
-
(and 5 more)
Tagged with:
-

Zipper Satchel Bag
5 Spice replied to huns's topic in Purses, Wallets, Belts and Miscellaneous Pocket Items
Hats off to you. Another masterpiece.


.thumb.jpg.d5a9cf726a0c0ebf95ccef0f85cd1574.jpg)
-3.thumb.jpg.4a1a47544b463b46a21ec5c91b18f0f3.jpg)
-4.thumb.jpg.e366d704d9a92b779c51af80f696b6ed.jpg)
-5.thumb.jpg.8c574a22b5ef6d2b3a599a705e1c4d3d.jpg)
-6.thumb.jpg.6e808c901d1ccafcbdf3ac603adf2d69.jpg)
-7.thumb.jpg.17a280854547a1762d34219635190ffa.jpg)
-15.thumb.jpg.fdcf4f6476193572b0a082fa6d416619.jpg)
-17.thumb.jpg.ff5c18a6e3962facb52745f9e6b88faf.jpg)
-21.thumb.jpg.6165ce25eaf1f49fd3e64ff4270583a0.jpg)
.thumb.jpg.21904d5241037d0b5a6c73fef3f68b62.jpg)
-3.thumb.jpg.17657933311cbcbad11c5b0168fcceba.jpg)
-4.thumb.jpg.a73b5ec2a8cf17b3ecd27914878d4a43.jpg)
-5.thumb.jpg.967277a045da0ffb4f591cdb1c5e4155.jpg)
-7.thumb.jpg.e7cc540c067b6e3df1426eafbe1d7852.jpg)
-21.thumb.jpg.c5829cf75160564bb1cade5d7bc3a849.jpg)
-17.thumb.jpg.460f4b660a64cbd44f2d0e0b4d4975a0.jpg)
-11.thumb.jpg.97191ce8a666b510142f79f72658812b.jpg)
-15.thumb.jpg.511348fc36185aeafb601ecd6e125642.jpg)
-19.thumb.jpg.69d5a4b7ae8cd743949f3ce64c8d084d.jpg)
-17.thumb.jpg.c67019dfe44c38eacbf687407affa121.jpg)