Timbo
-
Posts
361 -
Joined
-
Last visited
Content Type
Profiles
Forums
Events
Blogs
Gallery
Store
Everything posted by Timbo
-
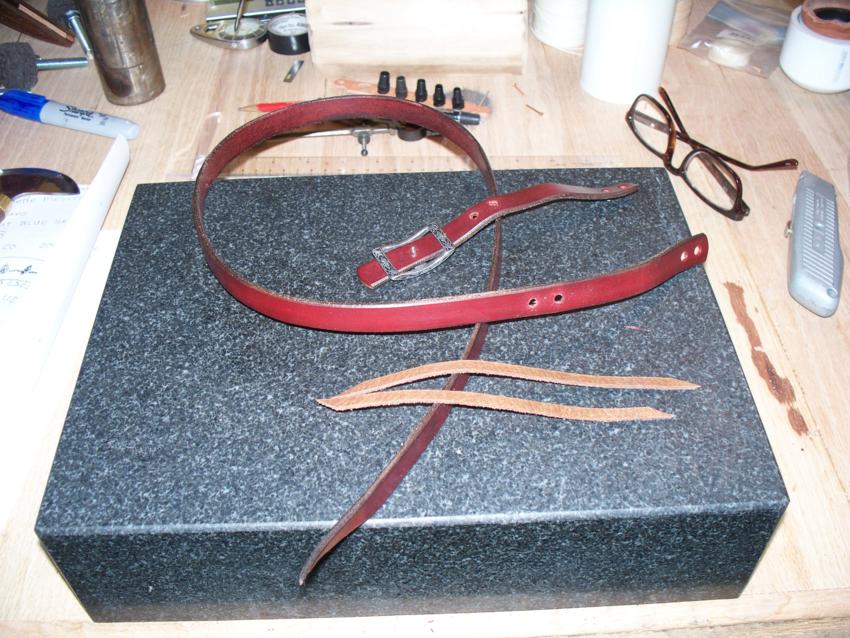
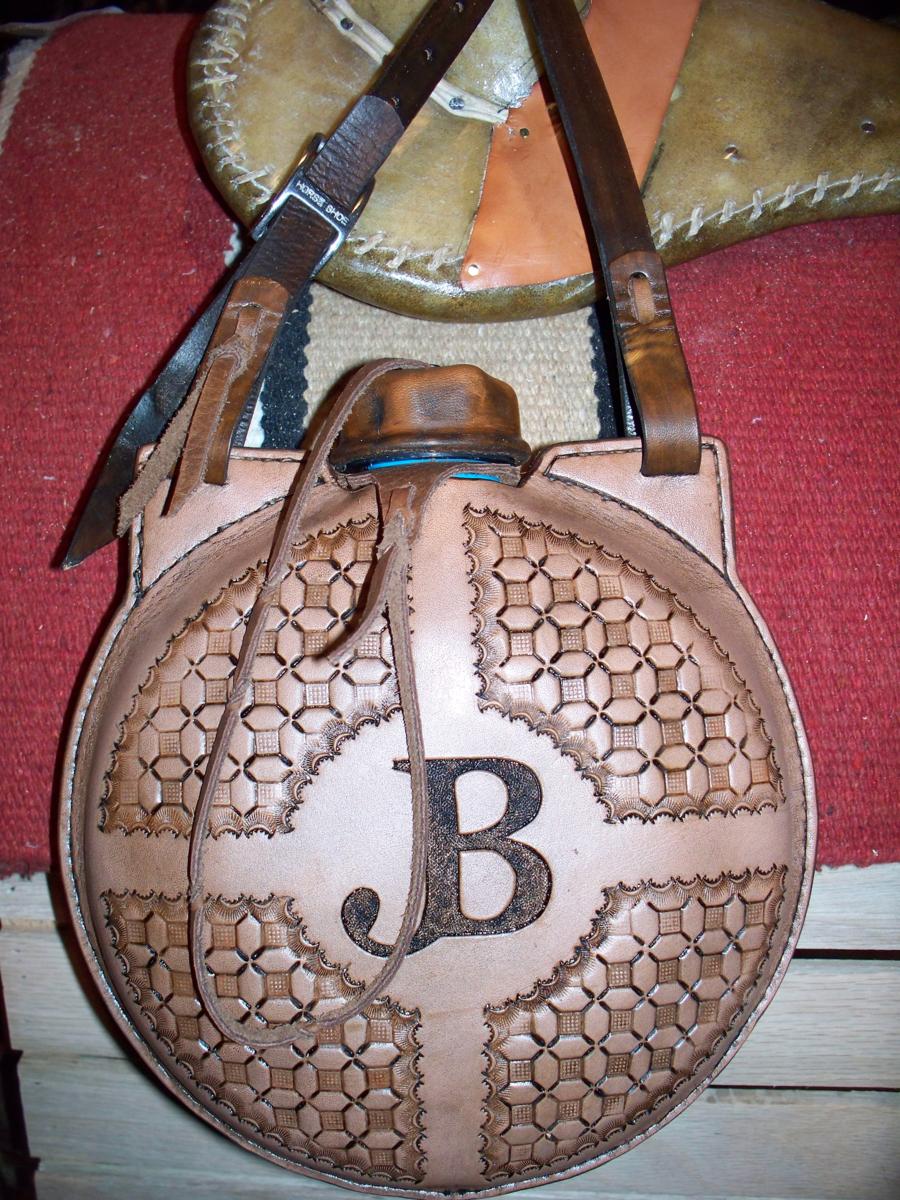
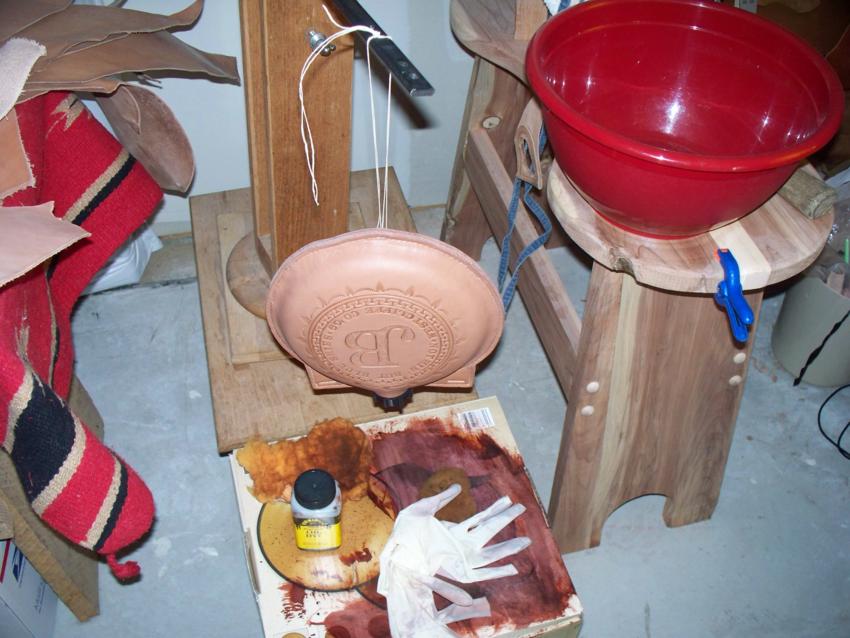
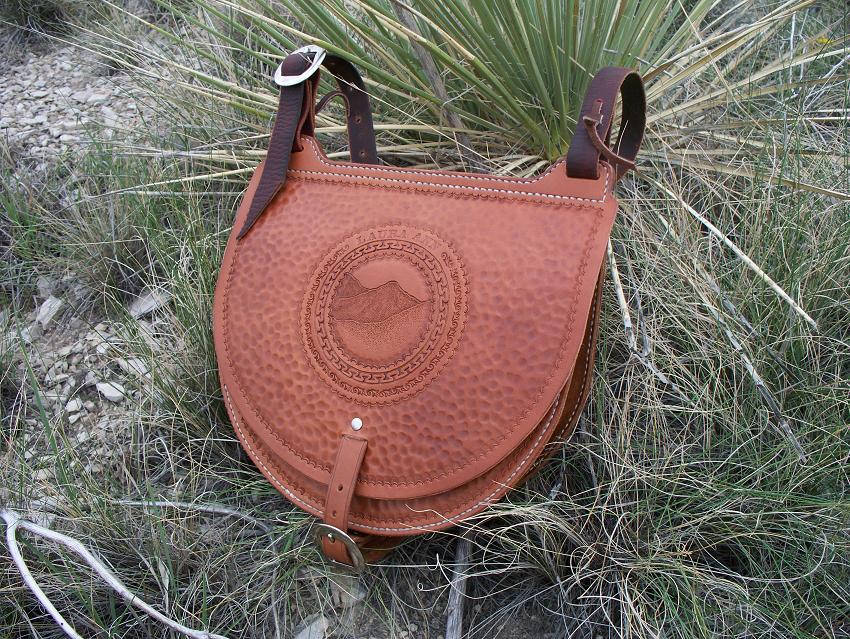
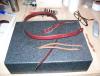
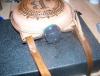
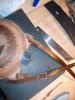
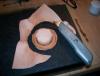
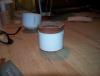
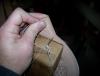
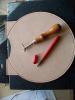
The strap of the canteen can be made any way you want. For this one I used a conway buckle from Jermiah Watt. It is stainless steel and very, very nice. For a saddle canteen I usually keep the strap fairly short. Somewhere around 18-20 inches long. I like to tie the straps on with leather thongs and tie them off with bleed knots. For a saddle canteen I put a twist in it so it stays on the saddle horn better. The last tip I will give is to slip a cardboard paper towel or tp roll over the neck to keep it clean when you are dying or staining the canteen. This customer wanted this canteen to be finished in a "rustic" fashion so that is what it is. It can be finished much much nicer and given a way more refined look if that is what you want. Well there it is................didn't plan on it taking this long but I wanted to be thorough. Hope it looks interesting enough for you to want to make your own or at least use some of the tips I've passed on. If anyone has any questions, don't hesitate to ask. ............and if you've stuck with it this far....well thanks for that too!!!! Tim Jones Drunk Horse Custom Leather Pueblo West, CO

-
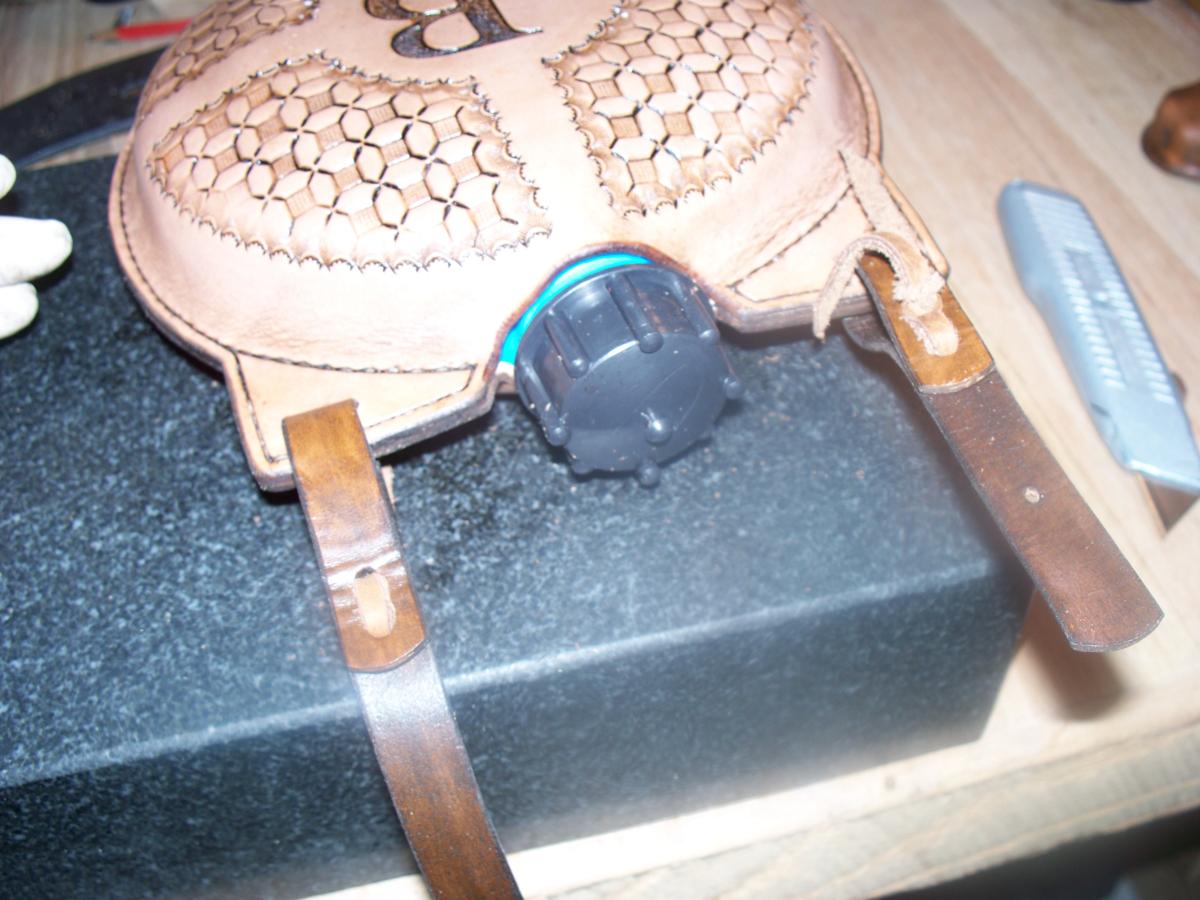
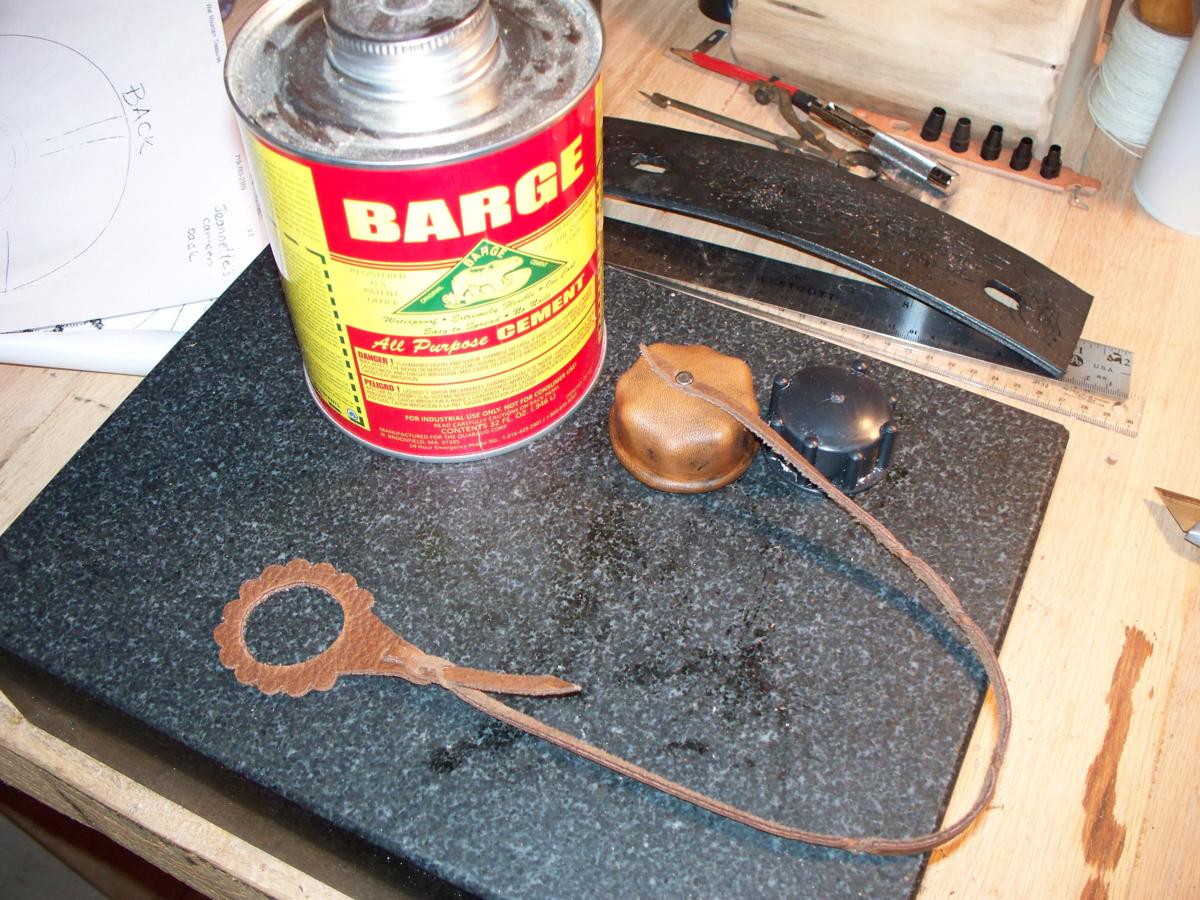
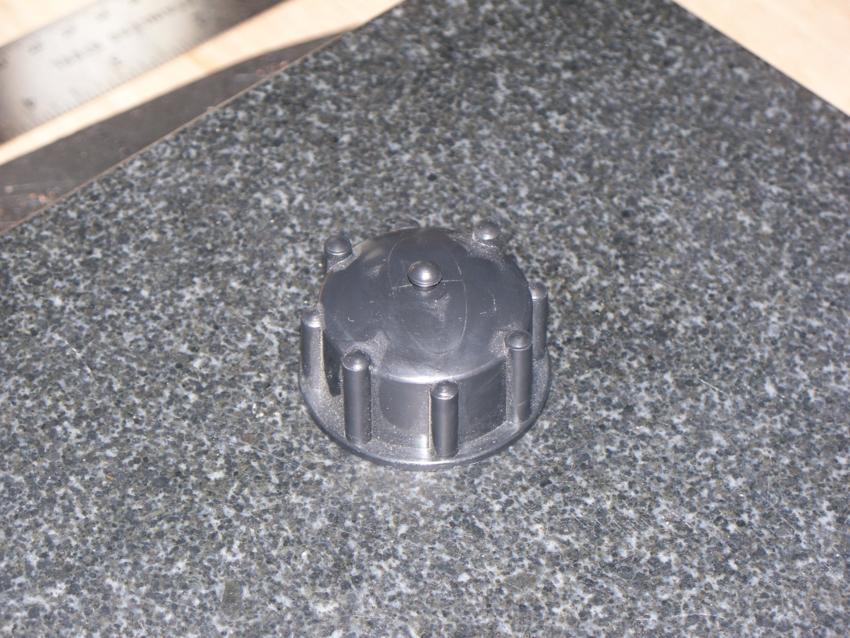
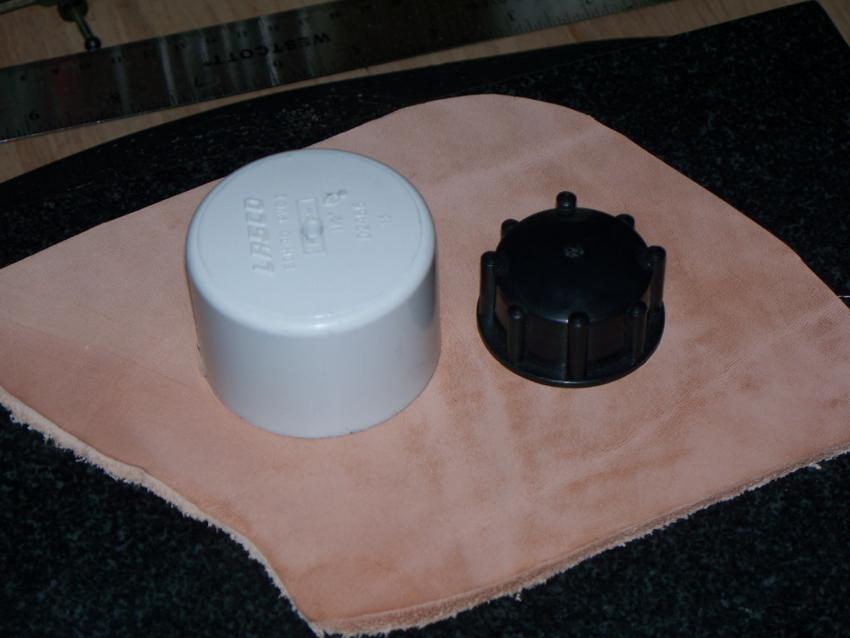
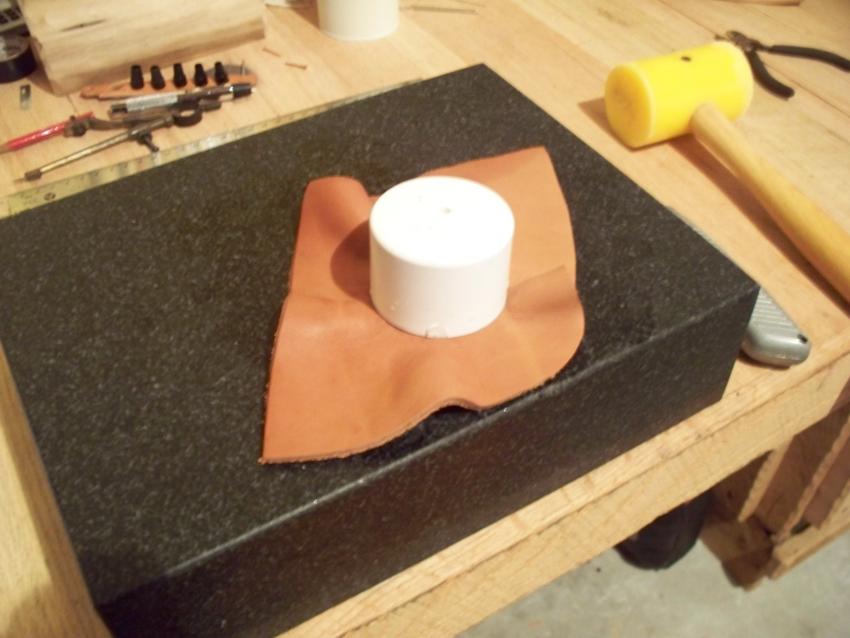
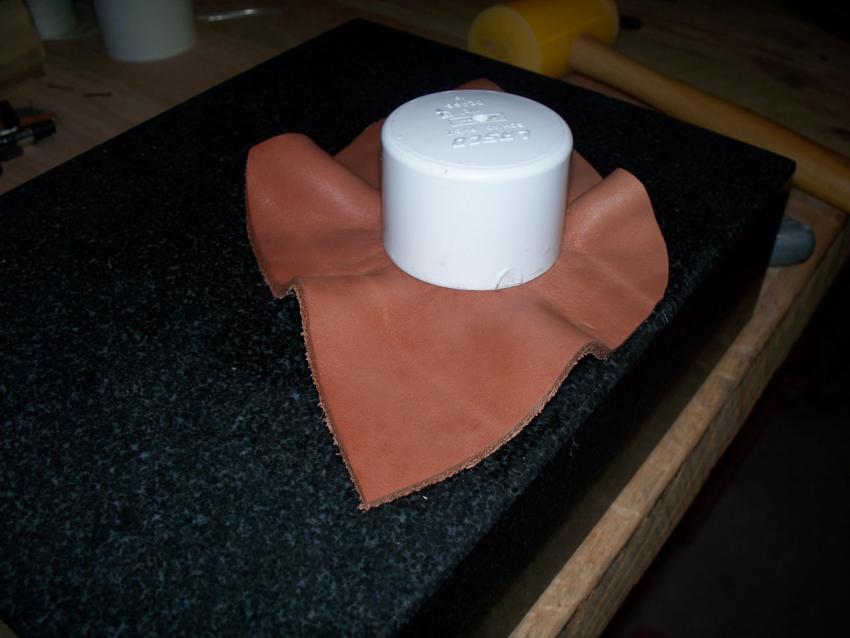
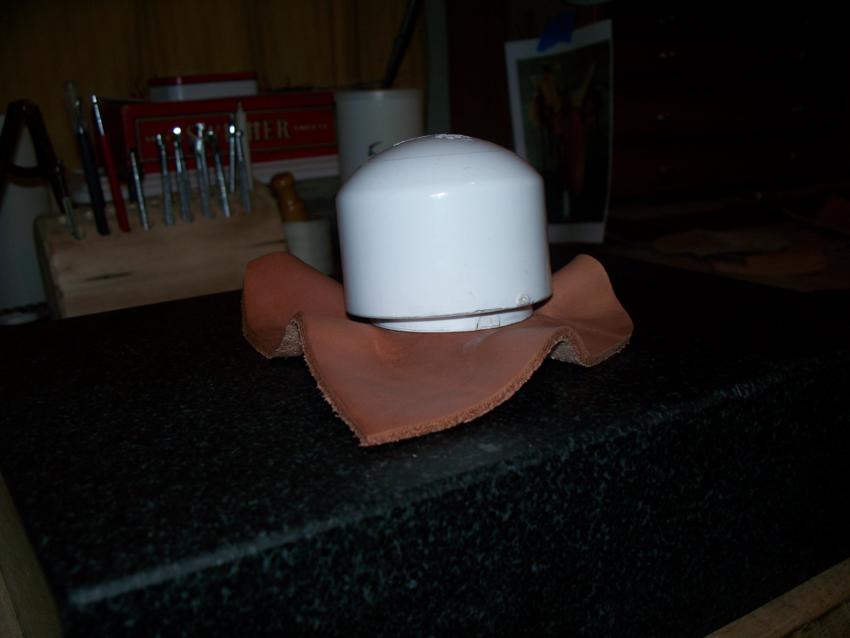
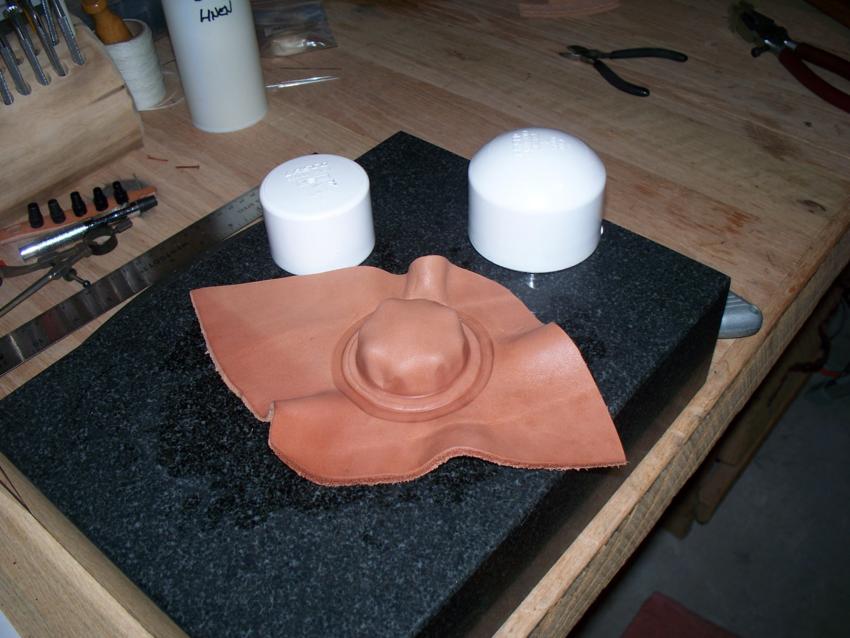
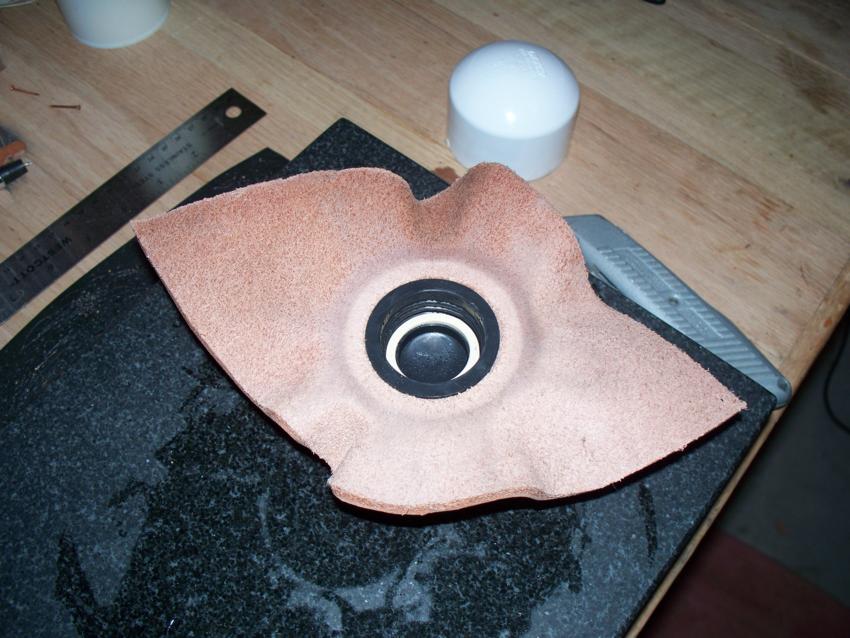
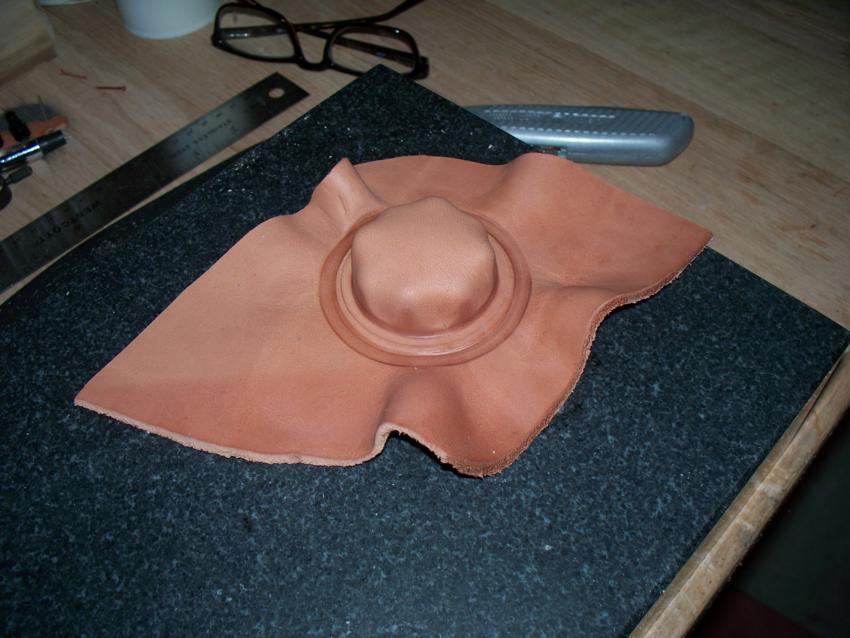
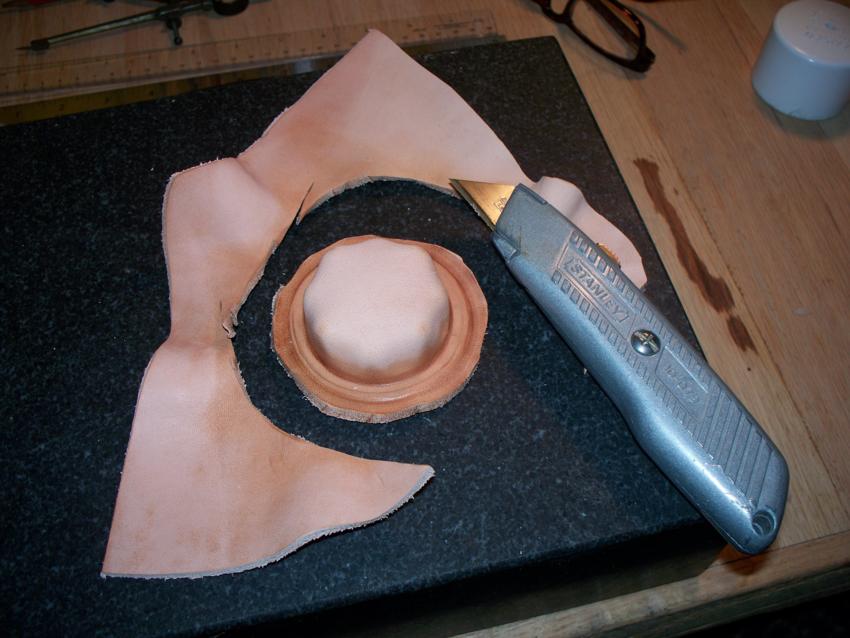
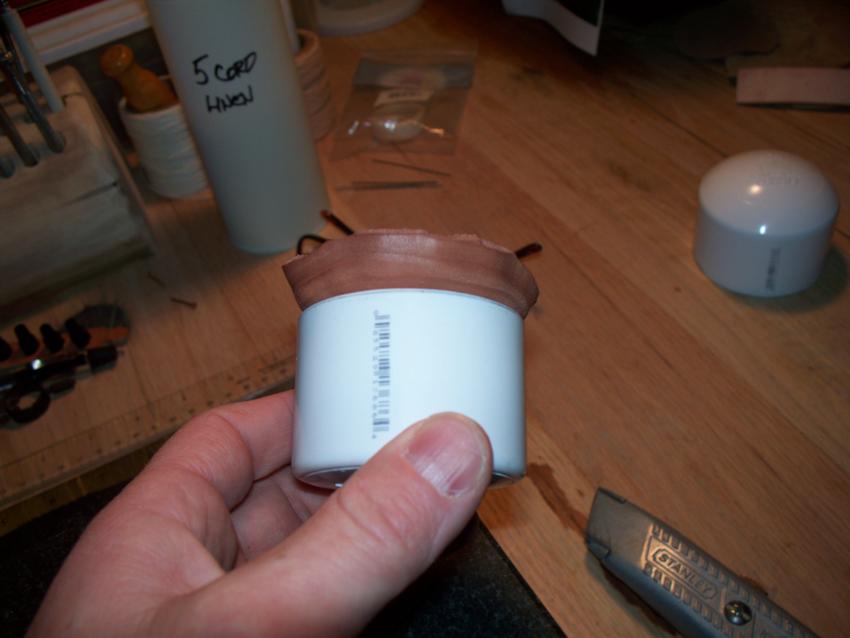
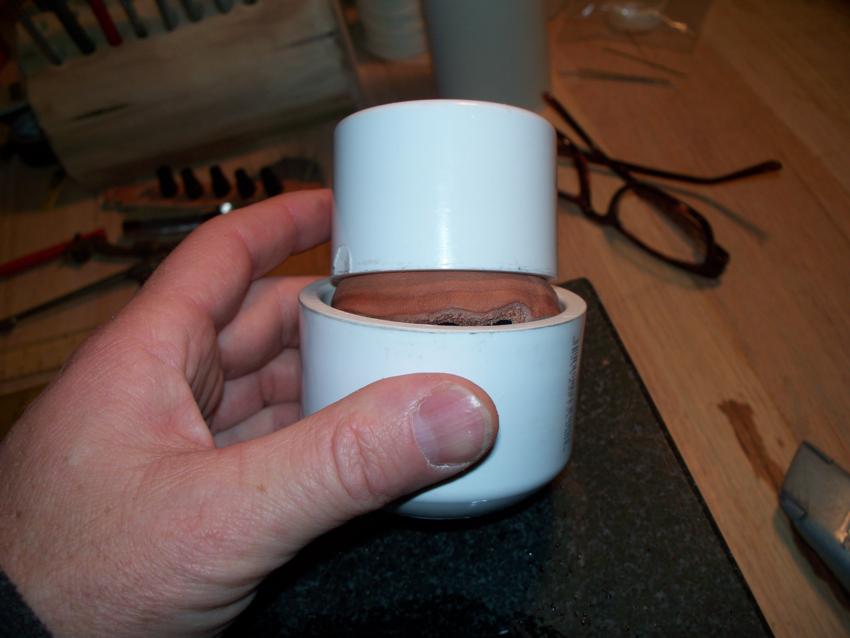
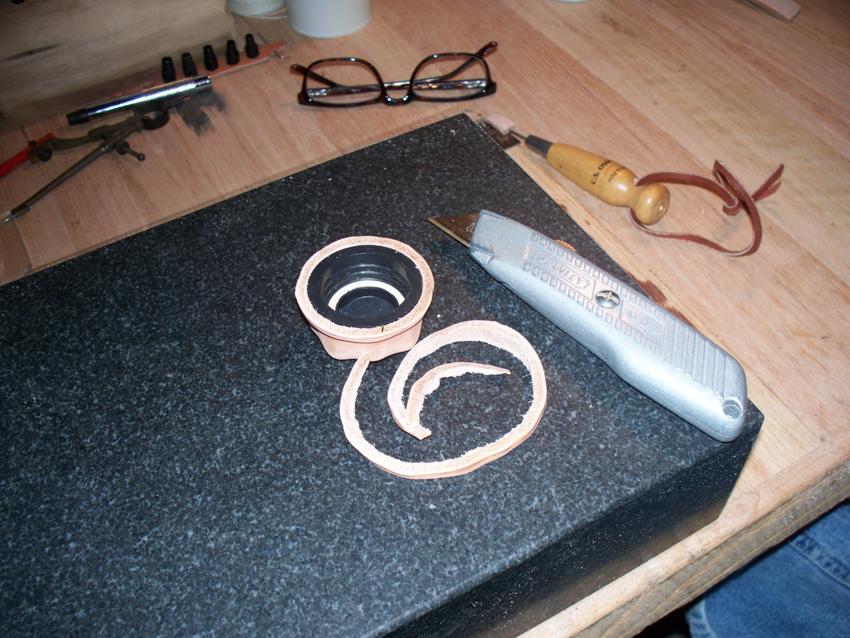
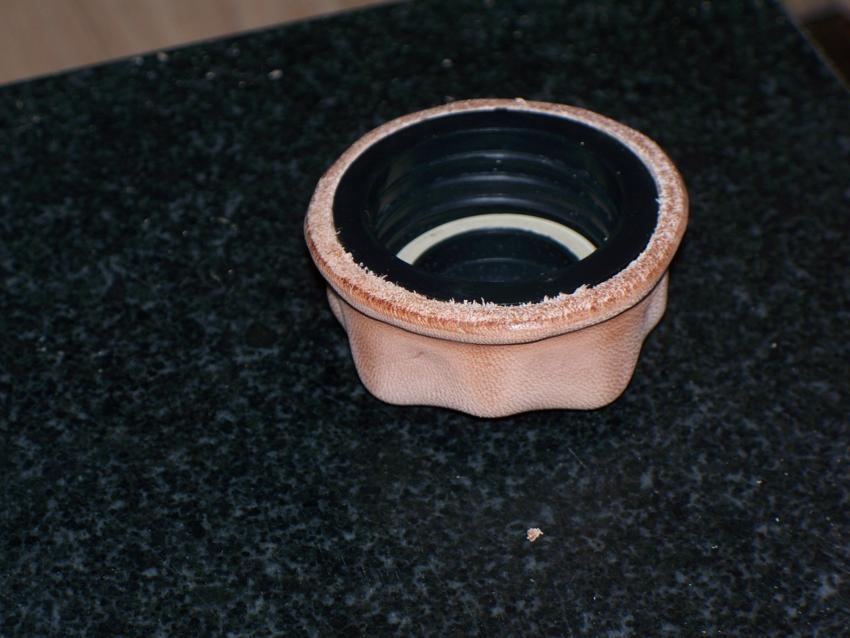
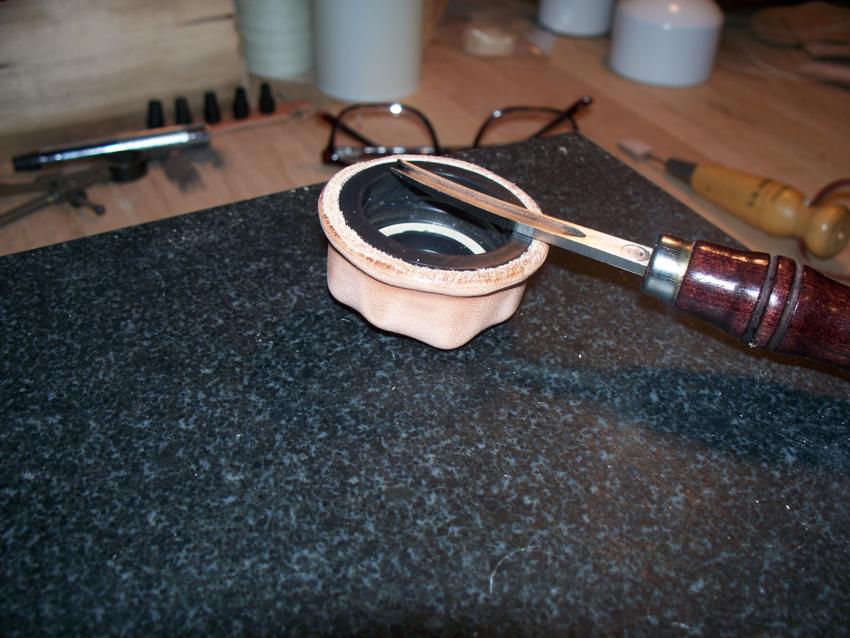
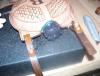
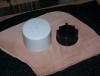
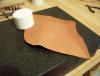
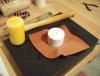
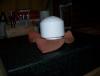
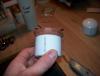
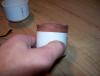
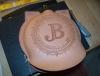
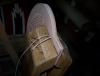
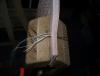
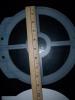
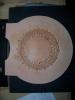
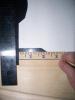
Now it's time to cover the cap with leather. The perfect piece of leather for this job is that stack of flanky, stretchy belly pieces that you don't ever have a use for. Allow yourself plenty of excess. I usually start with a piece 5-6" across in both directions. Throw it in a bowl of water and let it get good and saturated. While it is soaking I will cut the little button off the top of the canteen cap. Set the cap down on your rock or other hard surface and put the well saturated piece of wet leather on top of it, keeping it centered. Now take a 2.5" PVC pipe cap and drive it down over the leather and cap with you mallet. The trick here is to have drilled a hole in the top center of the cap to let the air out. Without the hole it will be really hard getting the cap to go down over the wet leather. You're going to have to smack it pretty good, but be careful and not smack it too hard or you can break the canteen cap. You also have to judge the thickness of your leather for this as well. Too thick and it won't go over the cap. Once you get the 2.5" cap driven down over it and it is nice and even all the way around, take a 3" pipe cap and slip it down over the 2.5" cap and press it down and turn. Keep doing this until you get a good ring going. Take the 3" cap off and set it all aside for 4-5 hours and let it dry out some. Once it has dried a little put the 3" cap back on and press and turn some more. This time it will leave a nice burnished ring. Take all the caps off and set it aside and let it dry some more. Before it is totally dry cut off all the excess leather up to the outside circle. Now roll the edges of this until they are sticking up out the pipe cap. You can also use the 3" cap for this purpose too. Set it aside without it being in any of the pipe caps and let it dry totally. When dry take the knife of your choosing with a sharp blade and trim all the excess off even with the bottom of the plastic canteen cap. When that is done and even all the way around, use your edger to round off the square edge you just made. Now you can burnish it and finish it as normal. When you are done finishing the cap be sure and glue the leather to the plastic. In this case I riveted on a small thong that I will use to keep the cap from being lost. I also make a keeper for the other end of the thong that goes around the neck of the canteen.


-
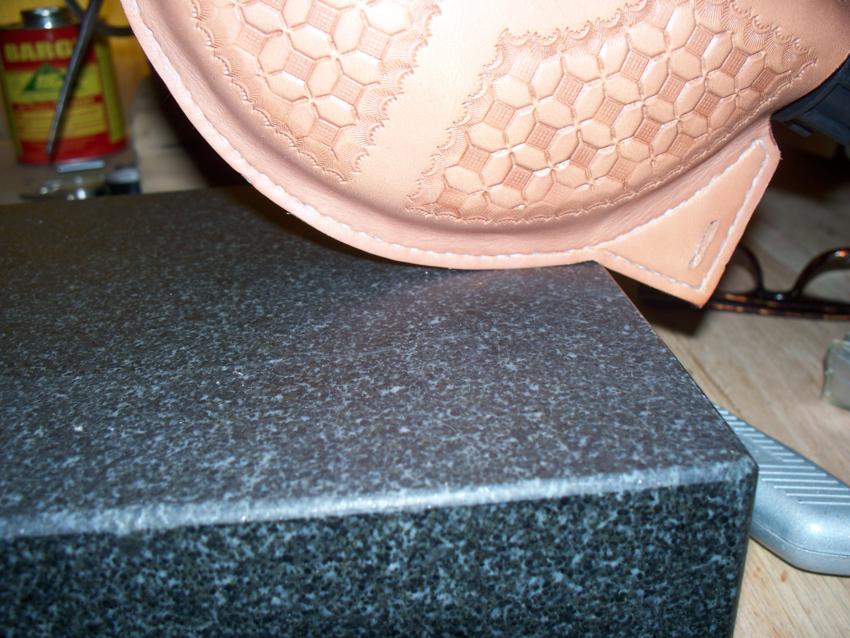
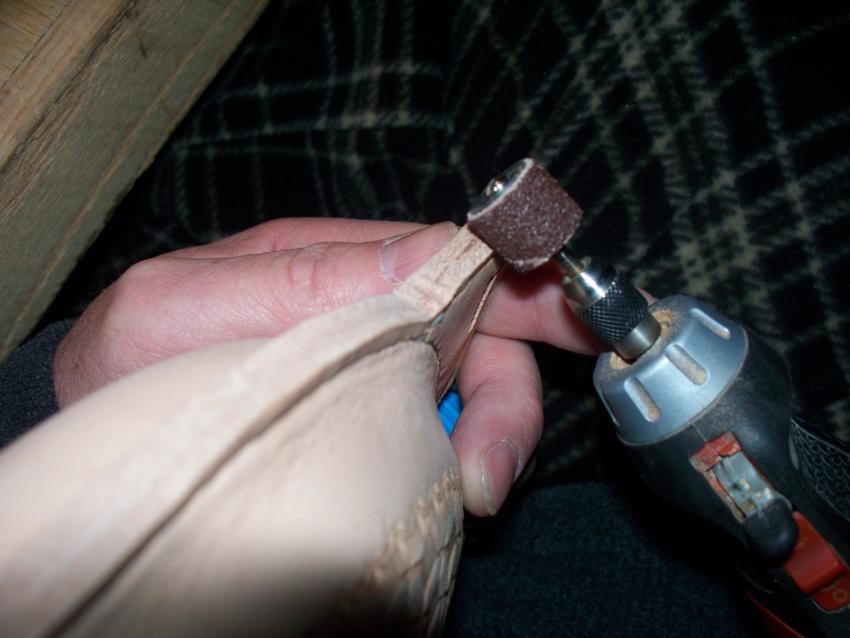
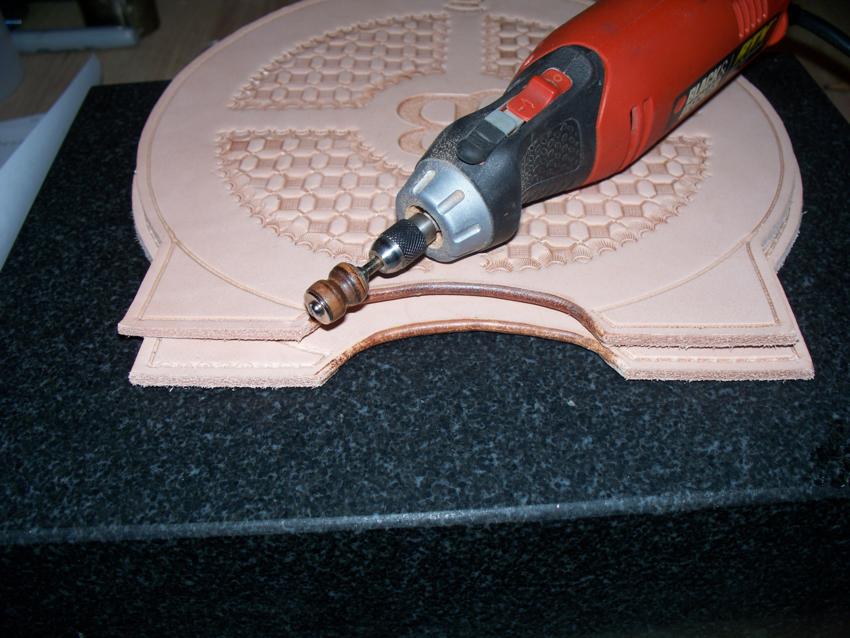
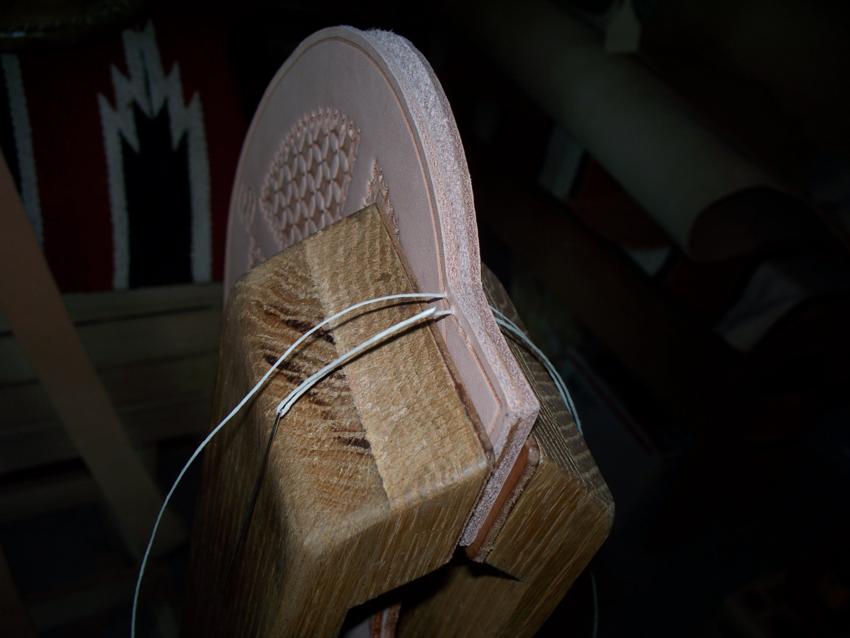
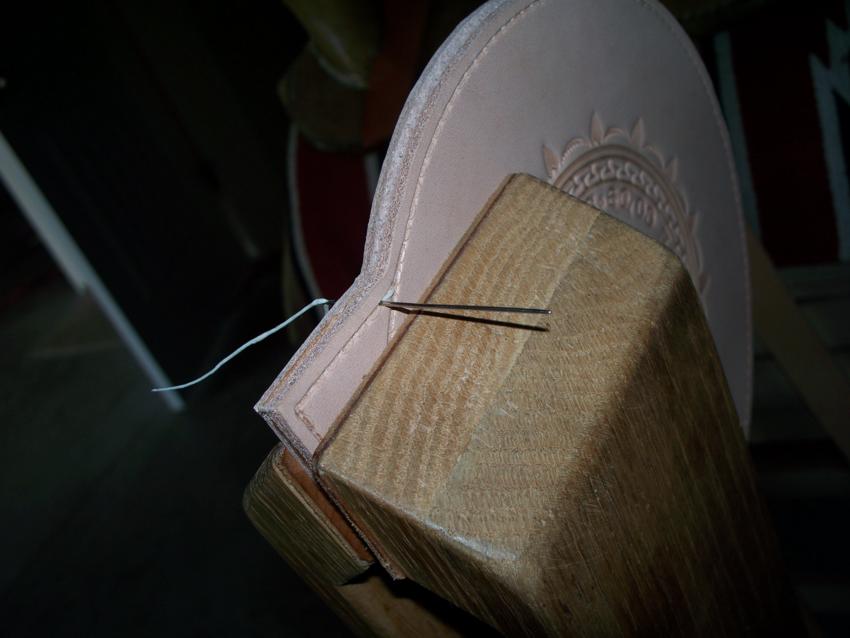
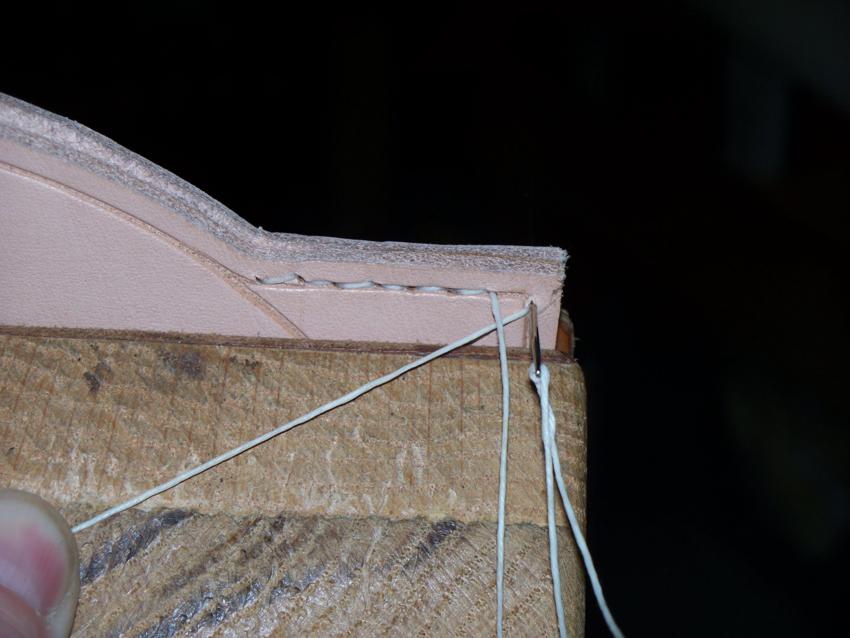
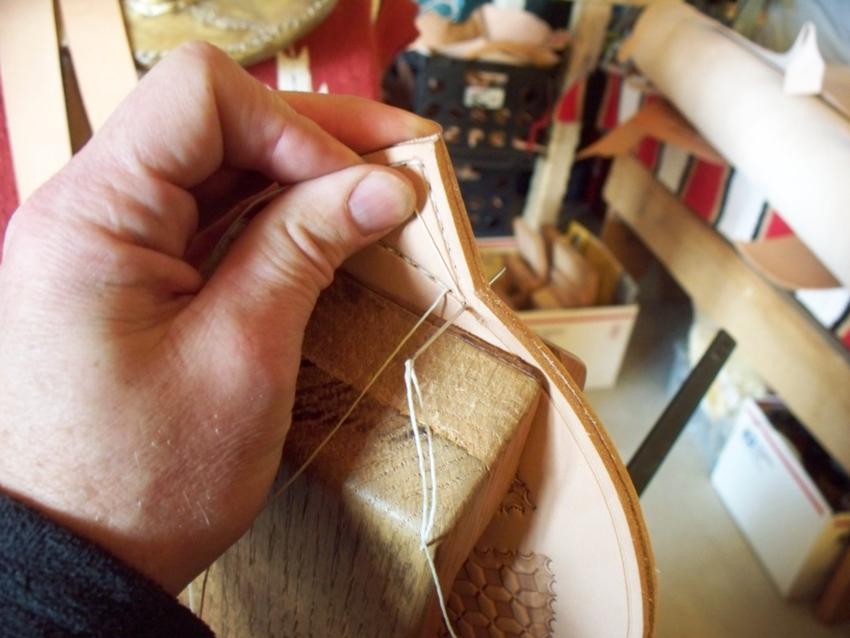
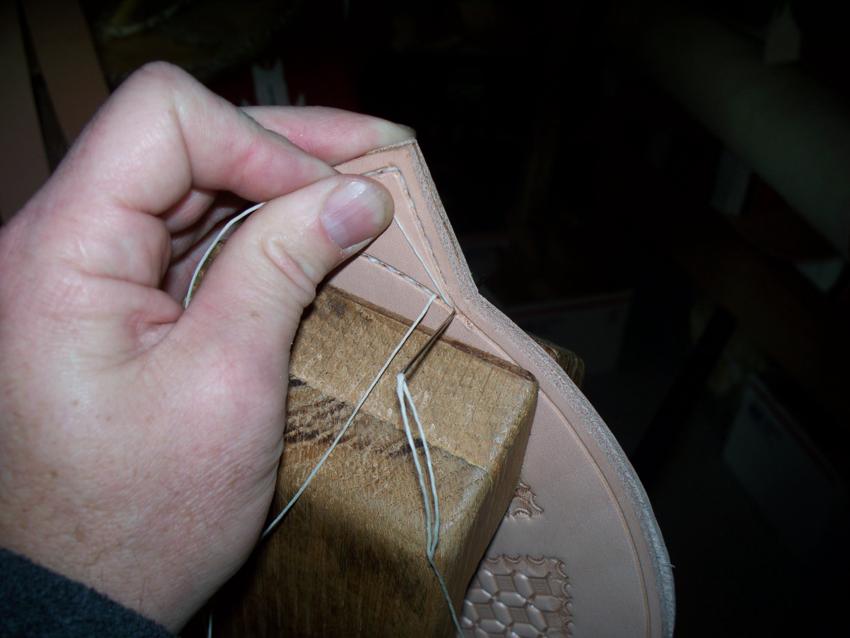
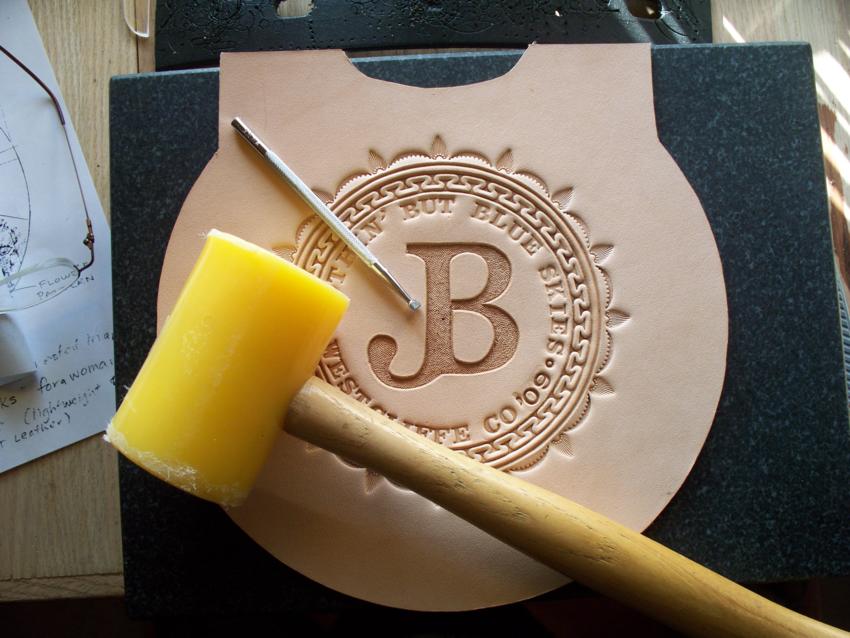
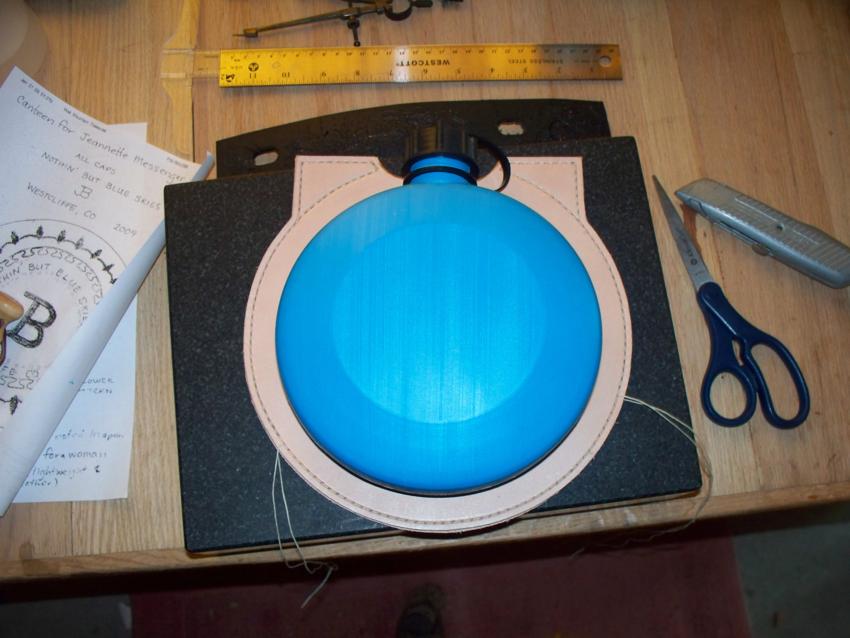
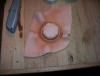
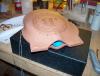
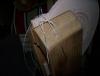
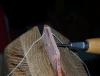
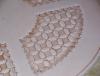
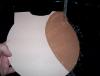
Now you can get the leather wet. Soak it inside and outside until it is just wet enough. Don't just throw it in a tub of water and let it sit. The longer it is in the water the more likely you are to start losing some of the depth of your impressions. It's hard for to tell you how wet to get it, just get it wet a little at a time until you feel the moisture level is something you can work with easily. You can always put more water on it. But no matter how much or how little water you use.......you are going to lose some depth to your impressions, especially those on the outside edges. Now before you go ahead and stuff the canteen into the leather, use your hands and thumbs to stretch the leather around the sewn seams. You don't have to stretch it alot but getting it opened up will help greatly in the molding process. Once you have done this go ahead and stuff the canteen into the leather. Be sure and keep the neck of the canteen centered in the opening and as soon as you can get the cap on. This helps to keep the canteen from crushing and once it is on you can get a little more physical in getting it in the leather. But don't get to rough with it as it could still crush or tear a hole in it. Once you get the canteen in there go ahead and resume your stitching. It will help if you will take one of your needles and open the holes back up so they will be easier to find when you are looking for them. I'll usually take 10-15 stitches then go over to the other side and stitch it for 10-15. Do this until you get it all stitched up. But be warned the last 10 or so stitches causes the leather to pucker and do really weird things that make it hard to find the stitching holes. To finish it off I will overstitch the last couple stitches and take the thread to the back side and cut them off flush. Now set it aside for a day or two (depending on your humidity level) and let it dry. Sometimes after it dries I will cut all the stitches out to do my dying and finishing, then sew it back up with bright white thread so it will looke all brand new and pretty. Something about nice white stitching just makes the final product "pop" if you know what I mean. On this canteen, before it is totally dry, I will even up the edges some by rolling them on my rock and what doesn't even out like I think it should gets a light sanding from my Dremel drum when it is dry. Be carefull with that tool as it is easy to take too much off or burn the edges. Then when it is dry I will edge it. I tend to leave the edges flat and just round off the corners. But if you have a big enough edger you can totally round them off which is also a nice look. You can also use a Dremel and sanding drum to round the edges to your taste........but be careful!!! (I'll dull a new sanding drum on some hardwood or something before taking it to the leather)


-
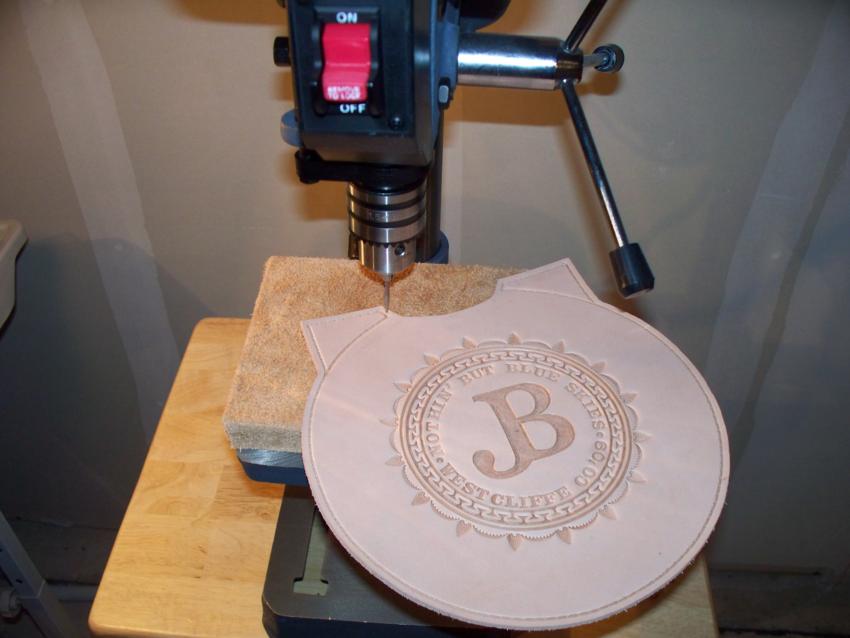
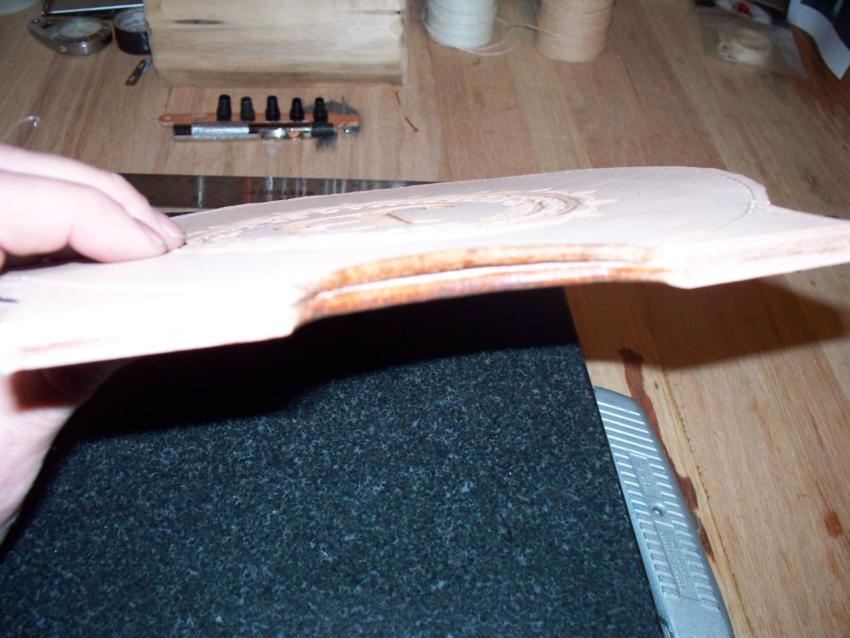
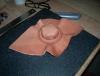
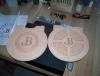
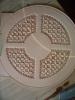
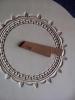
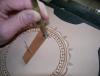
As you can see from the finished pic of the back, I put the initials on the back as well.....with my cartouche at the bottom. If the customer doesn't want anything personalized on the back I will put my cartouche in the center with a circle around it made with the same crescent border tool. Here are the finished front and back parts of the canteen. All the tooling is done, the leather is dry and the tape has been removed. Now for the stitching.............. Start by running your chosen overstitch wheel around the outside to mark your stitch spacing. Start at the bottom part of the vertical groove where it meets the circular groove. Go up, over, down and around. Do this on the left and right sides and let the grooves meet at the bottom. The bottom is the part that will not be seen much so the top will be stitched up symetrically on both sides. Now I will prepunch my stitching holes on the front side. Sometimes I will chuck my awl blade up in the drill press and use it as an arbor press to punch the holes. Sometimes I just use my awl and haft and prepunch the holes laying flat on my bench. (with something under the leather to protect the blade of course) The reason I pre punch is that it just makes it so much easier to run the awl thru one thickness rather than 2. Now before the stitching begins, edge and burnish the 2 rounded edges where the canteen neck will be. It is important to do them now as once it is sewn, access to them will be limited. I use my homemade burnishing tool in my Dremel to finish the edges. For this application I just used water on the edges before I slicked them. Now put the glue of your choosing on the top tabs and glue them together. Be sure and get them even before you press them together for the final time. Now to start the saddle stiching. Start stitching at the same point you started your overstitching. Run you awl thru three or four holes to start and get your stitches started. Since there is no real pressure strength issues on these stitches there is no reason to do any back stitching at the start. When you run your awl thru the back side be sure and watch you spacing and hit the middle of the groove as best as you can. As the pictures will show, the stitching on the backside will not be uniform if you don't hold the first thread in the proper position when you run the second on thru. It will take a little playing around with it and you might need to hold the first thread up or maybe down. So figure out which one works and do it consistently and the stiches on the back will be as uniform as the stiches on the front. As you can see from the first 3 or 4 stitches on the back side you have to figure out which way to hold the first thread after you bring it thru so it will make the rear stitches lay right and look good. You also might have to make some adjustments to this after you turn a corner. Don't pull the stiches too tight or they could rip out or cause the leather to pucker. Keep stitching until you are little over half way around on each side. When you have gotten to this point on both sides keep using the awl and punch the rest of the stitch holes in the back side. This will make sewing it up during the wetmolding process much easier. It is also impossible to keep stich lengths uniform on wet stretchy leather. But before you get the leather wet, go ahead and punch the strap holes at the top of each tab.


-
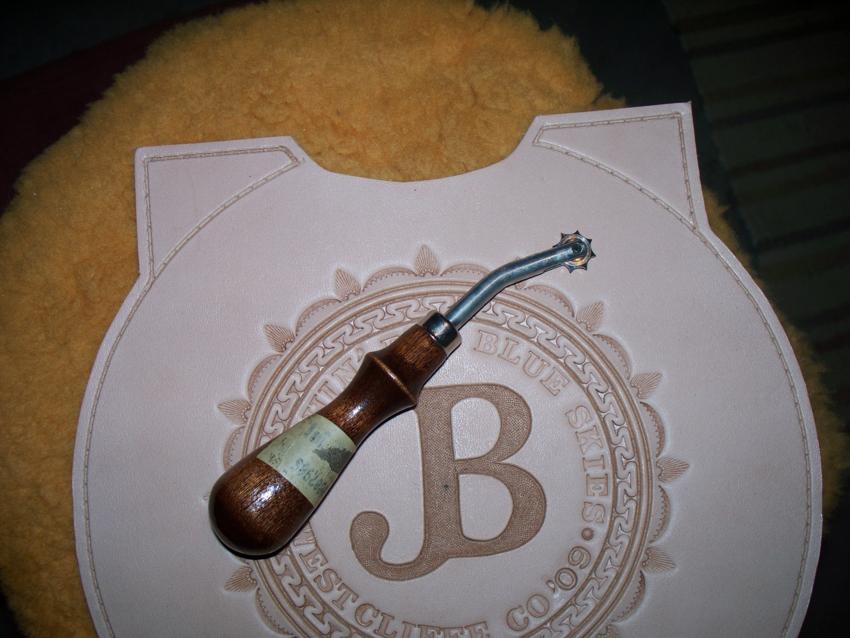
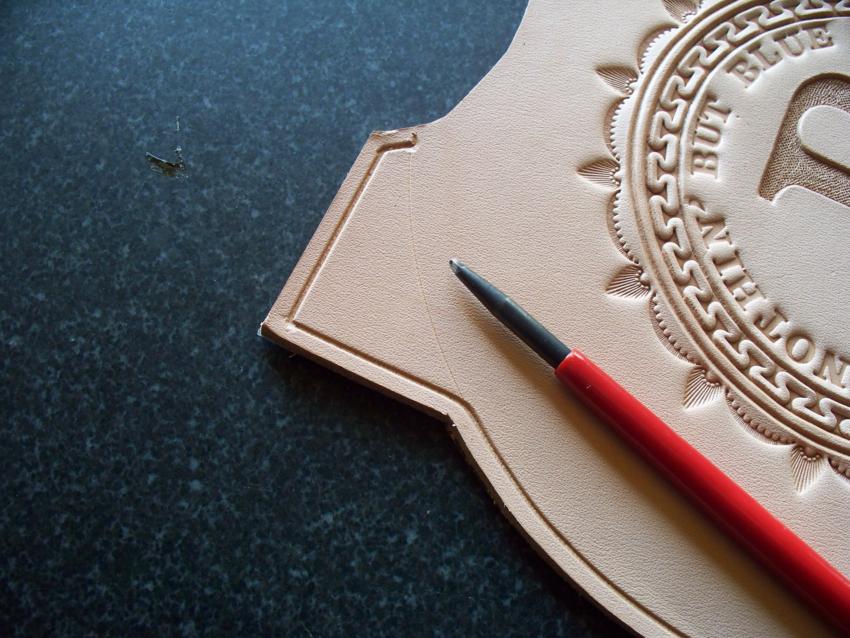
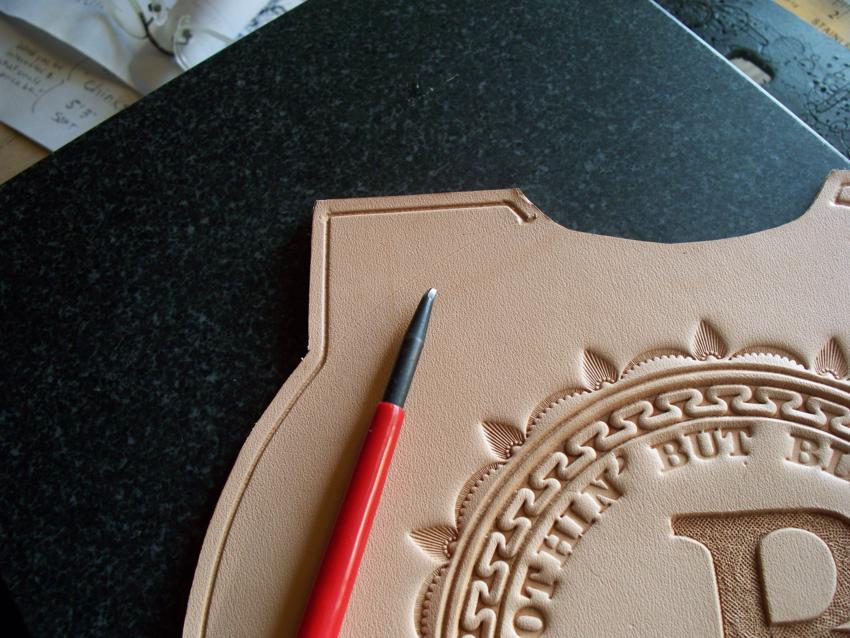
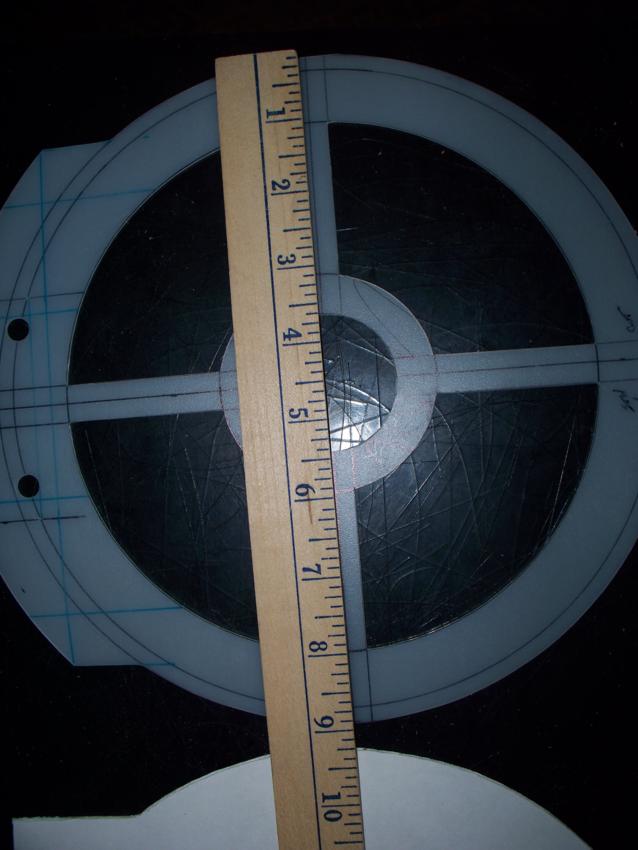
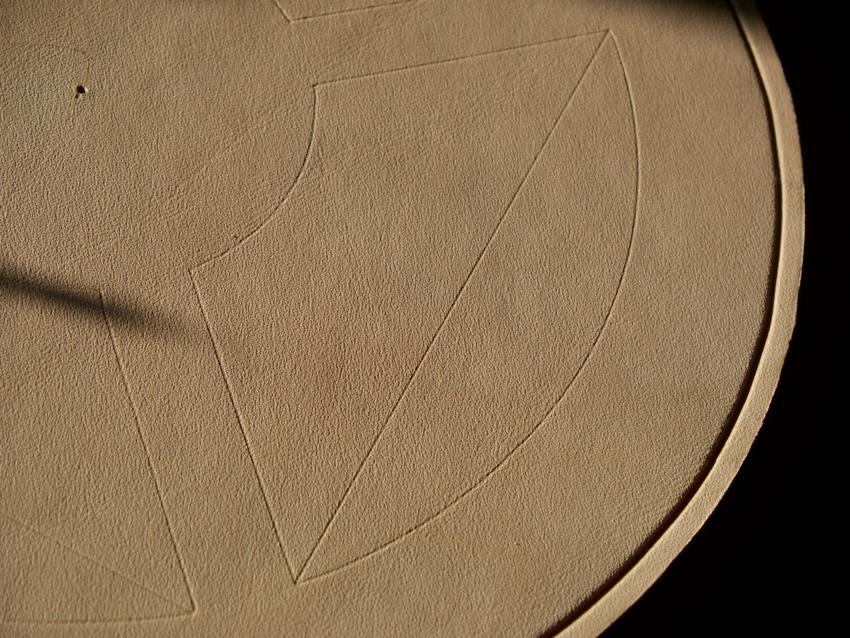
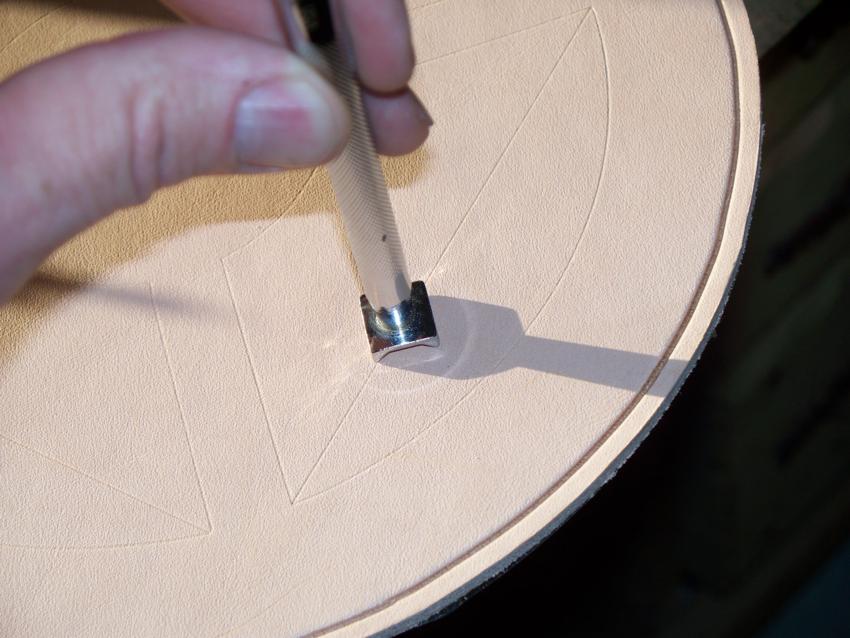
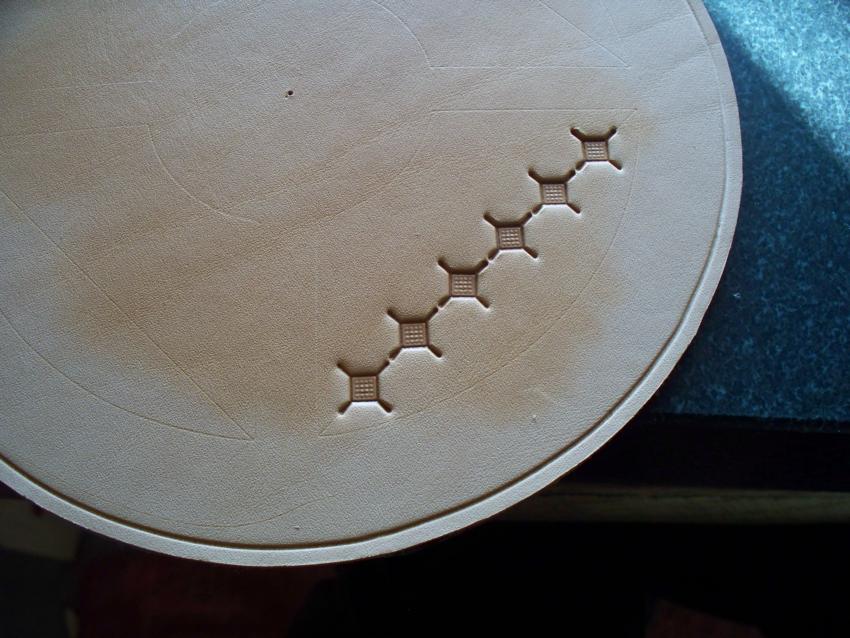
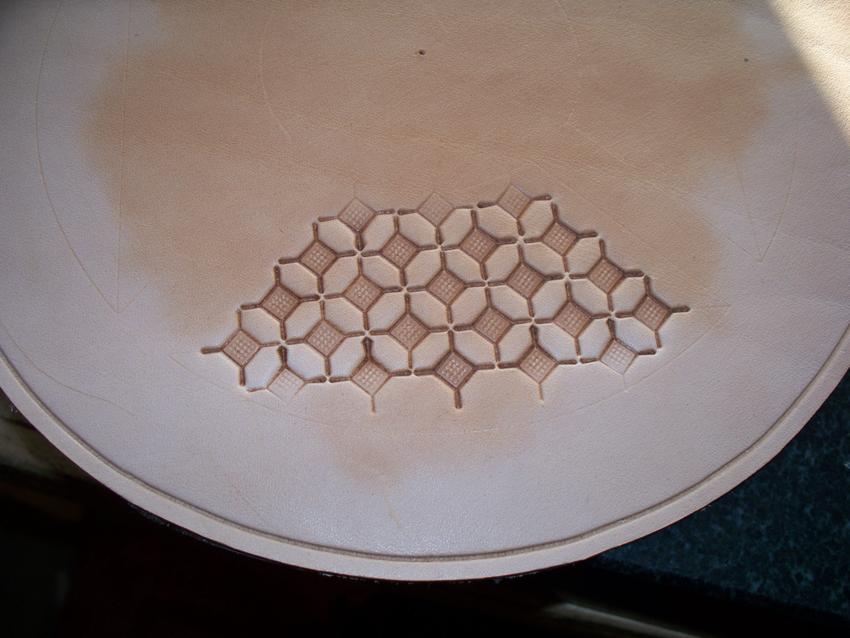
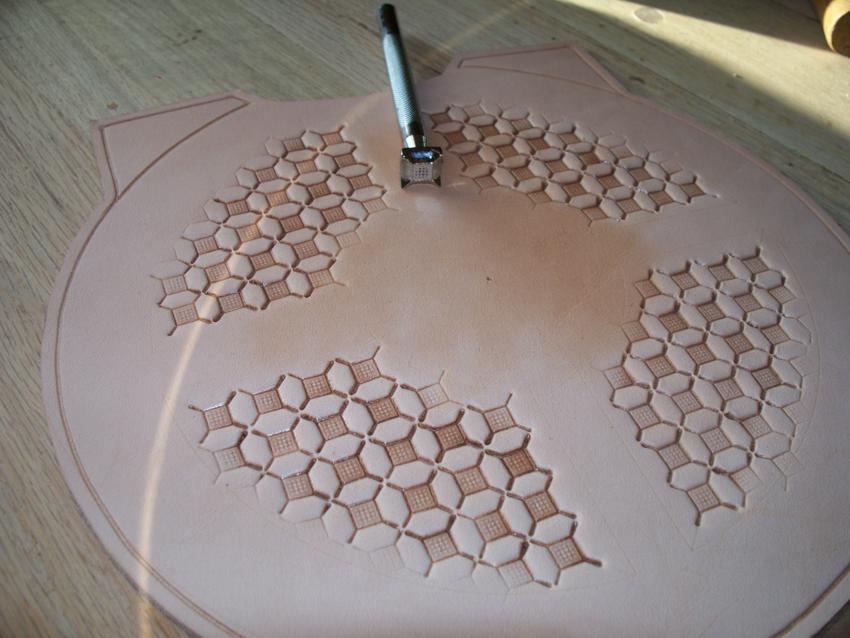
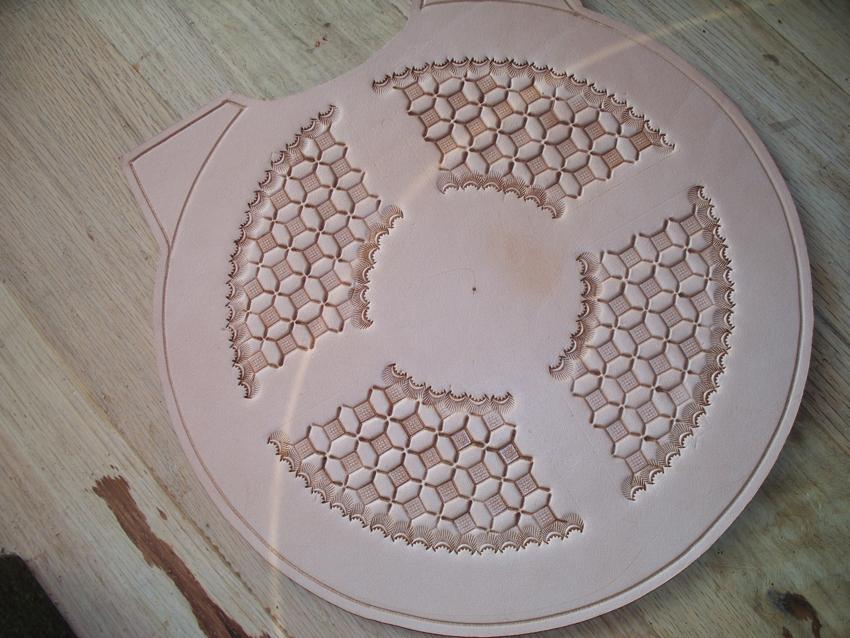
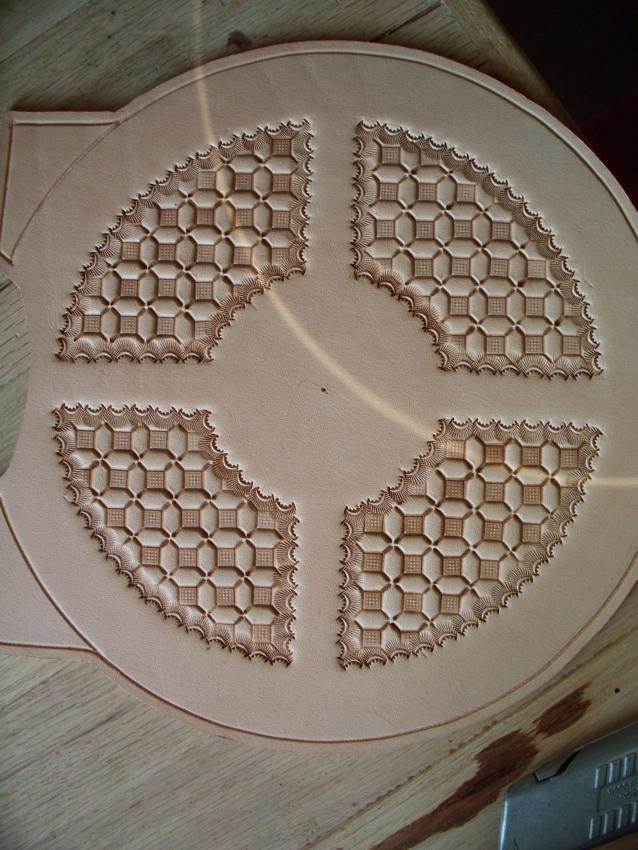
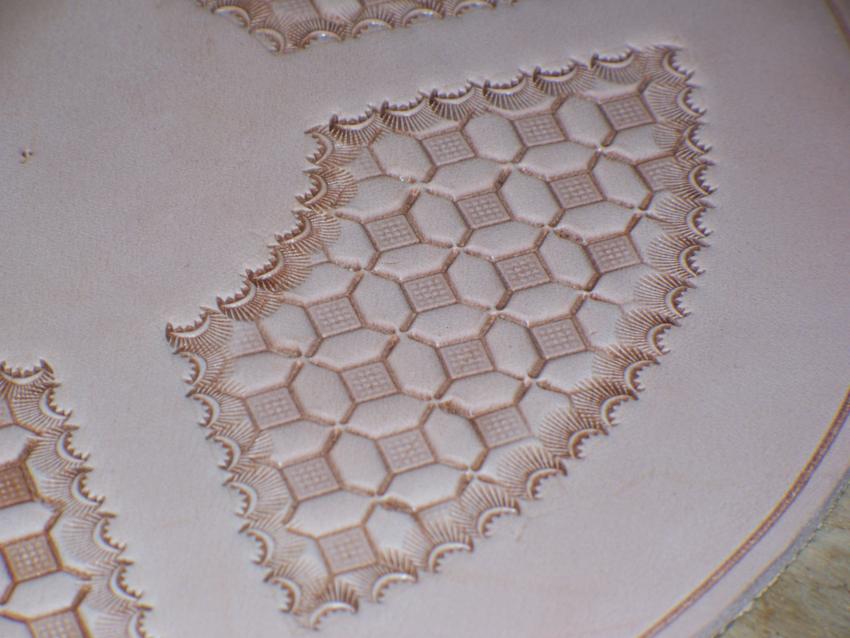
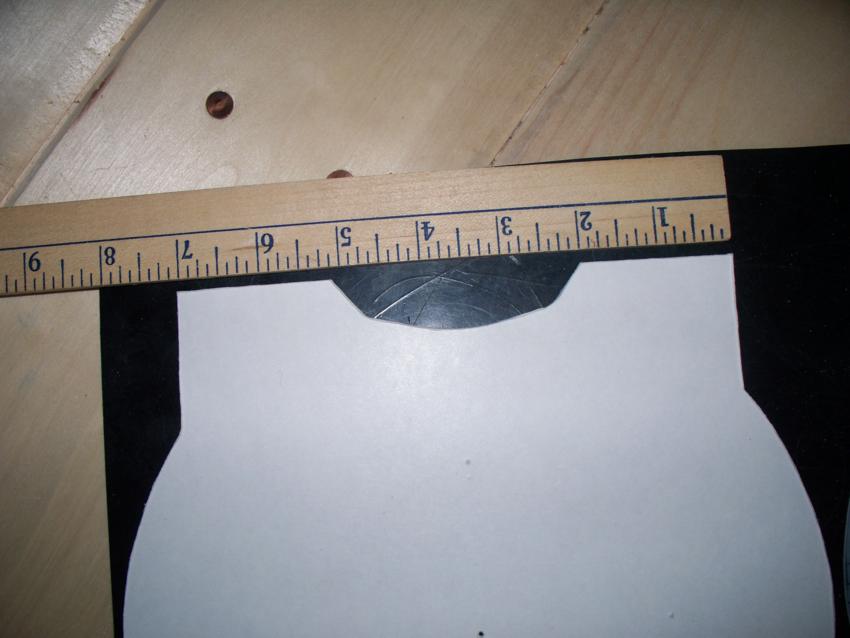
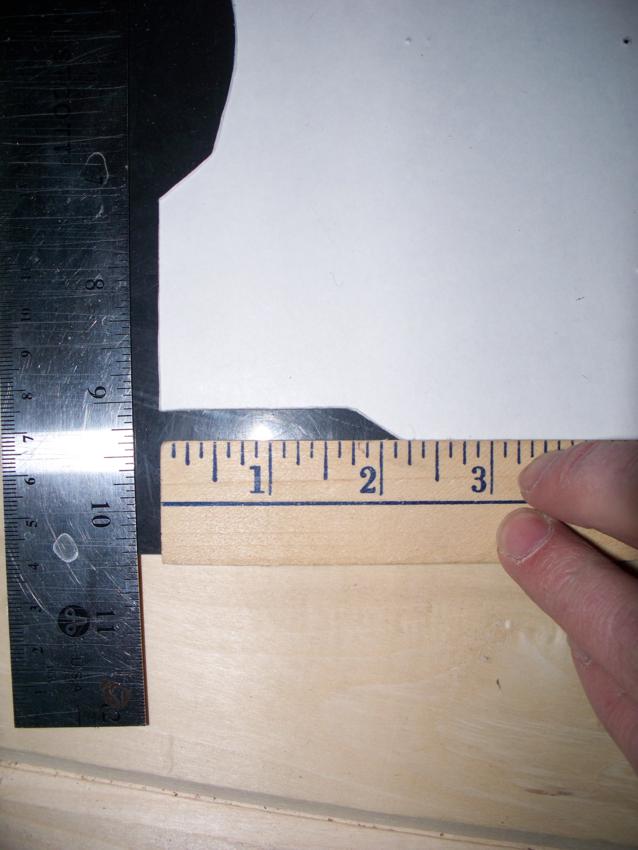
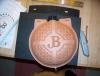
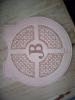
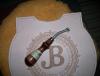
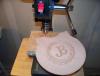
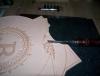
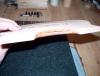
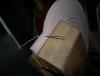
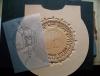
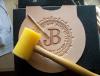
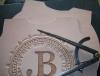
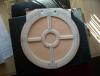
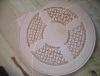
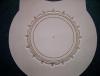
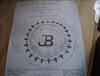
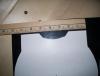
For the center of the canteen I'll be doing initials or a brand. In this case its initials made to look somewhat like a brand. My inside secret for this is that I use picnik.com to lay out, size and position my lettering. I save a blank white page in the paint program then upload it to picnik to use as my "background" then just start playing with the lettering til I come up with something I like. My next big secret is that I use my computers monitor as a light table to trace the design over onto the tracing film so I can transfer it to the leather. Yet another trick is that you can keep recycling your tracing film, just use a different color Sharpie marker every time you use it and and you can just keep going. But in this case the designs had no chance of interfering with each other so I just used black again. Use a stylus to transfer the design on the film to the leather. After that you can cut the design in with a swivel knife. Nothing too important about it but just be sure and keep the outside edges clean and straight as any mistakes will be very obvious on these edges. Once you get it all cut in you can start in with the matting tool. I have used several different matting stamps but I prefer A104 as it is small enough to get into sharp corners and leaves a nice dark background once the antiquing is on. I used in on the edges first, but not necassarily all at once, then fill in between them. When going along the swivel knife cuts angle the tool as shown to keep the edges clean and track free. It takes practice to get it to come out even as well as to eliminate the tool marks. Don't be afraid to go back over it to make it more consistent as well as to keep it level. Some of the matting tools are harder to make more consistent due to the marks on the tool face being wider spaced. But whatever you use just make it even and level with as few tool marks visible as you possibly can. Next you have to cut your stiching groove around the sides of both the front and back. You can do this at anytime before or after you tool the pieces. Cut the groove around the outside first. I use an adjustable stitch groover to do this. It is actually the cheap one that Tandy sells and I have been using the same blade for about 5 years now and do absolutely nothing to keep it sharp..........it just keeps working. I set it at around 1/4 to 3/16 " in from the edge. You can see in the pics how I do this. Now for the one section at the top that you can't get to I once again use my handy dandy antique compass and scribe a line that I then cut with my free hand groover. Go slow and steady and follow the groove and it will come out good. The white template in the next pic is what I use to layout the back of the canteen. The ruler gives you the basic measurements if you want to make your own. But you get the idea. Anyway, I use a stylus and trace it out on the back. Now in preparation for tooling I draw a line from corner to corner on each of the 4 panels. Next I start the tooling. You can pretty much look at the pics to see how I lay this all out. The stamp I am using is a G548. You'll need to figure out the spacing from end to end along this line to keep it even then start stamping. Wath the edges and don't go over the lines. After you get all the full impressions made that you can come back and start making the partial impressions to fill up to the edge. The neat thing about this tool is that you can rock it on one corner or two to get partial impressions from it. After you get the big stamp work all done it is time to come back and do the borders. For this I use a 441. I don't think it is made any longer but you can use whatever you prefer for the border. Camoflage tools or border tools can be used for this purpose. For each section I will first stamp each of the 4 corners as shown in the pic. Then come back and start filling in between them, going from side to side meeting in the middle. Watch your spacing and make some light impressions and you can get them to turn out everytime. Which is the beauty of this kind of border. It is very forgiving. Now all you have to do is come back in and do all 8 of the sides the same way.


-
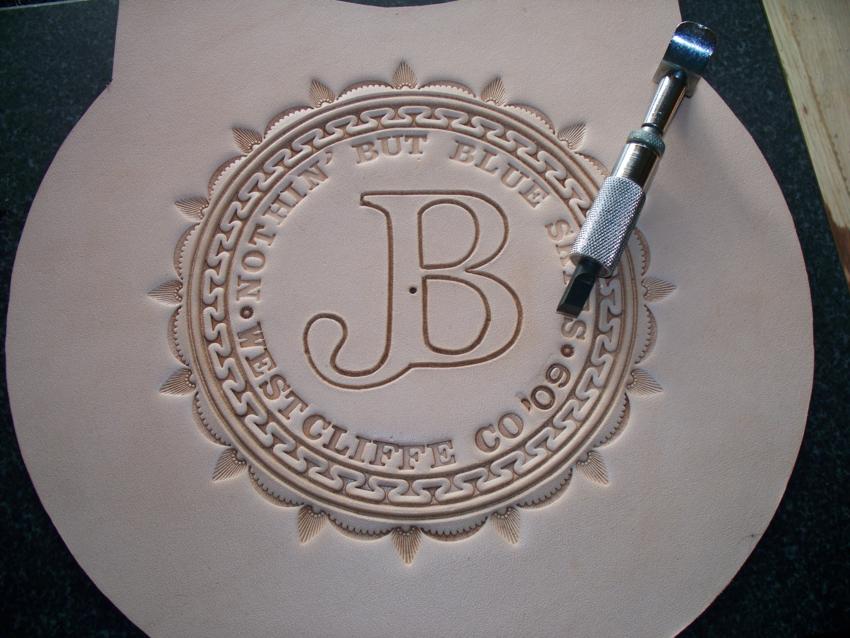
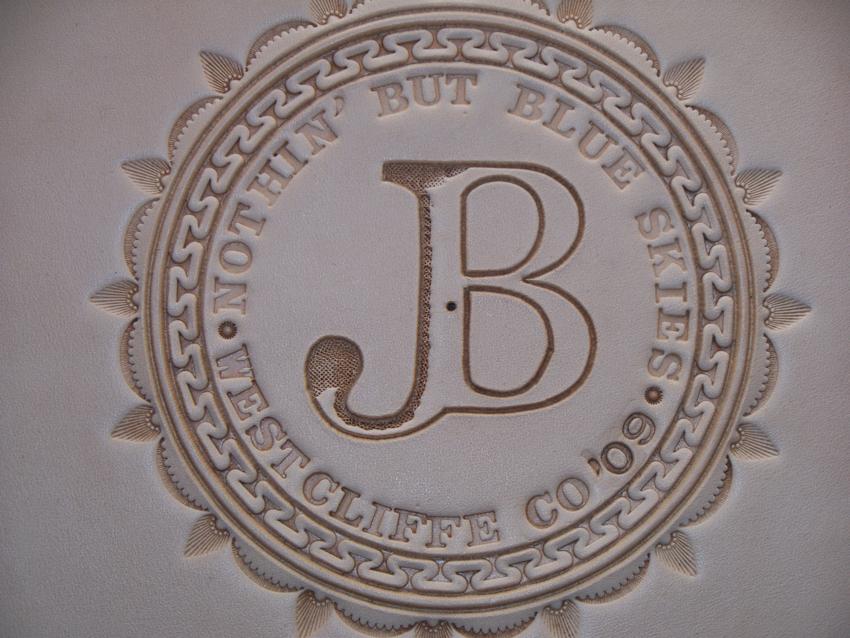
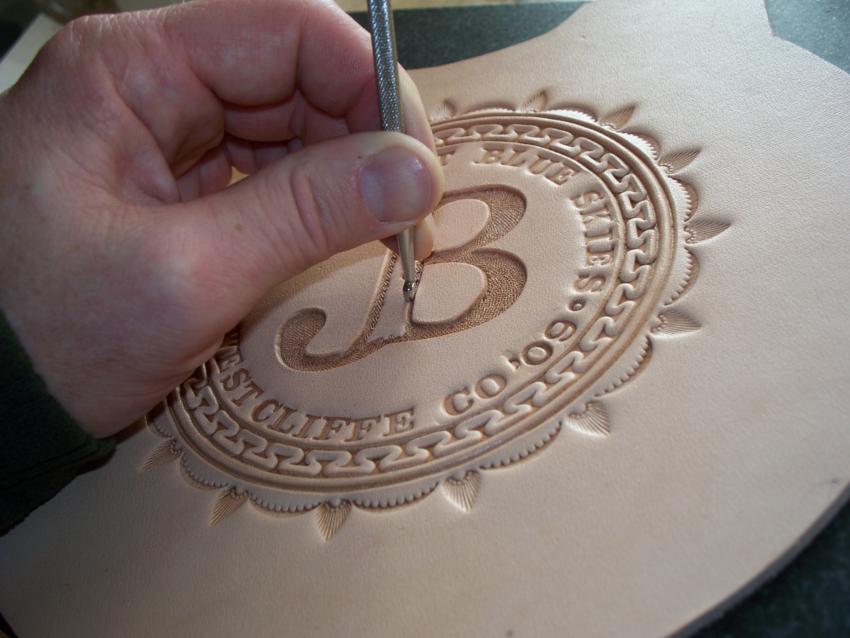
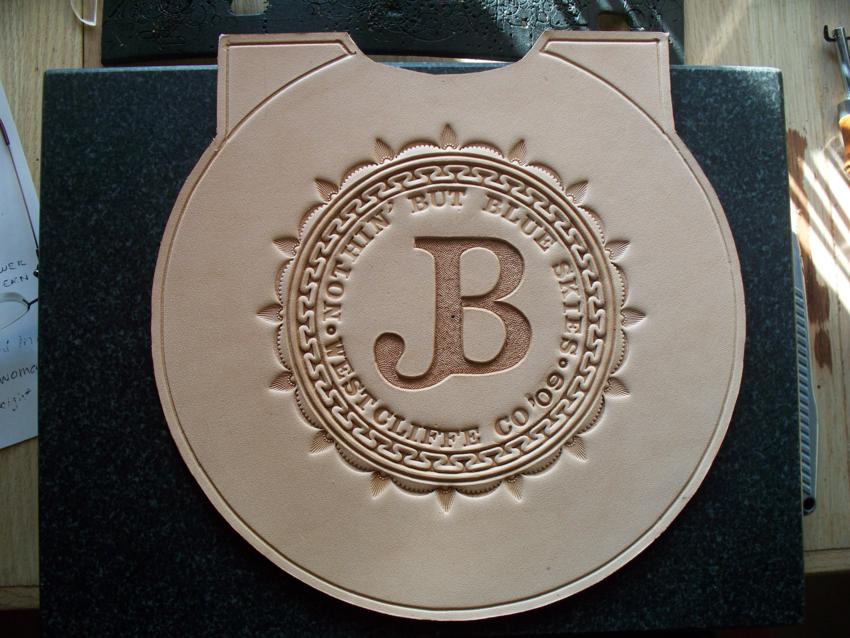
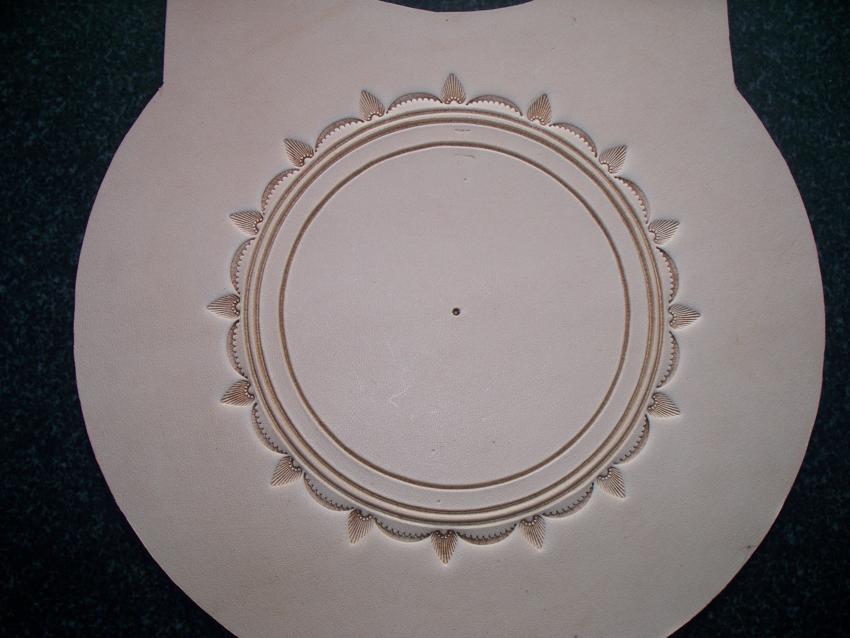
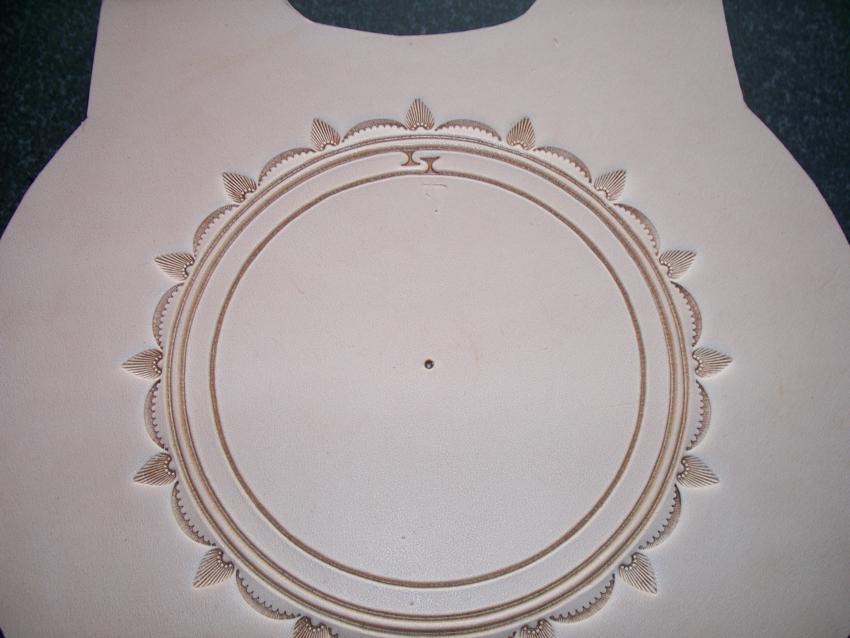
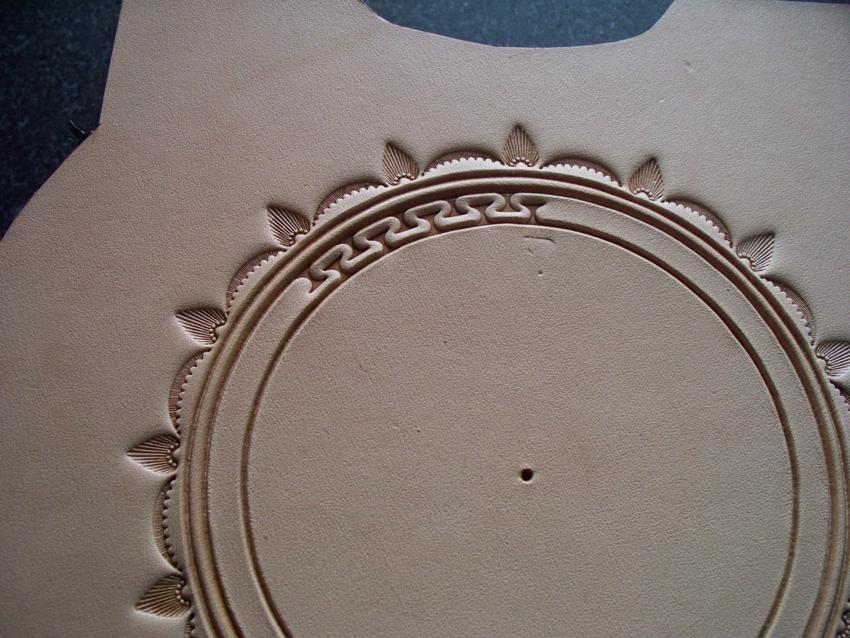
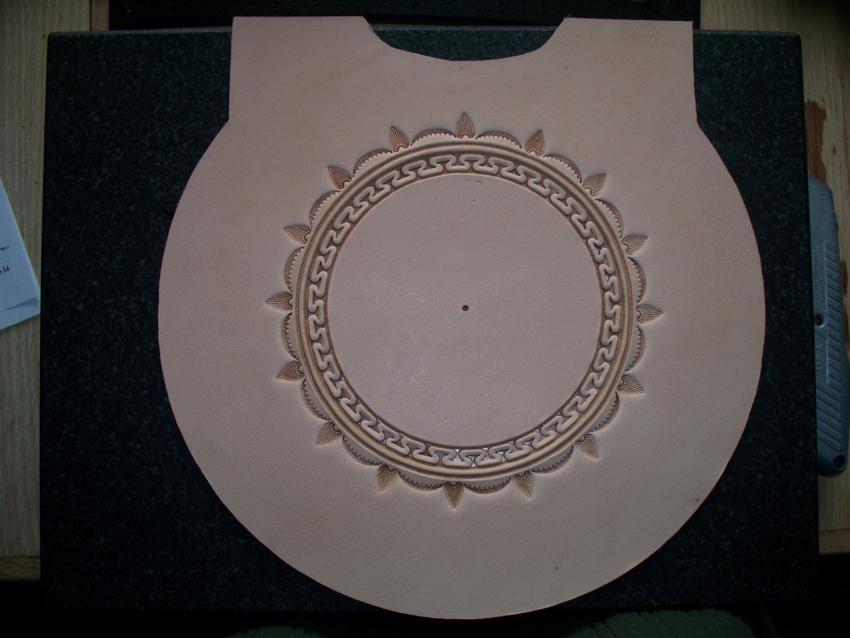
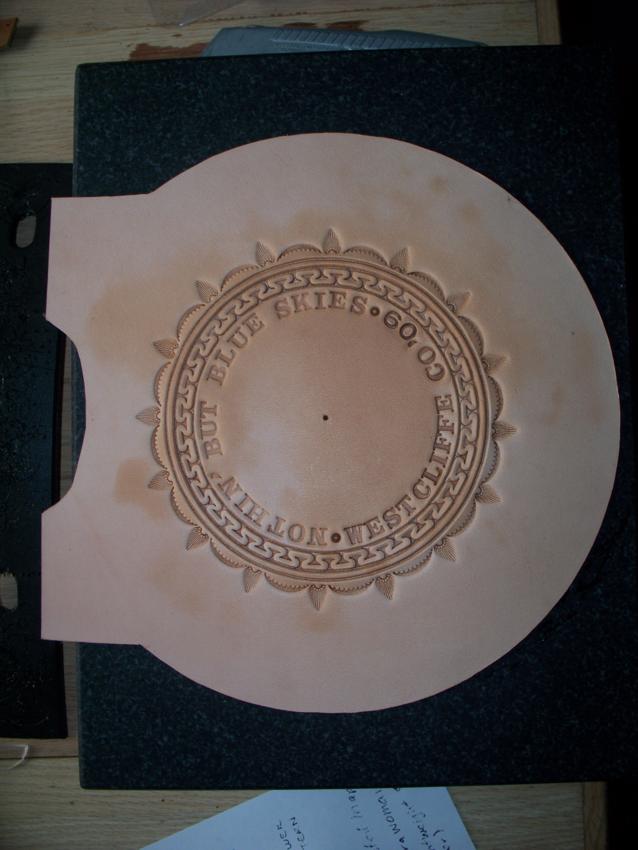
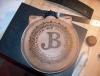
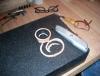
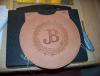
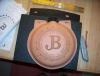
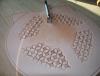
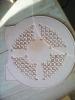
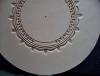
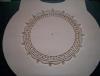
Now I have started the stamping. I always start from the outside and work to the center for some reason, mostly just personal preference than anything else. On a side note, be sure and keep your finger nails trimmed up, especially on the hand that holds the stamp, or you'll wind up with extra little chicken tracks all over the piece. The border I am using for the outer circle was chosen by the customer and gives a nifty old west flare to the work. I really like it, but it can really be a crap shoot to get it to come up even when the design finally meets itself. The tools I use for this are V708 and a 301 which is an old tool I've had for awhile and am not sure they make anymore. I always start in the top center of the canteen cover and work around both sides equally, 3 or 4 stamps at a time. When about a third of the way around you can make very faint impressions with just the outside edges of the tools to see how you will meet up and then make some adjustments if needed. This time........I gambled and won!!!! WOOHOO!!!! Now on to the next inner circle. It is going to be the serpentine or San Carlos border as I've seen it called. (but not sure if that is totally correct, but it does sound cool) It is tool D744300 I've seen that some people make marks with there compass to ensure correct tool placement everytime and some will do compass marks and stamp the inside or outside then come back and do the other side to fill in the design......but I just wing it. The goal is to make it uniform but also to keep the squiggle design at as constant of a thickness as possible. When I say constant thickness I am talking about the squiggle line itself which is between the tool marks and border cuts. Once again this is my preference as I have seen it done differently and it is okay but I like to keep it thin and consistent. I feel it gives a finer look and makes for a more refined look. Too many times this tool winds up making the design look chunky, which works on some pieces but I prefer it thin. This means you have to get your inner and outer swivel knife cuts spaced just right, too wide and it will wind up chunky too narrow and well, it just winds up kind of scrawny and weird. So practice on some scrap to get your line and tool spacing correct. Do the same with this tool as the outer border and start at the top and check your spacing with light tool marks as the design approaches itself. And as you can see......once again.....gambled and won!!!! Next is the drawing made for me by the wonderful lady that takes orders for me in the store that takes my stuff on consignment. She is getting really good at drawing out my canteen designs for me. She'll even do a rubbing from some of my other canteens on display to be sure and let me know exactly what the customer wants. How cool!! As you can see I've got some lettering to do. This is the hardest part for me. No matter how you count the letters and try to allow to find the center of the top and bottom lettering.....it doesn't always work. This one got a little off center but still came out good. I do it one letter at a time and do not use the spacing that you get when you put one letter stamp against the other, I think it leaves to much space between them. The best advice I can give is to do your lettering on some scrap first then do the real thing. The next pic is of my super secret circle lettering jig that I devised. It is pretty self explanatory and you'll see how it is used in the pics. I will always place the jig and letter stamp in place and make a very light impression to determine if I have good spacing between letters and words. Once again, ya just hafta eyeball it. If possible do your lettering on a piece of scrap first then make the needed adjustments and move it over to the real deal. In the finished result you can see that I use a seed tool to seperate the top and bottom lettering. When I have more room I'll do a something a little more elaborate to seperate them.


-
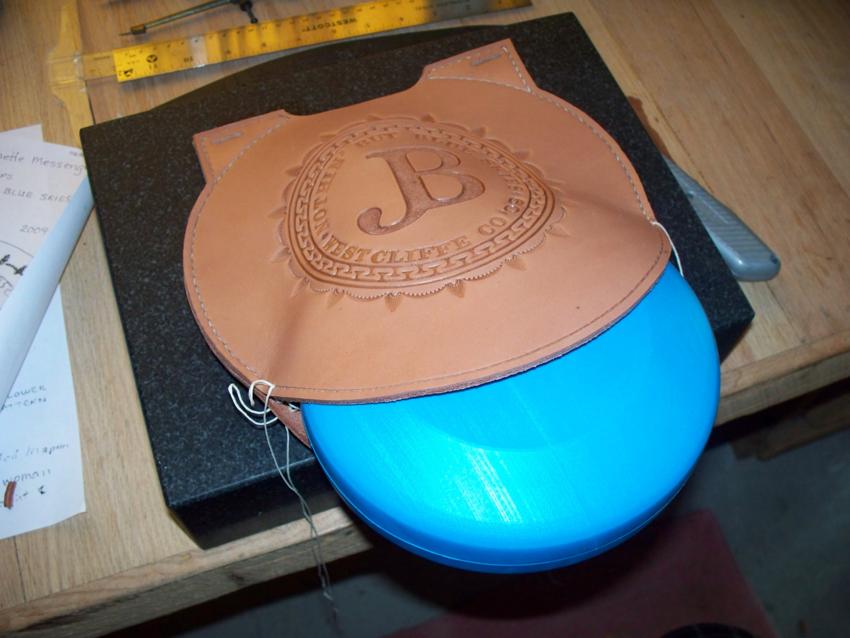
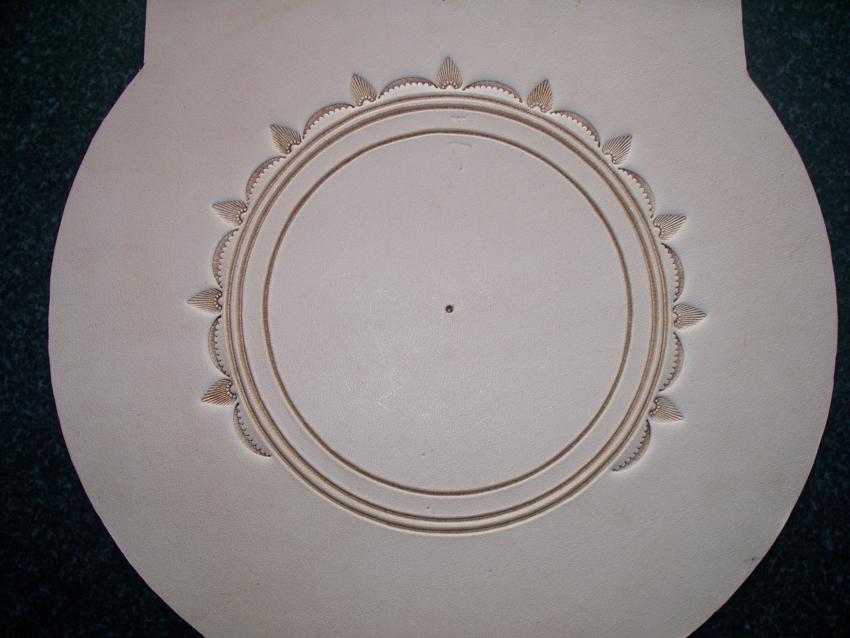
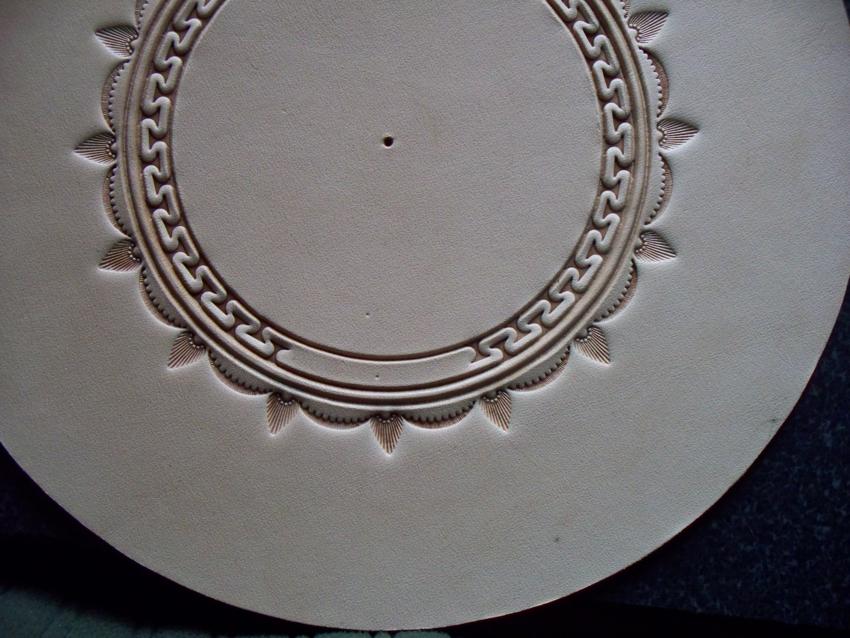
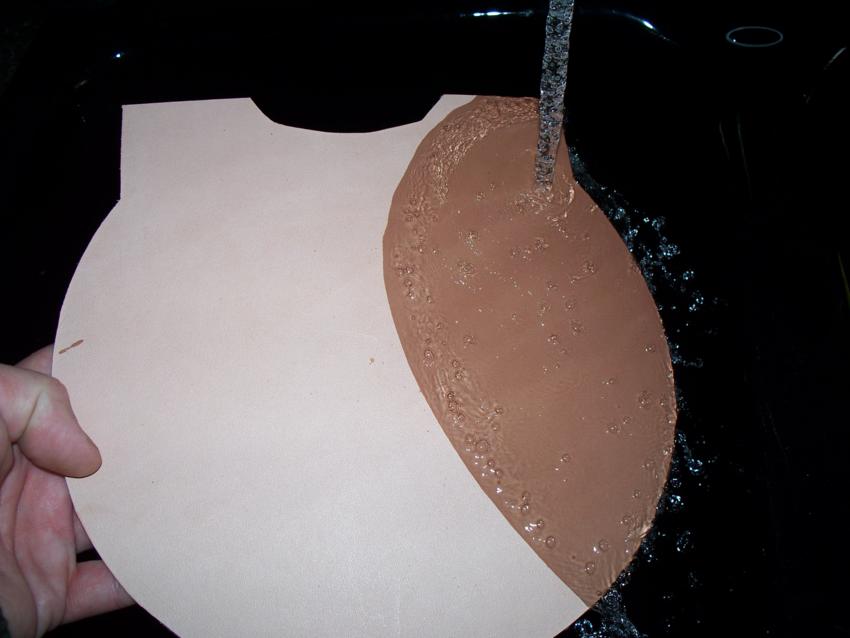
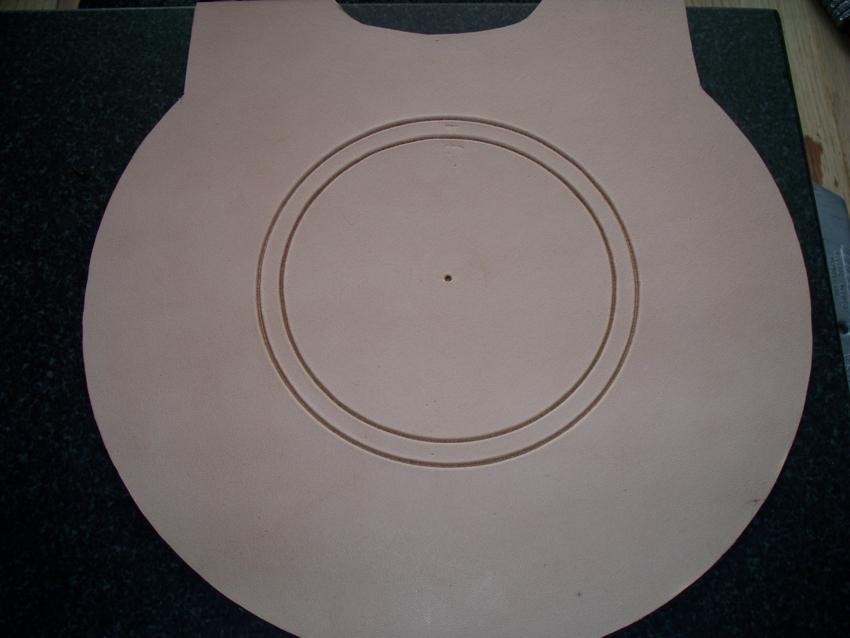
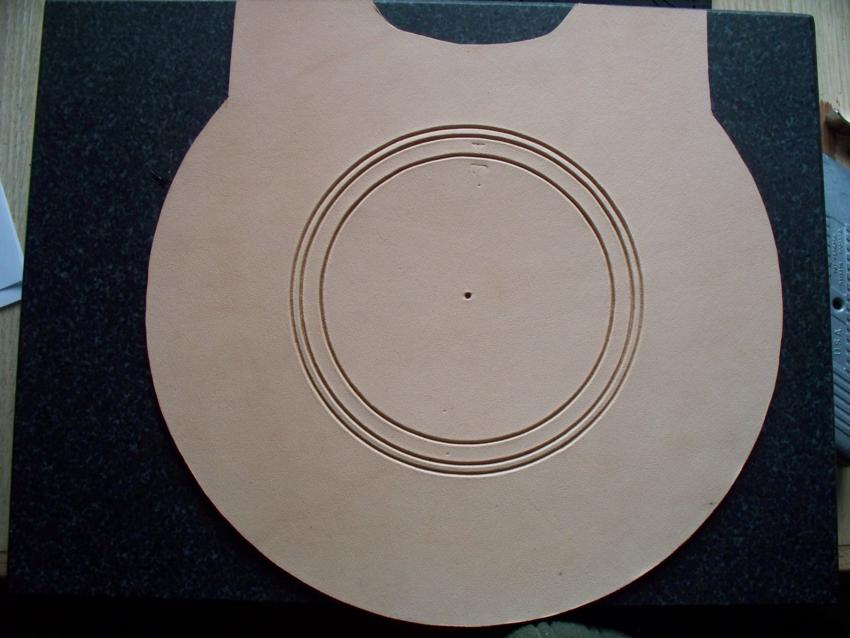
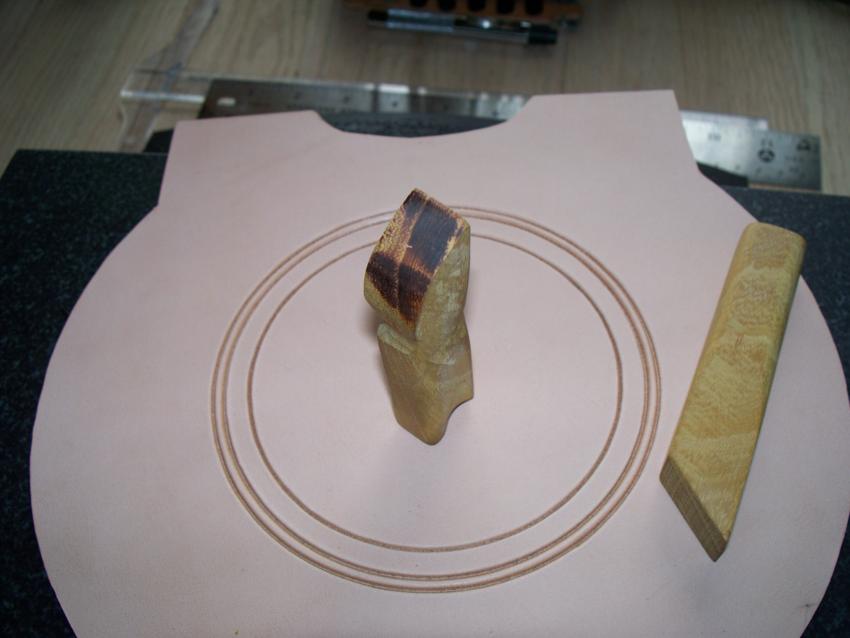
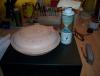
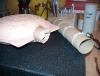
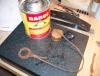
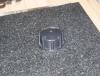
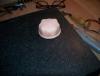
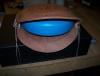
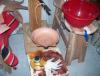
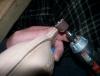
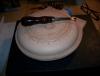
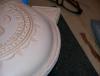
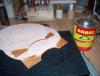
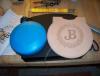
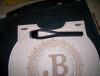
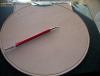
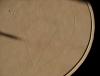
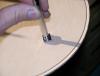
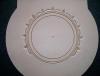
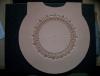
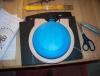
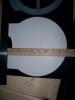
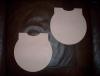
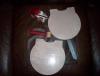
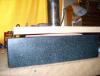
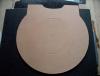
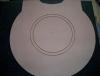
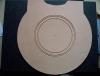
This is the first installment in my tutorial. It's gonna take me awhile to get it all up here. So be patient with me and I'll get there. Well here goes nothin'.............there's been some interest shown on the forum in the canteens I make. Since I was starting a new one, figured I'd go ahead and take some pics and post up a tutorial. So with that...............let's get started. This is a pretty basic plastic bladder canteen. They are a BPA free plastic, whatever that means. Used to be able to get them at Wal-Mart but the only place I can find them now is from Campmor. Here's the link for them: http://www.campmor.com/outdoor/gear/Product___21917 This is the pattern I made for cutting out both sides of the canteen leather. I only use the pattern as a guide to get the layout started. It's hard to make a perfectly round cutout of anything, but the rounder the pattern is in the beginning the better off it will be in the end. So the white poster board pattern is only used for the the center mark and the top. When transfering the pattern to your leather trace the top part out and mark the center point. Now remove the pattern and use a compass to draw a perfect round circle on the leather. The center point will be used for more stuff later as well. Be sure and flip the pattern over when you go to make the next one to ensure that they will fit together better when finally putting them together. I've posted some additional pics showing the dimensions of the patterns. Be careful and don't make the overall circle too small as it will be tougher to sew when you get to that stage. I use a 9" circle and that seems to work pretty good. I usually make them out of 6-7oz or 7-8 oz leather. Thicker and you'll need to allow even more. It has been a learning curve to come to this dimension, you can go smaller and tighter but it makes it a lot more work. After they are cut out, flip them over and cover the back side with packing tape. I have had the best luck using the most expensive 3M tape I can find. . Run the second layer perpendicular to the first. Tape it down to the work surface and then cut it loose when you are done. This way you don't have to worry about the tape flipping over and marring the grain side of the leather. I will also sometimes use blue painters tape for covering the back. Next you will need to case the leather. I am about to reveal my super secret method of casing leather............. ....run it under the faucet at the kitchen sink. Just so ya know, we have city water and it is very low in mineral content. So it works out good. Don't soak it all the way thru unless you WANT to wait a really long time before you start tooling. Hold the first one under the stream for about 10 seconds, then do the second the same. Do them both this way 2-3 times. Then put them face to face and set something heavy on them to flatten them out and wait about an hour or so to let the moisture do it's job and work it's way thru and mellow out the fibers. I don't always wait for the leather to be absolutely perfect, especially when I know the end product will be dyed and antiqued. In that case I'm not too concerned with how much burnishing the tool leaves or doesn't leave. In the next pic the leather is well cased and ready to start tooling. The circles you see are drawn on with my antique compass. Down side of it is that it always leaves a dark iron mark in the center, but I can cover it up when I antique. These circles I make are actually as deep as I can get them without breaking thru or tearing through the grain of the leather. You can also see some very light impression of the stamps I'll be using for the tooling. I do this to make sure my spacing on the circles is correct. When cutting the circles with your swivel knife hold the blade in the center of the circle groove and apply very light pressure to it for the first pass. Go in segments and turn the leather when you reach the point where you control starts to vary. I usually will start at 1:00 and go to 3:00 then turn the leather til 3:00 is back to the 1:00 position. The trick is to never lift your blade from the cut. When you have made it all the way around for the first pass, which should really only cut thru the very top grain of the leather, you can go around one more time with normal pressure for the depth you want and the previous cut wil help guide the blade like the compass groove did for the first pass. Next is the finished circles with the two tools I made to turn the 2 close outside circles into a nice rounded bead. These tools are made from Bois d'Arc wood.........or hedge apple trees as I have always known them. (thanks to my brother for the scrap wood from his guitar making!!) I use these tools just like a swivel knife. They really let you move the leather where you want it to be. You can use a modeling tool for this as well. But with all the blunt edges of these tools my chances of leaving a mark in error is greatly reduced.


-
Greetings and welcome from Pueblo, CO............But I've only been here since last June. Moved here from Neosho, MO......where I was born and raised. Welcome to the forum!!! Tim
-
So does the ivory soap get washed off after the carving is done or wipe it off or what exactly??? Never heard of ivory soap before just wondering what happens to when it's all done. Tim
-
.........just to add a few things.....if we had never started eating meat we would never have evolved into what we are today. It took the proteins that meat provides for our brains to develop. Without meat we would still be cavemen, but probably extinct. As far as using hides from dead things.......they are only good if you get them when they are still warm or at least very fresh. And it is way better if what killed them caused them to bleed out all the way before they died. When you find a dead cow in the field it is good for nothing. The hide and meat is no good.......unless you want to follow them around waiting for them to die. Our country is already too hung up on "pets" without getting into "no meat" In most countries around the world Trigger, Spot and Fluffy are on the menu. We have people out of work, people with no place to live and people with no food. Want to take up a cause?? Pick a real one. Not trying to be inflammatory..... Just my.02 Tim
-
Saddlebag purse pics
Timbo replied to Timbo's topic in Purses, Wallets, Belts and Miscellaneous Pocket Items
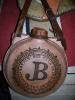
They touch more often than you think. It is a pear shader that makes the impressions and you lean it at all different angles when stamping. It just makes most of the little ridges on its own. It's hard to do and not get into a pattern. You just have to keep it random. Tim ........and thanks to all for the compliments, they are much appreciated. -
Saddlebag purse pics
Timbo replied to Timbo's topic in Purses, Wallets, Belts and Miscellaneous Pocket Items
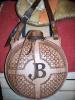
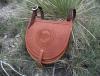
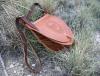
The gusset is 4" wide and it is that width all the way around. I have tapered the gussets towards the top before and it is just easier to use with it the same width all around. Tim -
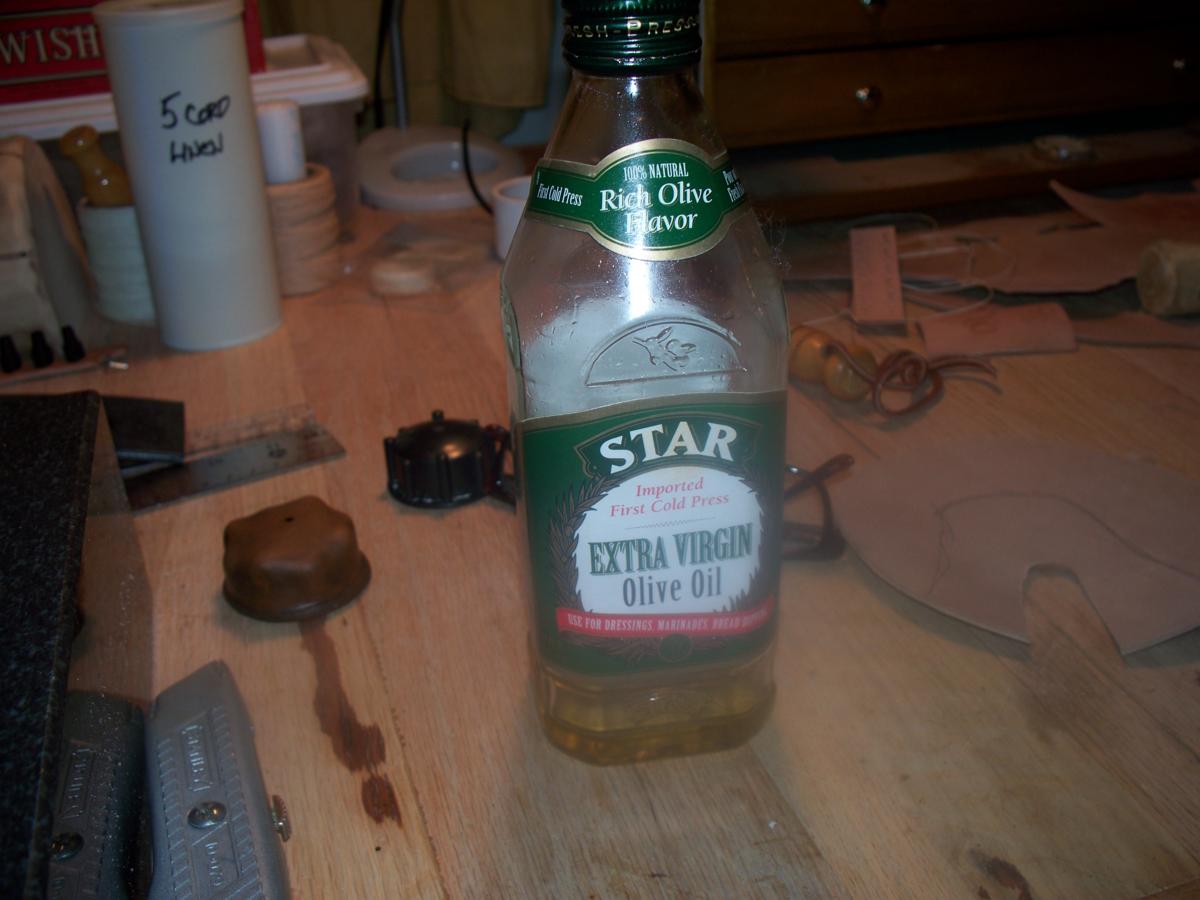
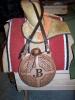
Here is a saddle bag purse I made for a lady. The finish is EVOO with a little mahogoney oil dye in it. The gussett is the backside of some moose I've had for awhile. It's really thick stuff. Timbo
-
Had to laugh when I read " get back to it this year"..........I've got 3 different horses and ponies I need to get back to "this year". At least one of them is usable and the other 2 are so close it's not funny. But I'll set my sights for this year as well. Tim
-
More congratulations guys!!!!!! The honors are well deserved and your work is inspiring. And now all of us on the board can say "Yeah we know those guys, hang out with them all the time!!!" Good job!!!! Tim
-
..........here ya go: http://aetnafelt.thomasnet.com/viewitems/f...?&forward=1 Look around the site as they offer wool felt as well. Tim
-
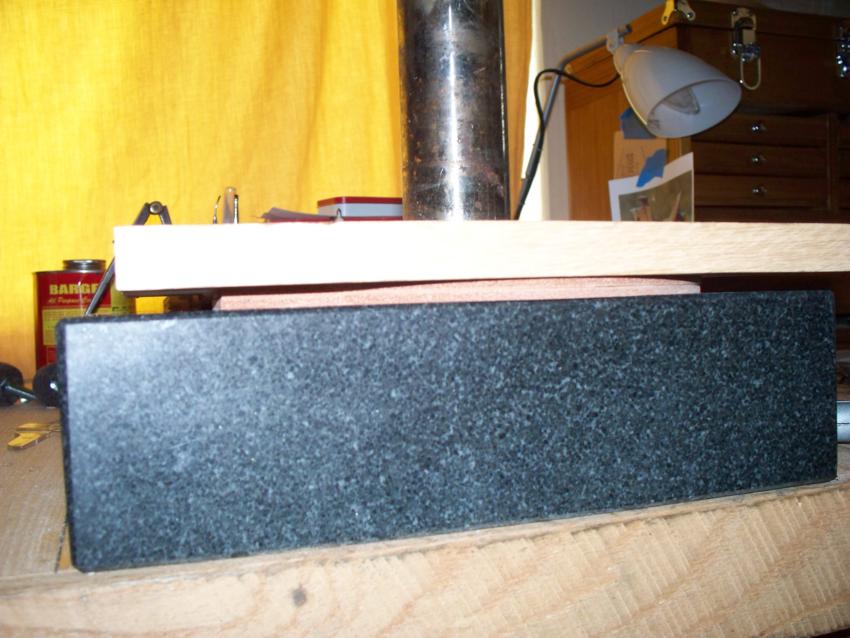
Wow that is a great price for granite plates!! The free shipping is also a great deal sweetener. Everybody on this forum who stamps or tools should get one of these, even if it is just a small one. I've been stamping on one for years and will never go back to thin, easily broken marble slabs. Thanks for posting!!!!!!!! Tim
-
Thanks for that Tony!!!!! I have never seen a jaw mechanism like that. The mechanics are very simple yet effective and very reproducible!!! That is really cool. Tim
-
Luke, I've got an old roll of Tandy lace that is red. It is a little bit dark red and not a really bright red. It is 1/8" and you are welcome to it if you want it. Tim
-
Very well done indeed!!!! Tim
-
quick question for the seat makers (wet wrappers)
Timbo replied to Scary Leatherworks's topic in Motorcycles and Biker Gear
I'm not even sure why the sell vegtan splits. They are very weak and good for nothing. They will rip and tear when trying to mold them or pull them tight. Just buy some more vegtan and go from there. You will be very dissatisfied with the splits. Tim -
Thanks Chris I sent you a PM. Tim
-
I'm with everybody else on washing them with Dawn..........but then pack them full of towels and wrap them in towels. This will help them keep some shape and also help wick out more of the oil. Tim
-
If any of the saddle folks have any old used latigos hanging on the wall that you don't need I would like to buy them from you. I use them to make straps for my canteens and for some reason people just love 'em. But I have exhausted my resources for them and was wondering if anyone had any that they want to get rid of???? Thanks, Tim
-
repairing a torn horn leather
Timbo replied to twofour878's topic in Saddle Identification, Restoration & Repair
........or you could get rid of the top piece of the horn cap and make new top and bottom caps, glue and stitch them in place them cover the neck in mulehide or latigo. That way you wouln't have to tear anything down any more than it is. Tim