


Ole South
-
Posts
237 -
Joined
-
Last visited
Content Type
Profiles
Forums
Events
Blogs
Gallery
Everything posted by Ole South
-
Thanks Tink your search kung fu is good!! Outwater seems to have the ones... 3 colors. This works for one type of table top 1 5/8 " with a 5/8" offset slot ... some tops have 2 slots 1/2" down and 1/2" up. Considered buying and routing as you suggested... works for me but my buddy has machines strung out across the state that can't have the noise and dust a trim router/dremel creates and the offset slot is an issue for the T-molding products as the slot keeper is centered. A brand new plywood top costs him around $100... after buying and hand fitting re-banding old comes close to that. The benefit of re-banding is that he can do an in-place repair/upgrade w/o tearing down and remounting everything. Also... some of these are in high end couture shops... can't snag a $2000 dress.
-
I picked up a 153 for a fellow forum member and we're going to make the exchange tomorrow (Ga to Fla). Before I hand this over I'd like to visit one issue. Currently the longest stitch length is about 6sti. This is okay for the type of work we both do but... the stitch length isn't linear with the indicator. 6 to 7sti line up with the numbers pretty closely but from 7-8 on the indicator wheel the actual measured stitch length jumps to about 10 or 11sti and gets increasingly smaller disproportionately compared to the indicator dial. Also when set as the book states (8 measured stitches and move the dial via set screw) I run out of bottom end at 6 rather than somewhere south of the set screw hole. Is this a wear issue, an adjustment (hopefully) or a problem somewhere else? It sews nice. Needed a few minor parts and the tension assy rebuilt and paint but the new owner wants to do that. I was sure this stitch length was working properly early on in the checkout as I set the stitch length indicator as part of the checklist. The only thing in between was tighten down the loose feed dog and replace a missing feed dog plate screw. Thanks folks for your attention.
-
Thanks Mikesc,,, they have 1" 1/2 and 2"... our table tops are 1" 9/16 or 1" 5/8 . Some company was selling exact lengths just for industrial sewing tables but we can't find them now.
-
Show & Tell: Building A Shipping Crate For An Adler 69
Ole South replied to Uwe's topic in Leather Sewing Machines
Nice work as always Uwe! What kind of finish are you gonna use? Poly or Tung Oil? :D Seriously, cheap and easy is a can or two of expandable foam sealant from HD and plastic bags. Bolt your item to your base, set it inside your box and place a plastic bags of suitable size strategically around the item. Shoot the foam into each bag and wait for it to expand (close the lid during this process so it fills the gaps you want filled rather than mushrooming out the top). Smaller bags in any remaining gaps. You don't have to use bags... sheeting is okay but a misplaced seam will get foam sticking to your item. This is good for one or two ships as the rough handling will degrade the foam blocks. -
A picture will let us see if what you are seeing is normal (probably) or a tension/needle problem. Machine stitch on the back of veg tan is kinda like an exit-wound. Mine never look like my saddle stitch on the flesh side. Have you run a gouge line down the flesh side? Doesn't look the same as the top grain... does it?
-
Does anyone have a source for the T-banding that edges our store-bought tables? You know... the plastic/pvc/rubber strip that protects us from snagging our high-dollar double knit custom designer slacks that we all wear whilst realizing our creative endeavors at the sewing machine?
-
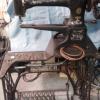
@DrmCa:... probably IS the start cap. (*Note the caveat that follows) He could have a shorted winding but that generates significant heat/smell and this motor does start... not the correct direction but that's the Start capacitor's job in a single phase ac motor: though Art has a point with the starting relay. If bad and it doesn't de-energize it can fry the start cap causing the electrolyte to overheat and expand. @LovetoLearn: Swelling (visible in the last picture) indicates the electrolytic inside the cap is expanding (I.E. failing) this is an old motor, *BUT.... the cost of the cap probably will equal or exceed a down payment on a new motor. Retail is probably $15-30.00 usd. Do you have a friend in A/C Heating? Caps like these are used in most air handlers and A/C condensing units. An A/C tech can probably source a substitute for you and steer you down a safe path should you choose to continue to try and resurrect this beast.. Me?... I'd plug in a substitute and stand well back as I power the motor up.... but I've done this before. Sparks flying make the heart beat faster! And often precede the rapid loss of aforementioned smoke necessary for proper operation of electrical components.
-
Just a guess not being able to see the inside of one of the pockets but notice it's: stitch, space, stitch... probably a running stitch pulled tight with a fid every twenty stitches or so. Just a guess but that's how I'd do it to get that look.
-
Thanks to all of you folk!! What a life-line this crew is!!! The whole not hitting the scarf bothered me all day so once Bob and Constab verified the timing was right all that was left was needle bar height... and of course we can't adjust that readily so..... Thinking outside the box... I swapped out the 135-17 needle for a 134-35 from my Adler and viola!!! IT STITCHED 18" without a single skip and this was with a crappy hook!!! *happy dance* still have some tension issues to work on but this is great for the owner. The 134 needle is a few thousandths shorter than the 135 thus raising the scarf and that minute variation made a huge difference in the final product.
-
Thanks Constab, The pinion gear is definitely running out of teeth. Yes it does have the openings for the racks to exit the end of the horn. Does your 71 needle rise twice each shuttle cycle?
-
I know this has been a topic ad nauseam, but I've run into a unit with problems. I've dealt with most issues but still stuck with skipped stitches. It's a Sewline model SL29 the owner purchased off eBay. Unit has never worked properly since owner purchased it. Three industrial sewing machine mechanics have worked on it before me (I am not a sew tech). Here is the timing: The needle descends and then rises about 1/16", the hook barely catches the very top of the scarf and then proceeds around as the needle descends again and pauses. The needle rises setting the loop and begins the next stitch. When I set the timing that the hook passes the scarf just above the eye... the rack and driver pinion gear run out of teeth and bind, hard stop. At the current setting the machine stitches about 5-6 good then skips 1 or 2, rinse and repeat. I can't rotate the pinion gear on the shuttle shaft as it is a "through the shaft" set screw. The machine is EXTREMELY picky about hook and bobbin selection!!! Here's my question: Should the hook pass the scarf on the first needle rise or the final needle ascent? I know it needs to pass nearer the eye but knowing which part of the cycle changes where to make the timing adjustment. I haven't run into this problem on other Singers but my 29-4 doesn't have that descend/rise/descend needle motion and I don't have easy access to a true 29k-71 for reference. And yes... both ascents and descents are machined into the cam follower pulley. Some of the other problems I've found: 1. The rack drive toggle connector knuckle was impacting the casting at the end of the throw, I've ground a bit from the casting allowing the driver rod full motion. This allows the timing to remain constant even if it seems incorrect. 2. Voids in the cam follower pulley race that appear to bind when sewing a single layer 4-5oz veg tan. 3. Burrs throughout the entire thread path. 4. Gouges in the shuttle drive pinion gear's bearing surface (poor factory machining), This may also be a factor affecting the binding in #2. The owner is stuck as they can't afford to purchase a new patcher and can't afford not to have one onsite. Any help would be most appreciated. Thanks
-
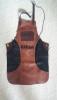
Seam allowance... depends on the material/design. I like 3/8", it allows for double needle look, lots of glued contact and 1/8" spacing, 1/4 gives similar look with a single stitch line. For me it's really what looks right and how much stretch/compression the material affords before puckering. Mallets are a tremendous aid in the disciplining of canvas and leather as well as setting the stitch line in both. I understand prior to hot iron they were used in the tailoring of regular fabric too. One more nice thing about leather is that it compresses better than most wovens thus a smaller seam doesn't force you to cut relief snips to keep the bulk down. Kinda cool to always have selvage too. I just did an apron design that's horrible in light nylon (ripstop weight) but was easy in leather. I couldn't gouge the seam lines in the body due to the type of leather used (waxed suede) and I'll probably use a contrasting thread if I do another in this color but... I was out of 138 black at the time.
-
Okay, since machining one of these lil guys seems out of the question... I went looking around. I found, Bobbin drive wheel from old domestic Singers (99k, model 66 etc)... Pull the tire off an you've got a 5/8ths (bottom of race) steel pulley mounted on a 1/4 shaft with a race of about a 3/32nds radius. You might find an aluminum drive wheel from a late 50's 221 Featherweight. Same assembly from a Patcher bobbin drive... These look to be closer to 7/8ths bottom of race diameter and a slightly wider radius.. Options: Tear apart an old 3 1/2" hard drive. The spindle in these are 1" diameter aluminum; probably similar to aircraft grade. You'll have to find one that doesn't have a live center, some have bearings mounted where you need to put the shaft. Too bad the the motors don't have enough uumph or you'd have your burnisher and motor right there. You'll still need to cut a groove, but a little time with a round file and abrasive paper will get you there. The wall thickness and workable height of the spindles vary. Older drives stacked more platters, thus were taller and usually had thicker walls. You will have to cut or break these free of the motor as they are pressed on. I have used the entire motor/spindle assembly as light duty live centers on drill press and (yes Tinker, gawd FO-bid...) my lathe.
-
Borax is a life saver! The only thing I've found that actually neutralizes dog and cat urine odor. Just yesterday I took powdered borax to an old stinky sheepskin fleece I acquired... smelled old like an abandoned tack shop. Sprinkled it with 20 mule team and let it sit for a few minutes then tumbled in the dryer on medium with a milled designer belly... both came out smelling 200% better. The belly is going to need a bit more airing out but the fleece is not bad. Of course there was a 30 minute clean up session involving a wet/dry vac and the dryer but those two hides don't chase me out of the room anymore.
-
Singer 29K72 Patcher (Large Bobbin) Ebay Uk
Ole South replied to Constabulary's topic in Leather Sewing Machines
It's amazing how "photogenic" old Singers are. I've taken pictures in progress of the old black Singer I happen to be working on and the sleek beauty in the picture looks like a prom queen compared to the cosmetically challenged machine on the bench. I wish pictures of me worked that way o.O -
"Soft" metal... if it's just to try... and you have a fairly decent drill press... center a round and mount on a 3/8 - 1/2"D, 3 or 4"L hex bolt. Chuck it in your DP, clamp up a steady rest and go at it with a fat handled rat-tail file. Smooth with emery and wet/dry. I've made a few temporary pulleys this way over the years... now I abuse my wood lathe. It will be slow going but you don't have to all that deep for a test tool. Let me look around the shop and see if there is anything readily available we could scavenge for this and not have to put life and limb at risk.
-
Effective Way Of Removing Paint From A Flat Bed
Ole South replied to Constabulary's topic in Leather Sewing Machines
What sort of paint did you use? -
What type of metal should be used? Preferred diameter and race width?
-
Could also be Steel Rapid Rivets pg 144 #190 Tandy Buyers Guide Look up Tandy sku 1381-11
-
Looks like Double Cap Rivets. Tandy is now carrying Brass rivets and burrs.... put them in backwards... bump to the back.
-
Feet sweating... try using only a thin layer of cork under a smooth insole, no lining. Add a couple 3/16ths grommets to the upper under your arch.
-
I re-soled a pair that fit perfectly a while back... used saddle-stitch and had to tear it out and re-stitch using a whip-stitch. If you have exact sizing saddle-stitching doesn't allow stretch around the sole. If you have a slightly larger sizing allowance you're probably okay.
-
Check your regional craigslist. I think I saw one in "Antiques" or "Leather tools" in Mass. when I was up there at Christmas.
-
What type of glove? Fashion? Work? Welding? Roping? Type suggests material, material determines stitch requirement. McCalls and Simplicity have a pattern pack (see your local fabric store) or... you can always google for free glove patterns.
-
Effective Way Of Removing Paint From A Flat Bed
Ole South replied to Constabulary's topic in Leather Sewing Machines
Black goes with pretty much everything. You going to spray booth or rattle can it?
