


barehandcustoms
-
Posts
243 -
Joined
-
Last visited
Content Type
Profiles
Forums
Events
Blogs
Gallery
Store
Everything posted by barehandcustoms
-
Resolene On Thin, Soft Pigskin?
barehandcustoms replied to jeremyqmartin's topic in How Do I Do That?
It would be tricky to apply to thin leather without getting blotchy areas. You may try a light coat of Obenauf's to seal it instead. Its a dense gel and can be applied lightly so it doesn't discolor the leather but seals it. -
How To Brighten Up A Dyed Finish?
barehandcustoms replied to NorrinRadd's topic in How Do I Do That?
Water down your oil dyes with rubbing alcohol to thin them out. If it is a small item then your best bet is to actually dip dye it. Just dip the piece into a bowl of the thinned out dye until you get the desired darkness. Wipe off any excess and let it dry. It will lighten up big time as it dries out and leave a nice even coat. Try it on some scrap until you get the right mix. Luckily 90% of my items are red, brown or black..... When I do light unique colors like greens and purples I always end up dip dying them. I pour a whole big bottle of rubbing alcohol into a mixing bowl and pour my dye in until I have the right color. Every time I try using wool daubers to apply those light colors they end up over lapping and looking like crap. -
What To Do About Blemishes Made From Blades In Sheaths?
barehandcustoms replied to countyholster's topic in How Do I Do That?
Tell the customer to oil their blades before storing them for months in a leather sheath..... I doubt your dye is causing the problem. To me it just sounds like two cases of improperly stored high carbon blades. Some of the expensive high carbon blades will grow a rust forest overnight if not stored properly. Ive seen Mora blades rust up in hours when I leave them wet. I might be missing something but I really don't think your sheath is the problem unless you are using some funky product not mentioned in your post. -
http://www.ebay.com/itm/2pcs-Pro-Groover-Stitching-Skiving-Edge-Beveller-Leathercraft-Leather-Tool-/350999288479?pt=LH_DefaultDomain_0&hash=item51b9301a9f Buy a set of these little bevellers. I have done that same design on a lot of journals using them. Just use the little edge bevellers to draw the stem. Darken the stems using whatever method works best for you and then dye the piece. You can buy those small flower stamps for several bucks as well.
-
From my understanding drain grain is a leather defect that leaves wrinkles on the surface of the leather. Usually you will see it on cheaper import leather that doesn't have good quality control in place. Occurs during the liming process and leaves marks on the surface of the leather. You will see it on higher quality stuff too but not near as often. You are basically buying rejected leather from a tannery due to a bad liming process during the run. It should be functional though.
-
Well crap........
-
Keep in mind that usually a professional looking leather item takes a professional level of knowledge and skill. Atelier Pall was started back in 1950s and has a team of people assembling the items. You have people who sit around for several hours a day mastering their technique through repetition. Not to mention the room full of expensive machines that assist in the process. Also business's like them buy directly from tanneries and have access to a grade of leather product that you may not. I think it is safe to say their family members are not out on the floor assembling items but they probably invested million over the years in time and material to achieve their leather's personality. Glad to see people working with you to figure things out though. Just keep in mind that you don't create amazing products like that without having a passion for what you are doing. So when is it okay to give up leather craft? I guess when your heart is no longer in it. A lot of times I am not having fun in the shop but that is where I want to be anyways. Honestly, figuring out new designs can be a major headache and I hate making the same thing over and over again. Slow down and develop a love for your craft if you want to make professional looking products. I am still constantly learning better ways to do things after multiple years of being out in my shop every week.
-
Help! Need Help With Stained Leather. Asap
barehandcustoms replied to jessebeckham's topic in How Do I Do That?
Generally you can just dampen the whole piece with a sponge and let it dry back out. Just make sure to do the whole thing and not just that one area like electrathon said. Using clear hot water and a clean sponge has worked in the past for me. -
Getting Good Penetration With Water Based Stains
barehandcustoms replied to tatsumi's topic in How Do I Do That?
I think Eco-Flo is pretty much the king of the water based dyes right now. I agree the finished colors are amazing but then I realize I can scratch them off easily with my finger nail. Most of my products are built to be abused over time so I have to stay away from them. Ican usually get away with using them on journals and some pouches. I have tried several methods to lock the pigments in better and prevent the color from scratching off so easily but no luck yet. Which kind of sucks because the colors from water dyes are so vibrant compared to oil dye. I would recommend trying out a few gel stains. The gels stains tend to be a happy middle ground between oil and water dyes. They tend to be more vibrant than oil dyes and penetrate better then water dyes. Personally I stay away from water dyes and some gels when I am making sheaths or any kind of outdoor items. -
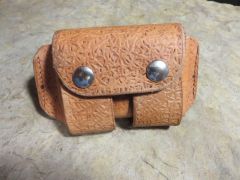
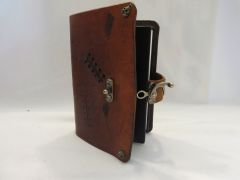
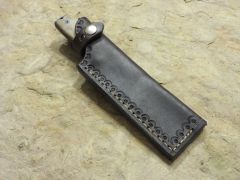
From the album: My Creations
-
Where Can I Get This Tool Made To Emboss Logo
barehandcustoms replied to DavidL's topic in How Do I Do That?
off topic I could watch that guy work all day. He looks like he has done that a few thousand times. -
I buy those huge sponges from the hardware store and cut them into small sizes.I will reuse the same oil sponge numerous times to apply my finish until it gets discolored. I keep one next to each type of oil finish and they work great. I tried several other methods before settling into using a soft sponge. It is just what works best for me. Plus the oil will stay in the sponge for days so you aren't wasting oil. I have always dyed first and then applied oil afterwards. I generally let the leather dry out overnight after I wet mold and then dye the next day. A few hours after I have dyed a piece then I will apply a heavy coat of oil. I also apply one more thin coat before I ship an item. I always do the oil dye first because the oil finishes tends to prevent the oil dye from soaking deep into the leather. I expect the product to be oiled throughout its lifetime but I doubt it will ever get dye applied to it again. So I want the dye to penetrate as deep as possible when I apply it.
-
Reality Check, Please. Tandy Leather Price Doubled.
barehandcustoms replied to dcobranding's topic in Suppliers
Funny I stumbled upon this thread today. I was punching numbers last night on a new item to get my per unit cost and noticed something weird. The leather cost were coming out the same as it did for drum dyed Hermann Oak products. I ordered a double shoulder from Tandy over the weekend because I needed it ASAP. I did a SQ ft measurement on the piece I got and this average quality leather cost as much as freaking Hermann Oak from Springfield. I was shocked because not only was I paying more for less product and quality but I have a membership with Tandy. I don't have one with Springfield *yet*. I will say the double shoulder from Tandy was very clean and showed up after 2 days. I will just buy Hermann Oak from Springfield if its going to cost the same as imported leather from Tandy with a membership. I hadn't bought from them in a few months because I loaded up on leather awhile back. So the price change kind of caught me off guard. I also got that blue slip from Springfield on my last order stating that Tandy was changing the rules of the game on them. WTF Tandy I think Chief said it best... ""Too bad, without Tandy over the years, many people wouldn't have gotten into leather, me included. Oh well, enough ranting, they should just go ahead and move from Fort Worth to China and be done with it."" -
Best Glue For Leather On Leather?
barehandcustoms replied to zaynexpetty's topic in How Do I Do That?
I switch between Weldwood and Fiebings Leather Cement from week to week. The Weldwood gives me a longer time period to work with the leather and Fiebings is easier to spread but dries very quick. I wonder if Fiebings Cement is just regular old Elmer's glue since they cost the same. If I had to pick one then it would be Weldwood. You just get so much more product and the end result is the same. -
There are a lot of niche tools out there for leather. They will usually collect dust in your shop but absolutely excel at the specific task they were created for. One thing not in the video that you will need are stitching punches. I would get a 4 prong and a 2 prong. He is most likely referring to tools strap cutters, stitching horse, various punches and numerous other tools.Eventually you will build up a wider variety of tools so don't get bogged down on the idea of missing one. As far as learning goes, I watched almost every video Ian had posted multiple times before I ordered my first tool. In my opinion he has some of the best how to videos you can watch. Those books might bore you to death but it wont hurt to read them. Videos and books are great but you have to get started if you really want to learn. Most of what I know came from getting out in the shop and messing up until I figured things out. P.S. Buy good tools now so you don't have to buy new ones later to replace the cheap stuff. If you plan on selling leather then you might as well invest now in good tools.
-
1. Personally I would stay away from the starter kits. You learn a lot by having to design and cut out your own templates. http://www.youtube.com/watch?v=X1pAMZQpYFA 2. Tools you will need by Ian Atkinson *great guy to learn from* 3. Buying Horween leather squares from Springfield Leather would be a good start when you are ready for that grade of material. By the time you are ready to start making actual branded products you will have a laundry list of leathers you prefer though. 4. Buy some cheap goat leather or Economy grade leathers from various vendors. I would recommend trying several varieties as you start learning to get a feel for different leathers. For wallets I tend to cut out my designs using thick sketch paper first and then using it as a template on the leather. Hope that helps
-
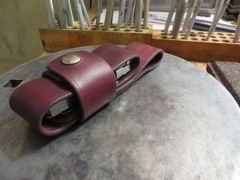
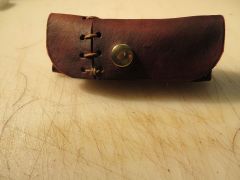
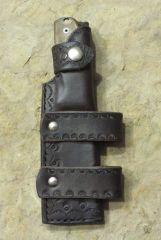
From the album: My Creations
-
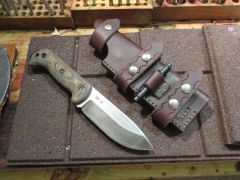
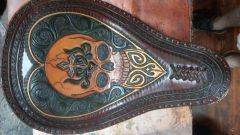
From the album: My Creations
-
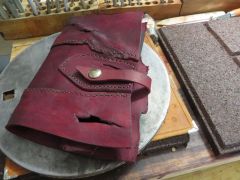
From the album: My Creations
-
From the album: My Creations
-
From the album: My Creations
-
From the album: My Creations
-
From the album: My Creations
-

From the album: My Creations
-
10155180 10202491686992417 1382071684813642342 N
barehandcustoms commented on Spartan's gallery image in Gallery- Our Leatherwork
 Love it