TwinOaks
-
Posts
4,513 -
Joined
-
Last visited
Content Type
Profiles
Forums
Events
Blogs
Gallery
Store
Everything posted by TwinOaks
-
You should be able to use double sided seam tape to hold the patches in place, but shop carefully. Some types are 'removable', some are permanent. As to what size thread.....that will depend on you. You could sew it with big, thick, 415 thread, but it'd look terrible (on most patches). I'd think you'd want to stay at size 69 or 92. Sewing them on a home machine......ummm, sure. Be aware that you'll likely have to sew through the lining if you use that type of machine, or make larger openings to get the arm inside it. A LOT of patch sewing is done with a Singer 29 (called a patch machine) or clone, because it features a very small arm and bobbin, and the foot can sew 360 degrees without turning the garment. If you happen to be sewing on unlined vests....disregard that last part.
-
Trying to decide whether insomnia is a good thing....or a bad thing
- Show previous comments 4 more
-
LOL
-

I have to say, it's a bad thing. It wreaks all kinds of havoc on the old bod.
-
I had to quit all caffeine so I could sleep again… It took 2 weeks of raging headaches to get the caffeine out of my system, but I sleep better now. I have heard they say it helps to turn the lights down, computer & TV off about an hour before bed time…
-
Vinegaroon Uniformity
TwinOaks replied to jhinaz's topic in Dyes, Antiques, Stains, Glues, Waxes, Finishes and Conditioners.
The fact that the 'roon worked for both pieces indicates that the issue is with the leather. There are all kinds of factors that could contribute to the lack of reaction - finger prints are right up at the top of the list.....so is oil residue left on the swivel knife blade, or residue from the strop that's on the blade, or something on the paper used to transfer the pattern to the leather.....a pretty long list, really........and there's nothing to say that YOU contributed at all. It could simply be where something was laid on the leather at the distributor or tannery. You can eliminate many of the issues by cleaning the leather with alcohol or oxalic acid. For a LONG time, I presumed the leather was good to go, and would deal with any little problems as they popped up. Then I figured out that taking the longer route, and following a procedure of cleaning the leather, wearing sleeves and gloves, wiping off tools.....yada, yada, yada.......only SEEMS longer but it gets rid of all the problems that take additional time to repair. -
When Neutralizing?
TwinOaks replied to Aulus's topic in Dyes, Antiques, Stains, Glues, Waxes, Finishes and Conditioners.
You might get some neutralization that way, but I've found that the process tends to push the tallow and waxes to the surface which makes wetting it again a real PITA. Most of the time I neutralize immediately after the dip. After it's dry, I have to pretty much submerge the piece to get it wet. And presuming the next question, yes I mold while it's still damp from the 'roon process. -
Artisan Servo Motor Caution Light
TwinOaks replied to SkookumTack's topic in Leather Sewing Machines
Something I had happen with a home machine sounds similar - I was using my old Viking, when there was a tiny puff of smoke and then it started running at full RPM. Being an electrician, I figured there was some sort of problem with the motor and I started disassembling. What I found was thread dust....aka LINT. Enough had built up that it completed the circuit - that was the puff - and since charred cloth is mostly carbon...which is what motor brushes are made of (plus graphite) it completed the circuit and ran away. Here's the neat part: Motor brushes can wear down (depending on design) and the result is 'dust' with the same properties as the brushes. Add a large enough obstacle (thread lint) and the dust no longer falls out, it builds up and effectively makes another electrical contact. If that contact isn't cleared, it can cause shorts and overloads. I cleaned out all the dust, reassembled, and it works fine. If you have some compressed air, I suggest UNPLUGGING the machine and blowing out the motor housing. It's pure speculation, but you might have had a 'dust contact' build up and the motor is registering it as a direct short (which it is). You may get lucky and be able to blow the contact clear. -
If it isn't oil tanned, my only other guess would be chrome re-tanned. Can you post up a pic of the leather where you've tooled it? It may look familiar to some other members...
-
Another important aspect is to use shorter lengths of thread when hand sewing. Think about it, if you sew 2 feet of stitch line at 6 spi, that's 144 holes. If you use a single piece of line, then the ends of the thread will have been through ALL the holes and can look dingy or ratty. Using a shorter piece of line, you reduce the 'wear' on the thread caused by sewing. Regardless of the overall length of the stitch line, I try to keep my sewing threads to under 3 feet each. That means a foot and a half on each side, presuming you put the thread through a hole and center it. Then, when I'm down to about 6 inches of line, I start a new piece and complete 3-4 more stitches and snip. Then take the fresh line and stitch over the ends of the last one which both locks them down, AND hides them. There's also something I've noticed about using waxed linen - when it's on the spool, it's twisted and has a good color. After several pulls through stitch holes, it has lost some of the twist which makes it more translucent. If you've dyed the leather before stitching and the thread has become untwisted, you may be seeing the leather color through the thread fibers. Look closely at the stitches and see if the fibers are still twisted tightly or if they're straighter. If they're pretty straight, start putting a full twist (or more) on the line before pulling it through the leather.
-
Does it take a burnish in the tooling as well?
-
Well, it isn't "required", but it does look good and is functional in the sense that it prevents having an edge that gets ragged looking.
-
It's a storage container for roping gear/ lassos.
-
Ok Or Not? To Use Lighter To Seal Thread End?
TwinOaks replied to joeyrsmith's topic in Sewing Leather
Pull the thread a little "extra tight" and hold with a pair of needle nose pliers, then heat to the point it starts to melt. Once it's good and soft, release with the pliers and mash it with your finger or thumb. Yes, I'm saying put your finger on molten plastic. Yes, it will burn a little. After a couple of times, you'll either develop a sense of how long you can mash it without getting burnt, or you'll get a callous and won't notice it anymore. Learning when to let go is the fun part. The "extra tight" part means that you're pulling a bit more of the thread/sinew from the hole than you should, and it will pull back IN when released. The idea is not to make a ball of thread/sinew that won't pull out....that's the point of back stitching.....it's to "weld" then end so it doesn't fray. I've found that if you let it get to the "ball of molten plastic" on the end, THEN mash it flat, you'll end up with a little disc on the end of the thread that can/will still snag or scratch. If you just melt it enough to keep from fraying, and stretch it so that it pulls back in the hole...when you get done, the end will be between the layers or just under the surface of the back. -
Thanks for the late evening laugh!!!!!
-
Is it perhaps oil tanned?
-
My Belt Hole Punch Is Anemic
TwinOaks replied to renegadelizard's topic in Gun Holsters, Rifle Slings and Knife Sheathes
OOPS!!!! That wasn't a Weaver vid....it's an Osborne vid. http://leatherworker.net/forum/index.php?showtopic=24024&hl=+sharpen%20+punch#entry152979 Start watching the video about the 3 min mark. -
Yeah, I KNOW to use one of the -lac's to resist, but since I was working at my table and didn't want to go outside to use the high VOC products, I tried some supersheen. I didn't really want to break out the airbrush and spirit dyes, so I grabbed a seldom used 'all in one' (now I remember why it's so seldom used) and went to town. The intent was to block the stain, then tan-kote, antique, and top coat with the lacquer.......well, I made more work for myself by trying to 'cheat' the process....There's another lesson - just do it right the first time, and you don't have to spend EXTRA time to fix it.
-
My Belt Hole Punch Is Anemic
TwinOaks replied to renegadelizard's topic in Gun Holsters, Rifle Slings and Knife Sheathes
Take a close look at the cutting edge, it may just need to be sharpened. If it has a dull, flat, or damaged edge, it won't punch holes correctly. Weaver Leather has a nice little video on Youtube that shows how to sharpen a punch. -
Leatherburnishers.com ... Anyone Have Their Tools?
TwinOaks replied to RoosterShooter's topic in Leather Tools
Those are the ones that Chris (Spinner) designed and are now being produced by Ed the Bearman (Bearman). Both are members here, and the burnishers have earned a very good reputation. -
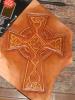
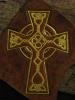
And the last pic is take with no flash. That's just reflections of lights around the room.
-
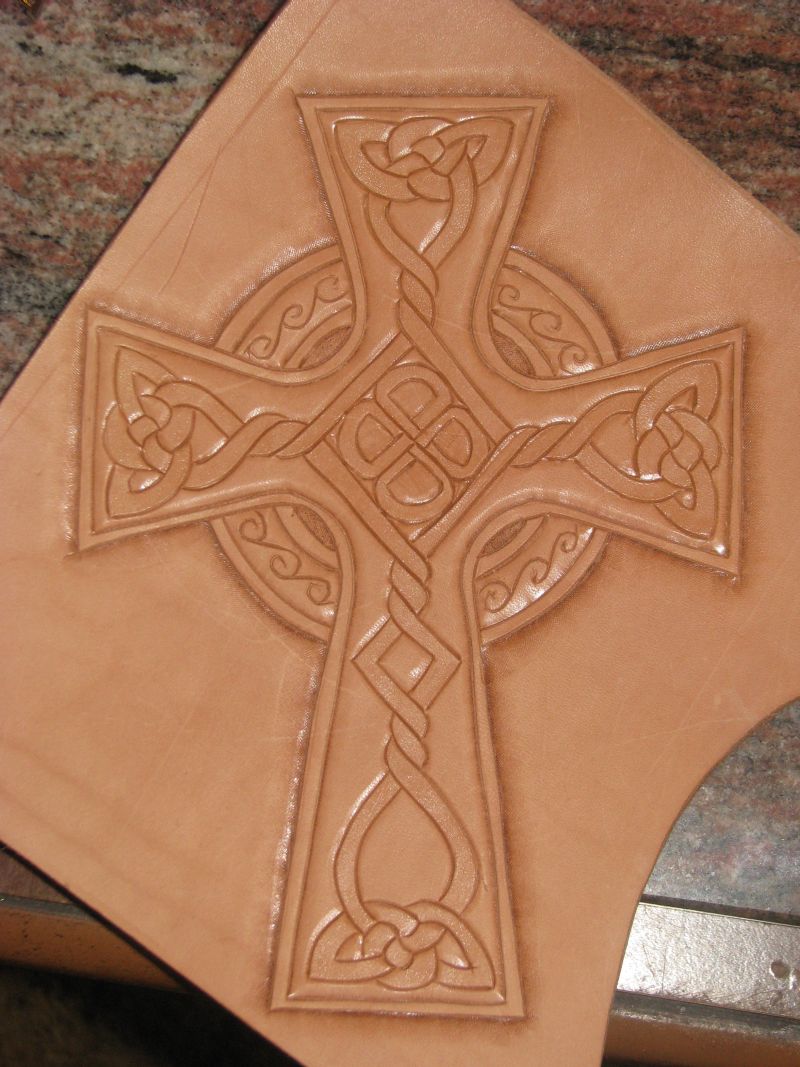
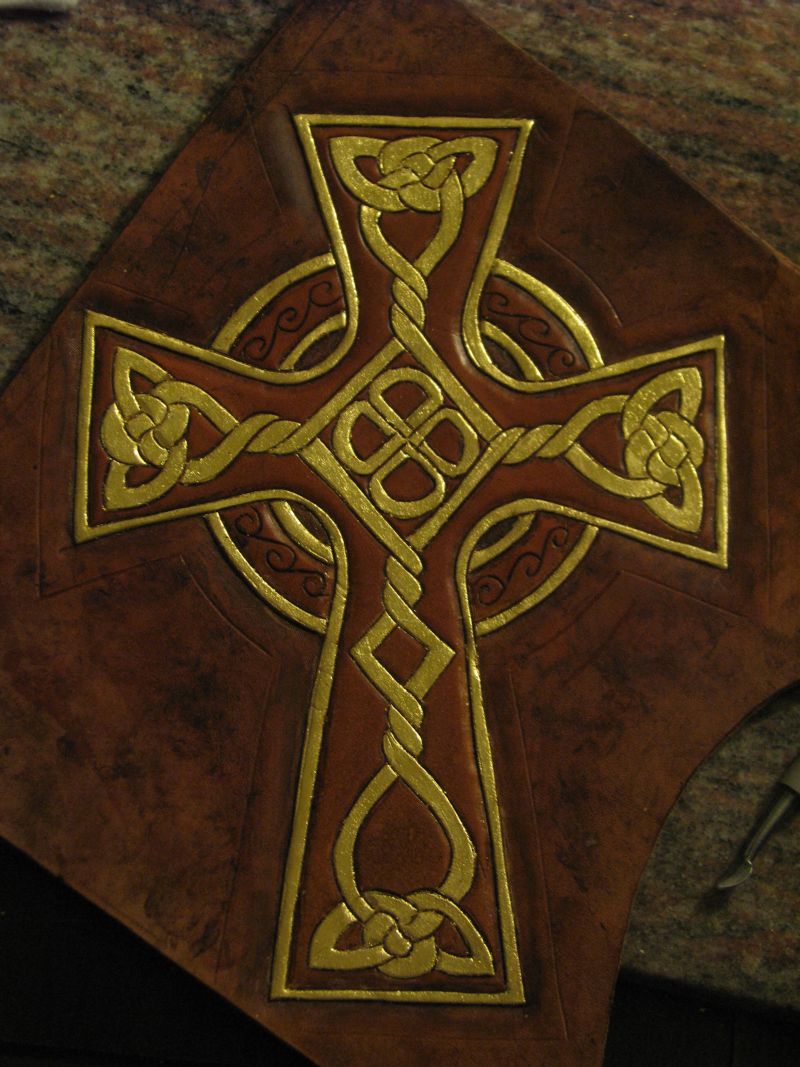
I started this little project as a test drive for a swivel knife, and decided to go ahead and bevel and dye it. And here's where I ran into a problem......I didn't get enough Resist/Block on the 'rope', and had some bleed through. Since I didn't want to "dye it black", I decided that covering the error would be the best solution, but just painting it didn't seem to be enough. So......I went with the MUCH LONGER process.... If you didn't know it, gold leaf that doesn't go exactly where you put it, well it comes off it's sheets in little flakes. If you don't have it stuck down, the little flakes go EVERYWHERE. And if they get in a place you don't want them....it's a nice afternoon eating project to pick off the little flakes that don't want to brush or blow off. However....I think the result is well worth the effort. I originally set out to just complete it, and now I think I'll cut it out and mount it on proper background. Incidentally.....this is not actual gold leaf.....I'm a poor, broke, leatherworker after all.

-
Another Wallet
TwinOaks replied to jayjay's topic in Purses, Wallets, Belts and Miscellaneous Pocket Items
Nicely done!! Fantastic job on the even color. -
Welcome to the site, and don't worry...you can get leather in Korea. Also....provided you can still get internet, you can always check in here. NOT having access to Tandy may be a good thing for you...you'll learn to make tools, and how to create effects with commonly found items. Keep in mind that the old masters didn't have a Tandy to get their tools from. Of course, there's internet sales, and I'm pretty sure I've seen S. Korea's flag here before. The tools may be a little different, but you should still be able to find something to work with if you can't fabricate your own.
-
plain water will thin it a good bit.
-
They have received very good reviews here from many people. I haven't used them personally, though. Take a look at some of the work by member "Tina", and you can see some of the results.
-
This is where a pair of wing dividers comes in handy. You can set your space, 3/16ths or 1/4 inch, and "walk" the divider down the edge, leaving a little dimple where each hole goes.
-
Travel Case
TwinOaks replied to swiety's topic in Purses, Wallets, Belts and Miscellaneous Pocket Items
Very nicely done! Welcome to Leatherworker.net!!