Uwe
-
Posts
2,221 -
Joined
-
Last visited
Content Type
Profiles
Forums
Events
Blogs
Gallery
Store
Everything posted by Uwe
-
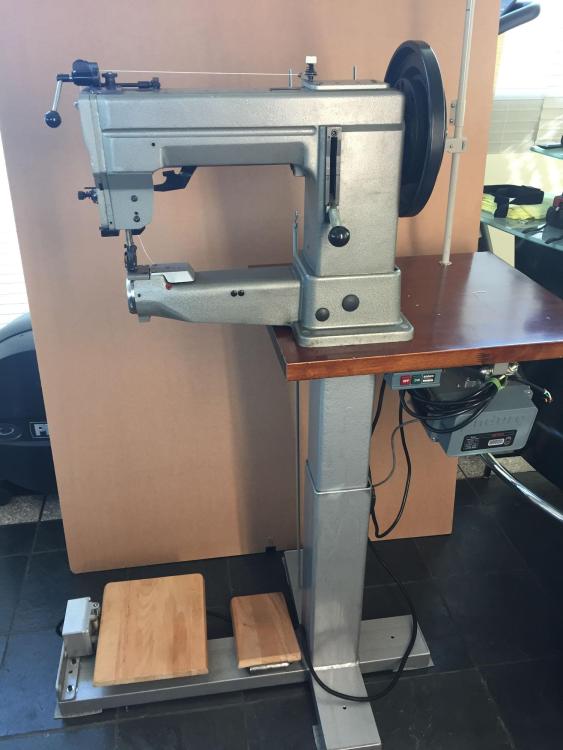
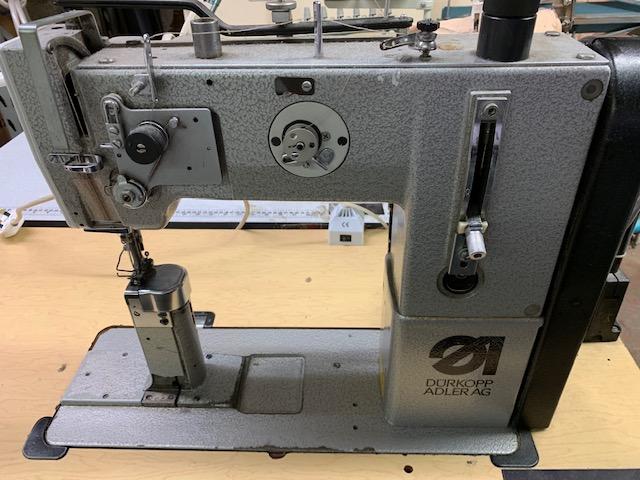
@Rob2613 the specs on the leaflet show that the 205-374 head by itself weighs 58kg (127 lbs.). You’ll need at least two people to move it safely. I’ve moved a head by myself, but I really don’t recommend it. You should be able to remove the hand wheel, which weighs quite a bit all by itself. With the hand wheel removed the main shaft stub sticking out makes a good handle for lifting. Don’t lift the head by the hand wheel if you leave it on - it may suddenly rotate and cause you to loose grip. The thick bars/shafts on the back of the machine also make a good grip for lifting the head. The head will definitely want to tip to the left once you loosen the bolts that attach it to the table, especially with the hand wheel removed. Remove the bolts on the right side of the base (under the hand wheel) last and have somebody hold up the left end of the head. Then re-install those bolts first when re-mounting the head to the table. Lay the machine head gently on its back for transport, don’t keep it upright. It’s very top heavy and wants to fall over. The table by itself shouldn’t be too heavy if it’s a standard industrial table with servo motor. If it’s mounted on a tall metal stand that is common here in the US, it’ll be quite heavy. The stand comes apart in two pieces for transport. The pressurized gas cylinder inside the column is quite strong to balance the weight of the head - be carful when loosening the screws on the column to adjust or remove the top of the column. Here’s picture of that stand (your machine may not have this:) Best of luck moving your machine. Post some pictures when you get a chance!
-
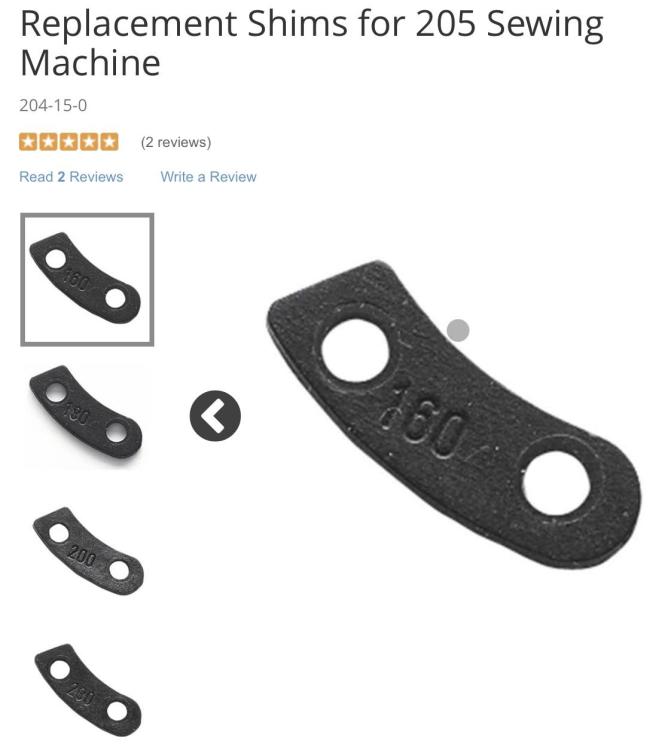
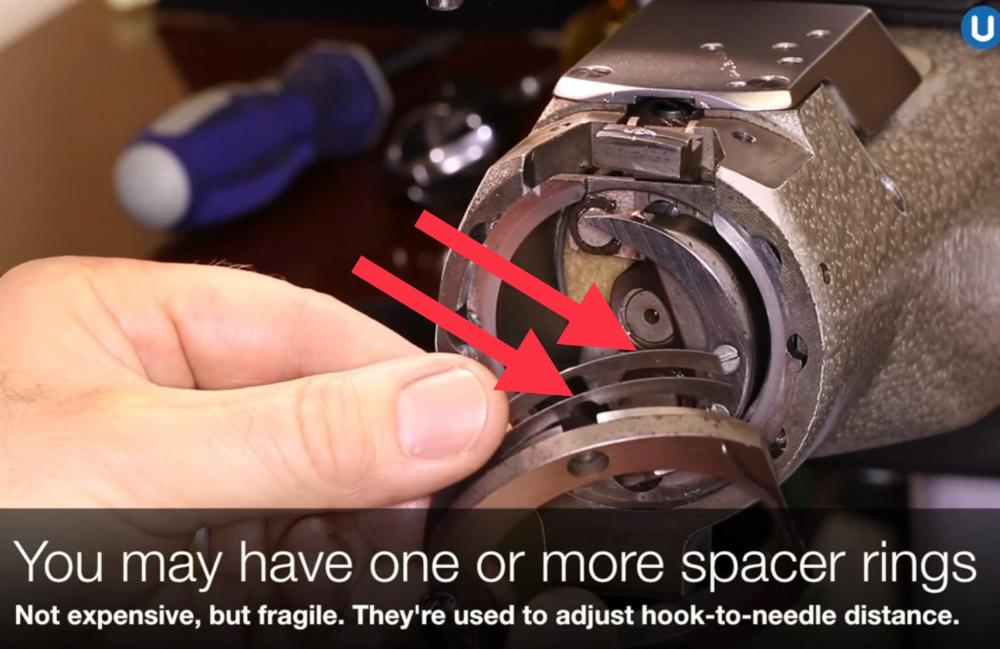
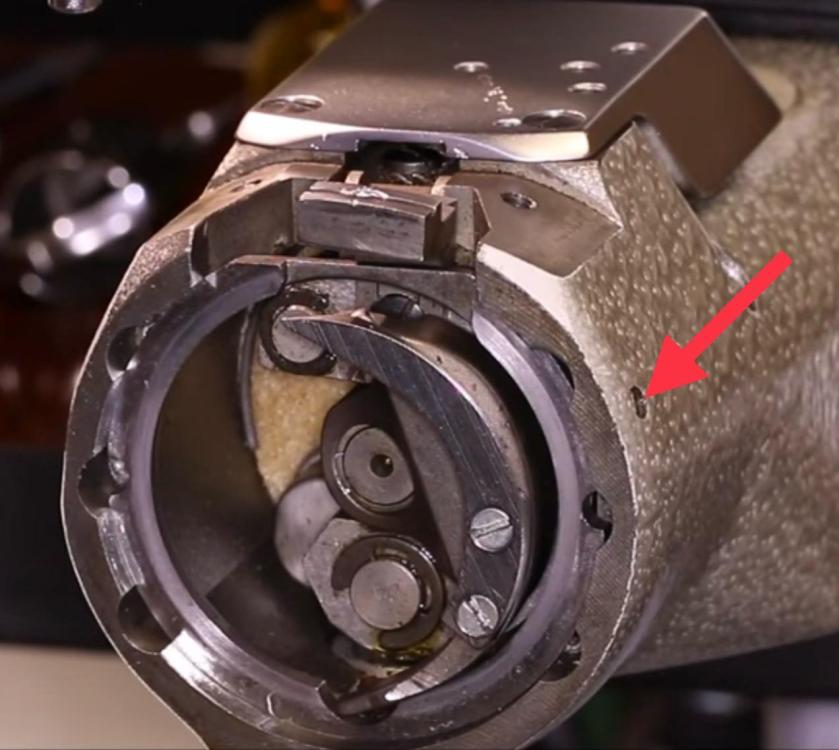
The (Durkopp) Adler 205 are *really* nice machines. The 205-374 and 205-370 are perhaps the most desirable version for general leather work. @Rob2613 that Adler 205-374 would be a bargain at 1400 Euros if it’s in good condition. The Adler 205 series machines have been out of production since 2010 (I think), so certain parts may be getting hard to find. Durkopp Adler replaced the 205 with the 969 H-Type, which starts around 7000 Euros for a basic model. It’s much bigger and has higher specs than the 205. Consider it if you can afford it. Here’s the pamphlet for the Adler 205-374 with specs: Leaflets_Adler_Class_205-374.pdf @Goldshot Ron, I’m glad you got the problem fixed. The additional spacer rings likely increased the available room inside the shuttle race to make it less likely for thread to get caught between shuttle hook and race. Adding the spacer rings also increased the needle-to-hook distance, but if the hook still reliable catches the loop, then you’re good. Since there’s bit of confusion around the spacers, here’s a bit more detail for others who might be following this topic: There’s actually two types of spacers: 1. The needle spacer shims that you use to adjust the needle guide distance depending on needle size. This is what you change to match the needle size. 2. Spacer rings that go behind the shuttle race to allow you to adjust the hook-to-needle distance. These spacer rings are not affected by needle or thread size. Adler uses very thin rings in various thicknesses that you can mix-and-match and stack to achieve the desired thickness. (Juki 441 class machines use a single ring, available in various precise dimensions, but not stackable.) Here’s what the needle spacers shims look like: Here’s what the spacer rings look like: This video shows how to remove the shuttle race (although there’s no need to remove the race to install a feed dog.) Make sure your race lock screw is NOT tightened when you sew. It should only be tightened when you remove the shuttle. If the race lock screw is tightened, then the shuttle hook will NOT be spring loaded, but fixed. If it’s fixed then it’s more likely to bind up if something like thread gets caught between the shuttle and the race. Here’s the location of that race lock screw: If you’re new to the Adler 205 or consider buying one, then this video might be helpful in terms of an introduction: This video shows how the stitch is formed on this class of machine. Compare hook position at the very back, and hook timing with your machine. I had a similar problem (thread getting caught in race channel, but only when sewing in reverse) on a Juki TSC-441 class machine once (Cowboy 4500.) On that particular machine, the problem was resolved by carefully timing the hook to spec. Here’s the video showing the problem on the Cowboy 4500. I have a feeling that your problem on the Adler 205 will look a lot like this one. The hook and shuttle race design between the Juki and the Adler are very similar, but not identical.
-

Cobra 26 thread binding around bobbin shuttle.
Uwe replied to bdeming's topic in Leather Sewing Machines
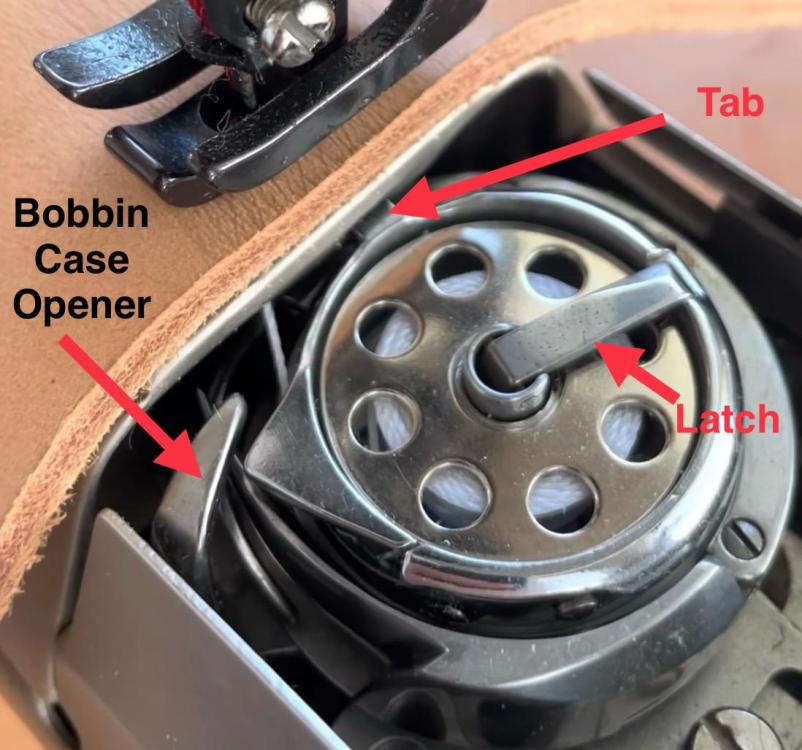
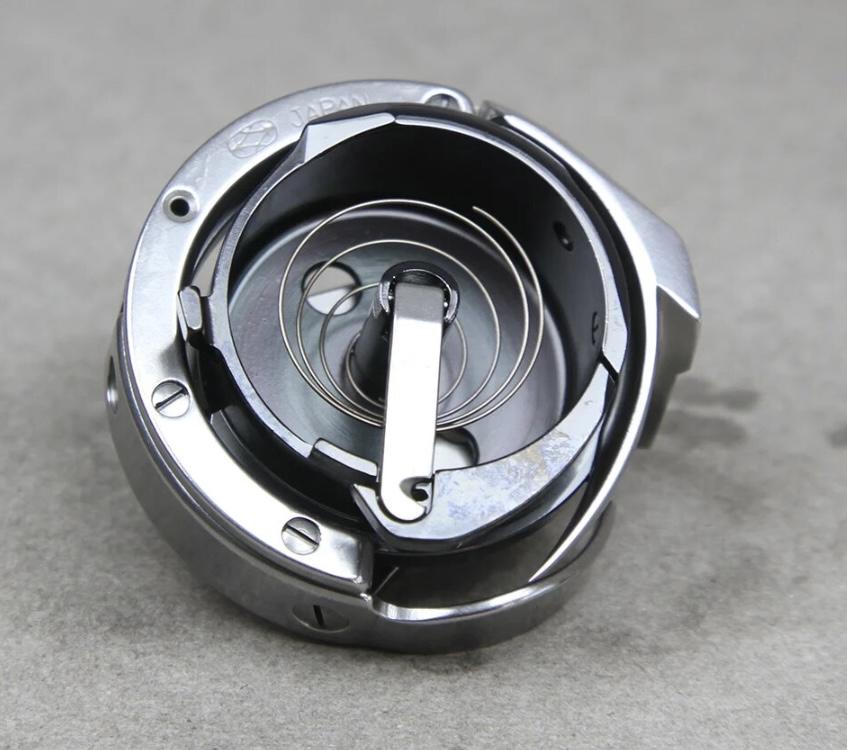
The threading is indeed correct according to the video by Leather Machine Co. you referenced. Here’s a screen shot from that video: This hook and bobbin case is different from what I have on my Juki LS-341 (your Class 26 is mostly a clone of the Juki, aside from the hook, apparently) The orientation of the latch arm that you fold down on top of the bobbin is pointing the opposite direction on my Juki. On the original Juki style hook, the bobbin thread stays below the triangular piece that the bobbin case opener pushes against. Previous posters expected to see the bobbin thread to have a path like on my Juki, I think. On your style hook the bobbin thread does indeed get threaded to the top of the latch arm, it’s clearly designed that way. The hook design on your machine reminds me of hooks I’ve seen on modern Durkopp Adler machines. Hook design used in the Durkopp Adler 867, with a very similar bobbin latch arm and thread path to your machine: So I doubt that the thread path is the cause of the issues you’re experiencing. From watching your video, it appears to me that two things are not quite right: 1. The thread occasionally does not slip easily into the cutout on the underside of the throat plate, where the thread has to wrap around the tab. You may have to adjust the finger (bobbin case opener) that pulls back on the bobbin basket to open the passageway that the thread has to slip through. (See video below) 2. The thread also appear to be let go too late from the gib that’s on the bottom of the hook. This indicates to me that the thread take-up lever starts pulling up on the thread before the hook has let go of the thread. This snag may cause loops at the bottom and also audible snapping sounds. Advancing the hook timing *should* help with that. This video shows how the stitch cycle works on my Juki LS-341. This video shows in more detail how that bobbin case opener is supposed to work: : This video illustrates the problem of the thread not being let go (cast off) by the hook gib soon enough (different machine than yours, but same issue). Advancing the hook timing (making the hoo tip arrive earlier at the needle) fixed the problem shown in this video: Hopefully these videos will help get you started on your path towards figuring out what the problem might be on your machine.
-
One more …
-
This video might shed some light on how mechanism is supposed to work. You may just need to add few drops of oil to get yours going again. Don’t take off the fabric belt, it may never be the same again.
-
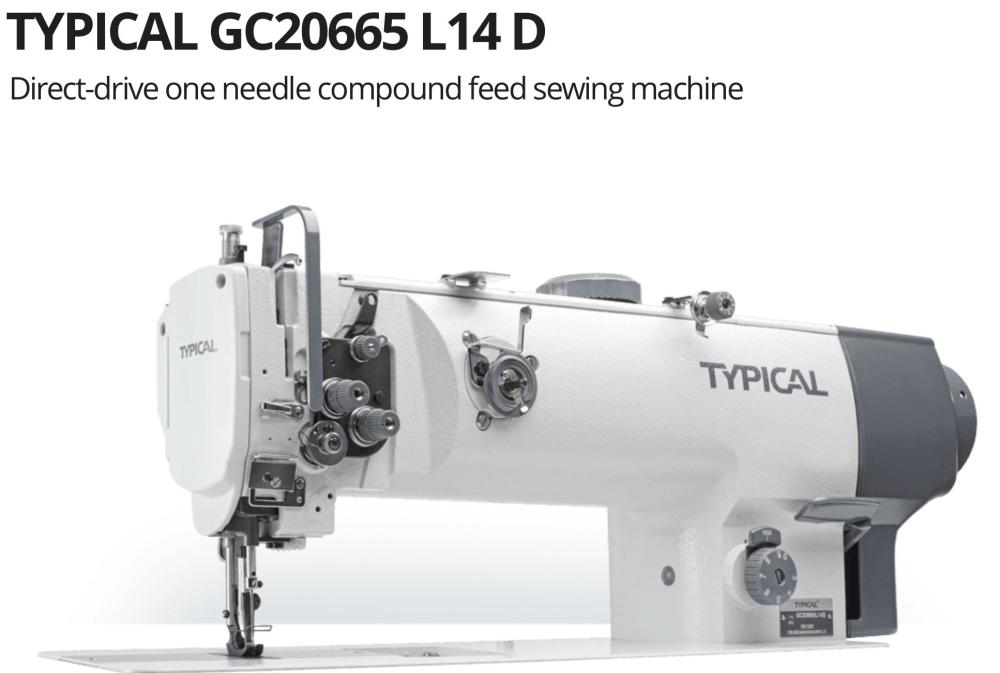
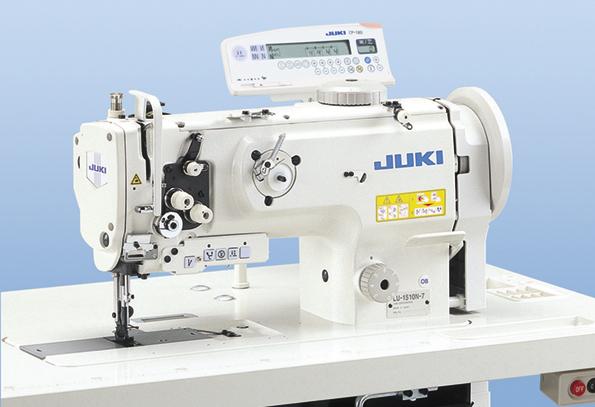
Here’s the website of the machine in question: https://www.vetrontypical-europe.com/typical-gc20665l14d It appears to be a decent medium/heavy duty compound feed sewing machine. It’s not an apparent clone of anything I recognize. Typical is a big enough brand to perhaps develop their own variations on certain themes. It does bear a certain resemblance with a Juki LU 1510N-7, but the body casting details are different. Who knows what’s going on inside. You have to compare parts diagrams side-by-side to determine how similar they are.
-
I’m not sure what an Adler K268 looks like, either. Pics would be great. The Durkopp Adler 268 Service manual(DA-268-Service-Manual.pdf) describes how to adjust the feed dog position and movement on pages 6 and 7. Hopefully these instruction will work on your machine as well. In general the feed dog movement should be centered in the throat plate opening. There will likely be a gap in front and back even at the highest stitch length. You don’t want to the feed dod to touch the throat plate, ever. Here’s what a Durkopp Adler 268 looks like, the class the manual above was written for:
-
New Member, First Post inquiring about a Singer 531-8bl
Uwe replied to Woodbender's topic in Leather Sewing Machines
Yep, I’m also putting my money on your Singer 531-8BL being a relabeled Seiko STH-8BL. The later models had a rotary stitch length dial with a separate reverse lever. This machine should do reverse, just like all the others with this type of combination stitch-length-and-reverse lever. It’s very likely a Seiko Design manufactured by Seiko in Japan and sold with various badges around the world. Consew was the marketing brand that Seiko used to distribute their machines in the USA. Here’s a picture of the original Seiko STH-8BL: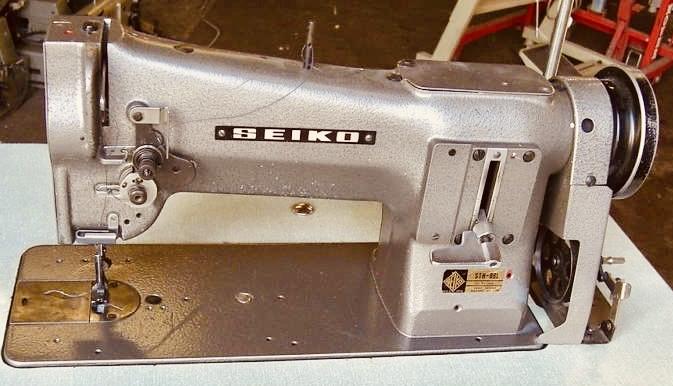
-
Adler Cylinder Arm 49-2 Any Info, Manual or Singer Equivalent
Uwe replied to FizzyWizzy's topic in Leather Sewing Machines
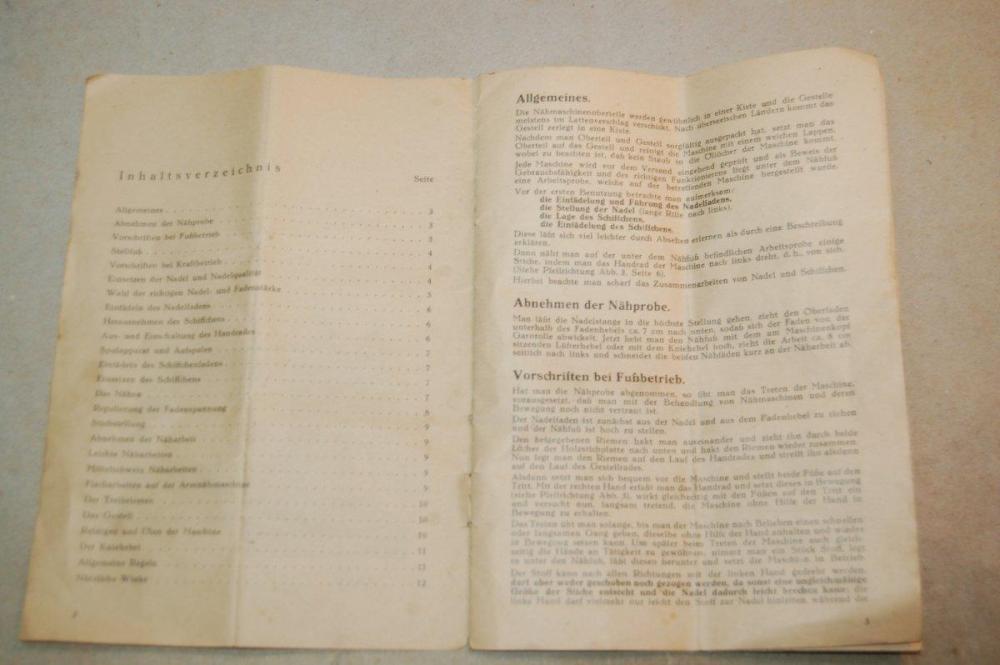
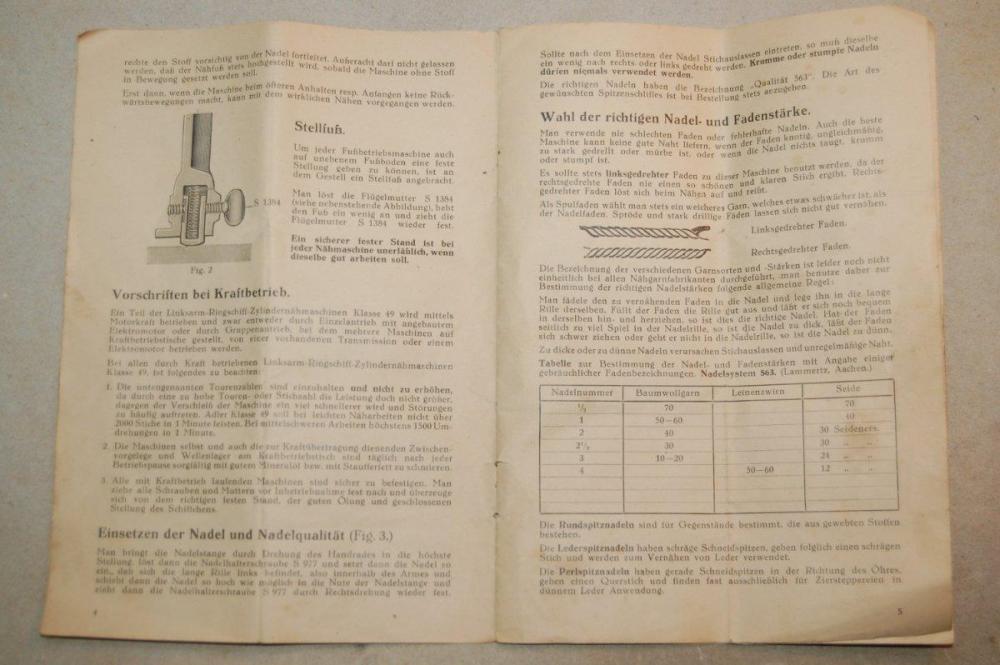
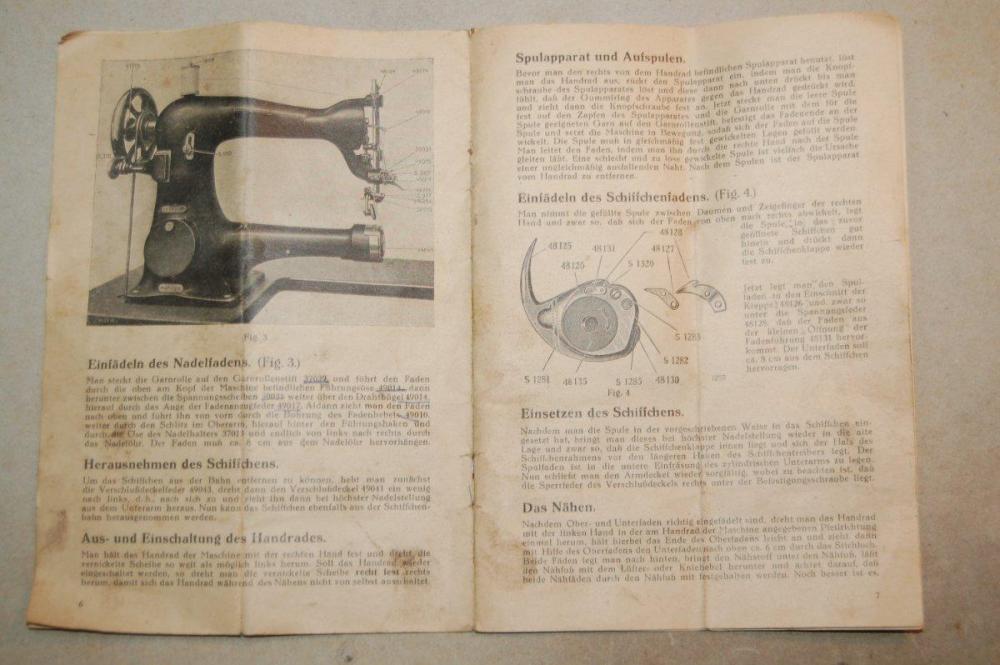
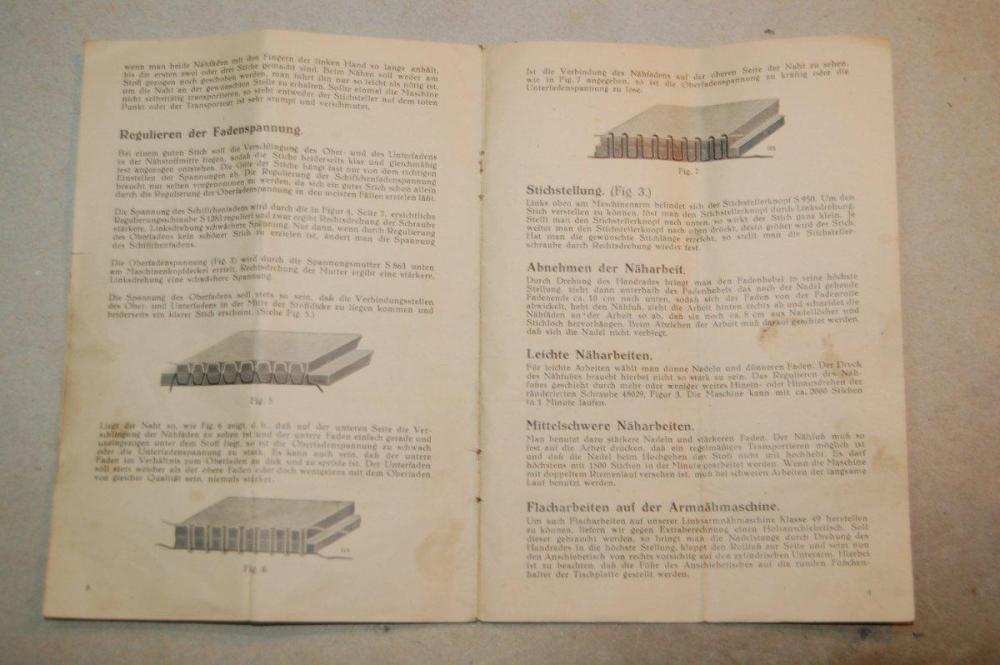
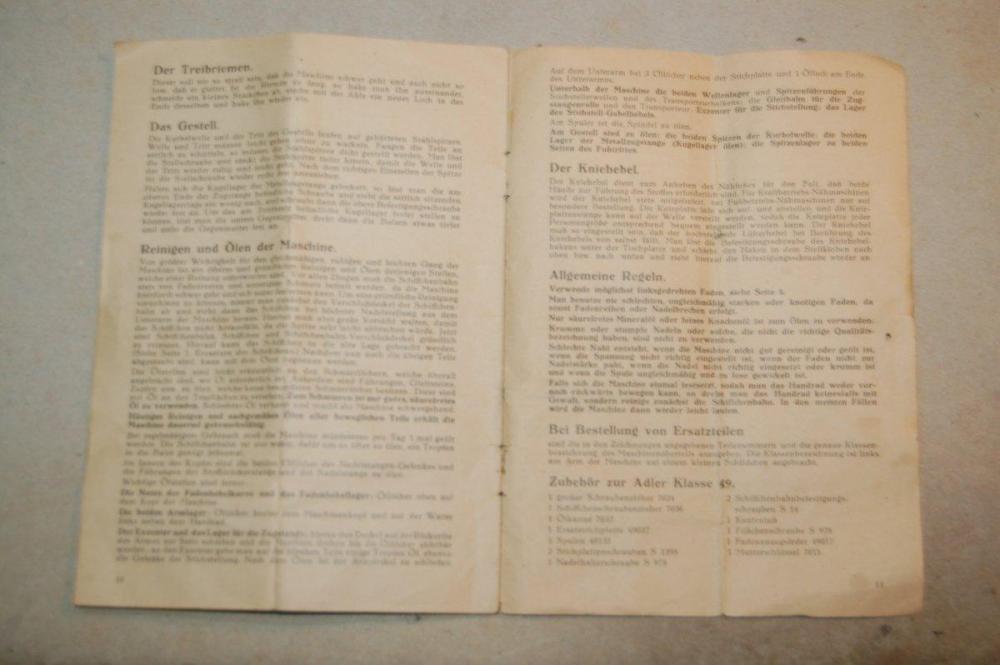
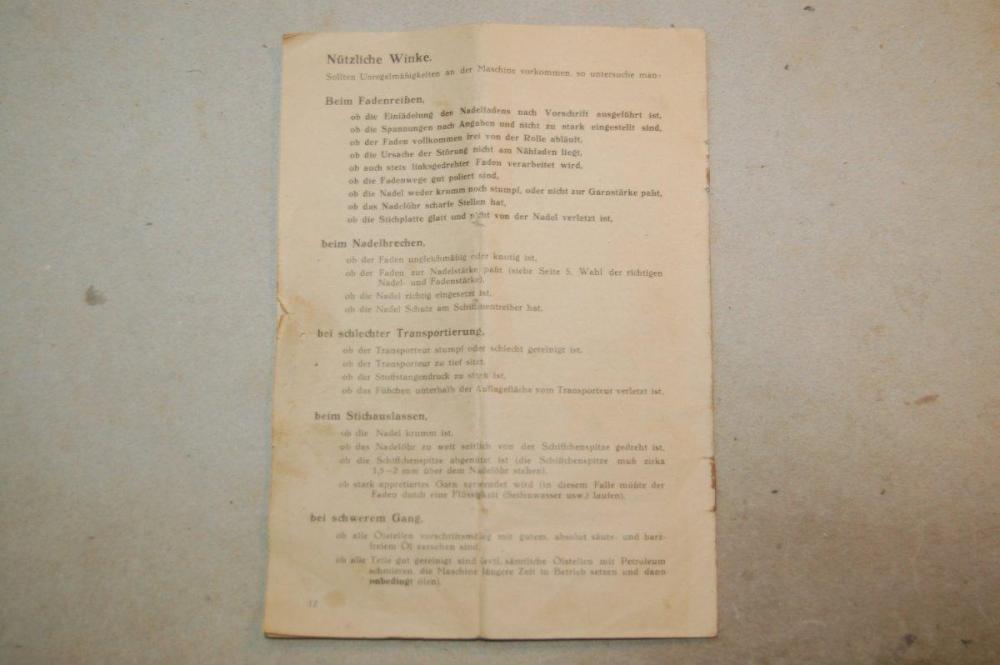
Yep, it appears that the Singer 18 class is very similar, and @Constabulary beat me to it and very likely knows more about it than I do. I also would recommend staying away from this model as a first machine. It may be a great machine and all, but it’s such an oddball machine that you’re essentially on your own figuring it out. At the same time, it may be valuable in a collector sense, since it’s such a rare vintage machine. Here’s a manual I found for the Singer 18 class: class_18.pdf The images below are the only manual I could find for the original Adler 49. Unfortunately the good soul who photographed them wasn’t very good at it, so the quality is rather poor. It’s also in German. But it may be better than nothing.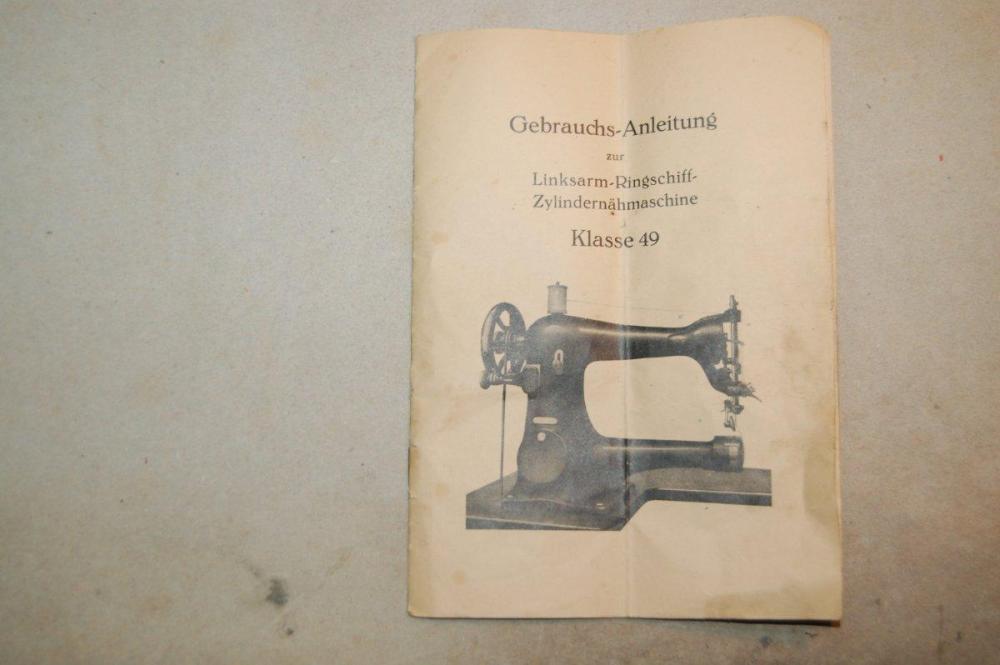
-
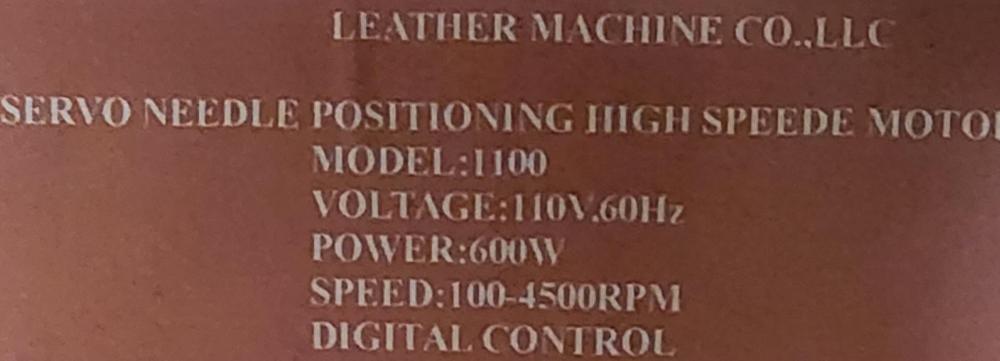
It seems hard to believe they would ship the motor without instructions on how to change controller settings. Give the Leather Machine Co. folks a call and after they give you the manual, post it here. I don’t know why they don’t just post the manual on their website. Or better yet, have a QR code that points to the manual online right on the controller box, like mine does.
-
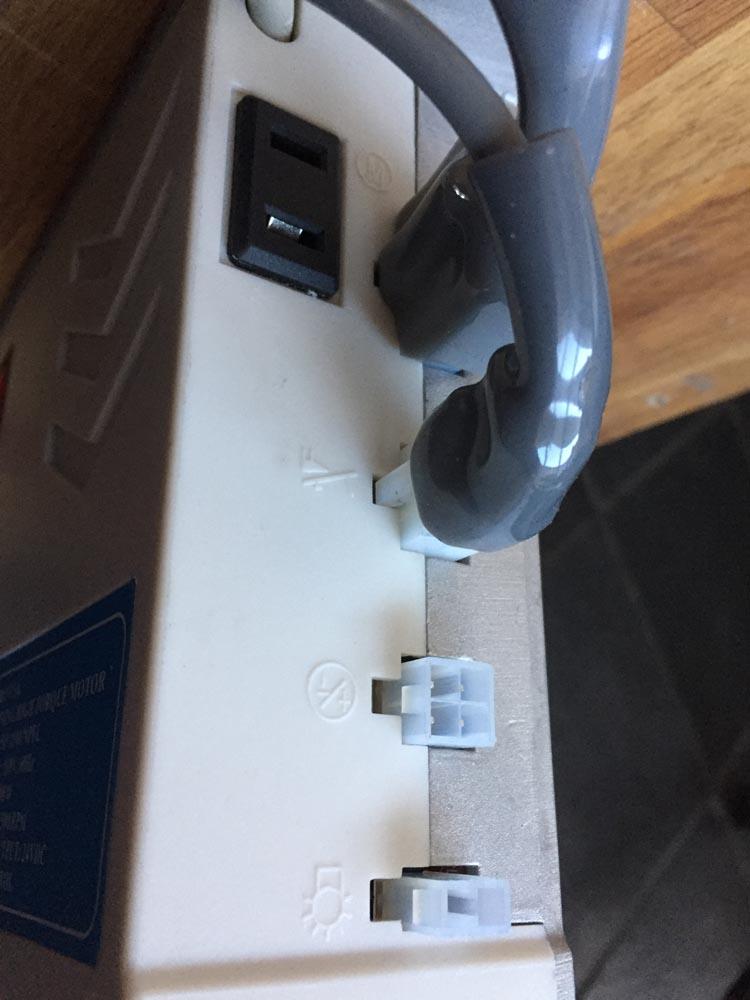
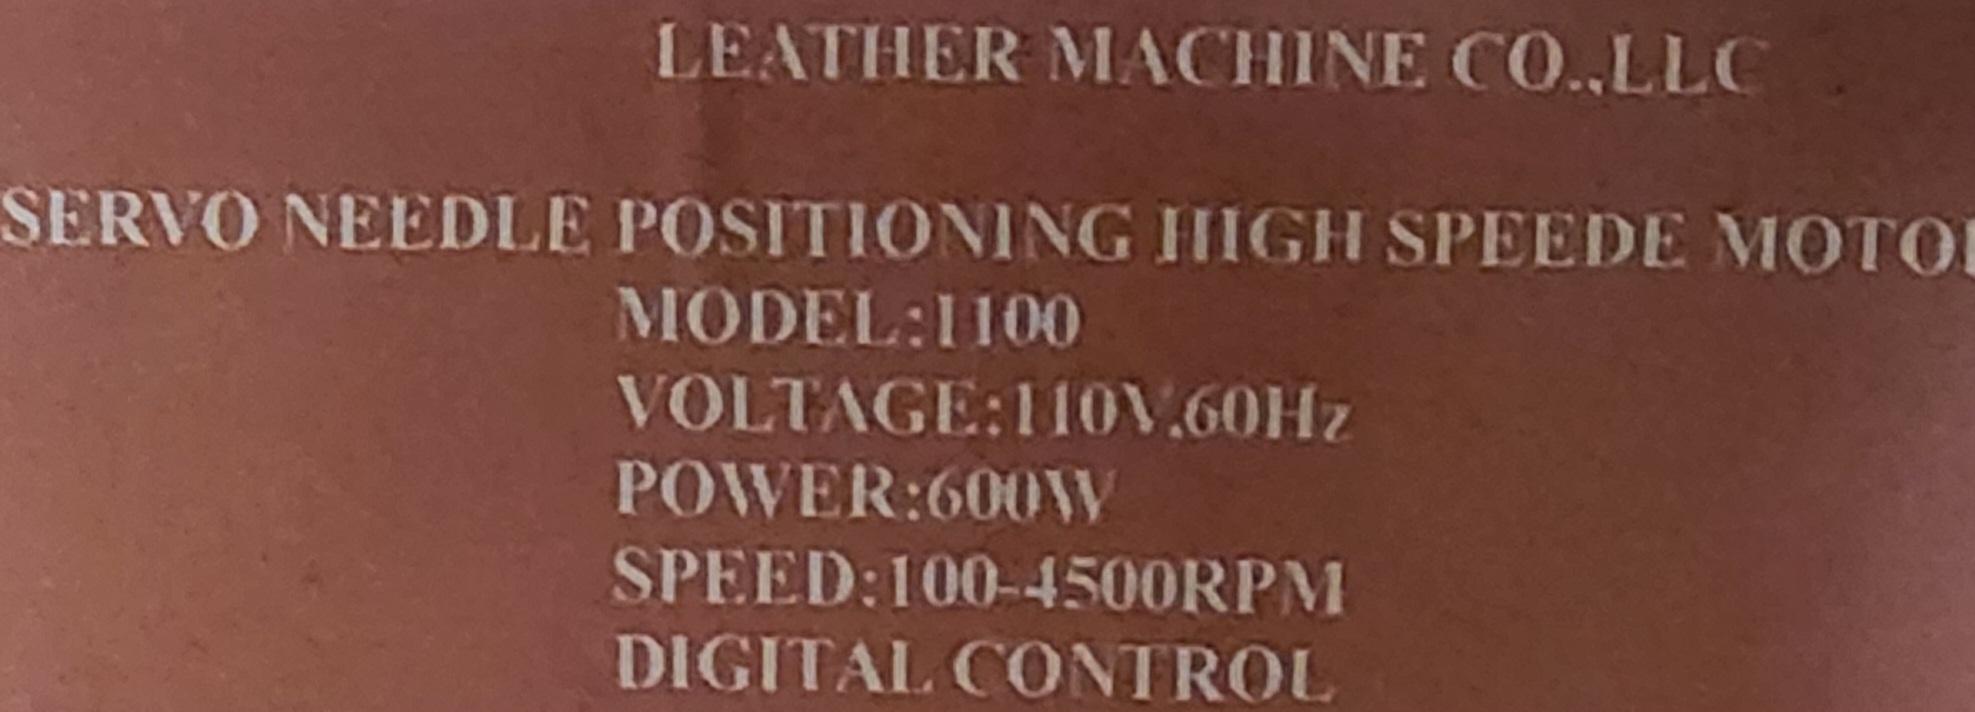
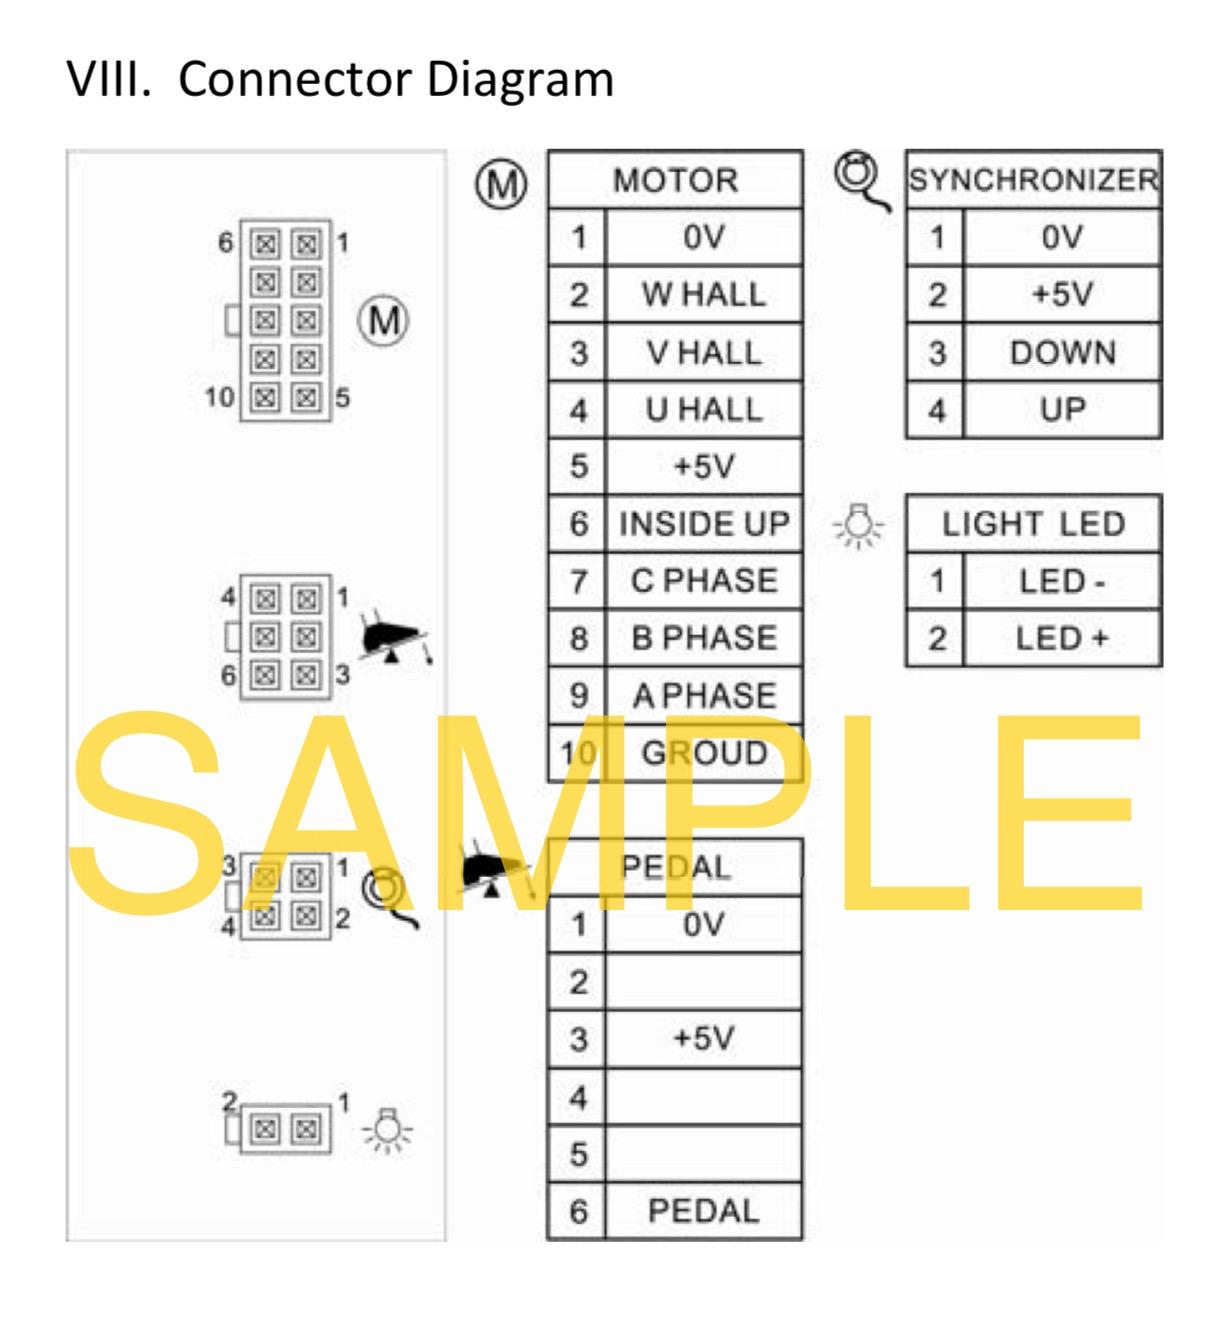
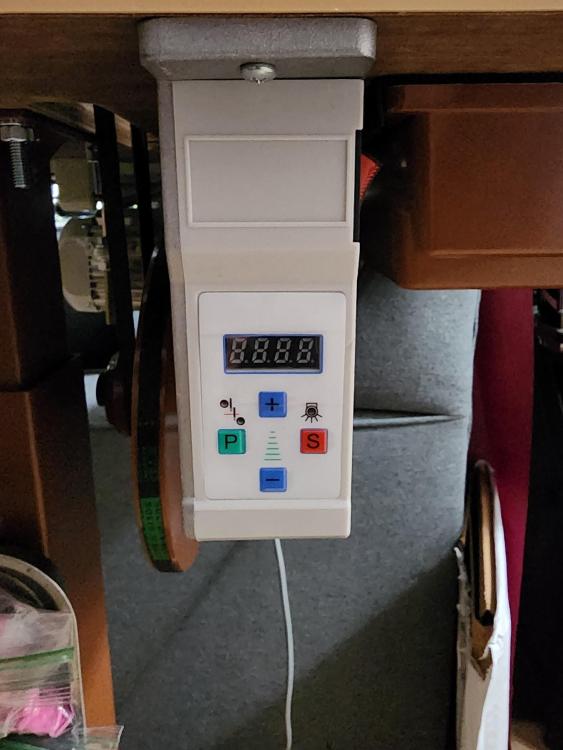
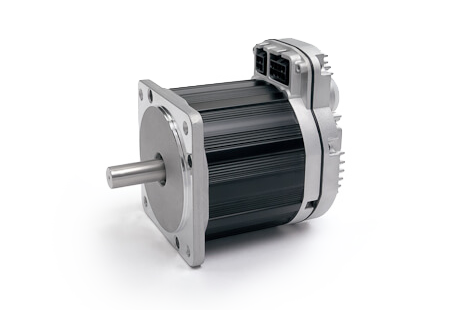
Your motor is likely the same as the SEWPRO motor, judging from the front panel and type plate. The rear should look like this: The two-pin connector has the light icon right next to it. The front panel has an “S” button to turn the light on and off: It’s very likely a 5V LED light outlet, but the documentation you got with the motor should really tell you that. Verifying with a voltmeter doesn’t hurt either. Please upload your images directly here on LW. Externally hosted images tend to just disappear after a while, often rendering the topic useless to future viewers. I’m embedding your other image here as well, just for posterity’s sake: The manual for my motor (similar but not identical to yours) came with a section like this, showing the connectors and pin-outs. YOURS MAY BE DIFFERENT! I’M JUST POSTING THIS SO YOU KNOW WHAT TO LOOK FOR IN YOUR MANUAL! If your motor manual doesn’t include this information, please call the folks at the Leather Machine Co. and complain about the incomplete documentation for your motor.


-
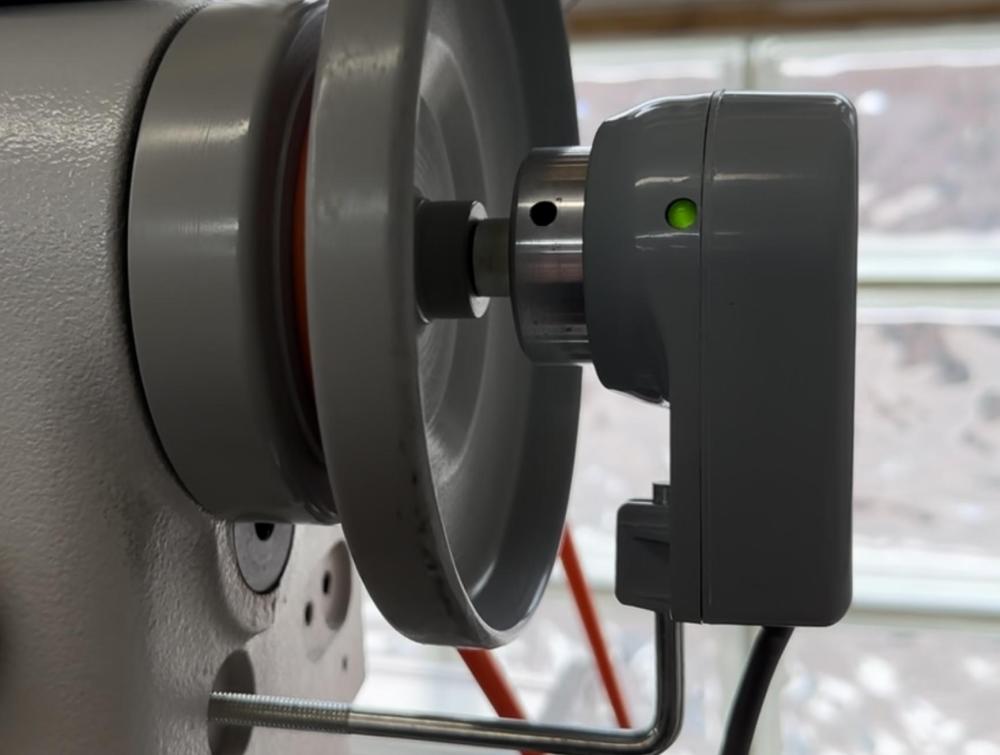
The folks Leather Machine Co. should be able to tell you if the screw in the handwheel has Loctite or other glue on it. With or without Loctite, make sure you use the largest screw driver you can securely fit into the slot of the screw to get maximum torque without slipping. The concepts of setting the positions for needle positing are not really brand or model specific. There’s no really hard rule and your preference may play a role. Exactly how you set the position depends on the specific position sensor and motor controller you use. On my Juki LS- 341 (which the Cobra Class 26 is a clone of,) I set the needle-down position to be after the hook catches the thread loop and the tip of the hook is at 12 o’clock (a quarter of a hook turn past the needle). In this position the loop is securely caught and the needle is still in the material to pivot the material around when making turns. For needle-up position, you can either set it to when the needle is a top dead center (for maximum foot lift and needle clearance) or when the thread take-up lever is a the very top (knot is pulled tight, good position to remove material, but needle is already on its way down again.) I use the take-up lever at very top position. Whether or not you can set each needle stop position independently depends on the needle positioner hardware and motor controller software. On my needle positioner (which has just one physical sensor) you set one needle position manually via the indicator light for the sensor. The other needle position is offset my 180˚ by default and can be fine-tuned via settings on the controller to advance or retard the second needle position. Some needle positioners have two physical sensors and you set each position by adjusting the position of the sensor discs inside. Please post a link to video you referenced, and then post some photos of your particular setup for the needle positioner installation. I’m not sure how you were able to install the position sensor without removing the center handwheel screw. If the positioner is not securely attached to the hand-wheel and slips, all bets are off. Here’s what the hand wheel of my Juki LS-341 looks like: My installation required the use of the adapter that is held in place by a center screw that replaced the original one in the hand wheel. The green light comers on when the sensor is triggered, for manual adjustment of the first needle position. I rotated the handwheel into the precise position I wanted, then I loosened the sensor collar and rotated it until the light came on, then tightened the collar again.

-
Here are the Durkopp Adler 268 manuals and leaflets I have in my archive, just to actually attach them to this topic in one place (since search engines are going to be pulling up this topic for Adler 268 manual searches in the future). Durkopp Adler 268 Service Manual: DA-268-Service-Manual.pdf Durkopp Adler 268 Parts List: 268 Parts List.pdf Durkopp Adler 268 Owners Manual: 268_gb.pdf Durkopp Adler 268 Leaflets Part 1:Leaflets_Adler_class_268_part1.pdf Durkopp Adler 268 Leaflets Part 2: Leaflets_Adler_class_268_part2.pdf
-
Looking at the Adler 768 parts list (durkopp_adler_768.pdf), the part numbers for the feed dogs begin with 0768. This indicates that the feed dogs are a newly designed part for the 768 generation and unlikely to be compatible with earlier models. Parts that are carried over from earlier models will retain the same part number. The parts list has a bunch of parts with numbers that start with 0268, 0367, etc. Those parts are carryover parts and thus interchangeable with earlier model generations indicated by the first four digits of the part number.
-
It takes only a small piece of metal in the wrong place to lock up a machine. Are you sure you retrieved all the bits of the broken needle from the hook area? Did something else break besides the needle? If the needle breaking incident was hard enough and at high speed, something may have slipped out of position and is now touching something it shouldn’t. You may have to do a careful investigation of all the parts that could slip. I’d recommend disconnecting the motor (remove the belt) until you get the issue resolved and the machine to turn over smoothly by hand.
-
The Adler 268 Brochures/leaflets (Leaflets_Adler_class_268_part1.pdf and Leaflets_Adler_class_268_part2.pdf ) should help you narrow down the possibilities. I would guess it’s an Adler 268-262, or something close to it. It’s hard to tell if it has or had a thread cutter, without seeing more detailed pics. I’d say you can rule out most of the subclasses that have letters in them. It looks like you already found some of the other manuals. Here’s the page at Durkopp Adler that shows what they have available for download in their archives. I had to switch the toggle button from “Exlusive Archive” to “All Data” to see vintage 268 documentation. https://www.duerkopp-adler.com/service/documents-download-center/catalogs-and-brochures/ I’m not sure you absolutely must know the precise subclass. Many of the basic adjustments for hook timing etc. will be very similar among the basic subclasses. Post some more pictures when you get a chance (rear, underside, close-up of needle area, hook covers open, etc.)
-
Juki 1508NH clone wobbly foot and needle size
Uwe replied to ThomasBH's topic in Leather Sewing Machines
Please post some pictures of the whole machine (Front& back) and a close-up of the actual feet you have. It’s very likely you have the standard gauge with Singer style feet. In that case you may simply have the screw inserted from the wrong side. The forked presser bar is threaded only on one side. You need to insert the screw from the non-threaded side in order to squeeze the forks together and hold the foot very tightly. If the screw is inserted from the threaded side, it will screw in just fine, but it will not squeeze the forks together and thus not hold the foot tight - the foot will just dangle loosely from the screw no matter how much you tighten it. And that adjustment wheel on top should indeed change the walking height of the feet. Look at the original Juki LU-1508NH manuals for general instructions … BUT that walking height adjustment wheel was actually not on the original LU-1508NH machines, so you won’t find it in that manual linked above. That adjustment wheel is a feature of a slightly different model. Clone manufacture often mix and match features from closely related OEM variations. Juki may have a dozen variations on the basic LU-1508, but the clone manufacturer makes just one model and puts all the useful features from the variations into that one model. I’d also say don’t worry too much about the “true” NH or not thing, although chances are good it actually has NH specs. If the machine sews nicely with the needle system that’s installed, just use that and enjoy it. If you run out of other useful things to do, you can investigate and verify precise specs, or maybe change needle systems. But don’t let it interfere with enjoying your absolute steal of a machine. -
Depending on your expertise in electronics and programming, you can also build your own motor and controller that does exactly what you want. I did that once using a stepper motor and Arduino controller, just as a demo project for a thumb controller retrofit. The stepper motor I had on hand for testing was not suitable for actual sewing, it was super noisy. Here’s the demo video I made of that experiment. Aside from the thumb controller, you can also see the super slow ramp-up speed I got with the foot pedal. Using a modern servo motor like the Clearpath line made by Teknic you could build a usable system that truly ramps up as slowly as you want with no jump from zero to some minimum starting speed. Cost would be around $700-$900 for the parts, I imagine.
-
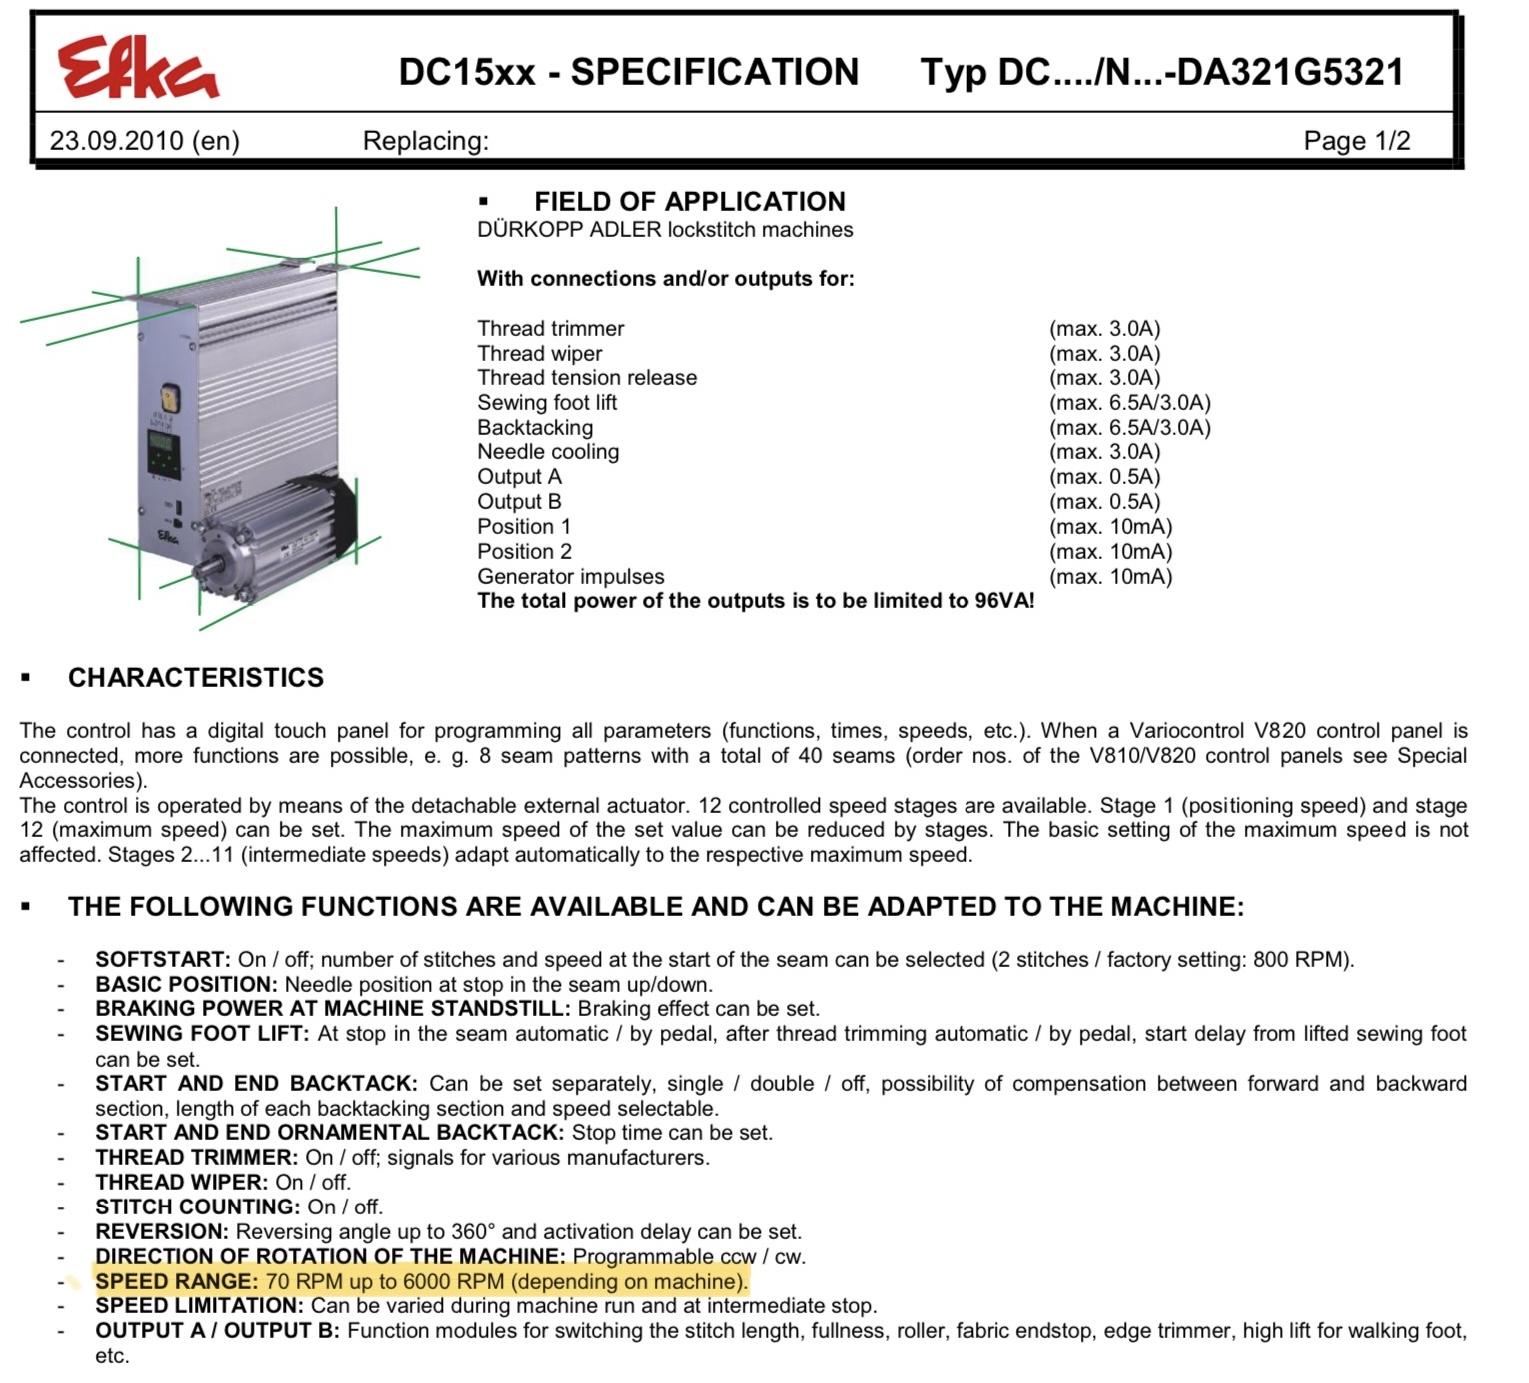
EFKA is one of the high-end motor and controller options for sewing machines, for a price (roughly $1,500+ range for motor+controller+control panel). These are designed for industrial production applications and are not targeted at the home/hobby market. The spec sheet for DC1550/DA321 combo states a minimum starting speed of 70rpm. I have a feeling this is the state of the art in motor controls. For speeds slower than 70rpm, you have the option of using an electronic thumb controller, that you can twirl as slowly as you want with your thumb.


-
Just trying to embed the video in the post … https://www.youtube.com/watch?v=4Uc7uEdmcK4 Hmmm, not sure why I can’t do this right now.
-
I made a short demo video showing the 100rpm startup speed on my Adler 30-1 and Juki LS-341 using the 1500 watt servo motors I source on Alibaba.com. They cost around $150 each shipped to the US (minimum order quantity is 4). I’m not trying to sell these motors, just giving a demo of the motor that works for my needs. https://youtu.be/4Uc7uEdmcK4
-
A few questions on the Adler 30-1
Uwe replied to Scorpio Leatherworks's topic in Leather Sewing Machines
Maybe I’m missing something, but why are motor mounting options a secret to be discussed in private? -
The short answers is NO, none of the brushless sewing machine servo motors you can buy today can do 1rpm, which is what you’re implying by starting from 0rpm. 1rpm means you’ll wait a minute for the motor to make a full rotation, three minutes or so for the machine to make a stitch. Not really practical. The spec on most servo motors should really read: 0rpm, then 300rpm-2000rpm. There is generally nothing between 0rpm and 300rpm. Most servo motors I have worked with have a starting speed of 300rpm, some can start at 200rpm, very few can start at 100RPM (including the 1,500 Watt motors I’ve been buying.) None of the motors I’ve seen can start slower than 100rpm. With a small pulley, that 100rpm starting speed translates to a stitch every two seconds or so on the big 441 style machines. That’s all I want, personally. The minimum starting speed is kind of a design feature inherent in servo motors, and the controllers that drive them. While it’s technically possible to make a servo motor start veeeery slowly (or one tiny step at a time), the sewing machine motors on the market here in the US are not designed that way.
-
Bartack machine not completing the back stich
Uwe replied to Cleggy's topic in Leather Sewing Machines
Great manual find @kgg ! A new needle may be all that’s need to fix the problem. The snag you hit may be an actual snag or a deformed needle tip. “If in doubt, change the needle” is generally good advice for sewing problems. P.S.: For those unfamiliar with the layout of Juki Engineering manuals, they’re intended to be read in side-by-side page mode to see two pages next to each other, like in an open binder or printed booklet. The standard adjustment info will be on the left, the how-to-adjust info on the right. That way the corresponding information lines up horizontally from left to right, especially if there are multiple adjustment topics on the same page. Depending on your PDF reader, that’s either easy or nearly impossible to do. Example:
-
I think it’s a bargain. A well-made copy of the Dürkopp Adler 204-370. Very good design and one of the best heavy duty flatbed stitchers you can find.