


dikman
-
Posts
4,862 -
Joined
-
Last visited
Content Type
Profiles
Forums
Events
Blogs
Gallery
Store
Everything posted by dikman
-
Great lob, they look .
-
The downside to my 10w diode laser is it can't cut clear acrylic, which is a nuisance. A CO2 would be nice but I've got nowhere to put it so I make do.
-
As they say a picture is worth a thousand words, now I can understand what you were describing.
-
re-conditioning holsters
dikman replied to chuck123wapati's topic in Gun Holsters, Rifle Slings and Knife Sheathes
Hold the reins in your teeth, it worked for Rooster Cogburn. -
It's a puzzle, being so narrow if you lever up to remove a staple those ends are sharp enough that they'll dig into the leather. Something to do with boot-making/repair? It doesn't look factory-made to me.
-
I reckon it should work ok, Ferg, but there's only one way to find out - then we'll all know.
-
Me too! I bought a set of patterns for making several different vest styles, made thick paper patterns and went as far as cutting the pieces out of some old curtain liners that I use for experimenting with. That's as far as I got, making the pockets work did my head in!! Yep, very nice job kgg.
-
That is a work-of-art in itself! Looking good.
-
Redneck philosophy 101.
-
an alternative
dikman replied to chuck123wapati's topic in Gun Holsters, Rifle Slings and Knife Sheathes
Who's a clever boy then? That's thinking outside-the-box. -
I made a horizontal spool holder with the shaft running on bearings to enable a smooth feed. It works but I don't use it (much) because I don't normally sew long runs so I rarely have twist problems. Braided thread - I have a spool, it's really nice stuff (came from a boot factory) but in "normal" walking foot machines it's a bit of a bugger as the needle has a habit of stabbing through the braid occasionally during sewing. I think the braid, being soft, opens up a little during sewing.
-
Try a fortune teller's crystal ball, I hear they're pretty accurate.
-
I would have just lined the jaws with thick leather, won't mark what you're clamping and has a little bit of give.
-
Singer double needle thread snagging and skipped stitch on one side
dikman replied to DMH's topic in Leather Sewing Machines
My first thought was a burr somewhere on that side that's catching the thread? -
Is this any help? https://www.usermanuals.au/duerkopp-adler/467/manual
-
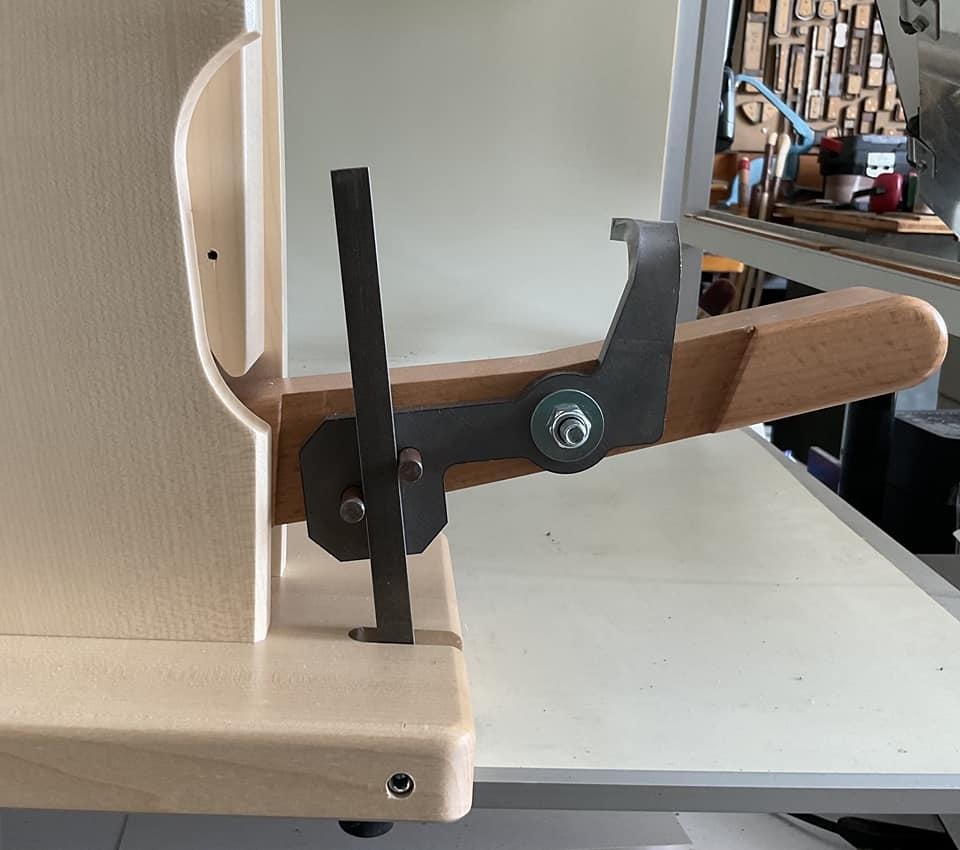
Thinking about it I could probably make one out of pallet wood, some of that wood is pretty good stuff (and cheap) once it's cleaned up. The latching mechanism looks pretty easy to make, just a bit of welding required. The hardest part would be drawing out the pieces so it will actually work, then it's just lots of time!! I hope you're making scaled drawings of yours as you go, ClaimedVacancy (hint,hint).. It's looking good so far.
-
Dyeing leather
dikman replied to Samalan's topic in Dyes, Antiques, Stains, Glues, Waxes, Finishes and Conditioners.
Maybe you're just accident-prone? -
That's $1500 Australian!!!! Plus shipping!
-
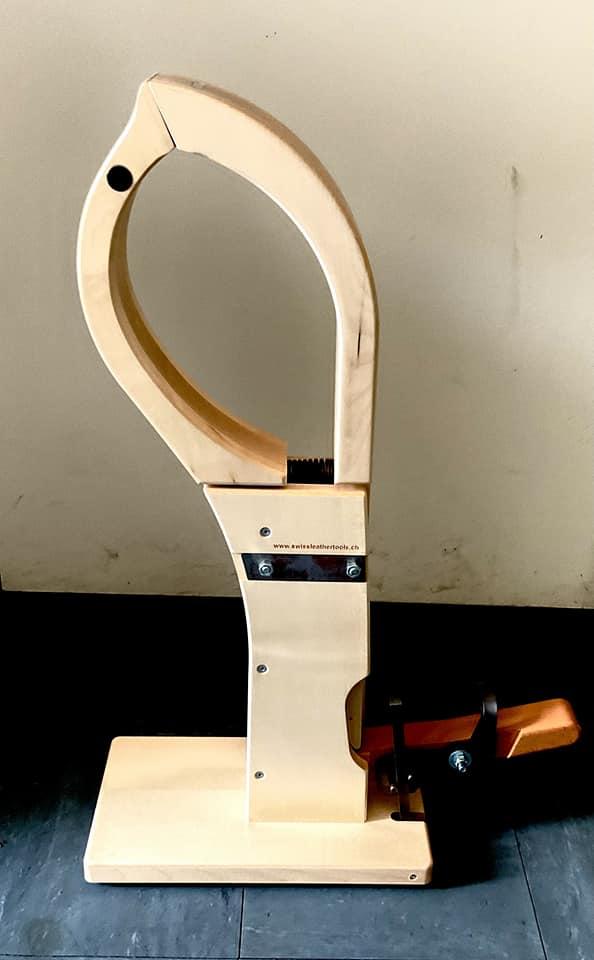
Looking good. It was on a facebook site by a guy called Slickbald (used to post on here once I think) and the photos were posted on there, so not for sale. I had a look at the website I mentioned but it's in German and I couldn't find the clam on there.
-
You do some very nice work indeed Meelis.
-
I came across this on facebook so saved the photos but unfortunately there were only the two. The locking/release mechanism is interesting, could be an interesting project. It is marked www.swissleathertools.ch but I can't find out anything more.
-
Very impressive!
-
My first thought too, all those pointy bits sticking up made me cringe! I can guarantee I would stick myself!!
-
Chiappa Rhino 60DS drop holster (stange situation)
dikman replied to DoubleKCustomLeathercraft's topic in Show Off!!
Very nice. You did a good job of keeping it clean considering all the handling it would have gone through. Given that you have no idea what the other shop is going to do I think I would have gone with dark brown/black stitching? Certainly a strange situation, what sort of "custom" shop does Western-style gunbelts but not holsters? -
G'day cobber, good to see another Aussie on here. Which State are you in? The 132K6 is a good solid machine but be warned, an interest in sewing machines can lead to a very deep rabbit hole!