


dikman
-
Posts
4,850 -
Joined
-
Last visited
Content Type
Profiles
Forums
Events
Blogs
Gallery
Store
Everything posted by dikman
-
Had a go at making some dies for a fellow shooter and leatherworker. It's not as easy as it looks and there's an element of luck in trying to match the shapes on two sides. Part of the process is figuring out which combination of tools works best to get a desired result - sometimes it's not what you think. I had to make up another tool because nothing I had would let me get the bend I wanted! I tacked the die together with the MIG, and after I'd taken the photos I put a sharpened bevel edge on one, using a worn 120 grit belt (that reduced the risk of grinding too much and also polished the edge). I put it under the Vevor press with some thick scrap and heaved away, very satisfying when it went clunk! It worked!! The banding works well and is surprisingly tough, although being 1 1/2", compared to the 1" of the steel rule, means it's just a bit harder to work with. Damn, I'm good!

-
That's a bright idea. If you turn on the drill press slow you could use the punch for mixing batter too.
-
Everything Fred said - and the bag looks good.
-
Leather sewing machine for beginner beginners
dikman replied to girlscout4's topic in Leather Sewing Machines
Sore hands - yep, but it gets better as you do more sewing! Finding a suitable machine under $400 is a big ask, not impossible but.....read that article AlZilla linked to and then reread it to gain an understanding of what you're looking for. You'll likely be faced with either continuing to hand sew or upping your budget. -
A very quick search on google (not hard to do ) immediately shows it is a high speed single foot garment machine.
-
Fred, those little animals are brilliant! If you made a clicker die to stamp them out in bulk or second choice use a laser to cut them out your cost will be minimal. Where did you get the patterns?
-
Spent a day repairing my hand-held bandsaw after one of the brushes fell apart, at the same time the top wheel wouldn't turn. Then back to the bending jig. Added a couple of bars across the bottom so it can be clamped to a bench, my reloading bench has three sets of holes for mounting various presses, these are reinforced underneath with steel so I made the bars so it can be bolted down using two of the holes. This works well as I can really lean into the handle and I don't have to hold the press down. Tomorrow I'll go over it with an angle grinder to tidy it up and then it's a matter of waiting for the weather to warm up (could be a while!) so I can paint it. I thought of powdercoating it but my little oven is too small for it. The bending tools have been heated and dunked in oil to give them some protection (also makes them look purty ). It's not perfect, if I'm not careful sometimes the bend can be slightly skewed but that's a minor point. I might need additional different bending tools but they're easy enough to make. All things considered I think I'll call it a success, and all it cost was some power and welding gas. Oh, and out of curiosity I tried one of the shapes that I'd bent under the Vevor press that I bought, using a bit of scrap hard leather, and blow me down it cut it - and it's not even sharpened!
-
They look great, so cute! I'm sure my grand-daughters (and wife) would love them.
-
Latest Holster for single action 22
dikman replied to Hildebrand's topic in Gun Holsters, Rifle Slings and Knife Sheathes
Looks good to me. -
Always good to hear ideas from others. I thought of the angle grinder/cut-off wheel but because I've welded this one up I didn't want to take the chance of slipping and buggering it up! I'm still pondering the best way of mounting the die itself. Wood "block" to screw it to, cut the shape in wood with an engraver and rebate it into the wood, cut a slightly oversize shape from sheet metal and tack weld the die to it, a few options there. I've noticed that a lot of the die makers only use one set of basic bending tools, tape a pattern to the steel rule and then bend bit by bit until they get the angle/shape needed. I may be overthinking this (not unusual for me!).
-
Now that makes sense, almost idjit-proof to use!
-
Functional, should do to keep your pants up while you make yourself some fancier ones.
-
Veg tan tooling with chrome tan projects
dikman replied to Blitz Thunderlungs's topic in How Do I Do That?
I would think using either contrasting or complementary colours would be best, trying to match stained veg with pre-coloured is always going to be iffy - plus you're going to end up with a large collection of stains! -
Same here, I'd like to try the water-based stuff but for the money they're asking they can keep it, the solvent-based stuff has always worked well for me (plus as a bonus there are the fumes.....).
-
I once made a couple of notebook covers for members of our police force (SAPOL), they have their own logo of course but it is very detailed and finicky. There's no way I could have manually copied that logo but the little laser I had was perfect for that job. But yeah, it does make it easy for anyone to copy almost anything.
-
I'm within a degree or two of a right angle! I used the mill to square up the inside of the first angle iron bender and cut the excess off the sides as looking at toxo's video it's obvious it doesn't need to be big. A bit more work with a triangular file to deepen it and change the angle a little bit should do it (stupid camera has a focus problem!).
-
I've lost count of the number of videos I've watched on youtube to do with die making but that's the first time I've seen that one! More fettling to do (fortunately I enjoy it), I now know that my machine will work it's just a matter of making the right bending jigs and then finishing it off.
-
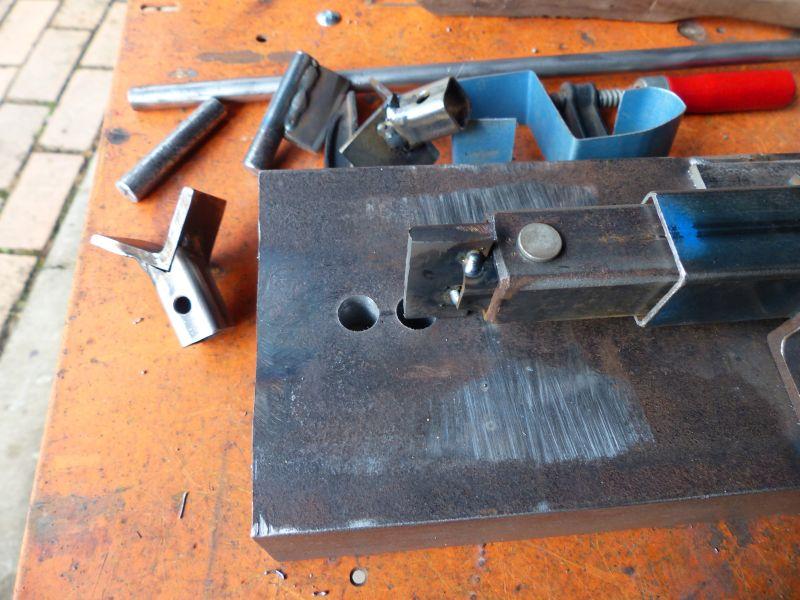
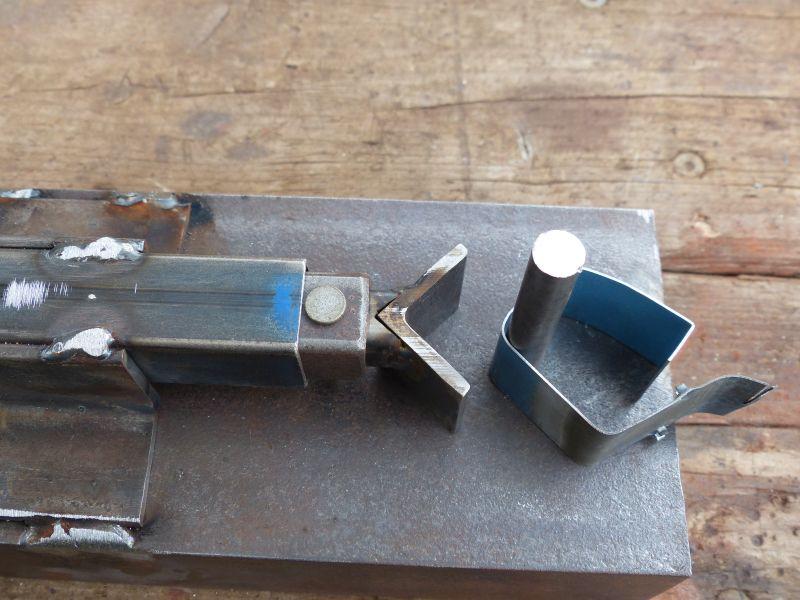
Today's effort. Reinforced underneath and drilled two 1/2" holes through, then made another toolbit with a different piece of angle iron, this one has minimal radius inside. Made a knife edge to push into the corner and tried that. As expected, and like Toxo said, the inherent springiness of the band stops it from staying at 90*. I'll have to weld up a piece less than 90*, only a minor problem. I'm going to sharpen the toolbit in the second photo and try quenching it, I'm pretty sure it's from an old mower blade so should be hardenable. Overall though I'm pretty happy with it as it can bend the strap without much effort.

-
I just say I used to build plastic model kits, most seem to understand that.
-
10 Hail Mary's should suffice.
-
Yep, that had already occurred to me, my intention is to make up tooling so I can use it both ways. That should hopefully cover most contingencies.
-
When I'm asked what hobbies I have I just say I dabble in leatherwork. People can make of that what they will.
-
Paracord is normally wrapped straight onto the tang, I guess it's simple and possibly looks "tacticool". If you glue leather onto the tang first it will bulk it up and make it more comfortable to hold.
-
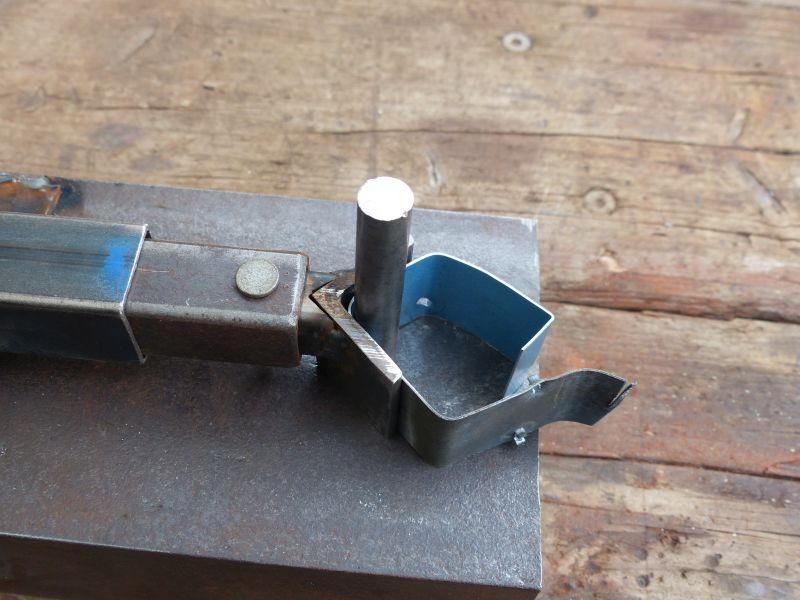
First bending bit, this was whipped up to see if I could actually bend anything in this contraption. As you can see it sort of works. Being angle iron the inside is radiused so I cant get a right angle bend, I'll have to file it to square up the inside. I also need to reinforce the underside where the 1/2" rod goes through to make sure it stays upright against the pushing force. Now to make more jig/tools of various shapes, I need one that is like a knife edge so I can get sharp bends, this may need to be made from something that can be hardened. One problem, which I half expected, is that pushing down on the handle causes the other end to rise so the whole thing needs to be clamped down
-
Thanks, I was very offended.......... I like to think it helps keep my mind somewhat functional by doing things the hard way.