Chief31794
-
Posts
1,801 -
Joined
-
Last visited
Content Type
Profiles
Forums
Events
Blogs
Gallery
Store
Everything posted by Chief31794
-

Leather Business Cards
Chief31794 replied to EmbossingDieCompany's topic in Marketing and Advertising
I been reading this one with interest for a few days. Personally, I don't think I would ever spend shop time making leather business cards. I'm in there 40-60 hours a week so If I don't have any orders to work on, I'm going fishing not dampening, pressing, drying, dying, and finishing leather business cards, but that's just me. Chief -
I have them and use them, my specialty is lacing, however, when I do stitch something I use these diamond punches and have never had a problem with them, stitches very well spaced, lined up neatly and I normally sew while the leather is damp and I only punch enough to slightly go through the back, the holes seem to close up pretty well. If I were good with an awl, I would probably prefer that, but my awl work compared to what I can do with these is terrible. Maybe I should learn, but I'm well over 60 and like I said, I don't do much sewing so for me they're a great time saver and make my stitching look better than I could do it with an awl. Chief
-
Tandy sells a set of Oval Punches that cover all the sizes you need, I use them on belts and love em. Make sure you line them up straight, it will show. This is the link to Tandy's product. http://www.tandyleatherfactory.com/en-usd/search/searchresults/3005-00.aspx Chief
-
I make guitar, banjo and dobro straps at 6 oz total. If you're going to line it, then I would use 3/4 oz leather with the 2/3 oz suede. Others may have different specs but for me 6 oz has always worked out, they drape really well and don't feel stiff at all. Chief
-
Tiara, Mike gave you some good advice on the edges, the only thing I would add is that some of your pieces have "overlays" where it appears you have cemented a different type of skin on top of the base material. That may work, but more than likely they will separate over time. Most times when we laminate two pieces of material, we sew them to make it permanent. The stitching can be quite attractive as well. I would recomment you try inlaying the pieces b cutting out the design, keeping the plug, laminate your inlay to the plug you cut out, we insert it from the bottom, glue it in with contact cement or leather glue and then put a stitch line around the inlay. That will take care of the inlay edges, then work on the base edges like Mike suggested and I think you'll see a differnce. Great job for starting out, learn the double loop stitch and round braid, they cover edges better and also learn to dress edges with a slicker if you're not going to lace them. Either works, and make the project look better, I refer to lacing and stitching as "part of the art", they not only provide construction strenght and durability they look very appealing as well. Keep posting, we love to see your work. Chief
-
One thing to note is that unless all you want to do is sheridan carving, basket weave and certain borders then Barry King won't be a good source, he is an excellent source for Sheridan Tools, basket weave and borders and has a sample list on his site with recommended tools and sizes for that type of Carving. I have his tools for Sheridan, have some old Tandy Tools from the good old days, but Beard will be your source for any other types of stamps if you want to get beyond Tandy, procrafters has a line of tools as well, I don't know much about them but they get good reviews. Keep in mind that Robert Beard tools start at about $50.00 and go up into the hundreds for single stamps, Barry King stamps run $25-$55. The new pro line from Tandy (~$18 for Elite/Business Accounts) is predominately Sheridan type tools so they will be priced at about what Barry King gets for his and the same basic types (I'd prefer the Barry King), they haven't released any pro line on figure carving that I'm aware of. Welcome to the forum.
-
Biker Wallet
Chief31794 replied to Chief31794's topic in Purses, Wallets, Belts and Miscellaneous Pocket Items
Thanks, yeah I can't get used to the tan on this type of wallet, I think I've made dozens of em' but all Black. Chief -
I use a punch, I mark the hole locations with a divider and a ruler to make them the right distance from the edge and the right distance apart. I would space the centers at 1/4" from the edge for that thickness of leather (that would place the lace at ~1/8" from the edge with 1/8" holes) and at 1/4" apart, I would make the holes 1/8" for Round Braid (Mexican Basket Weave), that would give you 1/8" between each hole and provide good coverage. Some others may have different dimensions. One note, mark the holes very accurately and punch them very accurately for a nice straight edge that is evenly spaced, it takes a little longer to make sure you're getting it accurate but is worth it in the final look. You could use a 3/32" hole punch but I don't see much difference and particularly on a piece this thick. Hope this helps, Chief
-
Biker Wallet
Chief31794 replied to Chief31794's topic in Purses, Wallets, Belts and Miscellaneous Pocket Items
Thanks Shadowryder, Chief Thanks David, Chief Thanks, Chief -
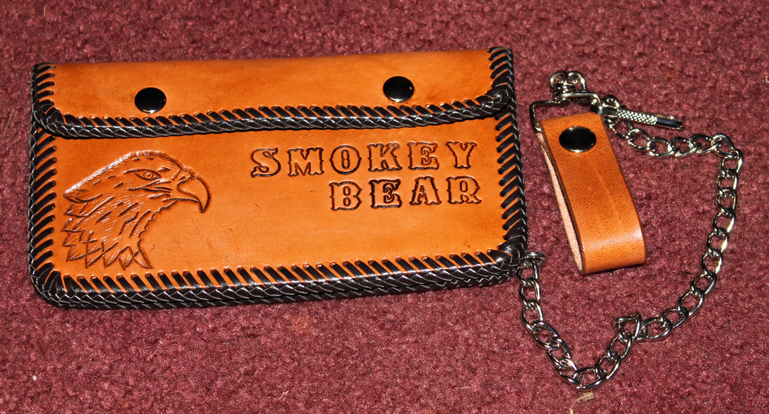
The customer wanted a tan Biker Wallet with an Eagle and the words Smokey Bear. First Tan Biker Wallet I've made. Chief

-
You can achieve that look with feibings oil dyes, I would use an air gun or a sprayer system of some type, I would thin the dyes to different shades, for example if I cut the main color by diluting it 10:1 (10 parts denatured alcohol to 1 part dye), then I would probably try cutting the edge color by about 5:1 making it darker. I would spray the entire project with the 10:1, let it dry and then spray the edges with the 5:1 or whatever area I wanted darker. I would test the colors and the technique on scrap before I put the dye to the actual project. Can be done with a sponge as well, just not quite as much control. Hope that helps, I'm sure others will have alternative solutions, Chief
-
Genuine Or Fake Alligator
Chief31794 replied to Oakley's topic in Exotics, Reptiles, Furs and others
Nice catch. It is one of the better looking embossing jobs I've seen. Looks pretty good what ever it is. Chief -
Clear Lac
Chief31794 replied to lowlife's topic in Dyes, Antiques, Stains, Glues, Waxes, Finishes and Conditioners.
It it doesn't then I don't think anything will. I would let the clear lac dry at least 8-12 hours, and I would try to keep the Feibings Black off the letters as much as possible, blot them immediately with a soft cloth (don't rub them), and like was said, test on scrap. It resists antiques and water dyes extremely well, never tried to resist against a spirit based dye, just don't normally go at it from that approach. I believe it will, but like I said let it dry throuroughly and make sure you get the entire blocked area covered or anywhere that you don't will dye fo sure as we say down here. Let us know how it goes. Chief -
Genuine Or Fake Alligator
Chief31794 replied to Oakley's topic in Exotics, Reptiles, Furs and others
Could be, your eyes are better than mine I didn't see that one, but it doesn't seem like that repeat if it is one is consistent with the areas above, below and to the sides of it. Hard to be certain when you can't touch, examine, etc. I'm no expert on exotic skins that's fer sure, most of the embossed I've seen has large areas that repeat every foot or so. This doesn't seem to do that, it looks like alligator or crock belly and sides. Chief Chief -
Genuine Or Fake Alligator
Chief31794 replied to Oakley's topic in Exotics, Reptiles, Furs and others
It appears genuine skin to me. Easier to tell from the flesh side, but it looks like this has been lined. Embossing normally produces a repeatable pattern at some length, just my opinion, I could be wrong, shoot that's happened before. Chief -
Nice, great job. Chief
-
We could refer to him as the "Sultan of Chat", sounds more impressive. LOL Chief
-
Nice job, colors compliment each other very well. Chief
-
Beautiful, I love the way you worked the Cross into the overall Sheridan theme. Very nice work as always, Chief
-
Make sure you let it dry for several hours (I recommend 8, 4 is ok) before applying a finish. After it drys, buff it really well with a piece of sheepskin or a soft cloth, then apply a finish very lightly rubbing it in, you might get just a trace of dye but that will be residual pigment and needs to go anyway. The key to dying and finishing is patience. I try to let my dye dry overnight and then let the finish dry for at least 4 hours, preferably overnight as well. I prefer Clear Lac, but I have used resolene, tankote, and super sheen the results are better in my opinion with the Clear Lac, but that's just me. Hope that helps. Chief
-
Finish Coming Off
Chief31794 replied to jforwel's topic in Dyes, Antiques, Stains, Glues, Waxes, Finishes and Conditioners.
Jforwel, I do it like Aaron and never had a problem. Most dying and finishing problems I've found relate to not enough drying time, you have to be patient. When you said the finish is "flaking" off, this indicates to me that you might be putting it on too thick, very light coats on finishing, repeat after drying until you get the finish you're looking for. Buff between coats, etc. If you're looking for a glossy finish, then I would do several very light coats of what ever finish you want to use, my favorite is Clear Lac, used it when it was Neat Lac and still use it today. I use it as a resist and as a final finish, however, light coats that are allowed to dry completely (at least 4 hours, 8 is better). You also mentioned that you maybe shouldn't be using the antique for your color and you mentioned Tandy, the Tandy EcoFlo antique gels will effectively dye a base color and provide antiquing, but they are a little unpredictable. I don't use the Feibings Paste Antique to do "coloring", if I want a base color other than pure antiquing, I dye that first, let it dry thouroughly, apply a very light coat of neetsfoot oil and let that dry thouroughly, apply Clear Lac (what ever resist you want to use), let that dry thouroughly, then apply the antiquing paste, work it in to the depressions, let it dry (oh year thouroughly), then I apply a finish in one or more very light coats and let it dry at least over night. Sorry to ramble on, but hope this helps. Chief -
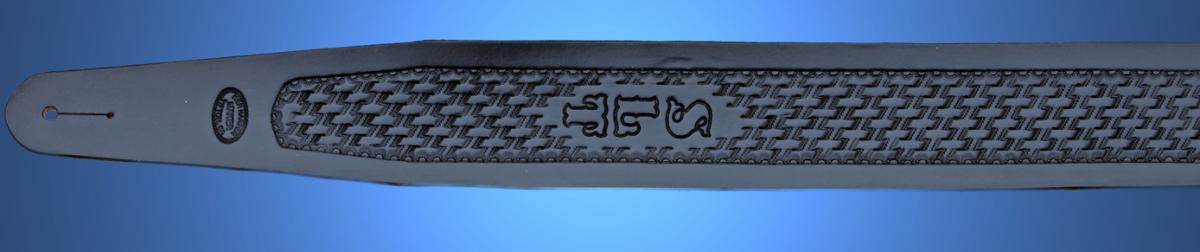
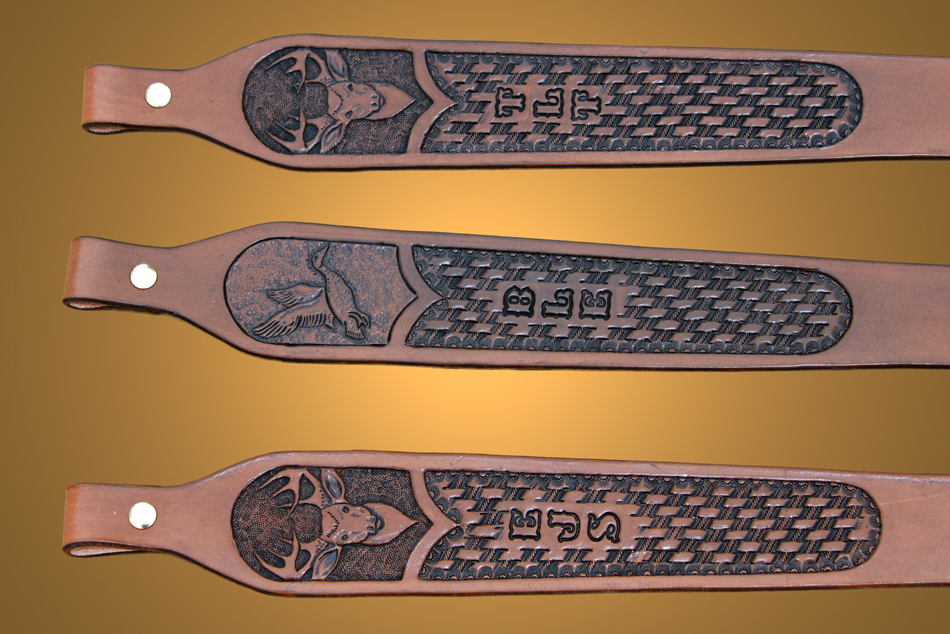
Doug, The rifle slings are 8/9 oz Hermann Oak. Chief Thanks everyone else, Chief
-
Absolutely Beautiful. Very nice work. Chief
-
I haven't posted in a while, been busy making Christmas stuff. these 4 came off the bench today, they'll be shipped Monday. I have a couple of more orders but they ain't gonna make the Christmas rush, the buyers said that was okay. The rifle slings are based on Tandy's design, except that like everything else with Tandy, the leather isn't very good and the Rifle Sling in their kit is only 37" long when the standard is somewhere around 44", these are 44" and cut from Hermann Oak, the Guitar Strap is Hermann Oak, I've had a couple of Black ones lately, kind of unusual, most people want medium brown, saddle tan or mahogany. Oh well, to each his own. Thanks, Chief


-
I punch my hole with a punch and hammer, always have, never found a better way for me. The hole size depends on the lace size, on wallets etc I use 3/32" lace and I punch the holes with a No. 00 punch, smallest you can get. For 1/8" lace I punch the holes at 1/16". The corner hole and adjacent on each side I "ream" out with a stylus (the pointed end), I enlarge them slightly, not a lot, you'll get a feel for it. If you are intent on punching a larger size then go up 1/32" from the size you're punching on the rest of the project. You can go around the corner without enlarging the holes, it just makes it go a little easier with them slightly enlarged. You've gotten a lot of good advise above from all the responders, the best way to get good at doing this is to do it, it will get easier and you will pick up better ways to do things as you go. Chief