Chief31794
-
Posts
1,801 -
Joined
-
Last visited
Content Type
Profiles
Forums
Events
Blogs
Gallery
Store
Everything posted by Chief31794
-

Dyes
Chief31794 replied to ivarian's topic in Dyes, Antiques, Stains, Glues, Waxes, Finishes and Conditioners.
I would say that it is antiqued, over a base dye. The second piture also has the collar and numbers dyed black then blocked before dying the base color, then eveything is blocked and then antique applied. I could be wrong, that's happened before. Chief -
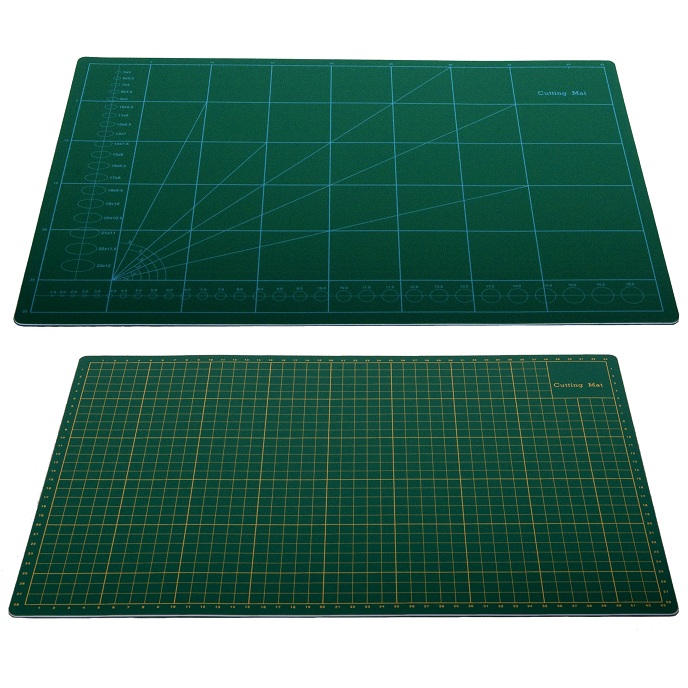
As long as it's 3/8" thick, might get by with 1/4" but I think 3/8" would be better. You can cut on these as well, I don't because they have like a pebbled surface and my knives jump sometimes, the ones you get from walmart etc are perfect. Poly boards can be obtained from Springfield Leather Company, Tandy, and most anywhere that does leather. They are relatively inexpensive and don't have to be very big for punching, you can keep moving the leather over the poly board. Chief
-
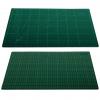
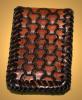
I keep a couple of the cutting mats you can get in the crafts area of Walmart, Kmart, etc. They are really cheap and last a long time. I don't punch on them for that I use a professional punching board or a poly board, the pro board is expensive but the poly boards are pretty cheap. If you punch on the cutting mats they wont last long. I attached a picture of a couple of samples of the type of board I use. Chief
-
Ohio Travel Bag is a great supplier for all kinds of hardware, but they require a business license or a Tax ID, and the minimum order is $50.00 Don't have any idea about where to find copper hardware, clasps and such, perhaps a google of "Copper Hardware" might help. Chief
-
If it's soggy with oil you may not get it out. I have never had one to dry the oil out, I did this once some time ago, wound up throwing the piece away. The oil doesn't evaporate so it is in the leather and I don't know of any way to get it out. I always oil very lightly since that day. Chief
-
I have 2 heaters for Winter Time and 2 Air Conditioners for the summer (deep south), I don't like being uncomfortable, I had a couple of heaters that weren't very good, get one with enough BTU's to heat the area. Some of the Ceramic Tube types are pretty good. I dress in Jeans and Flannel Shirt in the Winter and in Shorts and T-Shirt in the summer. I have aprons (I get the outdoor Bar-B-Que types) and I usually use them when dying. Chief
-
The ones at Springfield and Tandy are usually 8/9 oz I believe. If you want to line the belt, Springfield will split strips for you to any width you want. The price to split a strip is usually ~$1.00, however, sometimes they waive that. Another good thing about Springfield is that the belt strips are from Hermann Oak. They have very knowledgeable folks and will give you what you want. Chief
-
The stone at home depot is too coarse for doing swivel knife sharpening. I use diamond stones and in 400, 1200, and 2000 grits. You can use wet dry sand paper in 400, 1800, 1200, 2000, and 2500 progressively to get the swivel knife blade sharp. Is the sharpening jig made for swivel knives? If not, I recommend you get one of those as well. Sharpening is a skill that almost borders on being an art. If you are having trouble, I think some of the tool manufacturers will sharpen your blades for you. You could also replace the blades with ceramic blades, they don't require any sharpening, just stropping to keep them clean. Chief
-
I don't always use my makers mark, I put it on belts right behind the chicago screws on the buckle end so that it is covered by the belt tounge whlle wearing the belt. On guitar, banjo, dobro, and mandolin straps I put it a little above the front attaching hole, not normally seen while attached. I started asking people if they wanted an item to bear a maker's mark, some didn't care, I had none say they didn't want it and several wanted it on the item because, "it showed the item as being custom made". I wouldn't put it on the front or back of a Bible Cover but I do put it on the flap in side at the back lower corner. I don't put it on wallets, because there is no where to put it unobtrusively, cell phone cases, etc I put it on the back. Just my $.02 worth. Chief
-
I wouldn't try the white over black, if it were me, I would paint the recessed letters white with acrylic paint (I've never had much luck with white dye), protect them with a resist just to be safe, then block dye the black belt. Chief
-
Yes, just make sure it's one of the leathers they sell in 2 sq ft increments. Chief
-
Another option if you're just starting out and want to try it out is to buy a wallet kit, or a beginners kit that includes a wallet, it will come with many of the things I mentioned above depending on which kit you buy. These are readily available from Tandy and are on sale right now. The tools aren't high quality, but it is a start to determine if you like doing leather work. I would venture that most of us on here started with a Tandy Kit early on, I bought a deluxe kit in 1971/72 and it hooked me on leather work. None of the tools are still on my tool bench but it taught me how to work with leather. Most of the new ones come with a DVD of George Hurst showing you how to do most of the things in the kit and a book on leather working for reference. Chief
-
I would get veg tan 4/5 oz, you can buy it from Springfield Leather Company, one of our sponsors here in 2 sq ft increments. If your're just starting out I would get Herman Oak Craftsman Grade and 2 sq ft is plenty to make several wallets and other items as well. They are the only ones I know of that sell by the sq ft in 2 sq ft increments. Chief
-
A good way to start is to buy a bifold inner from Springfield Leather Company, then cut a piece of 4/5 oz leather so that the width is the same and the length is 1/8" longer to accomodate folding the wallet, on folded items you want to add ~2X the width of the leather, since it's 4 oz, that is 8/64 (after you double it), or 1/8". Decide if you want to sew it or lace it, then dye the leather and start assembly. There will be different tool requirements depending on lacing or stitching. Tools needed Straight Edge Ruler (preferrably stell with a cork back) Sharp knife (Box Cutters work well, just make sure it's sharp) dye finish Tools/materials needed for lacing Lace 3/32" (good quality) lacing punch 1/8" single prong lacing punch 1/8" 4 prong (A 00 hole punch can be substitued for the 2 lacing punches above) 2 prong lacing needles (at least 2) Scratch Awl for marking leather and can be used to pull lace ends up between the leathers) Stylus (not absolutely necessary, but better for pulling up lace ends) Stitching Diamond Awl (good quality) groover Harness Needles (at least 2) Thread (waxed) edge slicker I probably missed an item or two, trying to keep it just to the necessities. I'm sure someone will correct any thing I missed. Welcome to the forum. Chief
-
Does Anyone Know Why My Finish Is Removing My Dye?
Chief31794 replied to Natalie O's topic in How Do I Do That?
Natalie, Sorry I didn't notice you were from Greece. I think that Clear Lac is probably out of the question, it is not very environment friendly and has shipping restrictions in the US. The Supersheen you're using should work, you have to make sure you get it on good (not thick but completely covered), and 2-3 coats with drying in between or use a spray. I tried the sprays but didn't like them, you have to be very careful not to get it too thick, it will crack if put on too thick, still workable. Good Luck, Chief -
Does Anyone Know Why My Finish Is Removing My Dye?
Chief31794 replied to Natalie O's topic in How Do I Do That?
Natalie, Sorry you're having trouble, dyes are wonderfully mysterious things. There will always be some "rub off" when rubbing dyes whether they are spirit based or water based. The best way to approach a project where you want to keep part of the leather natural and part dyed is to protect the natural area. If I were going to do this I would use Neat Lac, thin it to about 2:1 2 parts neat lac and 1 part thinner. Dye the areas, let dry for at least 8 hours (normally you would buff the piece after that to remove any rub off, you can't do that or it will bleed onto the natural areas that are adjacent. Apply the prepared neat lac (preferrably with an air brush if no air brush is available then with a very soft brush), if you use a brush, paint the neat lac onto the natural areas only and let dry for at least 8 hours, then apply Clear Lac to the entire piece at full strenght, the first coat on the natural areas will resist and dye transfer. Oiling is done to restore natural oils that are lost during the dying process, this is more important with spirit based dyes, but it never hurts to oil before dying, very light coat, before dying. I think this can be done with supersheen but I don't trust it, and not many people do, it's a fine product for some applications, it just doesn't measure up to some of the better products on the market, Clear Lac (used to be called Neat Lac) is the best finish on the market in my opinion, some folks use homemade finishes (glocoat/water), I've never tried them, but I know that Clear Lac works. It's available from Springfield Leather Company and some of our other sponsors as well. Hope this helps, maybe some other folks will chime in with other ideas. Chief -
KP, Just my thoughts, any item will wear over time, that being said, it should take a long time or very heavy use for leather to start showing wear. I assume that by wax you used beeswax. For heavy use, you might try some wyoslick. Gum tragacanth is an old standby but many people don't particularly like it, if you use Gum Trag then you need to make sure you dye the edge first as most dye won't penetrate the Gum Trag. I haven't tried the Wyoslick but it is not supposed to stop dye from penetrating. Hope this helps, perhaps someone will chime in with more. Chief
-
Jax, Another member here asked me the same question in a PM, here is the answer I provided Cog. Cogs, I do open ended runs with the Mexican Braid. It isn't real difficult and looks really good. In my video I started in hole one and left about 1". To do an Open End, start in 1, leave about 1-1/2", when you come out of the back go back through hole 1 from the front, take the end you left out and run it along the top of the edge in the direction you will be stitching. Then continue stitching normally, stitching the end under the braid laying flat. when you get to the end, go in the front of the last hole, come out the back stitch back 2 stitches just as normal, that will complete the 2nd hole from the corner, when you come out the back go under the nearest lace as always then go back into the front of the last hole half-way and come out through the braid a couple of stitches back. If there is no pieces to go through then come completely out the back of the last hole and slide the lace back under the laces on the back side and take it back about 2-3 stitches and bring it out, either way trim off the excess and it will stay permanent. I hope this helps, it's harder to explain than to show. Let me know if you need any clarification on any of these. I would try a small test piece before tackling the holster just to get familiar with the technique. Jax, For a gussett, I use this technique on the top of each gusset, then when it is assembled the braid on the gussett and the braid on the edges of the main portion of the purse will look good together. Chief
-
Nothing To Brag About, Grant Update.
Chief31794 replied to DoubleC's topic in Leatherwork Conversation
Get a nap, these things take time, don't get discouraged. It'll happen!!! Chief -
Beautiful, High Quality work as always. Chief
-
More Stuff
Chief31794 replied to Chief31794's topic in Purses, Wallets, Belts and Miscellaneous Pocket Items
Thanks CountryTrash, I used to get to Oceanside once in a while before I retired, I worked with a large defense contractor and went to Camp Pendleton from time-to-time. Thanks, Chief -
More Stuff
Chief31794 replied to Chief31794's topic in Purses, Wallets, Belts and Miscellaneous Pocket Items
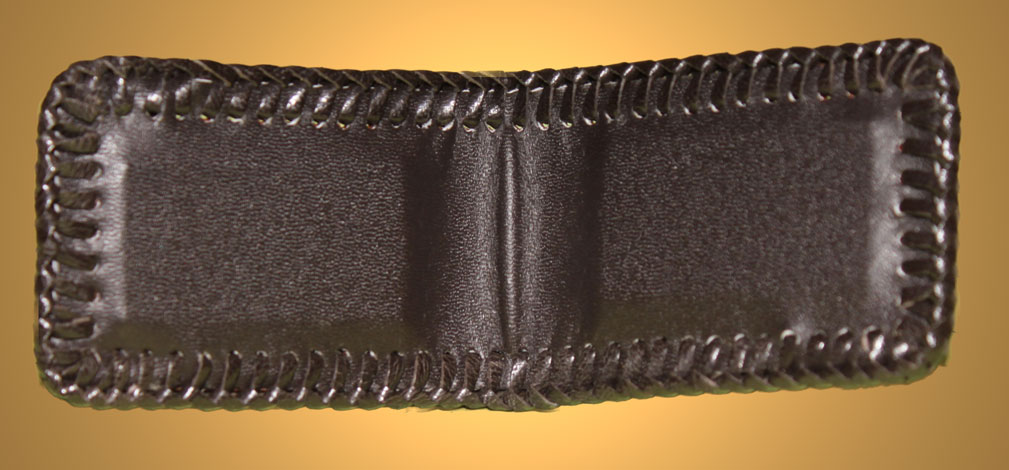
Thanks Bill, I kind of enjoy craft fairs and I do a lot of Bluegrass Festivals. I'm a Disabled Vet and I don't get out to see folks much like I did when I was working, so I enjoy the fairs and festivals even if I don't sell anything, just so I can talk to people and meet new folks. Chief SooperJake, I've never been told or heard which side they go on, I always put them against the leather backing, I glue them there with contact cement and I kind of liked cementing the metal plate vice the magnet itself, also the plate has a little "sharper" edge then the magnet so I liked it against the pigskin. I'm not positive how it was designed to be used, but this works for me. Thanks, Chief Sherlockian100, You asked for it, I went and done it. Here tis' Chief
-
More Stuff
Chief31794 replied to Chief31794's topic in Purses, Wallets, Belts and Miscellaneous Pocket Items
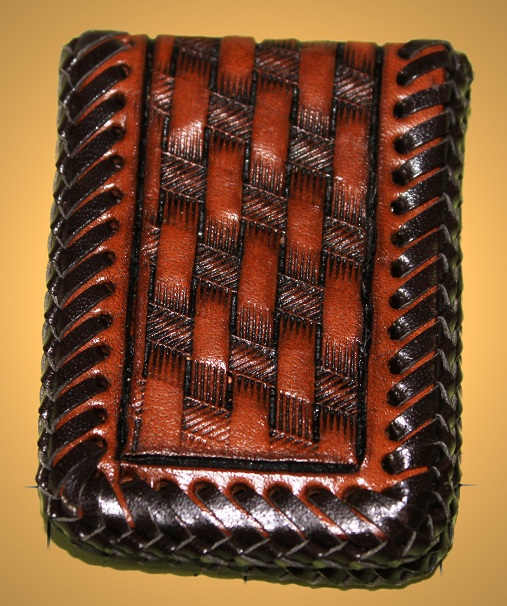
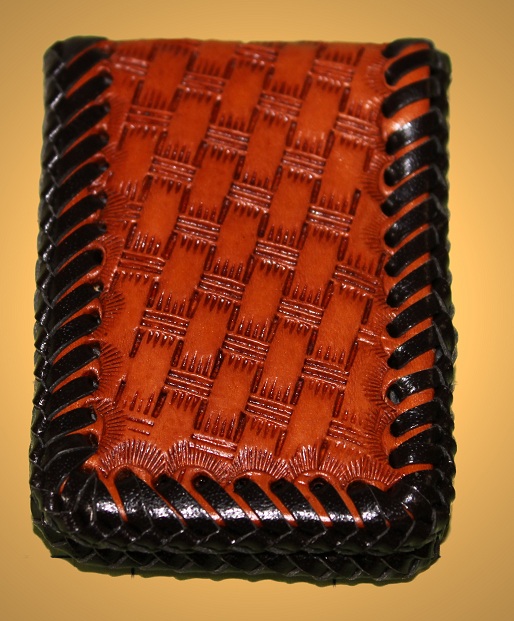
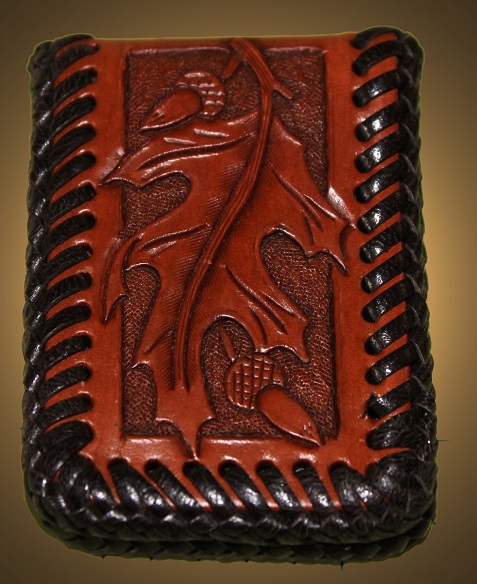
Beautiful, nice job on that. I don't but I'll take one and send it in a little while. Chief Thanks WinterBear, I like the oak leaf better as well, but lots of folks like the basket weave stuff. Chief -
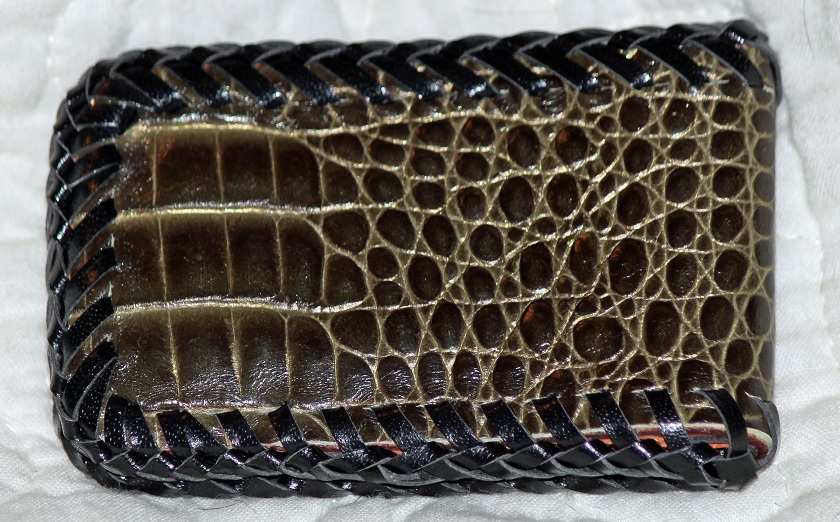
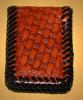
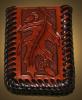
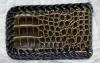
I love money clips and these magnetic ones are the best. I buy the magnet sets from Tandy then cut the backs from 3-4 oz HO and the liner from Pig Skin Lining. I've got one I've been toting for a long time, it's completely shiney from wearing in my pocket. I got a piece of skin that looked pretty good in a remnant box from SLC and made several of the Aligator ones, in fact I replaced my old worn one with one of the new Aligators. However, I sold them all out at a craft fair last week. Anyway, these are some I finished recently. Chief

-
DocLogic, First welcome to the forum and to leather working. I'm not much on watch bands but there are some folks here on the site that are and I'm sure some of them will chime in on this. Good to see another leatherworker from Georgia getting on the site. Chief