rickybobby
-
Posts
722 -
Joined
-
Last visited
Content Type
Profiles
Forums
Events
Blogs
Gallery
Store
Everything posted by rickybobby
-

Cartridge Holders
rickybobby replied to carr52's topic in Gun Holsters, Rifle Slings and Knife Sheathes
Tom, Great Idea for scrap! Nice job, Looks like your Strap is tight on each shell. I see rivets holding the strap, did you do them "wet" or dry? Again, great idea and good use of material. Rick J. -
Bobocat, That is a beautiful! Great job! Rick J.
-
Hilly, You can use Lacquer Thinner. Don't try Paint Thinner it is not strong enough to mix in. Rick Jorgenson
-
Nice job, great detail work in the tooling. Also good color on both. Rick Jorgenson
-
Santa Barbara spade
rickybobby replied to T Moore Medicine Hat Saddlery's topic in Saddle and Tack Accessory Items
I know of one bit and spur maker in Goleta (north of Santa Barbara) I met him at a trade show, his name is Ed Fields. He makes some beautiful pieces. His specialty is spade bits and his spurs are real nice too. I will try to locate his number and post it. Rick Jorgenson -
1st tooling and sissy pad in progress
rickybobby replied to cwa11is's topic in Motorcycles and Biker Gear
Chris, I suppose you have found out by now leather shrinks as it dries. The trick is to have it just wet enough to work, form, and tool (all 3 are different levels of moisture) and then to hold it to shape while it dries. Usually by a form or tacking it in place while drying. The metal work on your website is very cool. The sissy bar and leather cover is great. Rick J. -
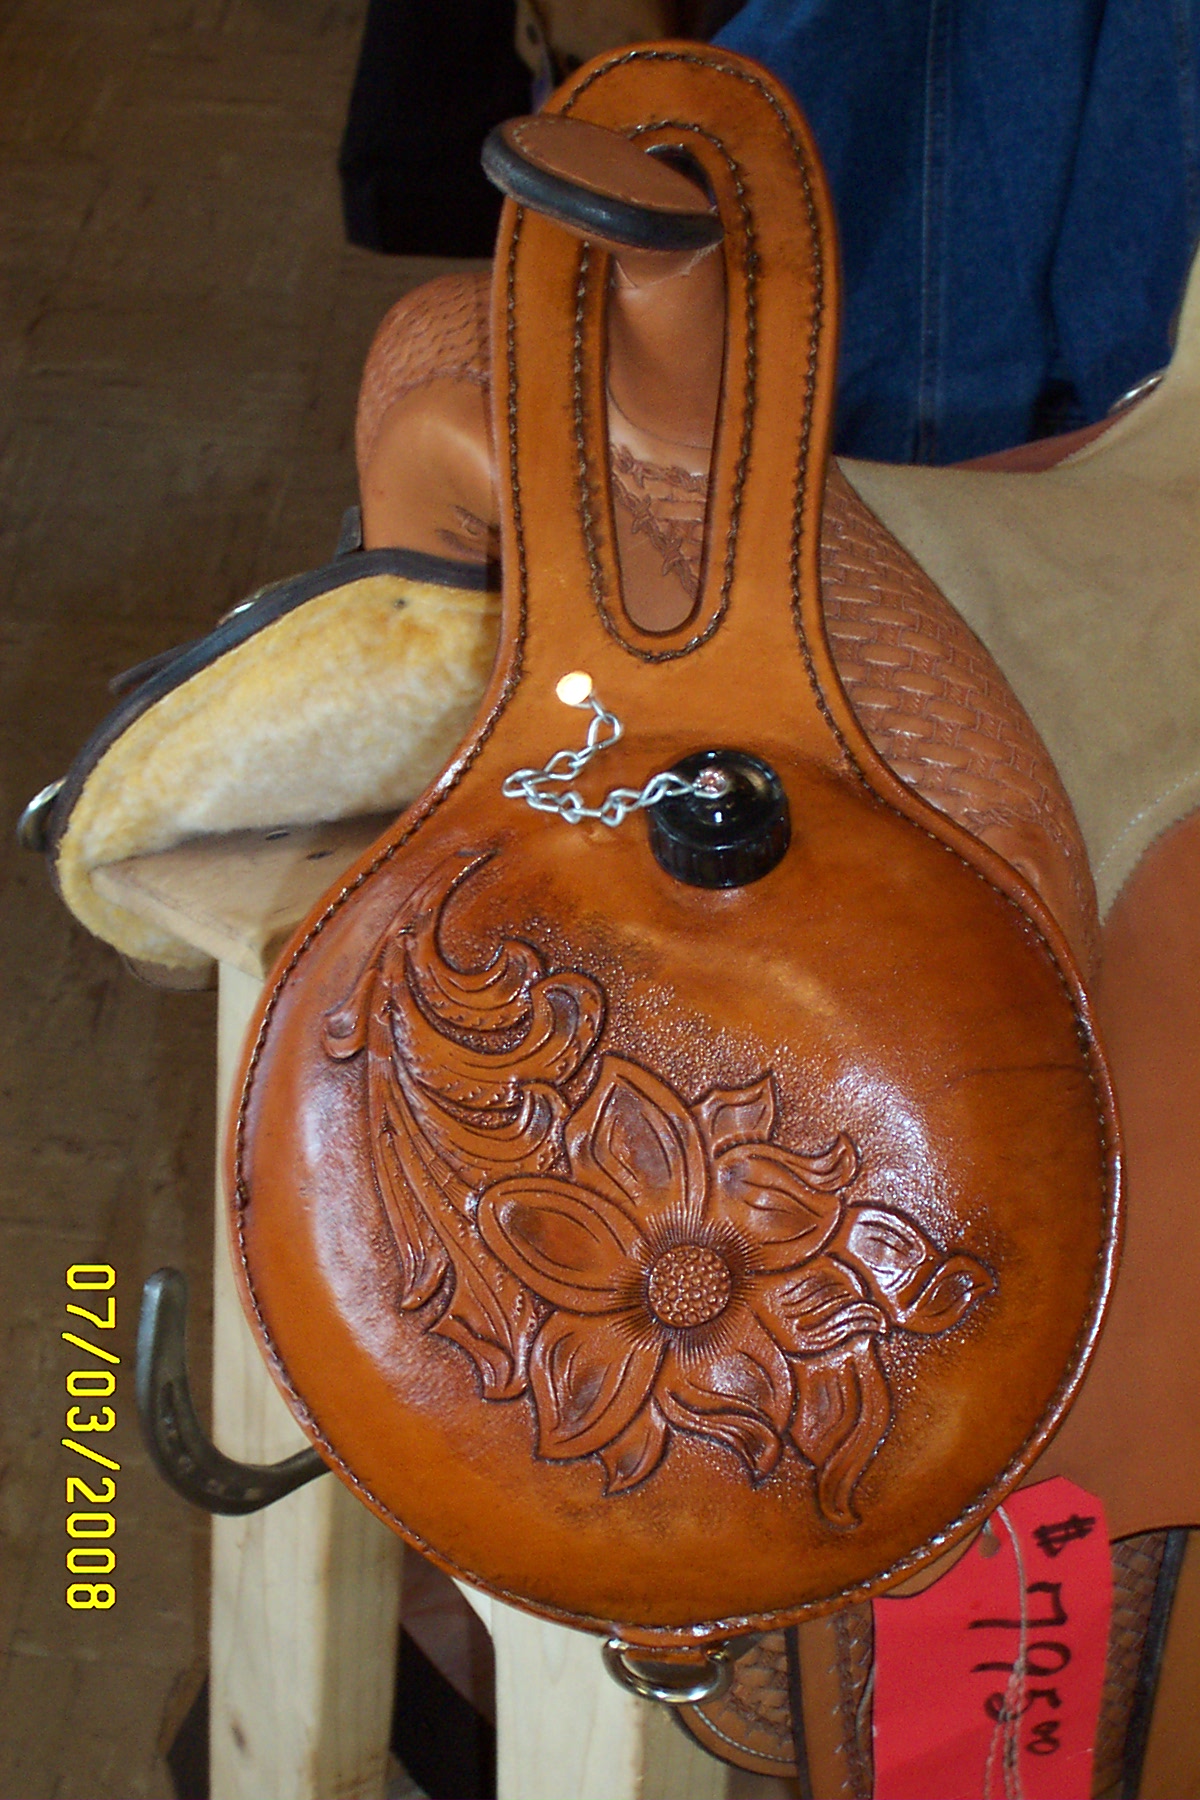
Cecil, Although this saddle has a lot of flash to it, it "dates" itself as far as using it in the show ring. The style is from 70's and it does show some wear, things are loose and bent. People in our area (Arizona) would shy away from it because it is to dated for the show ring and to pleasure ride in it, the brush in Arizona would be collecting under the bent silver. It would take someone that rode mostly in a arena and just fell in love with the saddle to want to buy it. They are out there, you just need to find them. My opinion, the saddle would sell in our area for $700.00 to $900.00 It would be at the shop for a while but there are people looking for used saddle all the time. Rick jorgenson
-
Cecil, The saddle appears to be a "production" type saddle. Not that it is a bad saddle but there was production type steps in making it. that said it would sell in our area (Arizona) as a pleasure saddle (week end riders) for about $375.00 to $425.00. providing that it was safe. (riggings, latigo, d-rings are in good condition) Rick Jorgenson
-
Saddle Junkie Needing Help
rickybobby replied to paintpony's topic in Saddle Identification, Restoration & Repair
Paintpony, #1 Start by removing the frt. conchos, nails, screws atr the frt of the seat jockey (area under the cinch keeper and latigo keeper) look under the swell (below the horn) for 2 screws maybe some nails. #2 Remove conchos, screws, and or nails from under the seat ear (next to the rear jockeys) this will also loosen the rear jockeys. #3 Remove rear conchos, screws and or nails from on top of rear jockeys, they should come off now unless there are nails holding them under the cantle. #4 Start pulling the skirts away from the saddle tree, there maybe nails on the underside of the tree bars hidden by wool. Use a long srewdriver to locate and pry on these. #5 Remove the old sheep skin cutting the stitching with a pointed knife. Watch for skirt plugs comming off, you will want to glue those back in place before glueing the shearling on. Use a "Dental pick" kind of tool to remove old cut stitching. #6 Lay out the sheep skin. Cut out the bald spots in the "arm pits" frt and rear. That way there are no mistakes laying your skits on thinking there is wool in those spots. Try to have the top of the skirts in the middle. Stagger them if you need to get them to fit. You want the "thickest" part of the wool at the top of the skirts (under your seat). #7 Use a felt marker and trace around the skirts 1/2 inch to 1 inch away. This is so you know where to smear RUBBER CEMENT I prefer it over contact cement , it is more forgiving and you can replace the shearling again at a later date. Put rubber cement on the sheep skins just enough to cover inside your lines. Apply rubber cement to underside of your skirts as well. Let them "tack up" dry for 10 or 15 minutes and press your skirts onto the sheep skin. Press hard all over to push the skin into grooves, and curves of the skirts. #8 Cut the skirts trimming the sheep skin about 1 inch away. At this point leave the sheep skin larger than the skirts untill after sewing. #9 Sew the shearling at the sewing line. If you are hand sewing use 2 needles and a awl, be careful not to pull wool with your stitch. I would recommend taking it to a saddle shop of shoe repair shop to have them sewn. Hand stitching fun will run out quick, save your energy for reassembly. #10 After they are sewn, use a french skiver, or a #1 saddle edger to trim the shearling to the skirting. When excess is removed "fluff" up the wool along the edges. Take a sharp pair of scissors and trim excess wool hanging out from under the skirt. Make 2 or 3 passes to get it all even. #11 Start reassembly process by locating the frt. holes the frt screws were in and screw them in. This lines up everything behind them. Pull up "lug straps" and tack into place. Skirts should be in proper place now. (If they are laced in the back there is a whole step for this, we will need to address seperatly)(if there are saddle strings there is another step) install the rear jockeys, use gavanized nails 1 inch. 1 shoud do. Check to make sure they did not go through the skirt. I don't put nails back into the bars underside there should be no need if everything else is right. Replace nails under the gullet next to the screws. #12 Put side conchos and frt conchos on and you should be ready to ride! If there are saddle strings on this saddle and if the skirts are laced together there are some additional steps. No big deal we will just need to handle those questions when you get to that point. The first saddle I relined took me 2 full days (16 hours +) I now do them in about 4 hours start to finish, on average. I also machine sew them! Good luck, and don't be afraid to ask additional questions. Everyone here likes to help. This site has helped me a bunch. Rick Jorgenson -
Saddle Junkie Needing Help
rickybobby replied to paintpony's topic in Saddle Identification, Restoration & Repair
Sometimes to get larger skirts to fit on a single shearling I end up with the skirts almost sideways (at a angle instead of frt to back) to keep from spliceing, I have not had any problems/complaints from customers. Have any of you had the same results or have I just been "lucky". Rick J. -
I had a friend make one from the Stohlman saddle books blue prints, it works great! Some people near where I work have a leather shop and website and it appears they are building that same draw down. The shop is called Crown King Customs LLC, they have all kinds of stuff and specialize in biker gear although it looks like they are doing western stuff and saddles too. http://www.crownkingcustomsllc.com/1246558.html Check them out, I did not look at prices, Rick J.
-
Wayne, Great job! I am going to the shop to kick my swivel knife! lol!! Rick J.
-
Ed, Use a disc grinder and start with #40 grit paper. Move on to finer grits and remember to keep it moving in a "cross hatch" patern. That will keep your surface flat. "Cross hatch" patern is useing the top 1/2 of the disc, leaning it to the left while moving to the right, leaning to the rt. while moving to the left. The patern looks like X's and keeps the surface flat. #40 grit #80 grit #150 grit you can use a jitter bug sander (or a vibrating sander) #220 grit you can use a jitter bug sander (or a vibrating sander) You can go to higher grits depending on how polished you want it. You can spend more time on rounding or cleaning up edges with the finer grit papers, be careful with the #40 grit it will eat up metal quick. These kinds of tools from harbour freight just are not finished off as nice as some others, but with some time spent grinding, sanding and polishing it can be real nice. Rick Jorgenson
-
sfcdan, I have made them with strips of brass cut from "d-rings" that we use for breast collars on saddles. The ones from tandy are about 1 1/4 in. to long and I use tin snips to cut them off. I sand them to shape with a drum sander, polish them on a wheel and drill the holes. I hold them with pliers that have leather for padding so they don't get scratched. It sounds like a lot of work but it takes just a few minutes and is a nice look on a holster. Rick Jorgenson Thanks tonyc1 for the info on fasnap. If I ever need to make a bunch of holsters at once I will use them! Fasnap corp. 800 624-2058 sales@fasnap.com
-
I grew up in So. California and as a teen my dad and I would go to Marysville area to a Paint horse and Quarter horse sale they have every year. We would pick up a couple of horses, take them home, ride them for 90 days and sell them. One year, one of the Paints we bought was a horse that Cotton Rossers wife Joanne raised. She was a nice lady, came out to the trailer after the sale to see the horse off. No. California is growing but the towns and people still make it feel "small town".
-
Very cool design! I love the use of tools to create the effects. Rick J.
-
I leave them in the skiver (black handle or the chrome one) run the buffer with rouge polish, flip the blade over, polish again and it is good to go! Go easy with the pressure you don't need much. Rick J.
-
Thanks JRedding and UKRay for your information, I will keep my items under my control and run ads and photos with #pull tags hung on feed store boards. Take care and thanks again, Rick Jorgenson
-
Shelly, Awsome saddle, Nice detail work, I have to ask about the boarder tool, it is not one I have seem before. Do Tell!! Do Tell !! It is making us nuts!! , o.k. we work with leather, we are all ready nuts!! Really, Good Work and thanks for sharing!
-
JRedding, I am considering putting some saddles in feed and tack stores on consignment. When you do that is there a contract that should be filled out by both parties. My concern is I go in and the saddle is gone but no one knows where it is, sold, stolen, borrowed, ect. How can I protect my merchandice? Or is that possible? What has worked for you? I have just moved to this area (Anthem, Az.) and do not know what shops are reliable yet. Any thoughts will help. Thanks, Rick Jorgenson
-
Welcome! You will get a bunch of help here. So much to learn reading others posts and trying new stuff. Look at the "supplies" section. A lot of info there for tools / leather and hardware. Welcome aboard,
-
Good job and nice details !! The detail on the inside is a professional touch. Rick J.
-
Nice job on the whole package!! Seat and bags Rick
-
Storm, I finished it with tandys water based antique (saddle tan) and then used Bag Kote when that was all dry I Sprayed it with a finish but I do not remeber the name on the can. It is like clear lacquer, they have it at tandys. I prefer to finish without the spray but this was for the shop I work at and the owner wants them sprayed with the lacquer. They also look nice "rough out" and laced instead of sewed and oiled. Rick
-
Hello there! Retailer hoping to turn into leatherworker
rickybobby replied to RunningRoan's topic in Member Gallery
Welcome Heather, I went to your website, GOOD JOB!! It is nice!! easy to navigate and interesting. I to have been lurking for a while and have just started to post. I am the opposite of you in the fact that I make all the tack and have not figured out how to sell on line yet. I work in a saddle shop in Wickenburg Az. and am getting my "feet wet" for retail sales. Rick Jorgenson