fredk
-
Posts
5,974 -
Joined
Content Type
Profiles
Forums
Events
Blogs
Gallery
Store
Everything posted by fredk
-

Can you buy die cut leather like for strap attachments
fredk replied to MtlBiker's topic in Leatherwork Conversation
Be careful with what you buy. Some [a lot] of this pre-cut is not in leather as we know it but in plastic leather -
Sometimes its stubborn. Use a crepe eraser to eliminate it. A more severe removal is using an old fashioned eraser for ink on paper - but use that just enough to remove the mark, too much and it can ruin the leather surface
-
That key fob and several others were available with and with out the blades to cut the stitching holes. I opted for the one with Keep lookin PS; the metal of the die is only pressed into a bit of wood. I / You can actually pull out the blades quite easily
-
See that key fob? It can double up as a strap attachment on a bag. I've not used it as such, but its one reason why I bought that one. Heck, even round key fobs can double up as strap attachments on bags
-
Yes you can, or the other way up; put the leather on the die and use a bit of scrap wood between the leather and the mallet, to save the mallet face from damage I have the Tandy press. [https://www.tandyleather.world/products/tandypro-r-hand-press?_pos=4&_sid=6f995a4f4&_ss=r] Its 1.25 T. I use it for a 'clicker press'. With some items I need to move the die around pressing it down area by area, with some smaller items just the one go does A couple of dies I have are a simple key fob; https://www.ebay.co.uk/itm/402349765586 I got this to cut key fobs out of scrap pieces and this valet tray die, with this I've used a mallet and my press, its one I have to around and do each side and corner in turn https://www.ebay.co.uk/itm/154533000463 on the smaller side, I have some circle dies which I use to punch out circular bases for game pieces. I can do them quicker with the die than with a regular hole punch, but more importantly, I can do them quietly at night
-
One other marker I use to mark holes which will be punched out, or sewn or laced over - a Tippex pen. Tippex is the UK name for 'wite-out' correction fluid. It can be removed with careful use of alcohol
-
If its in an area to be cut or punched out - an ordinary biro pen. Or a 4B pencil, or a small mark with a pointy awl or tailors chalk. On leather with a finish I use Tandy's marker pen https://www.tandyleather.world/products/leather-marking-pen?_pos=1&_sid=6b9cc59ba&_ss=r Or put down some low tack painters masking tape and mark that with a pen so many ways, each to suit the job in hand
-
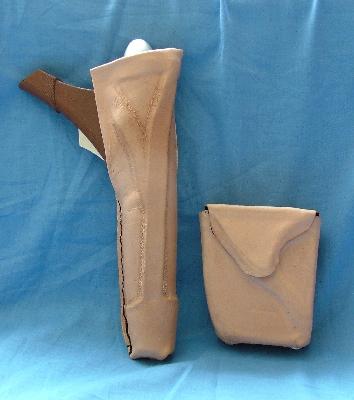
LARP is like SCA but fantasy. With LARP you make 'fantasy' gear, steam punk etc. With Cos its more difficult as you mostly have to replicate items used in films. I did bits for one young lady for Cos a long time ago. First time I did some serious wet-moulding. I had to replicate the belt, pouches and holster used by Queen Padme Amidala, in Episode 2, 'Attack of the Clones' of the Star Wars film. I only had low quality film stills to go by. afaik it was worn with success. I still have the bucks and have thought of doing another set sometime In their un-finished state; The originals, afaik, were made in moulded plastic There is good money to be made as in both the people are often willing to pay top ££ for the right things. And often, as in that Star Wars kit, they just cannot buy it Unfortunately N.I. has been flooded with ex-Games of Thrones items. So many people here were 'extras' and got kit supplied and for each new filming season new kit was supplied so the extras sold their old kit
-
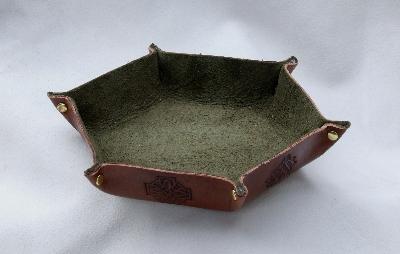
Small operation, just two sales agents now. They sell, I make, simples, or, I make, they sell On the hex dice tray: I use inexpensive 1 -1.2mm leather for the exterior, it has a cardboard re-enforcement in the centre base and has a thin lining leather glued on the insides. 6 ready-rivets and a small amount of glue hold the ears together to keep the shape. They are light and fairly flexible but at the same time hold their shape well. No stitching needed or used, not even on my other ones, just glue and ready-rivets. Basic ones can be knocked up in just minutes - afair I did 8 small ones [about 8cm x 8cm square] in an hour ~ cutting and assembling time, not counting the time for dye to dry
-
I think I saw a pattern in either a Stohlman book or in Tandy's library I'll think a thunk and try to rememble
-
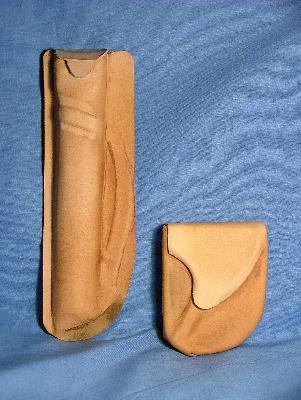
one version; a sewing palm http://www.leprevo.co.uk/photos/sewing-palm.html
-
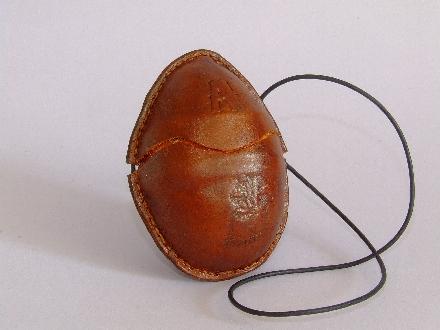
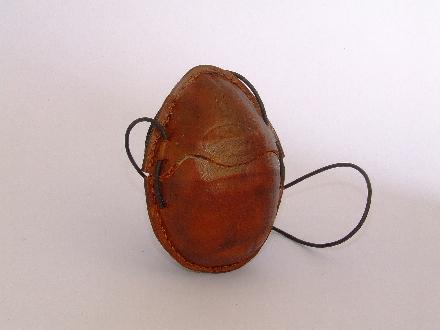
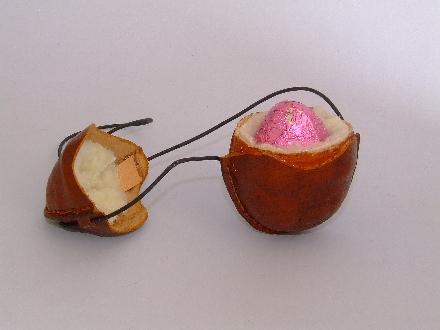
I've done that on a few items The only one I have a photo of happens to be an egg. This is the prototype and I'm still working on perfecting it. The initial idea* came from No.3 son many years ago after he saw a certain box thing in one of Olaf Goubitz' books Two near identical halves were wet moulded, then they were glued together around a large plaster egg. They were sewn together, allowing a gap for where it was cut open Shrinkage of the leather is the main problem. I'm thinking of a papier-mâché core with the leather on that, still wet moulded of course * kinda long story to that
-
Sometimes its what the item is called can make the difference if it sells or not and to whom it sells I'd never even heard of a 'valet tray' until I saw them on this forum I made a few, showed them to my sales agents - 'What is it?' A valet tray 'What's that for?'' uh, its a key or watch tray 'oh, right, a key tray, nice, I can sell those' Then I made some larger hex shaped ones. 'Too big' ah, but these are 'dice trays' 'The gamers will like these, stop their dice going all over the table or onto the floor' Thus the hex-shaped valet tray is a gamer's 'dice tray' and I include one with my board games set
-
Unlike the co-ordinator my sister had when she was a home-visit carer. That co-ordinator never allowed time to get between the homes, eg, 08.00 to 08.30 at Mrs Smiths, 08.30 to 09.00 at Mr Jones et cetera but it was at least 10 minutes to get from one to the other. The co-ordinator even had her going to homes far and wide whilst other carers did visits within the area my sister had to pass through, going into the areas best served by those other carers. Remember those Venn diagrams at school? with overlapping circles? like that
-
This may not add much but may amuse yaw'l This goes back a long time, pre-internet days. Time when we used fax machines I needed some parts for my old Cadillac, a '78 Coupe DeVille. I sourced the parts from a breaker in Alaska, of all places. They sent the parts out afternoon their time via FEDEX. The parts were in Northern Ireland about 36 hours later! That's the good part. The parcel then spent the next 25 days in FEDEX depots FEDEX had two depots in N.I. One serving the west of the country and one serving the east side. My parcel spent over 3 weeks being transferred between the depots When someone had drawn a line on the map of N.I. to show which area each depot delivered into the person had used a broad tip marker [sharpie?] and the thick line had gone right through and over my house! [I was shown the map later] On one side my neighbour was delivered by FEDEX West and a neighbour on the other side was delivered by FEDEX East, but neither depot could decide which of them I came under. What didn't help was that nearly all the FEDEX workers were not N.I. people so they had no idea that either depot could have delivered. It was resolved when they got in a part-time driver who knew me. Officially, he had me 'redirect' my parcel to my place of work then he delivered it there the same day Eventually FEDEX closed their depots and handed deliveries to another courier company, which had a single depot for the whole country
-
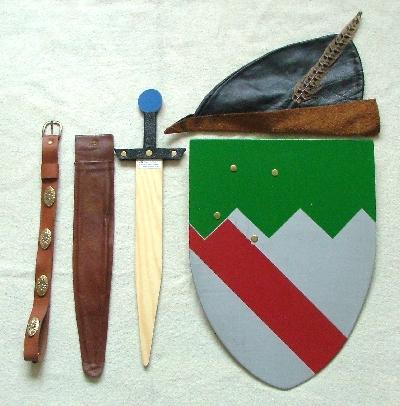
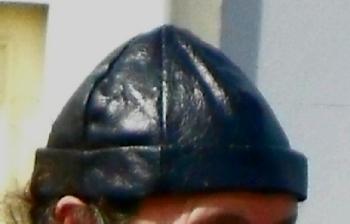
When I was involved in medieval presentations my wifey used to do the sales stall. I used to and sometimes still make a certain style of hat. I had made 4 for family to wear, we wore it under out chainmaille coifs. I'd also made about 20 for sales After a lunch break we went to put our hats and armour back on. Hats were gone. Wifey says, she had sold them. Why? Because 'I'd sold all the rest and I needed a few more. Anyway, shure, you can make more when we get home'. At £10 per, even though they were used and looked it, wasn't to be sniffed at. Actually, those customers were more than happy with the used look and yes I have made more. Actually I'm re-designing it so it not only looks better but is easier & quicker to make, but that Mark 2 will be made beside the Mark 1 Also at that particular sale I'd made small shields out of hardboard. They were about 10 inches across and 15 inches long. I'd painted them up with designs on them. They were strung together to hang along the frontage of the stall, to attract attention. When it came to pack up - there were no shields. Wifey had sold them as well! at £3 each. People bought them for their children That led on to a whole new line in my wooden toy business - White faced hardboard shields, un painted, with two leather straps riveted on, size 12 x 16 inches and also small toy wood swords*, with or without scabbards. I also downsized a real style of medieval hat, it looks like the stereotypical 'Robin Hood' hat - which I called it. A friend got me a big bag full of pheasant feathers in swop for a hat. [* wifey sold our wooden practice swords and daggers as well ! ] At later events we would clear between 40 and 60 shields per day, only about 10 swords, very few hats though. At one two day event we cleared 150 shields. At these No.3 son ran a 'paint your own shield' stall. £5 for shield and for child to paint it This is what our childrens' medieval pack consisted of [shield is painted as an example] Leather still used in the making For 'Viking' events I made a small wooden axe. A friend was making the round shields None of these things were planned from the outset - ' I'm going to make this & that and gonna sell them' Their production stemmed from the requests and wants of the buying public, to satisfy what they were prepared to buy

-
For small patterns/templates or ones which can be folded I use plastic document wallets. I use a marker pen [sharpie?] to write on the outside what's inside. Notes about the pattern are put in with it. Then these wallets are stored in a fold-up crate box
-
That
-
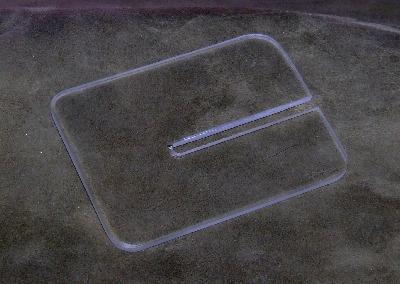
Here is my plastic pull-out thingy. Made from a scrap piece of acrylic, its 3mm thick by 6cm wide and 8cm long, the slot is about 4mm wide and 5cm long. I think it took me about 1/2 hour to make Boring, innit?
-
I just use boxes, and more boxes, and note books All just cut leather pieces go into one big box. Then as each set of items progresses it goes into its own box. At the mo I'm making some coin purses, some coin wallets, some hex trays and other things. Now there is a box for the dyed but not assembled coin purses et cetera. Notes are written as to how many of the item are in the box and what stage they are at, eg '6 coin purses, rivet hole punched, dyed' With the likes of the coin purses which need a split-ring I put the required number [plus a couple extra] in a plastic bag with them so I'm not having to hunt for the rings later When the items are done they get tossed into my 'sales' box For game boards; cut boards are stacked in one area. Boards prepared for covering are stacked in another place and boards with their first leather cover are stacked in yet another [safer] area
-
If you like chilli dishes you'll like curry. Altho its a hot spice it is different. I hate chilli but I'll eat curry
-
btw, on the odd occasion when I reckoned a thread was too grubby, I pulled the thread out and re-stitched with new clean thread Thread is cheap. You'll spend / waste more time trying to clean a length of thread worth less than 0.1c than its worth. Pull it out and re-stitch and be done with it. Also trying various solutions on the thread to try to clean it may damage the leather or its finish, and that bit is ultimately worth more
-
-
Yes, a seam through both outsides. Bevel the edges of both the base plug and the inside of the sides. then sew through at an angle. Like doing a dice cup Basketweave Dice Cup by Gerald Poissonnier.pdf see the drawings on this
-
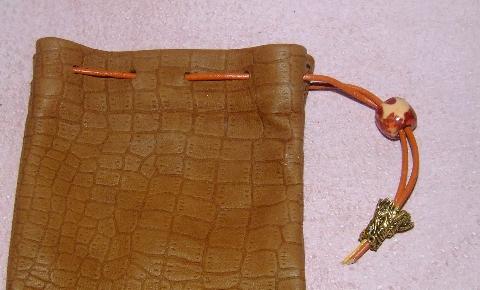
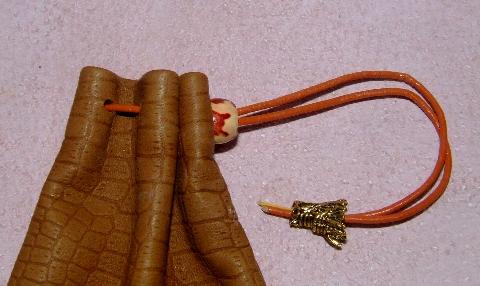
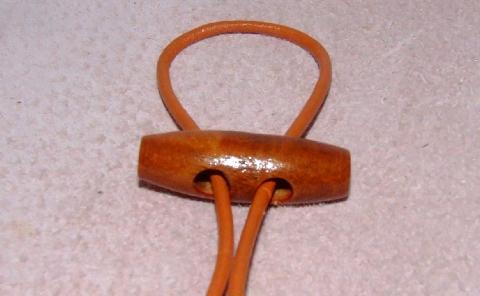
1. draw string bag, open, bead to the right 2. pull/push the bead along the lace and pouch closes There is a more elaborate system of two laces and 4 beads, two on each side, in which you pull two opposing beads to close the purse and you pull the other two opposing beads to open the purse I buy the beads with holes already through them. They are sold for and meant for jewellery making. My choice of bead is on the design of the bead and its size. A drill will soon make the hole the right size Then there are these; two hole toggle buttons; these are large ones, about 30mm across. Will do the same job as the single hole smaller bead but for larger applications