


Dwight
-
Posts
5,258 -
Joined
-
Last visited
Content Type
Profiles
Forums
Events
Blogs
Gallery
Store
Everything posted by Dwight
-

What style and size stitching chisels/pricking irons for starting?
Dwight replied to Moyerbros's topic in Getting Started
Since you are doing holsters, belts, etc . . . go for 5 stitches per inch or 6 at the most. Either makes a really good looking and good working belt, knife sheath, or holster. More stitches makes it look like an over sized watch band . . . fewer won't hold as well. My machine is set for just over 5 . . . and I never have any problem with the item being held together. AND it really looks better whether I'm using matching stitches or contrasting stitches (think black belt with white stitches). And the plus side . . . there will be times for one reason or another . . . you will want to pull out X number of stitches . . . and 5 or 6 doesn't take long and is not tedious to do. The other side of that as well . . . sometimes when I'm doing a very special holster or knife sheath (or other stuff) . . . I use my machine to punch the holes . . . and then hand stitch the item . . . using a saddle stitch. 5 or 6 stitches per inch is sort of quick to do . . . many more than that is a real pain. May God bless, Dwight -
That's almost too simple for a pattern . . . use a manila folder . . . wrap it around the gun . . . mark it and cut it . . . voila . . pattern May God bless, Dwight
-
When u design a new holster pattern
Dwight replied to rccolt45's topic in Gun Holsters, Rifle Slings and Knife Sheathes
I have gotten a reputation as the "odd ball" holster maker. Made an appendix carry holster for a double barreled derringer . . . made a double shoulder holster rig that doubles also as a pair of suspenders . . . made a double carry vest for notebooks / pencils / other oddball stuff / could carry a small auto pistol in it . . . made one to carry a long barreled .22 auto with a large scope mounted on top. And that just scratches the surface of my shenanigans. I simply make a decision that "this" holster will carry this weight / in this location / so it needs to be ______thick. I cut a piece that I know will be 1/2 inch to 1 inch too wide and too long along sides . . . get that dude sloppy wet . . . thumb mold to start with . . . then stick it on the vacuum former. Depending on how hard I do or do not want this . . . I may stick it in the hot box for hardening thru heat. Either way it then gets dried. Come back within 48 hours after the above . . . cut out what I need . . . put a back on it . . . glue / trim / sew / sand / and finish. I have more back patterns than I have for the fronts. May God bless, Dwight -
No . . . I put it around me and buckle it . . . or lay it across my file cabinet . . . and never have any problems with it. Someone would have to intentionally do something out of the ordinary to get it to be bent or folded. My friend used to be rather large . . . and his belts would "sag" so to speak. This one does not sag . . . he cinches it up . . . it stays there. May God bless, Dwight
-
Special Holster for Special Friend
Dwight replied to Dwight's topic in Gun Holsters, Rifle Slings and Knife Sheathes
I have a drawer with a couple pieces of leather that were cut for a right hand holster . . . and the customer was wrong handed like you said. I'll use em up some day . . . or forever have reminders of how not to do things. May God bless, Dwight -
I make steel lined belts . . . actually have a favorite black one that is steel lined . . . I often wear it to church. The steel is 20 thousandths thick . . . 1 inch wide . . . and it goes from the last of two buckle retention holes . . . to just shy of the last hole in the other end of the belt. I made one for a friend 10 years or so ago . . . he still wears it . . . loves it . . . I used two pieces of veg tan leather that were about .1000 thick . . . steel is glued on both sides with Weldwood contact cement . . . as well as the edges where the leather comes together. Leather sewing done with 346 poly thread . . . May God bless, Dwight
-
Special Holster for Special Friend
Dwight replied to Dwight's topic in Gun Holsters, Rifle Slings and Knife Sheathes
Chuck123wapati, FrankHester, JSage, Skinknife . . . thanks everyone for the kind words. Yeah . . . he's one of the last of the good guys . . . He's never failed to help out when he could . . . I first knew his grandfather . . . then his dad . . . now him . . . and both of his kids . . . as well as his 3 grandsons. It has been one fun trip May God bless, Dwight -
If you have a "friendly" Tandy store like I have . . . they'll give you more help than you can use as far as ideas are concerned . . . they also have patterns that I've found to be pretty simple and basic . They also are my "go to" store for leather. I've tried some of the expensive stuff . . . and it's like comparing a Ford to an Audi . . . both gets you down the road . . . but one is more than twice the price. I pick my own out . . . and they'll even help me there if they have time. May God bless, Dwight
-
Special Holster for Special Friend
Dwight replied to Dwight's topic in Gun Holsters, Rifle Slings and Knife Sheathes
Here you are . . . the rivets you see are holding the card for the thumb break The extra holes are where I anticipated the thumb break would go . . . had to move it . . . sheesh . . . May God bless, Dwight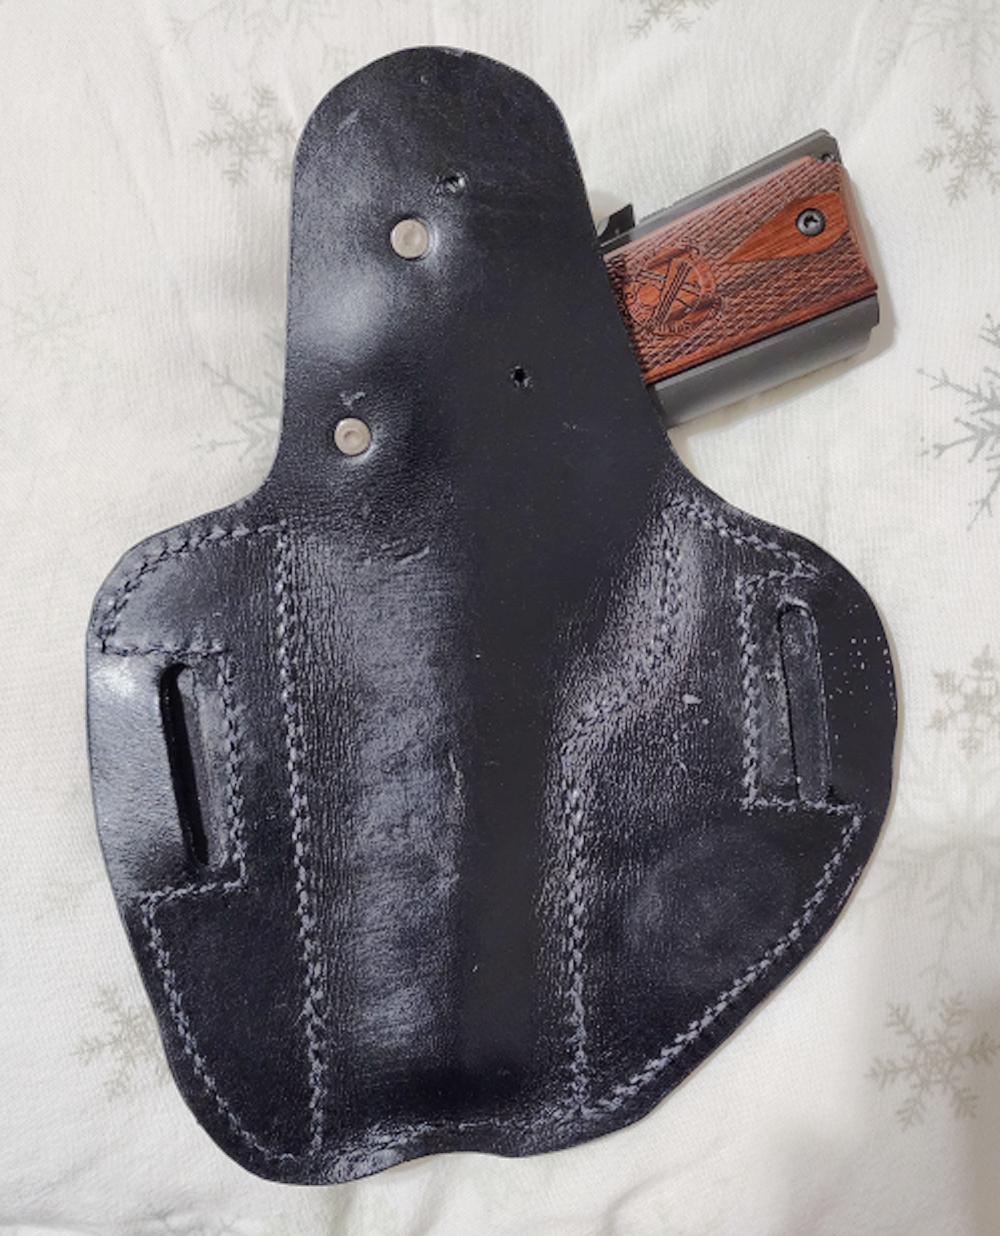
-
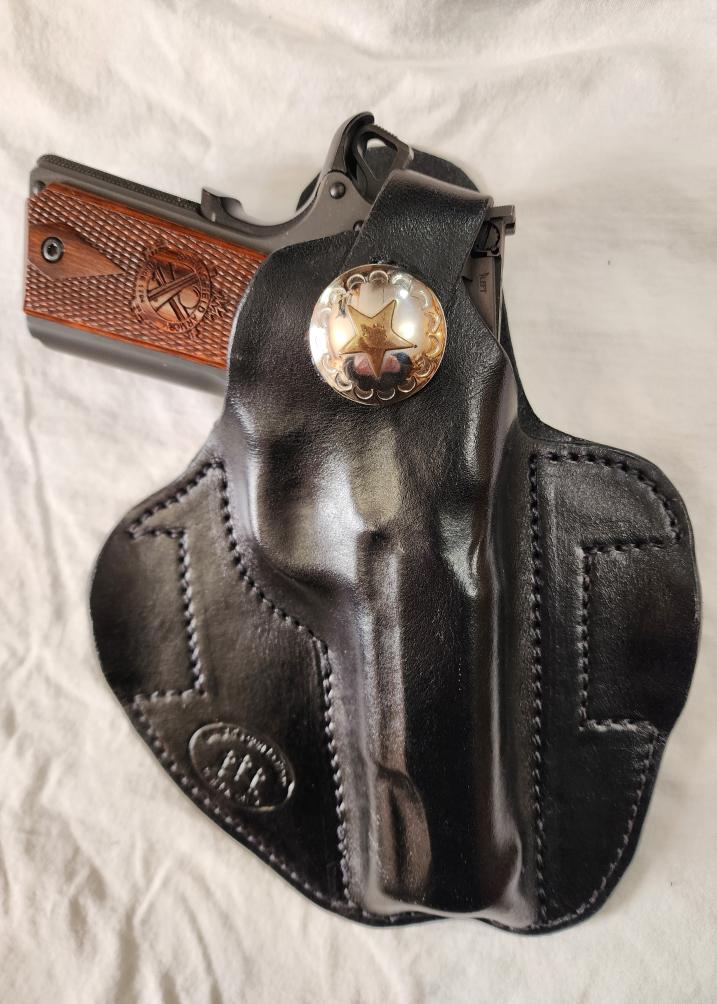
A good friend wanted a cross draw for his 1911 . . . black . . . with a thumb break. My favorite suggestion for that is the slip-cake style . . . which I made for him. Added a concho to kind of dress it up a tad . . . thought about white stitches . . . makes it too conspicuous . . . Anyway . . . here's the finished product. May God bless, Dwight
-
Good work May God bless, Dwight
-
Thanks, Thanks to you Cumberland . . . as well as "Good job there, Pardner" I've got an old brass buckle that I've hung on to . . . I knew some day I'd figure a use for it . . . and it'll take some "doing" . . . but I can see a belt in my future that will have a leather cover over the brass buckle . . . It's one of those buckles ya buy to prove you went to that event . . . but 40 years later . . . most folks don't recall the event ever happening . . . and the brass is kind of dirty black ugly anyway. May God bless, Dwight
-
He ^^^^ has the exact right idea . . . and if you do go with a 2 prong buckle . . . you can make it up to 2 inches wide . . . Best wishes . . . May God bless, Dwight
-
Hey bobm4360 . . . WOW . . . y'know I just never thought to hit up the old archives for something like that. Our military has always sent out specs for anything to be made for them . . . should have known this might be out there. I'll pull it out of download . . . clean up the extraneous spots on the *.tif's . . . go take a look at my leather supply. I just might make a couple changes in these . . . minor ones of course . . . and then again . . . might stay true to the pattern . . . have to just "wait and see" Please accept my definite gratitude and a special "Thank You" for your effort. May God bless, Dwight
-
Nothing but beautiful . . . May God bless, Dwight
-
AIZilla, Tony V, Oddball, ClaimedVacancy . . . thanks to you all . . . Lots of ideas there to digest . . . see if I can get anything out of the process that will work for me. May God bless, Dwight
-
For the last couple of years . . . been telling myself I'm gonna make me a set of saddle bags . . . horse and rider type saddlebags . . . not the Harley kind. Every place I look . . . patterns and all . . . they are almost the size of a woman's small purse . . . On the western's on TV . . . they seem to be a lot bigger. The question I'm asking . . . what are the largest set you've seen or made . . . height / width / depth. I'm looking to replace my AWOL bag from the Navy . . . and I thought that might work . . . Thanks for whatever help you can toss my way. May God bless, Dwight
-
Stitching is good . . . better than I do by hand . . . I'm a machine guy. BUT . . . do yourself a favor . . . scratch around on the internet and grab up a Harbor Freight sale flyer or coupon . . . usually good fo 5 to 15 bucks. THEN . . .go to harbor freight and buy a 30 inch bench top belt sander . . . the one with the little 1 inch wide belt. Buy some 80 grit belts to go with it. Trying to cut leather so that all the edges match will cause you to pull your hair out. Cut both of the a "tad" big . . . glue em up . . . and sand the edges. I don't know anyone who can cut his pieces for as good a fit as I can make them with my litle hand dandy sander . . . I actually have 2 of em . . . Glue seom scrap pieces together . . . put a line on it with an awl . . . and sand it to the center of the line you struck with the awl . . . practice with it a bit . . you'll learn . . . and you'll be just plumb tickled that you bought that little rascal. May God bless, Dwight
-
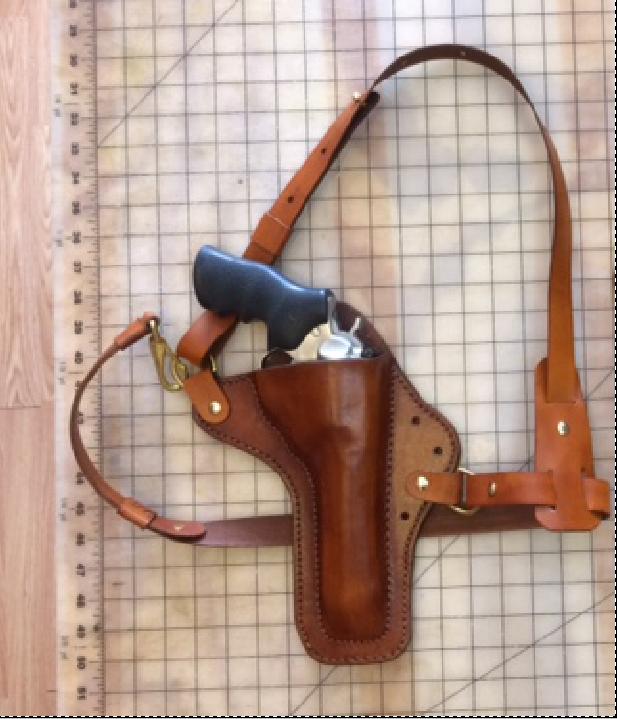
That's a good looking rig. Reminds me of the new briefcase(s) I gotta do for myself. I need one for church (Bible and song books) and one for my laptop / keyboard / mouse / charger. Would like to do one . . . make it good for both . . . doubt that I'm that ingenuity minded though . . . make one do for both jobs. But thanks for showing yours . . . got a couple Ideas out of it . . . I may put into play. May God bless, Dwight
-
What Machine Do I Need to Sew 12 mm Leather
Dwight replied to OscarRush's topic in Leather Sewing Machines
And if you are hard up for cash . . . a Tippmann Boss is a manual machine . . . one pull and one push of the lever . . . makes one stitch. I've sewn some pretty heavy stuff with one of them until I got my Cowboy 4500 . . . It'll do what you need . . . brand new for something in the neighborhood of 1000 bucks US. A cowboy 4500 is over 3000 just for comparison May God bless, Dwight -
There is no real "calculation" you can make . . . what you have to do is take the holster . . . that has been wet formed . . . and then fully dried . . . give it a light coat of neatsfoot oil and let that dry . . . then add your contact cement to both sides of the inside of the holster . . . wait for it to dry . . . place the weapon in the holster and squeeze the sides together. I have a pair of tin bending pliers I use to squeeze the sides together. The holster stitch line has to be as close to the weapon as you can get . . . and again there is no "formula" for it. You use your sewing machine . . . mine is a Cowboy 4500 with only a half foot on it . . . allowing the needle to get up close to the intersection where the two pieces of leather are bound together with the contact cement. As you can see on this holster . . . I got up real close. I have a hand held stitch maker (from Tandy) which makes those lines next to the weapon. All outside stitch lines are made with a typical gouge set for a determined distance . . . then you simply connect the two . . . and you have your holster finished. There is no (A x C) / 3 = stitch line formula . . . or calculation . . . you simply sew it where the leather comes together. Most of the time this will produce a tight holster . . . the customer can loosen it with the freezer bag trick if he wants it more loose. May God bless, Dwight
-
If you don't know how to make them . . . you probably shouldn't be taking orders . . . May God bless, Dwight
-
That's some good looking work . . . Most of us would like to see them being "modeled" . . . I for sure would May God bless, Dwight
-
Got a picture of one??? May God bless, Dwight
-
To sand the edges or not to sand
Dwight replied to ThisIsMyFirstRodeo's topic in Leatherwork Conversation
I've used 120 for 20+ years . . . never had one complaint May God bless, Dwight