-
Posts
5,249 -
Joined
-
Last visited
Content Type
Profiles
Forums
Events
Blogs
Gallery
Store
Everything posted by Dwight
-
Didn't see a place there on your web site . . . where we could get hold of you . . . With these stinking electronic boxes . . . always needing some advice . . . not sure we could do that phone number . . . I'm used to not having to pay for any phone calls . . . May God bless, Dwight
-
Just a note . . . I don't know if you can get the product . . . here it is called Resolene . . . it is an acrylic leather finish. Another one we use . . . it is a floor polish . . . called Mop and Glo. Cut either of them 50 / 50 with water . . . and brush the product on your shoes. Might take 4 coats . . . let em dry a couple hours between coats . . . might make those boots last you long enough to work out the cash for better ones. There is a fellow in UK . . . don't recall his name or website . . . makes some of the most beautiful holsters for the old .45 automatic from WW1 and WW2 days. Not sure how he managed to get and hang on to a .45 auto . . . but he shows pictures with it. Good luck. May God bless, Dwight
-
Couple of questions: 1. Where did you get the leather? 2. When you bought it . . . did it by any chance say "belly leather"? 3. Were there any other descriptive words about the leather when you got it? May God bless, Dwight
-
Now we go silly . . . I needed a pair of "work" boots a couple years ago . . . but not for anything that would be considered serious work. I bought a pair of lace up . . . high top boots . . . rubber cushion soles . . . think they were like 25 dollars American . . . turned out to be full . . . absolute . . . real leather. Actually a darn good pair of boots . . . and I'm still wearing them. May God bless, Dwight
-
My original stitch groover I bought from Tandy some 25 or so years ago . . . has the original blade in it . . . it still works fine . . . and all I've ever done with it is use it. I have both the fancy adjustable one and the cheap one designed to be set for one distance . . . that is my baby . . . Actually have both . . . use the fancy one very seldom. The other one is on every belt . . . every sheath . . . every holster . . . and a boat load of other things I've made down thru the years. Try it . . . you'll like it. May God bless, Dwight
-
I just use what is handy . . . Joann Fabric sells carpet thread . . . not very big . . . easily used . . . and you will just about yank your finger off or cut yourself with it if you try to break it in two. If you use it . . . plan on cutting it if you ever want to change the sewing . . . you won't pull it apart like some of the other threads women sew with. I use it for lots of stuff . . . but it only works in my heavy duty standard machine. May God bless, Dwight
-
I have one like this . . . and one like the other. The other is only for special projects . . . very seldom used. This one had the extra part of the blade ground off on the non cutting side . . . and the screw set tight as I could get it. It is my groover fro all my holsters, sheaths, belts . . . makes em all perfectly consistent. And it is so easy to use . . . May God bless, Dwight
-

First Time Tooling A Flower
Dwight replied to AzShooter's topic in Gun Holsters, Rifle Slings and Knife Sheathes
Looks alright from here May God bless, Dwight -

Number of times you pierced the thread when threading for saddle stitch?
Dwight replied to NDphung's topic in Sewing Leather
This makes 3 of us . . . I don't do a lot of hand sewing . . . but when I do . . . I don't mess with it. Thread the needle(s) . . . fold it over . . . and go for it. May God bless, Dwight -
You can make this stuff as hard on yourself as you want. Or follow the KISS method . . . Keep It Simple Stupid. For hand sewing . . . if it works . . . use it. For machine sewing . . . best advice I ever got came from the Tippmann Boss people. Thread the needle . . . hold your hands about 30 inches or 75 cm apart . . . with the needle in the middle of the string. Lift one hand . . . drop the other . . . build a 45 degree string for the needle to slide on. The needle . . . if properly sized . . . will easily slide down the string . . . switch positions with the hands . . . again the needle should slide easily. Has worked for me for 20 years. May God bless, Dwight
-
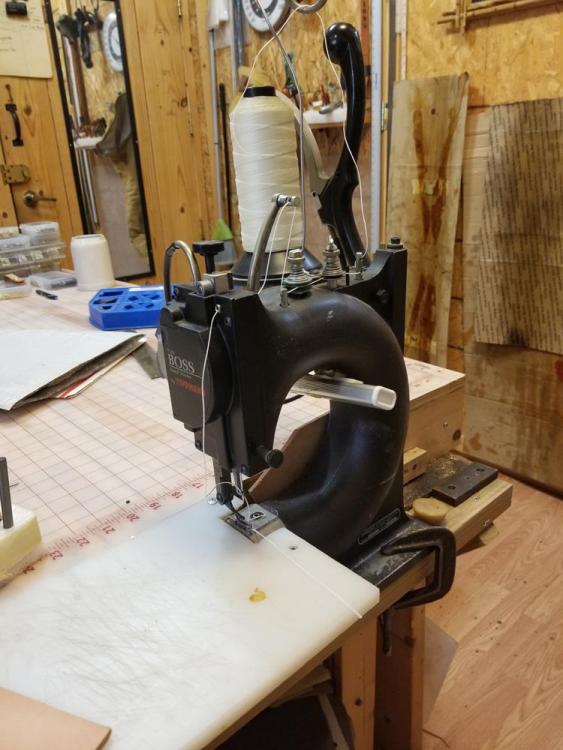
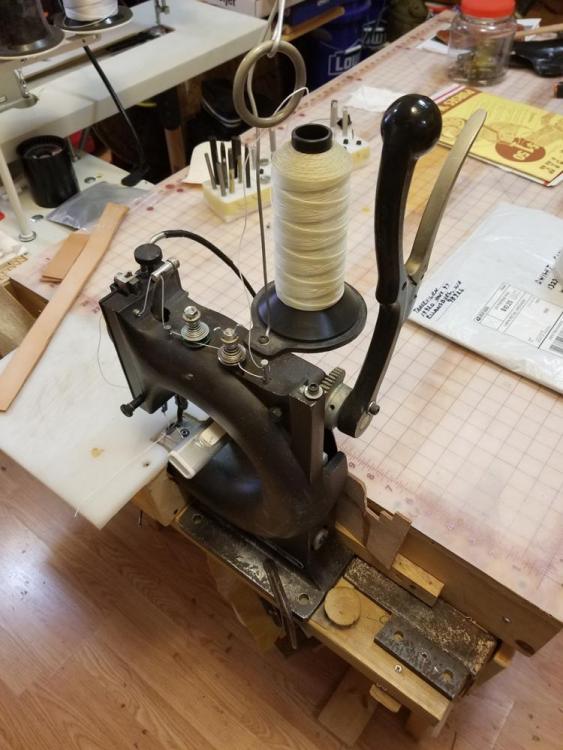
Here is my other machine I spoke about . . . Tippmann Boss . . . good little hand operated machine. I've punched holes with it for stitching almost 3/4 of an inch . . . came back and hand sewed the holes. May God bless, Dwight
-
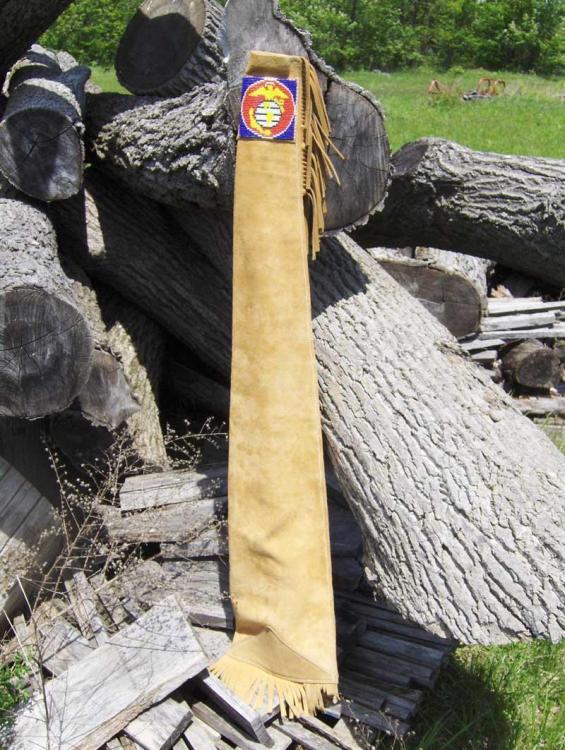
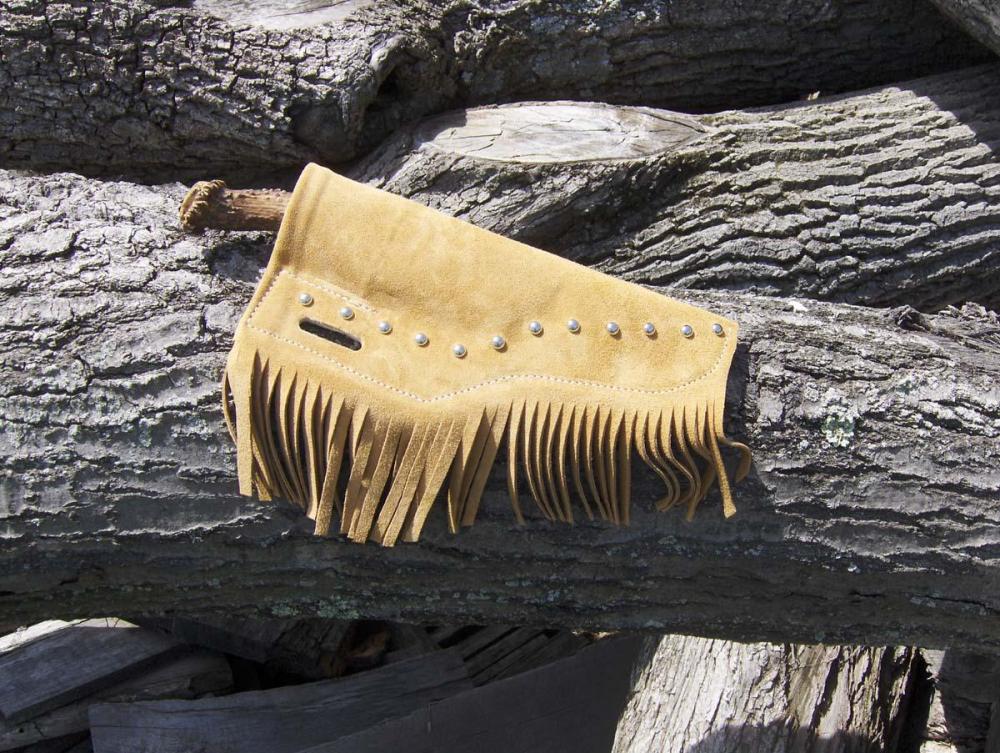
If you soak rawhide real good . . . you can then shape it pretty good. I did that for a knife sheath some time back. After it dried out . . . I glued the rawhide to the suede . . . with the rawhide seam so that the top of the blade was at that seam. The sharp part of the blade found a solid piece of rawhide . . . My customer was super happy with it. He also got the beadwork on the 45-70 rifle case as well. May God bless, Dwight
-
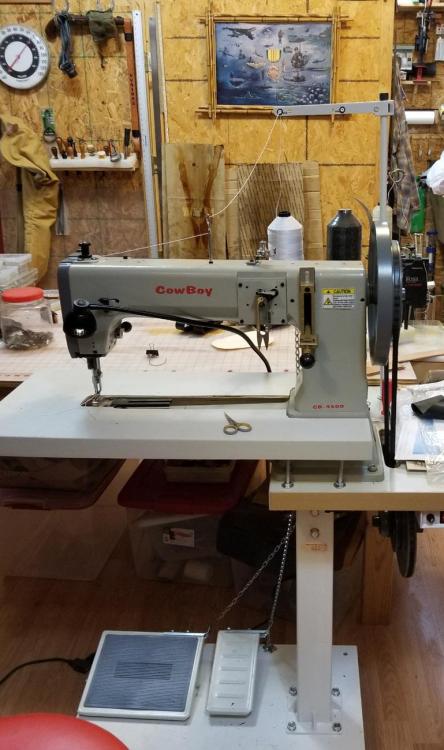
Here are my two . . . a Cowboy with a 16 inch free opening for sewing larger projects . . . it'll sew 3/4 inch of veggie tan . . . and yes, I tried it . . . it'll do it. You can only see a piece of it in the picture . . . the black blob to the right of the Cowboy . . . is a Tippmann Boss . . . and if you only are doing hobby stuff . . . let me recommend this machine . . . 100%. I've had mine 20 years . . . it has been back to the shop twice . . . fixed for free both times . . . it is a bit of a pain doing belts . . . takes a while . . . but for holsters, sheaths, and an occasional purse . . . it'll do you great. Tandy has flooded the market with a machine that was badly cloned from it . . . and in my opinion is junk . . . the Boss is a good machine. A couple years ago they were in the 1400 dollar range . . . Tandy's junk has pushed the price down to about a thousand brand new (price I paid for mine 20 years ago) . . . and used ones on Ebay are even less. Have fun . . . may God bless, Dwight
-

1911 with square trigger guard mold
Dwight replied to OldNSlowMarine's topic in Gun Holsters, Rifle Slings and Knife Sheathes
No . . . I didn't do the alteration . . . but I've got an extension I made for a Glock barrel . . . needed a full size . . . only have the next smaller one . . . added the barrel . . . made the holster . . . shipped it . . . he was happy as a lark. I also made a model of a S&W 29 to get a holster for another order. Sometimes ya just gotta go with what you have or can get quickly . . . May God bless, Dwight -

1911 with square trigger guard mold
Dwight replied to OldNSlowMarine's topic in Gun Holsters, Rifle Slings and Knife Sheathes
Glad to see I'm not the only redneck on here This makes at least 3 of us . . . -
Well . . . by golly . . . just a big up and "THANK YOU" . . . I have a very serious case of neuropathy in my feet . . . at times I can barely even wear shoes . . . found one style of tennis shoes I can wear . . . own 4 pairs of them. They are colder than anything I've ever worn. I have played a bit trying to come up with something that would work to keep my feet warm . . . easy on and easy off . . . and light and comfortable. There is one less of those books on sale today . . . will be delivered sometime next week. Again . . . thank you for the pointer. May God bless, Dwight
- 7 replies
-
- leather craft
- moccasins boots softsole
- (and 11 more)
-

1911 with square trigger guard mold
Dwight replied to OldNSlowMarine's topic in Gun Holsters, Rifle Slings and Knife Sheathes
Cut the round one off . . . screw on a piece of pine . . . and shape it on a belt sander . . . Piece of cake. May God bless, Dwight -
If you use Weldwood contact cement . . . and roll it out flat after putting it on there . . . you will have no need for staples . . . the contact cement will hold it. It holds kitchen cabinets together for 20, 30, or 40 years . . . with no problems at all. It can darn sure do your little leather project. And as well . . . I have a roman shield . . . leather bonded to plywood . . . that was bent into a curve . . . been on there for a number of years . . . still looks great . . . no droops . . . no bubbles . . . pretty as the day I first carried it. Stapling it will only ask for it to fail . . . leather is heavy . . . and with the cooling and warming of years ahead . . . it will contract when cold . . . expand when warm . . . and eventually a droop will form in it . . . you will not be able to stop that. The only reason that doesn't happen to paintings . . . the paint is stiff and will not let it even begin to droop. But either way . . . have fun. May God bless, Dwight
-
Unique . . . and good looking . . . May God bless, Dwight
-

S&W 38 with crimson trace...
Dwight replied to Chux's topic in Gun Holsters, Rifle Slings and Knife Sheathes
Crimson trace only builds lasers for the grip panel if I have been told correctly. That being the case . . . you only need the model that fits the gun itself. CT is negligible as far as influencing the holster. The only thing you may need to do is make a tunnel for it if he is a lefty . . . and make sure the place where the switch is turned on . . . is not contacted by the holster. That switch is in the grip panel . . . out front . . . under the trigger guard . . . and typically turned on by pressure from the middle finger. May God bless, Dwight -
Check with Toledo Sewing Machine . . . (419) 380-8540 . . . Bob is the man you want to talk to . . . And yes . . . you can tell him Dwight sent you. I've bought an sewing machine . . . and a servo motor for another one from him . . . May God bless, Dwight
-
A couple of light coats of Resolene . . . 50/50 with water . . . makes a very nice inside on belts. May God bless, Dwight
-
This may sound silly . . . it is not meant to be. Buy a piece Herman Oak or Wickett and Craig . . . 8 oz leather . . . 1/2 a square foot. Cut it down the middle . . . contact cement the pieces together . . . scribe a line 1/8 inch from the edge all the way around . . . get some 277 or 346 thread . . . couple needles . . . saddle stitch it all the way around. Then buy a 1 sq ft of 7 oz W&C or HO . . . cut it in 4 lengthwise pieces . . . glue 2 of em together . . . flesh to flesh . . . then glue them together . . . hair side to hair side . . . so you have a stack of 4 pieces of 7 oz. Scribe it 1/8 of an inch around . . . saddle stitch it all the way around. If you pass both of those tests . . . you may do alright . . . if not . . . you need to go to floral carving and give up holsters . . . or practice on your sewing . . . The two 8 oz represent many holsters you will make . . . the 4 7 oz are for some of the lined holsters you may make. Personally I have several thousand dollars invested in sewing machines . . . and if I had to sew holsters by hand . . . I'd be floral carving purses starting next weeks. But on the outside . . . welcome aboard . . . have fun . . . ask quesions . . . we'll see what we can do to help you. May God bless, Dwight
-

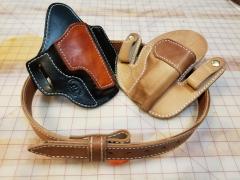
1st three made with the cowboy sewing machine small.jpg
Dwight commented on Dwight's gallery image in Gallery- Our Leatherwork
-

1st three made with the cowboy sewing machine small.jpg
Dwight commented on Dwight's gallery image in Gallery- Our Leatherwork
Bob up at Toledo sold me the machine (I drove up and picked it up) . . . and he asked me what thread I used. I have always used 346 in my Tippmann Boss . . . figured the same for this. I don't like his 346 . . . going to get some down at Tandy's one day soon. I'm also going to play around with some 277 . . . so I'll definitely be doing a smaller needle there. Gonna play with some decorative belts. They were sucha a pain with the Boss . . . it had to be SPECIAL before I would even say I could do them. But thanks for the tip . . .


