Gymnast
Members-
Posts
287 -
Joined
-
Last visited
Content Type
Profiles
Forums
Events
Blogs
Gallery
Store
Everything posted by Gymnast
-
And I have to ask - no offense - did you remember to lower the presser foot? I got your Picture in my head from forgetting that.
- 11 replies
-
- sewing machine
- tension adjustment
-
(and 2 more)
Tagged with:
-
Often when you put in smaller thread in bobbin, you need to adjust the lower tension, because it will be too low. Did you do that?
- 11 replies
-
- sewing machine
- tension adjustment
-
(and 2 more)
Tagged with:
-
I have based the needle size on the thread and fabric i use. I normally store all relevant sizes of needles with regular point. A starting point for me is the guide from the thread manufacturer - and in my case Amann: https://www.amann.com/products/ They have a recommended needle size for all their threads. I have noticed, that for the same tex value or number involved for nylon and polyester, then Amann recommends a larger needle for nylon. Polyester have a higher density than nylon, and therefore nylon will have a bigger effective size for the same weight. This could be one explanation. I start with a needle size recommended. Then I may try to reduce the needle size until it do not work for the fabric and thickness involved.
-
Thanks Kgg, for this information. Interesting way to fight these twisting problems. I think the resin used for bonding of the thread will relax (creep) in the weeks or more the thread is stored on their way from manufacturer. Perhaps most sewing thread is like that. As described in the "other thread" I noticed that to be true for the Serafil thread on my spools. However in the short time the thread is off the spool, it will fight any change in the twisting like a spring. This "fighting" is like how strong this internal "spring" is in the thread and I think this "spring" is stronger with the black nylon thread as also Wiz has commented on. When you avoid the thread comming off the end, no twisting is introduced by that from the spool. However, you may still have twisting comming from the machine. The newer models of domestic sewing machines do also have the thread comming off the end of small spools. I have seen arguments, that the step pull to the "heavy" spool causing some peak tension, that you want to avoid. What do you think about that for your application?
-
Yes, perhaps. The Techsew video is an official Techsew instruction. I noticed this Juki 1508 manual with the clockwise turn on the first steelplate. http://www.juki.co.jp/industrial_j/download_j/manual_j/lu1500n/menu/lu1508/pdf/instruction_7k_1508.pdf#page=1 I know that deviating from manufacturers threading instruction can have some issues. However it may be a way forward when your thread is kinking.
-
I made one more video in three parts of how a thread comes off the spool in three situations. 1) One thread guide and pretensioner. Result: kinks 2) One thread guide, 4 turns clockwise around something and pretensioner. Result: kinks 3) One thread guide, 4 turns counterclockwise around something and pretensioner. Result: OK and nice Perhaps a few readers did not notice the implications from the first video therefore this video. I think the thread comes off the spool over the top end clockwise in most cases. If the thread comes off counterclockwise, then this problem might not be that severe. I noticed, that more youtube videos and manuals on how to thread an industrial sewing machine actually make the thread go clockwise around something in the start. I do not think this is wise, if you have got thread like this serafil 20 or perhaps more difficult thread. This is an example of such a video for a Techsew 2700 (see from 1:20): I think it should be easy to make the thread turn counterclockwise the two first places on Techsew 2700. Here is another video on a Pfaff 545. In this video the thread turns counterclockwise in the start - so it is how I like it
-
For the test of these two spools, the perimeter om the spools were 0.163 m and 0.160 m. The 6 turns each meter fits an asumption, that the thread do not have internal moments (twisting) when stored on the spool. The twisting is added by taking the thread off the end.
-
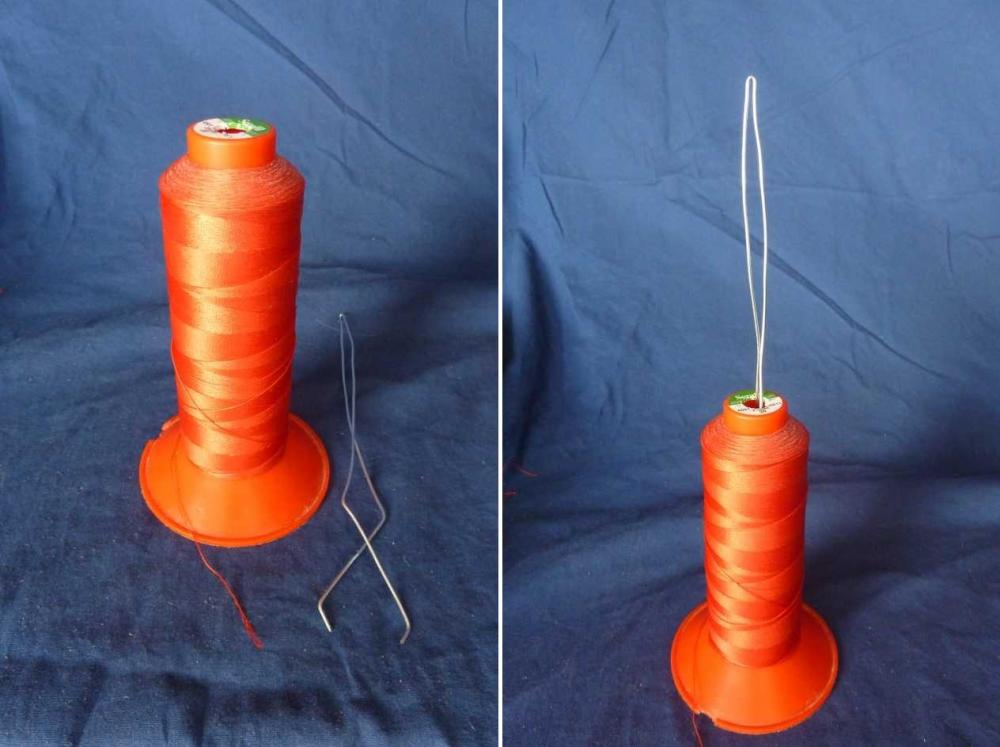
I saw this special thread stand from Australia. It has like an antenna on it: The video also tells you about metallic thread to be a challenge. The video do not have HD quality, but I think that the thread comes off the spool clockwise (i have seen examples of the opposite). Then the tread actually go around this antenna anticlockwise, when it moves forward. This should be good. I think, that this going anticlockwise around something also can be done a Little further away from the thread stand, and in a way that ads more tension. I tried a DIY version of this thread guide:
-
Sorry - I may not have been accurate here. 1:40 into the video I reveal the thread to be a tex 140 polyester thread. It is infact a tex 135. It is a Serafil 20 from Amann. And I think you got it in your second reply "size 20 thread". There might be a guide to the position of the thread guide over the spool. But in my experience it do not matter that much. It matters much more how the machine makes twisting back to the spool. Yes - the possibility is there with a row of guide holes. You can go clockwise around or anticlockwise. I did however Watch some manuals and videos for the use of them, at they may adwise only clockwise around, and this may be wrong in most cases. I noticed that for the Juki LU 1508. I have to asume, that the tread comes off the spool clockwise. Then the Z-twisting will be stronger after it comes off and off the small diameter of spool. In my video i show how ordinary thread guides and tensioners will make this twisting near the spool even worse. It will also make the Z-twisting stronger near the spool. The only way to make relief for that is to bring the thread anticlockwise around something on its way. It could be a piece of metal with a row of 4 holes. Or a steel thread parallel to the thread for some distance. That is my adwise here.
-
Do you always see the thread comming off the spool clockwise, when you look Down on it? They do on my spools.
-
Thanks for your reply, Mikesc. I am not quite sure how you mean here. Do you drill a Ø1 mm hole in the block? Is it a solid block or is it foam based polystyrene? Foam based can be extruded (XPS) or expanded (EPS). Expanded foam is most used and cheapest - I guess that is what you mean.
-
Thanks for your response, Constabulary. I am aware, that I use my sewing machines to jobs, they were not designed for. The machines may be destoyed by it. And it causes some problems for me. I describe the problems and how I try solve them, and perhaps somebody can use this information. I think that is what a forum is about. For some it will make sense for others not. I think problems with thread twisting is a popular subject in this forum. When you have got the good machine for the job, it may solve most of the problems for you without too much knowledge from the user. However I think, that a leatherworker sometimes will do a job on the limit for what his sewing machine can handle.
-
Thanks Wiz. Important observations due to color and how the thread manufacturer produce the thread. I made the "clips test" with two spools. I placed the spool at a platform near the ceiling and liftet the thread up through an eye at let the thread go controlled down to the floor with a clips on the end. For the red Serafill 20 thread (polyester continuous filament tex 135) I counted 6 turns anticlockwise each meter. It is from a 2500 m spool. I did se same for a Serafil 40 Black thread and got the same value. It is from a 1200 m spool. I suppose this could be one way to quantify how much twist you have in the spool. I did a test more regarding twist due to tension in the tread. I had a 2 m thread hanging Down from ceiling. Then I added 1 clips more on the clips already at the end. Its an extra tension to the thread of 0.0033 N. The Serafill 20 responded with 0.7 turn anticlockwise. The Serafill 40 responded with 1.5 turn anticlockwise. It is small values, so I do not think you need to take this into account as long as you apply such low weights.
-
Thanks for your nice replies kgg, dikman and nylonRigging. I hope the video will help you. I should have some of the nylon thread anyway, and then I may taste some of your more severe problems with it. I think, that all manufacturers of thread try to make the thread come off the end of the spool without internal twisting (moment) forces in the thread. But perhaps these manufacturers can vary on their quality in this regard. And perhaps even worse, that their twisting from spool vary. Anyway you should have the possiblity to actively do something about it in how your thread passes your machine and other things on its way.
-
Thanks for the reply. I have not tried the 8 oz spools of bonded Black nylon. The thickness of the thread is of cause also a factor in this. When the thread is Loose near the spool, kinks can easely form there. But the important results presented in the video is, that you in the first part of the threads going away from the spool actively can create twisting in both directions. So you should be able to avoid kinks near the spool, but perhaps you then get problems further on the threads way.
-
I know that twisting of thread is often debated in this forum. I have tried to make a video of some of my findings in that regard. I look forward to your remarks
-
Thanks Again This digital scale looks nifty. But will the minimum weights be in 10 g - NeXT 20 g ? I think you may like to measure the tension from bobbin case at some more accurate small figures. So perhaps a small scale more than this. Perhaps I should link to one supplier of dynamometers. I hope the link Works from another country. https://www.ebay.com/sch/m.html?_ssn=alpinetopline&LH_PrefLoc=&_from=R40&_trksid=m570.l1313&_nkw=dynamometer&_sacat=0
-
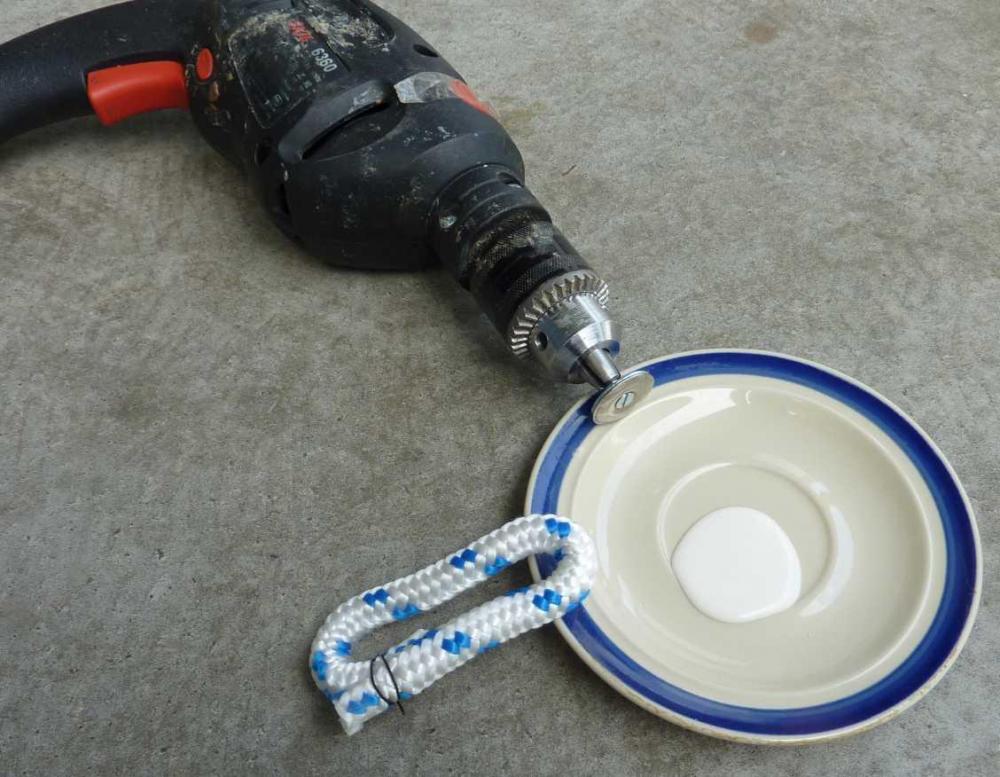
Well - now I tried the in the DIY way. I do not claim it to be right, but here is what I did. I do have some sandpaper from grit 60 down to grit 400. On the internet I have seen, that you actually can get sandpaper with grit 60000. I have got a drill, so I used that. And I have got some scouring cream. I needed to grind with the sandpaper grit 400 about 5 min to almost get off the previous marks. The result is not perfect - I know. But perhaps somewhat better than before and i think it should be more reliable. And when I measure the thread tension it seems in order. Result after Work: I made a Little video on how I use a spring dynamometer for thread tension etc. Do any of you use them? https://youtu.be/NW58ckOU6YI
-
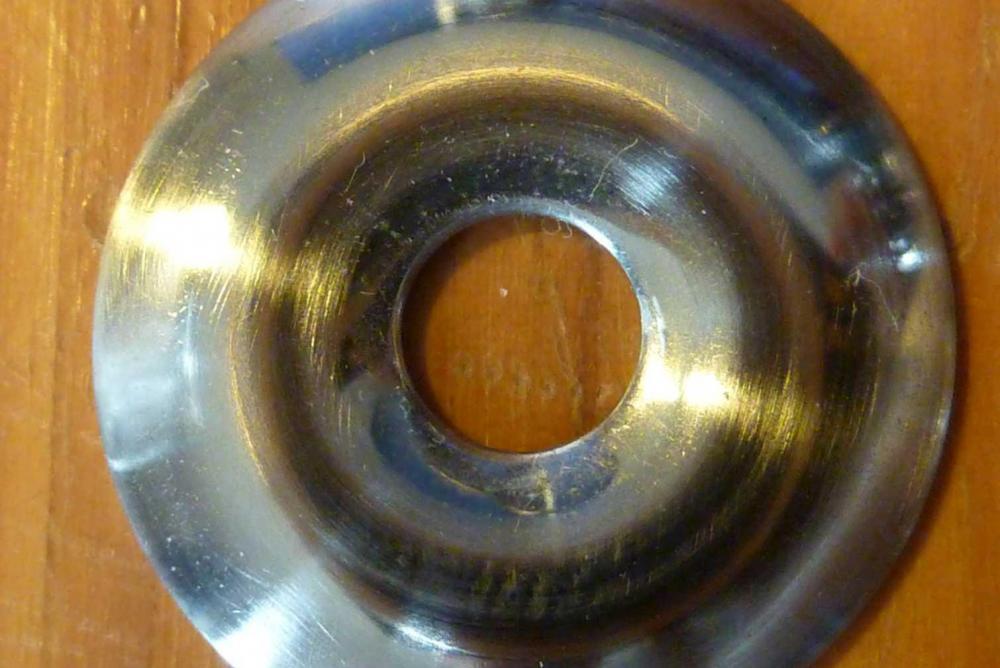
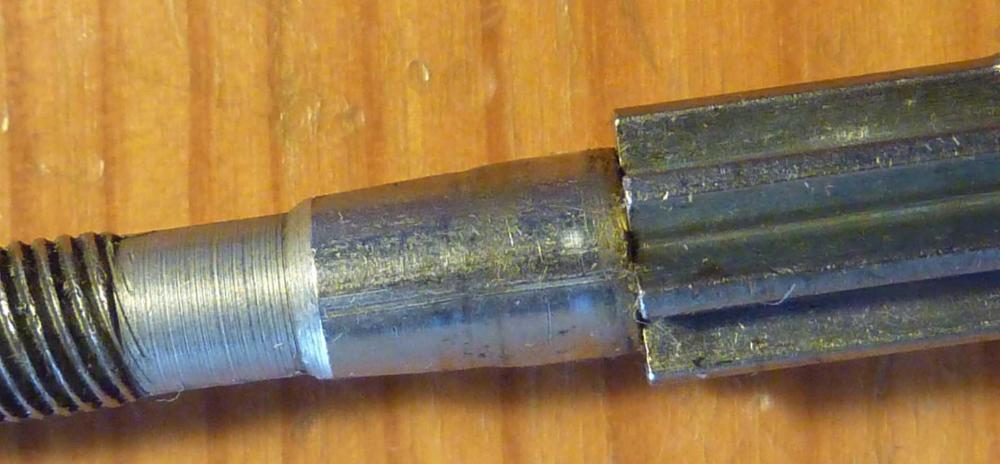
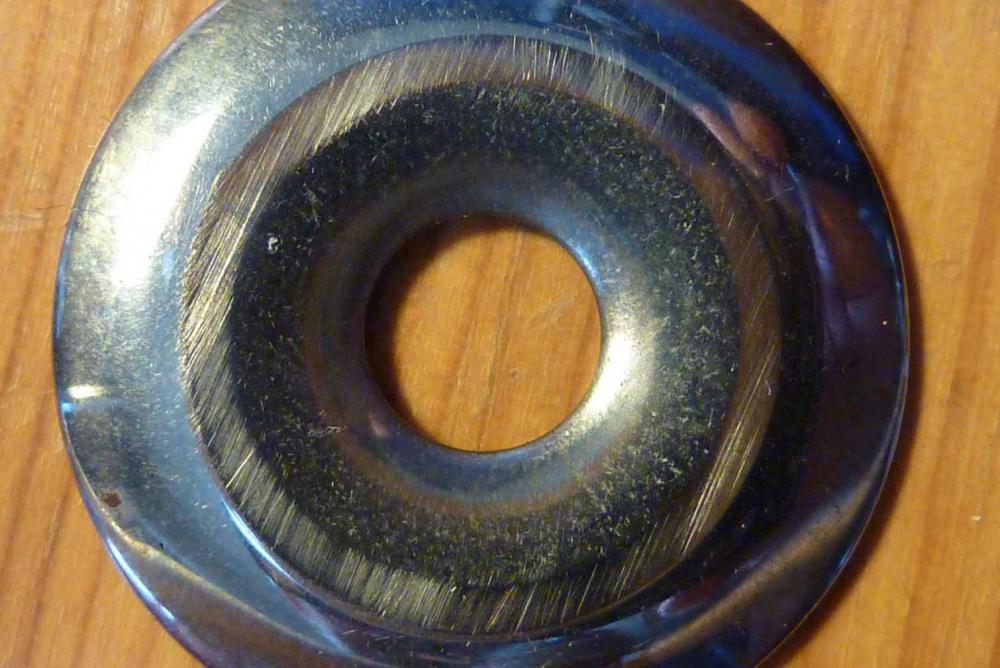
Thank you all for your helpfull remarks! First I need to say, that I think the close up and enlarged picture of the tension disc exaggerate the problem. You also have to get the right light direction to see it. The surfaces feel very smooth and the dept of the marks are way below the thinnest thread to be used. I have taken a Photo of the post in order to look for marks on it: I do not think that you see any severe wear marks from thread here. So I tend to believe, that the marks on the disc shown above are not from wear but from some kind of service. I have got this Singer 201k five years ago as well as a Singer 66k and a Singer 237. They are from different parts of my country, and i belive they have been serviced different places. However the service people may have had the same training and education. You cannot rule out what previous owners may have done. All machines use discs with the same Simanco number, 2102, but the dimensions vary a bit. All 6 discs have a flat part of the surface, like the vault have been grinded flat on the top. For me, it seems like part of the design. But it may also have been a standard practice for service personel to grind these surfaces. Perhaps the service grinding and polishing were not always done with the same care. The 4 discs on the two other machines do have marks like seen on picture above, but the grind marks are not that severe. I keep good control of the thread tension with a dynamometer, so I think I can manage until I get new discs.
-
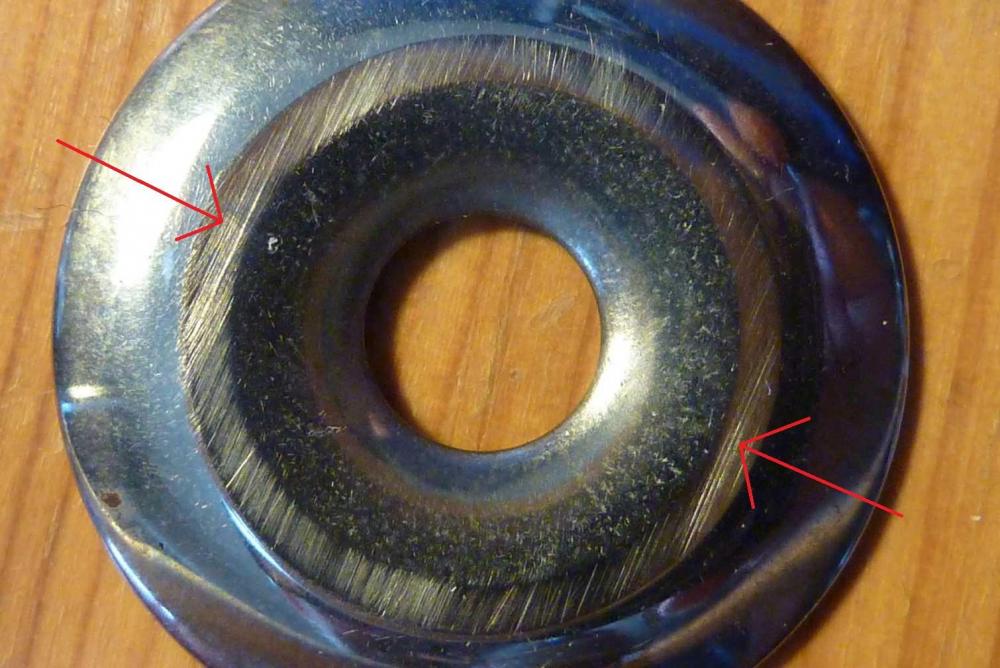
Thanks for the replies. It seems I should do something about it. I have tested the tension using a dynamometer, and it seems stable while pulling the thread. Now i have started to Wonder regarding the wear. Try to look at the Picture Again - now I put some arrows in it. How can it be, that you see wear marks like this in the parts of the discs indicated by the arrows? The thread passes from outside to around the center and then to outside Again. So you should not have Wear marks like this. Can these marks have been made by the manufacturer to make some more flat areas for the pressure on the thread?
-
Do you replace, grind or polisc your tension discs, when you notice some wear on them? I studied my tension discs. You can turn the disc until you get the right light direction for looking. This is my close up picture of one of them: You do see some grinding marks from the thread. I do not think, that I have got any problems using them. Then I compared to a picture I found on internet, and those discs seems to have been weared even more: https://oldsingersewingmachineblog.com/category/vintage-singer-sewing-machines/page/2/ So is this a problem at all?
-
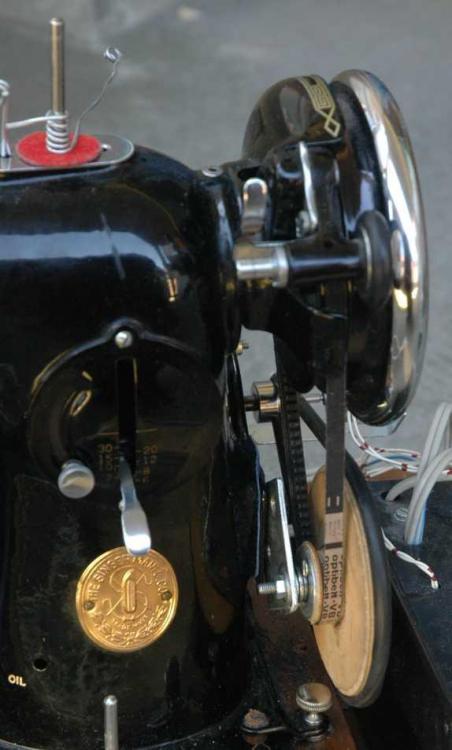
I agree, that it is not common. I have been warned, that the extra stress on the machine may ruin it. I take the risk. Anyway. I think you can get very high momentary stress on the machine with high speeds, when suddently the hook hits the needle, or when needle hits the needle plate. So in this way gear down can help by reducing speed I did actually notice other people have reported gear Down on domestic machines: http://danielbauen.com/make/index.php/cool-tools/speed-reduction-for-a-belt-drive-sewing-machine/ https://forums.mtbr.com/bikepacking-bike-expedition/vintage-sewing-machines-diy-bikepacking-gear-948319.html (somewhat Down in thread) And some Kenmores have in build in: https://softsolder.com/2014/07/18/kenmore-158-flipping-the-pulley/
-
Thanks Wiz - yes please. Could I do this in some other way?
-
1.5 amps motor on a walking foot
Gymnast replied to LeatherLegion's topic in Leather Sewing Machines
Hello Dikmann. Can you provide me with what kind of servomotor, you have got here. I like to look into the specifications/manual. I am interested in the shaft power of the motor and the weight of the motor. I do know something about electromechanics, and I do wonder about why these servo motors for sewing machines are that big. My guess is, that this servomotor could have an input max power of 550 W but an output max shaft power (continous) of about 300 W. And the motor weight is 5 kg? For general industrial servomotors like I link to below. you can get a motor with 200 W continous output power and 600 W peak power with a weight of 0.86 kg. However I think the shaft RPM is high. http://www.allaboutmotion.com/wp-content/uploads/2013/12/Parker-Aries-Brochure.pdf


