-
Posts
197 -
Joined
-
Last visited
Content Type
Profiles
Forums
Events
Blogs
Gallery
Store
Everything posted by bob21804
-
It would probably be a one time project, or a few at most, and I'd cover it with plastic wrap before applying the wet leather. At least that's how I imagine I'd proceed with it.
-
That's awesome. Love it. I have a couple really cool, old wooden Tibetan masks hanging on my walls, that I occasionally think about wet-forming leather over, to reproduce. (Another aspect of leatherwork for me to learn about).
-

My Latest Cellphone Case
bob21804 replied to bob21804's topic in Purses, Wallets, Belts and Miscellaneous Pocket Items
I'll briefly break down few methods I used on several phones, and the results. On the first one (my own) - Used some of that heavy, clear vinyl, like grandma used to cover her sofa (kept the sofa clean, but God, was that uncomfortable), to make little pockets to hold the phone in place. Glued and sewed the pockets to the case. It was kind of clumsy, looked ok, but eventually the pockets tore. I won't use this again. Next tried a dollar store rubber case made to fit an iPhone. Glued (Barge) that into the case. I checked with the girl I made it for, a few times, over a couple months. She said it's held up fine. I would use this again, (If a dollar store rubber case is available for the phone you're making a case for and #4, (below) isn't an option). Made the custom holder using Kydex - Barged in place - I think it looks quite professional, but adds a little more time to the construction. When I didn't have the phone on hand when forming the holder, it was common to have to reheat the Kydex and make adjustments to get a very good fit. It's really best to make sure you have a perfect fit before installing it in the phone, I think. Definitely a good choice, but does ad a little more time. Last version - Many people have a fitted plastic case for their phone, which is very similar to the dollar store rubber one mentioned above. Rough up the parts and Barge together. If this is available, it's my first choice, as you're guaranteed a perfect fit and it reduces the build time. My next version, I plan to experiment with a case I already made for a friend. I'll cut a hole through the back of the case, and sew around a 'window", so he can use his camera without removing it from the case. I've taken a week off leatherwork, trying to get the jungle (my backyard) under control, and I'm really itching to get back to work. -

My Latest Cellphone Case
bob21804 replied to bob21804's topic in Purses, Wallets, Belts and Miscellaneous Pocket Items
It's 4 - 5 ounce. The lining is a thin pigskin. -

8x11 Fully Carved Notebook
bob21804 replied to Bob Blea's topic in Purses, Wallets, Belts and Miscellaneous Pocket Items
Thanks for the tips, Bob. Ill definitely try to incorporate as many of those suggestions as I can. It would be great to take live classes from the real experts. I have taken one class at a Tandy store recently and one of Mike's online classes. Both were beneficial and I plan to take more very soon. Along with all the practice I can fit in. I appreciate you taking the time to pass on the advice.- 21 replies
-
- floral carving
- basketweave
- (and 5 more)
-

8x11 Fully Carved Notebook
bob21804 replied to Bob Blea's topic in Purses, Wallets, Belts and Miscellaneous Pocket Items
I was actually planning to post against and ask you besides practice, practice, practice, what other recommendations do you have for someone who wants to learn to tool leather as well as you. But I guess practice is the best advice. Thanks.- 21 replies
-
- floral carving
- basketweave
- (and 5 more)
-

Pipe & Tobacco Pouch
bob21804 replied to Chief Filipino's topic in Purses, Wallets, Belts and Miscellaneous Pocket Items
Very cool pouch. I could think of several things a pouch similar to that would come in handy for. What type and weight leather did you use for it? -

Steampunk Phone Holster
bob21804 replied to Airth's topic in Purses, Wallets, Belts and Miscellaneous Pocket Items
Very, very nice. I really like that a lot. Beautiful work. -
I've had a guy ask me about doing a couple helmet shields, that he'd like to give as gifts to his firefighter buddies. I've never done one, and know nothing about them. It'll probably be at least a few weeks before I can get started on them, so I'm hoping you guys can fill me in on making them. He'd like them to each have a large 2-digit number, the guys last name and a carved design/symbol. I could find some general info on ones being offered for sale online, but no details about how they're made. The type he'd like are called "Boston Front". I found a website that offers Boston Front shields, as well as "traditional" ones, but again, no info on the construction. To start, I'm wondering things such as: Am I right in assuming vegtan can/should be used? If so, what weight is usually used? The pics I've seen look like they may be done with a couple layers glued and sewn together. Is this right? How are the large numbers and names done? Are they cut through the top layer? Process? Can anyone break down the steps of constructing these, or point me in the direction of a thorough explanation or tutorial? Any other info you think would be helpful... What is a normal charge for making these? (I'll give him a good deal, as he's a friend, and these are my first, but I don't want to undercharge too much) Like I said, I have some time before starting these, so I'm sure I'll have more questions. Bob
-

8x11 Fully Carved Notebook
bob21804 replied to Bob Blea's topic in Purses, Wallets, Belts and Miscellaneous Pocket Items
Wow Bob, that's some beautiful work. Gives guys like me who are pretty new and barely mediocre when it comes to tooling, inspiration to improve.- 21 replies
-
- floral carving
- basketweave
- (and 5 more)
-
Gotcha, but "funny" isn't the word I'd use to describe it. Sometimes it seems like half the people on the road are either talking on their phone or texting. How bout "scary" instead. I've seriously been thinking about making a sign to hold up to people who I see driving while using their phones. It makes me mad that they're so willing to put me and my loved ones at higher risk on the roads. Also, I agree 100% with what Matt said about YouTube, (and the internet in general), making it so much easier for us to learn leatherwork. But I also agree with what Jeff alluded to - all this tech can, and is getting out of hand. I like things simple when possible. No smart TV (or any TV for a while now) for me, and I don't miss it a bit. Definitely no "Smart TV/Smart" appliances in my near future. Technology has made possible some really great tools, but it's a mistake to depend on them.
-
I like YouTube videos for the most part. I like to say - "I think I could learn to do brain surgery watching YouTube". And between YouTube and this website, I've improved my leatherwork quite a bit in the past few months. (Most recently it's been more website and less YouTube) Different people learn in different ways. It helps some people a lot to watch every steps someone else does, to get the details of how to do it properly, or the best way to do a seemingly simple task. If they're really unsure of how to do a it, it might help them to see every detail. But yes, a 45 minute video to watch a 20 minute task being performed seems to be a bit much. Now, I can watch and learn, but I really don't learn best until I actually do whatever it is with my own hands. Yes, some YouTube videos are much too drawn-out for my taste, (and it may-well depend on the subject, and the familiarity I already have with it) and when I start feeling that way I move onto a video is better suited. I love to learn all kinds of stuff, and I look at YouTube videos as ONE good way to increase my knowledge of a subject. And of course, books, asking questions of those who already do whatever-it-is well and actually doing are great tools and methods too.
-
That's one book I've been wanting to pick up - to add to my growing leatherworking library.
-
Absolutely! Jeff helped me out IMMENSELY when I was working on my holster. Incredible.
-
Cool. I never would have thought of that solution. Good thing it was too long rather than too short.
-
Well, no doubt, it's a damn pretty Frisbee! Ahh, yea, practice on a scrap piece... something I bet we've all remembered at times, after it was too late.
-
I was out with my granddaughter for a while, but peeked in from time to time. Thanks, Dave and everyone, I appreciate the compliments - so glad I asked for advice before starting. (and during the build, Jeff set me as straight as he could, numerous times) I know it all made a huge difference. . And I like the fancy gif too (as well as the belt strap idea) - that's a help... I punched and cut out the belt slots (all from the front) towards the end and sewed them separately - obviously now, not the best method. Alex, I'm kind if afraid if I tried my slots like you do (punching 3/4 thru from the front, then finishing from the back), I'd mess up and misalign about 2 1/2 scootches, one way or the other, and end up screwing the whole thing up. But I bet you have a system for that.
-
Got it. Man, that's nice. Purty basket weave!
-
Thanks, Alex. Great suggestions. Now that I look at it after reading your comments, I see exactly what you mean about centering the slots between the stitch lines. I agree that would look great. I didn't cut the slots until the perimeter stitching was done. I'll give it some more thought before my next one. I also like the idea of bending the ears in some when wet-forming... makes sense. Are you saying the green cutting board causes the color of the leather to look different when taking pix? If that's it - I never realized. Thanks for the heads up Bob.
-
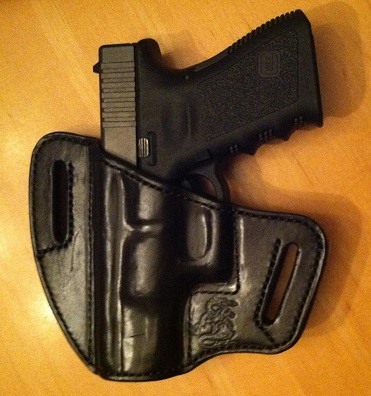
Thanks a lot guys. This was definitely a project I has a bit of apprehension about tackling, but the support here is AMAZING, enabling me to pull it off MUCH better than I would have without. I wish I had found this group the first time I got into the hobby a few years ago. I likely would never had set it aside. Jeff, I was pretty daggone precise with the glue. (I used the cut-up paper pattern as a guide when gluing and marking stitch lines as suggested in your instructions. I may have been able to go in a tad deeper when shoving the gun in to mold, and my buddy (the gun owner), may also have been able to shove it in deeper when he took that last pic. I think, when cleaning up and burnishing the slots, I may have opened them up just a "frogs hair" wider than needed in places (a new unit of measurement I learned here ) One other thing I'll mention, I'm glad I made this lined, and that I used the combo of 3/4 and 4/5 oz. as suggested by Alex and Jeff. I really like the sturdiness of it. The new owner seemed to really like it too. I told him he needs a matching mag holder now.
-
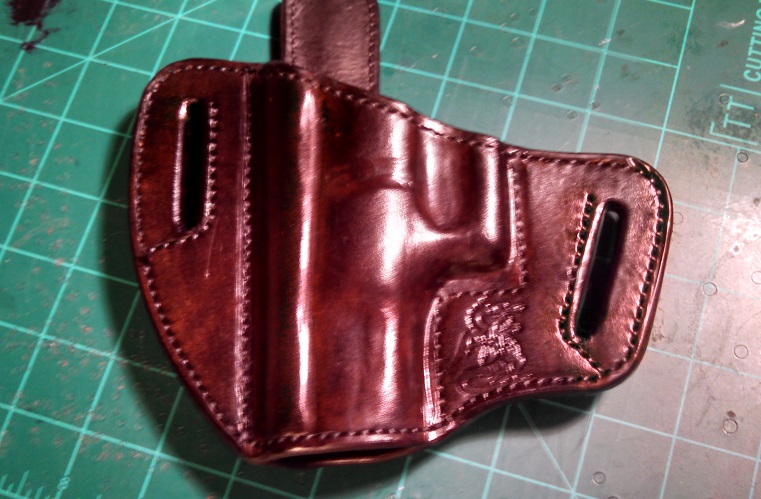
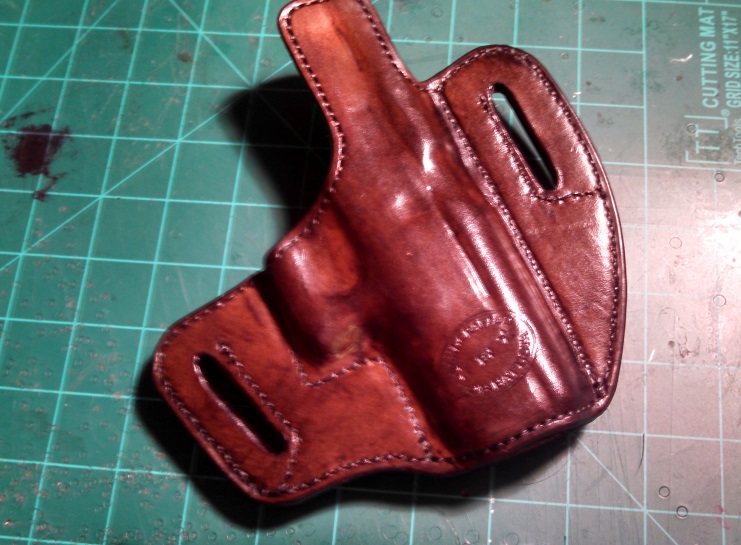
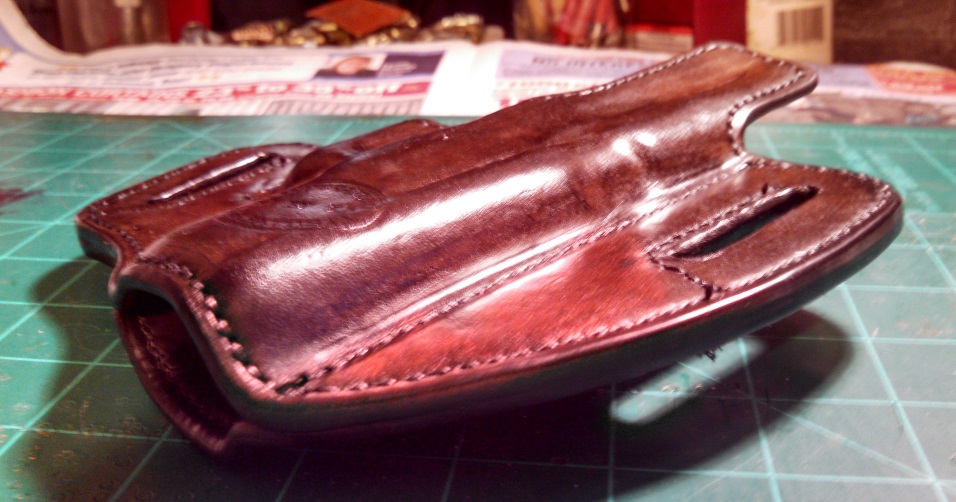
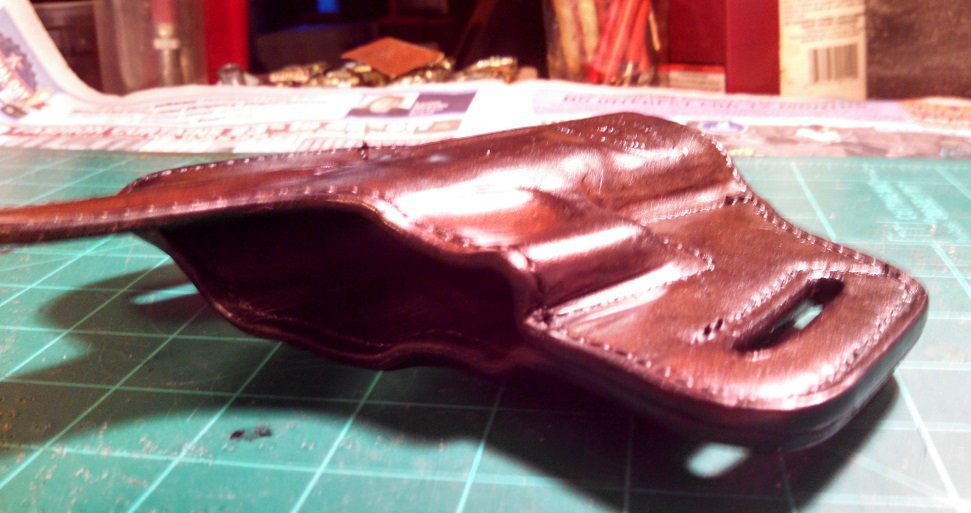
Figured I'd post a few pix of the holster I made after starting this thread. I know it's not as pretty as the ones you guys who gave me so much advice have done, but it is my first, and I'm pretty happy with it. I took the pics without the gun, this morning, with my phone, and they came out a bit light. The antique black does have brown running throughout it, but not as much as the pix show. The guy who I made the holster for sent me the other pic - with the gun. That one came out looking much different. Thanks a lot for all the help. it really is a appreciated. I could type a million thanks and more here, but I'll just post these pix now, and say I'm looking forward to my next holster. I really enjoyed learning the process, methods and techniques and looking forward to the next one being even better. Bob
-
Wow, that's a really nice idea. I'm assuming the dad had passed and using his favorite shirt was a way to keep him close. I'll be making a few items for a lady who lost her mom about 6 months ago, and I may suggest that to her. Either way, i'll definitely keep my eyes open for vintage material for linings. I really like the idea. Thanks again.


