Stetson912
-
Posts
1,441 -
Joined
-
Last visited
Content Type
Profiles
Forums
Events
Blogs
Gallery
Store
Everything posted by Stetson912
-

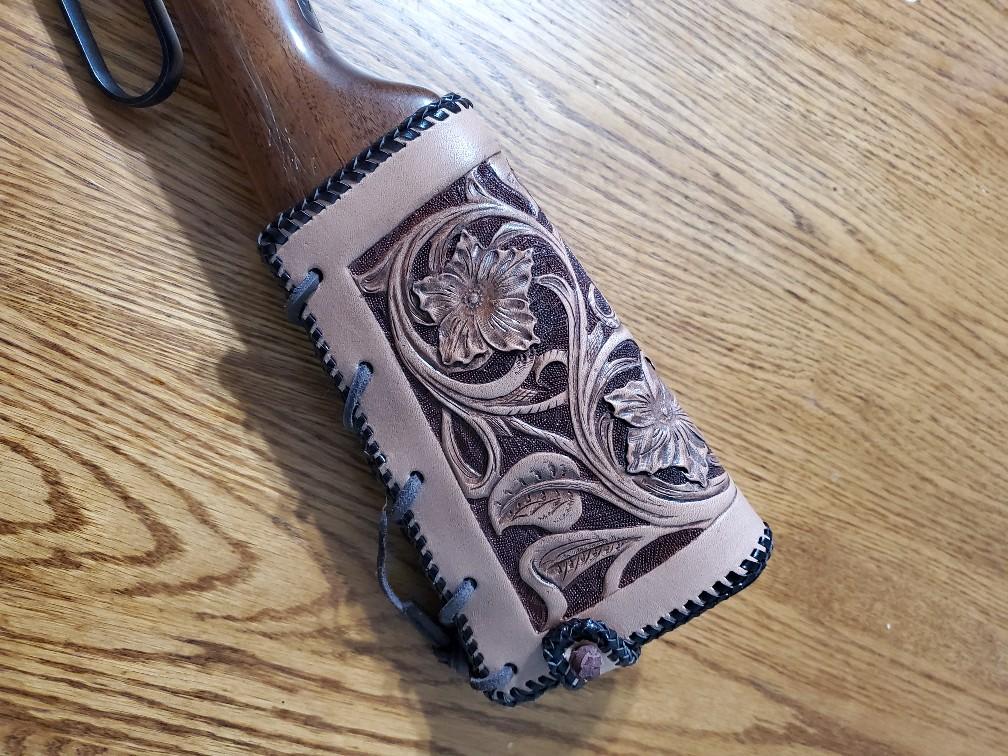
Finished lever gun butt stock cover
Stetson912 replied to Stetson912's topic in Gun Holsters, Rifle Slings and Knife Sheathes
Thanks it was fun to do. Thanks Munky, it was a lot of back grounding. But turned out ok I think Thanks! I don't know. I made it for my uncle. No complaints yet though. I did skive it a little thinner than the leather i used for the rest of it. I wouldn't think it would be uncomfortable. I didn't fire it but I shouldered it and it felt about the same as normal. His is also a .357 mag instead of a 30.30 like mine -
Hans atelier on youtube has two videos making very similar airpods cases. Along with patterns. You may want to look it up. I think that design is actually done by him as well
-
Finished lever gun butt stock cover
Stetson912 replied to Stetson912's topic in Gun Holsters, Rifle Slings and Knife Sheathes
Thanks! Fun project Thank you. -
All I can think of for chrome tan is edge paint. Which I'm still figuring out myself. Edge kote (a feibings product) might work also. There are lots of types of edge paint, but I personally use indelible brand from makers.
-
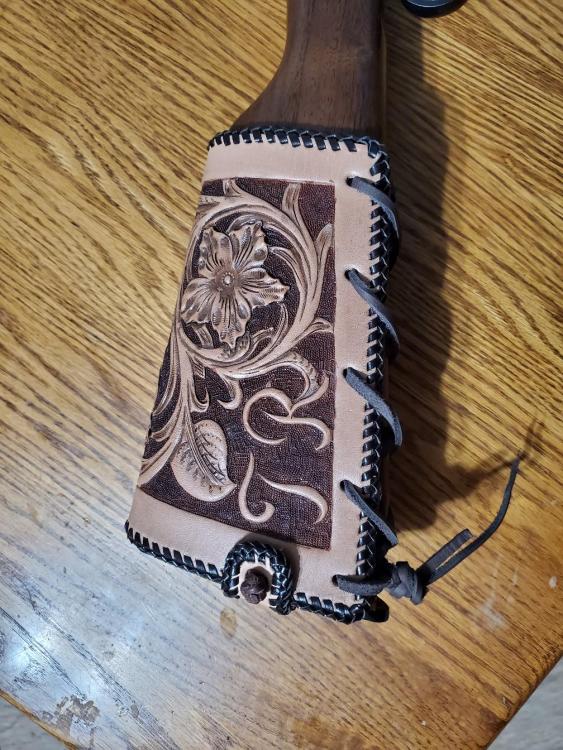
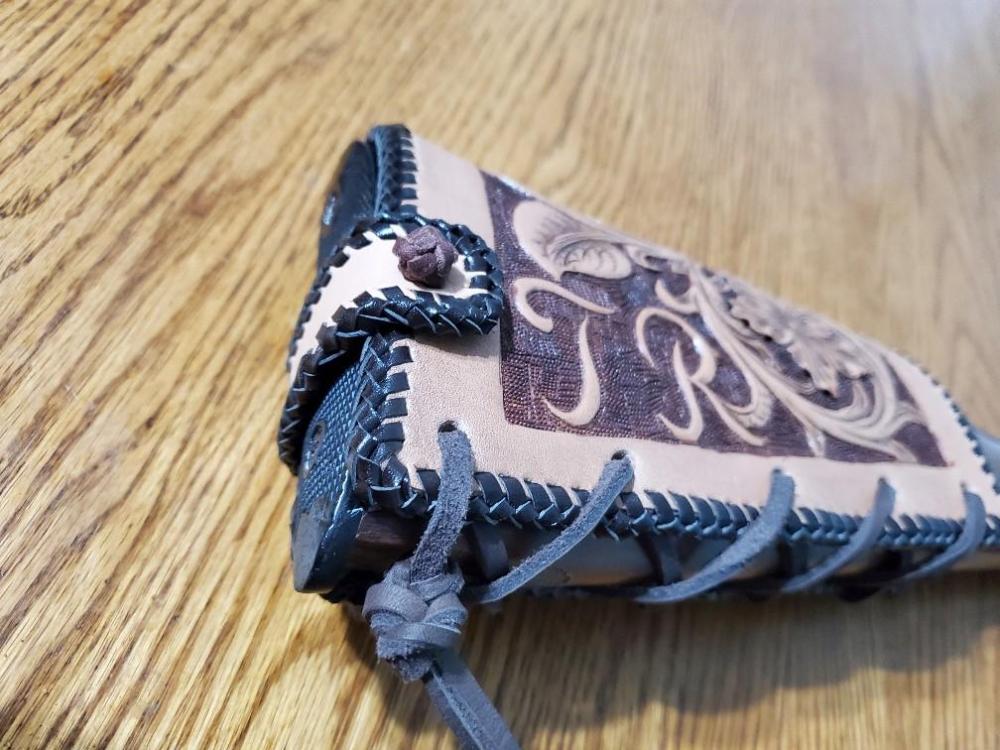
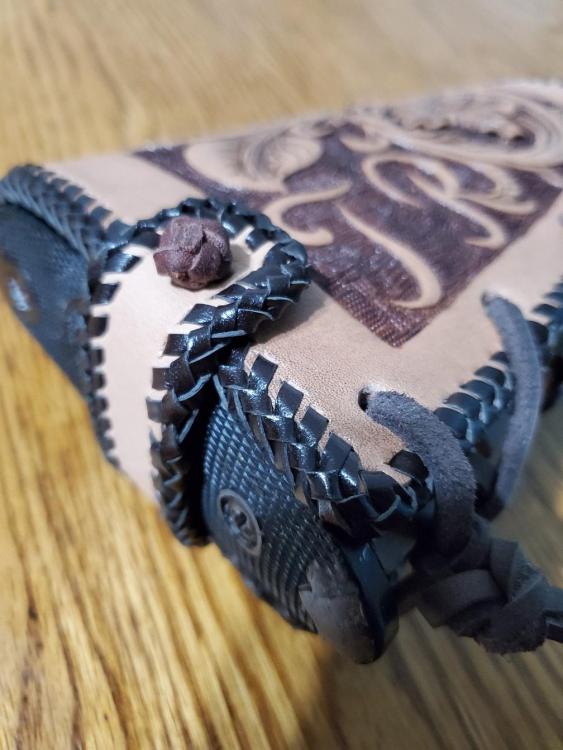
Finally finished this stock cover for a model 94. 100% leather construction. Lined with deerskin and laced together. Even the back strap is laced in and tied off. I'm happy with how it came out, especially since I dont own a lacing chisel haha

-
Well, that's frustrating. But, I have had that problem before as well. What I did, depending on how much more room you need, is I took a spade bit the size of my snap and drilled out the depth I needed. If you have a french skive you can do much the same thing. Basically the idea is to cut away a circle of leather just wide enough that your snap sets lower than it would. And, if you are worried about the line coming up, stitch around the snap. Unfortunately 7/16 I think is as long as they get. You could try and separate the layers and set the snap between the layers as well. But you wouldn't be able to use the cap part, just the flat base post for both sides of the snap. Anywho, hope my experience with your frustration helps a bit
-
Hope it works out for you
-
Looks great. Nice job
-
Well if it were me and I had to rely on math, I would do this for a starting place: Leather dimension = phone dimension + phone thickness+ 2x leather thickness + 2x stitch allowance + extra If needed. I would make the width of your case 76mm + extra (maybe 8 mm?) Total 86mm. Obviously this isnt exact and may vary a bit. But should get you close. The extra to add will depend on how loose the phone needs to be. Then do the same for the height. That being said, I would recommend making a blank. You can make one out of leather scrap too if you need too. And cardboard works well also for basic shapes like most phones.
-
Bummer, I also stopped ordering from them.. well leather anyway. I got some caiman and its junk. Still rawhide in the middle and damn near impossible to cut. I get what I need elsewhere.
-
Chrome tan? Card wallet
Stetson912 replied to Stetson912's topic in Purses, Wallets, Belts and Miscellaneous Pocket Items
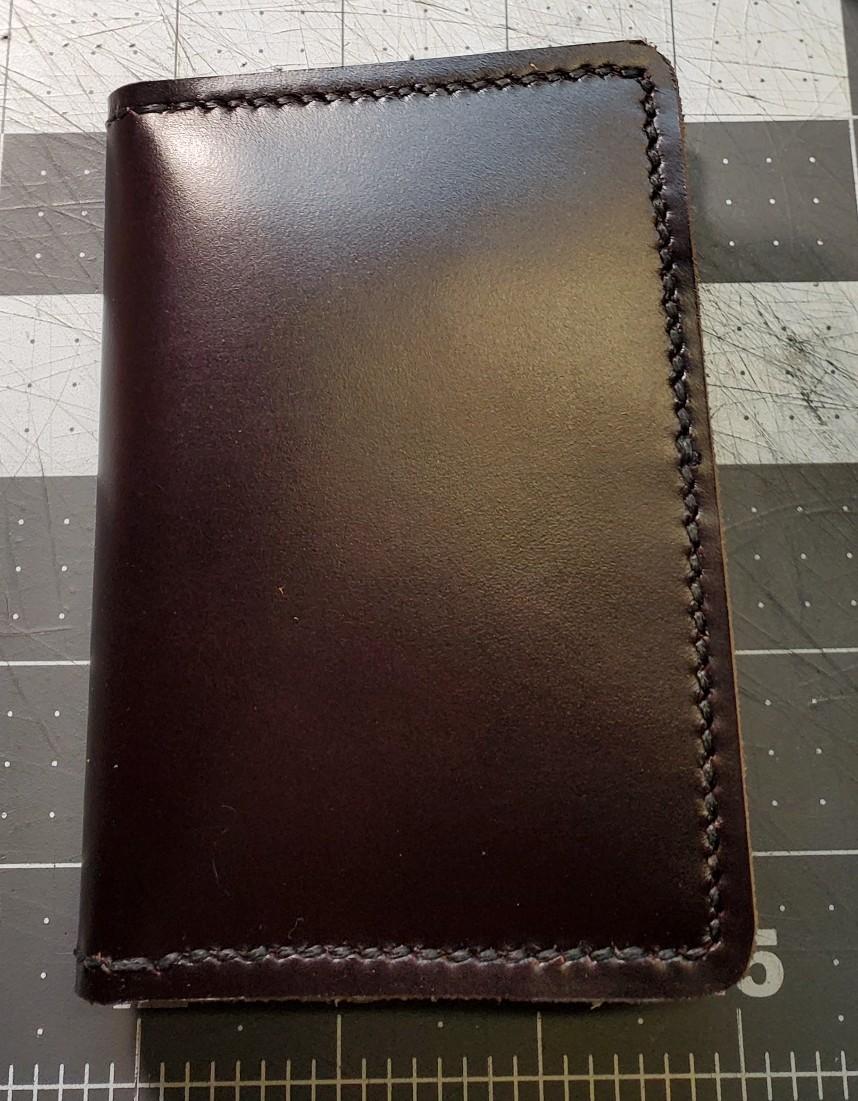
This is 3/4 oz. Probably closer to 4. I got it at makers leather supply. I'm not sure if they still have it or not as I got it a good while ago. I know what you mean about it feeling flimsy. Some leathers are softer and others have a firmer feel. I would give it a go with what you have and see how it comes out. This wallet has a t slot and bottom pocket on a panel to make the card pockets. That assembly is then stitched to the back. So it is essentially 2 layers of 3 oz or so and that can stiffen it up a bit. -
Tote bag
Stetson912 replied to Dunluce's topic in Purses, Wallets, Belts and Miscellaneous Pocket Items
Very well done. Linings are always a nemesis of mine. That came out great! I'm sorry she didn't accept it but I'm sure it won't be hard to sell or give to someone else! That's a lot of work there. Good job -
Not too shabby haha nice work
-
I recommend you learn to splice in lace. This way you can work with manageable lengths and not waste time dragging 50 feet of lace through 100 holes. Bruce Grant's book is a great braiding resource as mentioned in the above comment.
-
Chrome tan? Card wallet
Stetson912 replied to Stetson912's topic in Purses, Wallets, Belts and Miscellaneous Pocket Items
If your vertical pockets are too tight there are 3 things I'd suggest you try. 1. Depending on your leather thickness (mone is all 3 oz) you may need to skive down the sides and bottom of your pockets to thin them out a bit. Extra bulk will make them tighter. 2. It looks like the stitching on the left side of your vertical pockets has a sizable seam allowance. I would recommend making your stitching guideline 1/8 to 3/16 of an inch. 3/16 is my preference (about 4 mm) this will keep the stitching from encroaching the space of the card pocket preventing the card from being inserted easily. 3. Finally, simply make the card slot bigger. You need to account for the thickness of leather you are using for the pockets as well as your seam allowance. Try measuring the card width (should be about 2 1/8 inches) then add twice your seam allowance plus leather thickness. So using 4 oz leather that is 2(3/16 + 1/16)=1/2". Add this to the measurement. The width of your card slot (as a starting point) is 2 5/8" wide. If using 3 oz possibly 2 1/2" would work. -
Chrome tan? Card wallet
Stetson912 replied to Stetson912's topic in Purses, Wallets, Belts and Miscellaneous Pocket Items
Thanks. Me too. Dark cherry I think it was called. Thanks! Double creased -
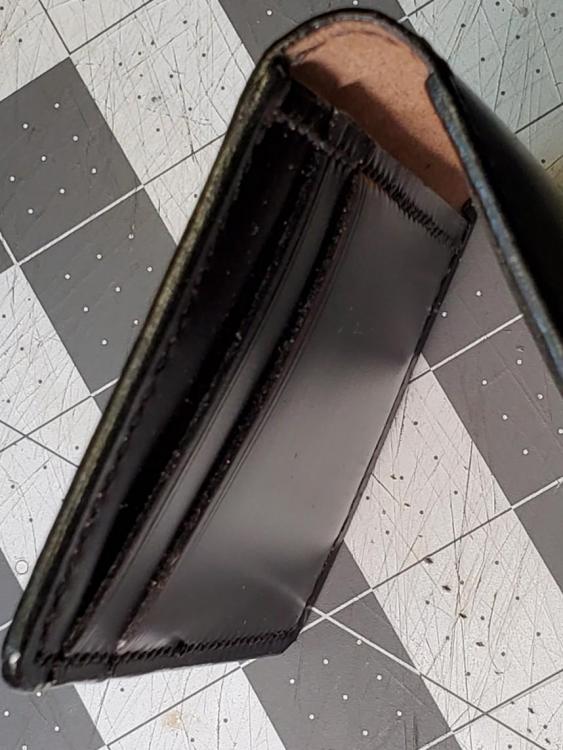
I usually use chrome tan as a liner instead of the main body of projects. But this stuff was really nicely finished. So I made this card wallet. Thanks for lookin! Critique always welcomed too.


-
Crocodile / calf leather duffel
Stetson912 replied to motocouture's topic in Satchels, Luggage and Briefcases
Well done. Per usual haha. -
That's interesting. I wasn't aware of that product or I'd forgotten. The gel certainly makes it easier to transfer the color to the leather. But it also inhibits the spread of the color when dropped onto the "size". But that seems like a fair trade for the convenience.
-
Sealing Flesh Side of Leather after Dyeing with Angelus
Stetson912 replied to BillCody's topic in How Do I Do That?
Dwight's advice is good advice I'd listen to it. He is a very knowledgable member of this forum. I also use resolene almost exclusively ( I like mop n glo too) and have sealed the interior of holsters with it. I've also heard of but not tried saintjoy's method. I've heard of this method being used with tan kote. My advice is to try both methods and see which you like best. Test on scrap first... I'd hate for you to mess up a project (been there!) -
This was a while ago. I used a jaquardmarbeling kit that came with 6 colors and everything else you need. I followed the instructions that came with it and it worked out well. Jaquardproducts.com should have the kit. I just floated the leather on top as I would fabric or paper. Let it sit a minute or two then took it out and gave it a quick rinse to get extra pigment off. Let dry and seal.
-
Thanks. Much appreciated
-
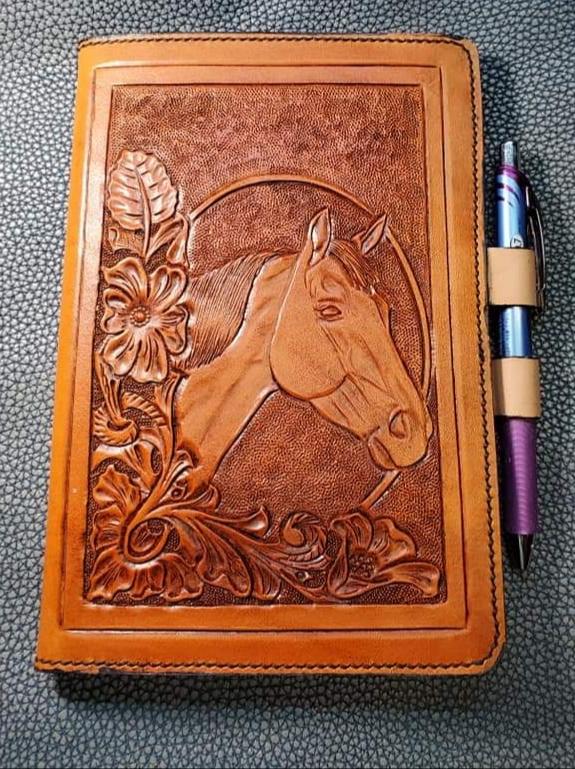
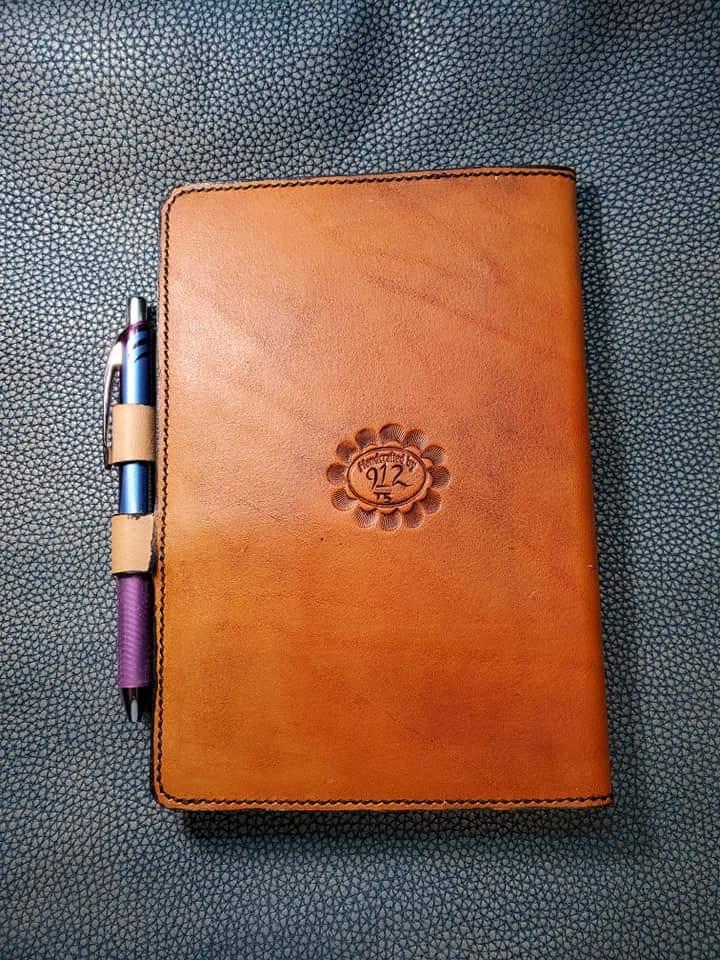
I have been working on this project for a good while. it's nice to be able to put it to rest. But I always like feedback and critique on my work so ill share it here. The actual padfolio pattern I designed myself to test it out. Fits like a glove too haha. Carving pattern courtesy of Jim Linnell at elktracks studios.


-
HA! That's the $#!% right there. I like the humor behind it.
-
A couple of Christmas gifts
Stetson912 replied to airplaneguy's topic in Furniture: Inlays and Upholstery
That is very nice. I wouldn't know ol w where to begin on something like that