cdthayer
-
Posts
483 -
Joined
-
Last visited
Content Type
Profiles
Forums
Events
Blogs
Gallery
Store
Everything posted by cdthayer
-
I think that should be "Emdeko" with an "o". Google "Emdeko" for a bunch of returns. I've serviced one or two Emdeko domestic (household use) machines. I think they were imported by Brother. I've not ever heard of any Emdeko Industrial Machines. They seem to be as good as any of the other vintage Japanese machines, and should sew light garment leather as well as any of the vintage domestic machines.
-
I came up with a stripped Durkopp Adler K205 990017-370 hull/parts machine that may have a few parts still useable on it. The handwheel, face plate, and most of the hook assembly are missing, and it is rusted up badly from lying outside in the weather for several years. There may not be anything to salvage on it, but who knows? I've doused it with sewing machine oil since taking the photos, to help loosen it up for parts removal, and will give it another shot of oil from time to time and let it soak. I'll sell parts off of it, or the whole thing as one piece. I'll take $50 for the whole thing, but no shipping, pick-up only. I'll ship parts, if they're any good after I get them off. Like I say, it's a basket case, so it'll take a lot of work and money to try getting it to sew again, and I'm not sure that wasn't irreparable when it was last touched. It came out of a local factory, was sold at auction, and was acquired by a local Salvage Dealer. As-is, no guarantees. CD
-
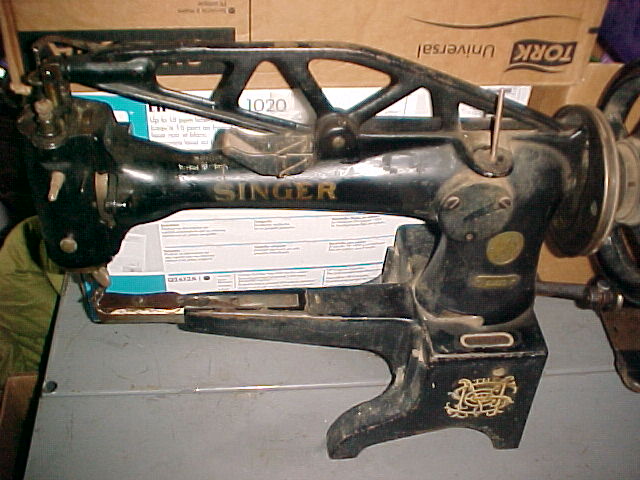
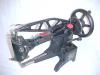
Beener, How are you coming with getting your machine adjusted to sew? I finished my clean-up on the 28k70, and have it sewing (at least by hand crank). I never will get it to look as good as your 29k58, but it's useable now. The Stitch Regulator and Check Lever are pretty well worn, and the Bobbin Winder is pretty sloppy, but everything else is in pretty good shape. I have a Stitch Regulator coming for it, and I dressed the thread notch down in the Check Lever eye so thicker thread won't snag. As a side note, I hadn't noticed that the Needle Bar Driving Lever (top arm) on mine was from an earlier model, probably a 29-4, and it doesn't have the adjustable Check Lever feature that is on the later models. It seems to sew ok with this arrangement. Nice thing about these old machines; parts will interchange on them. CD
-
Belt Tips/Idea for Singer Model 27 Treadle Machine
cdthayer replied to bevelededge's topic in Leather Sewing Machines
The early traditional belts were made of leather, but now we're starting to see mostly synthetic leather belts, at least for the domestic class of machines. The synthetic belts are very uniform in size and seem to work just fine. They tend to come in "Good", "Better", and "Best". I like the "Better" ones myself, because the price is right. You'll need a 3/16" x 72" belt for your domestic machine. It will be too long, so you'll need to trim it off to fit as Art mentioned. They come extra long so they can be cut to fit the particular machine and treadle stand that they're going onto. The clamp to make it continuous is similar to a hog ring, but smaller and without the sharp points. Actually, from what I understand, the early belts (and some current leather belts) were strips of shaved hair-on skin cut and allowed to cure. The process caused the hair side of the skin to "roll under" exposing only the flesh side, creating the round belt. There's no doubt more to it than that, but I don't have any details. If you look closely at some of the larger industrial treadle belts, you can sometimes see a little of the shaved hair side showing. CD -
Very nice job! Your machine really came out nice! I'm "cleaning up" a 29K70, but I won't go as far as you have gone. I'm just going to get mine functional for home and remote use. I have another one at the shop that is not pretty, but functional (see my avitar). The base for it is painted dull green, but it doesn't hurt the way it works. I painted this base flat black to cover up the sparse white paint that a previous owner had sort of "applied". I've got the moving parts of the head soaking with a generous application of sewing machine oil to get the grime loosened up a bit, then I'll be able to determine what is grime and what is rust. Sometimes, what looks like rust is actually old dried oil. I use a Dremel tool w/wire brush to clean the bare metal parts. It especially works well in bolt threads. (Just keep it off of any painted areas.) I just hope that I don't run into any really stubborn screws when I start taking things apart. Some of these old machines have never ever been disassembled for a good cleaning. This one's a 1943 model, and I don't even know how long it's been since it was last used and/or oiled. CD
-
I think Singer may have used the term "dressmaker" in some of their advertising for the model 201, as a means to promote the machine as being the perfect thing for ladies who made their own dresses. However, I don't have any printed proof to back it up. It was one of their finest models, and quite suitable for the home dress maker. I've heard the term used in association with the 201, especially by the older ladies I've talked to that bought one of them new years ago, and by reading internet posts by former Singer Salesmen. CD
-
Years of tightening and loosening the clutch to wind bobbins, if oil wasn't applied to the threads every once in a while, would wear the threads down to where they fit a little "sloppy" and back off with use. An old remedy was to wrap sewing thread around the threads to gently "jam" the threads. Put some oil on the threads and your added "thread wrap" to help slow down additional wear. Plumber's Teflon thread tape works on the same principal, and provides both the "jam" plus the lubrication. CD
-
Or, it might not be the correct BC. Those get lost often, and someone may have put one in that was almost the same, but not quite. Compare yours to the one in the parts manual (page 6), although the photo may not give you enough detail, and see if anything catches your attention as being different... CD
-
Some of the older Singer 31-15 machines that were originally set up for treadle operation did have the "stop motion device" on them that TwinOaks referred to in an earlier post. It's a threaded knob in the center of the handwheel that allowed the user to treadle the bobbin winder without turning the machine mechanism. Not all 31-15s have it, and I can't see the end of the handwheel of your machine to see if it has it. The way that your machine is acting, and looking at the size of your handwheel, it may have the stop motion knob on it. The fix would be to simply tighten the knob (right-hand thread) more with your hand. The fact that the machine sewed fine for a while and then started acting up could just mean that the old debris on the shaft under the handwheel finally broke loose. Download the User Manual for the 31K from Singer at http://parts.singerco.com/IPinstManuals/31K.pdf to read about using a stop motion device (and see what it looks like - on page 4), or a Parts Chart for the 31-15 at http://parts.singerco.com/IPpartCharts/31-15.pdf (page 4). Not all BCs (bobbin cases) had the "latch" built into them that hold the bobbin in when the BC is tipped, especially the older ones. Runaway bobbins were probably what spurred the development of the latch, but I don't know that as a fact. It's basically just a tiny extension of the release lever that pivots in to jam against the edge of the bobbin. The BC may not be latching securely onto the hook shaft due to wear on both the latch and the pin, or simply just "not holding your mouth right". Some BCs can be a little cantankerous about being inserted "just so". CD
-
Thanks for the input HorsehairBraider. Sounds like you're doing it about the same way that we have been doing it. But, with our "I want it all, and I want it NOW!" world that we're doing business in these days, people sometimes don't like the hassle of two-way communications to buy something. They want to select the quantity, put in the shipping and credit card info, click on [buy!], and forget about it. I've just been trying to figure out a way to make it as easy as possible for people to buy from us. Although, a large portion of our merchandise is custom-made, so they'll just have to wait for it if they want it. To help make the process go smoother, I started using forms on some of our pages. It really helps to get good information that I need to fill their order, but they still have to wait until I contact them back before they can purchase anything. [forms = webpage with blank text windows that the customer enters order information in, and then when they click "Send", it sends the order form to me via email.] It has really helped on our end for calculating the shipping. People tend to ask (in a standard email inquiry) what the shipping will be, and then not tell you where in the world that they are. LOL! I now have them enter their Zipcode or Country Code as a required field on the form. I can weigh their items and quote a shipping cost to them on the initial reply to them along with the availability and payment information. It's helped eliminate some additional emails. But of course, some people don't use the form for one reason or another, so we still get a few emails that say "I want a number 820. How much is it with shipping?". (We don't say it, but we think it: "Uuuuh, the 820 comes in 6 sizes, 2 rear-closure options, and we can add a foam bill on it if you want it. Which 820 do you want, and where are we shipping it to?") Keeps life interesting. Keeping up with the photos is a full-time job, isn't it? I need to re-shoot some of my old sewing machine parts and get those back up-to-date. I enjoy doing it though, and that helps. It would be a real pain if I didn't like to do it. Another problem with listing OOAK and Vintage Stock items on-line, for us anyway, is being able to accurately describe them. For instance, some of our vintage fabrics were originally purchased out of a stationwagon on the street out in front of the store. Back in the old days, when vendors came around with a new load of goodies, there weren't many part numbers or content labels on things. The merchant picked them by the "purdy-lookin' flowerdy one", the "multi-colored heavy chair-coverin' stuff", or "that shiny leather-lookin' roll". One of the most often asked questions about fabric, is "is it 100% cotton?". Who knows what it was made of? Dupont and others were on a roll back in those days, cooking up all kinds of man-made fibers. We can do a burn test to get an idea of what's in it, but without labels, we can only get close like in horseshoes. About all we can say is "We don't know for sure what it's made of, but it's real nice multi-colored heavy chair-coverin' stuff!". LOL! CD
-
Very good article, but I would like to point out a difficulty for those of us that have very small operations. My wife & I have a small Mom & Pop brick-and-mortar business, not big enough to compete on-line by price alone, sell some niche or difficult-to-find items that are easy to ship, and have time to ship & maintain our website daily. Of course, right now, our website is more of an "advertisement" site rather than an on-line "store". One thing that I've heard is that "small-business" (I think) technically means a business with less than 500 employees. Selling the same thing in two places at the same time can be a nightmare for smaller operations. We would like to expand the sales capabilities on our website, but we're having difficulty figuring out how to manage both the walk-in and on-line purchases that can happen at the same time. We have about a 50:50 mixture of common-stock items and niche or difficult-to-find items. Our "niche" is vintage fabrics and sewing notions. These are the items that we'd like to get on-line. The common-stock items that we can restock quickly to fill duplicate orders are the ones that we can't compete on-line by price with very well, so there's not much reason to push them on the site. The niche or difficult-to-find items are very limited in quantity, and no longer available in additional quantities to us. The possibility of not being able to fill an on-line order because the only one of that item that we had just walked out the door 5 minutes ago may seem like wishful thinking, but could happen if the inventory levels on-line weren't adjusted at least daily and maybe even hourly or minute-by-minute. It's bad business if the "Vintage Whatzamajigger" listed on-line isn't actually available to the Buyer that just clicked on "Buy" at our website. Currently, the items that we make available on-line are not available to walk-in buyers on the sales floor. They're boxed up in storage, so we don't have to worry about "over-selling". Additionally, we don't have any on-line instant purchase capabilities so far. The Buyer has to contact us by email for availability for every purchase. So, we basically have two separate businesses; the walk-in store and the online store. That's the only way that we've figured out how to do it so far. But, we'd like to place inventory on-line that we also have for sale on the sales floor. A sophisticated computerized bar-code scanning sales system that would link the cash register to a database would do it, but that would cost more money and time to set up than we could afford. The bulk of our niche inventory is "pre-barcode", and we have inventory that dates back 50 years through two previous owners. How do other small operations cope with this type of thing? CD in Oklahoma
-
Stitching patches on leather motorcycle jackets
cdthayer replied to UKRay's topic in How Do I Do That?
We have put most of our own patches on our own biker vests, although we've had Vendors put some on while we were at the rally where we bought the patches. My wife put a bunch of them on with a home sewing machine (an old JC Penny free-arm machine) using common Coats & Clark Dual Duty thread. She pinned them. They've been on there for years, through more than one rain storm, and are still firmly attached with no problems. We've never sewn a patch onto our coats, which are thicker. All of the patches go on our vests that have thin liners. We sew a few patches onto biker vests at our shop, and have probably "moved" as many as we have added new ones. So far, all of the patches that we've sewn on have been on non-club vests for recreational bikers with no set standards as to where a patch goes. We have the customer put the patch where they like it, and we sew it on for them. Then, later on, they'll come in with a new patch that they like better, and want it put where we put the last one. LOL! We've tried a variety of methods to keep patches from moving while we're attaching them, but they all seem to have some kind of problem. Two-sided tape doesn't always stick good enough to "seasoned" leather. Pins work ok, but are hard to insert and can cause puckering, and some folks don't like for us to add more holes to their leather without putting thread in it. (Remember, a lot of these jobs include moving a patch, so there's already going to be several unfilled holes and another hole or two from a pin isn't an issue for them.) One customer brought in his vest with duct tape rolled and placed under the patch. Worked really good to hold the patch for me, but then one day I had to move a patch that had been stuck with duct tape about 5-6 years earlier. Wasn't hard to get the patch off, the tape "cloth" just fell out when I removed the stitches, but the gum from the tape was on there like concrete. We are going to start using Fabri-tac sparingly (just a few dots around the patch), but it's a permanent bond and I'm concerned about how it "untacks" after time. We're still looking for a better solution. I may try the sprits of spray adhesive. At the shop, my wife puts patches on leather vests with a Singer 401A and Dual Duty thread, just like she does on uniform shirts. I use a Consew 225 for flat patches, especially large back patches, and a 29k70 (without table extension) for patches over pockets. I use whatever thread I have that matches the patch border color, but like to use V92. If a patch is only partially over a pocket, I sew what I can with the Consew first, and then finish up on the boot patcher. I've had problems keeping the lining straight with the 29k. I usually start sewing at the bottom of the patch for some reason. I'm not sure why. And from the looks of the patches coming into the shop lately, I think that patch makers have a contest going on to see how many points and curved edges they can design into them.... CD in Oklahoma -
I use the same type of tool and anvil, and I believe it's most important to press down on the snap with your fingertips. Press as firmly as possible. It'll sort of pinch your fingers once in a while, but you'll have better luck getting a good set. I've had good luck setting line 24 Dritz (short shank for thin fabrics), and both Tandy and Leather Factory snaps (back when they were two companies) with the long shank by pressing hard with the fingertips. Even when the shank is a little too long for the application, this seems to help keep it from bending as much. CD
-
I ran my own index page through it, and it said that it couldn't return all of the errors because it had exceeded the limit. LOL! I built my entire site with FrontPage, so it may be just trash to any browser other than IE. Back when I started the site, some of the other browsers weren't around yet, and I haven't ever looked at it with any of them.... CD
-
Have you seen the errors that it kicks out when you feed it this page we're on now? (http://leatherworker.net/forum/index.php?s...mp;hl=frontpage)
-
Hi Ray, Yes, we get to pick what goes on them...to an extent. Here in Oklahoma, you have to select 3 different personalizations, rate them 1st, 2nd, and 3rd choice, and send in your money. Then the state selects one of the three, or denies your request and keeps some of the money for messing with you. I can't remember if they keep it all or just part of it. I got my tag, so I've never went through that part. We get to pick the color of the tag also, so I picked the closest color that they had to my truck color. I chose "79 F250" because people always wanted to know what year it was. I've owned it since 1981, and it only has 68,000 miles on it today. It's still got the original brake shoes and clutch in it too! We've always had "her vehicle" that has usually been a newer (more comfortable) one, plus we ride our motorcycles more than we drive our trucks, so Ol' Blue has had an easy life. Her current truck is a 2003 F-150 Ford Supercab with an 8-foot bed and topper (small camper shell). Another thing that is unusual (for the states), is that Oklahoma only has one tag (or "license plate"), and it always goes on the rear of the vehicle. No front-end tag, so many people put a personalized tag (non-state issued) on the front. Usually it's their favorite sports team or their first name. My wife and I have plates with our website address on them, but we just bought a new "www" address for our current business, and we haven't gotten new tags yet. That's all of the advertising that we have for our business on our vehicles right now. We've been thinking about magnetic signs, but haven't gotten any yet. Vinyl letters in the rear window of our topper may be another choice to consider. Many businesses around here advertise their business on their rear windows. A final note: With a personalized tag in Oklahoma, you still have to register your "original" tag each year, and keep it in the vehicle at all times in case an officer wants to see it. So, if you have a personalized state tag, you also have a "regular" state tag, and you pay for both of them. And there are no tags on personal trailers, no matter how big. Only trailers registered "commercial" have tags. They used to require that you put your Social Security number on the rear of personal trailers, but I think they dropped that because of ID Theft a while back. Same with our Driver's License. They used your SS# for your license number for a long time, but quit that a couple of years ago too.... CD in Oklahoma www.thayerrags.com
-
Worked Highlines (High Voltage Electric Power Lines) for 28 years, got tired of it, and now co-own an old fabric store in rural Oklahoma. Tooled a little leather as a hobby back in the 80s, now work half of the day servicing domestic sewing machines and mending (on industrial sewing machines) whatever fabric and leather gear walks into the shop. Spend the other half of the day selling auction & Estate Sale findings on the internet, riding my motorcycle, drinkin beer, and telling the wife how much I enjoy her making the living for us now.
-
You can get the parts manual for the 236W and several submodels at the Singer site: http://parts.singerco.com/IPpartCharts/236W.pdf CD
-
Use it up, wear it out, make it do or do without!
cdthayer replied to Johanna's topic in Leatherwork Conversation
My creations aren't very fancy, but they get the job done and I am recycling leather. I had been using a cell phone belt case made out of a recycled leather purse, but it only lasted about 2 years before it got holes in it. This time I made one out of a Justin Roper boot top. The snap is the only thing included that wasn't part of the boot. As you can tell, I'm still learning how to guide my stitches on my Singer 29K70 boot patcher. The bottom seam was done on a Consew 225. My only concern is whether the vinyl pull strap will hold up since I more or less "perforated it" to attach it as a belt loop. CD -
A few easy things that you may have already done, or can do, would be: 1. Try 1 or 2 other new needles, or ones that you're pretty sure aren't bent. What size needle are you trying to use? Some machines don't get along well with some needle sizes. Try a different size needle to see if anything improves. Make sure you have the needle positioned the right way. This machine threads from right to left, so the 15x1 needle goes in with the flat side toward the left, and make sure it goes all of the way up in to the stop. 2. Re-thread everything. Make sure you've loaded the bobbin in the bobbin case correctly, and that the upper thread is routed correctly. If you don't have a book, there are several places online where you can get a free threading guide. Just Google [ Singer 201 Threading ]. 3. Make sure the bobbin case is setting in the machine correctly. It will go in wrong, so it may need taken out and re-inserted. You'll need a User Manual for instructions to do this if you haven't done it before. It should feel just a little "loose" and move a little bit when in correctly. There has to be room for the upper thread to go completely around it to make the stitch. Hopefully, it will be something simple that gets it going again. CD
-
Glad I could help, and glad you got something figured out. I took my little "scootin" photo back out of my signature, since I just put it in there for an example for you. It's on my host server and is a photo of my wife and I scootin across northern New Mexico back a few years ago, on one of the few trips when we had two of our children following along behind us in the pickup. We usually just rode two bikes all over the country with no support vehicle, so that photo of us was unusual. It's one of my favorite photos, and I used it as my avatar image on a motorcycle forum a while back. Some folks like to use a banner (advertising logo and such) in their signature, and that may be the reason that LWN has it set up to simply display the image from some other server. Some of those banners can take up sizable drive space! Have fun! CD
-
Bob, I think the difference may be that the avatar photo is a copy of the photo loaded directly into here from your computer, but the signature photo needs to be online (at a server) that displays the photo here from that server using the path that you provide....
-
Are you talking about making separating zippers or non-separating zippers from continuous zipper stock? I would like more information about how the zipper can be separated and joined without any hardware on the end. Thanks.
-
Good job! Just a thought on background... How about using the same backgrounder (that you use inside of mouth, nose, and eyes) for about an inch around the outer part of the entire design, and feather it out (deepest close to the design, and less as you move out) to nothing at the outer extent? You can probably do the same thing around the name of the shop when you add it in. I might even lift the areas around the eye sockets to make them stand out and look closest to you? Maybe lift the tail of the wrap where it crosses over itself and the skull? Lifting the eye sockets may not stay over time, but I might try it to get that "hollow" look....CD
-
Chap Purse
cdthayer replied to Butch's topic in Purses, Wallets, Belts and Miscellaneous Pocket Items
Nice job! I like the look. Just out of curiosity, what is the length from top to bottom of the "chap", not counting the fringe?