TargetRockLeather
-
Posts
154 -
Joined
-
Last visited
Content Type
Profiles
Forums
Events
Blogs
Gallery
Store
Everything posted by TargetRockLeather
-

Knife sheath
TargetRockLeather replied to Dave Richardson's topic in Gun Holsters, Rifle Slings and Knife Sheathes
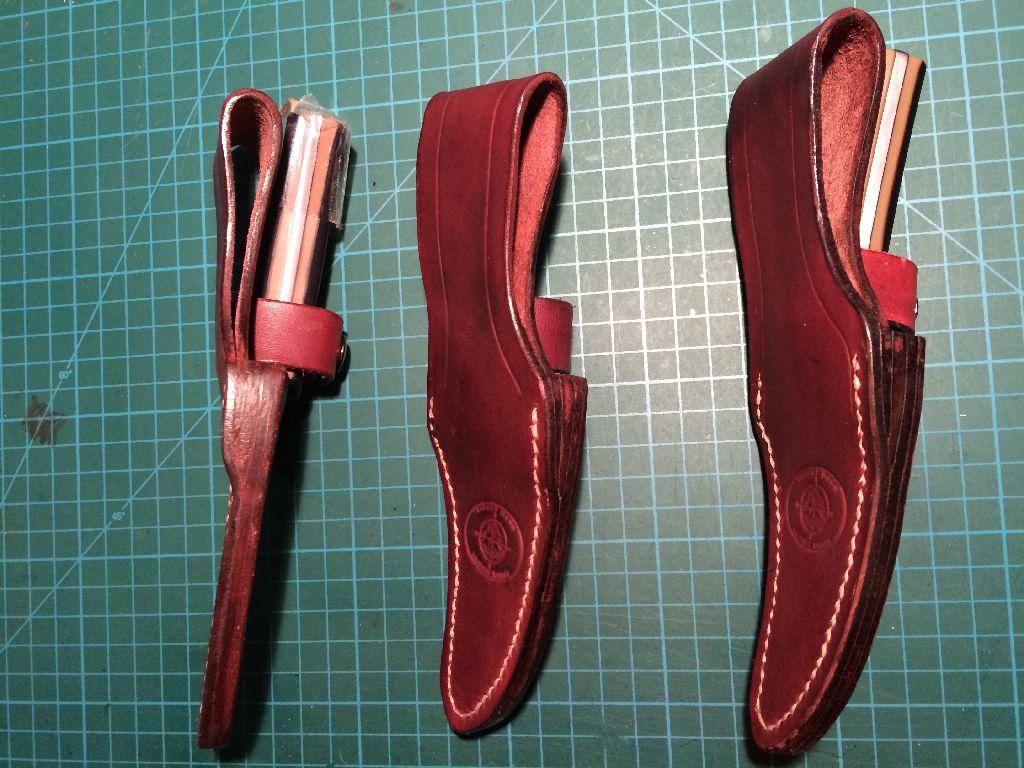
Here's another example. This is a larger knife with a more gradual transition from thick to thin. Note that the belt loop is folded over, then skived. Then a wedge is added which is also skived to very thin at the bottom of the wedge.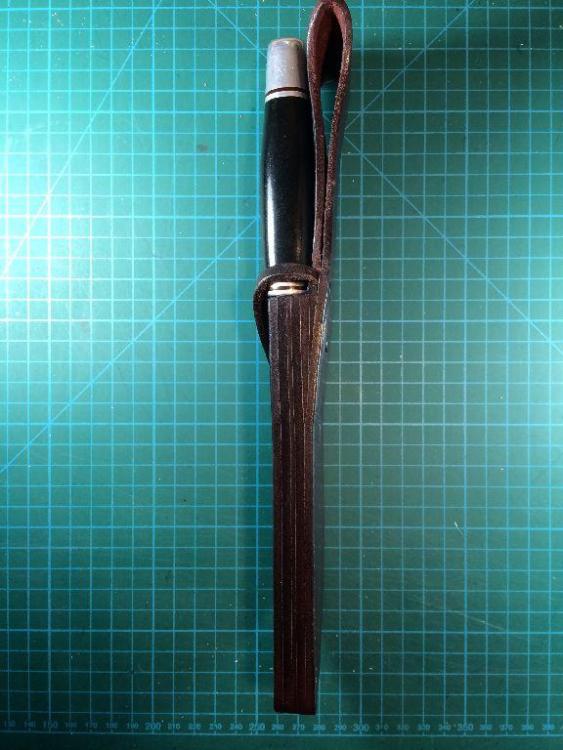
-
Hair-On Deer Hide Suggestions
TargetRockLeather replied to TargetRockLeather's topic in Leatherwork Conversation
I sort of like this idea. I'm going to experiment with that. I laughed when I first read this, but you're actually right. The hide does lend itself more to a fur hat than a knife sheath. Not sure how I would hide a knife in a hat though lol. -
Hair-On Deer Hide Suggestions
TargetRockLeather replied to TargetRockLeather's topic in Leatherwork Conversation
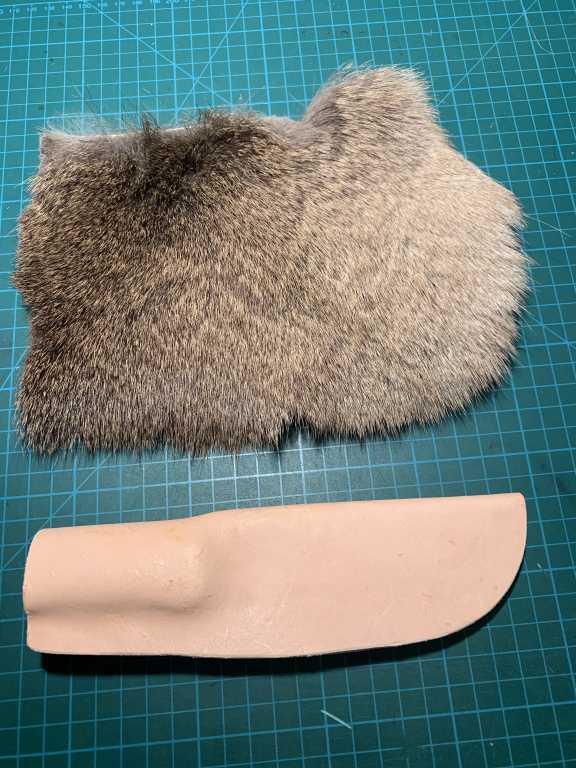
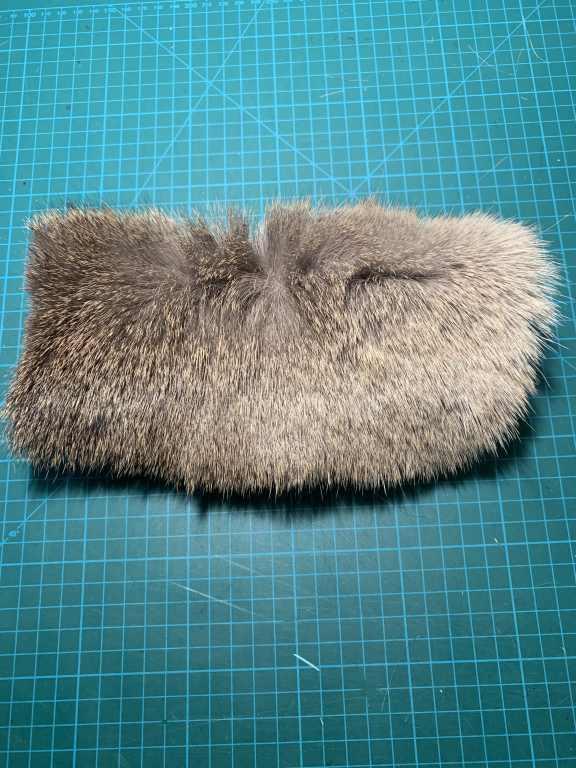
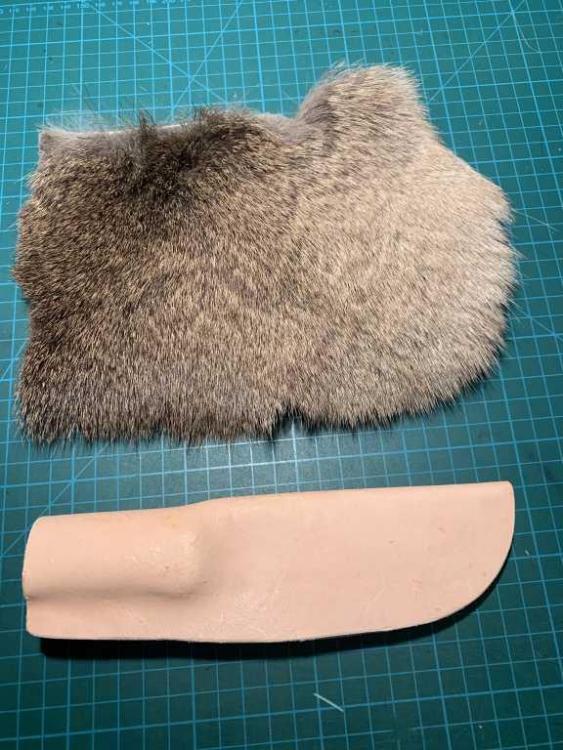
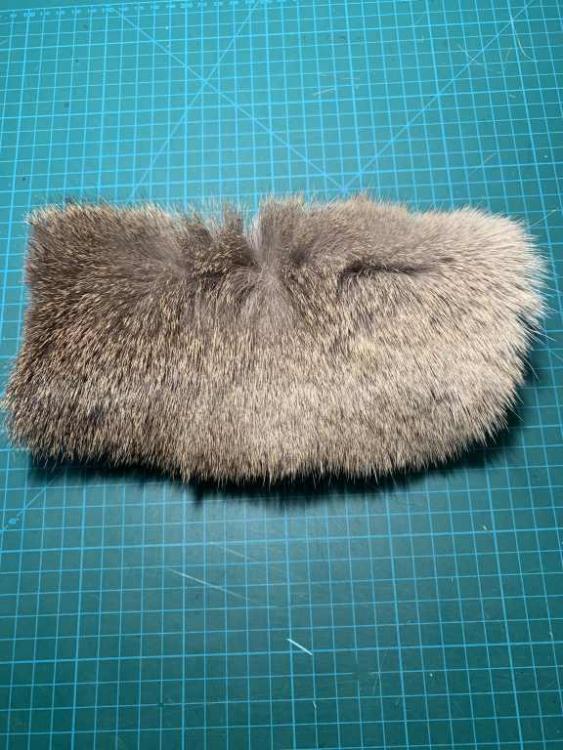
I guess I would consider it long fluffy. Panels might work on a larger project, but this one is probably too small for that. Maybe that's my problem, that the sheath is too small for what I'm trying to do with it. I never thought of trimming the hair. I might try that on a piece of scrap. This is what it looks like. In the last photo it's wrapped around the leather sheath and as you can see it just looks like a ball of fur lol.
-
Knife sheath
TargetRockLeather replied to Dave Richardson's topic in Gun Holsters, Rifle Slings and Knife Sheathes
I also like a thick welt, but it does add bulk and weight. Adding a tapered "wedge" shaped spacer helps with the transition from a thick welt (to accommodate a thick handle) to thin blade. In this example, the entire welt would be unnecessarily thick due to the shape of the handle. In my opinion, the wedge keeps things aligned nicely.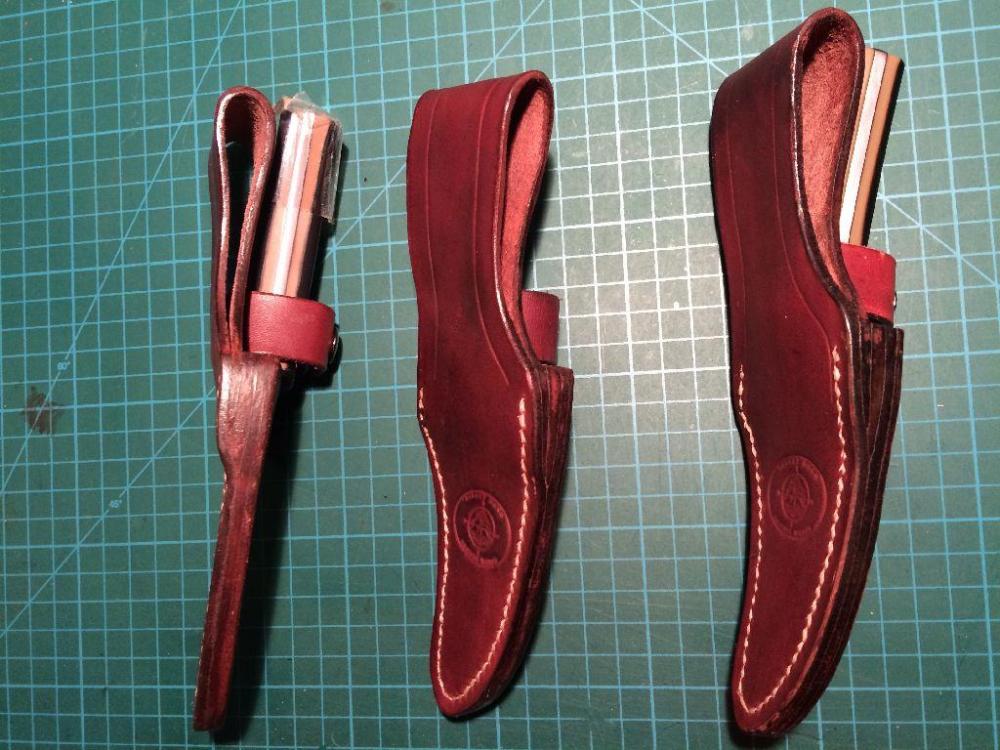
-
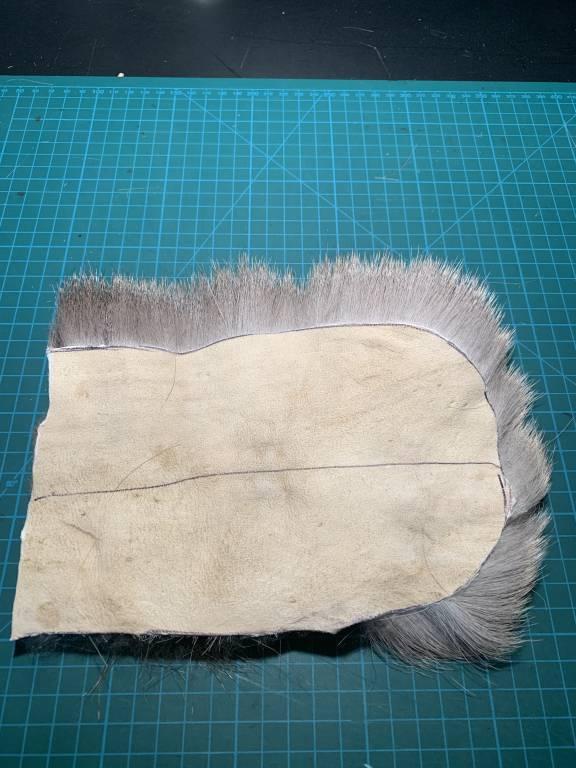
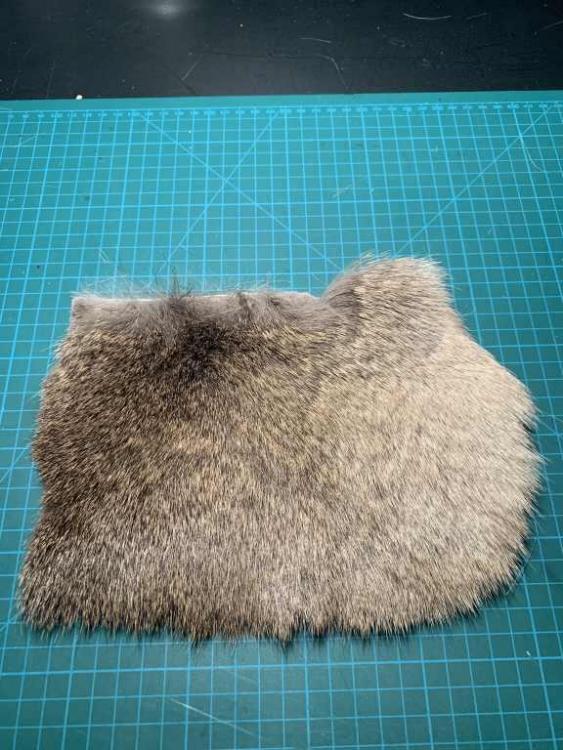
Someone gave me a hair-on deer hide and asked to incorporate it into a sheath design. I'm looking for any suggestions on how to use it. I thought about making a normal cowhide sheath and covering it with the deer hide. I could glue it to the leather but I'm not sure what to do about the seam. I considered punching holes and lacing it with artificial sinew or perhaps leather lace. Also, the hair is rather "fluffy" which seems like it will hide the shape of whatever I attach it to. I think it might make the entire project look like a ball of fur. Does anyone have any suggestions or better yet, examples that I can look at for ideas? I've done a fair amount of searching and haven't found it used anywhere. I can't be the first one to attempt it. Any suggestions would be most welcome.
-
That's some beautiful damascus. Seems like a shame to pair it with a cheapo sheath when you have the skills to make one of your own. Show us what you come up with for this one.
-
Spray them with wd40. That should slow down any further rusting. Then dry them the best you can. Use a hair dryer to warm them up so they will dry thoroughly. To remove surface rust I would use very fine steel wool (grade 0000) with some wd40. Fun fact: wd40 was invented as a "water displacement" treatment.
-
King n Queen seat harley update
TargetRockLeather replied to Bawarrior's topic in Motorcycles and Biker Gear
The face is disturbing, but the work is fantastic. Very nicely done! -
Very cool! Is it DOT approved?
-
That looks freakin awesome. Makes me want to do something like that for my Heritage Softail.
-
That's a heck of a lot better than OK. Looks great to me. I'd love to see a pic of them installed.
-
@Bob Blea Interesting idea to use the baby wipes. I'll have to try that some time. I have tried spray on finish and it does seem to be the best way to avoid streaking/smearing on top of antiquing. I used Saddle Lac and that seems to work well. The thing I don't like about Saddle Lac is that it seals the leather completely which prevents conditioners such as neatsfoot oil from penetrating. I would prefer if years down the line someone will be able to oil the leather. Also it makes the piece look like plastic which isn't desirable in my opinion. I wonder if your approach works better.
-
First thing I would do is TRY it on a few pieces of scrap first. Don't make your first attempt on something you care about. Do some quick tooling on a scrap and try it with and without resist. In my personal experience, using antique without any resist just makes the whole thing darker without getting decent contrast in the tooled areas. I've seen Chuck's videos too and I know he shows using antique without resist and it seems to work for him. I tried it and wasn't happy with the results. That's why I'm saying to try it first. I've seen Eco Flo Super Shene recommended and I've tried that. It works "ok". Any top coat type finish that seals the leather will probably work. You just want to be able to wipe off the antique gel or paste without it making the project darker. Where I seem to run into trouble is when I try to apply a top coat AFTER the antiquing. It seems to smear the antiquing even after the paste has dried. Hopefully others will chime in with their recommendations as I still don't have a process I'm totally happy with.
-
I think the darker color has more to do with the texture of the leather than the shade/color of it before you dye it. The more porous the leather, the more dye it will absorb. The texture and smoothness/porosity will vary from one piece of leather to the next. It's not something you can control. That's why you should try to cut all of the pieces from the same piece of leather. I don't think dying the back made the front darker unless you completely saturated the back. You mentioned applying antique. I'm not sure what you were trying to accomplish or how it turned out. If the project came out too dark then perhaps you could have applied a "resist" layer before the antiquing step. The resist will allow the antiquing to darken some of the details (tooling cuts, stamping etc) without darkening the overall project.
-
I never tried bleach either, but my thought was that bleach might damage the leather, not just dry it out. Have you ever seen bleach used to clean something that was stitched with cotton thread? The thread can literally disintegrate. Happened to me on some vinyl boat seats. The seats came out nice and clean, then eventually fell apart. I'm wondering if leather might react similarly since it is essentially a natural fiber. Even if the NFO makes it soft again, I'm not sure if it would be structurally intact. Having said that, you're absolutely right; neatsfoot oil is the best way that I know of to rejuvenate stiff/dried out leather.
-
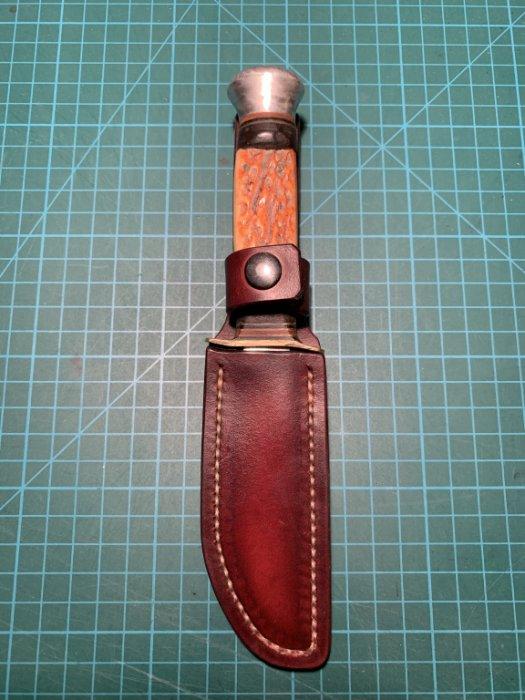
Yep, that's the "effect" I was talking about. This is what mine looks like:
-
I think bleach would ruin the leather and still not get you back to the color you want. As an experiment , I submerged a piece of dip-dyed leather into denatured alcohol (since the dye is alcohol based). It didn't lighten the leather at all, but it did make the leather a blotchy mess. I think that any attempt to remove dye will have similar results. Bob's suggestion is the one I would use. No one will ever know that you didn't color it that way on purpose. I've found that dip-dying works well, but you have to be careful. Any edges/cuts will take the dye deeper than the rest of the piece if you leave it in the dye for more than an instant. That makes the edges darker than the rest of the piece. I think that's why your small pieces came out darker than the rest. Also, if you dip a piece that has the stitch holes punched already, you'll end up with a dark stripe where the holes are. All of those holes will let more dye penetrate deeper. Made that mistake once myself, but I decided to pass it off as an interesting "effect".
-
I agree with garypl. I had the exact same problem. I learned that I was cutting too deep with the swivel knife and I wasn't beveling deep enough. I did the tooling while the item was flat, then when I folded the tooled section slightly my cuts opened wider and exposed the "core" of the leather. From your picture it looks like the same thing happened to you. I found the solution on learnleather.com. The concept is "Cut Less, Bevel More". I can't find the article now, but they have an excellent youtube video that explains the whole thing: https://www.youtube.com/watch?v=LZp_ZI2XnzM After watching that I practiced cutting less deep and that solved my problem. Take a look and practice on some scrap to see if that helps.
-
There is always a residue after it dries. After the leather has dried completely, rub the dyed surface briskly with a soft cloth. It will pick up any residual pigment that has been left on the surface. It will also give the leather a nice luster. That should prevent it from rubbing off where you don't want it. Also if you apply carnauba creme or any other finish, that will also help.
-
Can you elaborate on the problem you are having? Do you mean the dye bleeds onto your clothes or whatever after it has thoroughly dried and the item is completed?
-
That's absolutely incredible. Had you done floral tooling before, or is that your first attempt?
-
I use my own mixture of beeswax and neatsfoot oil. I personally wouldn't want to add anything to give it a different smell. Many people, myself included, like the smell of leather. Just watch someone pick up a new leather item for the first time. One of the first things they will do is sniff it! I would be careful covering up that smell.
-
This is what I use to thin Barge: https://www.weaverleathersupply.com/catalog/item-detail/50-2121/s-18-all-purpose-cement/pr_54566 Much cheaper than Barge thinner. Seems to work great.
-
What tools do I need to recreate this design by hand?
TargetRockLeather replied to Alexis1234's topic in How Do I Do That?
I have used this one https://www.leatherstampmaker.com Reasonable pricing and friendly service. -
There's a trick I saw in a Weaver Leathercraft video that might be helpful. Chuck Dorset does a thing where he passes about half of the thread through each of the needles, which reduces the distance by half. Take a look at his video here and jump to around 15:20 to see it done: https://www.youtube.com/watch?v=AEsSbYBLxD4