-
Posts
698 -
Joined
-
Last visited
Content Type
Profiles
Forums
Events
Blogs
Gallery
Store
Everything posted by Hardrada
-
Neat, TomG. I was gonna open a thread about whether it's necessary to finish the flesh side of English bridle belts and what to use and how to do it. I've been leaving it alone, since English bridle seems to be pretty much finished at the tannery what with all the tallows and oils and that, unless you split it or skive it.
-
Couldn't have put it better myself.
-
Sad, but what else can be expected when environmentalism has driven many to the point of psychosis?
-
Does anyone know what's the width for the Master Tools 1" and 1 1/8" oblong punches? Can't find that anywhere. I don't know why Weaver doesn't list such a useful value for their punches (I had the same issue finding the width of their oval hole punches). TIA
-
Thanks for the replies, fellows. Looks like stitching is the way to go.
-
Well, the bag has two U-shaped (more like Џ-shaped) gussets. If the leather is ~3 mm thick, that'd leave me with a 6 mm thickness to stitch through. I was thinking of thinning the edges so as to end up with, roughly, 3 mm thickness. This leather is just not burnishable, and I was thinking I didn't want a super thick edge there.
-
That is the question. I tried to google the answer but all I get is noise. Can anyone here tell me when should one thing be preferred over the other? Is lace less durable or resistant than Tiger thread? My (probable) present problem is a Bible bag a friend of mine commissioned: he wants me to use the 9 oz water buffalo I got from Tandy, and that leather is chrome tanned and pliable as heck—I so dread even the thought of skiving it to punch the stitching holes. I was wondering if lacing would be an acceptable alternative. Of course, I'll run the idea by him, but I'd still like to know if I should presently incorporate lacing to my meagre set of skills or if I should leave it for later. TIA.
-
To add to your worries, maybe, I've been wondering whether you'd run into problems if you mix tannages. Will something ugly happen if I glue a chrome tan liner to a veg tan belt?
-
For belts, skip the Tandy economy punches. I have their Crafttool hole punches and they are OK, but for the oblong punch I'd go with the Master Tools from Weaver or the C. S. Osborne one. Same for the copper river setter: I already have Weaver's in my wish list.
-
Tandy is OK once you get into leatherwork and become more discriminating in terms of what to order from whom. When I started buying my tools, I bought from Tandy exclusively. I ended up with some decent tools (such as the diamond chisels you listed, the metal gauge cutter, among others) and others that are absolute crap (their economy oblong punch). I still buy from them, mostly Fiebing's products and hardware (rivets); and the last purchase (a week ago) included a strap end punch that turned out to be Japanese made (two thumbs up). I've expanded to other suppliers such as RML, Buckleguy (though I was VERY disappointed that their belt buckles ended up being Chinese), Longview Leather, and Lonsdale Leather. Again, now I go after a particular tool/tool maker, rather than after a vendor; of course, this sometimes increases the amount you end up paying on shipping, but well, man can't have everything.
-
Diamond chisel - each side separately or through both?
Hardrada replied to livewire516's topic in Sewing Leather
You can also buy "reverse" pricking irons/chisels. Of course, that doubles the cost of that part of the stitching equipment. -

Flaky Backside of English Bridle: An Issue?
Hardrada replied to Hardrada's topic in Leatherwork Conversation
Thanks for the replies, fellow pipers—er leatherworkers. Alas, I don't have a splitter yet: it's on the list, as it seems to be a must have for belt making, specially if one's making lined belts. I ended up cutting a strap from the butt and remaking them. Even then, once the strap gets closer to the shoulder area the flesh side starts to look less firm, not flaky yet, but a wee bit so, specially when you bend it. Noted about the skiving. I'll try it on the (now) spare rests and see what I can do. Otherwise I guess I'll just sell them as seconds and throw away the really flaky ones. -

Flaky Backside of English Bridle: An Issue?
Hardrada replied to Hardrada's topic in Leatherwork Conversation
This is the intended purpose: There are two versions: one that is fastened with Chicago screws so that the Czech pipe tool can be inserted/removed, and one that is permanently fastened with double cap rivets and has no pipe tool. Lining them would make them too expensive for the local tobacconist to resell them, methinks; after all, these are not really classy items, more like everyday use ones. -
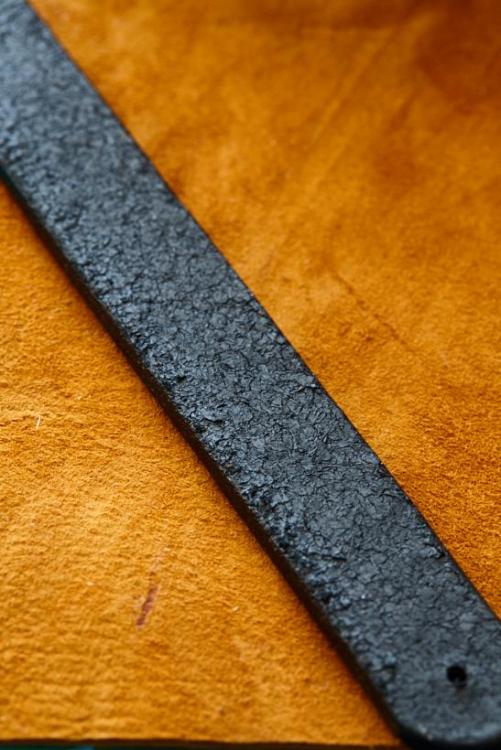
Well, I've an order for a score of pipe rests, and I decided to use the shoulder portion of my English bridle side, as the butt is meant to be for belts. However, some areas of this portion have this flaky surface texture: I'm trying to burnish the back side of the straps that are like these with Tokonole, but I'm wondering if this is passable for a deliverable, or if I should cut another strap with a smooth flesh side instead. What would you do? Would this flake off and deteriorate quickly with use? Don't really want to deliver sub-par goods to the customer. TIA.
-
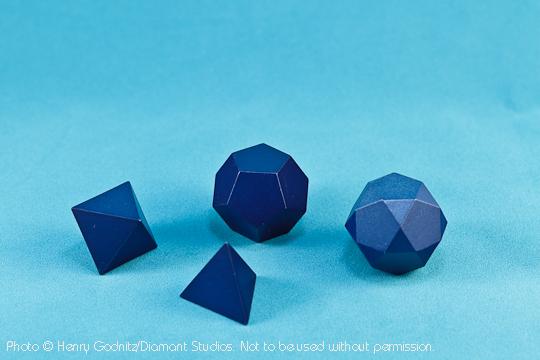
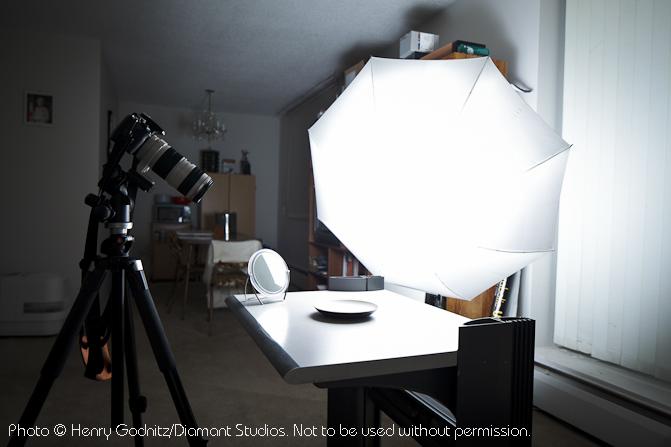
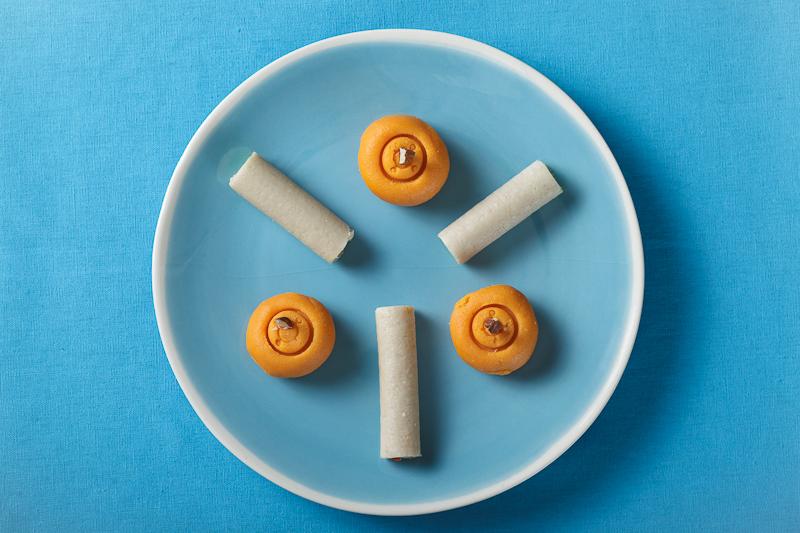
Again, and sorry to be so insistent, I strongly suggest staying away from lightboxes. They are presented to budding photographers as the perfect solution—that all that it's needed is to drop your subject in, surround it with lights and snap away. And therein is my main concern about them: they make it very inviting for the shooter to place lights behind every side but the camera's, which results in crossed shadows and ruined photos. I know: I've been there before: Setting up the 'seamless' background that comes with them is also frustrating, as it's made of fabric that creases very easily: those creases get augmented by the lights into real eyesores. I mean, if you have the budget, feel free to buy a box and see for yourself what I mean. If your budget is limited, I'd try a different setup. Keep in mind: the only things that matter for the photo is whatever you can see inside the picture frame (and stuff outside of it only when it has an effect on what you can see within the frame). You have more freedom when you can set your lights, tripod, and products wherever you want without being boxed in (pun intended). Here's one very simple setup I use (I've used it mainly to shoot food, but it's also effective for leather items, especially textured ones): And, the results: Look, ma! No lightbox!
-
Since your camera is a cropped sensor you'll have to place it farther away from the items already; thus, the 50mm will do fine. You can always get a macro lens later if it's really needed. A roll of neutral grey seamless paper should come in handy. They're roughly the same price as the elcheapo Chinese light tents you find on Amazon and a 100 times more useful and versatile: Savage seamless grey background paper. Even better, the used portions from these papers are good material to make patterns for leather items. You can use inexpensive diffusion sheets to soften your light so that you don't get sharp, defined shadows: White diffusion paper. For the seamless you'll need some sort of background support. Those are not inexpensive (they're not terribly expensive either), so you might want to borrow one from your sister when she's not using it, or improvise one with a curtain rod.
-
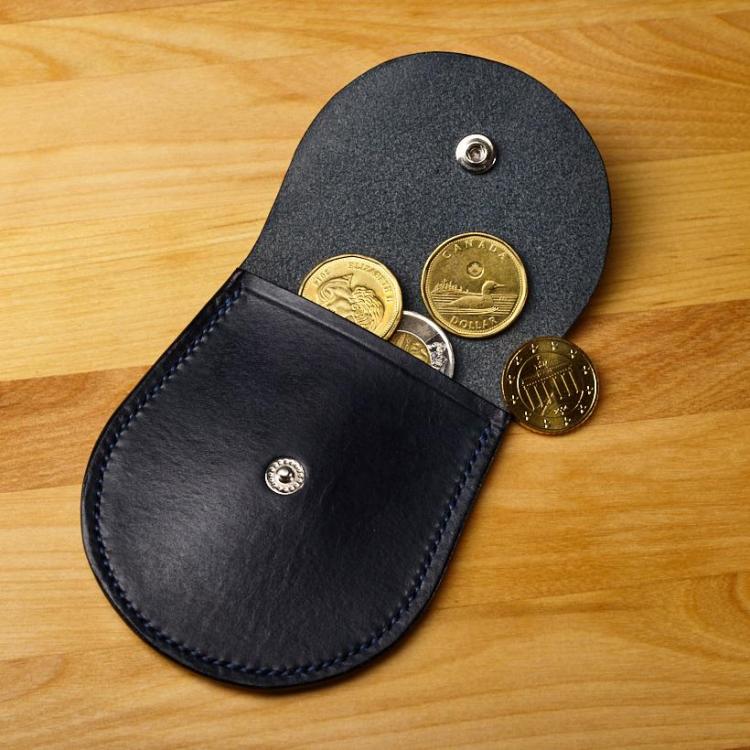
Do NOT bother with those light tents. Just DON'T. They're essentially useless. I've got one here that I've only used for tests and was never used again. You can do plenty of things with one good light and foamcore sheets and mirrors. For this pouch I used a single softbox to the left of the frame and a mirror on the opposite side, and a piece of black foamcore to the upper right corner of the frame to add contrast. 100 mm macro lens. Your new 50mm normal lens should be OK too, you just need to get the camera closer. You don't need tons of lights, all you need is knowing how to use them: i.e. WHERE to place them. For instance, when photographing items with texture, such as your tooled leathercraft, you need to place the light to the side or the subject so that the light falls across it (rakes it): this will bring out the texture. You can see that effect a bit in my image: had I placed the flash on the same axis as the camera, the crease would have been flattened by the light and lost. You can even use window light till you get a decent flash or lamp. Here: Quick and Clean by Window Light (a bit verbose, but you can just follow along with the pics).
-

Need help learning this construction method please? Interlocking?
Hardrada replied to ddct70cc's topic in How Do I Do That?
No, thank YOU for mentioning that. I've been struggling to find a material thicker than paper and firmer than fabric to make prototype patterns. Now I know what to use. -

Need help learning this construction method please? Interlocking?
Hardrada replied to ddct70cc's topic in How Do I Do That?
That looks like an electric creaser. Since he's Korean, he probably gets access to stuff we don't, but here's a selection of the same thing available in North America: Electric creasers and other machines. -
LOL. All this time, looking at your signature, I've been assuming you were Alex.
-
Well, as we know, English Bridle looks like an Oreo when viewed sideways. Whilst the flesh side comes already kinda finished and nothing I can see needs to be done to it, when you skive it or split it, the back 'choco' cover gets shaven off and you end up with natural colour. My question is, what's best to dye that? On a sample belt that I made I used Edge Kote to have no light colour shewing where I skived the buckle end. It didn't matter much in this case because I stitched said end and the flesh side won't be seen. However, I've some belts in the works that won't be stitched, but have Chicago screws instead, and I'm wondering what's the best practice there. I made a test last night with Giardini Edge Paint. It looks OK, but this is a very small piece and the Giardini bottle is very small too. The actual area on the belt is relatively large. Should I use Fiebing's Pro Dyes for this? All I have right now for dyes is black Edge Kote and black Giardini Edge Paint. Also, once dyed, should the dyed area be sealed and burnished?
-
I agree with keeping politics in a separate arena. Unfortunately, the politicians have made it their business to make politics everybody's business by sticking their long dirty fingers into everything. When everything is then politicised it is impossible not to bring politics into areas where it used to be foreign. Alas, politics nowadays has A LOT to do with leatherwork—the banning of fur by CA being a perfect example: it wasn't leatherworkers who did it or pushed for it, yet they now must bear the brunt of the legislation. Politics has a lot to do with leatherwork when tax grabs and stupid environmental regulations smother the industry and limit our choices in supplies and products we market in order to make ends meet. It's perfectly understandable that leatherworkers post about such things and share their frustration with their fellows, since writing to their elected representatives is now an exercise in futility, and in some cases only serves for the police state to open a file on those who complain via the official channels. Some of us might be OK with the occasional political thread or blurt, as long as people don't push partisan views. Then again, it's not a secret which colour or side of the political spectrum the political oppression tends to come from, and people express it accordingly. Shutting people down and clamping down on anything that resembles politics on fora such as these only benefits those who profit from enacting retrograde regulations, such as the one being this thread's topic, and their supporters—and we know what colour they are, don't we?
-
Plenty. They end up in government.
-
California sux. I'm so glad I don't live there (not that I could stand the ugly broiling weather anyway...).
-
Kinda like this? Stitched belt keeper He's not crossing it, but I'm guessing you could, just by running the thread to different holes.


