-
Posts
698 -
Joined
-
Last visited
Content Type
Profiles
Forums
Events
Blogs
Gallery
Store
Everything posted by Hardrada
-
Not sure it's the best method, but it's what I've been thinking about throughout the day since it's quite likely I also have to undo stitches on a project of mine:
-
I'm thinking that if you cut them open you can line up the holes again using the pricking iron you used to make them. You'd probably get glue on the iron but if it's water-based adhesive maybe it'll be easier to clean.
-
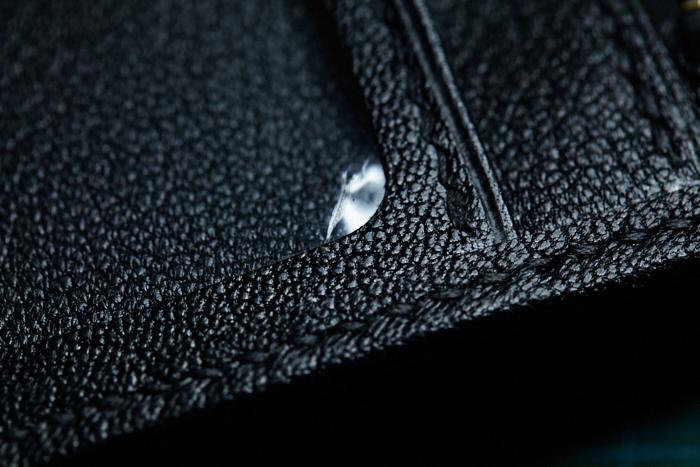
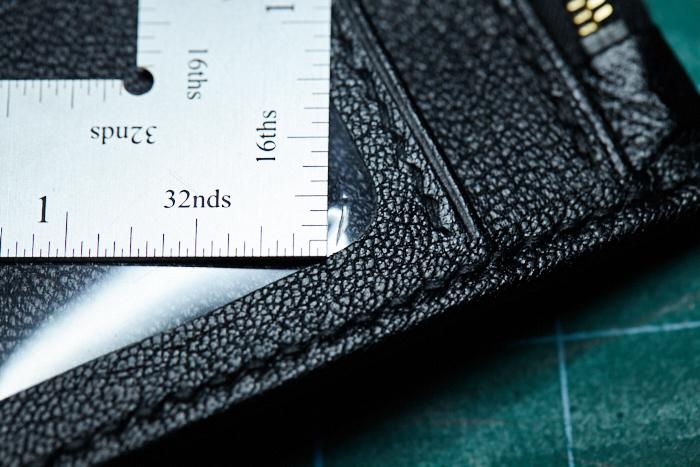
Worst kind of accident: the one that happens when you're almost done. Whilst marking the line for the stitches, the dividers jumped and landed on the acrylic window for this wallet: Not just a scratch but an actual cut: it went through the plastic. Is there a way to fix this that doesn't require remaking the entire panel? Yea, I went and made worse by proceeding with stitching the edge band and locking the blunder in, but at the time I felt fixing the boo-boo would require remaking the whole thing and I thought it best to give a discount for the blem. Now, I'm not happy with delivering this as it is. Any suggestions? TIA for any helpful input.
-
No, it's been inside a cabinet all these years. That too, you know, I got this paint anywhere between 8 to 6 years ago. Yes, I share your opinion. The Fiebing's Edge Kote seems to still be workable—longer shelf life it seems—but shark doesn't seem to take too kindly to edgers and the pain runs into the "channels" in the leather's grain.
-
Well, I haven't been doing much leatherwork lately, but this month I had to make a bag and to my dismay I found my Uniters paint in a sorry state: thin liquid with lotsa curd-like semisolid blobs in it. I tried stirring it vigorously but could not melt them clots back into liquid form. Applying whatever is still liquid in there to an edge takes forever to dry. Is there a way to reconstitute this paint or is it dumpster material? I really need to finish this bag and can't wait for two weeks for new edge paint to get here.
-
Thanks, mates. The bone folder and a recreasing did the trick.
-
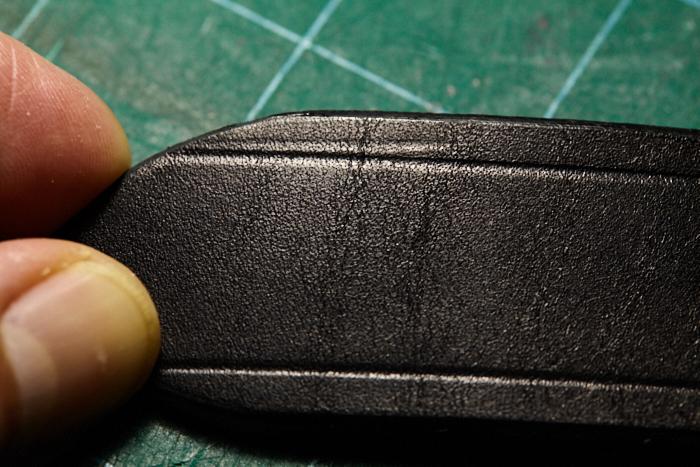
As you can see, if I were to trim the end would be pretty much next to the hole—it'd probably look worse than the blemish: In non-raking light, it's not too obvious, but it's still there:
-
I went askew with the electric creaser when creasing a belt and was hoping the final length would be short of that blemish, but alas, it was within an inch of the tip. Is there a way to smooth out that blemish or make it disappear? I'd really not want to cut the billet any shorter. Thanks in advance for any helpful input.
-
These are used on wood, but it's still steel and it's still round, so, it may help:
-

Applying "Lining" over Round, Bulgy Surfaces
Hardrada replied to Hardrada's topic in How Do I Do That?
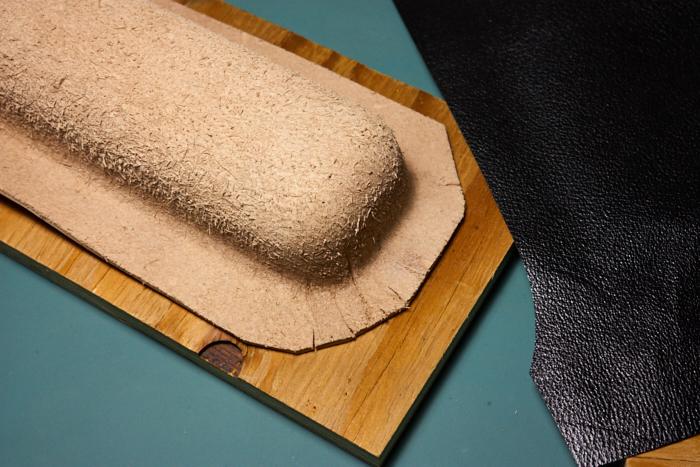
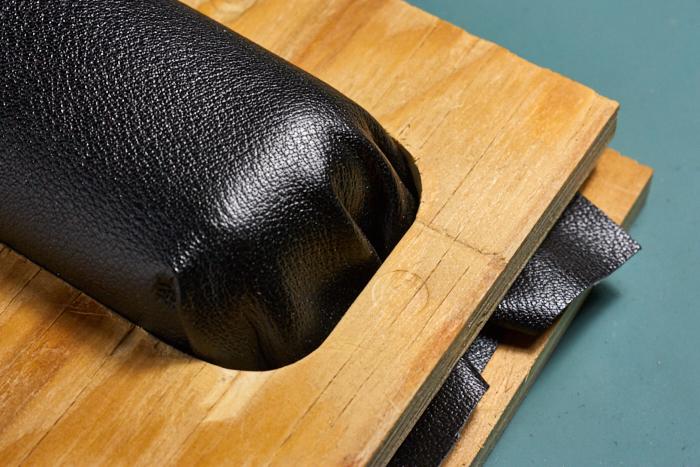
Yes, I know pics help—was gonna post some last night when I made the post only to find out my camera's battery was drained. Here's the issue: This is the molded spectacle case. I decided to mold "in reverse" as I wanted to avoid dying and also to have the outer surface be chevre which is more scratch resistant: And, this is what happens when I try to put the 1.5oz chevre over the molded leather: Those pleats... argh! -
Ahoi, Is there an ideal way to apply a cover of thin chevre leather over a wet moulded pouch? I'm particularly interested in how to deal with the pleats that form whenever I attempt to stretch the chevre over the bulgy round end. I guess I could cut the leather, but then I wouldn't have a smooth finish and it'd look real terrible. Any ideas or should I start over, maybe this time gluing the chevre over the veg tan first? TIA
-

fiebing's edge dye opinion needed
Hardrada replied to TonyGreen3455's topic in Leatherwork Conversation
Don't use spirits-based dye: as it says, it is PENETRATING and it'll run off your edge into the adjacent portions of the leather, ruining the project. Edge dyes (i.e. Fiebing's Edge Kote) are polymer-based dyes that will coalesce on the edge and remain there till wear and tear removes them or you sand/rub them off. -

a few knife sheaths...
Hardrada replied to bladegrinder's topic in Gun Holsters, Rifle Slings and Knife Sheathes
Neat work! I've always wondered how is it possible that knives with hooks like that skinner don't get caugh in the sheath when pulled out. Obviously, they don't. Amazing. -
For thick layers a solution is to cut a strip of leather 1/2" wider than the total thickness and stitch it in as edge cover.
-
Folded edge and stitch.
-
https://www.outpostworkshop.co.uk/
-

A wee wallet
Hardrada replied to GavinO's topic in Purses, Wallets, Belts and Miscellaneous Pocket Items
Looks pretty cool. As a comment, keep in mind that small goods, by requiring careful attention to detail and being less tolerant of error, give you the base on which to solidly build excellent craftsmanship with large items. Good with the little things, good then with the big things, as was wisely said by Someone. Neat use of the lightbox in those last two images. Most people just blast the item with light from all sides and it looks terrible. I see you're using light ratios and raking the light to bring up texture. Good show. -
@jcwoman: check out Tandy's Crafttool punches. They have sizes all the way down to 1/64" and even "needle" punches. They might not be KS Blade top notch quality, but they're still good quality. They don't clog and clean themselves out automatically. That's all I use, along with a template to: first mark the holes by pressing the punch with my hand as it sits in the template's hole over the strap, and then removing the template and lining up the punch over the mark made previously and whack it with a poly mallet. Oval punches can be tricky, but round ones are a zinch with this method and tools.
-

DIY Shoe Making (Video) My first Pair
Hardrada replied to Campleathergoods's topic in Shoes, Boots, Sandals and Moccassins
Yeah, well. After stepping on an aluminium template and puncturing my toe—my place is carpeted and not s'sposed to wear outside shoes in it—I was trying to find crepe soles to make myself a pair of mocasins or something I could indeed use to protect my feet and not soil the carpet, and the only place I could find the material was Tandy: ~$30 for a sheet with barely enough for a pair, plus ~$25 shipping ... and still having to buy or make the insole... $60 looks like a bargain.- 5 replies
-
- shoe making
- leather shoes
-
(and 1 more)
Tagged with:
-

DIY Shoe Making (Video) My first Pair
Hardrada replied to Campleathergoods's topic in Shoes, Boots, Sandals and Moccassins
Well, well, well... ain't that ever neat. And I see one of my main suppliers in Canada carries their stuff, so even neater. Thanks for posting. I'm looking forward to making myself a pair.- 5 replies
-
- shoe making
- leather shoes
-
(and 1 more)
Tagged with:
-

Trying to learn video making skills... warmup video, comments welcome please!
Hardrada replied to YinTx's topic in Show Off!!
Take out the extra space between "up" and "where" @0:26.- 31 replies


