-
Posts
698 -
Joined
-
Last visited
Content Type
Profiles
Forums
Events
Blogs
Gallery
Store
Everything posted by Hardrada
-
Hah! The selfsame cigars I smoke! Welcome!
-
30.30 leather buttstock bullet loop cuff
Hardrada replied to GardeninginCalifornia's topic in How Do I Do That?
Recoil. -

30.30 leather buttstock bullet loop cuff
Hardrada replied to GardeninginCalifornia's topic in How Do I Do That?
Again, lining saves the day. Thanks! -

30.30 leather buttstock bullet loop cuff
Hardrada replied to GardeninginCalifornia's topic in How Do I Do That?
I had run earlier into another method. Maybe worth taking a look? But, yes, you'll need a liner for loops with rivets. The only similar project I've tried is this one: -

30.30 leather buttstock bullet loop cuff
Hardrada replied to GardeninginCalifornia's topic in How Do I Do That?
Super duper stupier question: with that design, isn't there risk of pulling on one of the loops and making it larger and the others smaller in diameter? I see you're wetting it, so kinda wet-moulding it would make it stay put, but just wondering. It would also be interesting to see a picture of a but cover fully done. I've been squeezing my brain trying to make a couple of them with an integrated butt pad, and I just can't figure out how to do it properly, specially what to use for closing/securing it—velcro, snaps, zipper.... -
What kinda glue did you use for the foam, if any?
-
Yup, thanks!
-
I wished I were more like you and all my first attempts were successes. Terrific!!
-
Yup. Kinda what I was suggesting above, but I dunno whether the laws in his area allow for that. Another option is to have the customer come over and be present whist the gun is wrapped in cellophane and molded, then let him take both gun and wet, molding leather with him back home; then, 24-48 hours later retrieve the now-molded leather from the customer, bring back to the shop, and finish the holster.
- 14 replies
-
- performance center 629
- performace center
- (and 7 more)
-
Could you borrow the gun from him for the day or so that it takes to do the wet moulding?
- 14 replies
-
- performance center 629
- performace center
- (and 7 more)
-
This is what I have: https://www.danswhetstone.com/product/bench-stones/ A Soft (medium) and a Fine (hard) Arkansas, in size 8 x 2 x 1/2 ". Bought them at Lee Valley, along with some honing oil (not the Dan's brand). They've worked fine for my round knife. I use the method described by Al Stohlman in his book.
-
Yup, I know. I was referring to my latest experience with deliveries.
-
Packaging has gone to the dogs. I recently placed an order with Buckleguy and they just tossed the belt punch in. Of course it was knocked about in the box during transit and the edge was nicked. How these people seem to forget that a razor sharp edge is also very fragile and easily nicked no matter how tough the steel is beyond me. Or maybe it's C. S. Osborne's fault: the punches I've purchased from Goodsjapan.com and even from Tandy have all come with a rubber cap on the tip—obviously none of them have arrived nicked.
-

Can You Recommend Leather for a Newbie's Watch Straps ?
Hardrada replied to Schick's topic in How Do I Do That?
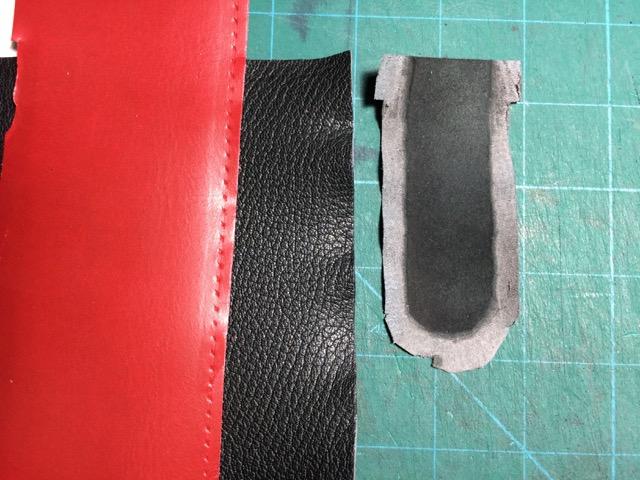
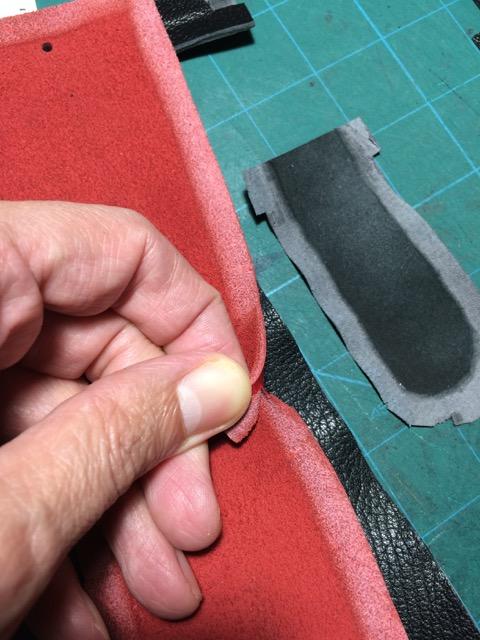
I'd say so. Even medium temper leather can get pulled out of shape with a paring machine: See how bendy the Alran chevre got when I did the edge paring? Ugh. The Heritage Series didn't strech as bad, or much. I think I've observed that the worst stretching happens when you try to pare down leather from a thick weight down to a very thin thickness. Maybe doing it gradually would help preventing or reducing the issue, but then again, several passes might also increase the chances for stretching. I'm thinking there should be a proper technique to avoid all this, but I'm yet to find it. Proper feeding is also crucial with a paring machine too, lest you end up with this: A whole piece of expensive leather can be ruined in an eyeblink if the right beat is missed on the feeding and the leather rides high on the anvil. Not fun. After ruining several pieces due to the blade biting through and through into the leather I can see why such love for a bell skiver, but then you look at the price of them... and your heart starts loving the paring machine again even as your mind starts thinking on how to find the proper technique. -

Can You Recommend Leather for a Newbie's Watch Straps ?
Hardrada replied to Schick's topic in How Do I Do That?
If you're in my SK, you can PM me your addy. I'll send you a "starter kit" with enough patches of goat and nigh-unscratchable calf to get you started. I can even split them to the right weights with my paring machine. I've quite a bit of clean leftovers that aren't good for a major project such as a bag or wallet, but they're just the right size for watchbands. Heck, if you're in the Queen City the delivery is $0. If you insist on buying, I order most of my leather from Rocky Mountain Leather supply. They're in the US and we must pony up for duties, but they're the only ones who split your leather to your chosen weight. A paring machine is helpful up to a width of 1 inch, beyond that you'll need a splitter. RML splits your pieces for you at no additional cost. They also sell 1 sq ft pieces: a 9x16" rectangular piece is just the right size for several watchbands since you cut the initial pieces as rectangles. I don't like buying leather from Tandy. Hardware and some tools is OK, but their leather is all over the spectrum and you what you end up getting isn't always up to snuff. My other supplier is Lonsdale Leather, but they're in Vancouver. I occasionally buy stuff from Longview Leather in Alta. -
You know, I was just at Staples picking up a DHL parcel and got one of those flexible curves. Staedler brand. Since it's made of plastic, I'd rather not use it for cutting, unless I'm extremely careful. Leather knives being super sharp, those plastic tools would be easy to knick and be ruined. Goodsjapan.com can ship the real deal, Japanese-made, top quality skiving knives via DHL and you'll get them within the week. Don't waste your money on crap from the mainland. I've bought lots of tools from goodsjapan.com and never had an issue with them. They might not look as spiffy as others but they're solid, durable, and perform flawlessly, and that's what really matters.
-
I haven't used it for that but I have indeed used mine for long straight cuts. It's doable: once the knife is embedded in the leather the embedding itself helps keep it on the straight and narrow. RE: getting the initial straight edge, @RockyAussie has posted a video of his method. Funny, he uses the same brand and type of knife I have; and apparently it's the only thing he uses it for!
-

Something is off with this leather...?
Hardrada replied to HondoMan's topic in Leatherwork Conversation
Or sell the belt to a geographer/meteorologist as a mammatus clouds belt. -
This, maybe? https://www.leevalley.com/en-ca/shop/tools/hand-tools/marking-and-measuring/marking-accessories/32536-flexible-curves Before I had the round knife, I got this for curves: https://windfiredesigns.com/Tools/CircleTool/index.html Yes, that's the one. I got mine from Abbey England. Rocky Mountain Leather has the Vergez Blanchard for $99: some might prefer the VB since it's not bevelled. I saw that RM has their own brand round knives now too, but I don't know where they're made, so I can't recommend them... yet.
-

Can You Recommend Leather for a Newbie's Watch Straps ?
Hardrada replied to Schick's topic in How Do I Do That?
Hmm, it seems that he updated his tutorial. What I use is his previous video (which is the one I got when I purchased his pattern set). Here: -

Can You Recommend Leather for a Newbie's Watch Straps ?
Hardrada replied to Schick's topic in How Do I Do That?
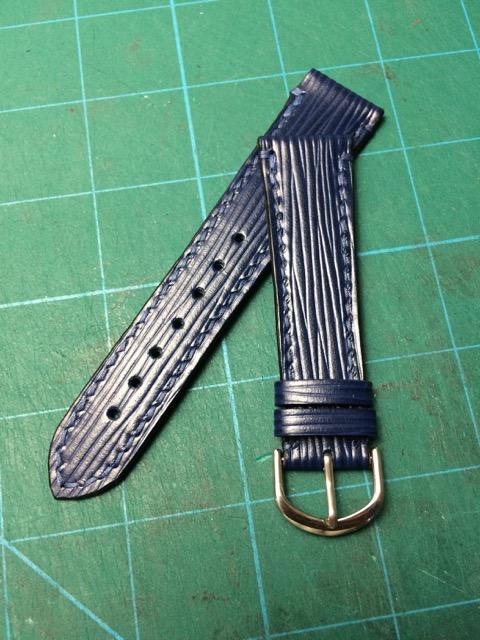
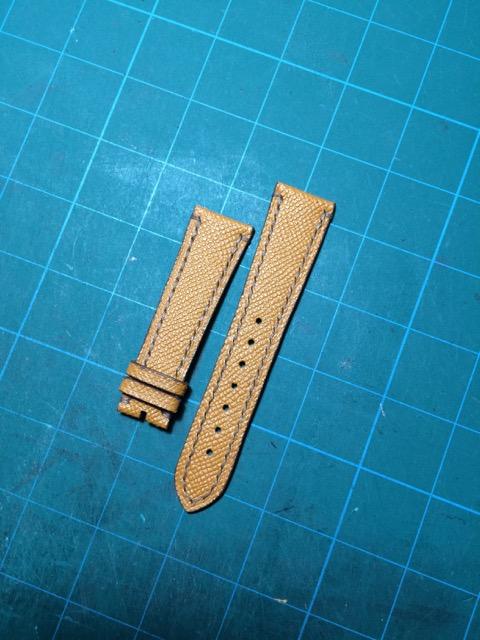
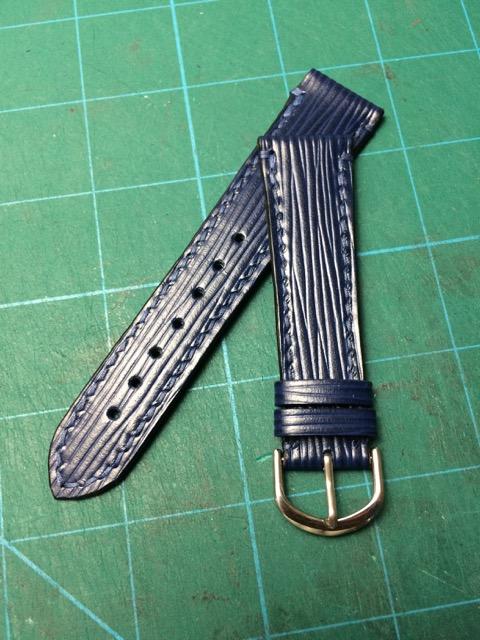
You need to keep in mind that temper is more important than tannage here. Aside from those who might have allergic reactions to leather (some might be allergic to chrome tan, but I'd wager there are folks out there who are also allergic to vegetable tanned leather too!) your choices in leather for a given project should be guided not by tannage, but by the item itself and how it works and what its function is and what characteristics it must have to perform said function. Take belts, for instance: you need leather that is firm in temper and that doesn't stretch; additionally, in some cases you also want the leather to be resistant to the elements. It's not the same to make belts for the outdoorsman than it is for the lady going to a party. Now, wristwatch bands are basically mini-belts. Again, you need leather that's firm in temper so that it doesn't stretch. Firmness of temper also makes it easy to skive since it's less likely to pull out of shape when you run it through a paring machine or put it under the skiving knife. You may also want something that is resistant to scratches and that looks good. Regarding the liner, I use goat skin (chevre). Again, it skives easily and it's more scratch resistant (although this last feature is probably not too important for a liner). I use scrap veg tan for the inner reinforcement. I replied to your welcome thread because I hadn't seen this one. So, I'll repost here what I posted there since it's apropos: This is the pattern set that I use: https://am-leathercraft.com/collections/pdf-patterns/products/simple-watch-strap-pattern-video-tutorial-from-18mm-to-25mm $5 for the full set in PDF is a steal. Just print them out onto cardstock paper and you're set. The video is available on YT without the patterns. I recommend watching it before buying; whether you'll buy that pattern set or not, you'll get an idea of the whole process of making a wristwatch band. It's the same process that I use, 'cept that I use a paring machine instead of a belt skiver. The results I got with that pattern/process aren't half bad. They're not perfect because I'm not good at it yet: -
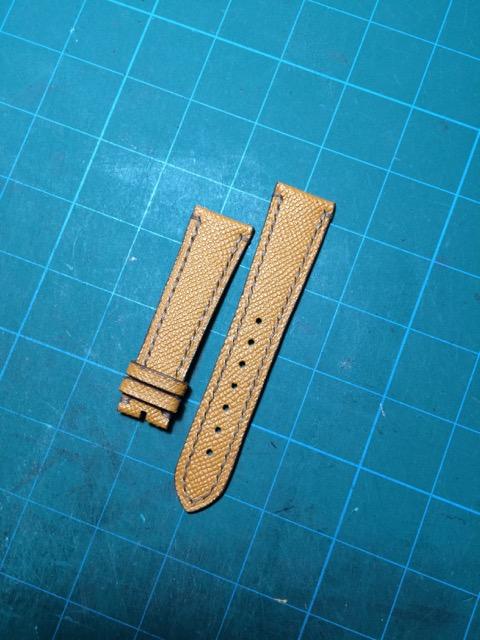
Here you go: https://am-leathercraft.com/collections/pdf-patterns/products/simple-watch-strap-pattern-video-tutorial-from-18mm-to-25mm I purchased the PDF version (I wanted the acrylic version but shipping what it is to-day it woulda taken months to get here and I needed the pattern immediately since someone had commissioned one). The results weren't half bad: I must note, however, that in order to make good wristwatch bands you must have access to a paring machine or a bell skiver, or have crackshot skiving knife skills. Most of the leather does not come in the weights you require for this particular project and it has to be pared down, sometimes all the way down to 1-1.5 oz.
-
All I use for curves is a Don Carlos round knife. Before that knife curves were a dreaded nightmare, now they're a zinch and even enjoyable to cut.
-
Welcome from the Queen City!


